
You seem to be located in .
Take me to Scania Trinidad tobago
Stay on the Global site

Corporate website
- Corporate website
-
-
COMPLETE MANUAL FOR SCANIA RADIO 7” SCREEN
Complete manual with special features such as route planning suited to your vehicle’s properties. The map data for the navigator is stored on a SD card. Possibility to pair mobile phone using Bluetooth and to monitor an external camera.
Manual – Radio 7” with navigation (German)
Manual — Radio 7″ with navigation (English)
Manual – Radio 7” with navigation (Portuguese)
Manual — Radio 7″ with navigation (Swedish)
COMPLETE MANUAL FOR SCANIA RADIO 5” SCREEN
Manual – Radio 5” (German)
Manual – Radio 5” (English)
Manual – Radio 5” (Portuguese)
Manual – Radio 5” (Swedish)
Older Infotainment Systems
Manual — Scania Radio Premium (English)
Manual — Scania Radio Premium (Swedish)
Manual — Radio Medium (English)
Manual — Radio Medium (Swedish)
Manual — Radio Medium (Portuguese)
Older versions
Manual — Scania Radio Medium (English)
Manual — Scania Radio Medium (Swedish)
Manual — Scania Radio Medium (Portuguese)
Manual — Radio Medium with Bluetooth (English)
Manual — Radio Medium with Bluetooth (Swedish)
Manual — Radio with Navigation (English)
Manual — Radio with Navigation (Swedish)
Phones compatible with Radio 5″ and 7″
Phones compatible with Radio Premium with Bluetooth
Phones compatible with Radio Medium with Bluetooth
The radio gives you the option of listening to the FM and AM wavebands. For this to be possible in all parts of the world the radio must be set to the correct region.
SELECTION OF REGION (ENGLISH)
SELECTION OF REGION (PORTUGUESE)
Explore our products and services
1
Manual
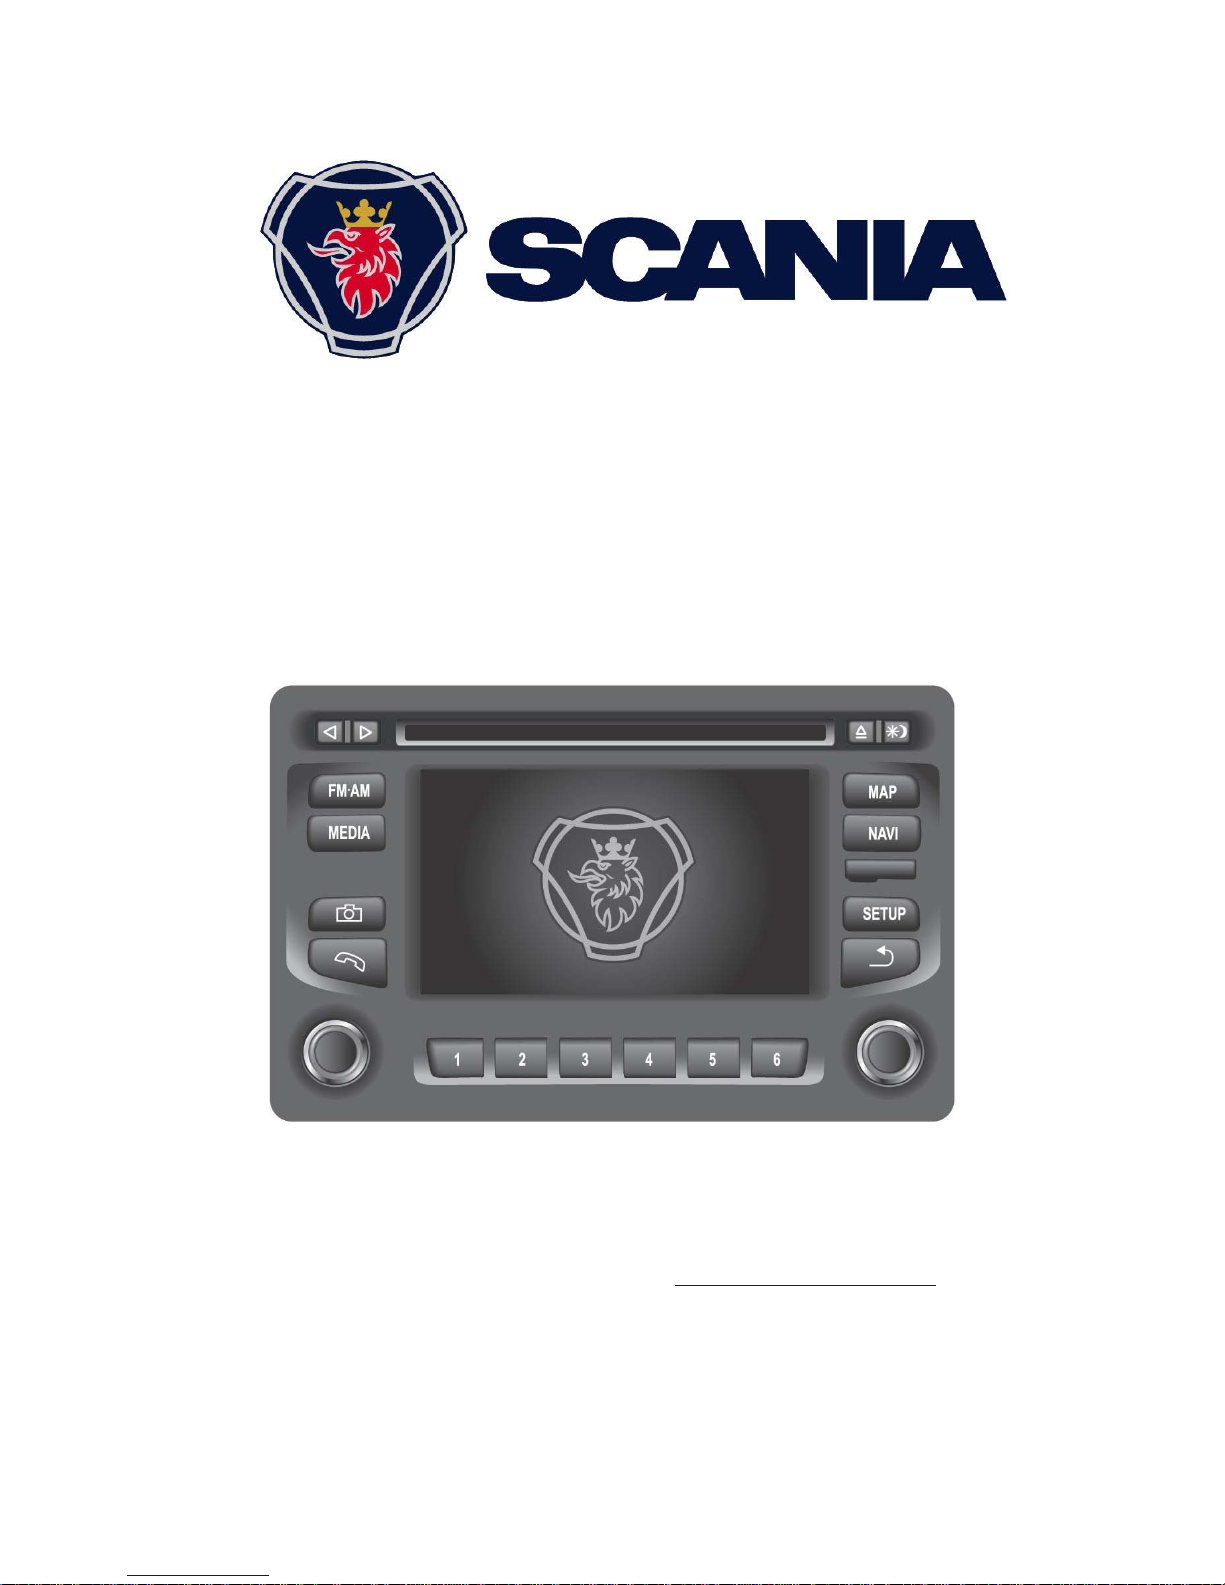
Radio Premium
Complete manual for Scania Radio Premium
This manual can be downloaded at www.scania.com/manuals

2
Buttons and controls
1. Arrow keys and :
In radio mode: Automatic search for radio stations.
In CD/MP3 mode: Select track (short press), Fast-forward/rewind (long press).
2. Slot for CD disc.
3. Display/touch screen
4. Eject CD disc.
5. : Display day-night.
Short press: Day or night illumination in the display.
Long press: Switch the display on or off.
6. MAP: Show map
7. NAVI: Open the menu for navigation.
8. Slot for SD card f or navigation.
9. SETUP: Opens the menu for system settings.
10. : Go back to the previous menu page.
11. Multi-function button:
In a menu: Turn — select, change. Press — confirm.
In radio mode: Turn — set a station.
In CD mode/MP3 mode: Turn — select track.
12. Function buttons for saved radio stations 1-6.
13. Multi-function button:
Long press: Switch on/off the radio.
Short press: Activate/deactivate Mute (when the radio is on).
Turn: Change volume.
14. : Open the menu for the phone.
15. : Show or hide the camera images.

3
16. MEDIA: Change between different audio sources:
• CD disc
• USB
• AUX
• Bluetooth
17. FM•AM: Start the radio mode and change between different sources.
• FM1
• FM2
• AM

4
Table of contents
Manual Radio Premium …………………………………………………………………………………. 1
Complete manual for Scania Radio Premium 1
Buttons and controls ……………………………………………………………………………………… 2
Important information …………………………………………………………………………………….. 8
Warning texts 8
Please note the following! 8
Stipulated use ………………………………………………………………………………………………………………………………… 8
Cleaning 11
Disposal (EU countries) 11
Instructions for handling CD discs 11
Compatible SD cards with maps 11
About the Scania Radio Premium manual 12
Introduction ………………………………………………………………………………………………….13
General Information 13
Radio reception 13
Operating modes 14
Radio ……………………………………………………………………………………………………………………………………………14
Media ……………………………………………………………………………………………………………………………………………14
Navigation ……………………………………………………………………………………………………………………………………..14
Telephone: …………………………………………………………………………………………………………………………………….14
Use 14
Controls ………………………………………………………………………………………………………………………………………..14
Touch screen …………………………………………………………………………………………………………………………………14
Multi-function button ……………………………………………………………………………………………………………………….15
Switching on the system 15
Automatic shutdown ……………………………………………………………………………………………………………………….15
Setting the volume 16
Scroll through a list of menu items 16
Selecting the settings 17
System settings ……………………………………………………………………………………………………………………………..17
Navigation settings …………………………………………………………………………………………………………………………19
Bluetooth and phone ……………………………………………………………………………………………………………………….19
Traffic message settings ………………………………………………………………………………………………………………….19
Radio settings ………………………………………………………………………………………………………………………………..20
Truck attributes ………………………………………………………………………………………………………………………………20
Volume settings 20
Setting the volume for traffic announcements (TA) ………………………………………………………………………………21
Setting the volume for AUX input sources (if available) ………………………………………………………………………..21
Setting the speed-dependent volume ………………………………………………………………………………………………..22

5
Setting the volume for voice guidance (navigation) ……………………………………………………………………………..22
Setting the volume for the phone sound …………………………………………………………………………………………….22
Camera 23
Radio ………………………………………………………………………………………………………….24
Starting radio mode 24
Selecting frequency ranges 25
Radio Data System (RDS) 25
RDS regional mode ………………………………………………………………………………………………………………………..25
Activating or deactivating RDS Regional ……………………………………………………………………………………………26
Traffic announcements (TA) 26
Activating or deactivating TA ……………………………………………………………………………………………………………26
Activating or deactivating the priority for traffic announcements (TA) …………………………………………………………..27
Tuning into stations 27
Automatic tuning …………………………………………………………………………………………………………………………….27
Manual tuning ………………………………………………………………………………………………………………………………..28
FM station list 28
Storing a station 30
Retrieving a station …………………………………………………………………………………………………………………………30
Media ………………………………………………………………………………………………………….31
Playing CDs 31
General Information ………………………………………………………………………………………………………………………..31
Playing CDs …………………………………………………………………………………………………………………………………..33
Pausing playback (Pause) ……………………………………………………………………………………………………………….34
Selecting a track …………………………………………………………………………………………………………………………….34
Skip to the next or previous track ………………………………………………………………………………………………………34
Fast-forward/rewind forward or backward …………………………………………………………………………………………..34
Random playback …………………………………………………………………………………………………………………………..35
Repeating a track ……………………………………………………………………………………………………………………………35
Ejecting a CD disc ………………………………………………………………………………………………………………………….35
USB port 36
General Information ………………………………………………………………………………………………………………………..36
Important information ………………………………………………………………………………………………………………………36
Playing back audio files from an MP3 player, a USB device and an SD card …………………………………………..37
Playing back audio files from an iPod ………………………………………………………………………………………………..37
Bluetooth audio connection 38
General Information ………………………………………………………………………………………………………………………..38
Important information ………………………………………………………………………………………………………………………38
Pairing with a Bluetooth device …………………………………………………………………………………………………………38
Use ………………………………………………………………………………………………………………………………………………39
Activating Bluetooth music mode ………………………………………………………………………………………………………39
AUX connection 40
General Information ………………………………………………………………………………………………………………………..40

6
Use ………………………………………………………………………………………………………………………………………………40
Telephone: …………………………………………………………………………………………………..41
General Information 41
Bluetooth profiles ……………………………………………………………………………………………………………………………42
Bluetooth connection ………………………………………………………………………………………………………………………42
Pairing with a Bluetooth device …………………………………………………………………………………………………………42
Connecting to another paired device …………………………………………………………………………………………………42
Disconnecting a paired device ………………………………………………………………………………………………………….43
Emergency calls 44
Making an emergency call ……………………………………………………………………………………………………………….44
Use 44
Controls on the front panel for phone use …………………………………………………………………………………………..45
Handsfree mode 45
Activating handsfree mode ………………………………………………………………………………………………………………45
Making a call using the phonebook ……………………………………………………………………………………………………46
Searching for a phone number …………………………………………………………………………………………………………46
Using call lists ………………………………………………………………………………………………………………………………..47
Redialling a phone number ………………………………………………………………………………………………………………47
Entering the phone number ……………………………………………………………………………………………………………..48
Accessing the voice mailbox …………………………………………………………………………………………………………….48
Incoming phone calls ………………………………………………………………………………………………………………………48
Functions during a call 49
Temporary deactivation of the handsfree mode …………………………………………………………………………………..49
Temporary deactivation of the microph one …………………………………………………………………………………………49
Ending a call ………………………………………………………………………………………………………………………………….49
Setting the phonebook 50
Downloading the phonebook ……………………………………………………………………………………………………………50
Sorting in the phonebook …………………………………………………………………………………………………………………50
Show the phonebook on the SIM card or in the phone memory …………………………………………………………….51
Navigation……………………………………………………………………………………………………52
General Information 52
Navigation system function s 52
TMC traffic information system and dynamic navigation 53
Map data ……………………………………………………………………………………………………………………………………….53
Vehicle specifics 53
Map options 54
Saving the current position ………………………………………………………………………………………………………………55
Show position information ………………………………………………………………………………………………………………..55
Show destination information ……………………………………………………………………………………………………………55
NAVI button and Navigation menu 55
Select destination …………………………………………………………………………………………………………………………..56
Home address ……………………………………………………………………………………………………………………………….58

7
Select route outline …………………………………………………………………………………………………………………………59
Changing the mode for the time display …………………………………………………………………………………………….60
Previous destinations ………………………………………………………………………………………………………………………60
Setting route options ……………………………………………………………………………………………………………………….61
Stopping the guidance …………………………………………………………………………………………………………………….62
TRAFFIC INFO menu ……………………………………………………………………………………………………………………..62
Blocking ………………………………………………………………………………………………………………………………………..62
TA ………………………………………………………………………………………………………………………………………………..63
Route outline ………………………………………………………………………………………………………………………………….64
All …………………………………………………………………………………………………………………………………………………64
SETUP button and NAVIGAT ION m enu 64
Information on the map ……………………………………………………………………………………………………………………67
User-defined points of interest (POI) …………………………………………………………………………………………………69
Maps 72
SD cards with maps ………………………………………………………………………………………………………………………..72
Replacing an SD card with maps ………………………………………………………………………………………………………73
Steering wheel buttons ………………………………………………………………………………….74
PIN list ………………………………………………………………………………………………………..75
Frequently asked questions ……………………………………………………………………………76
GENERAL ……………………………………………………………………………………………………………………………………..76
RADIO ………………………………………………………………………………………………………………………………………….76
CD disc (AUDIO/MP3) …………………………………………………………………………………………………………………….76
NAVIGATION …………………………………………………………………………………………………………………………………77
Technical Specifications ………………………………………………………………………………..80
Power Supply …………………………………………………………………………………………………………………………………80
Power consumption ………………………………………………………………………………………………………………………..80
Fuse ……………………………………………………………………………………………………………………………………………..80
Output …………………………………………………………………………………………………………………………………………..80
Frequency range …………………………………………………………………………………………………………………………….80
Frequency response (±3 dB) ……………………………………………………………………………………………………………81
Temperature range …………………………………………………………………………………………………………………………81
Dimensions and weight ……………………………………………………………………………………………………………………81
Glossary ……………………………………………………………………………………………………..82
8
Important information
This Scania Radio Premium has been manufactured according to the latest
technological developments and in compliance of applicable technical safety
regulations. However, the failure to comply with these safety instructions could
involve risk:
Read through the whole manual carefully and thoroughly before using any of the
functions.
Store the Audio Operating Guide where it is easily accessible for all users.
Warning texts
The manual contains the following important warning texts:
Note
This symbol is used for certain important information.
Warning
This symbol is used when there is a risk of personal injury or damage to
physical property, primarily the radio.
Please note the f oll owing !
Stipulated use
The Scania Radio Premium is equipped with an operating voltage of 12 V. The
system is intended for installation and use in a truck.
Consult a professional to perform repairs, installation and removal as required.
Do not adjust settings or input information into the navigation system while the
truck is in motion. Stop before you enter a new destination or change system
settings! The navigation equipment must be used in a way that does not put
you and other road users in danger. Traffic safety must always come first. The
risk of serious accident is great if you neglect to keep your full attention on the
traffic situation.
The route outline with the route guidance that the navigation equipment
calculates is a suggestion. You must always demonstrate good driving
behaviour and give your full attention to the current traffic situation. Signs,
temporary directions and other regulations always take priority over route
guidance from the navigat ion sy s tem.
If you are using vehicle-specific navigation (Truck Navigation), make sure that
you are aware of the applicable conditions for the route outline that the
navigation system has suggested. This appli e s , for exam pl e, t o the b ear i ng
capacity of roads or bridges, local regulations, etc.
Familiarise yourself will all functions before you begin driving.
Only use the Scania Radio Premium and other functions w hen tr a ffi c
situations permit.
The navigation system provides route guidance during navigation. Follow
them only on condition that you do not break any traffic rules!
The Scania navigation system has been designed for us e in truc ks .
Adjust the volume to the current traffic situation. You must be able to hear
sounds from emergency vehicles clearly and in good time.
The Scania navigation system has been designed for use in trucks.
When calculating the route outline you can instruct the navigator to take into
account height limits or maximum permissible axle weights on the heaviest
axle which are required in order to navigate a truck to the destination, to the
extent they are stored on the SD card. In the manual this is called navigation
with the truck’s specifics.
While driv i ng , alway s be observant of road traffic restrictions, even when
you are following the recommendations provided by Scania in the manual.
The information saved on the SD card may not be complete or up-to-date.
Only use original Scania SD cards in conjunction with the Scania Radio
Premium.
Make sure that your vehicle specifics and current load are always input in
full into the navigation system to prevent the system from reco mme ndi ng
unsuitable or hazardou s route outl ines.
10
Note
Use the demo mode when the truck is stationary to familiarise yourself with
the functions available in the Scania navigation system. Read more about this
in the section » SETUP button and the Navigation menu» in the chapter
«Navigation».
Risk of injury
Do not open or make alterations to the inside of the Radio with Navigation!
The CD player contains a Class 1 laser which emits invisible laser beams that
could damage your eyes.
Do not repair or otherwise modify the Radio with Navigation.
Consult a trained professional to repair and maintain the Radio with
Navigation.
Risks associated with improper use of the Radio with Navigation
Do not use Mini-CDs (8 cm diameter) or contoured CD discs (”Shape CD
discs”) as these can damage the CD player.
Scania disclaims any liability for damage to the CD player caused by inserting
unsuitable CD discs.
11
Cleaning
Only use mild detergents to prevent damage to the plastic surface of the Radio with
Navigation. The display must be cleaned with a treated screen wipe designed for
monitors and displays. Clean other surfaces with a dry or lightly moistened cloth, and
use a mild detergent when necessary.
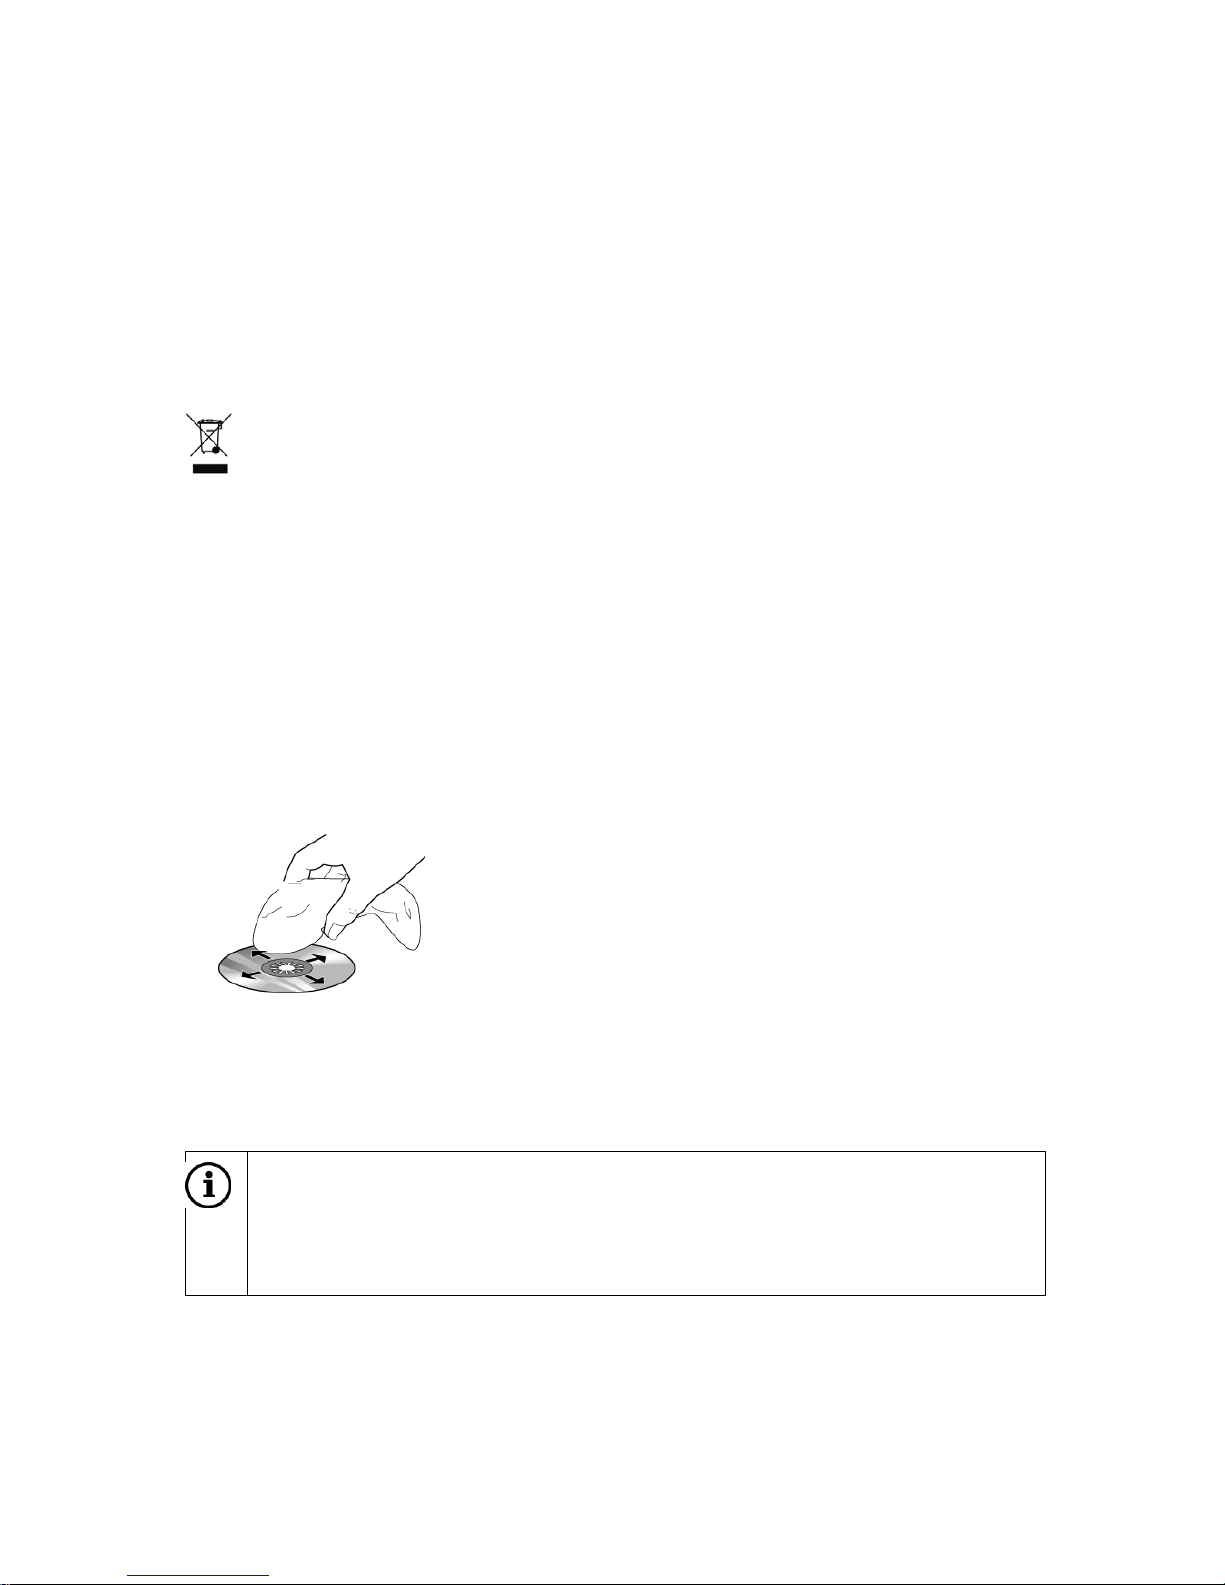
Disposal (EU countries)
Do not throw electronic products out with the household waste!
Take them to a suitable recycling and recovery centre for disposal.
Instructions for handling CD discs
Clean and undamaged CD discs must be used in order to ensure a flawless function.
Damaged or dirty CD discs can lead to CD reader malfunction.
Handle CD discs with care.
Avoid damage to CD discs (e.g. scratches). Store CD discs in a protective casing.
Keep CDs/DVDs free of dirt, dust, fingerprints, etc. Only handle the edges of the disc.
Do not expose CD discs to direct sunlight.
Do not use a circular motion to clean a dirty CD disc.
Instead, use a soft, lint-free cloth and wipe the disc from the
centre outwards.
Compatible SD cards with maps
Only use original Scania datamedia with the Scania Radio Premium.
Note
Scania Radio Premium is not desi g ned for use with self-produced SD cards
with maps. Impaired function caused by their use is not covered by the
warranty.
12
About the Scania Radio Premium manual
Read carefully through the manual before using the Scania Radio Premium and store
the manual in the truck. The manual describes all functions to help you use the radio,
CD player and navigation system safely and efficiently.
To help you quickly locate safety instructions, these have been marked using the
symbol with a grey background.
Useful information is indicated by symbol .
You will also find the following special symbols and fonts used in the manual:
Identifies an action to be performed.
Identifies sequences and lists.
Buttons (e.g. button NAVI 10)
Function buttons on the touch screen (activated by tapping on the touch screen)
Note
The sequence and availability of the menu items depends on which SD card
with maps is being used, and may therefore differ from the figures in the Audio

13
Introduction
General Information
Playback of audio CD discs and MP3/WMA CD discs
MP3 players
USB flash drives
Portable CD players
Other mass storage devices via cable or Bluetooth
Dynamic route guidance for avoiding traffic congestion or
Connection for Bluetoo t h mobil e ph ones
Always use the system in such a way that it is always safe to drive the vehicle. In
the event of any doubt, stop your vehicle and operate the system while the vehicle
is stationary.
Using the navigation system does not relieve you as a driver from your
responsibility for a correct and careful driving style in traffic. The road traffic
regulations must always be followed. If you need to interact with the system (e.g.
type in addresses), stop your vehicle in a safe place and then carry out the
necessary action.
Some areas may not be marked on the navigation map. For example, one-way
streets, driveways and other areas that are closed to vehicular traffic and where it
is forbidden to drive into. The system gives no warning message in such areas,
follow the road traffic regulations.
Radio reception
Radio reception can become worse due to hissing, noise, distortion or reception
interference, for exam ple:
Changed distance to the transmitter
The reception of a radio signal several times due to reflection.
14
Operating modes
Radio
Press the FM•AM (17) button to switch on the radio function.
See the chapter ”Radio” for more information.
Media
Press the MEDIA (16) button to start a CD disc, MP3 disc, iPod, USB, Bluetooth
AUDIO or AUX function (if available).
See the chapter ”Media” for more information.
Navigation
Press the NAVI (7) button to start the Navigation menu.
See the chapter ”Navigation” for more information.
Press the MAP (6) button to retrieve a road map that shows the vehicle’s current position.
See the chapter ”Navigation” for more information.
Telephone:
Press the
(14) button to open the Phone menu.
See the chapter ”Telephone” for more information.
Note
In the main menus for audio and phone you can only use the screen
buttons at the bottom of the menus via the touch screen. It is not possible
to use the multi-function button.
Before a system function is performed you will often get a message
prompting you to confirm that the selected system function actually should
be performed. The messag e can also instruct you to complete the function.
Press the (10) button to cancel such a message without triggering any
system function.
Use
Controls
The system can be controlled using knobs, buttons and menus that are shown on the
touch screen.
In addition, in some cases it is possible to use the system via steering wheel buttons.
For more information, see chapter ”Steering wheel buttons”.
Touch screen
The system’s monitor has a touch-sensitive surface that allows direct selection from
the menu options shown. For example, you can activate a menu option on the screen
by tapping your finger on the screen button or change the position of a scroll bar on
the screen by moving it with your finger.
15
Risk of damage to the touch screen
Never use any sharp or hard material objects, such as pens or pencils, to
operate the touch screen.
Multi-funct ion button
To navigate through menu options,
Turn the multi-function button (11) clockwise or anticlockwise.
To activate the selected menu item,
Press the multi-function button (11).
The corresponding system function is then activated or a message or a submenu
with additional options i s shown.
Note
In the main menus for audio and phone you can only select or activate the
screen buttons at the bottom of the menu via the touch screen.
Note
Before a system function is performed you will often be prompted via a
message to confirm that the selected system function actually should be
performed. The message can also instruct you to complete a function.
Press the (10) button to cancel such a message without triggering any
system function.
Switching on th e syst em
Turn the vehicle’s starter key.
The system is switched on automatically.
Note
If it is not switched on automatically, press the multi-function button (13).
Automatic shutdown
If you switch on the system while the vehicle’s 15-voltage is switched off then the
system will be automatically shut down after an hour.
16
Setting the volume
Turn the multi-function button (13).
The current setting is shown. When the system is switched on, the volume is set
according to the last selected volume.
Press the multi-function button (13) in order to switch off the volume on the device
or to return to the original volume.
If the volume is switched off then the symbol is shown on the screen.
Note
The volume is switched on again automatically as soon as you change
audio source.
The volume can also be set via the steering wheel buttons. For more
information, see chapter ”Steering wheel buttons”.
Scroll through a list of menu items
With the touch screen:
Tap on the or ke y in t he scroll list.
or
Move up or down with your finger in the scroll list in order to scroll through the list.
With the multi-function button (11):
Turn (11) clockwise or anticlockwise in order to scroll through the list of menu items.

17
Selecting the settings
The following example describes a method for changing the settings that are
available in the different menus, either by using the menu options on the screen or
the multi-function button (11).
System settings
The standard settings for the system can be changed via the SYSTEM SETUP menu.
Press the SETUP (9) button and tap on System.
With the touch screen:
Tap on a menu item in order to change a setting.
With the multi-function butt on (11) :
Turn the multi-function button (11) clockwise or anticlockwise in order to select a
menu item.
Press the multi-function button (11) in order to change the setting.
Configuring the display
Select the Display menu item.
Select the appropriate option in order to change the brightness of the screen.
Select an option in order to adjust the screen in a suitable way in relation to the
surrounding light conditions.
18
Note
If you select «Automatic» then the screen will automatically change
according to the external light conditions.
The dots under a setting indicate that there are more options available.
Press on the dots to show the other options.
With the multi-function button (11):
Turn the multi-function button (11) clockwise or anticlockwise in order to select a
menu item.
Press the multi-function button (11) in order to change the setting.
Selecting the scrolling direction
If you set the scrolling direction then you can only scroll in the direction for selecting a
menu item.
Selecting with the multi-function button (11):
Set the scrolling direction on or .
Setting the clock
Press the SETUP button.
Tap on System.
Tap on Clock.
Tap on the desired setting item and change it with either the screen or the multi-
function button (11).
With this function you can:
Set the time display in 24-hour form at.
Set the clock automatically or manually.
Set daylight saving time.
Set the time zone.
Selecting the language
Note
If the Language sync option is set then you cannot select the language
manually. The system will then automatically use the same language that is
set for the vehicle.
The menus can be shown in different languages on the screen. The voice commands
will be in the same language.
Select the Language menu item.
A list of languages is shown.
Select the desired language.
The language setting is now complete.
19
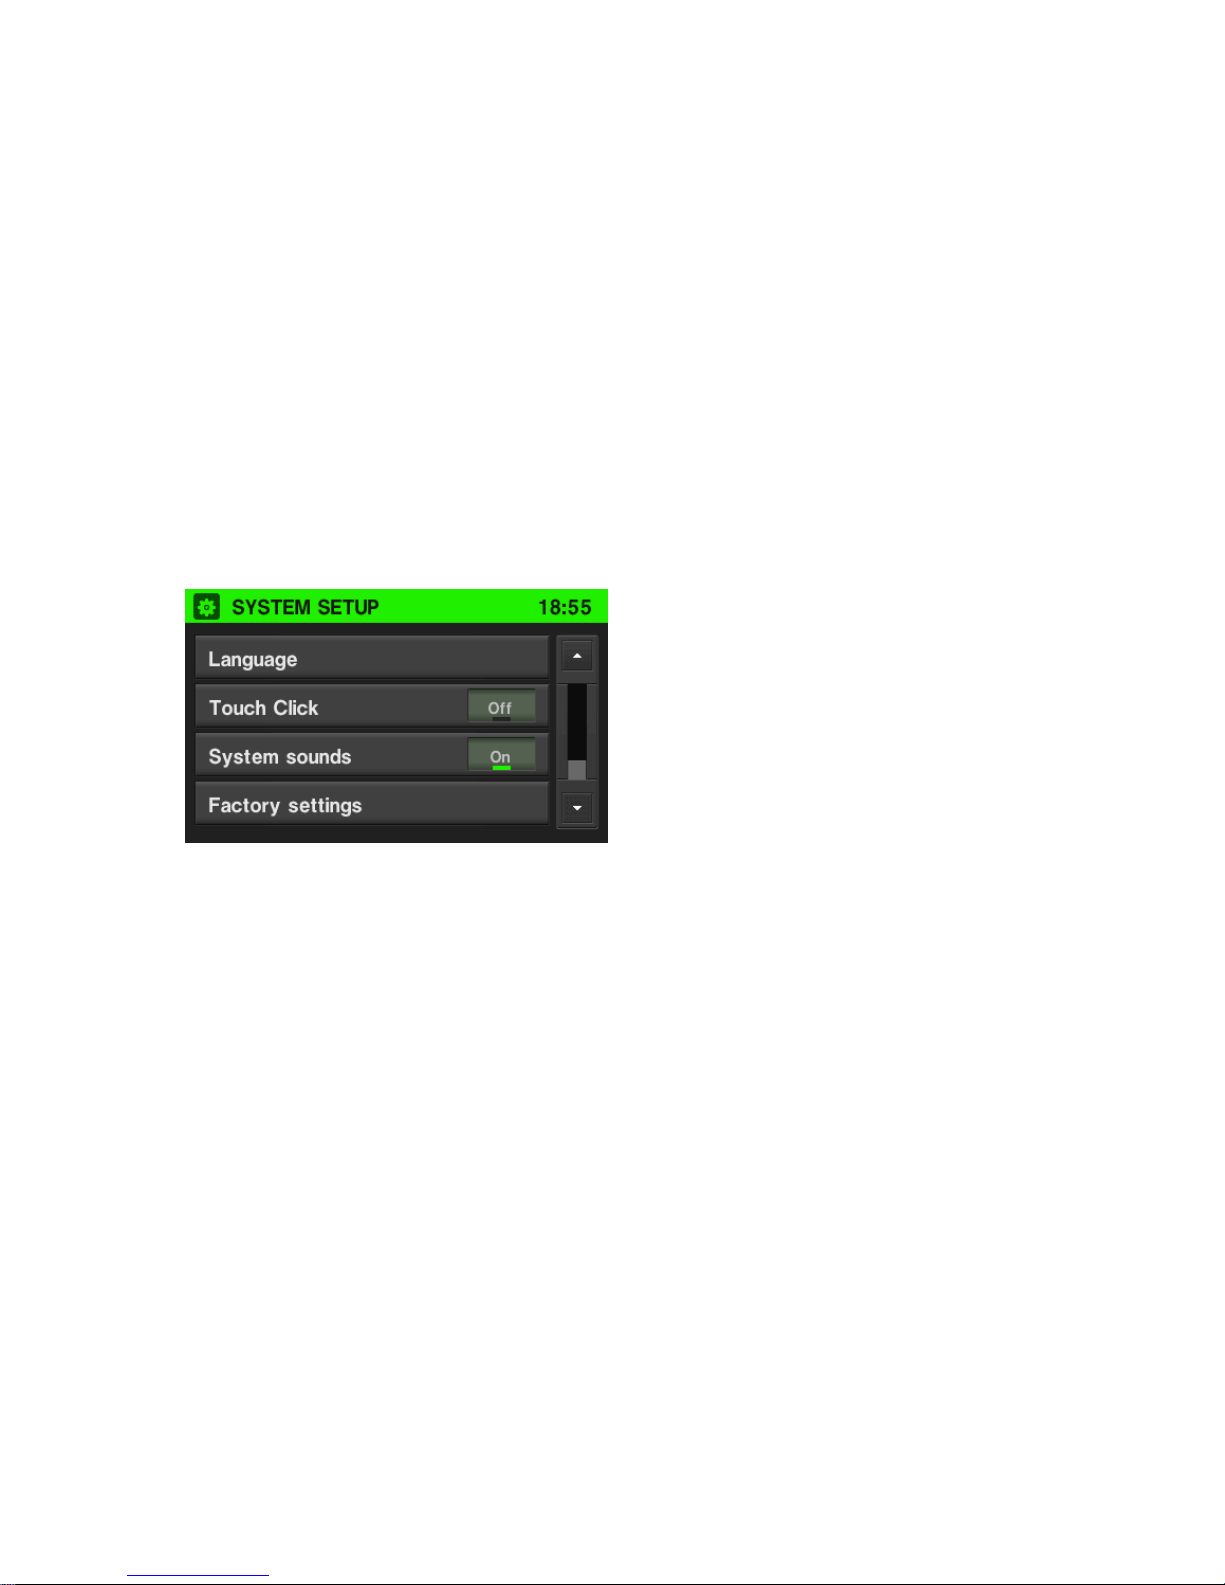
Activating or deactivating the clicking sound
If the Touch click option is activated then a clicking sound is heard each time you
touch the screen.
Activating or deactivating the system sounds
If the System sounds option is activated then the following user or system actions
will be indicated by a beep:
Radio: When storing a radio station on a station button.
CD player: When activating fast-forward/rewind forward or backward.
Navigation: When activating/deactivati ng voice commands in navigation mode.
Return to factory settings
Proceed as follows in order to reset all system settings and memories to factory
settings.
In the SYSTEM SETUP menu, select Factory settings.
Tap on Yes to return to the factory settings.
Navigation settings
See the chapter ”Navigation”, subchapter ”SETUP button and the Navigation menu”
for more information.
Bluetooth and phone
See the chapter ”Media”, subchapter ”Bluetooth audio connection” and the chapter
”Phone,” subchapter ”General information” respectively for more information.
Traffic message settings
See the chapter ”Navigation”, subchapter ”NAVI button and the Navigation menu”,
section ”Traffic message menu” for more information.
20
Radio settings
See the chapter ”Radio”, subchapter ”Radio Data System (RDS)”, section ”Activating
or deactivating RDS regional mode”.
Truck attributes
See the chapter ”Navigation”, subchapter ”Vehicle specifics”, section ”Activating or
deactivating RDS regional mode”.
Volume settings
The volume of the voice commands can be changed during a guidance message
using the multi-function button (13) or via the NAVIGATION SETUP menu.
The setting is saved by the system and is used automatically for all future voice
commands until the setting is changed again.
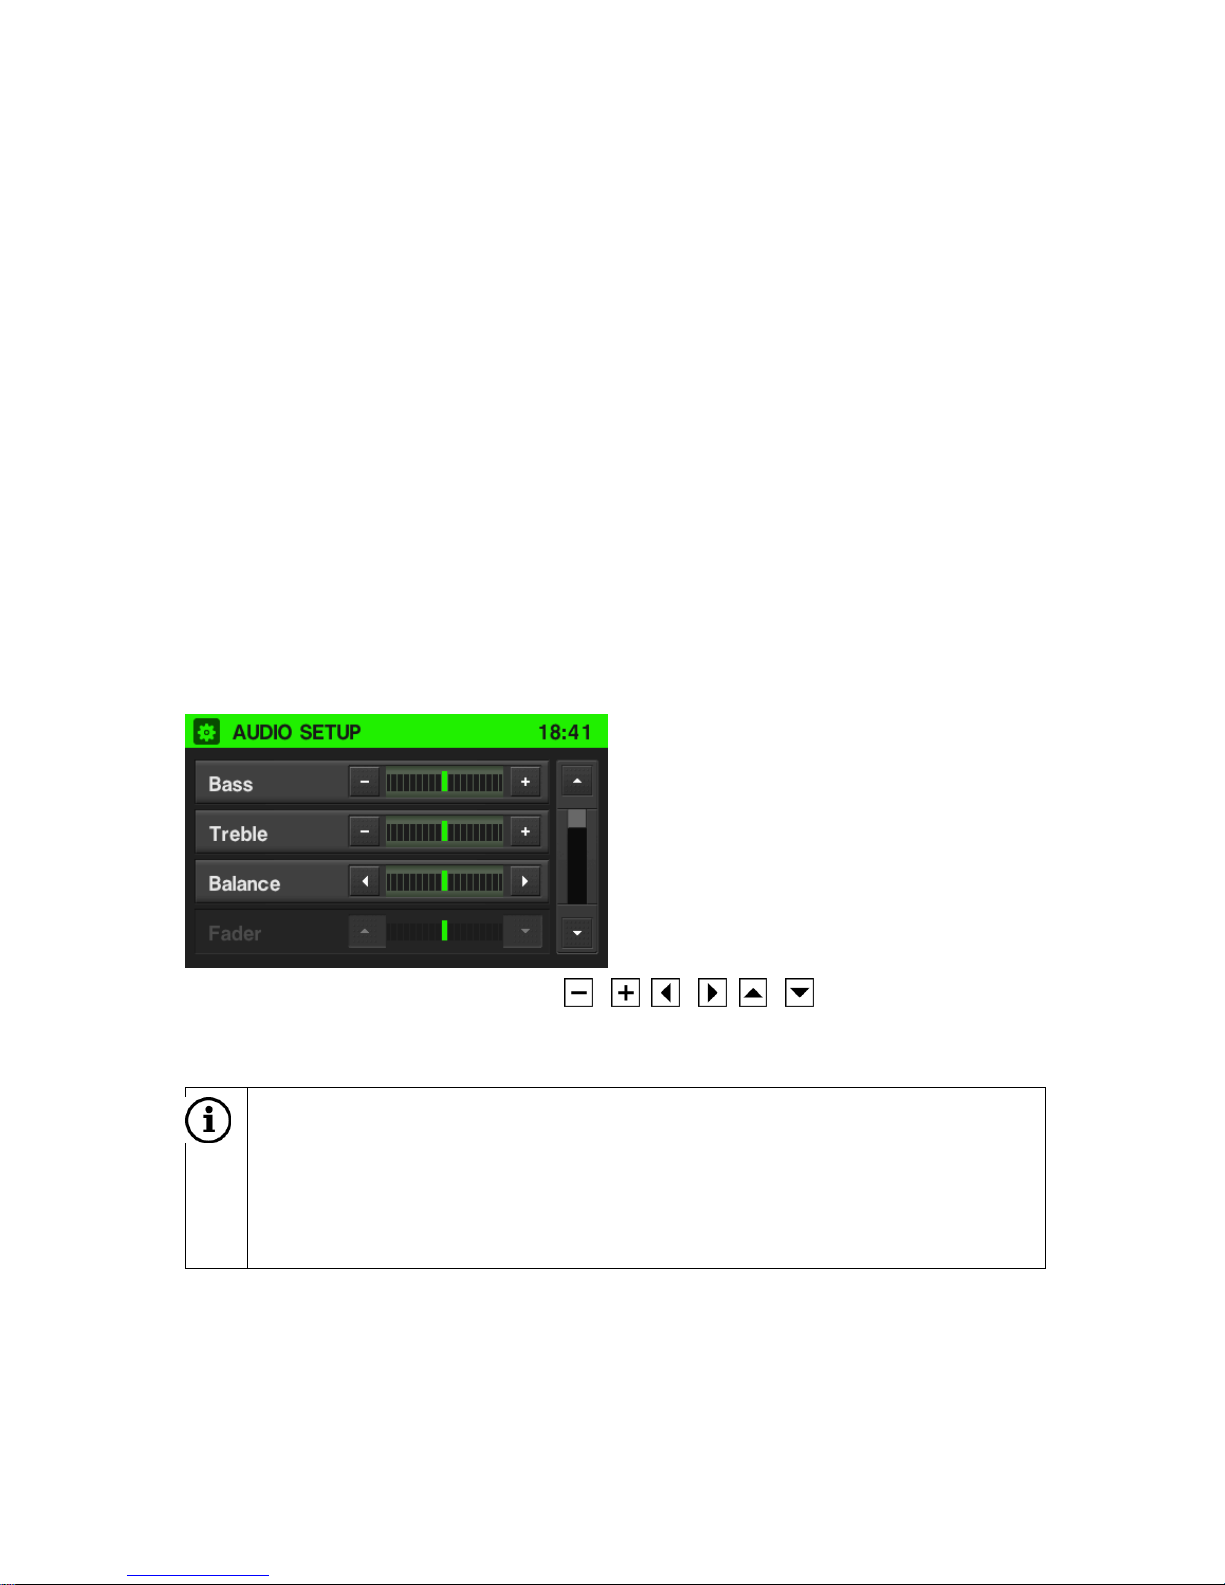
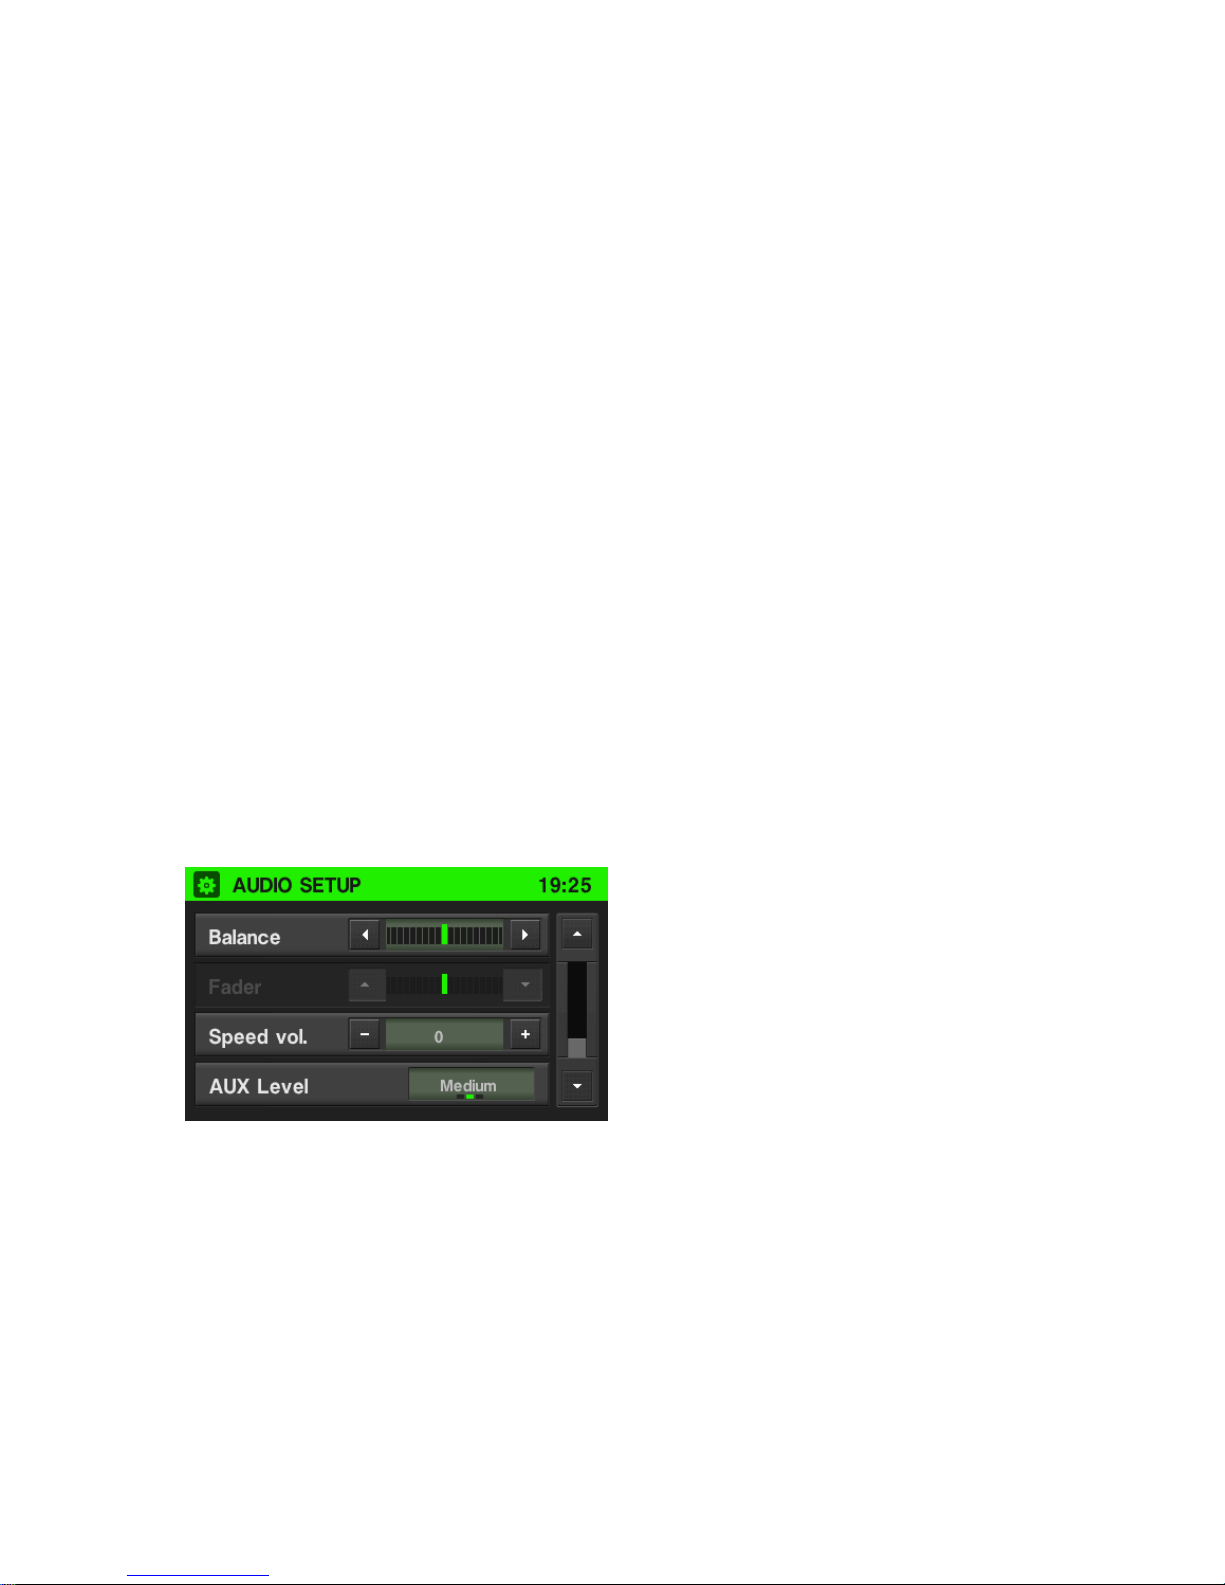
Audio settings:
With the touch screen:
To open the AUDIO SETUP menu press the SETUP (9) butt o n and sel ec t Audio.
Tap on one of the screen buttons ( / , / , / ) in order to adjust the
audio settings.
Note
Alternatively you can use the multi-function butto n (11) i f a main menu f or
audio is activated.
You cannot select the Audio button in the SETUP menu if the volume on
the device is switched off.
Bass: Use this setting to adjust the low frequencies in the sound source.
Treble: Use this setting to adjust the high frequencies in the sound source.
21
Balance: Use this setting to adjust the volume balance between the left and right-
hand loudspeakers in the vehicle.
With the multi-function button (11):
Turn the multi-function button (11) clockwise or anticlockwise in order to select a
menu item.
Press the multi-function button (11) in order to activate the selected menu item.
The selected menu item is highlighted.
Turn the multi-function button (11) clockwise or anticlockwise in order to change
the setting.
Press the multi-function button (11) in order to confirm the setting.
The setting has now been changed.
Setting the volume for traff ic a nnounc e m e nt s ( TA)
The volume for traffic announcements can be changed during a message using the
left-hand multi-function button (13). When the message is finished or interrupted the
volume automatically returns to the original setting.
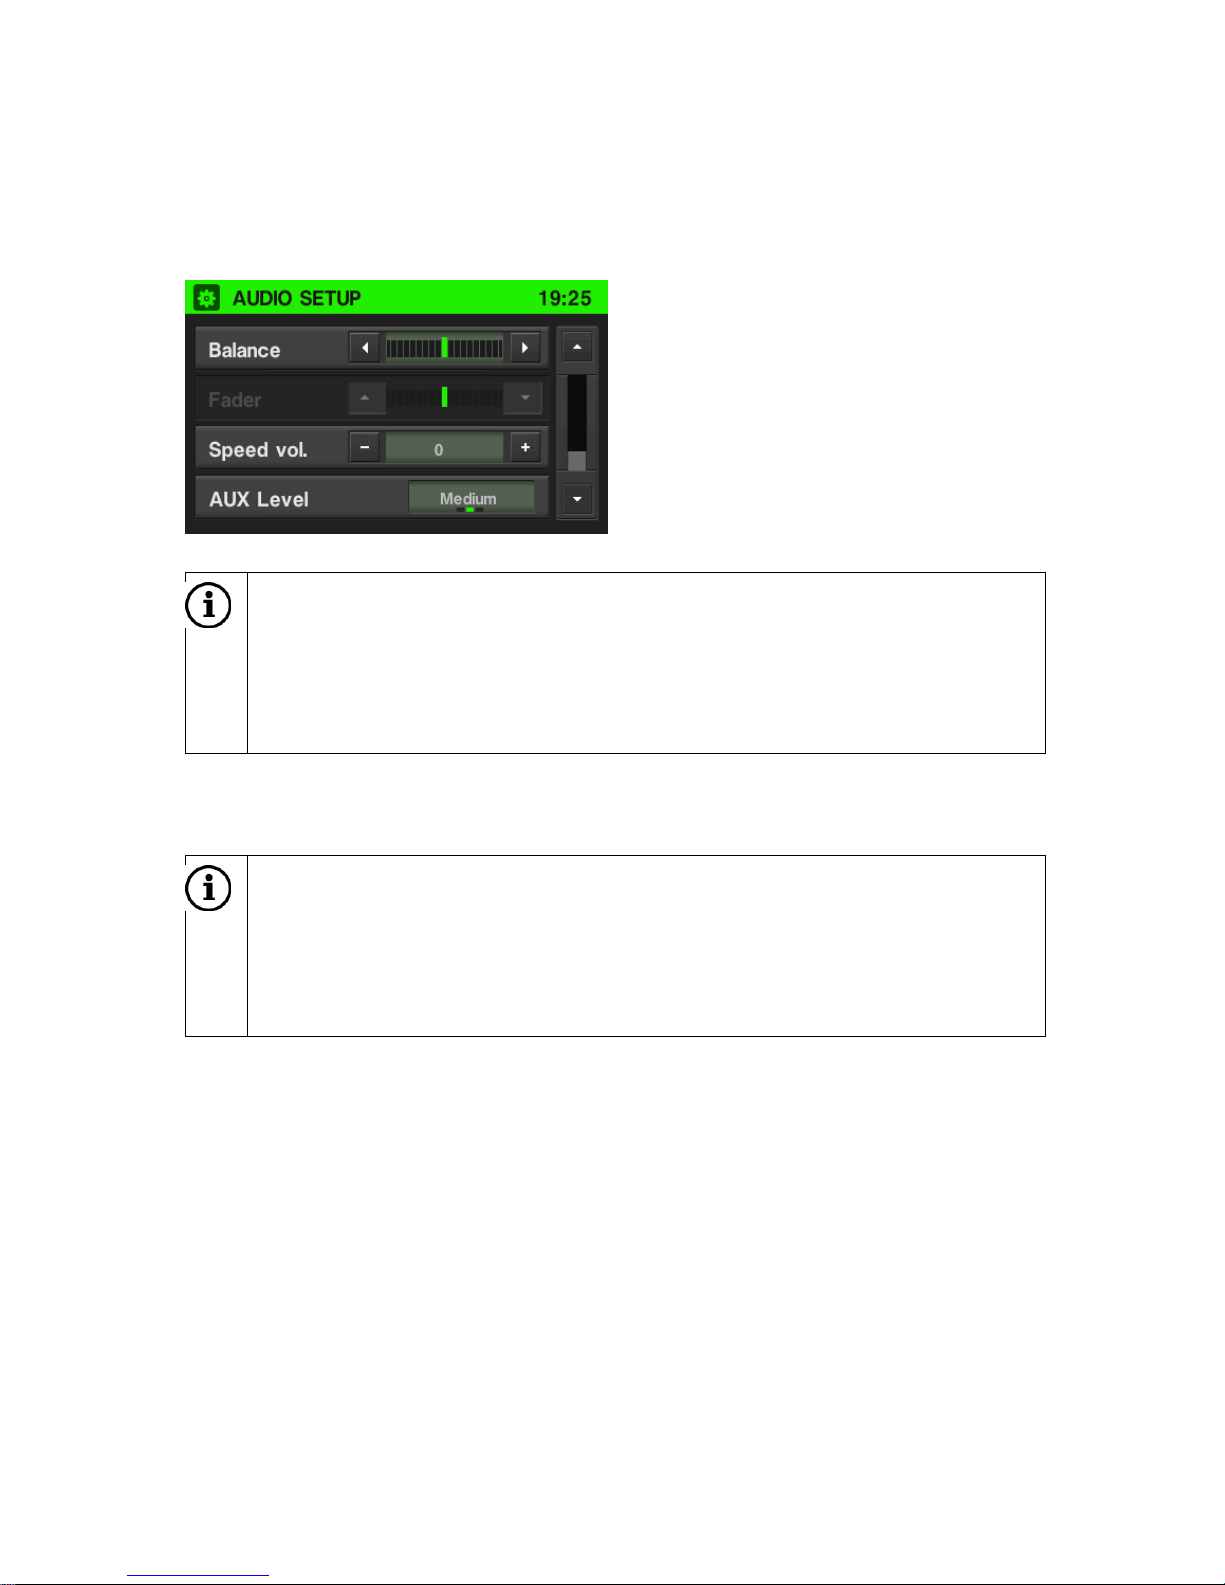
Setting the volume for AUX input sources (if available)
The relative volume level for external audio sources, e.g. an MP3 player, can be
changed via the AUDIO SETUP menu.
To change the relative volume level for external audio sources, set the AUX level
to «Quiet«, «Medium» or «Loud«.
22
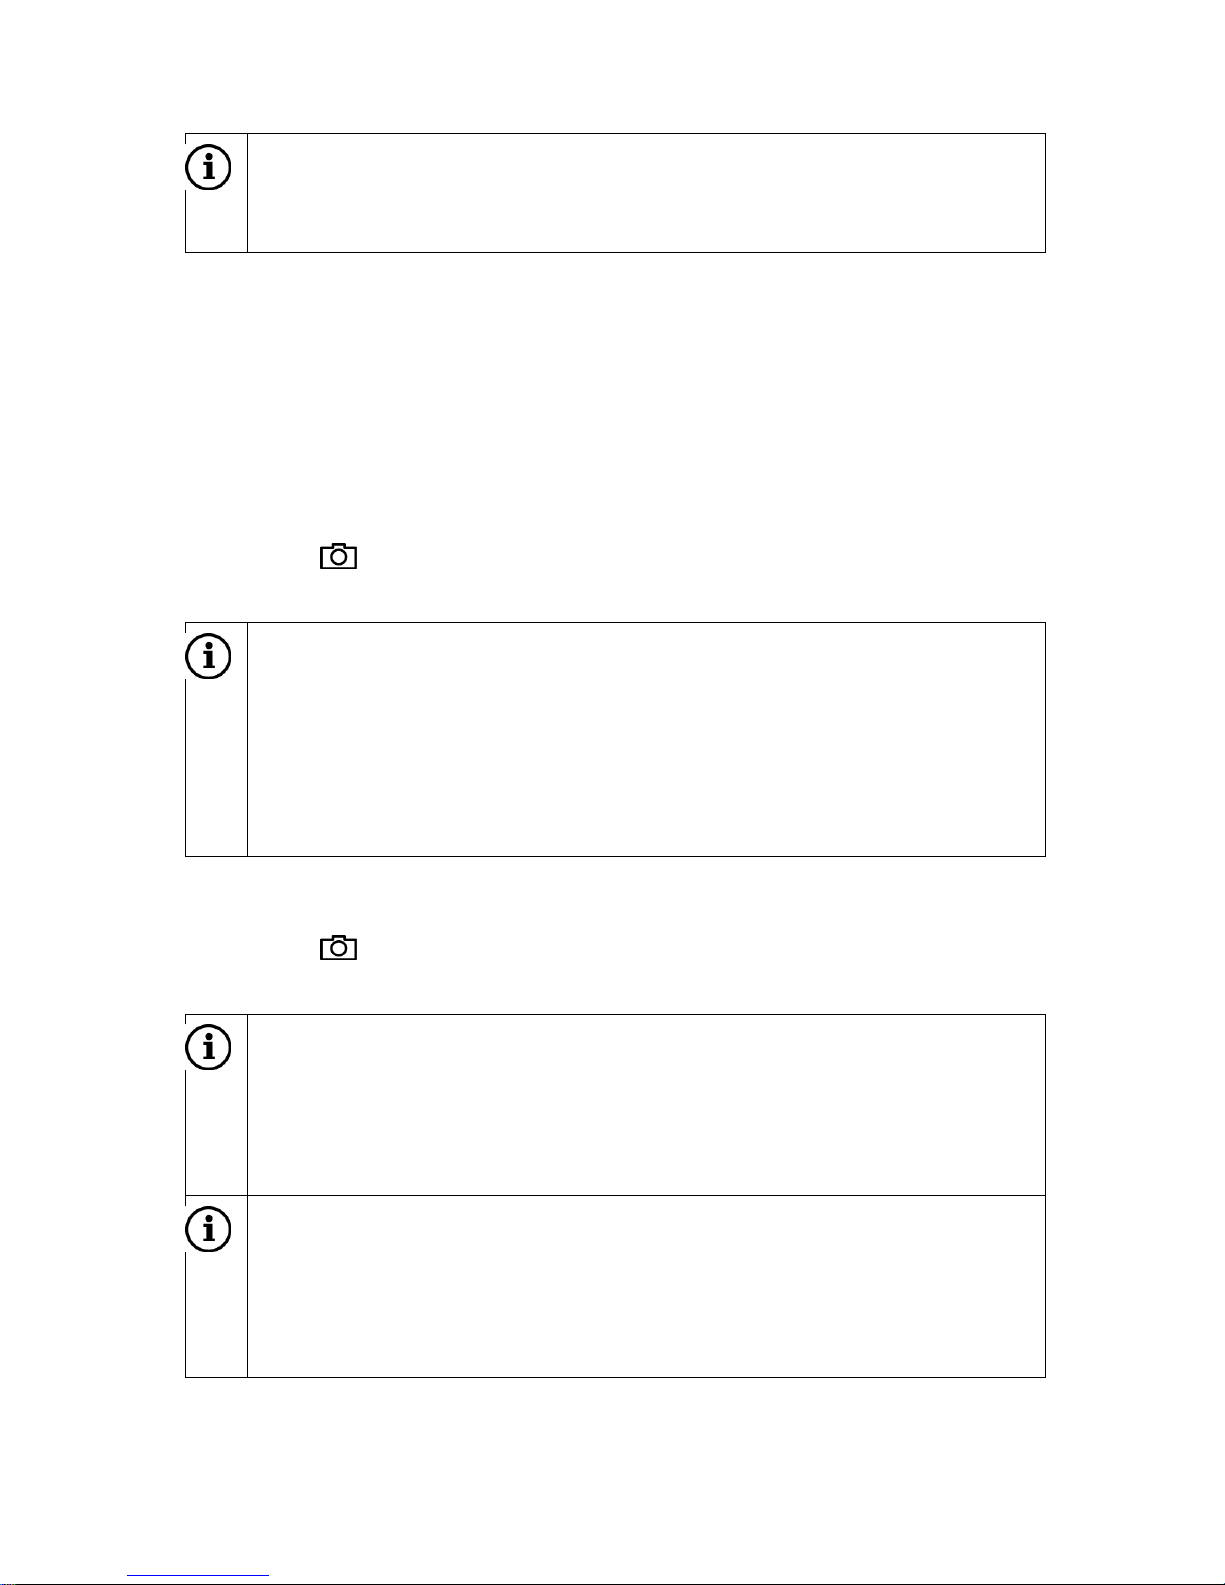
Setting the speed-dependent volume
When the speed-dependent volume is activated the volume is automatically changed
in order to compensate for road and wind noise that occurs when you drive.
Press the SETUP (9) button and tap on Audio.
Note
Alternatively you can use the multi-function button (11) for setting if a main
menu for audio is activated.
You cannot select the Audio button in the SETUP menu if the volume on
the device is switched off.
To change the degree of volume adjustment, set Speed vol. to a value between 0
and 5.
Note
If the speed-dependent value is set to 0 then it indicates that the volume will
not increase with increasing vehicle speed.
If the speed-dependent value is set to 5 then it indicates that the volume will
increase to a maximum with increasing vehicle speed.
Setting the volume for voice guidance (navigation)
Press the SETUP (9) button and tap on Navigation. If Voice Guidance is set to
«Off» then change the setting to «On«.
Set the volume to the desired level. Once you have changed the volume you will
hear the selected volume.
Setting the volume for the phone s ound
The volume of the phone sound can be changed during a phone call using the multifunction button (13).
When the volume has been changed the new setting will be saved by the system and
used as the standard setting for all future phone calls until the setting is changed
again.
23
Note
When the volume of the phone sound changes the ring signal volume will also
change.
Camera
The device supports the display of a camera image, e.g. a rear view camera. The
following formats are supported:
P AL BG: PAL Conformity acc. Rec. ITU-R 624-4:1990 and ITU-R BT.1700 (2005)
NTSC M: NTSC Conformity acc. SMPTE 170M-2004
Activating the camera
Press the (15) button.
If a camera is connected then the camera image is shown for a second.
Note
The camera can act as a rear view camera depending on how is
connected. In which case the camera image is shown automatically for as
long as the vehicle’s reverse gear is engaged. Contact your Scania
workshop for more information.
If no camera is connected then the device returns to the menu that was
last active.
Deactivating the camera
Press the (15) button.
The device returns to the menu that was last active.
Note
If a rear view camera is connected then the camera image is hidden
automatically when the vehicle reaches a certain speed.
The speed at which the camera image is hidden can be changed. Contact
your Scania workshop for more information.
Note
The camera is a separate product and is not always included with the
device. Contact your dealer for more information about what is included in
your vehicle, or which camera solutions suit your vehicle.
24
Radio
In the menus for the radio you can only use the touch screen to select or activate the
menu items.
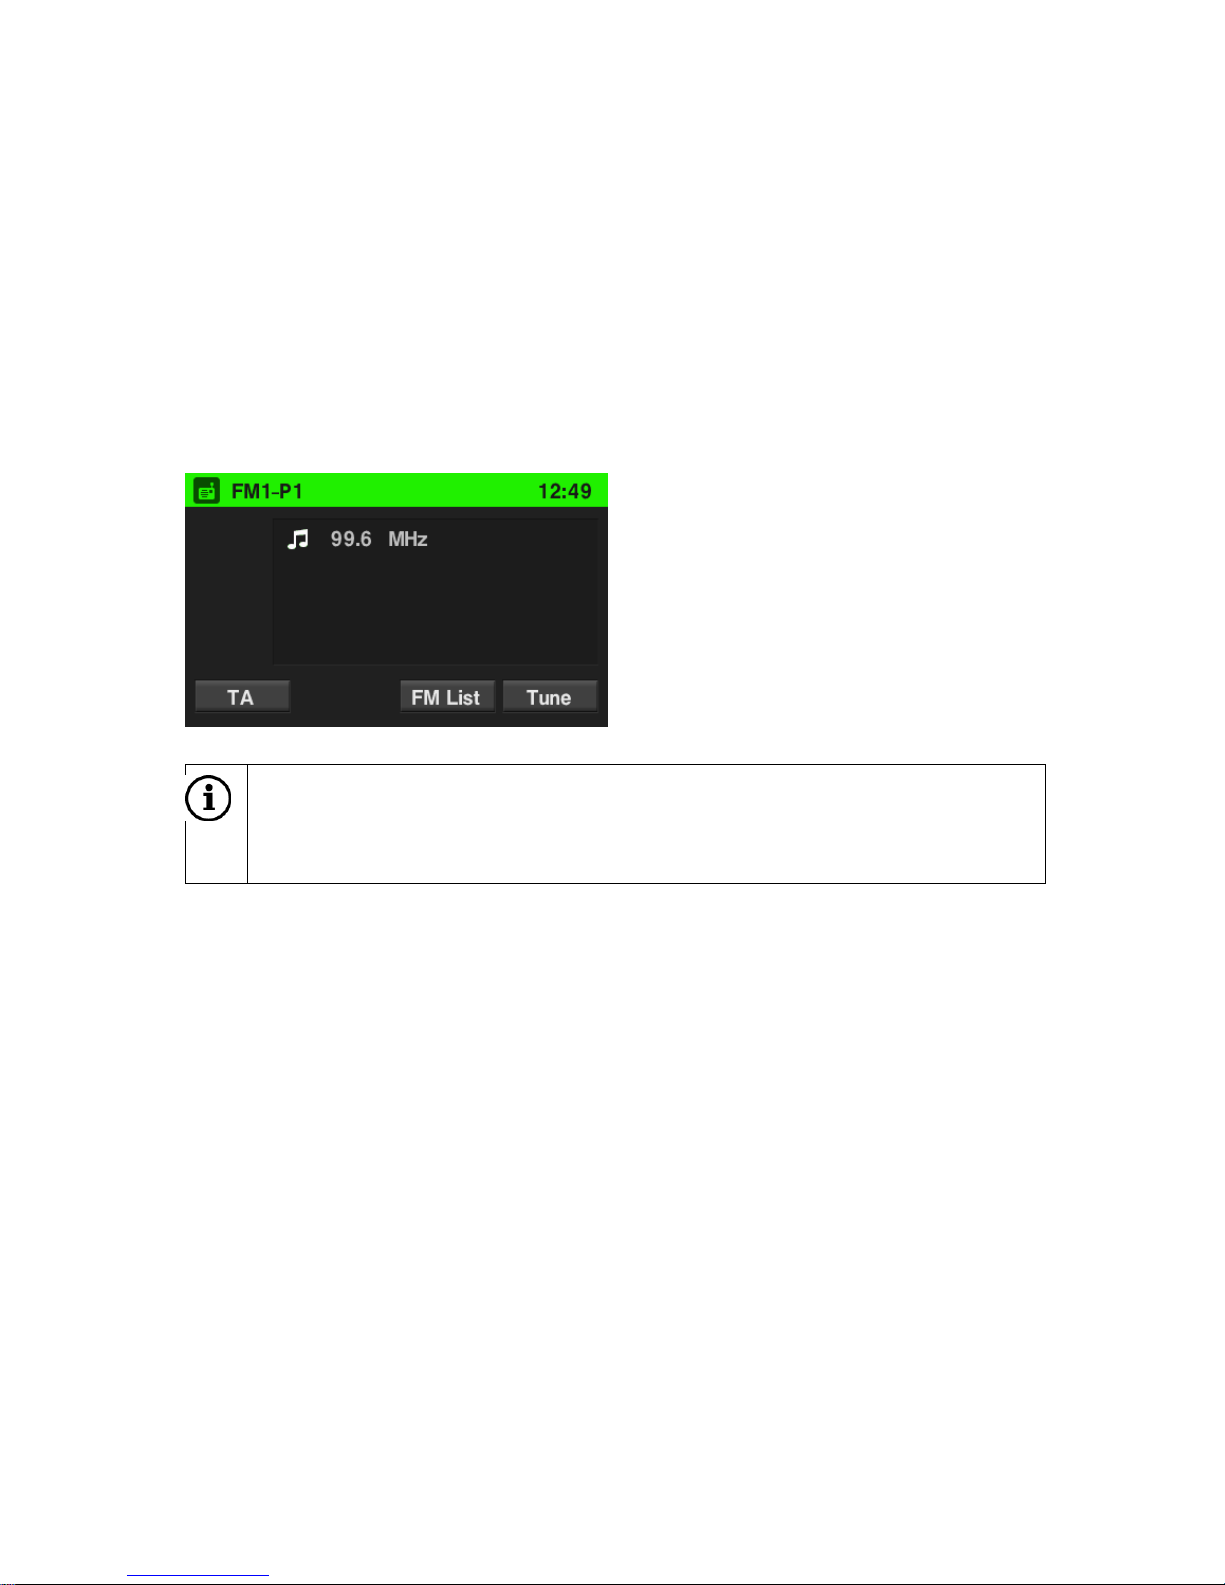
Starting radio mode
Switch on the system.
Press the FM•AM (17) button.
The radio is activated. The last played radio station will be played when the radio is
switched on.
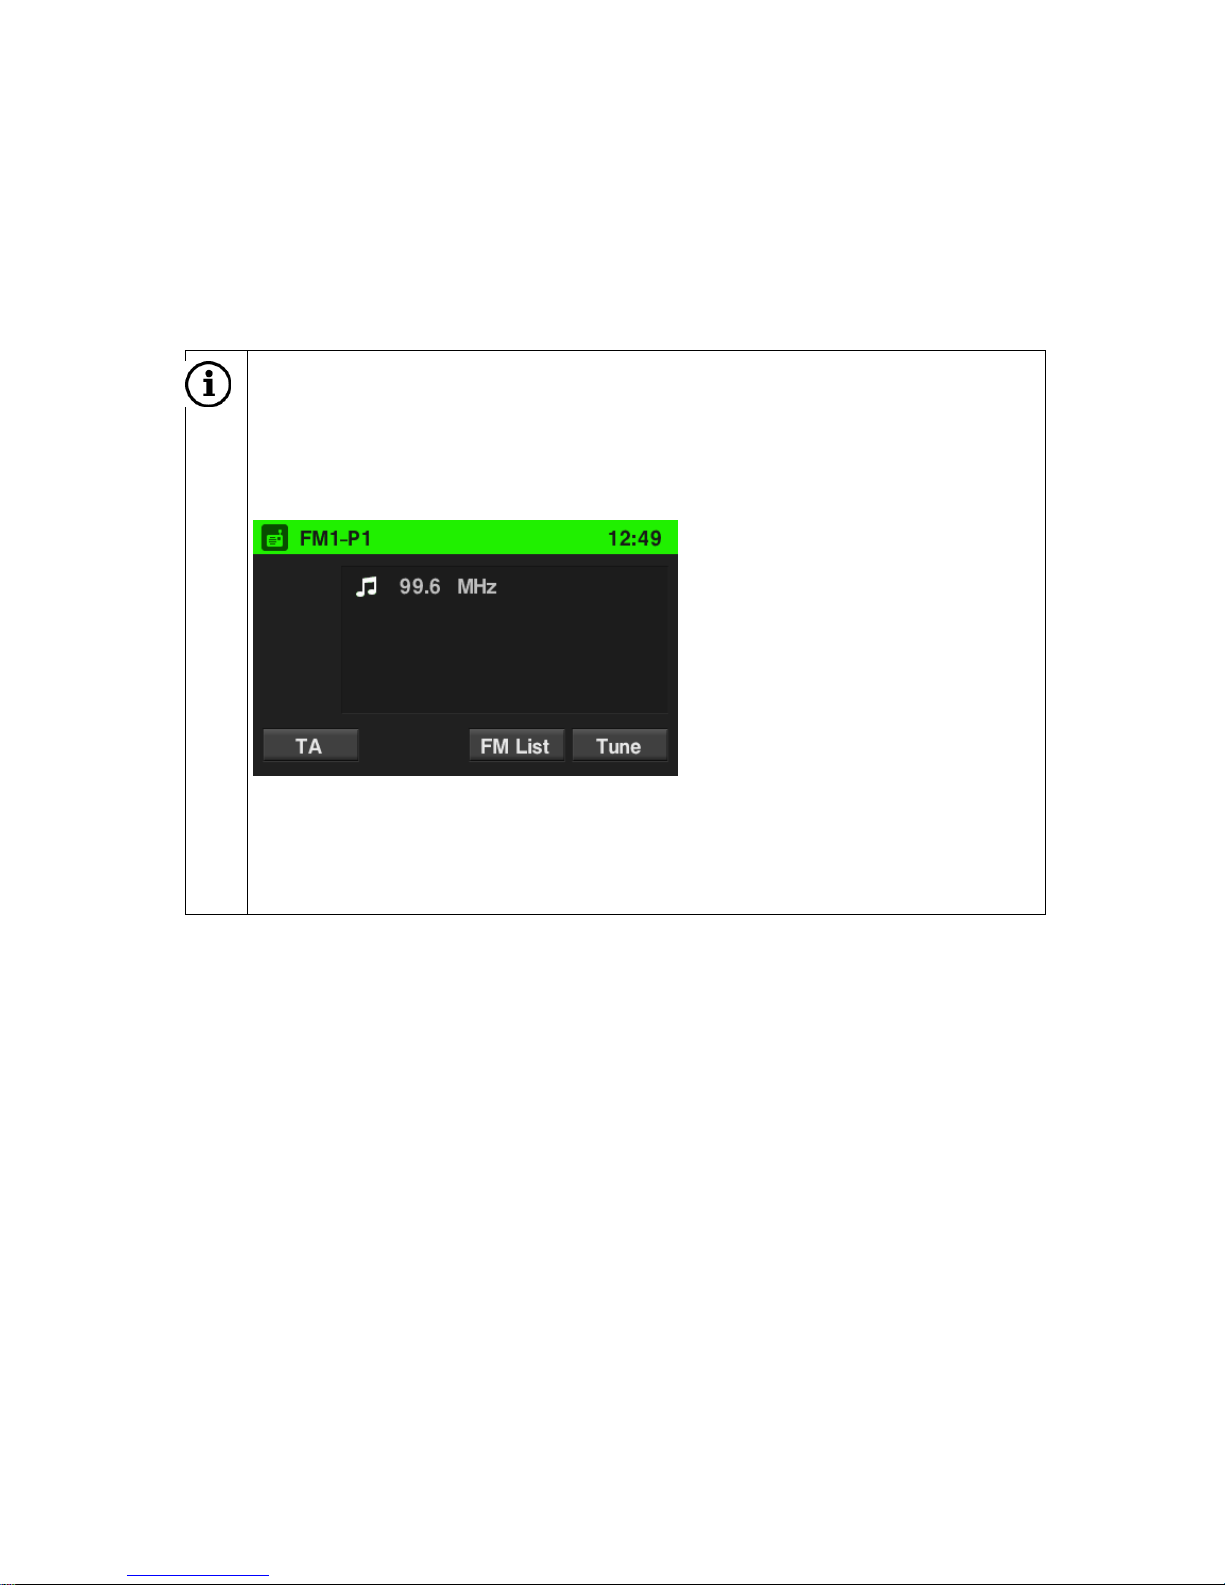
Note
If an RDS station is played then the station name and programme-related
information are shown.
25
Selecting frequency ranges
Press the FM•AM (17) button once or repeatedly in order to set the desired
frequency range.
The last played radio station in the selected frequency range is played.
Note
If a frequency range is changed from FM1 to FM2, to AM or vice versa
then the current radio station will also be activated in the future. If the
current radio station is saved by using one of the station buttons then the
corresponding button number is shown on the screen.
There are 2 frequency band menus for FM. You can save 12 FM stations
using the station buttons.
There is one frequency band menu for AM. You can save 6 AM stations
using the station buttons.
Radio Data System (RDS)
RDS is a system that transmits both encoded digital information and normal FM radio
broadcasts. RDS provides information services such as station names, traffic
information and radio text.
RDS regional mode
Sometimes the RDS stations broadcast di fferent programmes on different
frequencies based on the region. The system always receives the frequency that
gives the best reception of the RDS station currently being played.
If RDS Regional is activated then only frequencies from the currently received RDS
station with the same regional programmes will be used.
If RDS Regional is deactivated then frequencies from the currently received RDS
station with other regional programmes will also be used.
Loading…
Document Download |
‹
›
Scania AUS4 Manual Online:
4.6,
985
votes
Scania AUS4 User Manual
Scania AUS4 User Guide
Scania AUS4 Online Manual
Text of Scania AUS4 User Guide:
More Instructions:
|
Scania AUS4 Original instructions manual
|
DOWNLOAD | |
|
Scania AUS4 Manual
|
DOWNLOAD | |
|
Scania AUS4 Manual
|
DOWNLOAD |
Related Products and Documents (Car Receiver):
-
Alpine CDE-W203RI Car Receiver Owner’s manual
CDE-W203RI
alpine/cde-w203ri.pdf, 33 -
Topfield Digital Satellite Receiver TF 6000 PVR Car Receiver Operation & user’s manual
Digital Satellite Receiver TF 6000 PVR
topfield/digital-satellite-receiver-tf-6000-pvr.pdf, 120 -
LD WS10002 Car Receiver Operation & user’s manual
WS10002
ld/ws10002.pdf, 128 -
JVC KS-FX742R Car Receiver Instructions manual
KS-FX742R
jvc/ks-fx742r.pdf, 146 -
Kenwood KDC-X395 Car Receiver Instruction manual
KDC-X395
kenwood/kdc-x395.pdf, 112 -
Kenwood KRC-594 Car Receiver Service manual
KRC-594
kenwood/krc-594.pdf, 26 -
Nuvo NV-T2 Car Receiver Specifications
NV-T2
nuvo/nv-t2.pdf, 2 -
Audiovox Prestige Home Theater Sytem Car Receiver Installation instructions
Prestige Home Theater Sytem
audiovox/prestige-home-theater-sytem.pdf, 4
Comparable Devices:
| # | Manufacturer | Model | Document Type | File | Updated | Pages | Size |
|---|---|---|---|---|---|---|---|
| 1 | Quest Engineering | DL1300 | Deployment manual | quest-engineering/dl1300-4T5.pdf | 04 May 2025 | 57 | |
| 2 | Philips | MWV2053T | Manual | philips/mwv2053t-S8V.pdf | 06 Nov 2023 | 2 | 0.33 Mb |
| 3 | Avanti | BCA886 | Instruction manual | avanti/bca886-7DD.pdf | 12 Sep 2024 | 20 | 0.25 Mb |
| 4 | LG | UV36.NKD | Owner’s manual | lg/uv36-nkd-8FA.pdf | 23 Aug 2024 | 209 | |
| 5 | Philips | Mono FSQ 21PT1346 | Specifications | philips/mono-fsq-21pt1346-J74.pdf | 26 Feb 2025 | 2 | |
| 6 | Vorzuge | VorzAMPduo | Operation & user’s manual | vorzuge/vorzampduo-A87.pdf | 09 Dec 2023 | 12 |
Similar Resources:
Car Receiver Instructions:
-
media-tech Mouse MT1073
media-tech MT1073 Guide (Instruction manual), @6N6STU
MT1073, 4
-
Dynamite Battery Charger PASSPORT Ultra Duo
Dynamite Battery Charger PASSPORT Ultra Duo Instruction manual
PASSPORT Ultra Duo, 2
-
Creative Digital Camera NX Pro
NX Pro Operation & user’s manual — 8V5X34
NX Pro, 30
-
American Dynamics Security System DV16000
Security System PDF Installation and operating instructions manual
DV16000, 201
-
Cisco Network Router WRT54GP2
Cisco Network Router WRT54GP2 Installation and troubleshooting manual
WRT54GP2, 112
-
komodo Tent KDTNT8PPTTNA
KDTNT8PPTTNA (Tent ePDF Manual, #9Y8J69)
KDTNT8PPTTNA, 3
-
Buick Automobile 2013 Enclave
Buick Automobile Manual (File: buick-2013-enclave-automobile-18, 16th Oct 2024)
2013 Enclave, 18
-
Polaroid Watch SB-502
Polaroid SB-502 Watch Operation & user’s manual
SB-502, 12
-
HP Laptop Compaq nc6220
Quickspecs for HP Compaq nc6220 Laptop
Compaq nc6220, 40
-
Daewoo TV DSC-3270E
Daewoo TV DSC-3270E Service manual
DSC-3270E, 60
-
OPTICOM Other KD8
OPTICOM Other KD8 Datasheet
KD8, 4
-
Craftsman Saw 21194 — 7-1/4 in. Sliding Compound Miter Saw
Guide: Craftsman 21194 — 7-1/4 in. Sliding Compound Miter Saw (A85EKH, Upd.Thu 10.2024)
21194 — 7-1/4 in. Sliding Compound Miter Saw, 44
Comments, Questions and Opinions:
Scania AUS4 user guide recommended for: AUS4STD, KS-FX945R, HT-R370(B)(S), Radio Medium, OPT 3US TX.
The Scania AUS4 Car Receiver manual (Scania Original instructions manual, 92 pages) is completely safe to download (last scan date: 13/01/2025). You can rest assured of your safety when interacting with Scania AUS4 document.
1
DPX-510
Instruction manual Kenwood Car Receiver Instruction manual (File: kenwood-dpx-510-instruction-manual-26, 23/02/2025)
26
1469
221
3
EXAD KW-AVX810
243
666
140
6
CDX-L510X — Fm/am Compact Disc Player
Product manual PDF Manual (@ETLFSW), Sony CDX-L510X — Fm/am Compact Disc Player Car Receiver (11th Nov 2024)
2
744
186
7
SCR-5381USDR
Instruction manual Premier Car Receiver Instruction manual (File: premier-scr-5381usdr-instruction-manual-11, 03/11/2024)
11
1327
279
10
CQ-C7413U? CQ-C7113U
38
869
166
Scania Radio Premium Car Stereo System PDF User Guides and Manuals for Free Download: Found (1) Manuals for Scania Radio Premium Device Model (Manual )
Scania Radio Premium Manual
Details:
- Manufacturer: Scania
- Product Name/ID: Scania Radio Premium / #710152
- Category: Car Stereo System
- File Path: scania/radio-premium_710152.pdf
- Last Updated: 10 May 2025
- Description: Discover the features of Scania Radio Premium with this manual, which provides detailed setup instructions, user interface tips, and troubleshooting advice to enhance your overall experience.
- Document Type: User Manual
- Pages: 83
Download PDF
Read Online
The Scania Radio Premium is a remarkable addition to any truck or commercial vehicle, engineered to elevate the driving experience through superior sound quality and enhanced functionality. Designed with the modern driver in mind, this device comes packed with features that promise not only entertainment but also convenience and connectivity.
One of the standout features of the Scania Radio Premium is its user-friendly interface. The intuitive controls allow drivers to navigate between various functions without becoming distracted from the road. The large display ensures that information is easy to read, whether you’re adjusting the volume or selecting a different media source. This commitment to user experience makes it an excellent choice for long-haul drivers who depend on a reliable entertainment system.
Sound quality is equally impressive, often exceeding expectations for a vehicle radio. The Scania Radio Premium is equipped with cutting-edge audio technology that provides crystal-clear sound across all frequencies. Whether you’re listening to music, news, or podcasts, you’ll appreciate the depth and clarity that this radio brings to your audio experience.
Connectivity is crucial in today’s world, and the Scania Radio Premium does not disappoint in this area. It boasts multiple connectivity options, including:
- Bluetooth for hands-free calling and wireless audio streaming, ensuring safety on the road.
- USB ports that allow for quick charging of devices and playback of audio files.
- Support for various media formats, making it easy to enjoy your personal music collection.
Integrating seamlessly with other Scania systems, the Radio Premium enhances the overall functionality of the vehicle. It works harmoniously with external navigation systems, providing drivers with turn-by-turn directions while keeping them entertained. This level of integration is a hallmark of Scania’s design philosophy, prioritizing the driver’s needs above all.
Safety features contribute significantly to the appeal of the Scania Radio Premium. The system is designed to minimize distractions while driving, allowing drivers to control music and calls without taking their focus off the road. This is an essential aspect of modern vehicle design, reflecting Scania’s commitment to safety and functionality.
Furthermore, Scania places a strong emphasis on durability and reliability in their products, and the Radio Premium is no exception. Built to withstand the rigors of daily use in various environments, it can handle the vibrations and shocks typically associated with truck driving. This resilience ensures that the radio remains a trusted companion for years to come.
In conclusion, the Scania Radio Premium stands out as a top-tier product that encompasses everything a driver could want in a vehicle radio. From impressive sound quality and user-friendly design to extensive connectivity options and safety features, this product is a testament to Scania’s commitment to excellence. Whether you’re a long-haul trucker or someone who simply appreciates good audio, the Scania Radio Premium is an investment that will enhance your driving experience significantly.