
Panasonic NN-CS89LB
Operating Instructions and Cookbook
Steam / Convection / Grill / Microwave Oven
Model No. NN-CS89LB
Household Use Only
Important safety instructions
Please read carefully and keep for future reference
View the manual for the Panasonic NN-CS89LB here, for free. This user manual comes under the category microwaves and has been rated by 7 people with an average of a 9.6. This manual is available in the following languages: English. Do you have a question about the Panasonic NN-CS89LB?
Ask your question here
Product Images (10)

Panasonic NN-CS89LB specifications
Below you will find the product specifications and the manual specifications of the Panasonic NN-CS89LB.
The Panasonic NN-CS89LB is a countertop combination microwave with a spacious interior capacity of 31 liters. It has a powerful microwave power of 1000 W and offers 7 different power levels. The control type is touch and it features inverter technology, which provides consistent and even cooking.
Additionally, the microwave comes with a grill power of 1300 W and a steam power of 1300 W. The door hinge is located at the bottom, and the door opens with a drop-down opening. A built-in display, featuring an easy-to-read LCD technology, makes it simple to navigate through the various settings and programs.
Constructed with premium materials, this Panasonic microwave provides reliable and durable performance over time. Its exterior boasts a sleek design that enhances any kitchen decor, while its large interior capacity is perfect for cooking or re-heating family-sized meals.
In summary, the Panasonic NN-CS89LB is an efficient and practical microwave that offers multiple cooking options and features. Its advanced inverter technology ensures uniform cooking, while its modern design and user-friendly interface make it an excellent addition to any kitchen.
Appliance placement
Countertop
General
| Brand | Panasonic |
| Model | NN-CS89LB | NN-CS89LBGPG |
| Product | microwave |
| EAN | 5025232940134 |
| Language | English |
| Filetype | User manual (PDF), Datasheet (PDF) |
Features
| Appliance placement | Countertop |
| Product type | Combination microwave |
| Interior capacity | 31 L |
| Microwave power | 1000 W |
| Control type | Touch |
| Inverter technology | Yes |
| Grill power | 1300 W |
| Steam power | 1300 W |
| Number of power levels | 7 |
| Door hinge | Down |
| Door opening | Drop down opening |
| Built-in display | Yes |
| Display type | LCD |
| Delayed start timer | — |
| Product colour | Black, Stainless steel |
| Removable grill rack | Yes |
| Removable water tank | Yes |
| Water tank capacity | 0.8 L |
| Door material | Glass |
| Door colour | Black |
| Noise level | 60 dB |
| Temperature (max) | 230 °C |
| Cooking time (max) | 540 min |
| Turntable | Yes |
| Interior material | Stainless steel |
Cooking functions & programs
| Grill | Yes |
| Convection cooking | Yes |
| Steam cooking | Yes |
| Keep warm function | — |
| Rotisserie | — |
| Defrost function | Yes |
| Reheat function | Yes |
| Number of cooking programs | 12 |
| Cooking programs | Meat, Pizza |
| Auto cook function | Yes |
| Number of auto cooking programs | 36 |
| Defrost programs quantity | 1 |
Power
Weight & dimensions
| Width | 500 mm |
| Depth | 437 mm |
| Height | 391 mm |
| Weight | 21500 g |
| Interior dimensions (W x D x H) | 410 x 320 x 240 mm |
Packaging content
| Steam bowl | Yes |
| Grill grid included | Yes |
Packaging data
| Package weight | 28600 g |
| Package width | 615 mm |
| Package depth | 590 mm |
| Package height | 555 mm |
show more
Frequently asked questions
Can’t find the answer to your question in the manual? You may find the answer to your question in the FAQs about the Panasonic NN-CS89LB below.
What is the weight of the Panasonic NN-CS89LB?
The Panasonic NN-CS89LB has a weight of 21500 g.
What is the height of the Panasonic NN-CS89LB?
The Panasonic NN-CS89LB has a height of 391 mm.
What is the width of the Panasonic NN-CS89LB?
The Panasonic NN-CS89LB has a width of 500 mm.
What is the depth of the Panasonic NN-CS89LB?
The Panasonic NN-CS89LB has a depth of 437 mm.
How long does a microwave last before it loses power?
A microwave lasts an average of 2000 hours before it loses power.
Is heating food in the microwave bad for your health?
Reheating food in the microwave is not bad for your health.
Which food should not be used in the microwave?
It is not wise to put peeled food in the microwave. The heat cannot escape through the skin, causing the food to explode.
Is it bad to turn on a microwave empty?
Yes. Turning the microwave on empty can result in damage to the microwave. When the microwave is empty, the microwaves are not absorbed by the food.
Is the manual of the Panasonic NN-CS89LB available in English?
Yes, the manual of the Panasonic NN-CS89LB is available in English .
Is your question not listed? Ask your question here
Всем доброго дня.
Недавно на моей кухне появилась новая печь. Необычна она тем, что выполняет функции микроволновки, духовки, пароварки, в ней есть гриль и даже с некоторыми ограничениями можно готовить су вид. Перед тем, как установить дома печь, я понял, что газовая духовка мне больше не пригодится. Дублировать функции я не вижу смысла, а вот убрать лишние приборы с кухни очень хотелось, чтобы места стало больше. В ролике-обзоре я показал и переделку кухни для новой печки и множество вариантов приготовления блюд в печи.
Посмотреть ролик и наглядно увидеть процесс работы печи можно тут:

Об основных возможностях расскажу в обзоре, если появятся вопросы – задавайте или тут или в комментариях под роликом.

Печь удобно заняла место в углу кухни. Отдельной духовки у меня теперь нет, места стало больше)

Внутри печка очень большая. В ней нет поворотного стола, можно готовить в прямоугольном блюде, используя всю площадь дна. В печи можно одновременно готовить на двух уровнях.

Например пирожки можно приготовить в режиме конвекции 180 градусов. Пирожков получится много, они будут равномерно выпекаться

Также можно одновременно готовить на двух уровнях на пару, причём одновременно можно готовить 2 блюда. Я одновременно готовил на пару рыбу и гарнир

Большой внутренний объём легко позволит приготовить курицу или утку. Используя режим гриль легко получить красивую золотистую корочку.

Это микроволновая печь с инверторным управлением. Разморозка в ней идёт быстро и равномерно. В ролике вы также сможете посмотреть тест по распределению микроволн.

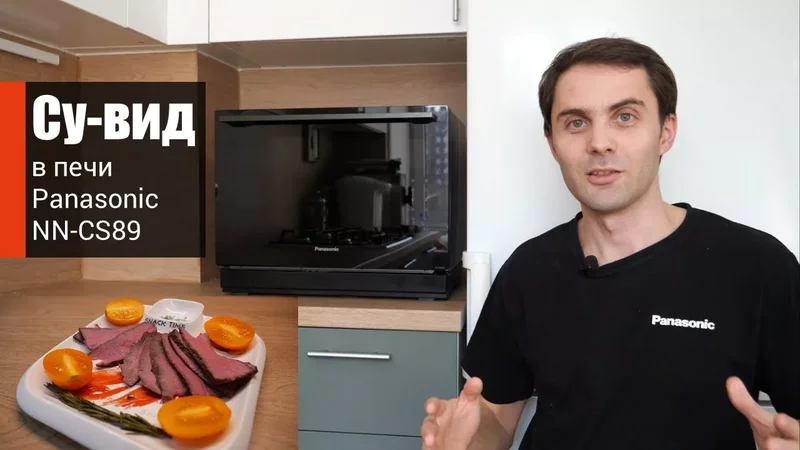
В этой печи в режиме конвекции можно устанавливать температуру в диапазоне 30-100 градусов с шагом в 10градусов. Такой диапазон позволяет готовить су-вид. Мясо получается очень нежным, вкус и запах просто божественны. Если честно, именно из за этого я ждал 89-ю и не хотел брать 894-ю

Внутреннее покрытие легко чистить. Есть даже отдельные программы самоочистки. Понравилось то, что гриль скрыт. Это опять же облегчает процесс очистки печи после приготовления.
За пару месяцев использования к печи привык и она стала центром приготовления на кухне.
Поделюсь еще видео приготовления в этой печи:

Похожее
Печка конечно очень интересная и подумываю её купить на замену конвекционной от самсунга. Но по прошлым моделям немало отзывов про трескающуюся нижнюю стеклянную часть печки. Причём прямо в режиме приготовления. А в СЦ людям радостно заявляли про механические повреждения, либо нарушение правил эксплуатации. Есть жалобы на прогары. Пока мало отзывов по новым моделям, интересно исправили их, или опять получишь дорогой кусок мусора в итоге.
Сергей, дно могло прогорать если режим микроволн включался в пустой печке, это правда. Антенна отражатель располагается под дном, магнетрон сверху. Если при включении печи между ними ничего нет, например тарелки с едой или кружки с жидкостью, прогорает дно. Выдержка из инструкции: «Не допускается включение микроволнового режима, если внутри печи нет продуктов. Это может вызвать повреждение устройства.» Также в инструкции написано: «При эксплуатации печи в режиме Комбинации не
ставьте алюминиевые или металлические контейнеры непосредственно на решетку – между ними всегда должно находиться стеклянное блюдо. Это предотвратит искрение, способное повредить печь»
Но инструкцию, особенно предостережения производителей обычно никто не читает…
У меня 89-я дома почти год. По функционалу очень нравится. На моём канале также можно посмотреть примеры приготовления различных блюд в этой печи. Скоро, кстати, будет видео приготовления батона с предварительным замесом и расстойкой в новой хлебопечи Panasonic SD-R2530
Про прогар мне попадался всего один отзыв и там вполне возможно просто грязная печка была. В том то и дело что стекло трескается в процессе готовки. И трескается повторно через несколько месяцев после замены. Весьма настораживает такое количество отзывов, учитывая что модель премиальная, покупали её не так много.
Может конечно люди настолько невнимательны, что решили пожарить курочку прямо на стеклянном дне без поддона, но как то не верится в массовость таких акций. И почему это проявляется через несколько месяцев, а не сразу. Очень странно.
Эта модель в продаже уже давно, но как то отзывов по ней нет совсем.
Юрий
К сожалению, их очень мало привозят в Россию. Обычно люди пишут отзывы либо если что то не понравилось, либо если магазин, в котором покупали товар, мотивирует на написание отзывов, например бонусными баллами. Эта печка в основном продаётся в фирменном магазине , мотивации за отзывы нет, ну а если нареканий мало, вряд ли будет много отзывов. Но это просто моё мнение
Я почти сдалась в бою с жабой и ужасно хочу эту печь, в первую очередь потому, что у меня есть место либо для микроволновки, либо для духовки. Однако при этом ужасно смущает отсутствие внятных рецептов на просторах интернета. Ну есть что-то на английском на официальном сайте панаса, но там не густо совсем и малоорентировано на наш рынок (например, блинчики с начинкой, сырники, пирожки с картошкой и т. д. ), а сама я пекарь еще тот, да и очень сложный девайс – приготовление в микроволновке (с микроволнами) и пар в духовке для меня вообще темный лес и мне совершенно непонятно как это использовать включая фантазию, а не повторяя готовые описанные рецепты.
Если у кого-то уже есть, вы хоть делитесь своими успехами, очень бы помогло таким зеленым, как я
Какое то количество рецептов есть в инструкции, но если вы будете использовать ручные программы – подойдут любые рецепты из интернет. Например вы хотите выпекать, как в духовке – у вас есть конвекция в диапазоне температур 30-230 градусов. Выставляете температуру и время как в любом рецепте в интернет и готово, пар аналогично – просто ставите время, как в пароварке. Комбинация режимов позволяет делать многие блюда просто быстрее, например курицу. Недавно после рыбалки щуку готовил на комбинации. Замариновал (лимонный сок, соль, прованские травы и базилик) минут на 30 и в печь. Получилось лучше чем на мангале. Кебаб великолепный получается. Выложу на hlebopechka.ru в ближайшее время рецепты, пока только видеоверсия у меня на канале есть
конвекция в диапазоне температур 30-230 градусов
На моей любимой Панасоник NN-C781JF 2003 года (сейчас такое качество не делают) – до 250 градусов.
Кстати, Юрий, ведь можно на конвекции безопасно предварительно прогревать пустую микроволновку?
Выложу на hlebopechka.ru в ближайшее время рецепты, пока только видеоверсия у меня на канале есть
Вот только ваши рецепты на ютубе и нашла, что, в принципе, тоже неплохо. Пирожки жду с нетерпением Еще и замес теста на них в такой же ХП как у меня, ух, чего еще можно желать?!
Кстати, Юрий, ведь можно на конвекции безопасно предварительно прогревать пустую микроволновку?
Судя по инструкции – да. Пустую включать запрещено на микроволнах.
Ах да, передайте там панасу, что было бы классно, если бы блокировка клавиш была постоянная-автоматическая, а не включалась в ручную каждый раз после использования прибора. Смотрю сейчас на многих устройствах почему-то такого плана блокировка и когда дома дети, животные, это очень неудобно.
Кстати, Юрий, ведь можно на конвекции безопасно предварительно прогревать пустую микроволновку?
Там же в инструкции есть блюда с предварительным прогревом печи.
Однако при этом ужасно смущает отсутствие внятных рецептов на просторах интернета.
Меня тоже это смущает. Рецептов реально мало, приходится импровизировать.
а сама я пекарь еще тот, да и очень сложный
Девайс на самом деле не сложный. Есть комбипрограммы с паром специально для выпечки. Весьма интересный результат выпечки получается с паром.
блокировка клавиш была постоянная-автоматическая
Так там она есть вроде. Скачайте инструкцию с просторов интернета.
Кстати, Юрий, ведь можно на конвекции безопасно предварительно прогревать пустую микроволновку?
Да, конечно можно. Функция предварительного разогрева в режиме конвекция есть. Максимальная температура 230, десяток лет назад была выше, но я так понимаю это связано с Европейскими требованиями по безопасности. Для сертификации в Европе есть ограничения по температуре снаружи печи и тут самым простым решением было снижение максимальной температуры
Если что, инструкцию NN-CS 89 в которой есть рецепты можно скачать тут:
А как реализована пароварка? Есть отдельный парогенератор, куда то надо заливать воду?
Есть ли возможность составления цепочек режимов (некое программирование), сколько их?
Если воткнуть, в допустим мясо, шуп-термометр металлический, то не будет искрения?
Смотрел и уже забыл… курогрудка в сувиде, в ролике, 70°С и с паром??
Игорь, да, есть отдельный парогенератор. Схему прибора можно посмотреть тут:


(это не сайт Panasonic, но схемы тут хорошие)
В печи есть многоэтапный режим приготовления (стр 32 инструкции) и есть комбинированные режимы с паром (стр 25) и без пара (стр 27)
По поводу щупа – есть ведь разные режимы приготовления. На режимах конвекция, пар, гриль точно искрить не будет. На микроволнах, если он не касается стенок не должен, по аналогии с металлическим комплектом steam plus Pot в NN-GD39. Но я не пробовал
Сувид я делал на 70 градусах, видео тут:
готовил без пара в zip-пакете. После приготовления лучше ещё несколько минут на гриле доготовить, чтобы получить красивую корочку
Так там она есть вроде. Скачайте инструкцию с просторов интернета.
вот как раз читала, она там включается несколькими нажатиями на сто, по-моему. А потом отключается стартом. Я так поняла это одноразовая акция. Включил – выключил, а затем автоматически блок сам не включается.
У меня сенсорные кнопки заблокированы всегда. Разблокируются при открывании и закрывании дверцы. Выложил рецепт су-вид в формате фото-текст: hlebopechka.ru…
Постепенно буду пополнять список рецептов. У себя на канале сделал отдельный плей-лист по 89-ой.
У меня сенсорные кнопки заблокированы всегда. Разблокируются при открывании и закрывании дверцы.
это хорошая новость! Спасибо!
приходится импровизировать.
вы выкладывайте свои импровизации, хотя бы с указанием времени и программы, сами рецепты блюд уже такое, можно в инете откопать
Размеры внутренней камеры и противня напишите, не нашла.
Ш41 Х Г31 Х В22
Можно одновременно готовить на двух уровнях
Добрый день. Хочу купить такой аппарат, но есть вопрос по месту. Сколько у печи длинна при открытой крышке?
Константин
Габаритные размеры печи (Ш Х В Х Г): 500 х 391 х 480 мм
Глубина открытой дверцы 320мм
С Новым Годом и Рождеством!
Наконец-то приехала ко мне моя красавица. Европейская версия. Сразу отмечу, что автоматические программы в ней таки отличаются (совсем другие алгоритмы).
С ней шли две книжки в комплекте, одну их которых (инструкцию, слева на фото) я нашла на русском, а есть ли где-то на русском вторая (которая справа на фото)? Очень полезная книжка, в ней есть таблицы приготовления блюд/продуктов на тех или иных программа, включая время. А так же неплохое количество рецептов.
Кстати, по поводу блокировки панели управления, то у меня она таки работает по-дурацки или я еще не разобралась, так как перед каждым использованием ее надо отключать (ну это ожидаемо), а вот после использования ее надо опять руками включать, что крайне неудобно так как велик шанс забыть. У меня, например, плита сама блокируется сразу после отключения при включенной защите от детей.
Блокировка как раз очень умная. Она снимается после открытия дверцы и включается, через некоторое время после закрытия дверцы и сброса программы. Ничего руками дополнительно не нажимаю. И там слышно как щёлкает релюшка, так что надеюсь там реально выключаются все электрические цепи кроме часов.
Вторую хотя бы на английском найти.
Русская версия достаточно странная, большинство рецептов весьма далеки от реальной жизни. Не покидает ощущение, что составляла её Юлия Меньшова.
Блокировка как раз очень умная. Она снимается после открытия дверцы и включается, через некоторое время после закрытия дверцы и сброса программы. Ничего руками дополнительно не нажимаю.
К сожалению, у меня подобное поведение не наблюдеается.
Возможно из-за различных версий печей. Модели для Европы и для России действительно отличаются
Блокировка как раз очень умная. Она снимается после открытия дверцы и включается, через некоторое время после закрытия дверцы и сброса программы. Ничего руками дополнительно не нажимаю.
К сожалению, у меня подобное поведение не наблюдеается.
Я разобралась! Уф. Она по умолчанию так работает, без включения блокировки панели тройным нажатием на старт. Я просто со своими котами сразу полезла искать как блокировать но не мешало бы и сделать подобное поведение на блоке от детей. Коты то мои навряд откроют дверцу, а вот дети могут)
Вторую хотя бы на английском найти.
Раз такие дела, тогда как-нибудь на досуге отсканирую ее и выложу сюда.
C 89 стр инструкции есть много совпадений с тем, что в моей книжке – таблицы и рецепты
а вот даже с картинками. Поразительно что они не вложили такую книжку. Видно что делали именно для цветной печати
У панасоника конечно странная политика. Почему бы не собрать все рецепты в одну книжку и выложить хотя бы в электронном виде. Приходится собирать и пытаться адаптировать из разных книг.
Сергей, к сожалению это так. Надеюсь когда-нибудь изменится. Некоторые рецепты от NU-SC300 подойдут. Книга по ней есть в электронном виде тут:
Такая уже есть. Она очень похожа на ту, которая идёт в комплекте с печкой из данной темы.
Кто кстати пробовал выпечку, пирожки там всякие. В инструкции советуют включать пароувлажнение. Но на каком этапе это лучше делать? Вначале, или когда прошло 2/3 программы, как советуют при выпечке хлеба?
Для Англии самая адекватная и подробная инструкция с кучей рецептов. Плюс там мегаадекватные автоматические программы, разные виды мяса и овощи, детское меню. В русском варианте просто бесполезная мешанина из программ, даже жареной картошки нет.
Жаль что нет пошагового описания этапов программ с временем и применяемой обработкой, как в хлебопечках. Чтоб можно было самому воспроизвести.
Но на каком этапе это лучше делать? Вначале, или когда прошло 2/3 программы, как советуют при выпечке хлеба?
У меня в инструкции homemade bread и всякое такое советуют делать на комби 3 – конвекция + пар уровень 1 (max).
Я делала дважды пампушки по этому рецепту, первый раз у меня не вышло тесто (не поднималось толком), но я ради интереса запекла, были красивые.
Второй раз передержала в духовке и перебор по румяности был. Пропеклись супер.
Судя по всему, пароувлажнение происходит где-то на начальном этапе. Откровенно говоря мне лениво было пол часа сидеть у печки

А я правильно понимаю, что из новой версии печи убрали не только решетчатый противень, но и сам режим «хрустящей корочки»? И вообще режима гриль+микроволны больше нет, только вместе с конвекцией. Очень странно. Я на этом режиме на противне этом любил делать и пиццу и котлеты жарил и вообще хорошая штука была. Огромный минус производителю что убрал эту функцию.
Да, всё так. А какой моделью пользуетесь вы?
Я как раз заказал NN cs 89lb, уже едет ко мне, и только в процессе узнал об отсутствии режима хрустящей корочки. Интересно, если докупить решетчатый противень от старой модели и использовать его в режиме комбо 4-8 (гриль+микроволны+конвекция), будет ли так работать? По идее должно
О, мне тут книгу рецептов положили толстенную, это мне одному так свезло или панасоник теперь всем кладет?

Юрий, подскажите, а отдельно решетки для СВЧ продаются? Не нашла в магазине.
Мне нужна для 383 модели, очень не хватает решетки.
Юрий Железняков, Юра, можно и мне включиться в Вашу тему? Просто я неделю назад купила похожую печку, а создавать новую тему, думаю, нет смысла. У меня с 2014 года исправно служила Panasonic NN DS592. Она и сейчас прекрасно работает, но она в другом городе в другой нашей квартире. Перевозить её в Питер было довольно проблематично, да и старенькая она уже. Поэтому неделю назад купила на Озоне похожую модель, но более новую. Так же с духовкой и с паром. Называется она Panasonic NN DS596. Единственное, что меня немного расстроило, что в такой дорогой печке аксессуаров меньше, чем в моей старой: нет стеклянного поддона на дне и нет обычного противня. Только противень для комбинации и металлическая решётка. А в целом, конечно, все очень достойно. Уже два раза пекла в ней хлеб. С паром отлично. Да, в ней есть отдельная функция Пар помимо Пароувлажнения. И на моей маленькой кухне освободилось место. Одна печка вместо микроволновки и настольной духовки.
Можно=ли готовить в этой микре на крисп тарелке и куда ее можно ставить, у этой микры нет вращающейся тарелки.
Интересно, намного ли различаются модели
Микроволновая паровая печь с конвекцией и грилем Panasonic NN-CS89LBZPE
(микроволны, гриль, конвекция, пар, комбинированный)
И
Инверторная микроволновая печь Panasonic NN-DS596MZPE
(микроволны, гриль, духовка, пар, комбинированный)
У первой конвекция указана, а у второй – духовка
Это не одно и то же?
Называется она Panasonic NN DS596
Светлуча, конвекция у нее есть? Режим духовка это оно или что то иное?
У 596 – режим духовка, т. е. просто выбирается температура в печи, которая обеспечивается нагревательным элементом. У 89-ой конвекция – кольцевой нагреватель + вентилятор. При конвекции блюда могут готовиться быстрее. Также значительное отличие в температуре. У 89-ой есть возможность выставить температуру в диапазоне 40-100 градусов, это позволяет готовить су-вид.
Хочу немного рассказать о своем впечатлении о Панасонике (596 модель) после трех с половиной месяцев пользования этой печкой. Я уже не помню, почему в первые дни пользования я написала, что хорошо получается хлеб. К сожалению, ни одной фотки не сохранилось. Может, разок и было хорошо. Но сейчас по прошествии этих месяцев хочу сказать, что я очень недовольна функцией духовки в этой печке. У меня такое ощущение, что снизу вообще нет никаких тенов, а общий нагре во время в#печки осуществляется только верхними тенами. Так как вся выпечка снизу получается очень бледная, хотя ставлю противень на нижние направляющие. Зато верхние тены жарят так, что выпечка быстро начинает сверху гореть. В общем, не знаю, что думать и что делать. Использовать ее за такие деньги только как микроволновку как-то не хочется.
Светлана, вы точно выпекаете в режиме духовки, а не в режиме гриль? Снизу точно есть нагревательные элементы. Схема у печки можно найти тут:
На моё взгляд варианта 2: либо выбран неверный режим (гриль вместо духовки) либо неисправен нагревательный элемент. Второе очень маловероятно, но если такое случится – всегда можно обратиться в сервис
Юрий Железняков, Юра, конечно же я выпекаю в режиме Духовка, тем более аналогичная модель у меня была в пользовании с 2014 года. Но, к сожалению, происходит то что происходит. Только порчу хлеб. Приходится после выпечки его переворачивать и допекать дно под верхним теном. Спасибо за схему. С мужем посмотрим.
Светлана, в 14 году такой печи не было, была CS596. C- convection. В DS596 конвекции нет, как к примеру в DS592. Печка ведь на гарантии, можно в сервисе проверить.
У меня, кстати дачная печка DS592 недавно тоже в сервисе побывала. На даче бравые электрики фазы перекинули, у многих соседей техника вышла из строя.
Юрий Железняков, Юра, я неправильно выразилась, не аналогичная, но похожая (592 модель, насколько я помню), но духовка в ней работала отлично, да она и сейчас работает, вот только небольшая проблема перевезти ее из Новосибирска в Питер.
Светлана, тогда есть смысл обратиться в сервис по гарантии. Адреса и телефоны сервисов тут:
Юрий Железняков, спасибо, Юра! Буду пробовать всё что можно.
Продолжение приключений с моей печкой Панасоник. Отвезли ее сегодня в сервисный центр на диагностику. Буквально через пару часов мне звонят оттуда и говорят, что с печкой все в порядке. Нижний тэн работает также как и верхний. На мой вопрос, почему же она не печет нормально, мне ничего толком не ответили. Я спросила, может, за деньги заменить нижний тэн. Сказали, что можно, только это ничего не даст. Так как тэн исправен. Вот и не знаю, что мне делать дальше. Просто какая-то невезуха.
Позвоните на горячую линию Panasonic и обсудите информацию из сервиса: 8 (800) 200-21-00
Докупили в нашу NN cs89 крисп противень от предыдущей модели, готовим на комби режимах 6-8, получается супер) это замена режиму хрустящей корочки.
Позвонила на горячую линию Панасоник, обсказала проблему с нашей печкой. Оказывается, мы возили ее не в тот сервисный центр. Мне объяснили, что сервисный центр Панасоник в Петербурге только один и находится совсем по другому адресу. В общем, мы вчера ее туда отвезли. В сервисном центре нам сказали, что если запчасти есть в Москве, то сделают всё дней через 10-15, а если везти из Японии (если это будет вообще возможно в связи с санкциями), то это порядка 45 дней. Но это максимальный срок, после которого мне выдадут заключение, что у печки брак (если не удастся отремонтировать), и я смогу ее вернуть продавцу. В общем, головная боль еще та, к тому же мы на 45 дней остались без микроволновки, что очень неудобно.
Продолжение моих приключений с микроволновкой. Сегодня мне позвонили из сервисного центра и сказали, что у моего Панасоника не работает нижний ТЭН на программе Духовка. Запчастей в Москве нет, ждать из Японии нужно 2-3 месяца. Если я не согласна ждать, они всё согласуют с Москвой и выдадут мне заключение, что микроволновка с браком и ремонту не подлежит. Я естественно ждать столько времени отказалась, и мне предложили приехать завтра в сервисный центр и забрать заключение. Микроволновка остается у них, а заключение я отношу в пункт выдачи Озон, оформляю возврат денег за бракованный товар.
Светлуча, Светлана, возможно, и правда. Но у нас так чуть телевизор не отжали, большой и почти новый. Не успели выключить в грозу, да и ремонт там был копеечный, как выяснилось потом у нормального мастера.
Забрали вчера в сервисцентре акт, в котором описали проблему и написали, что ремонт возможен, но не укладывается в сроки, предусмотренные законом, так как запчасти из Японии навряд ли придут через 45 дней. Кстати, в акте указали, что микроволновка остается у них. Обратилась с этим актом в Озон, они мне ответили, что поставщик товара был московский магазин Еплаза, я должна обратиться к ним. Я созвонилась с магазином и отправила им на электронную почту фото акта. Они мне скинули образец заявления на возврат денежных средств. Я все заполнила и им отправила. Они мне сегодня предложили вместо денег такую же новую печку. Я им ответила, что уже заказала ее у них же через Wildberries и она уже в пути. Тогда они мне ответили, что деньги переведут 17 августа. Так что ждем деньги и новую печку. Надеюсь, что она будет нормальная.
Слава Богу, все утряслось. За неисправную микроволновку мне вернули деньги, и я на Wildberries купила точно такую же модель, которая нормально печёт, к тому же, она обошлась мне на целых 10 т дешевле, чем предыдущая печка.
- Главная ►
- Форум
- ► Кухонная и бытовая техника
- ► Готовим в кухонной технике
- ► Микроволновки
- ► Микроволновая печь Panasonic NN-CS89
Интересное в разделе «Микроволновки»
Новое на сайте

Operating Instructions and Cookbook
Steam / Convection / Grill / Microwave Oven
Model No. NN-CS89LB
Household Use Only
Important safety instructions
Please read carefully and keep for future reference

Important Notice
The IEC (60705)
power output (watts)
The heating category
for small packs of food
Microwave symbol
Thank you for purchasing a Panasonic Microwave Oven.
Your oven is rated 1000 Watts (IEC). When using other cookbooks remember to
adjust cooking times accordingly. The symbol indicates the heating category for your
oven when cooking or reheating convenience foods.
Your oven is rated ‘E’, which is very efcient. It is therefore very important that you
refer carefully to the packet instructions on convenience foods.
Some packet instructions only display information for B or D rated ovens. We
therefore provide additional guidelines for reheating and cooking on pages
of this book.
90-105
Always
door. After checking the progress of the foods, touch
the cooking time.
Failure to follow the instructions given in this operating instructions and cookbook,
may affect the recipe result and in some instances may be dangerous.
check the progress of the food as it cooks or reheats by simply opening the
Start/Conrmation
to continue
Customer Communications Centre 0344 844 3899
Selected Spares and Accessories:
Order direct on line at
Communications Centre number above.
For Cookery Advice call: 01344 862108 (open Monday to Wednesday 9 am — 12 pm)
Alternatively visit our web site at
Or write to the address below:
Panasonic UK, a branch of Panasonic Marketing Europe GmbH,
Maxis 2
Western Road
Bracknell
Berkshire
RG12 1RT
UK
www.panasonic.co.uk
www.theideaskitchen.co.uk
or by telephoning the Customer
2
2

Thank you for purchasing this Panasonic appliance.
Contents
Safety Instructions ………………………. 4-9
Disposal of Old Equipment ……………….9
Important Safety Instructions …….. 10-12
Before Using Your Oven …………………12
Placement of Your Oven …………………13
Care & Cleaning of Your Oven ….. 13-14
Maintenance of Your Oven ……………..15
Oven Accessories ……………………. 16-18
Parts of Your Oven ………………………..19
Outline Diagram…………………………….20
Important Information —
Read Carefully ………………………… 21-23
Microwaving Principles …………….. 24-25
Control Panel ………………………………..26
General Guidelines ………………….. 27-29
Containers to Use ……………………. 30-31
Microwave Display Window …………….32
Cooking Modes……………………….. 32-33
Combination Cooking Modes ………….34
Let’s Start to Use Your Oven …………..35
Setting the Clock …………………………..36
Child Safety Lock…………………………..36
Operation Guide Setting …………………37
Up/Down Selection ………………………..37
Microwave Cooking and Defrosting ….38
Defrosting Guidelines …………………….39
Defrosting Chart ……………………… 40-41
Grilling …………………………………… 42-43
Convection Cooking ………………… 44-48
Steam Cooking ……………………….. 49-50
Steam Shot …………………………………..51
Combination:
Cooking with Steam…………………. 52-53
Combination:
Cooking with Microwave …………………54
Combination:
Convection, Grill and Microwave .. 55-56
Combination:
Convection and Microwave ………. 57-58
Combination:
Convection and Grill ………………… 59-60
Multi-Stage Cooking ………………………61
Using the Timer ………………………. 62-64
Using the Add Time Function…………..64
Chaos Defrost…………………………. 65-67
Sensor Reheat Program …………… 68-69
Auto Steam Programs ……………… 70-73
Healthy Grill Menu …………………………74
Auto Sensor Programs …………….. 75-77
Auto Cook Programs ……………….. 78-81
Re-bake Bread Programs ……………….82
Junior Menu ……………………………. 83-85
Cleaning Programs ………………….. 86-88
Cleaning the Water Tank ………………..89
Cooking and Reheating
Guidelines ……………………………… 90-91
Reheating Charts…………………….. 91-97
Cooking Charts ……………………… 98-105
Increasing and
Decreasing Recipes …………………….106
Using Recipes From Other Books ….106
Cooking for One ………………………….106
Recipes………………………………. 107-150
Questions & Answers …………… 151-152
Technical Specications ……………….153
3
3

Safety Instructions
Important safety instructions. Before operating this oven,
please read these instructions carefully and keep for
future reference.
This appliance can be used by children aged from
8 years and above and persons with reduced physical,
sensory and mental capabilities or lack of experience
and knowledge if they have been given supervision
or instruction by a person responsible for their safety
concerning the use of the appliance in a safe way and
understand the hazards involved. Children shall not play
with the appliance. Cleaning and user maintenance shall
not be made by children without supervision. Keep the
appliance and its cord out of reach of children less than
8 years.
When this oven is installed, it should be easy to isolate
the appliance from the electricity supply by pulling out the
plug or operating a circuit breaker.
4
If the supply cord is damaged, it must be replaced by the
manufacturer or its service agent or a similarly qualied
person in order to avoid a hazard.
Warning! It is hazardous for anyone other than a
competent person to carry out any service or repair
operation which involves the removal of a cover which
gives protection against exposure to microwave energy.
The appliance should be inspected for damage to the
door seals and door seal areas and if these areas are
damaged the appliance should not be operated until it
has been repaired by a service technician trained by the
manufacturer.
4

Safety Instructions
Warning! Do not attempt to tamper with or make any
adjustments or repairs to the door, control panel housing,
safety interlock switches or any other part of the oven.
Do not remove the outer panel from the oven which
gives protection against exposure to microwave energy.
Repairs should only be made by a qualied service
person.
Warning! Liquids and other foods must not be heated in
sealed containers since they are liable to explode.
Warning! Do not place this oven near an electric or gas
cooker range.
Warning! Only allow children to use the oven without
supervision when adequate instructions have been given
so that the child is able to use the oven in a safe way and
understands the hazards of improper use. Ensure that
children do not touch the hot outer casing after operation
of the oven.
This oven is intended for Counter-top use only. It is not
intended for built-in use or for use inside a cupboard. The
microwave oven shall not be placed in a cabinet.
For Countertop use:
The oven must be placed on a at, stable surface 85 cm
above the oor, with rear of oven placed against a back
wall. For proper operation the oven must have sucient
air ow, i.e. 5 cm at one side, the other being open;
15 cm clear over the top; 10 cm at the rear.
When heating food in plastic or paper containers, check
the oven frequently as these types of containers ignite if
overheated.
5
5

Safety Instructions
If smoke is emitted or a re occurs in the oven, touch
Stop/Cancel and leave the door closed in order to stie
any ames. Disconnect the power cord, or shut o power
at fuse or circuit breaker panel.
This appliance is intended to be used in household
applications only.
When heating liquids, e.g. soup, sauces and beverages
in your oven, overheating the liquid beyond boiling point
can occur without evidence of bubbling. This could result
in a sudden boil over of the hot liquid.
Microwave heating of beverages can result in delayed
eruptive boiling, therefore care must be taken when
handling the container.
The contents of feeding bottles and baby food jars are to
be stirred or shaken. The temperature has to be checked
before consumption to avoid burns.
6
Do not cook eggs in their shells and whole hard-boiled
eggs by microwave. Pressure may build up and the
eggs may explode, even after the microwave heating has
ended.
Clean the inside of the oven, door seals and door seal
areas regularly. When food splatters or spilled liquids
adhere to the oven walls, base of the oven, door seals
and door seal areas wipe o with a damp cloth. Mild
detergent may be used if they get very dirty. The use of
harsh detergent or abrasive is not recommended.
Do not use commercial oven cleaners.
Some foods may inevitably splatter grease on to the
oven walls when cooking. If the oven is not cleaned
occasionally, it may start to “smoke” during use.
6

Safety Instructions
Failure to maintain the oven in a clean condition could
lead to deterioration of surfaces that could aect the
life of the appliance and possibly result in a hazardous
situation.
Warning! The accessible parts may become hot in grill,
convection, steam and combination use. Young
children less than 8 years of age should be kept away.
Children should only use the oven under adult supervision
due to the temperatures generated.
A steam cleaner is not to be used for cleaning the
appliance.
Do not use harsh, abrasive cleaners or sharp metal
scrapers to clean the oven door glass since they can
scratch the surface, which may result in shattering of the
glass.
Exterior oven surfaces and the oven door will get hot
during grilling, convection, steam, and combination
modes, take care when opening or closing the door and
when inserting or removing food and accessories.
This appliance is not intended to be operated by means
of an external timer or separate remote-control system.
Only use utensils that are suitable for use in microwave
ovens.
Warning! This appliance produces boiling hot steam.
During and after cooking with steam function, do not
open the oven door when your face is very close to the
oven. Care must be taken when opening the door as
steam may cause injury.
7
7

Safety Instructions
Warning! Steam may billow out when you open the door.
If there is steam in the oven, do not reach in with your
bare hands! Risk of burns! Use oven gloves.
Please refer to page 16-17 for correct installation of the
shelf accessories.
The oven has heating elements situated in top of the
oven, a steamer boiler situated in the left side of the
oven and a convection heater situated in the back of
the oven. After using the grill, convection, steam and
combination functions, the inside surfaces of the oven
will be very hot. Care should be taken to avoid touching
any of the inside surfaces near the heating element inside
the oven. N.B. After cooking by these functions, the oven
accessories will be very hot.
The microwave oven is intended for heating food and
beverages only. Drying of food, newspapers or clothing
and heating of warming pads, slippers, sponges, damp
cloth, wheat bags, hot water bottles and similar may lead
to risk of injury, ignition or re.
8
Take care when heating foods low in moisture, e.g. bread
items, chocolate, biscuits and pastries. These can easily
burn, dry out or catch on re if cooked too long. We do
not recommend heating foods low in moisture such as
popcorn or poppodums.
The oven lamp must be replaced by a service technician
trained by the manufacturer. Do not attempt to remove
the outer casing from the oven.
Before using the oven, place the drip tray in position.
Refer to page 19 for correct installation.
8

Safety Instructions
The purpose of the drip tray is to collect excess water
during steam and steam combination mode. It should
be emptied after each steam and steam combination
operation.
Do not use the water tank if it is cracked or broken, as
leaking water could result in electrical failure and danger
of electric shock. If the water tank becomes damaged,
please contact your dealer.
The appliance must not be installed behind a decorative
door in order to avoid overheating.
The oven should be cleaned regularly and any food
deposits removed.
Disposal of Old Equipment
Only for European Union and
Countries with Recycling Systems
This symbol on the products,
packaging, and/or
accompanying documents
means that used electrical
and electronic products must
not be mixed with general
household waste.
For proper treatment, recovery and
recycling of old products, please take
them to applicable collection points
in accordance with your national
legislation.
By disposing of them correctly, you will
help to save valuable resources and
prevent any potential negative effects
on human health and the environment.
For more information about collection
and recycling, please contact your local
municipality.
Penalties may be applicable for incorrect
disposal of this waste, in accordance
with national legislation.
9
9
Important Safety Instructions
Please read carefully and keep for future reference.
This appliance is supplied with a
moulded three pin mains plug for your
safety and convenience. A 13 amp fuse
is tted in this plug. Should the fuse
need to be replaced, please ensure that
the replacement fuse has a rating of 13
amps and that it is approved by ASTA or
BSI to BS1362.
Check for the ASTA mark or the BSI
mark on the body of the fuse.
Important
If the fuse cover is
detachable, never use the
plug with the cover omitted.
A replacement fuse cover can
be purchased from your local
Panasonic Dealer.
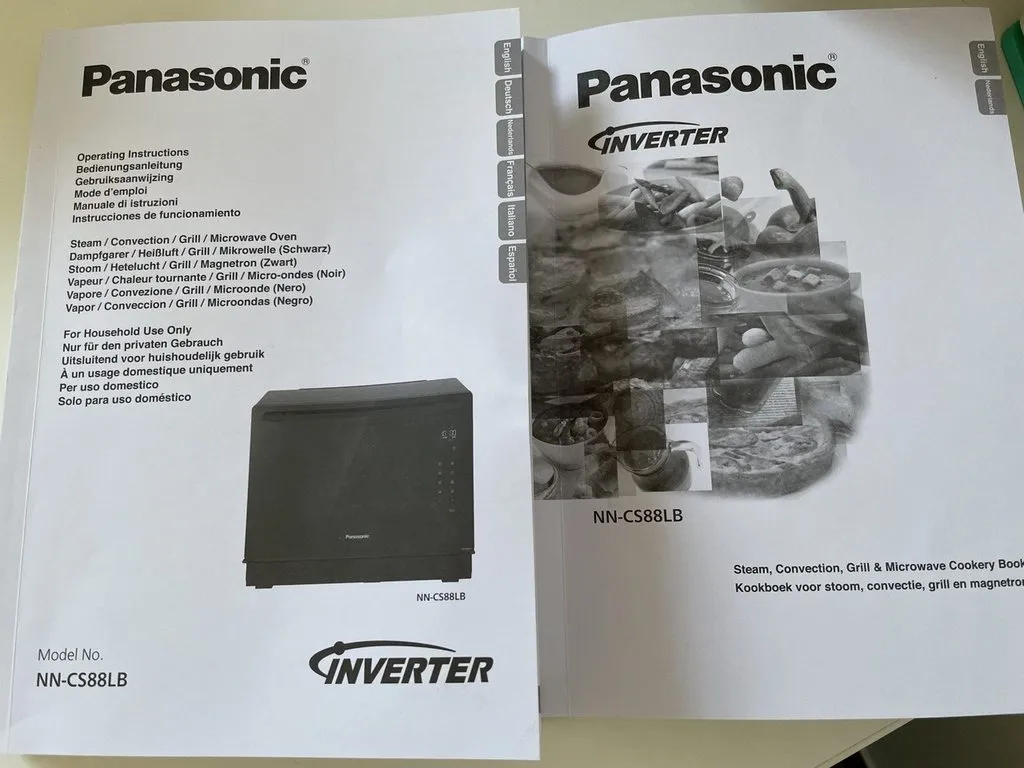
How to Replace the Fuse
Open the fuse
compartment with a
screwdriver and
replace the fuse.
If the tted moulded plug is
unsuitable for the socket outlet in
your home then the fuse should
be removed and the plug cut off
and disposed of safely and an
appropriate one tted. There is a
danger of severe electrical shock if
the cut off plug is inserted into any
13 amp socket.
Important
The wires in this mains lead are
coloured in accordance with the
following code: Green-and-yellow:
Earth, Blue: Neutral, Brown: Live.
As the colours of the wire in the
mains lead of this appliance may not
correspond with the coloured markings
identifying the terminals in your plug,
proceed as follows:
The wire which is coloured
and-yellow
terminal in the plug which is marked
with the letter E or by the Earth symbol
or coloured
yellow.
The wire which is coloured
be connected to the terminal in the
plug which is marked with the letter N
or coloured
coloured
the terminal in the plug which is marked
with the letter L or coloured
When this oven is installed it should be
easy to isolate the appliance from the
electricity supply by pulling out the plug
or operating a circuit breaker.
brown
green-
must be connected to the
green or green-and-
must
blue
. The wire which is
black
must be connected to
.
red
If a new plug is to be tted, please
observe the wiring code as shown
opposite. If in any doubt, please consult
a qualied electrician (For U.K. Models
only).
Warning!
This appliance must be
earthed.
10
10

Important Safety Instructions
Voltage & Power
The voltage used must be
the same as specied on this
microwave oven. Using a
higher voltage than that which
is specied is dangerous and
may result in a re or other type
of accident causing damage.
Do not immerse cord, plug or oven in
water. Keep cord away from heated
surfaces. Do not let cord hang over the
edge of table or work top. Do not plug
your oven in via an extension cable as
this can be dangerous. It is important to
plug the oven directly into a wall socket.
The back of the appliance heats up
during use. Do not allow the cord to be
in contact with the back of the appliance
or cabinet surface.
1. In case of electronic failure, oven
can only be turned off at wall socket.
Warning!
Only allow children to use the
oven without supervision when
adequate instructions have been
given so that the child is able
to use the oven in a safe way
and understands the hazards
of improper use. Ensure that
children do not touch the hot
outer casing after operation of
the oven.
2. This appliance can be used by
children aged from 8 years and
above and persons with reduced
physical, sensory and mental
capabilities or lack of experience
and knowledge if they have been
given supervision or instruction by a
person responsible for their safety
concerning the use of the appliance
in a safe way and understand the
hazards involved.
3. Children shall not play with the
appliance. Cleaning and user
maintenance shall not be made by
children without supervision.
4. During and after cooking with a
steam function, do not open the
oven door when your face is very
close to the oven. Care must be
taken when opening the door as
steam may cause injury.
5. To prevent burns, take care of hot
surfaces which may exist from the
cooking process.
Caution!
Steam may billow out when you
open the door. If there is steam
in the oven, do not reach in with
your bare hands! Risk of burns!
Use oven gloves.
Storage of Accessories
6. Do not store any objects other than
oven accessories inside the oven in
case it is accidentally turned on.
Exterior Oven Surfaces
7. Exterior oven surfaces and the
oven door will get hot during
grill, convection, steam
combination
when opening or closing the door
and when inserting or removing food
and accessories.
modes. Take care
and
11
11
Important Safety Instructions
Heater
8. The oven has heating elements
situated in top of the oven, a steamer
boiler situated in the left side of
the oven and a convection heater
situated in the back of the oven.
After using the
and
steam
the inside surfaces of the oven
will be very hot. Care should be
taken to avoid touching any of the
inside surfaces near the heating
elements inside the oven. N.B. After
cooking by these functions, the oven
accessories will be very hot.
Caution! Hot Surfaces!
After cooking by these modes,
the oven accessories will be very
hot.
9. Before using
or
steam
for the rst time operate the oven
without food and accessories on
convection
This will allow the oil that is used
for rust protection to be burned off.
grill, convection,
combination
grill, convection
combination
230 °C for 5 minutes.
functions,
function
This is the only time that the oven is
operated completely empty.
Caution! Hot Surfaces!
Exterior oven surfaces and the
oven door will get hot during
combination/grill/convection
Do not operate the oven
apart from point 9 and
empty
when preheating. The appliance
must not be operated
by
microwave
including microwave
food in the oven
when empty will damage the
appliance.
During use the appliance
becomes hot. Care should be
taken to avoid touching heating
elements inside the oven.
The accessible parts may
,
become hot in combination
use. Young children less than
8 years of age should be
kept away. Children should
only use the oven under
adult supervision due to the
temperatures generated.
or
combination
without
. Operation
.
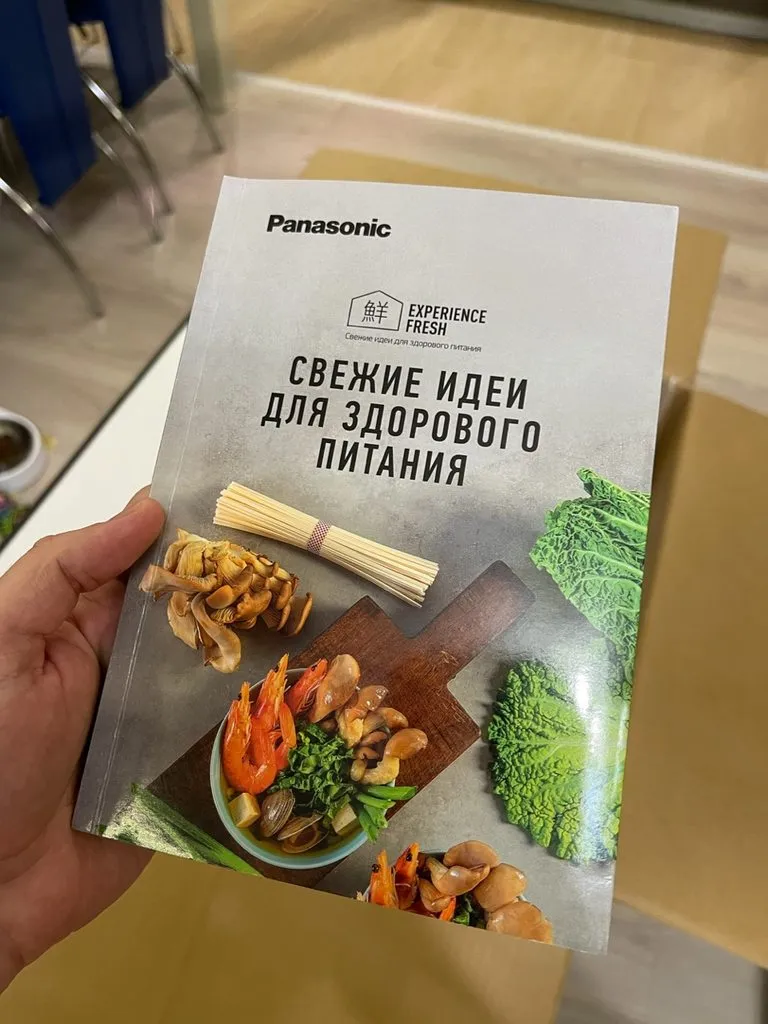
Before Using Your Oven
Examine your Oven
1. Unpack oven, remove all packing
material, and examine the oven for
any damage such as dents, broken
door latches or cracks in the door.
Notify dealer immediately if unit is
damaged.
damaged.
Guarantee
2. Your receipt is your guarantee,
please keep it safe.
Cord
3. If the supply cord of this appliance
is damaged, it must be replaced
by the manufacturer or it’s service
agent or a similarly qualied person
12
in order to avoid a hazard.
Do not
install if unit is
12
Note
The appliance should be
inspected for damage to the
door seals and door seal areas.
If these areas are damaged
the appliance should not be
operated until it has been
repaired by a service technician
trained by the manufacturer.
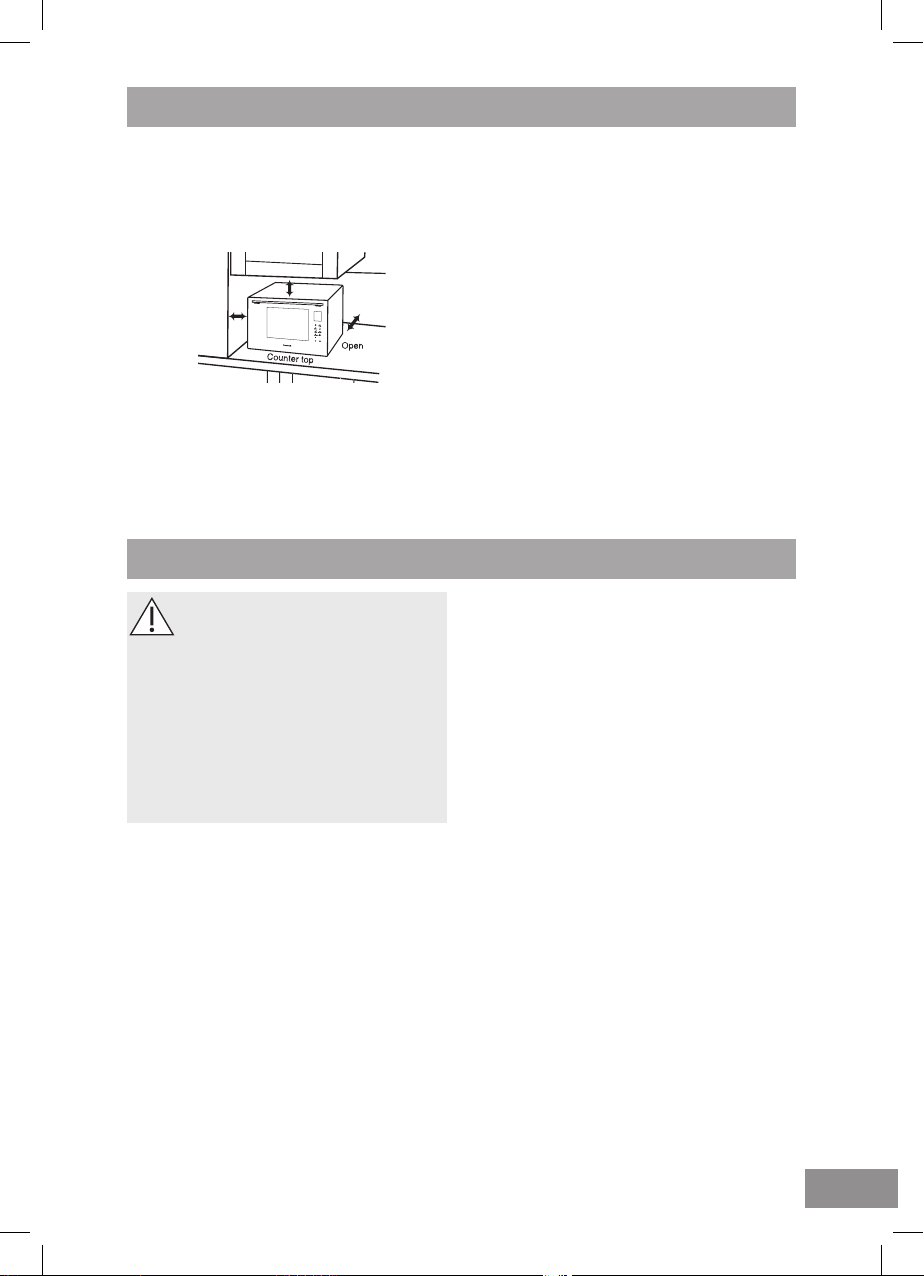
Placement of Your Oven
This oven is intended for counter-top
household use only. It is not intended for
built-in use or for use inside a cupboard.
The microwave oven shall not be placed
in a cabinet.
1. The oven must be placed on a at,
stable surface 85 cm above the oor,
with rear of oven placed against a
back wall. For proper operation the
oven must have sufcient air ow,
i.e. 5 cm at one side, the other being
5cm
15cm
10cm
open; 15 cm clear over the top;
10 cm at the rear.
2. Do not place the microwave oven
on a shelf directly above a gas or
electric hob. This may be a safety
hazard and the oven may be
damaged.
3. Do not block air vents on the top of
the oven. If air vents are blocked
during operation, the oven may
overheat. If the oven overheats,
a thermal safety device will turn
the oven off. The oven will remain
inoperable with blank display until it
has cooled.
4. This appliance is intended to be
used in household applications only.
Care & Cleaning of Your Oven
Important
It is essential for the safe
operation of the oven that it is
kept clean, and wiped out after
each use. Failure to maintain the
oven in a clean condition could
lead to deterioration of a surface
that could adversely affect the
life of the appliance and possibly
result in a hazardous situation.
1. Switch the oven off before
cleaning and unplug at the socket if
possible.
2. Keep the inside of the oven, door
seals and door seal areas clean.
When food splatters or spilled
liquids adhere to oven walls, door
seals and door seal areas wipe off
with a damp cloth. Mild detergent
may be used if they get very dirty.
The use of harsh detergent or
abrasives is not recommended.
3. After using grill, convection,
steam and combination cooking
the walls of the oven should be
cleaned with a soft cloth squeezed
in soapy water. Particular care
should be taken to keep the window
area clean especially after cooking
by grill, convection, steam and
combination. Stubborn spots
inside the oven can be removed by
using a small amount of branded
conventional oven-cleaner sprayed
onto a soft damp cloth. Wipe
onto problem spots, leave for
recommended time and then wipe
off. Do not spray directly inside
the oven.
4. After cooking with a steam
function, check and wipe away
any excess water which may have
condensed within the oven cavity.
Empty the drip tray (refer to page
19).
5. Do not use harsh abrasive cleaners
or sharp metal scrapers to clean
the oven door glass since they may
scratch the surface, which may
result in shattering of the glass.
13
13

Care & Cleaning of Your Oven
6. The outside oven surface should
be cleaned with a damp cloth. To
prevent damage to the operating
parts inside the oven, water should
not be allowed to seep into the
ventilation openings.
7. If the control panel becomes dirty,
clean with a soft, dry cloth. Do not
use harsh detergents or abrasives
on control panel. When cleaning the
control panel, unplug the socket.
Leave the oven door closed.
8. If steam accumulates inside or
around the outside of the oven door,
wipe with a soft cloth. This may
occur when the microwave oven
is operated under high humidity
conditions and in no way indicates a
malfunction of the unit or microwave
leakage.
9. The oven cavity oor should be
cleaned regularly. Simply wipe the
bottom surface of the oven with mild
detergent and warm water then dry
with a clean cloth. Cooking vapours
collect during repeated use but in no
way affect the bottom surface.
10. When grilling or cooking by
convection, steam or combination
some foods may splatter grease
onto the oven walls. If the oven is
not cleaned to eliminate this grease,
it can accumulate and cause the
oven to ‘smoke’ during use. These
marks will be more difcult to clean
later.
11. A steam cleaner is not to be used
for cleaning.
12. Ensure all accessories are
kept clean, especially when
using microwave or combination
programs.
13. Keep air vents clear at all times.
Check that no dust or other material
is blocking any of the air vents
on the top of the oven. If vents
become blocked this could cause
overheating which would affect the
operation of the oven and possibly
result in a hazardous situation.
14. Run the system cleaning program
when the symbol shows in the
display. See pages 87. Clean the
water tank at least once a week to
prevent build up of limescale. See
page 89.
14
14
Maintenance of Your Oven
Service
1.
When your oven requires a service
call your local Panasonic engineer
(Customer Communications
Centre on 0344 844 3899
recommend an engineer).
Warning!
It is hazardous for anyone other
than a competent person to
carry out any service or repair
operation which involves the
removal of a cover which gives
protection against exposure to
microwave energy.
can
Door Seals
2. Do not attempt to tamper with or
make any adjustments or repairs to
door, control panel housing, safety
interlock switches or any other part
of the oven. Do not remove outer
panel from oven. The door seals
and door seal areas should always
be kept clean – use a damp cloth.
Warning!
The appliance should be
inspected for damage to the
door seals and door seal areas.
If these areas are damaged the
appliance should not be operated
until it has been repaired by a
service technician trained by the
manufacturer.
Water Tank
3. Do not use the water tank if it is
cracked or broken, as leaking water
could result in electrical failure
and danger of electric shock. If the
water tank becomes damaged,
please contact your dealer.
Oven Light
4. The oven lamp must be replaced
by a service technician trained by
the manufacturer.
to remove the outer casing from the
oven.
Do not
attempt
Selected Spares and Accessories
5. These may be ordered directly
on line at
or by telephoning the
Communication Centre on 0344
844 3899.
debit cards accepted. Ensure you
quote the correct model number.
www.panasonic.co.uk
Customer
Most major credit and
15
15
Oven Accessories
1. Do not cook food directly on the
base of the oven. Always place food
in a microwave safe dish.
2. The metal accessories provided
must only be used as directed for
grilling, convection, steam and
combination cooking. Never use
metal accessories when cooking
in microwave only mode. Do not
use if operating the oven with less
than 200 g of food on a manual
Combination program. Do not use
the enamel shelf in combination
with microwave. The maximum
weight that can be used on the
enamel shelf is 4 kg. Failure to
use accessories correctly could
damage your oven.
3. When cooking with microwave
power arcing may occur if the
incorrect weight of food is used,
a metal container has been used
incorrectly, or the accessories have
been damaged. If this occurs, stop
the machine immediately. You can
continue to cook by grill, steam or
convection only.
4. Always refer to instructions for
correct accessories to use on all
programs.
3. Do not use wire shelf in
mode only.
4. The maximum weight that can be
placed on the wire shelf is 4 kg (this
includes total weight of food and
dish).
Plastic covers
Wire shelf
Important user information
note the plastic covers on the wire shelf
are designed to remain on the shelf.
They are not packaging and must not
be discarded.
microwave
— Please
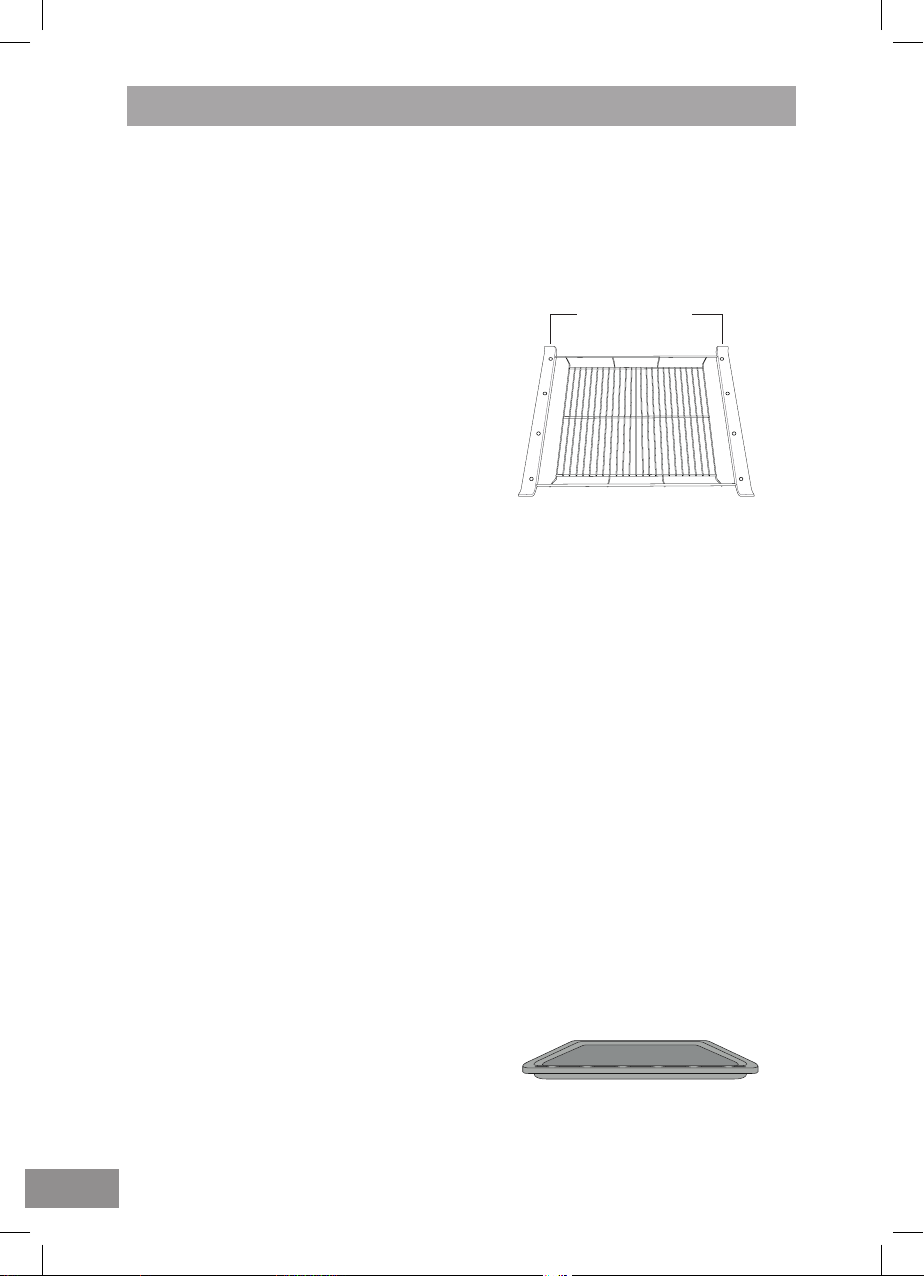
Enamel Shelf
1. The enamel shelf is for cooking on
grill, convection or steam
Do not use on
or
combination
modes.
microwave
with
modes.
only
microwave
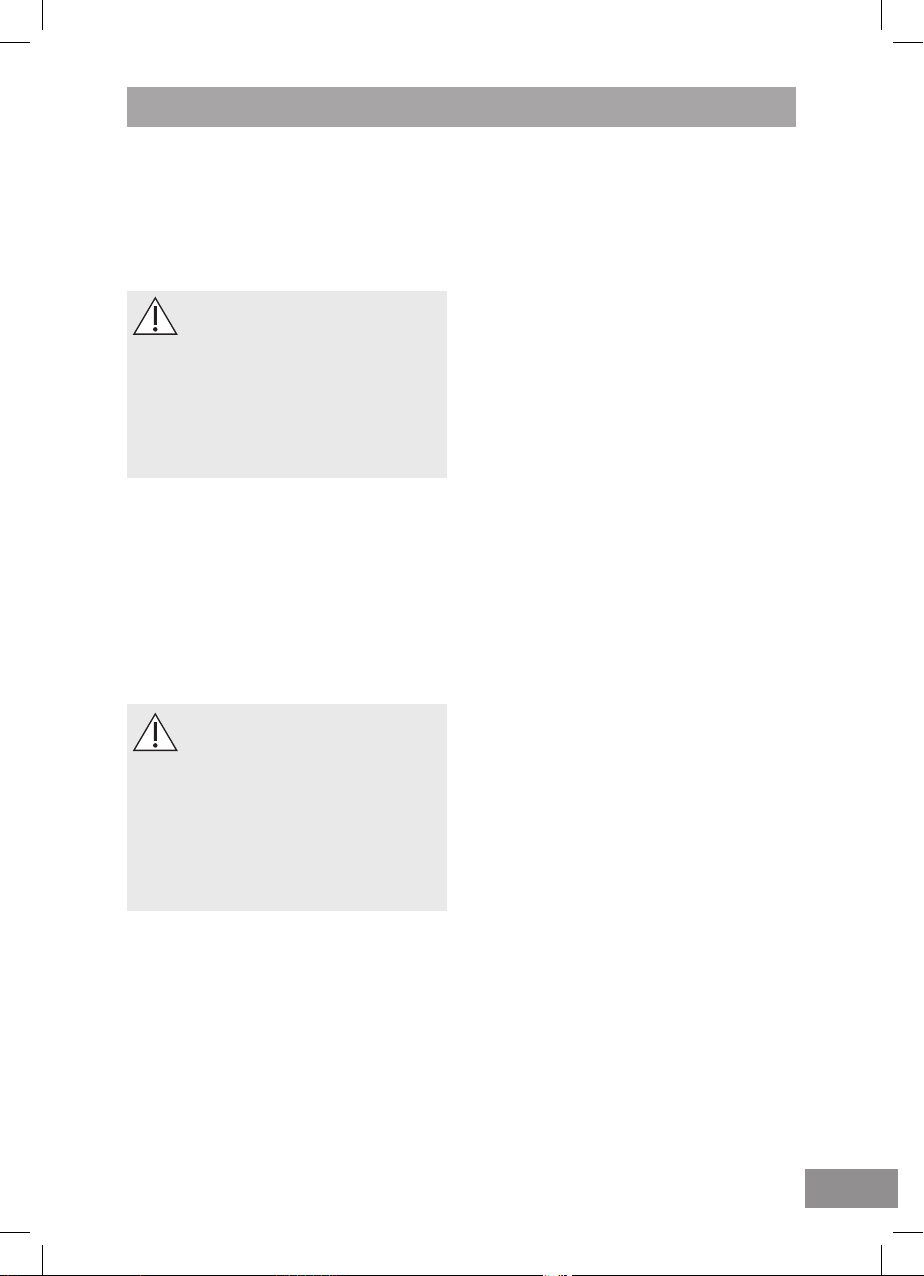
Wire Shelf
1. The wire shelf can be used in the
upper and middle shelf positions
for
grilling or steaming
can be used in the upper, middle or
lower shelf positions for
or
combination
2. Do not use any metal container
directly on the wire shelf in
combination
cooking.
with
16
foods. It
convection
microwave.
2. For 2 level
wire shelf can be used as the upper
level and the enamel shelf can be
used as the lower level.
3. The maximum weight that can be
placed on the enamel shelf is 4
(this includes total weight of food
and dish).
convection
Enamel shelf
cooking, the
16
kg
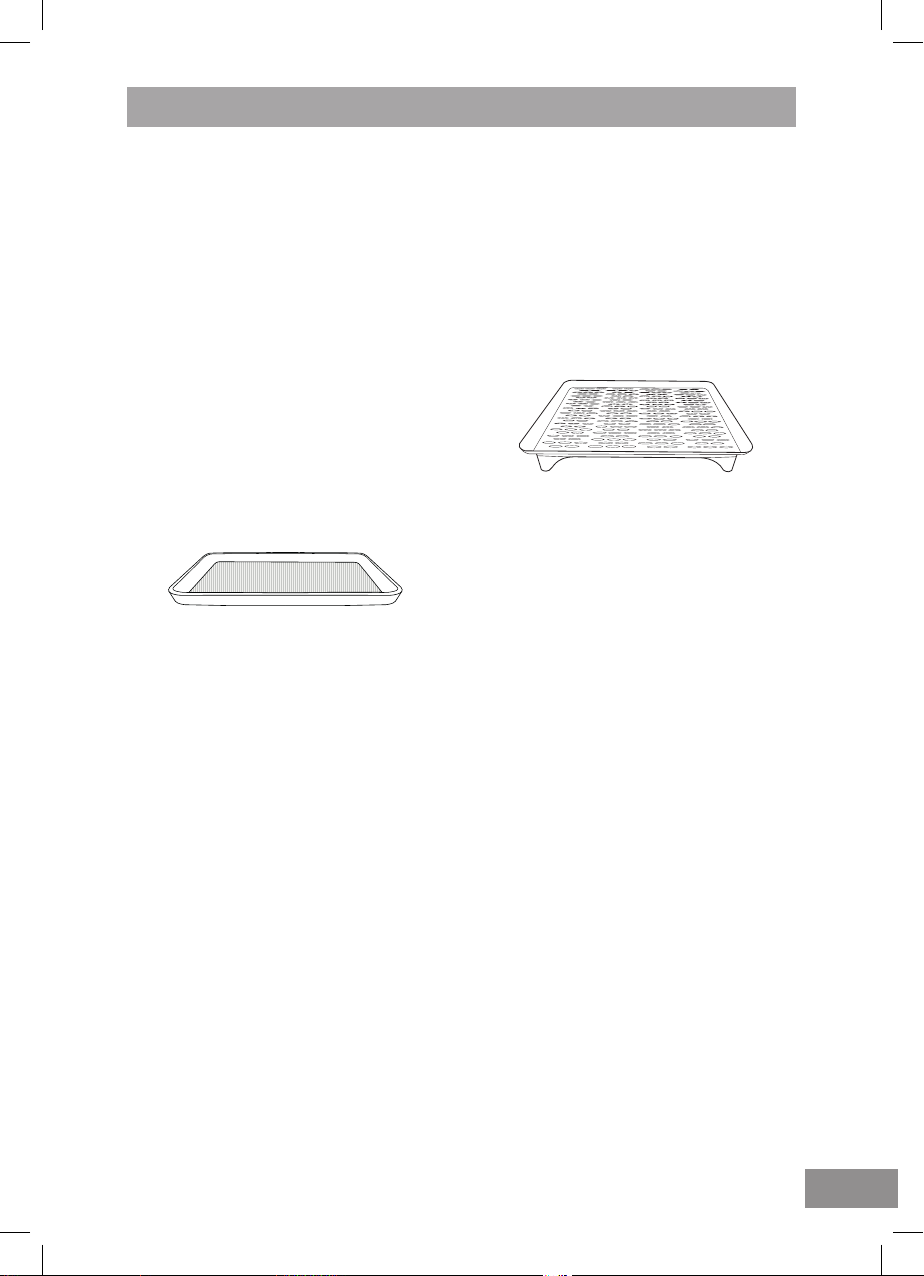
Oven Accessories
Glass Tray
1. The glass tray can be used on the
base of the oven for cooking on
microwave
2. The glass tray is used on top
of the wire shelf for cooking on
combination
3. If the glass tray is hot, let it cool
before cleaning or placing in cold
water, as this could crack or shatter
the accessory.
4. The maximum weight that can be
placed on the glass tray is 4 kg
(this includes total weight of food
and dish).
mode only.
mode.
Glass tray
Plastic Trivet
1. The plastic trivet is placed inside the
enamel shelf to cook on
mode or
convection
directly on the plastic trivet.
2. The plastic trivet is placed on the
glass tray on wire shelf for steam
combination with microwave.
steam + grill
. Food can be placed
Plastic trivet
or
steam
steam +
only
17
17
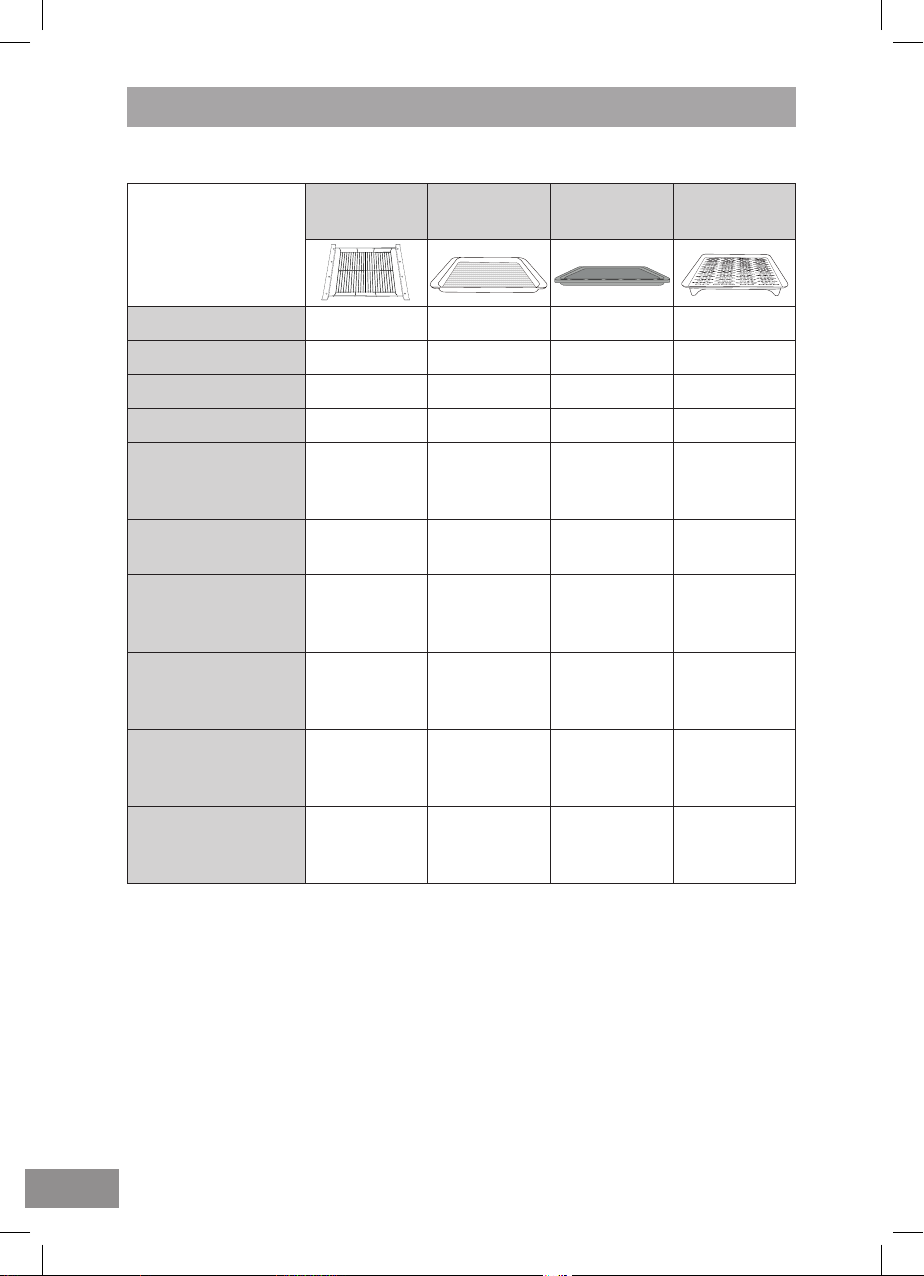
Oven Accessories
The following chart shows correct use of the accessories in the oven.
Microwave
Grill
Convection
Steam
Steam +
Microwave
(Combi 1)
Steam + Grill
(Combi 2)
Steam +
Convection
(Combi 3)
Convection +
Microwave + Grill
(Combi 4, 5, 6, 7, 
Convection +
Microwave
(Combi 9, 10, 11)
Grill +
Convection
(Combi 12)
Wire shelf Glass tray
✖ ✔ ✖ ✖
✔ ✔ ✔ ✖
✔ ✔ ✔ ✖
✔ ✔ ✔ ✔
✔
*
✔ ✔ ✔ ✔
✔ ✔ ✔ ✔
✔
*
✔
*
✔ ✔ ✔ ✖
✔ ✖ ✔
✔ ✖ ✖
✔ ✖ ✖
Enamel
shelf
Plastic trivet
* Metal containers can not be placed directly on the wire shelf. Either place food
directly on the wire shelf or place glass tray directly on the wire shelf.
18
18

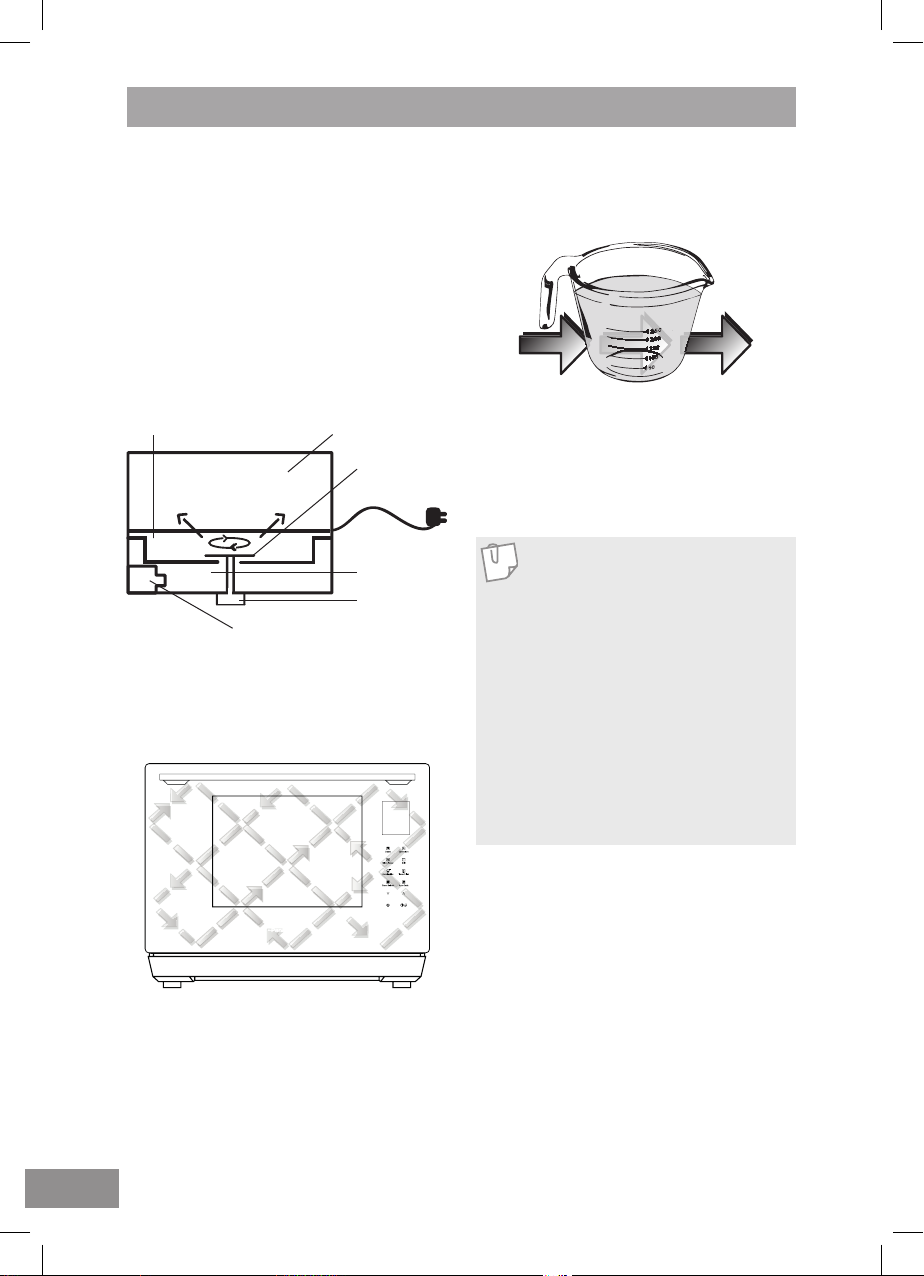
Parts of Your Oven
1 Control panel
2 Drip tray
3 Water tank (behind drip tray)
4 Air vent exhaust (do not remove)
5 Identication label
6 Warning label
Front view
32
Drip Tray
1. Before using the oven, the drip tray
must be tted as it collects excess
water during cooking. The drip tray
should be removed and cleaned on
a regular basis.
5
1
64
2. Fit the drip tray by holding with both
hands and clicking onto the front
legs of the oven.
3. To remove the drip tray, hold
with both hands and gently ease
forward. Wash in warm soapy water.
Reposition the drip tray by clicking
back onto the legs.
4.
Do not use a dishwasher to clean
the drip tray.
Drip tray
Reposition the drip tray by clicking back
onto the legs.
Water tank
Refer to guidelines for water tank on
19
page 50.
19

Outline Diagram
1 Door handle
Pull the door handle downwards
to open. When you open the oven
door during cooking, the cooking
is stopped temporarily without
clearing the programmed settings.
The cooking is resumed as soon
as the door is closed and Start/
Conrmation is touched.
2 Oven window
3 Door safety lock system
To prevent injury, do not insert
nger, knife, spoon or other object
into the latch hole.
4 Power supply plug
5 Power supply cord
6 Bottom microwave feeding
(refer to page 38)
7 Steam outlets
8 Warning label
9 Grill elements
10 Convection heater
11 LED lights
The oven lamp lights as soon as
the oven door is opened.
12 Shelf positions
13 Door hinges
To prevent injury when opening or
closing the door, keep ngers away
from the door hinges.
14 Menu label
Position your supplied menu label.
20
Note
The illustration is for reference only.
20

Important Information — Read Carefully
Safety
If smoke is emitted or a re occurs in
the oven, touch Stop/Cancel and leave
the door closed in order to stie any
ames. Disconnect the power cord, or
shut off power at the fuse or the circuit
breaker panel.
Short Cooking Times
As microwave cooking times are much
shorter than other cooking methods it
is essential that recommended cooking
times are not exceeded without rst
checking the food.
Cooking times given in the cookbook
are approximate. Factors that may affect
cooking times are: preferred degree of
cooking, starting temperature, altitude,
volume, size and shape of foods and
utensils used. As you become familiar
with the oven, you will be able to adjust
these factors.
It is better to undercook rather than
overcook foods. If food is undercooked,
it can always be returned to the oven for
further cooking. If food is overcooked,
nothing can be done. Always start with
minimum cooking times.
Important!
If the recommended cooking
times are exceeded the food
will be spoiled and in extreme
circumstances could catch re
and possibly damage the interior
of the oven.
Small Quantities of Food
Take care when heating small quantities
of food as these can easily burn, dry out
or catch re if cooked too long. Always
set short cooking times and check the
food frequently.
Never operate the oven without food
inside on microwave or combination
mode involving microwave.
Food Low in Moisture
Take care when heating foods low in
moisture, e.g. bread items, chocolate,
biscuits and pastries. These can easily
burn, dry out or catch on re if cooked
too long. We do not recommend heating
foods low in moisture such as popcorn
or poppodums. The microwave oven is
intended for heating food and beverages
only. Drying of food, newspapers or
clothing and heating of warming pads,
slippers, sponges, damp cloth, wheat
bags, hot water bottles and similar may
lead to risk of injury, ignition or re.
Christmas Pudding
Christmas puddings and other foods
high in fats or sugar, e.g. jam, mince
pies, must not be over heated. These
foods must never be left unattended
as with over cooking these foods can
ignite.
Boiled Eggs
Eggs in their shell and whole hardboiled
eggs should not be heated in microwave
ovens since they may explode even
after microwave heating has ended.
Foods with Skins
Potatoes, apples, egg yolk, whole
vegetables and sausages are examples
of food with non porous skins. These
must be pierced using a fork before
cooking to prevent bursting.
Warning
Liquids and other foods must not
be heated in sealed containers
since they are liable to explode.
21
21

Important Information — Read Carefully
Liquids
When heating liquids, e.g. soup, sauces
and beverages in your microwave oven,
overheating the liquid beyond boiling
point can occur without evidence of
bubbling.
This could result in a sudden boil over of
the hot liquid. To prevent this possibility
the following steps should be taken:
a. Avoid using straight-sided containers
with narrow necks.
b. Do not overheat.
c. Stir the liquid before placing the
container in the oven and again
halfway through the heating time.
d. After heating, allow to stand in
the oven for a short time, stirring
again before carefully removing the
container.
e. Microwave heating of beverages can
result in delayed eruptive boiling,
therefore care should be taken when
handling the container.
Lids
Always remove the lids of jars and
containers and takeaway food
containers before you microwave them.
If you don’t then steam and pressure
might build up inside and cause an
explosion even after the microwave
cooking has stopped.
Deep Fat Frying
Do not attempt to deep fat fry in your
oven.
Meat Thermometer
Use a meat thermometer to check the
degree of cooking of roasts and poultry
only when meat has been removed from
the microwave. If undercooked, return
to the oven and cook for a few more
minutes at the recommended power
level. Do not leave a conventional
meat thermometer in the oven when
microwaving.
Paper, Plastic
When heating food in plastic or paper
containers, keep an eye on the oven
due to the possibility of ignition. Do not
use wire twist-ties with roasting bags
when cooking mode includes microwave
power as arcing will occur. Do not use
recycled paper products, e.g. Kitchen
roll unless they say they are specically
designed for use in a microwave oven.
These products contain impurities which
may cause sparks and/or res when
used.
Reheating
It is essential that reheated food is
served “piping hot”. Remove the food
from the oven and check that it is “piping
hot”, i.e. steam is being emitted from
all parts and any sauce is bubbling.
(If you wish you may choose to check
the food has reached 72 ˚C with a food
thermometer – but remember do not use
this thermometer inside the microwave.)
For foods that cannot be stirred, e.g.
lasagne, shepherds pie, the centre
should be cut with a knife to test
it is well heated through. Even if a
manufacturer’s packet instructions have
been followed always check the food is
piping hot before serving and if in doubt
return your food to the oven for further
heating.
22
22

Important Information — Read Carefully
Standing Time
Standing time refers to the period at the
end of cooking or reheating when food
is left before being eaten, i.e. it is a rest
time which allows the heat in the food to
continue to conduct to the centre, thus
eliminating cold spots.
Keeping Your Oven Clean
It is essential for the safe operation of
the oven that it is wiped out regularly.
Use warm soapy water, squeeze the
cloth out well and use to remove any
grease or food from the interior. Pay
particular attention to the door seal
area. The oven should be unplugged
when cleaning.
Grill
The oven will only operate on the
function with the door closed.
grill
Fan Motor Operation
After using the microwave oven, the fan
motor may operate to cool the electric
components. This is normal and you
can take out food even though the fan
motor operates. You can continue using
the oven during this time.
Babies Bottles and Food Jars
When reheating babies bottles always
remove top and teat. Liquid at the
top of the bottle will be much hotter
than that at the bottom and must be
shaken thoroughly before checking
the temperature. The lid must also be
removed from babies food jars, the
contents must also be stirred or shaken
before the temperature is checked.
This should be carried out before
consumption in order to avoid burns.
See page 91.
Arcing
Arcing may occur if a metal container
has been used incorrectly, if the
incorrect weight of food is used, or if
the accessories have been damaged.
Arcing is when blue ashes of light
are seen in the microwave oven. If this
occurs, stop the machine immediately.
If the oven is left unattended and this
continues it can damage the machine.
You can continue to cook by
convection or steam only.
grill,
Utensils/Containers
Before use check that utensils/
containers are suitable for use in
microwave ovens. See pages 30-31.
23
23
Microwaving Principles
Microwave energy has been used in
this country to cook and reheat food
since early experiments with radar in
World War II.
Microwaves are present in the
atmosphere all the time, both naturally
and from manmade sources. Manmade
sources include radar, radio, television,
telecommunication links and mobile
phones.
How Microwaves Cook Food
Oven cavityBase of the oven
Microwave
stirrer
Waveguide
Stirrer
Magnetron
In a microwave oven, electricity is
converted into microwaves by the
magnetron
refer to page 38.
. For bottom feeding, please
motor
Reection
The microwaves bounce off the metal
walls and the metal door screen.
Transmission
Then they pass through the cooking
containers to be absorbed by the water
molecules in the food, all foods contain
water to a more or lesser extent.
Important Notes
The dish used to cook or
reheat the food will get warm
during cooking, as the heat
conducts from the food. Even in
microwaving, oven gloves are
required!
Microwaves can not pass
through metal and therefore
metal cooking utensils can
never be used in a microwave,
for cooking on microwave
only.
24
24

Microwaving Principles
How Microwaves Cook Food
The microwaves cause the water
molecules to vibrate which causes
friction
the food. Microwaves are also attracted
to fat and sugar particles, and foods
high in these will cook more quickly.
Microwaves can only penetrate to a
depth of 4-5 cm (1½-2 inches) and
as heat spreads through the food by
conduction, just as in a traditional
oven, the food cooks from the outside
inwards.
, i.e.
. This heat then cooks
heat
Foods Not Suitable for Cooking
by Microwave Only
Yorkshire pudding and soufes. This
is because these foods rely on dry
external heat to cook correctly, do not
attempt to cook by microwave.
Foods that require deep fat frying
cannot be cooked either.
Standing Time
When a microwave oven is switched
off, the food will continue to cook
by conduction –
. Hence
energy
important in microwaving, particularly
for dense foods i.e. meat, cakes and
reheated meals (refer to page 27).
not by microwave
standing time
is very
Boiled Eggs
Do not boil eggs in your
microwave. Raw eggs boiled in
their shells can explode and
cause serious injury.
25
25
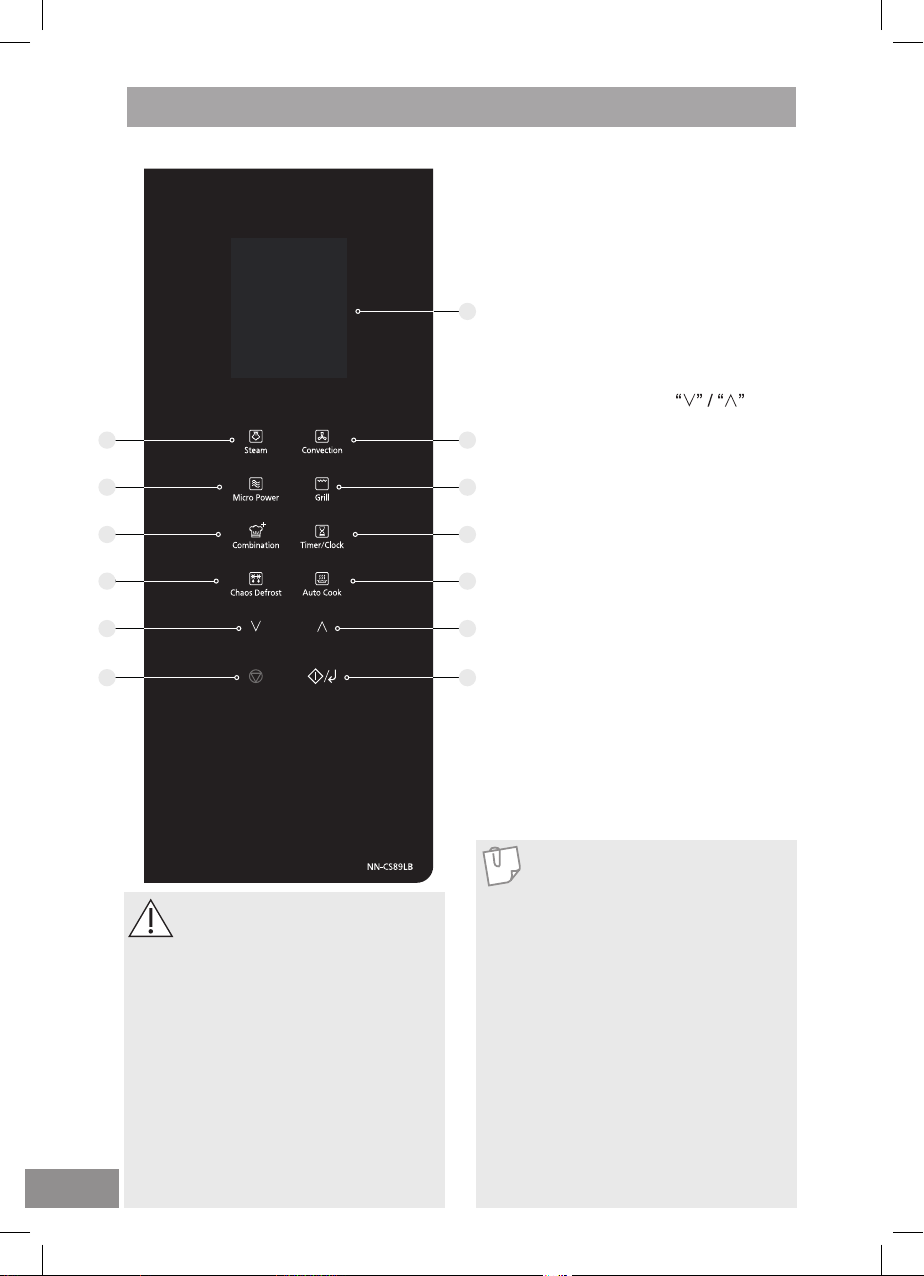
Control Panel
NN-CS89LB
2
4
6
8
10
11
1 Display Window
2 Steam (pages 49-51)
3 Convection (pages 44-48)
4 Micro Power (pages 38)
5 Grill (pages 42-43)
6 Combination (pages 52-60)
7 Timer/Clock (pages 36, 62-64)
8 Chaos Defrost
1
(pages 65-67)
9 Auto Cook (pages 68-88)
10 Up/Down Selection (page 37)
Select the time, weight or auto
menu by tapping
11 Stop/Cancel:
3
Before cooking:
One touch clears your
instructions.
5
During cooking:
One touch temporarily stops
7
the cooking program. Another
touch cancels all your
9
instructions and a colon or the
clock will appear in the display.
12 Start/Conrmation
10
12
Touch to start operating the
oven or conrm the setting.
If during cooking the door
is opened or Stop/Cancel
is touched once, Start/
Conrmation has to be touched
again to continue cooking.
.
26
Beep sound
A beep sounds when a key is
touched. If this beep does not
sound, the setting is incorrect.
When the oven changes from
one function to another or an
auto program reminds you to stir
or turn food, two beeps sound.
After the completion of the
preheating on grill, convection,
or combination mode, three
beeps sound. After completion
of cooking, the oven will beep 5
times.
26
Note
1. The oven will enter standby mode after the last
operation has completed.
When in stand-by mode, the
brightness of the display will
be reduced.
2. When in stand-by mode, it
is necessary to open and
close the oven door before
operating the oven.
3. If an operation is set and
Start/Conrmation is not
touched within 6 minutes, the
oven will automatically cancel
the operation. The display will
revert back to colon or Clock
mode.

General Guidelines
Standing Time
Dense foods e.g. meat, jacket potatoes
and cakes, require a
(inside or outside of the oven)
time
after cooking, to allow heat to nish
conducting through the food.
standing
Jacket Potatoes
Wrapped in aluminium foil when
cooked by microwave only. It is not
necessary to stand jacket potatoes
cooked in
for 15 minutes.
combination
mode. Stand
Fish
Stand for 2-3 minutes.
Egg Dishes
Stand for 1-2 minutes.
Precooked Convenience Food
Stand for 1-2 minutes.
Moisture Content
Many fresh foods e.g.
vegetables and fruit, vary
in their moisture content
throughout the season.
Jacket potatoes are a
particular example of this.
For this reason cooking
times may have to be
adjusted throughout the
year. Dry ingredients
e.g. rice, pasta, can dry
out during storage so
cooking times may differ
from ingredients freshly
purchased.
Meat Joints
Stand for 15 minutes wrapped in
aluminium foil.
Plated Meals
Stand for 2-3 minutes.
Vegetables
Boiled potatoes benet from standing
for 1-2 minutes, however most other
types of vegetables can be served
immediately.
Defrosting
It is essential to allow standing time to
complete the process. This can vary
from 5 minutes e.g. raspberries, to
up to 1 hour for a joint of meat. See
pages 40-41.
If food is not cooked after
, return to oven and cook for
time
additional time.
standing
Piercing
The skin or membrane
on some foods will cause
steam to build up during
cooking. These foods must
be pierced or a strip of skin
should be peeled off before
cooking to allow the steam
to escape. Eggs, potatoes,
apples, sausages etc, will all
need to be pierced before
cooking.
boil eggs in their shells.
Do not attempt to
27
27
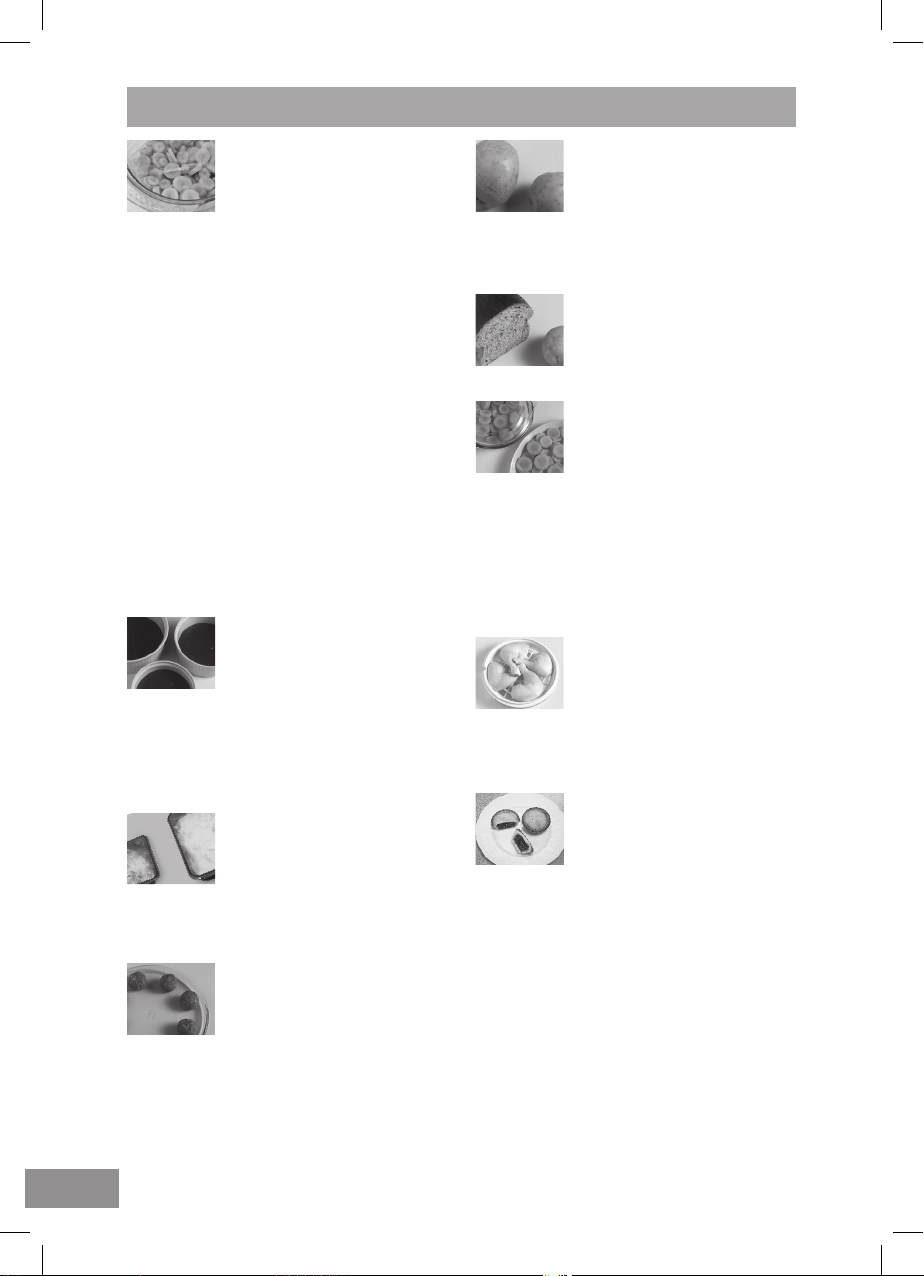
General Guidelines
Cling Film
Cling lm helps keep the
food moist and the trapped
steam assists in speeding
up cooking times. However
it should be pierced before
cooking, to allow excess
steam to escape. Always
take care when removing
cling lm from a dish as the
build-up of steam will be
very hot. Always purchase
cling lm that states on
the packet “suitable for
microwave cooking” and
use as a covering only.
Do not line dishes with
cling lm. Do not cover
foods when cooking
by
grill, convection
combination.
or
Dish Size
Follow the dish sizes given
in the recipes, as these
affect the cooking and
reheating times. A quantity
of food spread in a bigger
dish cooks and reheats
more quickly.
Quantity
Small quantities cook faster
than large quantities, also
small meals will reheat
more quickly than large
portions.
Spacing
Foods cook more quickly
and evenly if spaced apart.
pile foods on top of
never
each other.
Shape
Even shapes cook evenly.
Food cooks better by
microwave when in a
round container rather than
square.
Density
Porous airy foods heat more
quickly than dense heavy
foods.
Covering
Cover foods with microwave
cling lm or a self-tting
lid. Cover sh, vegetables,
casseroles, soups. Do not
cover cakes, sauces, jacket
potatoes, pastry items.
Please refer to cooking
charts and recipes for more
information.
Arranging
Individual foods e.g. chicken
portions or chops, should
be placed in a dish so that
the thicker parts are to the
outside
Ingredients
Foods containing fat, sugar
or salt heat up very quickly.
The lling may be much
hotter than the pastry. Take
care when eating.
overheat even if the pastry
does not appear to be very
hot.
Do not
28
28

General Guidelines
Starting Temperature
The colder the food, the
longer it takes to heat up.
Food from a fridge takes
longer to reheat than food
at room temperature. Food
temperature should be
between 5-8 °C before
cooking.
Turning and Stirring
Some foods require stirring
during cooking. Meat and
poultry should be turned
after half the cooking time.
Liquids
All liquids must be stirred
before, during and after
heating
must be stirred before and
during heating, to avoid
eruption. Do not heat liquids
that have previously been
boiled.
. Water especially
Do not overheat.
Checking Food
It is essential that food is
checked during and after a
recommended cooking time,
even if an
has been used (just as you
would check food cooked
in a conventional oven).
Return the food to the
oven for further cooking if
necessary.
auto program
Cleaning
As microwaves work on
food particles, keep your
oven clean at all times.
Stubborn spots of food
can be removed by using
a branded oven cleaner,
sprayed onto a soft cloth.
Always wipe the oven dry
after cleaning. Avoid any
plastic parts and door area.
Customers should not spray
directly into the cavity.
29
29
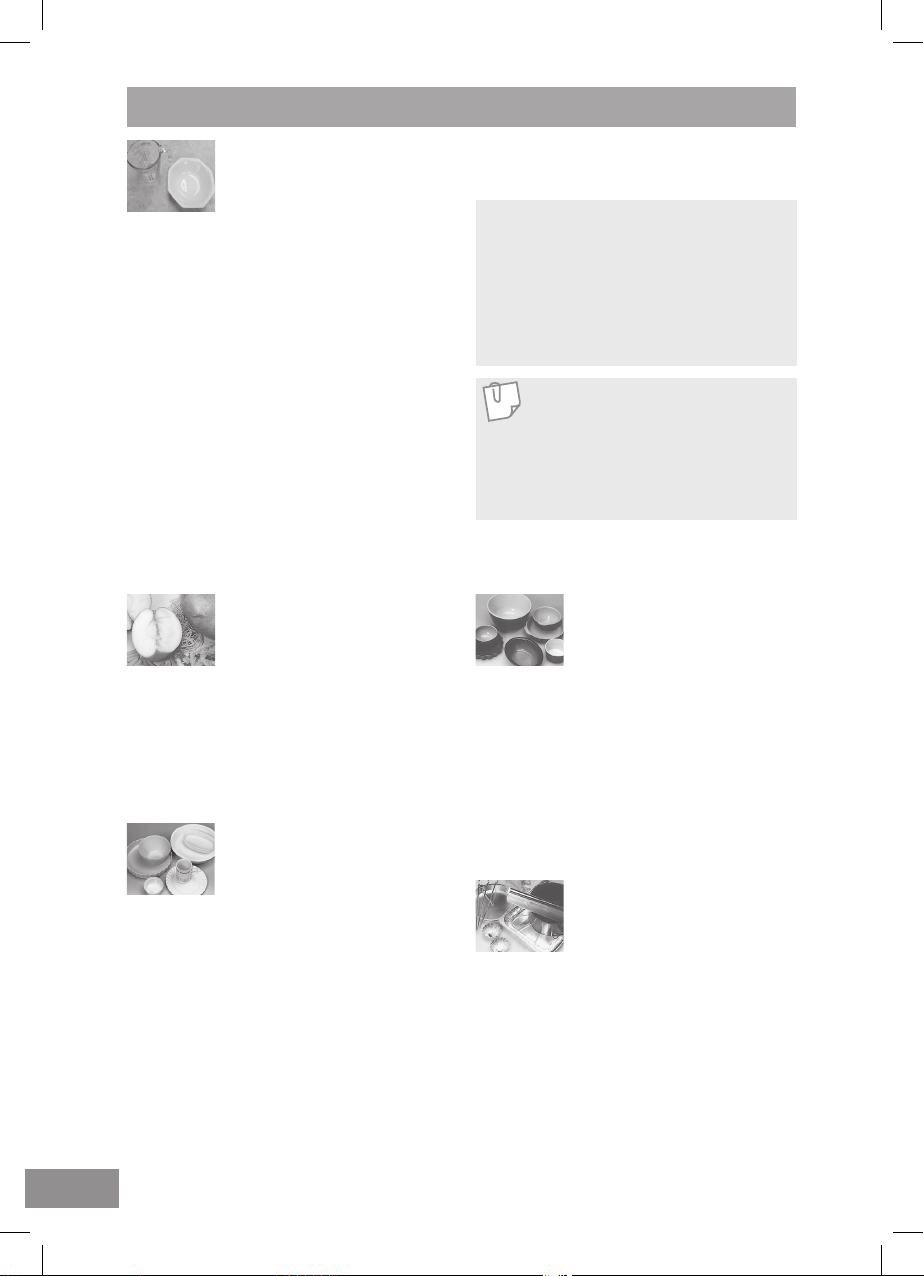
Containers to Use
Choosing the correct
container is a very important
factor in deciding the
success or failure of your
cooking.
Testing Dishes for Suitability —
For Microwave Cooking Only
When unsure that a cooking container
is suitable for use in your microwave,
check by the following test:
1.
Fill a microwave safe measuring jug
with 300 ml (½ pt) cold water.
2.
Place it on the base of the oven
along side the dish to be tested. If
the dish you are testing is a large
dish, then stand the measuring jug
on top of the empty dish.
Quick Check Guide to Cooking Utensils
Oven Glass
Everyday glass that is
heat resistant e.g. Pyrex®,
is ideal for microwave,
convection or combination
cooking.
Do not use delicate glass
or lead crystal which may
crack or arc.
China and Ceramic
Everyday glazed china,
porcelain or ceramic plates,
bowls, mugs and cups can
be used if they are heat
resistant. Fine bone china
should only be used for
reheating for short periods.
Do not use dishes with a
metal rim or pattern. Do
not use jugs or mugs with
glued handles, since the
glue can melt. If dishes are
heat resistant they may be
used on convection and
combination but not directly
30
under the grill.
3. Heat on
1 minute.
High Microwave
Result
If the dish is suitable for microwaving,
it will remain cool, whilst the water in
the jug will begin to feel warm. If the
testing dish feels warm, do not use as
it is obviously absorbing microwave
energy.
Note
This test does not apply to plastic
or metal based containers e.g.
Le Creuset® style dishes, which
should not be used as they are
cast iron covered with enamel.
Pottery, Earthenware,
Stoneware
If completely glazed, these
dishes are suitable. Do
not use if partially glazed
or unglazed, since they
are able to absorb water
which in turn absorbs
microwave energy, making
the container very hot and
slows down the cooking of
food.
Foil/Metal Containers
Never attempt to cook in
containers
30
foil or metal
on Microwave only as the
microwaves cannot pass
through and the food will
not heat evenly, it may also
damage your oven. Foil and
metal containers can be
used on grill, convection and
grill + convection modes
and may be used with care
during certain combination
cooking as long as they are
not damaged or dented.
for
Loading…
2
de
Mikrowellengeräte sollten nicht über den Abluftschlitzen eines Backofens eingebaut werden, sonst erlischt die
Garantie.
1. Dieser kann in einen Schrank eingebaut werden. Die Schranköffnung muss folgende Innenabmessungen Einbausatz
(Nischenmaß), gemäß aufweisen.abb.1, s.5-7
Auf der Rückseite des Schranks muss ein Abzug vorhanden sein. Dieser sollte über die gesamte Höhe des Schranks
verlaufen und nicht abgedeckt sein. Mindestabmessung des Abzugs: 45 mm x 562 mm (abb.2, s.5-7).
INSTALLATIONSHÖHE: MINDESTENS 850 MM.
2. Elektrische Anschlüsse
Das Gerät ist mit einem Netzkabel versehen und sollte nur an eine Schutzkontaktsteckdose, die entsprechend den
geltenden Sicherheitsrichtlinien installiert wurde, angeschlossen werden. Wenn der Stecker nach dem Einbau des
Geräts in den Schrank nicht mehr zugänglich ist, muss ein zweipoliger Trennschalter entsprechend den geltenden
Sicherheitsvorschriften installiert werden.
3. Der Schrank muss aus Stabilitätsgründen unbedingt an der Wand befestigt werden. Der Schrank muss ein Gewicht von 30 kg
tragen können.
4. Soll das Mikrowellengerät aus dem Küchenschrank ausgebaut und frei aufgestellt werden, ist es erforderlich,
die Einbauteile zu entfernen und das Gerät wieder in den Originalzustand zu versetzen. Heben Sie diese
Einbauanweisungen zur späteren Verwendung auf, damit Sie wissen, wie der Einbauvorgang rückgängig gemacht
werden kann.
KABEL NICHT EINKLEMMEN ODER ABKNICKEN.
Die Zeichnungen können vom Gerät abweichen und dienen nur als Referenz.
it
I forni a microonde non devono essere incassati direttamente sopra il sistema di areazione di alcun piano cottura. La
suddetta installazione invaliderà la copertura legata alla garanzia.
1. Il presente Trim kit può essere installato in un mobile da incasso. L’apertura del mobile da incasso deve presentare le
dimensioni interne riportate in figura fig.1, p.5-7.
Sulla parte posteriore del mobile da incasso deve essere prevista una presa d’aria che dovrà correre per l’intera altezza del
mobile da incasso e non risultare OSTRUITA. Le dimensioni minime della presa d’aria sono 45 mm x 562 mm (fig.2, p.5-7).
ALTEZZA MINIMA PER L’INSTALLAZIONE: 850 MM.
2. Connessioni elettriche
II presente elettrodomestico viene fornito con cavo elettrico e relativa spina, da inserire in una presa con messa a terra
installata secondo le vigenti normative di sicurezza. Nel caso in cui, dopo l’incasso, la spina non risulti più accessibile, si
dovrà provvedere all’installazione di un isolatore bipolare conforme alle vigenti normative di sicurezza.
3. Per garantire la stabilità di installazione é essenziale che il mobile da incasso sia fissato a parete. ll piano di appoggio deve
essere in grado di sostenere un peso pari a circa 30 kg.
4. Qualora si intenda togliere il forno a microonde dal mobile da incasso della cucina componibile e installarlo in posizione
autonoma, si dovranno rimuovere i componenti impiegati per l’incasso e riportare il forno alle condizioni originali.
Conservare le presenti istruzioni di installazione per un eventuale riferimento futuro in caso si decida di installare
nuovamente ad incasso l’unità.
ATTENZIONE A NON INTRAPPOLARE O ATTORCIGLIARE IL CAVO.
Lo schema illustrato potrebbe differire da quello reale e si prega di considerarlo solo un riferimento.
F0313CH10EP.indd Sec1:2
F0313CH10EP.indd Sec1:2
F0313CH10EP.indd Sec1:2
F0313CH10EP.indd Sec1:2F0313CH10EP.indd Sec1:2 2020/7/21 13:27:50
2020/7/21 13:27:50
2020/7/21 13:27:50
2020/7/21 13:27:502020/7/21 13:27:50