
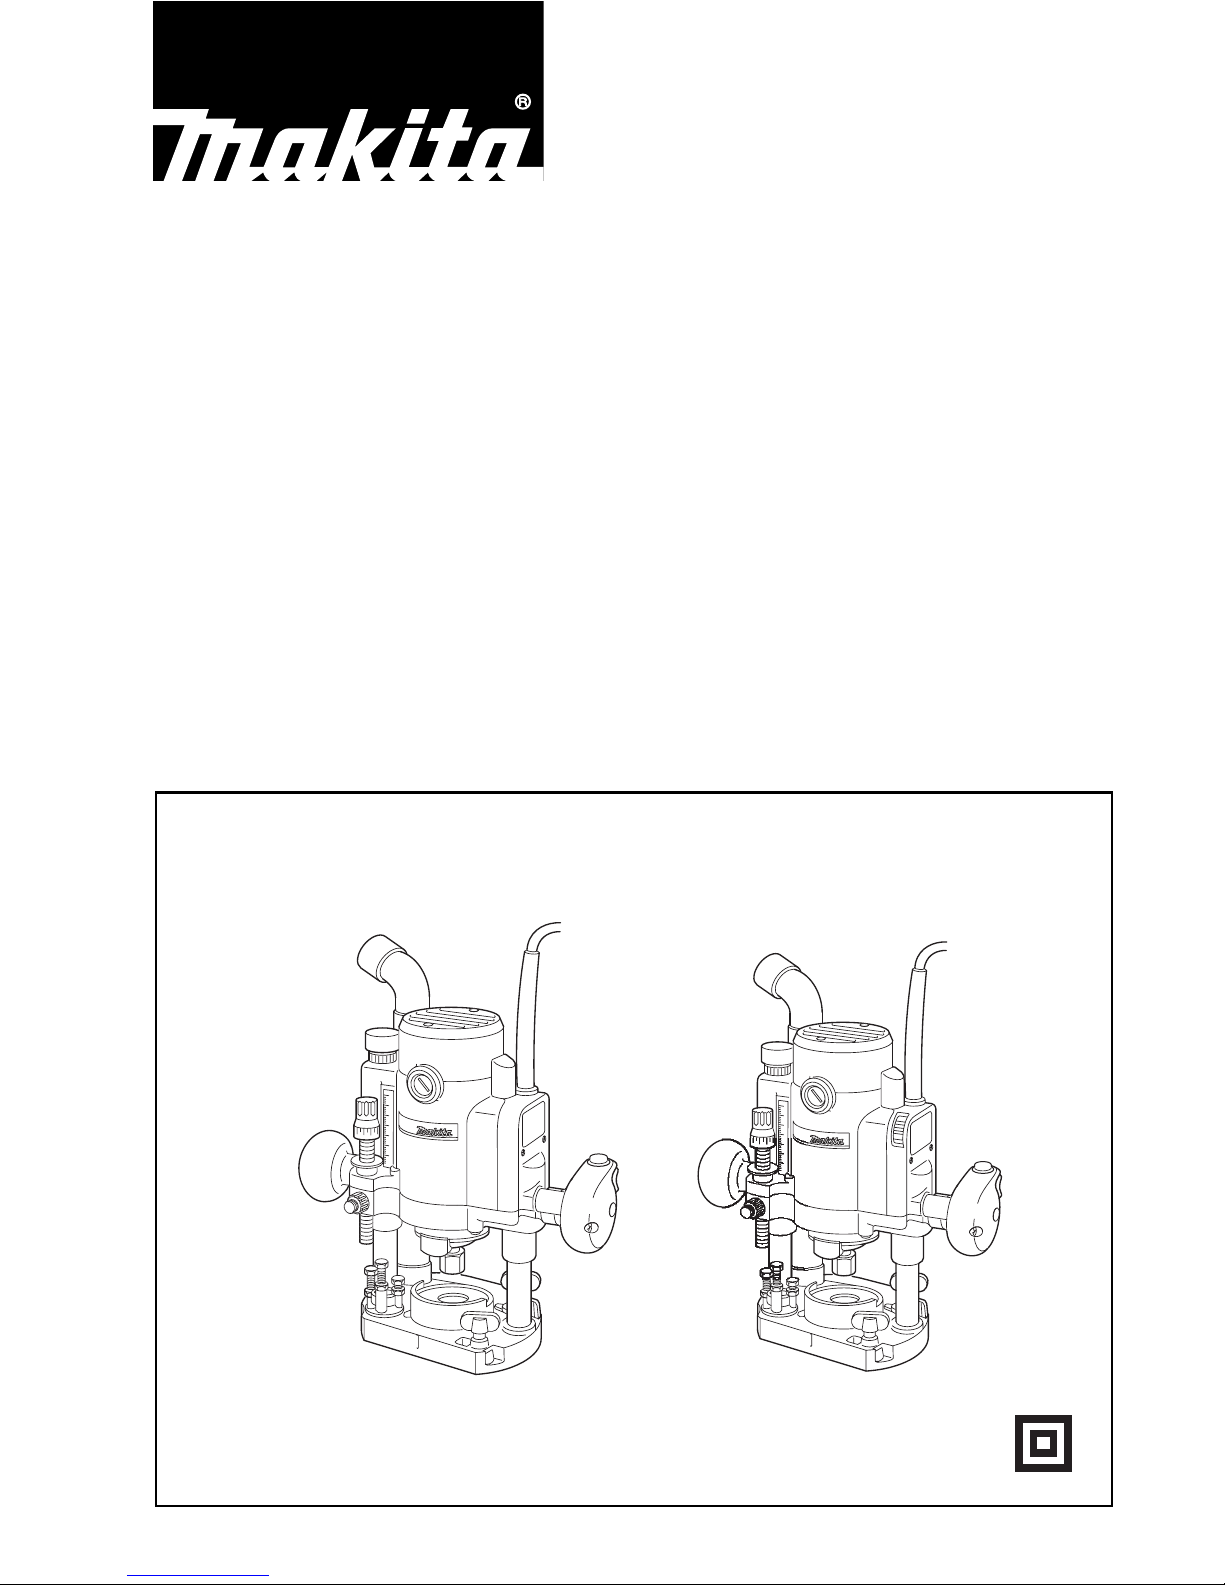
Характеристики
|
Производитель |
|
|
Мощность, Вт |
1100 |
|
Макс. число оборотов, об/мин |
24000 |
|
Размер цанги, мм |
8 |
|
Рабочий ход фрезы, мм |
57 |
|
Копировальные вставки в комплекте |
Нет |
|
Плавный пуск |
Да |
|
Регулировка оборотов |
Да |
Фрезер Makita RP 1110 C и другие оригинальные товары в категории универсальные фрезеры доступны на сайте интернет-магазина Бигам в Москве по специальной цене 41300 рублей. Перед покупкой данной модели бренда Makita рекомендуем посмотреть особенности, технические параметры, документацию и сертификаты на продукцию. Также предлагаем сравнить товар фрезер Makita RP 1110 C с ассортиментом модификаций и аналогов из категории универсальные фрезеры Makita.
-
-
Инструкция Makita RP 1110 C
Инструкция.pdf 208.71 КБ
На странице представлена инструкция по эксплуатации и другие материалы производителя о товаре фрезер Makita RP 1110 C, необходимые пользователю. Из руководства пользователя Makita (Макита) можно узнать устройство изделия, срок службы и комплект поставки. Фрезер Makita RP 1110 C и все товары серии требуют соблюдения правил использования, обслуживания, ухода и хранения.
-
Похожие товары
Electronic Router
Instruction Manual
Elektronische Oberfräse
Betriebsanleitung
Elektroniczna frezarka
pionowa
Instrukcja obsługi
Электрический фрезер
Инструкция по эксплуатации
RP0910
RP1110C
RP0910
RP1110C
2
1
2
5
4
3
50
40
30
20
10
0
7
8
39
11
10
9
12
13
50
40
30
20
10
0
14
15
11
7
13
18
6
16
17
12
34
56
7
3
25
24
26
21
20
19
22
23
21
20
27
28
29
33
30
31
32
8
910
11 12
13 14
4
38
37
34
35
35
36
15 16
17

5
Symbols
The followings show the symbols used for the tool. Be sure that you understand their meaning before use.
Symbole
Die folgenden Symbole werden für die Maschine verwendet. Machen Sie sich vor der Benutzung unbedingt mit ihrer
Bedeutung vertraut.
Symbole
Poniższe symbole używane są do opisu urządzenia. Przed użyciem należy upewnić się, że rozumie się ich znaczenie.
Символы
Следующие объяснения показывают символы, используемые для инструмента. Убедитесь перед
использованием, что Вы понимаете их значение.
❏ Read instruction manual.
❏ Bitte Betriebsanleitung lesen.
❏ Przeczytaj instrukcję obsługi.
❏ Прочитайте инструкцию по эксплуатации.
❏ DOUBLE INSULATION
❏ DOPPELT SCHUTZISOLIERT
❏ PODWÓJNA IZOLACJA
❏ ДВОЙНАЯ ИЗОЛЯЦИЯ

6
ENGLISH
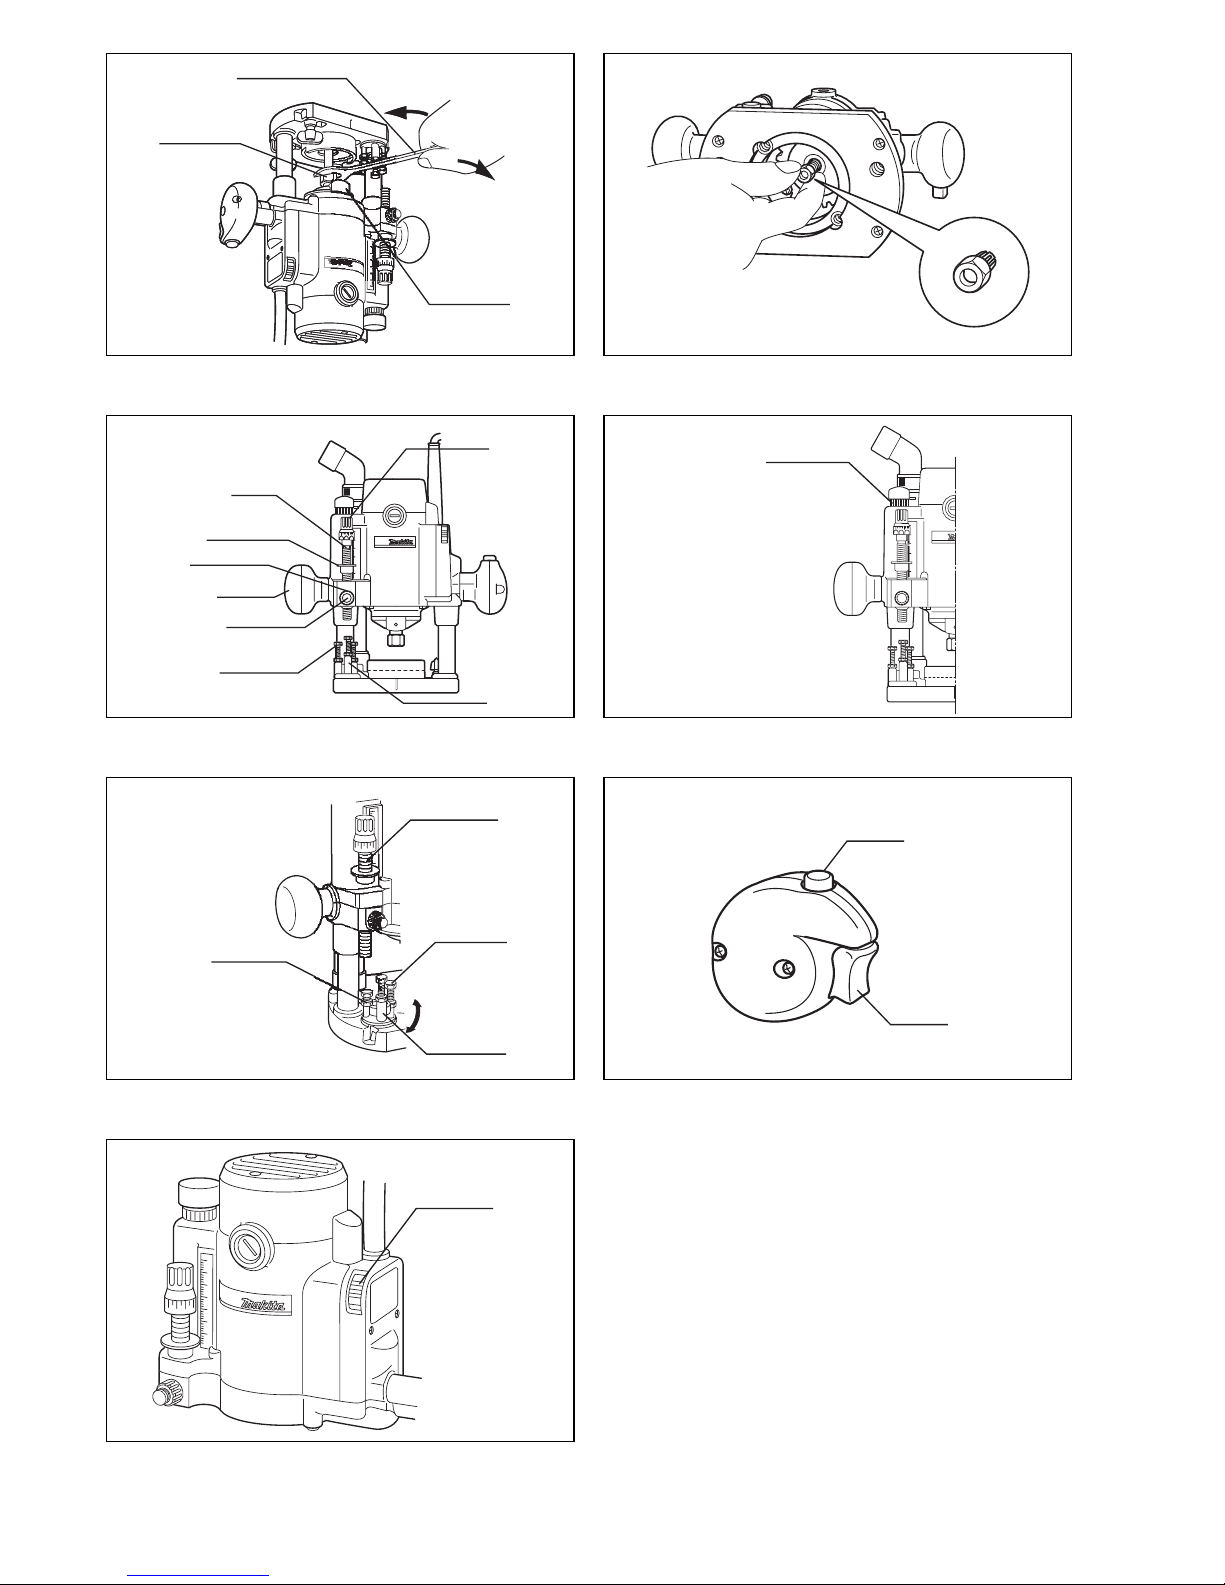
Explanation of general view
1 Collet nut
2 Wrench
3 Shaft lock
4 Tighten
5 Loosen
6 Correct size collet cone
7 Stopper pole
8 Depth pointer
9 Lock knob
10 Fast-feed button
11 Adjusting hex bolt
12 Adjusting knob
13 Stopper block
14 Nylon nut
15 Hex nut
16 Lock button
17 Switch trigger
18 Speed adjusting dial
19 Workpiece
20 Bit revolving direction
21 Feed direction
22 (View from the top of the
tool)
23 Correct bit feed direction
24 Lock screw
25 Guiding surface
26 Straight guide
27 Templet guide
28 Screw
29 Bit
30 Base
31 Templet
32 Workpiece
33 Templet guide
34 Nozzle assembly
35 Dust nozzle assembly
36 Limit mark
37 Brush holder cap
38 Screwdriver
39 Stopper pole setting nut
SPECIFICATIONS
Model RP0910 RP1110C
Max. collet capacity …………………………………………………………… ø8 mm ø8 mm
Plunge capacity ………………………………………………………………… 0 – 57 mm 0 – 57 mm
No load speed (min–1) ……………………………………………………….. 27,000 8,000 – 24,000
Overall height …………………………………………………………………… 260 mm 260 mm
Net weight ……………………………………………………………………….. 3.3 kg 3.4 kg
• Due to our continuing program of research and development, the specifications herein are subject to change
without notice.
• Note: Specifications may differ from country to country.
Power supply
The tool should be connected only to a power supply of
the same voltage as indicated on the nameplate, and can
only be operated on single-phase AC supply. They are
double-insulated in accordance with European Standard
and can, therefore, also be used from sockets without
earth wire.
SAFETY INSTRUCTIONS
Warning! When using electric tools, basic safety precautions should always be followed to reduce the
risk of fire, electric shock and personal injury, including the following. Read all these instructions before
attempting to operate this product and save these
instructions.
For safe operation:
1. Keep work area clean
Cluttered areas and benches invite injuries.
2. Consider work area environment
Don’t expose power tools to rain. Don’t use power
tools in damp or wet locations. Keep work area well
lit. Don’t use power tools in presence of flammable
liquids or gases.
3. Guard against electric shock
Prevent body contact with grounded surfaces (e.g.
pipes, radiators, ranges, refrigerators).
4. Keep children away
Do not let visitors contact tool or extension cord. All
visitors should be kept away from work area.
5. Store idle tools
When not in use, tools should be stored in dry, high,
or locked-up place, out of the reach of children.
6. Don’t force tool
It will do the job better and safer at the rate for which
it was intended.
7. Use right tool
Don’t force small tools or attachments to do the job
of a heavy duty tool. Don’t use tools for purposes not
intended; for example, don’t use circular saw for cutting tree limbs or logs.
8. Dress properly
Do not wear loose clothing or jewelry. They can be
caught in moving parts. Rubber gloves and non-skid
footwear are recommended when working outdoors.
Wear protective hair covering to contain long hair.
9. Use safety glasses and hearing protection
Also use face or dust mask if cutting operation is
dusty.
10. Connect dust extraction equipment
If devices are provided for the connection of dust
extraction and collection facilities, ensure these are
connected and properly used.
11. Don’t abuse cord
Never carry tool by cord or yank it to disconnect it
from receptacle. Keep cord from heat, oil and sharp
edges.
12. Secure work
Use clamps or a vise to hold work. It’s safer than
using your hand and it frees both hands to operate
tool.
13. Don’t overreach
Keep proper footing and balance at all times.
14. Maintain tools with care
Keep tools sharp and clean for better and safer performance. Follow instructions for lubricating and
changing accessories. Inspect tool cords periodically and, if damaged, have repaired by authorized
service facility. Inspect extension cords periodically
and replace if damaged. Keep handles dry, clean
and free from oil and grease.

7
15. Disconnect tools
When not in use, before servicing, and when changing accessories such as blades, bits and cutters.
16. Remove adjusting keys and wrenches
Form the habit of checking to see that keys and
adjusting wrenches are removed from tool before
turning it on.
17. Avoid unintentional starting
Don’t carry plugged-in tool with finger on switch. Be
sure switch is off when plugging in.
18. Outdoor use extension cords
When tool is used outdoors, use only extension
cords intended for use outdoors and so marked.
19. Stay alert
Watch what you are doing. Use common sense. Do
not operate tool when you are tired.
20. Check damaged parts
Before further use of the tool, a guard or other part
that is damaged should be carefully checked to
determine that it will operate properly and perform
its intended function. Check for alignment of moving
parts, binding of moving parts, breakage of parts,
mounting, and any other conditions that may affect
its operation. A guard or other part that is damaged
should be properly repaired or replaced by an authorized service center unless otherwise indicated elsewhere in this instruction manual. Have defective
switches replaced by an authorized service center.
Do not use tool if switch does not turn it on and off.
21. Warning
The use of any other accessory or attachment other
than recommended in this operating instruction or
the catalog may present a risk of personal injury.
22. Have your tool repaired by an expert
This electric appliance is in accordance with the relevant safety rules. Repairing of electric appliances
may be carried out only by experts otherwise it may
cause considerable danger for the user.
ADDITIONAL SAFETY RULES
ENB033-1
1. Hold tool by insulated gripping surfaces when
performing an operation where the cutting tool
may contact hidden wiring or its own cord. Contact with a “live” wire will make exposed metal
parts of the tool “live” and shock the operator.
2. Wear hearing protection during extended period
of operation.
3. Handle the bits very carefully.
4. Check the bit carefully for cracks or damage
before operation. Replace cracked or damaged
bit immediately.
5. Avoid cutting nails. Inspect for and remove all
nails from the workpiece before operation.
6. Hold the tool firmly with both hands.
7. Keep hands away from rotating parts.
8. Make sure the bit is not contacting the workpiece before the switch is turned on.
9. Before using the tool on an actual workpiece, let
it run for a while. Watch for vibration or wobbling
that could indicate improperly installed bit.
10. Be careful of the bit rotating direction and the
feed direction.
11. Do not leave the tool running. Operate the tool
only when hand-held.
12. Always switch off and wait for the bit to come to
a complete stop before removing the tool from
workpiece.
13. Do not touch the bit immediately after operation;
it may be extremely hot and could burn your
skin.
14. Always lead the power supply cord away from
the tool towards the rear.
SAVE THESE INSTRUCTIONS.
OPERATING INSTRUCTIONS
Installing or removing router bit
Important:
Always be sure that the tool is switched off and
unplugged before installing or removing the bit.
Loosen the collet nut. Insert the bit all the way into the
collet cone. Press the shaft lock to keep the shaft stationary and use the wrench to tighten the collet nut securely.
(Fig. 1)
A 8 mm or 1/4” collet cone is factory installed on the tool.
When using router bits with other shank diameter, use
the correct size collet cone for the bit which you intended
to use. (Fig.2)
Optional accessories include 6 mm, 8 mm and 1/4″ collet
cones.
To remove the bit, follow the installation procedure in
reverse.
CAUTION:
Do not tighten the collet nut without inserting a bit, or the
collet cone will break.
Adjusting the depth of cut (Fig.3)
Place the tool on a flat surface.
Loosen the lock knob and lower the tool body until the bit
just touches the flat surface. Tighten the lock knob to lock
the tool body.
Turn the stopper pole setting nut counterclockwise.
Lower the stopper pole until it makes contact with the
adjusting bolt. Align the depth pointer with the “0” graduation. The depth of cut is indicated on the scale by the
depth pointer.
While pressing the fast-feed button, raise the stopper
pole until the desired depth of cut is obtained. Minute
depth adjustments can be obtained by turning the adjusting knob (1 mm per turn.)
By turning the stopper pole setting nut clockwise, you
can fasten the stopper pole firmly.
Now, your predetermined depth of cut can be obtained by
loosening the lock knob and then lowering the tool body
until the stopper pole makes contact with the adjusting
bolt of the stopper block.
Nylon nut (Fig.4)
CAUTION:
• Do not lower the nylon nut too low or the bit will pro-
trude dangerously.
By turning the nylon nut, the upper limit of the tool body
can be adjusted. When the tip of the bit is retracted more
than required in relation to the base plate surface, turn
the nylon nut to lower the upper limit.

8
CAUTION:
• Since excessive cutting may cause overload of the
motor or difficulty in controlling the tool, the depth of cut
should not be more than 15 mm at a pass when cutting
grooves with an 8 mm diameter bit.
• When cutting grooves with a 20 mm diameter bit, the
depth of cut should not be more than 5mm at a pass.
• For extra-deep grooving operations, make two or three
passes with progressively deeper bit settings.
Stopper block (Fig. 5)
The stopper block has three adjusting hex bolts which
raise or lower 0.8 mm per turn. You can easily obtain
three different depths of cut using these adjusting hex
bolts without readjusting the stopper pole.
Adjust the lowest hex bolt to obtain the deepest depth of
cut. Adjust the two remaining hex bolts to obtain shallower depths of cut. The differences in height of these
hex bolts are equal to the differences in depths of cut. To
adjust the hex bolts, first loosen the hex nuts on the hex
bolts with the wrench and then turn the hex bolts. After
obtaining the desired position, tighten the hex nuts while
holding the hex bolts in that desired position. The stopper
block is also convenient for making three passes with
progressively deeper bit settings when cutting deep
grooves.
Switch action (Fig.6)
CAUTION:
• Before plugging in the tool, always check to see that
the switch trigger actuates properly and returns to the
“OFF” position when released.
• Make sure that the shaft lock is released before the
switch is turned on.
To start the tool, depress the lock button and pull the
switch trigger. Release the switch trigger to stop. For continuous operation, pull the trigger and then depress the
lock button further.
To stop the tool, pull the trigger so that the lock-off button
returns automatically. Then release the trigger. After
releasing the trigger, the lock-off function works to prevent the switch trigger from being pulled.
Speed adjusting dial (Fig.7)
For RP1110C
The tool speed can be infinitely adjusted between 8,000
and 24,000 min
-1
by turning the speed adjusting dial.
This allows the ideal speed to be selected for optimum
material processing, i.e. the speed can be correctly
adjusted to suit the material and bit diameter.
Refer to the table below for the relationship between the
number settings on the dial and the approximate rotating
speed.
CAUTION:
The speed adjusting dial can be turned only as far as 5
and back to 1. Do not force it past 5 or 1, or the speed
adjusting function may no longer work.
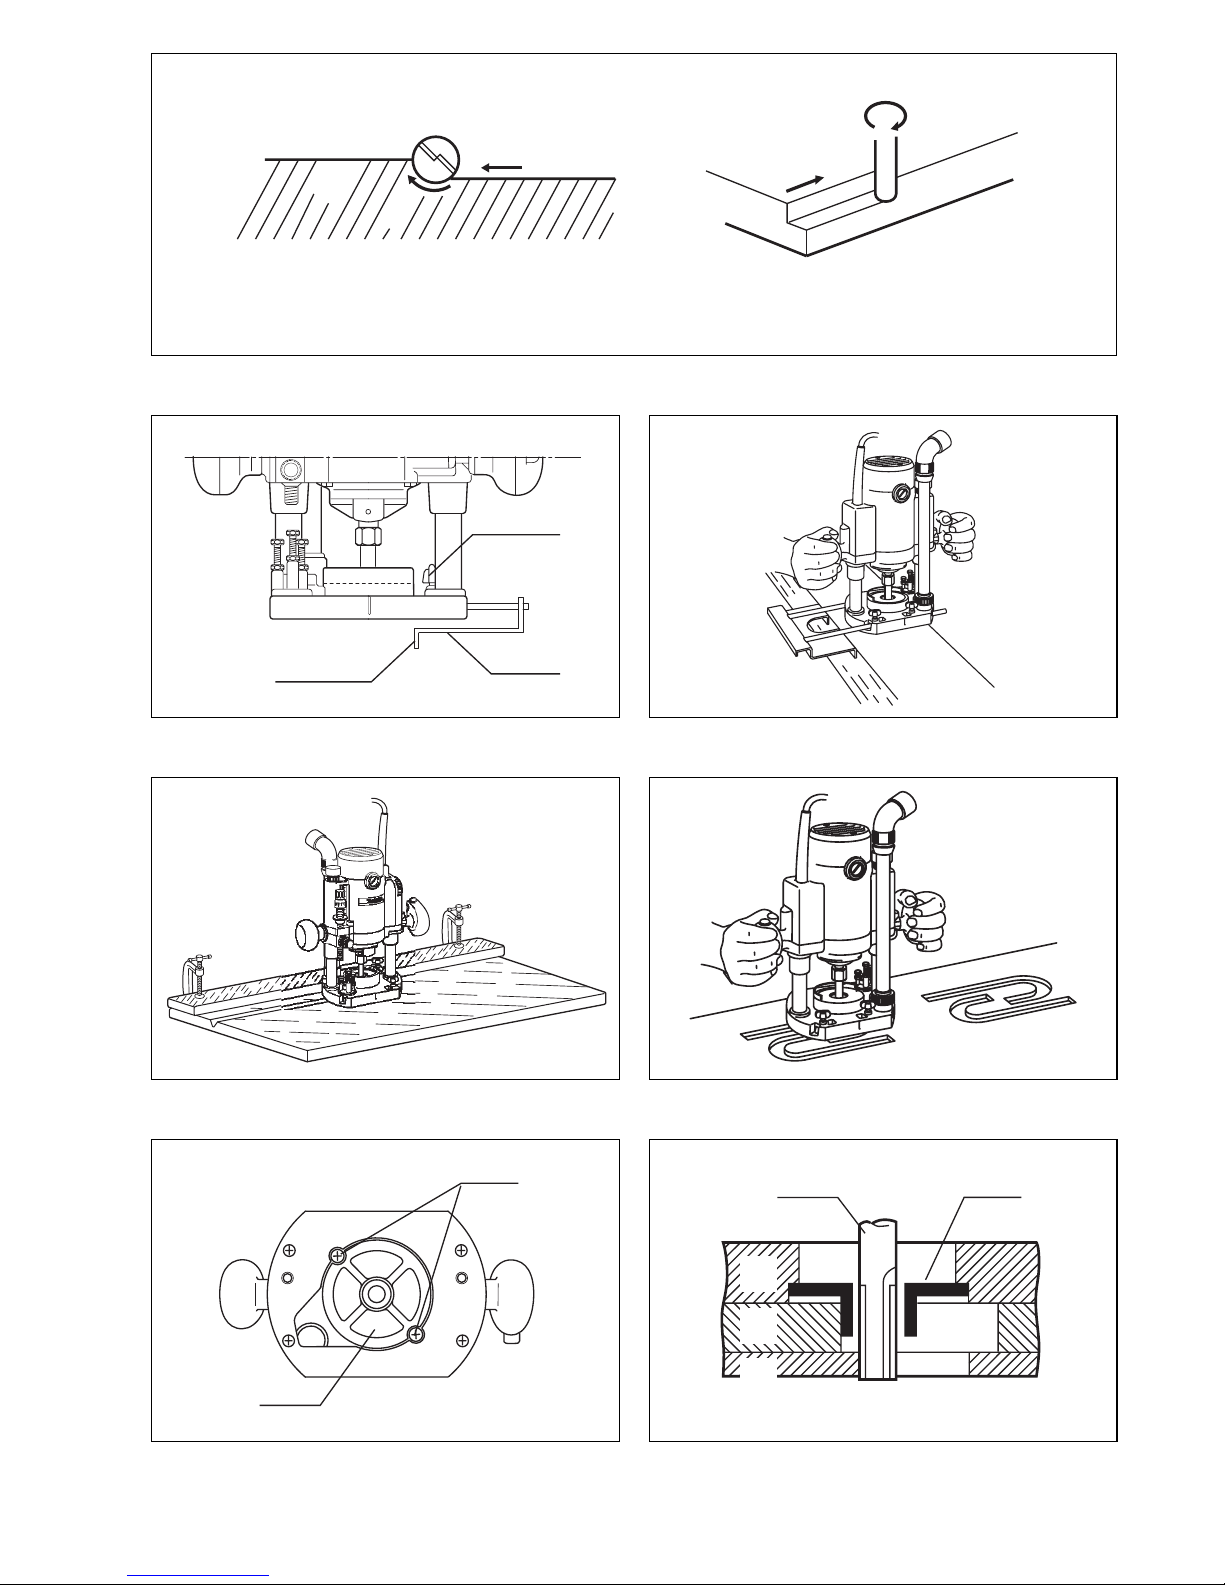
Operation (Fig. 
• Set the tool base on the workpiece to be cut without the
bit making any contact. Then turn the tool on and wait
until the bit attains full speed. Lower the tool body and
move the tool forward over the workpiece surface,
keeping the tool base flush and advancing smoothly
until the cutting is complete.
• When doing edge cutting, the workpiece surface
should be on the left side of the bit in the feed direction.
NOTE:
• Make sure that the tool raises automatically when the
lock knob is loosened. The position of the bit must be
higher than the tool base.
• Also, make sure that the dust guide is installed properly.
• Moving the tool forward too fast may cause a poor quality of cut, or damage to the bit or motor. Moving the tool
forward too slowly may burn and mar the cut. The
proper feed rate will depend on the bit size, the kind of
workpiece and depth of cut. Before beginning the cut
on the actual workpiece, it is advisable to make a sample cut on a piece of scrap lumber. This will show
exactly how the cut will look as well as enable you to
check dimensions.
• When using the straight guide, be sure to install it on
the right side in the feed direction. This will help to keep
it flush with the side of the workpiece.
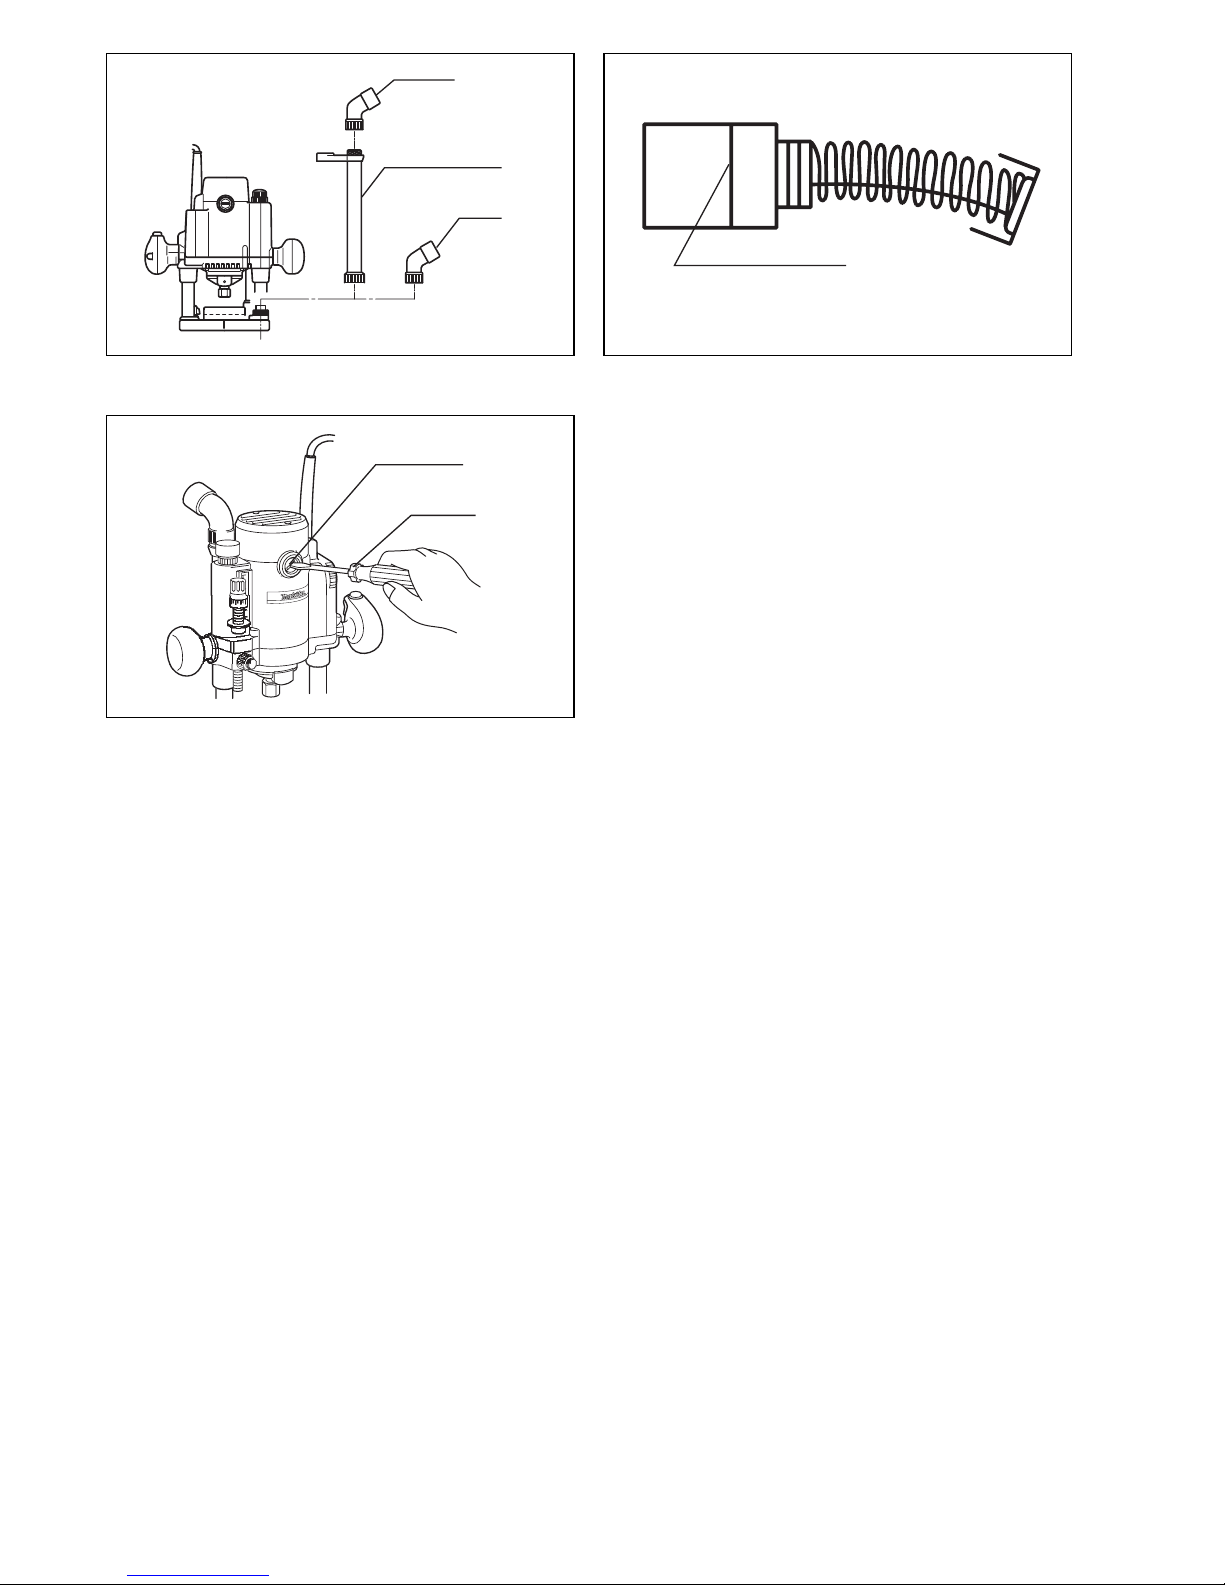
Straight guide (Fig. 9, 10 & 11)
The straight guide is effectively used for straight cuts
when chamfering or grooving.
To install the straight guide, insert the guide bars into the
holes in the tool base. Adjust the distance between the
bit and the straight guide. At the desired distance, tighten
the lock screw to secure the straight guide in place.
When cutting, move the tool with the straight guide flush
with the side of the workpiece.
If the distance between the side of the workpiece and the
cutting position is too wide for the straight guide, the
straight guide cannot be used. In this case, firmly clamp
a straight board to the workpiece and use it as a guide
against the router base.
Templet guide (optional accessory)
(Fig. 12, 13 & 14)
The templet guide provides a sleeve through which the
bit passes, allowing use of the router with templet patterns.
To install the templet guide, insert the templet guide into
the tool base and then tighten the screws.
Secure the templet to the workpiece. Place the tool on
the templet and move the tool with the templet guide sliding along the side of the templet.
Number min
-1
18,000
2 12,000
3 16,000
4 20,000
5 24,000
Loading…
Manual
View the manual for the Makita RP1110C here, for free. This user manual comes under the category milling machines and has been rated by 1 people with an average of a 5.2. This manual is available in the following languages: English. Do you have a question about the Makita RP1110C?
Ask your question here
Frequently asked questions
Can’t find the answer to your question in the manual? You may find the answer to your question in the FAQs about the Makita RP1110C below.
Do I have to wear hearing protection when using a milling machine?
The amount of sound varies a lot per brand and type of milling machine, it is therefore wise to wear hearing protection to be sure.
Is the manual of the Makita RP1110C available in English?
Yes, the manual of the Makita RP1110C is available in English .
Is your question not listed? Ask your question here
Код: 40412
Извините, товара сейчас нет в наличии
Бесплатная доставка
по Красноярску
Извините, товара сейчас нет в наличии
Новости интернет-магазина «Лаукар»:
Дополнительная информация в категории Фрезер:
В интернет-магазине бытовой техники «Лаукар» Вы можете скачать инструкцию к товару Фрезер Makita RP1110C совершенно бесплатно.
Все инструкции, представленные на сайте интернет-магазина бытовой техники «Лаукар», предоставляются производителем товара.
Перед началом использования товара рекомендуем Вам ознакомиться с инструкцией по применению.
Для того чтобы скачать инструкцию, Вам необходимо нажать на ссылку «скачать инструкцию», расположенную ниже, а в случае, если ссылки нет,
Вы можете попробовать обратиться к данной странице позднее,
возможно специалисты интернет-магазина бытовой техники «Лаукар» еще не успели загрузить для скачивания инструкцию к товару:
Фрезер Makita RP1110C.

Фирма-производитель оставляет за собой право на внесение изменений в конструкцию, дизайн и комплектацию товара: Фрезер Makita RP1110C. Пожалуйста, сверяйте информацию о товаре с информацией на
официальном сайте компании производителя.