
Box Contents
Along with your Scarlett Solo, you should have:
- USB cable, Type ‘A’ to Type ‘C’
- Getting Started Information (printed inside the box lid)
- Important Safety Information
System Requirement
The easiest way to check if your computer’s operating system (OS) is compatible with your Scarlett is to use our Help Centre’s compatibility articles: support.focusrite.com/hc/categories/200693655. As new OS versions become available, you can continue to search our Help Centre at support.focusrite.com for further compatibility information.
GETTING STARTED
With the Third Generation, Scarlett interfaces introduce a new, faster way of getting up and running, using the Scarlett Quick Start tool. All you need to do is connect your Scarlett Solo to your computer. Once connected, you will see the device is recognized by your PC or Mac and the Quick Start tool will guide you through the process from there.
IMPORTANT: The Scarlett Solo has a single USB 2.0 Type C port (on the rear panel): Connect it to your computer using the USB cable provided. Note that Scarlett Solo is a USB 2.0 device, and thus the USB connection requires a USB 2.0+ compliant port on your computer.
The Scarlett Solo does not need a separate power supply; It gets its power from your computer via a USB connection. However, we recommend that when using a laptop, the laptop is powered using its AC adaptor, as otherwise, the battery will drain faster than when powered from the laptop alone. Your computer will initially treat your Scarlett as a Mass Storage Device (MSD), and during its first connection, the Scarlett will be in “Easy Start mode”.
Quick Start Tool
We have tried to make registering your Scarlett Solo as simple as possible. The procedure is designed to self-explanatory, but we have described each step below, so you can see how they should appear on either a PC or a Mac.
Mac users only
On connecting your Scarlett Solo to your Mac, a Scarlett icon will appear on the desktop:
- Double-click on the icon to open the Finder window shown below:
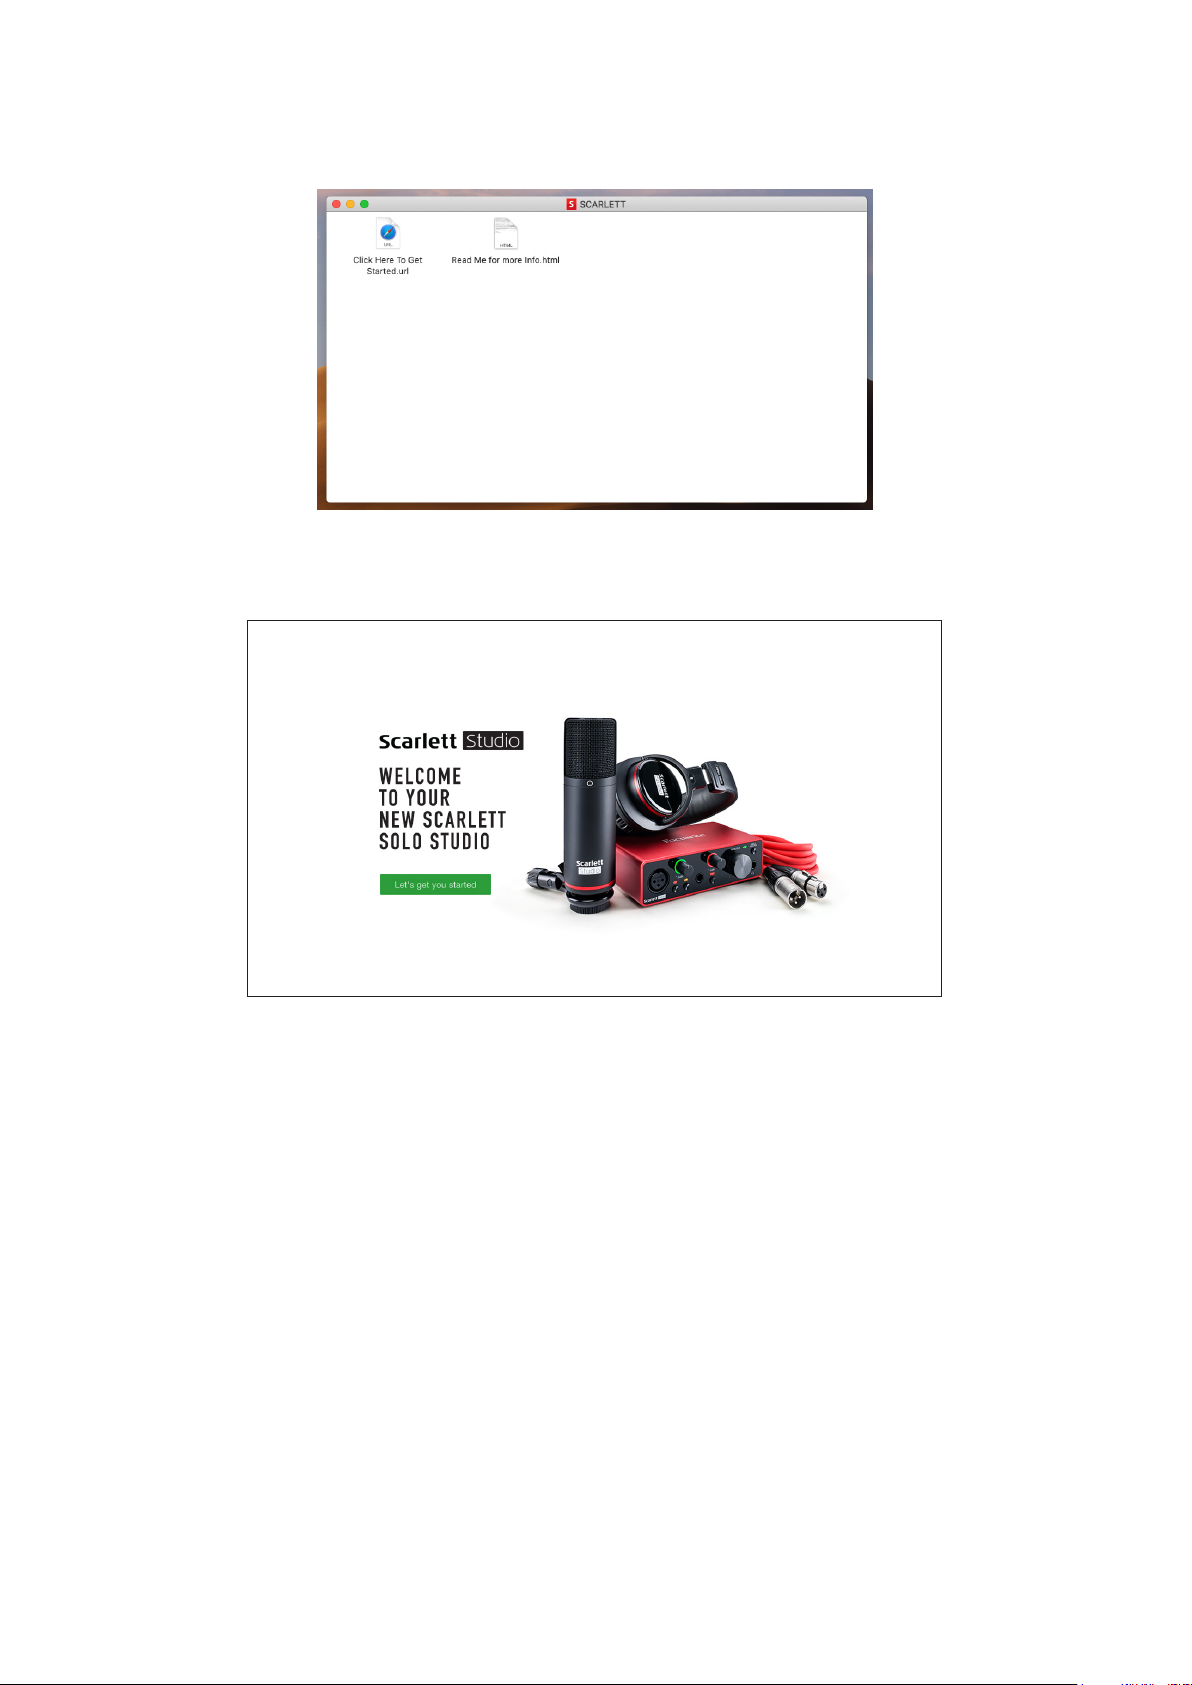
- Double-click on the “Click Here to Get Started.url” icon. This will redirect you to the Focusrite website, where we recommend you register your device:
Click on “Let’s get you started”, and you’ll see a form that will be partly prefilled for you automatically. When you submit the form, you’ll see options to go straight to the downloads to get the software for your Scarlett or to follow a sstep-by-step setup guide based on how you want to use your Scarlett.
Once you have installed the Focusrite Control software to set up and configure your interface, the Scarlett will be switched out of Easy Start mode so it no longer appears as a Mass Storage Device when connected to your computer.
Your OS should switch the computer’s default audio inputs and outputs to the Scarlett. To verify this, go to System Preferences > Sound, and ensure the input and output are set to Scarlett Solo.
For detailed setup options on a Mac, open Applications > Utilities > Audio MIDI Setup.
Windows users only
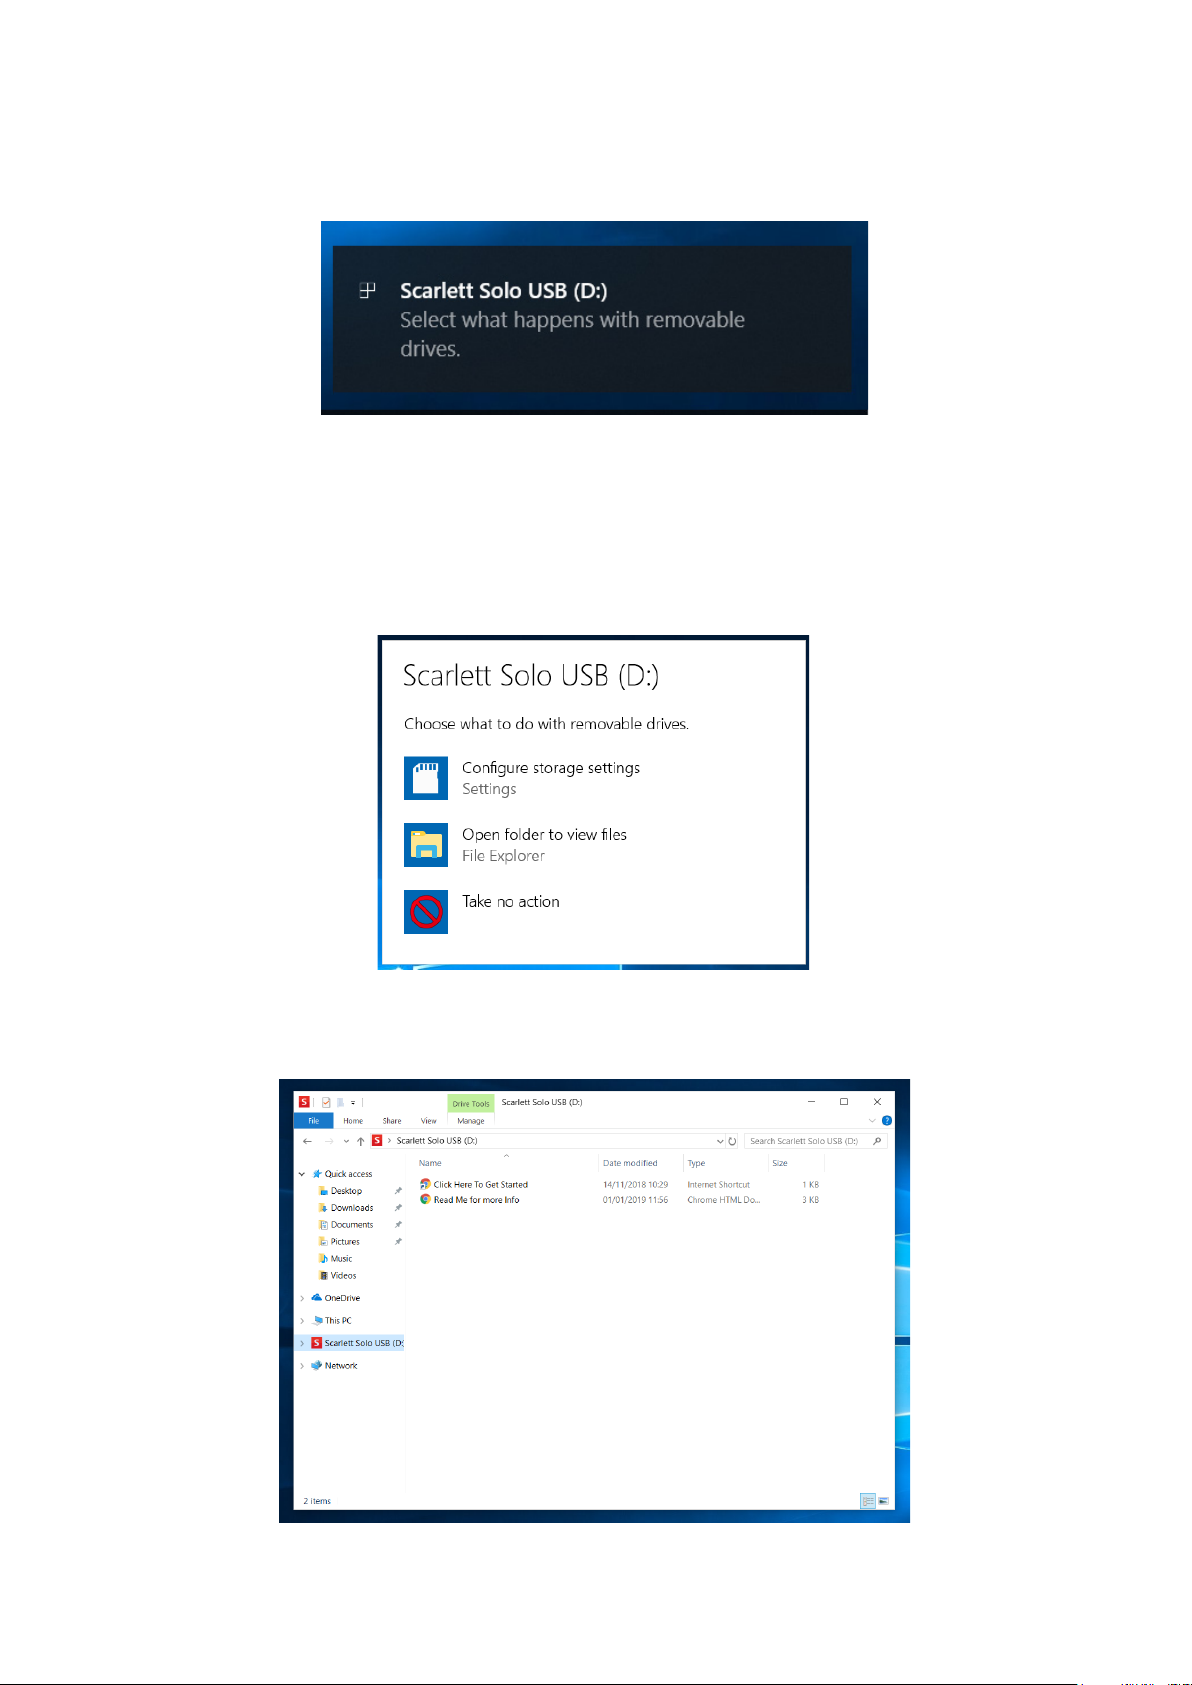
On connecting your Scarlett Solo to your PC, a Scarlett icon will appear on the desktop:
(Note: that the drive letter may be something other than D:, depending on other devices connected to your PC.) Double-click on the pop-up message to open the dialogue box shown below:
Double-click on “Open folder to view files”: this will open an Explorer window.Double-click on “Open folder to view files”: this will open an Explorer window:
Double-click “Click Here to Get Started”. This will redirect you to the Focusrite website, where we recommend you register your device:
Click on “Let’s get you started”, and you’ll see a form that will be partly prefilled for you automatically. When you submit the form, you’ll see options to go straight to the downloads to get the software.y our Scarlett, or follow a step-by-step setup guide based on how you want to use your Scarlett. Once you have installed the Focusrite Control software to set up and configure your interface, the Scarlett will be switched out of Easy Start mode so it no longer appears as a Mass Storage Device. When connected to your computer. Your OS should switch the computer’s default audio inputs and outputs to the Scarlett. To verify. This, right-click on the Sound icon on the taskbar, select Sound Settings, and set the Scarlett as the Input and Output Device.
All users:
Note that a second file – “More Info & FAQs” – is also available during the initial set-up process. This
file contains some additional information about the Focusrite Quick Start tool, which you may find
helpful if you have any issues with the procedure. Once registered, you will have immediate access to the following resources:
- Focusrite Control (Mac and Windows versions available) – see NOTE below
- Multi-language User Guides
You can find the license codes and links for the optional bundled software in your Focusrite account. To find out what bundled software is included with Scarlett 3rd generation, please visit our website.
NOTE: Installing Focusrite Control will also install the correct driver for your device. Focusrite Control is available to download at any time, even without registering: see “Manual Registration” below.
Manual Registration.
If you decide to register your Scarlet at a later time. Date you can do so at:.customer.focusrite.com/register. You will need to enter the Serial Number manually: this number can be found on the base of the interface itself, and also on the barcode label on the side of the box.
We recommend you download and install our Focusrite Control application, as this will disable Easy Start mode and unlock the full potential of the interface. Initially, when in Easy Start mode, the interface will function at sample rates up to 48 kHz. Once Focusrite Control is installed on your computer, you can work at sample rates up to 192 kHz. If you decide not to download and install Focusrite Control immediately, it can be downloaded at any time from customer.focusrite.com/support/downloads. To force your Scarlett out of Easy Start mode without first registering it, connect it to your computer and press and hold the 48V button for five seconds. This will ensure your Scarlett has full functionality. Please bear in mind that should you wish to register your Scarlett after taking this action, you will need to do so manually, as explained above.
Audio Setup in your DAW
The Scarlett Solo is compatible with any Windows-based DAW that supports ASIO or WDM or any Mac-based DAW that uses Core Audio. After following the Getting Started procedure described above, you can start using your Scarlett Solo with the DAW of your choice. To allow you to get started if you do not already have a DAW application installed on your computer, both Pro Tools | First and Ableton Live Lite are included; these will be available to you once you’ve registered your Scarlett Solo. If you need help installing either DAW, please visit our Getting Started pages at focusrite.com/get-started, where Getting Started videos are available. Operating instructions for Pro Tools First and Ableton Live Lite are beyond the scope of this User Guide, but both applications include a full set of Help files. Instructions are also available at avid.com and ableton.com, respectively.
Please note – your DAW may not automatically select the Scarlett Solo as its default I/O device. You must manually select Focusrite USB ASIO as the driver on your DAW’s Audio Setup* page. Please refer to your DAW’s documentation (or Help files) if you are unsure where to select the ASIO or Core Audio driver. The example below shows the correct configuration in the Ableton Live Lite Preferences panel (Windows version shown).
Once the Scarlett Solo is set as the preferred Audio Device* in your DAW, its inputs and outputs will appear in your DAW’s Audio I/O preferences. Depending on your DAW, you may need to enable certain inputs or outputs before use. The two examples below show two Inputs and two outputs enabled in the Ableton Lite Audio Preferences.
Examples of use
Scarlett Solo is an ideal audio interface for many DAW applications running on a laptop or other computer, PC, or Mac. A typical set of connections is illustrated below.
Connecting a microphone/instrument.
This setup shows a typical configuration for recording using DAW software on your Mac or PC. You would record vocals through Input 1 and guitar through Input 2 into your recording application while monitoring the playback via headphones. Scarlett Solo’s inputs are on the front panel: Input 1 uses a standard 3-pin XLR socket, and is configured to work with microphones of most types; you will probably have a male XLR connector on the end of your mic cable.
If you are using a “studio” condenser microphone designed to operate on 448-voltphantom power, press the 48V button. Some lower spec. Condenser microphones can operate from a lower phantom power voltage – typically 15 V. You should check the mic spec to see if it is safe to operate it from 48 V; if not, obtain a suitable external phantom power supply. Most modern microphones of other types, e.g., dynamic or ribbon, will not be damaged by the inadvertent application of phantom power, but note some older mics may be; if you have any doubt, please check the specification of your mic to ensure it is safe to use.
Input 2 uses a ¼” (6.35 mm) jack socket, which is 2-pole when in instrument mode and 3-pole when used as a mono line input. It can accept signals from an electric or electroacoustic guitar or bass, a keyboard, and most other types of audio equipment. Set the INST switch ON (‘INST’ illuminates red) if you are connecting a musical instrument, e.g., a guitar in the example, using an ordinary 2-pole (TS) guitar jack. Set the INST switch to OFF if you are connecting a line-level source such as a keyboard, synthesizer, or the balanced output of an external audio mixer via a 3-pole (TRS) jack. Note that the jack socket accepts both TRS and TS types of jack plugs.
Using Direct Monitoring
You will frequently hear the term “latency” used in connection with digital audio systems. In the case of the simple DAW recording application described above, latency will be the time it takes for your input signals to pass through your computer and audio software. Latency can be a problem for a performer who wishes to record while monitoring their input signals. The Scarlett Solo is fitted with a “Direct Monitoring” option, which overcomes this problem. Setting the front panel DIRECT MONITOR switch to ON will route your input signals directly to the Scarlett Solo’s headphone and main monitor outputs. This enables you to hear yourself with zero latency – i.e., in “real time” – along with the computer playback. Your inputs will be summed to mono, so both mic and instrument will appear in the centre of the stereo image. Note that the input signals to your computer are not affected in any way by the use of Direct Monitor. When Direct Monitoring is set to ON, ensure your recording software is not set to route its input (what you are currently recording) to its output. If it is, you will hear yourself “twice”, with one signal audibly delayed as an echo. Monitoring with DIRECT MONITOR set to OFF can be useful when using an FX plug-in to your DAW to create a stereo effect which contributes to the live performance. In this way, you will be able to hear exactly what is being recorded, complete with the FX. However, some latency may result, the amount depending on the DAW’s buffer size and the processing power of the computer.
Headphone monitoring
Connect a pair of stereo headphones to the front panel headphone output to hear both what you are recording – your current input signal(s), plus any tracks you’ve already recorded in your computer. Note: Set the front panel DIRECT MONITOR switch to ON when recording. The pre-recorded tracks will be heard in stereo, and the current input signals will be centered in the stereo image. If you are using both the mic and instrument inputs, the two inputs will be summed in mono.
Connecting Scarlett Solo to loudspeakers
You can use the ¼” jack outputs on the rear panel to connect monitor speakers. Active monitors have internal amplifiers with a volume control, and can be connected directly. Passive loudspeakers require a separate amplifier; the rear panel outputs should be connected to the amplifier’s inputs.The line outputs are 3-pole (TRS) ¼” (6.35 mm) jack sockets and are electronically balanced. Typical consumer (Hi-Fi) amplifiers and small powered monitors will have unbalanced inputs, either on phono (RCA) sockets or via a 3.5 mm 3-pole jack plug intended for direct connection to a computer. In either case, use a suitable connecting cable with jack plugs at one end. Professional power amplifiers will generally have balanced inputs; we highly recommend using balanced cables to connect these to the outputs of the Scarlett Solo. NOTE: You run the risk of creating an audio feedback loop if loudspeakers are active at the same time as a microphone! We recommend you always turn off (or turn down) monitoring loudspeakers while recording, and use headphones when overdubbing.
HARDWARE FEATURES
The front panel includes the input connectors for mic and line/instrument signals, and the input gain and monitoring controls.
- Input 1 – electronically balanced input via 3-pin XLR socket for microphones.
- GAIN 1 – adjust the gain for the microphone signal at Input 1. The gain controls have tri-colour LED ‘rings’ to confirm signal level: green indicates an input level of at least -24 dBFS (i.e., ‘signal present’), the ring turns amber at -6 dBFS to indicate the signal is close to clipping, and red at 0 dBFS (digital clipping).
- 48V – phantom power switch for mic input – enables 48 V phantom power at the XLR socket.
- Input 2 – ¼” TRS jack socket to connect both instruments (unbalanced TS jack) or mono line level (balanced) sources.
- GAIN 2 – adjusts the gain for the line/instrument signal at Input 2. The gain control has a tricolour LED ring as [2].
- INST/LINE – Instrument/Line level switch for Input 2 – switches gain to suit instrument or line level signals. ‘INST’ illuminates red when Instrument mode is selected. Note that INST mode may also be selected from Focusrite Control.
- AIR – switch enabling AIR mode for the mic input. AIR modifies the frequency response of the input stage to model the classic, transformer-based Focusrite ISA microphone preamps. ‘AIR’ illuminates yellow when the mode is selected. Note that AIR may also be selected from Focusrite Control.
- MONITOR – main monitor output level control – sets the output level at the rear panel outputs and the front panel headphone output.
- USB LED – a green LED illuminates when the Scarlett is connected and recognised by your computer.
- DIRECT MONITOR – selects monitoring of input signals (mixed with the DAW output) to be directly from inputs (ON) or via the DAW (OFF).
- – ¼” TRS output jack. If your headphones have a ¼” TRS jack plug, connect them directly; if they have a 3.5 mm TRS “mini jack”, use a TRS ¼”-to-3.5 mm jack adaptor. Note that it is likely headphones fitted with 4-pole TRRS plugs will not operate correctly.
- K (Kensington security lock) – Secure your Scarlett Solo to a suitable structure if desired.
- USB 2.0 port – Type C connector; connect the Scarlett Solo to your computer with the cable supplied.
- LINE OUTPUTS: LEFT and RIGHT – 2 x ¼” (6.35 mm) TRS jack sockets; +10 dBu output level (variable), electronically balanced. Either ¼” TRS (balanced connection) or TS (unbalanced connection) jack plugs can be used.
SPECIFICATIONS
Performance Specifications
All performance figures are measured per the provisions of AES17, as applicable.
|
Supported sample rates |
44.1 kHz, 48 kHz, 88.2 kHz, 96 kHz, 176.4 kHz, 192 kHz |
|
Microphone Input |
|
|
Dynamic Range |
111 dB (A-weighted) |
|
Frequency Response |
20 Hz to 20 kHz ±0.1 dB |
|
THD+N |
<0.0012% (minimum gain, -1 dBFS input with 22 Hz/22 kHz bandpass filter) |
|
Noise EIN |
-128 dB (A-weighted) |
|
Maximum Input Level |
+9 dBu |
|
Gain Range |
56 dB |
|
Input impedance |
3 kΩ |
|
Line Input |
|
|
Dynamic Range |
110.5 dB (A-weighted) |
|
Frequency Response |
20 Hz to 20 kHz ±0.1 dB |
|
THD+N |
<0.002% (minimum gain, -1 dBFS input with 22 Hz/22 kHz bandpass filter) |
|
Maximum Input Level |
+22 dBu at minimum gain |
|
Gain Range |
56 dB |
|
Input impedance |
60 kΩ |
|
Instrument Input |
|
|
Dynamic Range |
110 dB (A-weighted) |
|
Frequency Response |
20 Hz to 20 kHz ±0.1 dB |
|
THD+N |
<0.03% (minimum gain, -1 dBFS input with 22 Hz/22 kHz bandpass filter) |
|
Maximum Input Level |
+12.5 dBu at minimum gain |
|
Gain Range |
56 dB |
|
Input impedance |
1.5 MΩ |
|
Line Outputs |
|
|
Dynamic Range |
108.5 dB (A-weighted) |
|
Maximum Output Level (0 dBFS) |
+15.5 dBu at minimum gain; balanced outputs |
|
THD+N |
<0.002% (maximum level, -1 dBFS input with 22 Hz/22 kHz bandpass filter) |
|
Output impedance |
430 Ω |
|
Headphone Output |
|
|
Dynamic Range |
104 dB (A-weighted) |
|
Maximum Output Level |
+7 dBu |
|
THD+N |
<0.002% (maximum level, -1 dBFS input with 22 Hz/22 kHz bandpass filter) |
|
Output impedance |
<1 Ω |
Physical and Electrical Characteristics
|
Analogue Input 1 |
|
|
Connector |
Balanced, via female 3-pin XLR on front panel |
|
Phantom power |
48 V phantom power switch |
|
AIR function |
Front panel switch or via Focusrite Control |
|
Analogue Input 2 |
|
|
Connector |
¼” (6.35 mm) jack socket on front panel INST mode: unbalanced, 2-pole (TS) LINE mode: balanced (TRS) |
|
Line/Instrument switching |
Front panel switch or via Focusrite Control |
|
Analogue Outputs |
|
|
Main outputs |
Balanced, 2 x ¼” TRS jacks on rear panel |
|
Stereo headphone output |
¼” TRS jack on front panel |
|
Output level control (Main and headphone) |
On front panel |
|
Direct Monitoring |
Front panel switch; allows zero-latency monitoring of inputs |
|
Other I/O |
|
|
USB |
1 x USB 2.0 Type C connector |
|
Front Panel Indicators |
|
|
USB power |
Green LED |
|
Gain Halos |
Tri-colour LED rings ( with GAIN controls) |
|
Phantom power |
Red LED |
|
Instrument mode |
Red LED |
|
AIR mode |
Amber LED |
|
Direct Monitor mode |
Green LED |
|
Weight and Dimensions |
|
|
W x H x D |
143.5 mm x 43.5 mm x 95.8 mm 5.65 in x 1.71 in x 3.77 in |
|
Weight |
320 g 0.71 lb |
TROUBLESHOOTING
For all troubleshooting queries, please visit the Focusrite Help Centre at support.focusrite.com.
COPYRIGHT AND LEGAL NOTICES
Full Terms and Conditions of the Warranty can be found at focusrite.com/warranty. Focusrite is a registered trademark and Scarlett Solo and Scarlett Solo Studio are trademarks of Focusrite Audio Engineering Limited. All other trademarks and trade names are the property of their respective owners. 2021 © Focusrite Audio Engineering Limited. All rights reserved.
For more manuals by Focusrite, visit ManualsLibraryy
Focusrite Scarlett Solo 3rd Gen USB Audio Interface-FAQs
What size is the headphone jack on the Scarlett Solo?
The Scarlett Solo has a ¼-inch (6.35 mm) TRS headphone jack. If your headphones use a smaller 3.5 mm plug, you’ll need a ¼-inch adapter.
Does the Scarlett Solo need external power?
No external power is needed. The Scarlett Solo gets all the power it needs through the USB connection to your computer. For best performance, especially with laptops, it’s recommended to keep the laptop plugged in.
Do I need speakers to use the Scarlett Solo?
You can use either headphones or external speakers. For accurate monitoring without delay, it’s best to connect your headphones or speakers directly to the Scarlett Solo.
How many inputs does the Scarlett Solo have?
It has two inputs – one mic input and one switchable line/instrument input – plus two balanced outputs for monitors.
What is Air Mode on the Scarlett Solo?
Air Mode adds brightness and clarity to vocals and instruments. It mimics the sound of Focusrite’s classic ISA mic preamps and can be turned on/off via the Focusrite Control software.
Can I use regular headphones with the Scarlett Solo?
Yes! Most headphones will work fine with the Scarlett Solo. There’s no need to match impedance values.
What does Direct Monitor mean?
Direct Monitoring lets you hear your input signal (like vocals or instruments) in real time with almost no latency, by routing the sound directly to your headphones or speakers before it hits your computer.
What size jack do most microphones use?
Most microphones use a 3.5 mm or XLR connector, but for simple setups, the 3.5 mm jack is a common standard.
- Автор темы
-
#1
artscripts добавил(а) новый ресурс:
FOCUSRITE Scarlett Solo 3rd Gen руководство — В настоящем руководстве пользователя приводится подробное описание аппаратуры
Посмотреть вложение 2860
Благодарим за приобретение данного аудиоинтерфейса Scarlett Solo третьего поколения, который представляет семейство профессиональных компьютерных аудиоинтерфейсов Focusrite с высококачественными аналоговыми предусилителями Focusrite. Пользователь получает простое компактное решение для передачи высококачественных звуковых сигналов в компьютер и из компьютера, а также возможность загружать новые увлекательные программные…
Узнать больше об этом ресурсе…
Руководство пользователя
Версия 1.0
www.focusrite.com

СОДЕРЖАНИЕ
СОДЕРЖАНИЕ ………………………………………………………..2
ОБЗОР ………………………………………………………………3
Введение ………………………………………………………….3
Особенности ……………………………………………………….4
Комплект поставки…………………………………………………..4
Требования к системе ………………………………………………..4
НАЧАЛО РАБОТЫ ……………………………………………………..5
Средство быстрого запуска…………………………………………….5
Только для пользователей Mac……………………………………………5
Только для пользователей ОС Windows……………………………………..7
Для всех пользователей ………………………………………………..9
Ручная регистрация ……………………………………………………9
Настройка аудиоканала в приложении DAW ………………………………10
Примеры применения ……………………………………………….12
Подключение микрофона или инструмента …………………………………12
Запись с использованием микрофона……………………………………..13
Использование функции прямого мониторинга………………………………15
Мониторинг с помощью наушников……………………………………….15
Подключение Scarlett Solo к громкоговорителям …………………………….16
АППАРАТНЫЕ СРЕДСТВА ………………………………………………18
Передняя панель …………………………………………………..18
Задняя панель …………………………………………………….19
ТЕХНИЧЕСКИЕ ХАРАКТЕРИСТИКИ ……………………………………….20
Эксплуатационные характеристики …………………………………….20
Физические и электрические характеристики …………………………….21
Технические характеристики микрофона Scarlett CM25 MkIII………………….22
Технические характеристики наушников HP60 MkIII ………………………..23
ПОИСК И УСТРАНЕНИЕ НЕИСПРАВНОСТЕЙ ………………………………..24
УВЕДОМЛЕНИЕ ОБ АВТОРСКОМ ПРАВЕ И ПРАВОВАЯ ИНФОРМАЦИЯ…………….24
2

ОБЗОР
Введение
Благодарим за приобретение аудиоинтерфейса Scarlett Solo Studio третьего поколения, который
представляет серию профессиональных аудиоинтерфейсов Focusrite с высококачественными
аналоговыми предусилителями Focusrite. Это простое и компактное готовое решение для
записи звука с использованием микрофона или непосредственно с музыкальных инструментов
за счет обмена высококачественными аудиосигналами с компьютером.
При разработке интерфейсов Scarlett третьего поколения мы внесли дополнительные
улучшения как в характеристики, так и в функции, чтобы вы могли получить максимум от
своих записей. Благодаря улучшению параметров звукового тракта устройства в целом
удалось расширить динамический диапазон и еще больше уменьшить искажения и уровень
шума, а микрофонный предусилитель теперь позволяет подавать на входы сигналы более
высокого уровня. Важным элементом модернизации является добавление функции Focusrite
AIR. Функция AIR, включаемая для каждого канала в отдельности, незначительно изменяет
частотную характеристику предусилителя, имитируя акустические характеристики наших
традиционных трансформаторных микрофонных предусилителей ISA. При этом во время записи
с использованием высококачественных микрофонов отмечается повышение чистоты и четкости
звука в значимом диапазоне средних и высоких частот именно тогда, когда это необходимо для
передачи звука вокала и многих акустических музыкальных инструментов.
Также можно напрямую подключить гитару или бас-гитару к специальному входу для инструмента:
его широкий диапазон позволяет записать сигнал без искажений или ограничения. Оба входа
Solo имеют кольцевые индикаторы усиления, с помощью которых можно легко настроить уровни
входных сигналов. Теперь устройство Solo имеет симметричные выходы, при подключении
которых к мониторам или усилителю с симметричными входами звуковой сигнал будет защищен
от любых шумов и помех.
Аудиоинтерфейсы Scarlett третьего поколения аппаратно совместимы с операционной системой
macOS, то есть они являются автоматически подключаемыми, и пользователям компьютеров
Mac не нужно устанавливать специальный драйвер.
В настоящем руководстве пользователя приводится подробное описание аппаратуры,
помогающее получить полное представление об особенностях эксплуатации изделия. Мы
рекомендуем внимательно изучить данное руководство как тем пользователям, которые только
начинают осваивать компьютерную запись, так и более опытным пользователям, чтобы узнать
обо всех возможностях, которые предоставляют Scarlett Solo и сопровождающее программное
обеспечение. Если в разделах этого руководства пользователя нет необходимой информации,
обязательно посетите веб-сайт https://support.focusrite.com/, где содержится обширный список
ответов на типичные запросы в службу технической поддержки.
3

Особенности
В комплект Scarlett Solo Studio входят аудиоинтерфейс Scarlett Solo третьего поколения,
конденсаторный микрофон студийного качества Scarlett CM25 MKIII, наушники эталонного
качества Scarlett HP60 MKIII, а также все программное обеспечение, необходимое для
максимально быстрого начала работы.
Аппаратный интерфейс Scarlett Solo является основным компонентом Scarlett Solo Studio и
обеспечивает подключение микрофона CM25 MkIII (или другого), музыкальных инструментов и
каналов аудиосигналов линейного уровня к компьютеру, работающему под управлением Mac OS
или Windows. Сигналы, подаваемые на физические входы устройства Solo, могут быть направлены
через USB-соединение в программное обеспечение записи с разрешающей способностью
до 24 разрядов и частотой дискретизации до 192 кГц. Точно так же осуществляется передача
сигналов монитора программного обеспечения записи или записанных выходных сигналов
на физические выходы устройства Solo. (Примечание: программное обеспечение аудиозаписи
обычно называют «цифровой звуковой рабочей станцией» или «DAW» (сокр. от «Digital Audio
Workstation»), поэтому далее в настоящем руководстве пользователя будет использоваться
термин «DAW».) Выходы Solo допускается подключать к наушникам HP60 MkIII или, по желанию,
к усилителям и громкоговорителям, мониторам с автономным питанием, аналоговому микшеру
и любой другой аналоговой аудиоаппаратуре, которую требуется использовать.
Это дает возможность записывать «реальные» инструменты в Ableton Live Lite, Pro Tools | First
(или с использованием любой другой DAW) вместе с любыми «собственными» звуками, уже
доступными в компьютере, либо вместо этих звуков. Благодаря функции прямого мониторинга
Solo пользователь может прослушивать воспроизводимый звук в реальном времени без какоголибо влияния компьютерной задержки.
Комплект поставки
В комплект поставки Scarlett Solo Studio входят:
• аудиоинтерфейс Scarlett Solo (3-го поколения);
• конденсаторный микрофон Scarlett CM25 MkIII и зажим для микрофона;
• наушники Scarlett HP60 MkIII;
• микрофонный кабель Red XLR (3 м);
• USB-кабель «тип A – тип C»;
• руководство по началу работы (отпечатано с внутренней стороны крышки коробки);
• важная информация по технике безопасности.
Требования к системе
Простейшим способом проверки совместимости операционной системы (ОС) компьютера
с устройством Scarlett Solo является использование сетевого сервиса OS Checker на вебсайте https://customer.focusrite.com/downloads/os. По мере появления с течением времени
новых версий ОС следует обращаться в наш справочный центр (Help Centre) по адресу
https://support.focusrite.com/hc/en-gb, где можно найти актуальную информацию о
совместимости.
4

НАЧАЛО РАБОТЫ
С третьим поколением интерфейсов Scarlett представлен новый более быстрый способ начала
работы с использованием средства быстрого запуска Scarlett. Требуется лишь подключить
устройство Scarlett Solo к своему компьютеру. После подключения устройство опознается ПК или
компьютером Mac, после чего средство быстрого запуска помогает пройти все этапы процесса.
ВАЖНАЯ ИНФОРМАЦИЯ! Устройство Scarlett Solo имеет один порт USB 2.0 типа C (на
задней панели): его подключают к компьютеру с помощью USB-кабеля из комплекта
поставки. Учтите, что Scarlett Solo является устройством с интерфейсом USB 2.0,
поэтому для установления USB-соединения требуется наличие на компьютере порта с
поддержкой стандарта USB 2.0+.
Scarlett Solo получает питание от компьютера через USB-соединение, поэтому
необходимости в отдельном источнике питания нет. Однако при использовании
устройства с ноутбуком рекомендуется, чтобы ноутбук был подключен к сети питания
с помощью адаптера переменного тока, так как в противном случае, при автономном
питании ноутбука, аккумуляторная батарея будет разряжаться быстрее.
Первоначально компьютер распознает Scarlett как запоминающее устройство (ЗУ), и при первом
подключении Scarlett переводится в режим ЗУ (MSD Mode).
Средство быстрого запуска
Мы постарались максимально упростить процесс регистрации Scarlett Solo. Данный процесс
должен быть понятен без разъяснений, однако ниже мы рассмотрели все шаги, чтобы показать,
как это происходит на ПК и компьютерах Mac.
Только для пользователей Mac
При подключении устройства Scarlett Solo к компьютеру Mac на рабочем столе появляется
значок Scarlett.
5
Дважды щелкните этот значок, чтобы открыть окно Finder, которое показано ниже.
Дважды щелкните значок «Click Here to Get Started.url» (Щелкните для начала работы). Это
приведет к переходу на веб-сайт Focusrite, где мы рекомендуем зарегистрировать устройство.
Щелкните «Let’s get you started» (Начать регистрацию). В результате откроется форма,
которая будет частично заполнена автоматически. При отправке формы будут предложены два
варианта действий: перейти непосредственно в раздел загрузки, чтобы загрузить программное
обеспечение для устройства Scarlett, или шаг за шагом выполнить указания по настройке исходя
из собственных предпочтений. После установки программного обеспечения Focusrite Control
для выполнения настройки и задания конфигурации интерфейса устройство Scarlett выйдет из
режима ЗУ и больше не будет распознаваться как запоминающее устройство при подключении
к компьютеру.
ОС компьютера должна автоматически переключить заданные по умолчанию аудиовходы
и аудиовыходы компьютера на устройство Scarlett Solo. Чтобы подтвердить это, перейдите в
раздел System Preferences > Sound (Параметры системы > Звук) и убедитесь, что входы
и выходы настроены на Scarlett Solo. Чтобы получить более подробную информацию о
вариантах настройки на компьютере Mac, откройте Applications > Utilities > Audio MIDI
Setup (Приложения > Утилиты > Настройка Audio MIDI).
6
Только для пользователей ОС Windows
При подключении устройства Scarlett Solo к ПК на рабочем столе появляется значок Scarlett.
(Учтите, что в зависимости от других устройств, подключенных к ПК, буква диска может
отличаться от D:.)
Дважды щелкните всплывающее сообщение, чтобы открыть диалоговое окно, которое показано
ниже.
Дважды щелкните «Open folder to view files» (Открыть папку для просмотра файлов). В результате
откроется окно Проводника.
7

Дважды щелкните «Click Here to Get Started» (Щелкните для начала работы). Это приведет к
переходу на веб-сайт Focusrite, где мы рекомендуем зарегистрировать устройство.
Щелкните «Let’s get you started» (Начать регистрацию). В результате откроется форма,
которая будет частично заполнена автоматически. При отправке формы будут предложены два
варианта действий: перейти непосредственно в раздел загрузки, чтобы загрузить программное
обеспечение для устройства Scarlett, или шаг за шагом выполнить указания по настройке исходя
из собственных предпочтений. После установки программного обеспечения Focusrite Control
для выполнения настройки и задания конфигурации интерфейса устройство Scarlett выйдет из
режима ЗУ и больше не будет распознаваться как запоминающее устройство при подключении
к компьютеру.
ОС компьютера должна автоматически переключить заданные по умолчанию аудиовходы и
аудиовыходы компьютера на устройство Scarlett Solo. Чтобы подтвердить это, щелкните правой
кнопкой мыши значок Sound (Звук) на панели задач, выберите Sound Settings (Настройки
звука) и убедитесь, что устройство Scarlett установлено в качества устройства ввода/вывода.
8
Loading…
ManualsPro
Focusrite
Focusrite Scarlett Solo 3rd Gen USB Audio Interface User Guide
- June 15, 2024
- Focusrite
Table of Contents
- Focusrite Scarlett Solo 3rd Gen USB Audio Interface
- OVERVIEW
- Features
- HARDWARE FEATURES
- SPECIFICATIONS
- TROUBLESHOOTING
- References
- Read User Manual Online (PDF format)
- Download This Manual (PDF format)
Focusrite Scarlett Solo 3rd Gen USB Audio Interface
focusrite.com
OVERVIEW
Introduction
- Thank you for purchasing this Third Generation Scarlett Solo, one of the family of Focusrite professional computer audio interfaces incorporating high quality Focusrite analogue preamps. You now have a simple and compact solution for routing high quality audio to and from your computer and you will also be able to download some exciting new software plug-ins once you’ve registered the product.
- In developing the Third Generation series of Scarlett interfaces, we have made further improvements to both performance and features to allow you to get the best out of your recordings. Audio specifications have been upgraded throughout the unit to give you greater dynamic range and even lower noise and distortion; additionally, the mic preamp now accepts higher input levels. An important enhancement is the inclusion of Focusrite’s AIR function. Individually selectable on each channel, AIR subtly modifies the preamp’s frequency response to model the sonic characteristics of our classic transformer-based ISA microphone preamps. When recording with good quality microphones, you will notice an enhanced clarity and definition in the important mid to high frequency range, just where it is most needed for vocals and many acoustic instruments.
- You can also plug a guitar or bass straight into the dedicated instrument input : its high headroom will let you record without distortion or clipping. Both of Solo’s inputs have Gain Halo meters, which makes it easy to set input levels. Solo now has balanced outputs, which means when you connect them to monitors or an amplifier with balanced inputs, your audio will be protected from any hum or interference.
- Third Generation Scarlett interfaces are class compliant on macOS : this means they are plug-and-play, so no need to install a driver if you are a Mac user.
- This User Guide provides a detailed explanation of the hardware to help you achieve a thorough understanding of the product’s operational features. We recommend both users who are new to computer-based recording, as well as more experienced users, take the time to read through the User Guide so you are fully aware of all the possibilities the Scarlett Solo and accompanying software have to offer. If the main User Guide sections do not provide the information you need, be sure to consult support.focusrite.com, which contains a comprehensive collection of common technical support queries.
Features
- The Scarlett Solo hardware interface provides the means for connecting a microphone and an instrument or line level audio signal to a computer running Mac OS or Windows. The signals at the physical inputs can be routed to your audio recording software / digital audio workstation (referred to throughout this user guide as the “DAW”) at up to 24-bit, 192 kHz resolution; similarly, the DAW’s monitor or recorded output will appear at the unit’s physical outputs.
- This lets you record “real-world” instruments into Ableton Live Lite, Pro Tools | First (or whichever other DAW you may use) along with – or instead of – any “native” sounds already available within your computer. The physical outputs can be connected to an amplifier and speakers, powered monitors, headphones or any other audio equipment with analogue inputs you wish to use. Solo’s Direct Monitoring feature lets you hear what you are playing in “real-time”, without the effects of computer latency.
Box Contents
- Along with your Scarlett Solo you should have:
- USB cable, Type ‘A’ to Type ‘C’
- Getting Started Information (printed inside the box lid)
- Important Safety Information
System Requirements
-
The easiest way to check your computer’s operating system (OS) is compatible with your Scarlett is to use our Help Centre’s compatibility articles:
support.focusrite.com/hc/categories/200693655 -
As new OS versions become available over time, you can continue to check for further compatibility information by searching our Help Centre at support.focusrite.com.
GETTING STARTED
- With the Third Generation, Scarlett interfaces introduce a new, faster way of getting up and running, using the Scarlett Quick Start tool. All you need to do is connect your Scarlett Solo to your computer. Once connected, you will see the device is recognized by your PC or Mac and the Quick Start tool will guide you through the process from there.
- IMPORTANT:
- The Scarlett Solo has a single USB 2.0 Type C port (on the rear panel): connect it to your computer using the USB cable provided. Note that Scarlett Solo is a USB 2.0 device, and thus the USB connection requires a USB 2.0+ compliant port on your computer.
- The Scarlett Solo does not need a separate power supply; It gets its power from your computer via the USB connection. However, we recommend when using a laptop, the laptop is powered using its AC adaptor, as otherwise the battery will drain faster than when powering from the laptop alone.
Your computer will initially treat your Scarlett as a Mass Storage Device
(MSD), and during its first connection, the Scarlett will be in “Easy Start
mode”.
-
Quick Start Tool
We have tried to make registering your Scarlett Solo as simple as possible.
The procedure is designed to be self explanatory, but we have described each
step below, so you can see how they should appear on either a PC or a Mac. -
Mac users only
On connecting your Scarlett Solo to your Mac, a Scarlett icon will appear on
the desktop -
Double-click on the icon to open the Finder window shown below

- Double-click on the “Click Here to Get Started.url” icon. This will redirect you to the Focusrite website, where we recommend you register your device:

- Click on “Let’s get you started”, and you’ll see a form which will be partly prefilled for you automatically. When you submit the form, you’ll see options to go straight to the downloads to get the software for your Scarlett, or to follow a step by step setup guide based on how you want to use your Scarlett.
- Once you have installed the Focusrite Control software to set up and configure your interface, the Scarlett will be switched out of Easy Start mode so it no longer appears as a Mass
- Storage Device when connected to your computer.
- Your OS should switch the computer’s default audio inputs and outputs to the Scarlett. To verify this, go to System Preferences > Sound, and ensure the input and output are set to Scarlett Solo.
- For detailed setup options on a Mac, open Applications > Utilities > Audio MIDI Setup.

Windows users only
On connecting your Scarlett Solo to your PC, a Scarlett icon will appear on
the desktop

(Note that the drive letter may be something other than D:, depending on
other devices connected to your PC.)
All users
Note that a second file – “More Info & FAQs” – is also available during
the initial set-up process. This file contains some additional information
about the Focusrite Quick Start tool which you may find helpful if you have
any issues with the procedure.
Once registered, you will have immediate access to the following
resources
- Focusrite Control (Mac and Windows versions available) – see NOTE below
- Multi-language User Guides
You can find the licence codes and links for the optional bundled software in
your Focusrite account. To find out what bundled software is included with
Scarlett 3rd generation, please visit our website:
focusrite.com/scarlett
-
NOTE: Installing Focusrite Control will also install the correct driver for your device. Focusrite Control is available to download at any time, even without registering: see “Manual Registration” below.
-
Manual Registration
If you decide to register your Scarlet at a later date you can do so at:
customer.focusrite.com/register -
You will need to enter the Serial Number manually: this number can be found on the base of the interface itself, and also on the barcode label on the side of the box.
-
We recommend you download and install our Focusrite Control application, as this will disable Easy Start mode and unlock the full potential of the interface. Initially, when in Easy
-
Start mode, the interface will function at sample rates up to 48 kHz. Once Focusrite Control is installed on your computer, you can work at sample rates up to 192 kHz.
-
If you decide not to download and install Focusrite Control immediately, it can be downloaded at any time from: customer.focusrite.com/support/downloads
-
To force your Scarlett out of Easy Start mode without first registering it, connect it to your computer and press and hold the 48V button for five seconds. This will ensure your
-
Scarlett has full functionality. Please bear in mind that should you wish to register your Scarlett after taking this action, you will need to so manually, as explained above.
Audio Setup in your DAW
- The Scarlett Solo is compatible with any Windows-based DAW that supports ASIO or WDM or any Mac-based DAW that uses Core Audio. After following the Getting Started procedure described above, you can start using your Scarlett Solo with the DAW of your choice.
- To allow you to get started if you do not already have a DAW application installed on your computer, both Pro Tools | First and Ableton Live Lite are included; these will be available to you once you’ve registered your Scarlett Solo. If you need help installing either DAW, please visit our Getting Started pages at focusrite.com/get-started, where Getting
- Started videos are available.
- Operating instructions for Pro Tools | First and Ableton Live Lite are beyond the scope of this User Guide, but both applications include a full set of Help files. Instructions are also available at avid.com and ableton.com respectively.
- Please note – your DAW may not automatically select the Scarlett Solo as its default I/O device.
- You must manually select Focusrite USB ASIO as the driver on your DAW’s Audio Setup* page. Please refer to your DAW’s documentation (or Help files) if you are unsure where to select the ASIO or Core Audio driver. The example below shows the correct configuration in the Ableton Live Lite Preferences panel (Windows version shown).
- Once the Scarlett Solo is set as the preferred Audio Device* in your DAW, its inputs and outputs will appear in your DAW’s Audio I/O preferences. Depending on your DAW, you may need to enable certain inputs or outputs before use. The two examples below show two Inputs and two outputs enabled in the Ableton Lite Audio Preferences.
- Examples of use
Scarlett Solo is an ideal audio interface for many DAW applications running on
a laptop or other computer, PC or Mac. A typical set of connections is
illustrated below.

Connecting a microphone/instrument

- This setup shows a typical configuration for recording using DAW software on your Mac or PC. You would record vocals through Input 1 and guitar through Input 2 into your recording application, while monitoring the playback via headphones.
- Scarlett Solo’s inputs are on the front panel: Input 1 uses a standard 3-pin XLR socket, and is configured to work with microphones of most types; you will probably have a male XLR connector on the end of your mic cable.
- If you are using a “studio” condenser microphone designed to operate on 48 volt phantom power, press the 48V button. Some lower spec. condenser microphones are able to operate from a lower phantom power voltage – typically 15 V. You should check the mic spec to see if it is safe to operate it from 48 V; if not, obtain a suitable external phantom power supply. Most modern microphones of other types, e.g., dynamic or ribbon, will not be damaged by the inadvertent application of phantom power, but note some older mics may be; if you have any doubt, please check the specification of your mic to ensure it is safe to use.
- Input 2 uses a ¼” (6.35 mm) jack socket which is 2-pole when in instrument mode and 3-pole when used as a mono line input. It can accept signals from an electric or electroacoustic guitar or bass, a keyboard, and most other types of audio equipment. Set the INST switch ON (‘INST’ illuminates red) if you are connecting a musical instrument, e.g., a guitar in the example, using an ordinary 2-pole (TS) guitar jack. Set the INST switch to OFF if you are connecting a line level source such as a keyboard, synthesiser or the balanced output of an external audio mixer via a 3-pole (TRS) jack. Note the jack socket accepts both TRS and TS types of jack plug.
Using Direct Monitoring
- You will frequently hear the term “latency” used in connection with digital audio systems. In the case of the simple DAW recording application described above, latency will be the time it takes for your input signals to pass through your computer and audio software. Latency can be a problem for a performer who wishes to record while monitoring their input signals.
- The Scarlett Solo is fitted with a “Direct Monitoring” option, which overcomes this problem. Setting the front panel DIRECT MONITOR switch to ON will route your input signals directly to the Scarlett Solo’s headphone and main monitor outputs. This enables you to hear yourself with zero latency – i.e., in “real time” – along with the computer playback.
- Your inputs will be summed to mono, so both mic and instrument will appear in the centre of the stereo image. Note that the input signals to your computer are not affected in any way by the use of Direct Monitor.
- When Direct Monitoring is set to ON, ensure your recording software is not set to route its input (what you are currently recording) to its output. If it is, you will hear yourself “twice”, with one signal audibly delayed as an echo.
- Monitoring with DIRECT MONITOR set to OFF can be useful when using an FX plug-in to your DAW to create a stereo effect which contributes to the live performance. In this way, you will be able to hear exactly what is being recorded, complete with the FX. However, some latency may result, the amount depending on the DAW’s buffer size and processing power of the computer.
Headphone monitoring
- Connect a pair of stereo headphones to the front panel headphone output to hear both what you are recording – your current input signal(s), plus any tracks you’ve already recorded in your computer.
Note: Set the front panel DIRECT MONITOR switch to ON when recording. The
pre-recorded tracks will be heard in stereo, and the current input signals in
mono – central in the stereo image. If you are using both the mic and
instrument inputs, the two inputs will be summed in mono.
Connecting Scarlett Solo to loudspeakers
- You can use the ¼” jack outputs on the rear panel to connect monitor speakers. Active monitors have internal amplifiers with a volume control, and can be connected directly. Passive loudspeakers require a separate amplifier; the rear panel outputs should be connected to the amplifier’s inputs.
Connecting passive speakers
- The line outputs are 3-pole (TRS) ¼” (6.35 mm) jack sockets, and are electronically balanced. Typical consumer (Hi-Fi) amplifiers and small powered monitors will have unbalanced inputs, either on phono (RCA) sockets, or via a 3.5 mm 3-pole jack plug intended for direct connection to a computer. In either case, use a suitable connecting cable with jack plugs at one end.
- Professional power amplifiers will general have balanced inputs; we highly recommend using balanced cables to connect these to the outputs of the Scarlett Solo.
- NOTE: You run the risk of creating an audio feedback loop if loudspeakers are active at the same time as a microphone! We recommend you always turn off (or turn down) monitoring loudspeakers while recording, and use headphones when overdubbing.
HARDWARE FEATURES
Front Panel

The front panel includes the input connectors for mic and line/instrument
signals, and the input gain and monitoring controls.
- Input 1 – electronically balanced input via 3-pin XLR socket for microphones.
- GAIN 1 – adjust the gain for the microphone signal at Input 1. The gain controls have tri-colour LED ‘rings’ to confirm signal level: green indicates an input level of at least -24 dBFS (i.e., ‘signal present’), the ring turns amber at -6 dBFS to indicate the signal is close to clipping, and red at 0 dBFS (digital clipping).
- 48V – phantom power switch for mic input – enables 48 V phantom power at the XLR socket.
- Input 2 – ¼” TRS jack socket to connect both instruments (unbalanced TS jack) or mono line level (balanced) sources.
- GAIN 2 – adjusts the gain for the line/instrument signal at Input 2. The gain control has a tri-colour LED ring as [2].
- INST/LINE – Instrument/Line level switch for Input 2 – switches gain to suit instrument or line level signals. ‘INST’ illuminates red when Instrument mode is selected. Note hat INST mode may also be selected from Focusrite Control.
- AIR – switch enabling AIR mode for the mic input. AIR modifies the frequency response of the input stage to model the classic, transformer-based Focusrite ISA microphone preamps. ‘AIR’ illuminates yellow when the mode is selected. Note that AIR may also be selected from Focusrite Control.
- MONITOR – main monitor output level control – sets the output level at the rear panel outputs and the front panel headphone output.
- USB LED – a green LED illuminates when the Scarlett is connected and recognized by your computer.
- DIRECT MONITOR – selects monitoring of input signals (mixed with the DAW output) to be directly from inputs (ON) or via the DAW (OFF).
- ¼” TRS output jack. If your headphones have a ¼” TRS jack plug, connect them directly; if they have a 3.5 mm TRS “mini jack”, use a TRS ¼”-to-3.5 mm jack adaptor.
Note that it is if they have a 3.5 mm TRS “mini jack”, use a TRS ¼”-to-3.5 mm
jack adaptor. Note that it is likely headphones fitted with 4-pole TRRS plugs
will not operate correctly.
Back Panel

- K (Kensington security lock) – secure your Scarlett Solo to a suitable structure if desired.
- USB 2.0 port – Type C connector; connect the Scarlett Solo to your computer with the cable supplied.
- LINE OUTPUT S: LEFT and RIGHT – 2 x ¼” (6.35 mm) TRS jack sockets; +10 dBu output level (variable), electronically balanced. Either ¼” TRS (balanced connection) or TS (unbalanced connection) jack plugs can be used.
SPECIFICATIONS
Performance Specifications
- All performance figures measured in accordance with the provisions of AES17, as applicable.
| Supported sample rates | 44.1 kHz, 48 kHz, 88.2 kHz, 96 kHz, 176.4 kHz, 192 kHz |
|---|
Microphone Input
Dynamic Range| 111 dB (A-weighted)
Frequency Response| 20 Hz to 20 kHz ±0.1 dB
THD+N| <0.0012% (minimum gain, -1 dBFS input with 22 Hz/22 kHz bandpass
filter)
Noise EIN| -128 dB (A-weighted)
Maximum Input Level| +9 dBu
Gain Range| 56 dB
Input impedance| 3 kΩ
Line Input
Dynamic Range| 110.5 dB (A-weighted)
Frequency Response| 20 Hz to 20 kHz ±0.1 dB
THD+N| <0.002% (minimum gain, -1 dBFS input with 22 Hz/22 kHz bandpass filter)
Maximum Input Level| +22 dBu at minimum gain
Gain Range| 56 dB
Input impedance| 60 kΩ
Instrument Input
Dynamic Range| 110 dB (A-weighted)
Frequency Response| 20 Hz to 20 kHz ±0.1 dB
THD+N| <0.03% (minimum gain, -1 dBFS input with 22 Hz/22 kHz bandpass filter)
Maximum Input Level| +12.5 dBu at minimum gain
Gain Range| 56 dB
Input impedance| 1.5 MΩ
Line Outputs
Dynamic Range| 108.5 dB (A-weighted)
Maximum Output Level (0 dBFS)| +15.5 dBu at minimum gain; balanced outputs
THD+N| <0.002% (maximum level, -1 dBFS input with 22 Hz/22 kHz bandpass
filter)
Output impedance| 430 Ω
Headphone Output
Dynamic Range| 104 dB (A-weighted)
Maximum Output Level| +7 dBu
THD+N| <0.002% (maximum level, -1 dBs input with 22 Hz/22 kHz bandpass filter)
Output impedance| <1 Ω
Physical and Electrical Characteristics
Analogue Input 1
Connector| Balanced, via female 3-pin XLR on front panel
Phantom power| 48 V phantom power switch
AIR function| Front panel switch or via Focusrite Control
Analogue Input 2
Connector| ¼” (6.35 mm) jack socket on front panel INST mode: unbalanced,
2-pole (TS) LINE mode: balanced (TRS)
Line/Instrument switching| Front panel switch or via Focusrite Control
Analogue Outputs
Main outputs| Balanced, 2 x ¼” TRS jacks on rear panel
Stereo headphone output| ¼” TRS jack on front panel
Output level control (Main and headphone)| On front panel
Direct Monitoring| Front panel switch; allows zero-latency monitoring of
inputs
Other I/O
USB| 1 x USB 2.0 Type C connector
Front Panel Indicators
USB power| Green LED
Gain Halos| Tri-colour LED rings ( with GAIN controls)
Phantom power| Red LED
Instrument mode| Red LED
AIR mode| Amber LED
Direct Monitor mode| Green LED
Weight and Dimensions
W x H x D|
- 143.5 mm x 43.5 mm x 95.8 mm
- 5.65 in x 1.71 in x 3.77 in
Weight|
- 320 g
- 0.71 lb
TROUBLESHOOTING
- For all troubleshooting queries, please visit the Focusrite Help Centre at support.focusrite.com.
COPYRIGHT AND LEGAL NOTICES
- Full Terms and Conditions of the Warranty can be found at focusrite.com/warranty.
- Focusrite is a registered trade mark and Scarlett Solo and Scarlett Solo Studio are trade marks of
- Focusrite Audio Engineering Limited.
- All other trade marks and trade names are the property of their respective owners. 2021 © Focusrite Audio Engineering Limited. All rights reserved.
References
- Please log in | Customer Portal
- Focusrite | Focusrite Downloads
- Creative tools for music makers | Ableton
- Avid — Technology and tools that empower media creators
- Scarlett Audio Interfaces | Focusrite
- Get Started | Get Started
- Warranty | Focusrite
Read User Manual Online (PDF format)
Read User Manual Online (PDF format) >>
Download This Manual (PDF format)
Download this manual >>
На чтение2 мин
Опубликовано
Обновлено
Focusrite Scarlett Solo 3rd Gen — это компактный и удобный в использовании аудиоинтерфейс, позволяющий записывать и воспроизводить аудиосигналы высокого качества. Но чтобы начать использовать этот инструмент в своих проектах, необходимо сначала правильно настроить его.
В этой статье мы расскажем о пошаговом процессе настройки Focusrite Scarlett Solo 3rd Gen, который позволит вам запуститься и начать работать с аудиоинтерфейсом в кратчайшие сроки.
Шаг за шагом мы рассмотрим основные этапы настройки кард-ридера — подключение к компьютеру, установку драйверов, выбор нужных настроек и проверку работоспособности аудиоинтерфейса.
Не забудьте, что правильная настройка вашего Focusrite Scarlett Solo 3rd Gen позволит извлечь максимальную пользу из данного устройства и получить высококачественный звук при записи и воспроизведении аудио.
Присоединитесь к нам и давайте начинать!
Подготовка к настройке Focusrite Scarlett Solo 3rd Gen: что вам понадобится
Для успешной настройки Focusrite Scarlett Solo 3rd Gen вам понадобятся следующие компоненты:
- Компьютер или ноутбук с операционной системой Windows или macOS.
- Кабель USB-A/USB-C для подключения аудиоинтерфейса Scarlett Solo к компьютеру.
- Драйверы Focusrite Scarlett Solo 3rd Gen, которые можно загрузить с официального сайта Focusrite.
- Аудио-кабельы для подключения микрофона, гитары или другого звукового оборудования к аудиоинтерфейсу.
- Микрофон или другое звуковое оборудование, которое вы планируете использовать с Focusrite Scarlett Solo 3rd Gen.
Убедитесь, что у вас есть все необходимое оборудование перед началом настройки Focusrite Scarlett Solo 3rd Gen.
Шаг 1: Установка драйверов для Focusrite Scarlett Solo 3rd Gen
Для начала работы с аудиоинтерфейсом Focusrite Scarlett Solo 3rd Gen необходимо установить драйверы на компьютер.
Драйверы можно скачать с официального сайта Focusrite.
Для этого выполните следующие действия:
- Откройте веб-браузер и перейдите на официальный сайт Focusrite.
- Найдите раздел «Поддержка» или «Поддержка/Драйверы».
- Введите название вашей модели аудиоинтерфейса (Scarlett Solo 3rd Gen) и выберите операционную систему вашего компьютера.
- Нажмите на ссылку для скачивания драйверов.
- Сохраните файл драйвера на жесткий диск вашего компьютера.
После завершения загрузки драйвера, запустите его установку, следуя инструкциям на экране.
После установки драйверов компьютер будет готов к работе с Focusrite Scarlett Solo 3rd Gen.
Шаг 2: Подключение Focusrite Scarlett Solo 3rd Gen к компьютеру
Подключите Focusrite Scarlett Solo 3rd Gen к компьютеру, следуя инструкции:
| 1. | Возьмите один конец USB-кабеля, который поставляется в комплекте с Focusrite Scarlett Solo 3rd Gen, и вставьте его в порт USB вашего компьютера. |
|---|---|
| 2. | Возьмите другой конец USB-кабеля и подключите его к порту USB на задней панели Focusrite Scarlett Solo 3rd Gen. |
| 3. | Убедитесь, что кабель надежно подключен и прилегает к разъемам с обеих сторон. |
После подключения Focusrite Scarlett Solo 3rd Gen к компьютеру можно переходить к настройке программного обеспечения и проверке работоспособности аудиоинтерфейса.
Шаг 3: Настройка звука на Focusrite Scarlett Solo 3rd Gen
После успешного подключения Focusrite Scarlett Solo 3rd Gen к компьютеру и установки драйверов вам необходимо настроить звуковые параметры.
Вот пошаговая инструкция, как это сделать:
- Откройте панель управления звуком. Для этого нажмите правой кнопкой мыши на значок звука в системном трее и выберите «Звуковые настройки» или «Панель управления звуком».
- Во вкладке «Воспроизведение» найдите устройство Focusrite Scarlett Solo 3rd Gen и установите его как основное устройство воспроизведения. Выберите его и нажмите кнопку «По умолчанию».
- Перейдите на вкладку «Запись» и установите Focusrite Scarlett Solo 3rd Gen как основное устройство записи. Выберите его и нажмите кнопку «По умолчанию».
- Если вы планируете использовать микрофон или другое внешнее устройство записи, то вам необходимо выбрать его в качестве устройства записи. Для этого нажмите правой кнопкой мыши на нужное устройство и выберите «Сделать устройством записи по умолчанию».
- Проверьте настройки вкладки «Уровни» и установите нужный уровень громкости для воспроизведения и записи. Регулируйте ползунками громкости и нажимайте кнопку «Применить».
Теперь звук на Focusrite Scarlett Solo 3rd Gen должен быть настроен правильно, и вы можете приступить к записи и воспроизведению аудио.