
M
3
M-7 SERIES E TYPE
25
—
1217
207
R
Treadmill User Guides by Other Brands
| Brand | Device Model | Type of Document | Category | Pages | Size | Views | Downloads | Updated |
|---|---|---|---|---|---|---|---|---|
| Colorado time systems |
WaterFit |
Colorado time systems WaterFit Quick start manual |
Colorado time systems Treadmill |
2 | 1407 | 268 | 10-11-2024 | |
| ProForm |
831.29523.4 |
ProForm 831.29523.4 Operation & user’s manual |
ProForm Treadmill |
22 | 481 | 77 | 23-02-2025 | |
| Precor |
9.21 |
Precor 9.21 Owner’s manual |
Precor Treadmill |
44 | 887 | 142 | 01-02-2025 | |
| NordicTrack |
NTL15992.0 |
NordicTrack NTL15992.0 Operation & user’s manual |
NordicTrack Treadmill |
32 | 1209 | 303 | 04-04-2025 | |
| Weslo |
ENERGETICS TM1.5 |
Weslo ENERGETICS TM1.5 Operation & user’s manual |
Weslo Treadmill |
10 | 776 | 187 | 24-01-2025 |
Always be in the know. Access the essentials for deeper insights into the M7.
From equipment-specific manuals, brochures, and videos discover more to maximize your facility below.
Documents

M7 Sales Sheet 2025
This document provides information on the features and specifications of the M7 treadmill.

M7 Sales Sheet
This document provides information on the features and specifications of the M7 treadmill.
M7 Owners Manual (Quick Shift)
This document provides information on the M7 machine with quick shift capabilities.
M7 Owners Manual (No Quick Shift)
This document provides information on the M7 machine.
M7 Service Manual (E PLUS)
This document provides information on the M7 technology.
M7 Service Manual (LED)
This document provides information on the M7 technology.
Videos

Circle Fitness Entertainment Plus 2.0 Platform
This video introduces the E Plus 2.0 platform.
Additional Support
Still Looking For More?
- June 12, 2024
- circle FITNESS
Table of Contents
- Safety Instructions
- SAFETY INFORMATION
- Assembly
- Exploded Drawing
- Instruction
- Maintenance Chart
- Computer Instructions
- OPERATION PROCEDURE
- OPERATION
- Trouble shooting
- Read User Manual Online (PDF format)
- Download This Manual (PDF format)
circle FITNESS Sp8 Indoor Cycle Owner’s Manual

ATTENTION:
Read instructions carefully, failure to do so may cause permanent damage to
your bike.
Please verify that all parts associated with this product are in good
condition and accounted for.
During the assembly process please be sure to follow each step accordingly as
it has been explained within the manual.
Safety Instructions
- Consult your physician before starting with any exercise program to receive advice on the optimal training.
- Warning: incorrect/ excessive training can cause health injuries. Stop using the bike when feeling uncomfortable.
- Please follow the advice for correct training as detailed in the training instructions.
- Ensure that training only starts after correct assembly, adjustment and inspection of the bike.
- Always start with a warm-up session.
- Only use original parts as delivered.
- Follow the steps of the assembly instruction carefully.
- Only use suitable tools for assembly and ask for assistance if necessary.
- Place the bike on an even, non-slippery surface.
- For all adjustable parts be aware of the maximum position to which they can be adjusted.
- Tighten all adjustable parts to prevent sudden movement while training.
- This product is designed for adult. Please ensure that children only use it under supervision of an adult.
- Ensure that those present are aware of possible hazards, e.g. movable parts during training.
- The resistance level can be adjusted to your personal preference.
- Do not use the bike without shoes or loose shoes.
- Ensure that sufficient space is available to use the bike.
- Be aware of non-fixed or moving parts whilst mounting or dismounting the bike.
- To protect the floor or carpet from damage, place a mat under the exercise bike.
- In case of emergency please place both feet at the same time on the side reins.
- Ensure that an area of 2000 x 1000 mm behind the exercise bike is free from any obstacles.
- This product is tested up to a maximum body weight of 150 kilograms.
- We take no responsibility for personal injury or damage sustained by or through the use of this exercise bike.
SAFETY INFORMATION
- Keep children and pets away from this equipment at all times. DO NOT leave them unsupervised in the room where the machine is kept.
- If you experience dizziness, nausea, chest pains or any other symptom while using this machine STOP the exercise. SEEK IMMEDIATE MEDICAL ATTENTION!
- Keep your hands away from any of the joints and moving parts.
- Wear clothing suitable for doing exercise. Do not wear baggy clothing that might get caught in the machine. Always wear athletic shoes when using the machine and tie the laces securely.
- This machine must only be used for the purposes described in this manual. DO NOT use accessories that are not recommended.
- Do not place sharp objects near the machine.
- Any person with physical or coordination limitations should not use the machine without the assistance of a qualified per son or doctor.
- Do not use the machine if it is not working correctly.
- Before using the machine, thoroughly inspect the equipment for proper assembly.
- Use only authorized and trained technicians if a repair is needed.
- Use only the tools provided to assemble this machine.
- This machine can only be used by one person at a time.
- The moving pedals can cause injury.
Caution: Consult your doctor before beginning to use the machine or any
exercise program. Read all of the instructions before using any exercise
equipment. KEEP THESE INSTRUCTIONS SAFE FOR FUTURE USE.
CAUTION: During assembly it is recommended that all bolts be tightened by
hand, upon completing assembly, bolts should then be properly secured using
the wrench provided. To avoid injury, check bolts carefully before use.
Assembly
Step one
Attach the front foot tube (18) first by lifting up the front of the frame
and sliding the front foot tub under the frame. Align the holes of the tube
and frame then insert bolt (10) from below. Secure the bolt with washer
(9) and nut (b8) use the wrench. Use the same procedure to secure the
rear foot tube (14)

Step two
Attach the handlebar post (22) by inserting it into the head tube of the
frame. Use the release lever (6) to adjust and tighten the height to the
desired position. Attach the handlebar slider (23) on the handlebar post (22),
use release lever (17) to adjust and tighten the handlebar into position.
Install the clamp (67) on the handlebar and insert the console (64) to the
clamp (67), then connect the cable (65) to the back of the console (64) and
make sure the other side of the console cable (65) is connected securely to
the cable coming from the frame. After the cable is connected, put cable
connectors into frame hole then plug cable stopper (69) to frame.

Step three
Insert the seat post (43) into the seat tube on the frame. Attach the saddle
(1) into seat slider (42). Then tighten seat clamp’s nut. Insert the seat
slider (42) into the seat post (43) and fix. Loose the release lever (6) to
adjust the height and distance in the desired position, and tighten it finally

Step four
Attach the pedals (11) into the crank arms (20)(21), each pedal is marked with
L (left) or R (right), make sure it’s assembled on the correct side. (R: means
rider’s right side). Be careful to align the threads correctly to avoid
damaging them. Applying a little grease on the threads will help the pedals to
screw in easily and correctly, tighten using a 15mm spanner; both pedals
should tighten towards the front of the spinning bike.

Right Pedal
Please make sure pedal in your hand is the right pedal before Installation.
Please refer to the figure. Align the right pedal with right crank at 90
degree. Gently insert the pedal in the crank arm. Turn the pedals clockwise as
tightly as you can with your hand. Use the wrench to ensure it is tightened
securely. **Please always tighten by hand first, then finish by wrench.
**
Left Pedal
Please make sure pedal in your hand is the left pedal before Installation.
Please refer to the figure. Align the left pedal with left crank at 90 degree.
Gently insert the pedal in the crank arm. Turn the pedals counter- lockwise as
tightly as you can with your hand. Use the wrench to ensure it is tightened
securely. Please always tighten by hand first, then finish by wrench.

Remark:
Riding this bike backwards may loosen the pedals which will damage the
threads. Please always check pedals to ensure that the pedals are tightened.
If the pedals have become loose, tighten threads with the wrench to ensure
they are securely attached.
Adjusting the resistance
Adjust the exercise resistance on the spinning bike using the tension knob
(24) to loosen (-) or tighten (+).

Stability
If the floor is not even, you can adjust theheight by foot tube adjuster pad
(13) to make it firmly.

MOVING
There are moving wheel (39) located in rear foot tube (14) for easy to moving
the machine.

Exploded Drawing

| No. | Name | Unit | No. | Name | Unit |
|---|---|---|---|---|---|
| 1 | Saddle | PC | 35 | Flywheel axle | __ SET |
| 2 | Alloy bind clamp ( L ) | PC | 36 | Fixed wheel nut | |
| 3 | Spring for release lever | PC | 37 | Flywheel bearing | |
| 4 | Alloy bind clamp ( R ) | PR | 15,15-115-2 | Flywheel security washer & nut | |
| 5 | Washer for release lever | PC | 63 | Rubber cover for flywheel | |
| 6 | Release lever | PC | 38 | Axle bolt for moving wheel | PC |
| 7 | Crank bolt | PC | 39 | Moving wheel | PC |
| 8 | Foot tube nut | PC | 40 | Plastic washer for release lever | PC |
| 9 | Foot tube washer | PC | 41 | Fixed bolt for release lever | PC |
| 10 | Foot fixing bolt | PC | 42,29 | Seat slider w/ end plug | PC |
| 11 | Pedal | PR | 43 | Seat post | PC |
| 12 | Front / Rear foot tube end cap | PC | 44 | Washer for release lever | PC |
| 13 | Foot tube adjuster pad | PC | 45 | Belt | PC |
| 14 | Rear foot tube Complete | PC | 47 | Outer chain guard bolt M5 | PC |
| 16 | Flywheel adjuster bolt | PC | 48 | Bolt for protection tube | PC |
| 17 | Handle bar release lever w/washer | PC | 49 | Flywheel (complete) | SET |
| 18 | Front foot tube Complete | PC | 50 | Rubber sleeves | PC |
| 19 | Right belt guard | PC | 51 | Fixed bolt for tension knob casing | PC |
| 20 | Left crank arm | PC | 52 | Idler w/bearing, clip | SET |
| 21 | Right crank arm | PC | 53 | Rubber sealed | PC |
| 22 | Handle bar post | PC | 54 | Handle for tension knob | PC |
| 23 | Handle bar w/slider | PC | 55 | Casing for tension knob | PC |
| 24 | Tension knob set (complete) | SET | 56 | Bolt for tension knob handle | PC |
| 25 | End cap for handlebar post | PC | 58 | Flywheel protection tube | PC |
| 27 | Adjuster cable guide | PC | 61 | Belt pulley with screw, magnet | PC |
| 28 | Brake pad | PC | 63 | Rubber cover for flywheel | PC |
| 29 | End plug for seat slider | PC | 64 | Console complete set | SET |
| 30 | C Rubber sealed | PC | 65 | Upper cable | PC |
| 31 | Left belt guard | PC | 66 | Sensor cable | PC |
| 32 | Washer for protection tube | PC | 67 | Clamp for console | PC |
| 33 | BB bearing | PC | 68 | Rubber eyelet | PC |
| 34 | BB Axle with plate | PC | 69 | Cable plug | PC |
| 36 | Flywheel security nut | PC | G01 | Magnetic brake set, brake pad | SET |
Instruction
It is important that the handlebar and seat are set at the correct height
for your body. Ask your instructor for assistance.
Handlebar adjustment – Adjusting the handlebar height-Undo the adjuster
release lever that is located at head tube (where the handlebar post fits into
the frame). Slide the handlebar post up or down to the required height and
retighten the adjuster release lever. Make sure it is securely tightened and
that there is no lateral or vertical movement of the handlebar. The handlebar
position can also be adjusted forwards or backwards. Undo the release lever
located below the handlebar slider. Slide the handlebar assembly forwards and
backwards until you reach the required position. Then securely re-tighten the
release lever. Pay attention on ”MIN INSERT” mark for safety adjustment.
Seat adjustment – Undo the adjuster release lever located at seat tube
(where the seat post fits into the frame). Adjust the seat to the required
height. Then retighten the adjuster release lever. The seat position can be
adjusted forwards and backwards. Undo the adjuster release lever located
directly side of the seat slider. Loosen the adjuster release lever then slide
the seat to the required position. Then make sure the adjuster release lever
retighten.
Pay attention on ” MIN INSERT” mark for safety adjustment.
Saddle:
Make sure tighten enough for both side of nut after adjust the saddle
position. To prevent the saddle from twisting side to side.

Emergency Brake:
Pushing the RED lever (54) of the Tension knob (24) forward completely for
emergency brake.

Maintenance Chart
※ Adjusting the belt tension:
-
Loosen the bolt (47), and take off the belt guard (19, 31).
-
Loosen the nut (36).
-
Turn the nut of the adjuster bolt (16) to adjusting the belt tension. Suggest turn 1/4 circles each time.
Don’t turn too much to causing tension too tight then damage the axle and
bearings.
Please make sure this step be performed on both left & right sides and the
adjustment distance is the same. After adjusted, Make sure flywheel keeps
parallel with frame and in the middle position. -
After finished the above steps, screw the nut (36) by both sides. Make sure the nut is tighten and fixedly.
Computer Instructions
DISPLAY FUNCTION:
| ITEM | DESCRIPTION |
|---|---|
| SCAN |
- In SCAN mode, press MODE/ENTER key to choose functions.
- Automatically scan through each mode in sequence every 6 seconds.. The sequence of display when press MODE/ENTER key: TIME→ DIST→CAL→PULSE/LOAD→RPM/SPEED
SPEED|
- Range 0.0 ~ 99.9
- Without any signal being transmitted into the monitor for 4 seconds during workout, SPEED will display “0.0”
RPM|
- Range 0 ~ 999
- Without any signal being transmitted into the monitor for 4 seconds during workout, RPM will display “0”
TIME|
- Without setting the target value, time will count up.
- When setting the target value, time will count down from your target time to 0 and alarm will sound or flash.. Without any signal being transmitted into the monitor for 4 seconds during workout, time will STOP. Range 0:00 ~ 99:59
DISTANCE|
- Without setting the target value, distance will count up.
- When setting the target value, distance will count down from your target distance to 0 with an alarm sound or flash.. Range 0.00~99.99
CALORIES|
- Without setting the target value, calorie will count up.
- When setting the target value, calories will count down from your target calorie to 0 with an alarm sound or flash.. Range 0~9999
WATT|
- Display power consumption during workout.
- range 0 ~ 999
LOAD|
- isplay the level value when adjust LOAD.
- Range 1~16
**** PULSE|
- Current pulse will display after 6 seconds when detected by the console.
- Without any pulse signal for 6 seconds, console will display “P”.. Pulse alarm will sound when current pulse is over the target pulse.. Range 0-30~230 BPM
**SET**|
- Press SET key to increase value. Press and hold the key to increase value faster.
- TIME setting range: 00:00~99:00 (Each increment is 1:00). CAL setting range: 0~9990 (Each increment is 10). DIST setting range: 0.00~99.50 (Each increment is 0.5). PULSE setting range:0-30~230 (Each increment is 1BPM)
**MODE/ENTE R**|
- Choose each function by pressing MODE/ENTER key.
- Press and hold MODE/ENTER key for 2 seconds to reset all functions (same feature as the reset key if press for 2 seconds).
RESET|
- In setting mode, press RESET key once to reset the current function figures.
- Press RESET key and hold for 2 seconds to reset all function figures.
RECOVERY|
- After the console detects pulse signal, press the RECOVERY key to enter recovery mode to monitor heart rate recovery ability.
OPERATION PROCEDURE
POWER ON
- LCD will display all segments as Drawing 1.
- Monitor working display as Drawing 2.
- When adjust LOAD, the monitor will display as Drawing 3.
Drawing 1
Drawing 2
Drawing 3
POWER OFF
Without any signal being transmitted into the monitor for 4 minutes the
monitor will enter SLEEP mode.
OPERATION
Workout setting
- Press MODE/ENTER key to select the function of TIME, DISTANCE,CALORIES and PULSE. Use SET Key for setting and press MODE key for confirmation.
- For instance the time set-up, when the time value is blinking, you can use SET Key to adjust the number. Press MODE/ENTER key for confirmation and skip to next set-up. The set-up of DISTANCE/ CALORIES and PULSE is the same as TIME set-up.
- Once the workout begins and the console picks up the exercise signal, the value of SPEED/RPM, TIME, DST, CAL and PULSE will count up on the display.
Recovery
- The RECOVERY key will only be valid if pulse is detected.
- TIME will show “0:60” (seconds) and counts down to 0. Computer will show F1 to F6 after the countdown to test heart rate recovery status. User can find the heart rate recovery level based on the chart below.
- Press RECOVERY key again to return to the beginning.
| F1 | Outstanding |
|---|---|
| F2 | Excellent |
| F3 | Good |
| F4 | Fair |
| F5 | Below average |
| F6 | Poor |
Trouble shooting
- When the display of LCD is dim, it means the batteries need to be changed.
- If there is no signal when you pedal, please check if the cable is well connected.
NOTE:
- When stop training for 4 minutes, the main screen will be off.
- If the computer displays abnormally, please re-install the batteries and try again.
APP
- This console can connect APP on the smart device by Bluetooth.
- Once console is connect to smart device via Bluetooth, the console will power off.
www.circlefitness.com


Read User Manual Online (PDF format)
Read User Manual Online (PDF format) >>
Download This Manual (PDF format)
Download this manual >>
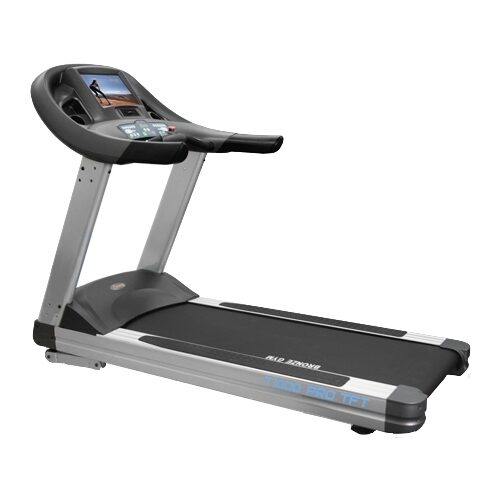
Дорожка беговая CIRCLE FITNESS M7 LUXURY
Для покупки товара в нашем интернет-магазине выберите понравившийся товар и добавьте его в корзину. Далее перейдите в Корзину и нажмите на «Оформить заказ» или «Быстрый заказ».
Когда оформляете быстрый заказ, напишите ФИО, телефон и e-mail. Вам перезвонит менеджер и уточнит условия заказа. По результатам разговора вам придет подтверждение оформления товара на почту или через СМС. Теперь останется только ждать доставки и радоваться новой покупке.
Оформление заказа в стандартном режиме выглядит следующим образом. Заполняете полностью форму по последовательным этапам: адрес, способ доставки, оплаты, данные о себе. Советуем в комментарии к заказу написать информацию, которая поможет курьеру вас найти. Нажмите кнопку «Оформить заказ».
Наша компания поддерживает различные безопасные способы оплаты:
- оплата банковской картой (на сайте);
- безналичный расчет (по выставленному банковскому счету);
- наличными при получении (курьеру);
- картой через терминал при получении (курьеру);
- наложенный платеж;
- бесконтактная оплата (Apple Pay, Google Pay, Samsung Pay)
- рассрочка или кредит.
Уточняйте подходящий способ оплаты во время оформления заказа в корзине или Вашему личному менеджеру.
Мы предлагаем несколько вариантов доставки товаров по России и странам СНГ.
Москва, Санкт-Петербург, Нижний Новгород — собственная курьерская служба, доставка до адреса клиента. Возможна сборка и установка оборудования при получении.
В другие города России и страны СНГ возможна:
- доставка курьером до квартиры/офиса;
- доставка курьером до подъезда Вашего дома;
- доставка до пункта выдачи в Вашем или соседнем городе (ТК: ПЭК, Деловые Линии, ГТД, DPD, Энергия, Возовоз).
При заказе от 30 000 рублей — доставка бесплатная *
Доставка крупногабаритных грузов рассчитывается в индивидуальном порядке **
* Уточняйте стоимость доставки у Вашего менеджера.
** Для некоторых регионов и крупногабаритных товаров доставка рассчитывается в индивидуальном порядке и оплачивается отдельно.
Сроки доставки по регионам РФ и странам СНГ
В зависимости от Вашего региона проживания доставка может занимать разное время, от 2-х до 10-ти календарных дней.
О сроках доставки в другие регионы России и страны СНГ уточняйте у Вашего персонального менеджера.
Добавить к сравнению
| Производитель | Circle Fitness |
|---|---|
Тип нагружения

Тип нагружения – это параметр, который влияет на то, каким образом спортивный тренажер будет воздействовать на ваши мышцы. То, какую силу нагрузки он сможет приложить. Считается одной из самых важных характеристик при выборе велотренажера. От типа нагружения напрямую зависит ваша скорость избавления от лишнего веса или набор мышечной массы. Одни виды этих современных устройств подойдут больше для занятий дома, а другие – для спортивного зала, занятий под руководством тренера. Спортивные товары разных типов нагрузки отличаются и по цене. В интернет-магазинах обычно представлены велотренажеры с такими видами нагружения, как:
Советуем перед покупкой хорошо ознакомиться со всеми достоинствами и недостатками каждого отдельного вида. Помните, что для регулярных занятий спортом нужно подобрать такое устройство, которое будет удобно именно вам. |
Электрический
Электрический тип нагружения – один из самых распространённых. Присутствует в конструкции современных велотренажеров и беговых дорожек. Их внутреннее устройство похоже на тренажеры механического типа, но на магнит здесь влияют электрические импульсы Велотренажеры и беговые дорожки данного типа оборудованы сенсорным дисплеем, на котором можно менять расположение магнита и, соответственно, сопротивление педалей. Менять нагрузку довольно просто, при этом спортсмену не понадобится отвлекаться от тренировки – все происходит в несколько касаний дисплея. Электрический велотренажер подходит тем, кто уже давно и регулярно занимается спортивными упражнениями. Благодаря ему спортсмен может выйти на новый уровень и значительно упростить себе тренировки, разнообразить их. Велотренажеры электрической системы регулирования нагрузки делают возможным использование дополнительных программ тренировок. Подходят для активных занятий спортом. Однако они противопоказаны новичкам. Для тренировок начального уровня больше подойдут спортивные товары механического или ременного типа нагружения. Значительным недостатком электронных тренажеров является и то, что работают они только от электросети. По сравнению с устройствами других типов, цены на электрические велотренажеры выше. |
| Макс.нагрузка | 182 кг |
Регулировка угла наклона

Регулировка угла наклона – это функция, которая есть у беговых дорожек и эллиптических тренажеров. Благодаря сложной системе на этих спортивных устройствах можно регулировать угол наклона бегового полотна или педалей. Это необходимо для того, чтобы настроить тренажер под свои цели, а также усилить эффективность тренировок. Изменив угол наклона, вы тем самым увеличите нагрузку на мышцы. От занятий спортом на тренажере под наклоном сжигается больше калорий, ведь сильнее нагрузка на мышцы. Беговое полотно или педали эллиптического тренажера имитируют процесс ходьбы в гору. Это будет полезно людям, которые желают сбросить вес. При этом, увеличивая угол наклона, вы переносите значительную часть нагрузки на мышцы ног, бедра, ягодицы. Такая тренировка позволит вам держать эти группы мышц в тонусе, поможет придать спортивный вид телу. Тренажеры разделяют по типам регулировки угла наклона. Среди них:
На эллиптических тренажерах наклон педалей можно менять в обе стороны от 0 до 20%. Для беговых дорожек имеются такие максимальные параметры угла наклона бегового полотна: положительный – до +40%; отрицательный – до -6%. Помните, что угол наклона необходимо настроить таким образом, чтобы вам было комфортно. |
электрическая |
| Макс. скорость | 25 км/ч |
Измерение пульса

Измерение пульса – полезная функция на тренажерах, способная увеличить качество и эффективность тренировки. На многих современных велотренажерах, беговых дорожках и других товарах для спорта есть встроенный датчик измерения частоты пульса. Он представляет собой металлические пластины, обычно прикреплённые к подлокотникам тренажера. С участков тела возле локтей устройство считывает слабые электрические сигналы, проходящие через кожу, и усиливает их, а система интерпретирует сигналы в показания и передает данные на сенсорный экран. Во время беговых упражнений спортсмен может как не касаться датчиков измерения пульса, так и держать руки на металлических пластинах все время. Точность измерения сердечного ритма от этого не меняется. На некоторых видах спортивных тренажеров может быть два датчика – их точность измерения выше. Датчик измерения пульса выполняет важную роль: позволяет спортсмену следить за своим сердечным ритмом и прекращать тренировку в тех случаях, когда частота пульса выходит за рамки нормы. Однако, следует помнить, что небольшое отклонение сердечного ритма от нормы обычно не является признаком болезни и свидетельствует об интенсивности тренировок. Следить за свои пульсом советуют и тем, кто желает похудеть – сердечный ритм лучше покажет, насколько эффективны упражнения. Такой датчик будет полезен и при кардио-тренировках. Велотренажер с кардио-датчиком будет союзником в борьбе против варикоза. Ученые сообщают, что такие спортивные занятия также полезны для укрепления дыхательной системы, способны улучшить работу сердца и кровеносных сосудов. Обратите внимание, что на некоторых бюджетных моделях тренажеров нет устройства для измерения пульса. В таком случае вы можете измерять ритм сердца самостоятельно или же приобрести спортивный товар с датчиком. |
есть (встроенный датчик), кардиодатчик на ручке, возможность подключения беспроводного датчика, опционально: нагрудный кардиодатчик |
| Консоль | 18.5 |
| Показания консоли | текущая скорость, расход энергии, пройденная дистанция, угол наклона |
| Комплектация тренажера | Вентилятор, Транспортировочные ролики, Компенсаторы неровностей пола, Подставка под аксессуары, Подставка для стакана |