
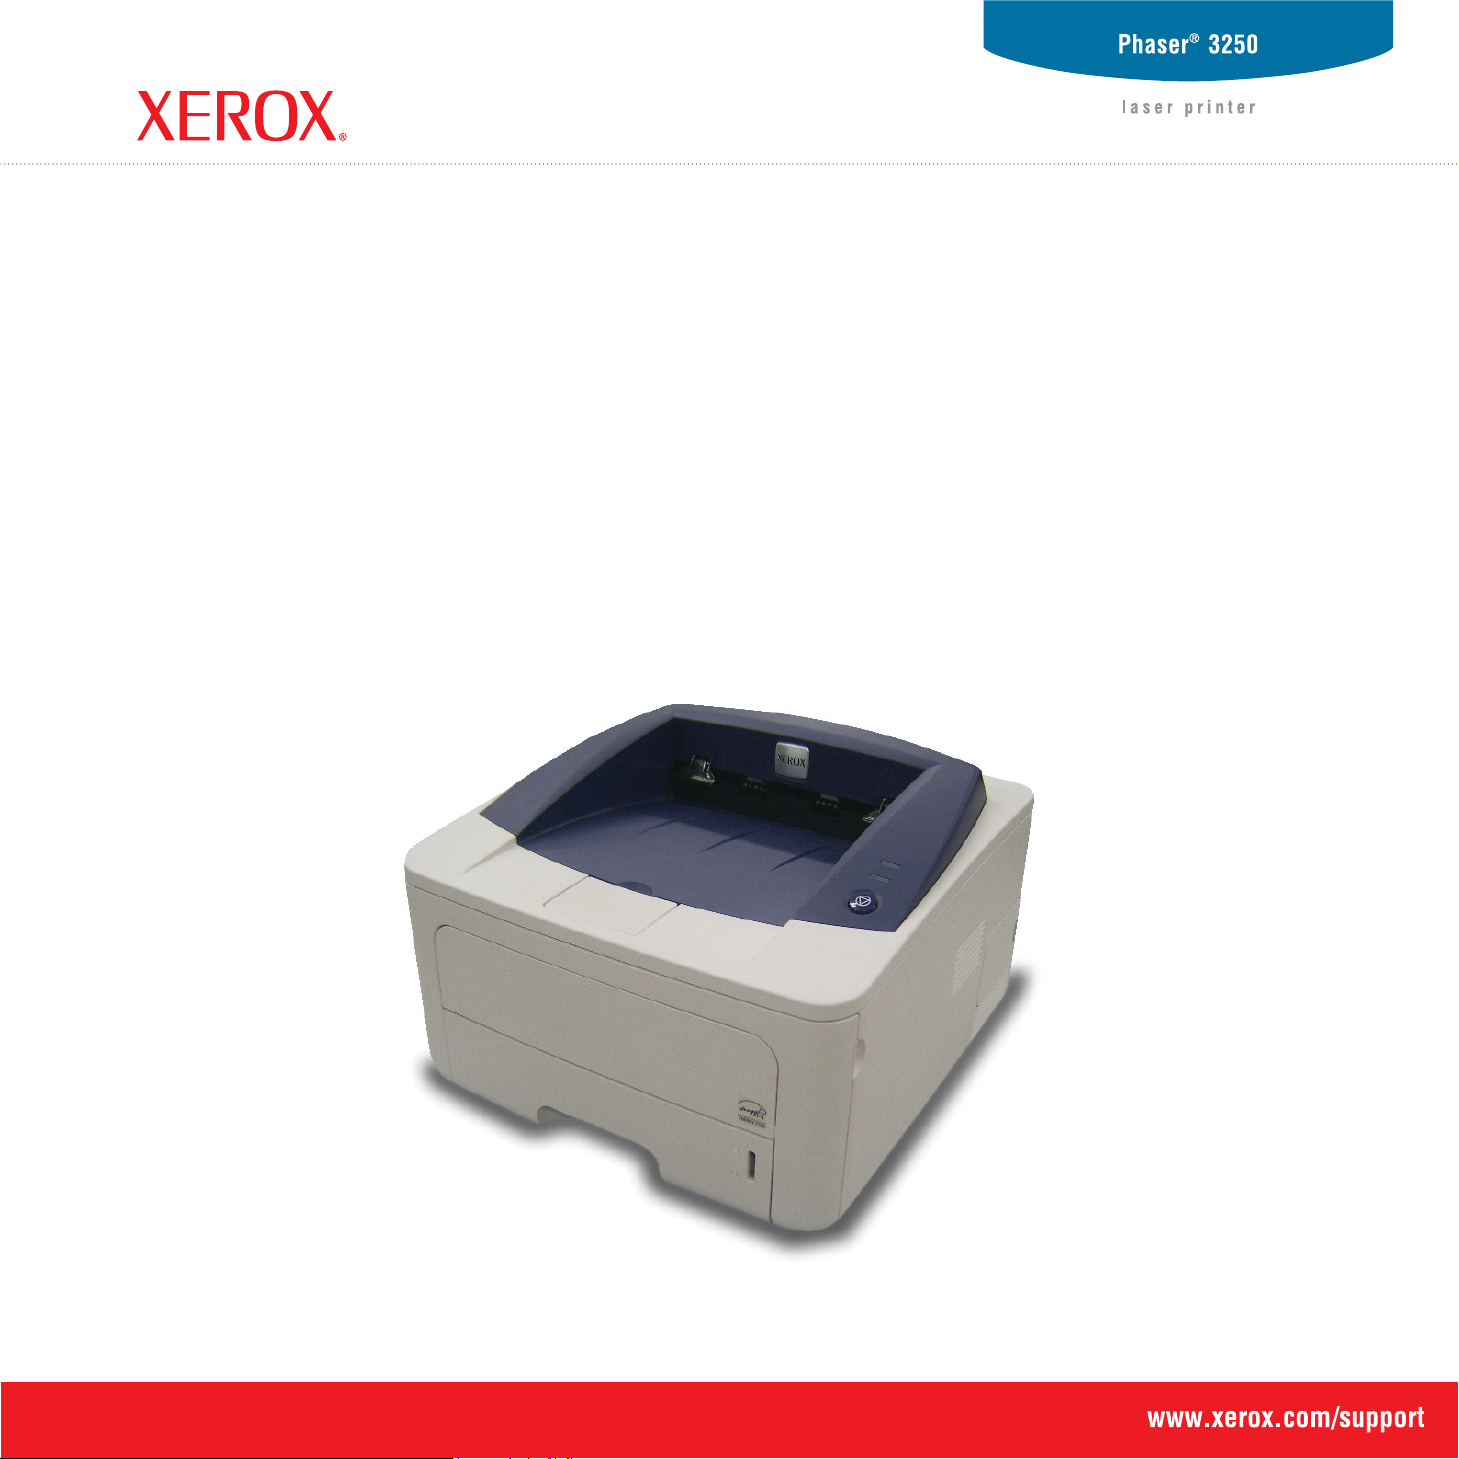
User Guide

This manual is provided for information purposes only. All information included herein is subject to change without notice. Xerox Corporation is not responsible
for any direct or indirect damages, arising from or related to the use of this manual.
© 2008 Xerox Corporation. All rights reserved.
• Phaser 3250D and Phaser 3250DN are model names of Xerox Corporation.
• Xerox and Xerox logo are trademarks of Xerox Corporation.
• IBM and IBM PC are trademarks of International Business Machines Corporation.
• PCL and PCL 6 are trademarks of Hewlett-Packard company.
• Microsoft, Windows and Windows Vista are either registered trademarks or trademarks of Microsoft Corporation.
• PostScript 3 is a trademark of Adobe System, Inc.
• UFST® and MicroType™ are registered trademarks of Monotype Imaging Inc.
• TrueType, LaserWriter, and Macintosh are trademarks of Apple Computer, Inc.
• All other brand or product names are trademarks of their respective companies or organizations.

Contents
Safety
Safety Introduction ……………………………………………………. …………………………………. .. …………………………………….. 1.i
Marks and Labels ………………………………………………………….. ………………………………… ………………………………….. 1.i
Radio Frequency Emissions …………………………………………………………………………………………………………………… 1.i
Laser Safety Introduction ………………………………………………………………………………………………………………………. 1.i
Operational Safety Information ……………………………………………………………………………………………………………….. 1.i
Maintenance Information ………………………………………………………………………………………………………………………. 1.iii
Product Safety Certification …………………………………………………………………………………………………………………… 1.iii
Regulatory Information ………………………………………………………………………………………………………………………. … 1.iii
Product Recycling & Disposal ………………………………………………………………………………………………………………… 1.iv
Energy program compliance ………………………………………………………………………………………………………………….. 1.iv
EH&S Contact Information …………………………………………………………………………………………………………………….. 1.iv
1. Introduction
Special features …………………………………………………………………………………………………………………………………… 1.1
Printer overview …………………………………………………………………………………………………………………………………… 1.2
Front view ……………………………………………………………. … ……………………………. … ……………………………………… 1.2
Rear view ………………………………………………………………. … ……………………………. ……………………………………… 1.3
Control panel overview ………………………………. …………………………………. .. …………………………………………………… 1.3
Understanding the LEDs ……………………………………………………………………………………………………………………….. 1.3
Finding more information ………………………………………………………………………………………………………………………. 1.4
Setting up the hardware ………………………………………………………………………………………………………………………… 1.4
Altitude adjustment ……………………………….. ………………………………… … ……………………………………………………….. 1.5
Changing the font setting ………………………………………………………………………………………………………………………. 1.6
2. Basic setup
Printing a demo page ……………………………………………………………………………………………………………………………. 2.1
Using toner save mode …………………………………………………………………………………………………………………………. 2.1
3. Software overview
Supplied software ………………………………………………………………………………………………………………………………… 3.1
Printer driver features …………………………………………………………………………………………………………………………… 3.1
System requirements ……………………………………………………………………………………………………………………………. 3.2
4. Network setup (Phaser 3250DN only)
Introduction …………………………………………………………………………………………………………………………………………. 4.1
Supported operating systems ………………………………………………………………………………………………………………… 4.1
Using SetIP program ……………………………………………………………………………………………………………………………. 4.1
5. Loading print media
Selecting print media ……………………………………………………………………………………………………………………………. 5.1
Supported sizes of paper ………………………………………………………………………………………………………………….. 5.2
Media sizes supported in each mode ………………………………………………………………………………………………….. 5.3
Guidelines for selecting and storing print media …………………………………………………………. … …………………….. 5.3
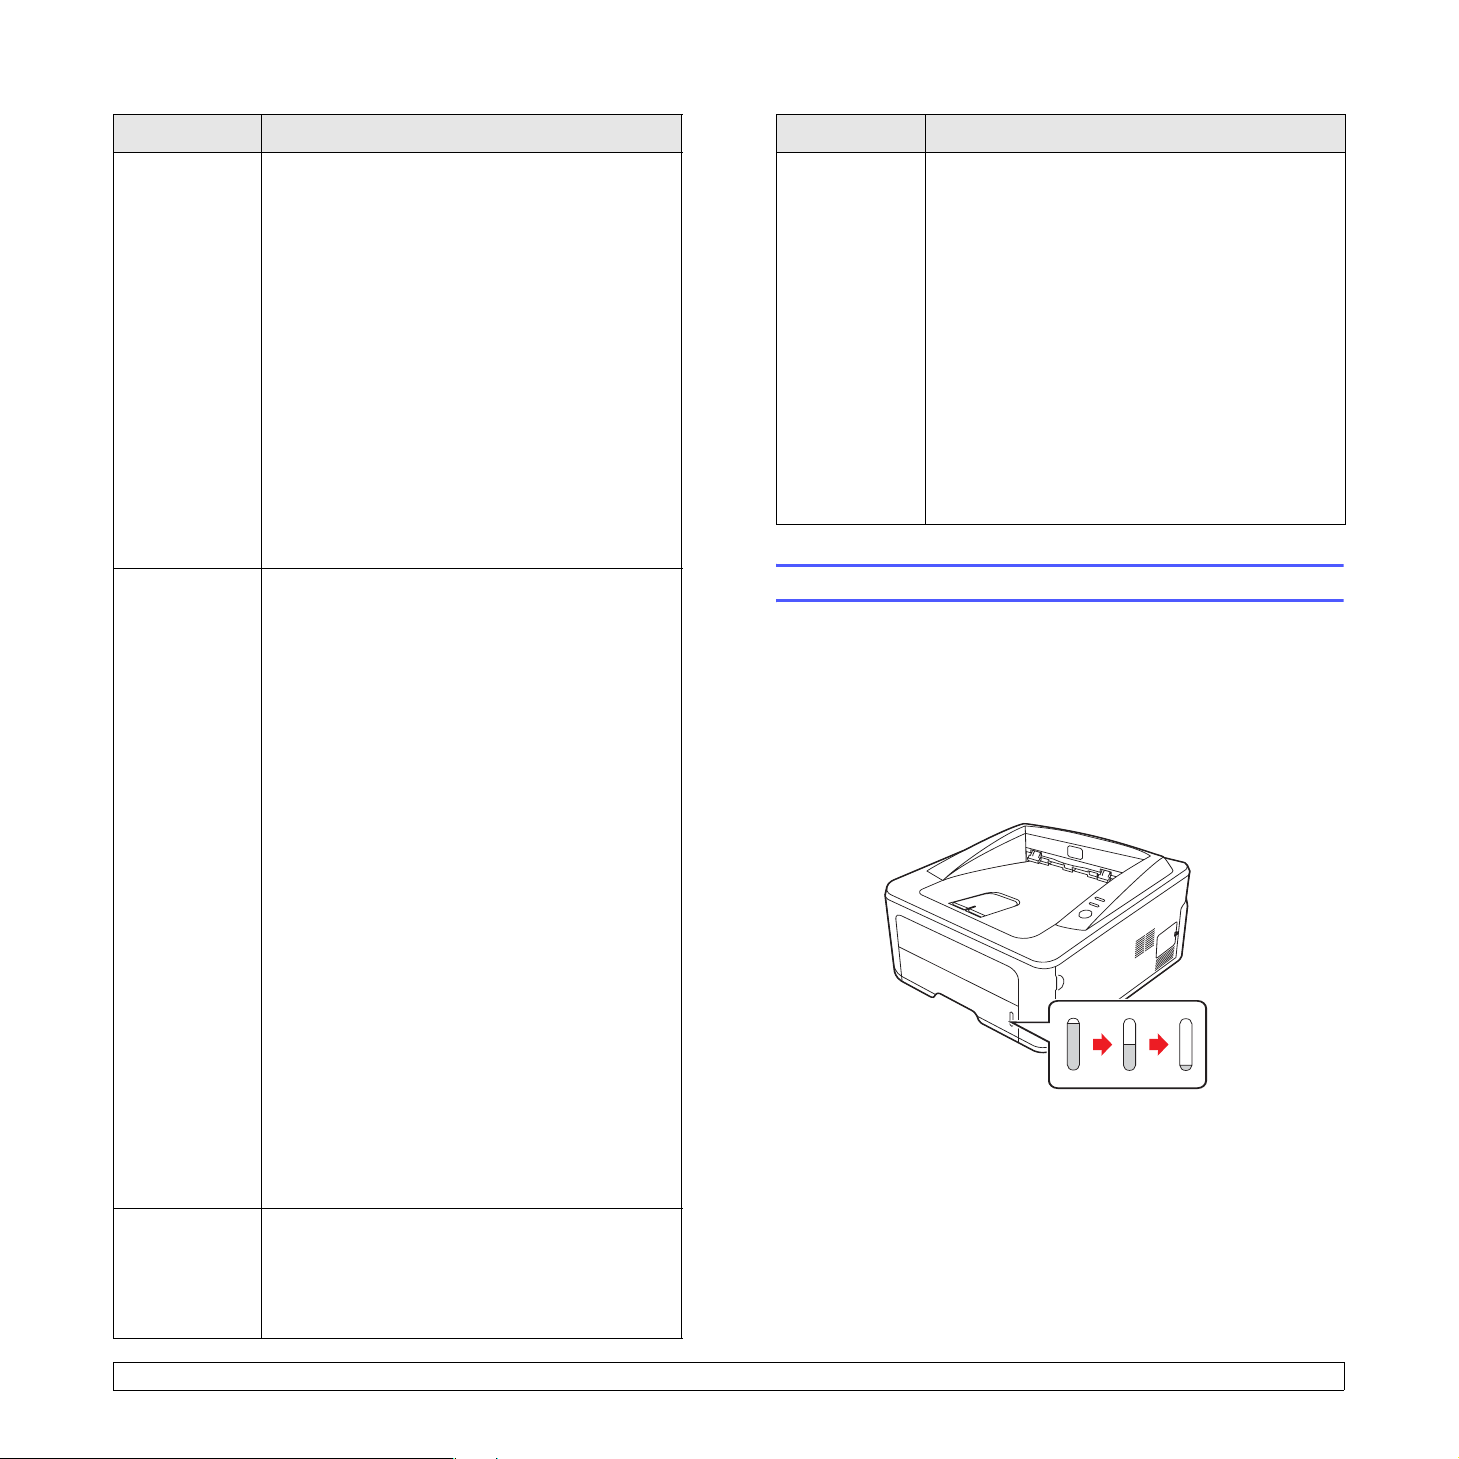
Loading paper ……………………………………………………………………………………………………………………………………… 5.4
Using tray 1 or the optional tray 2 ………………………………………………………………………………………………………. 5.5
Changing the size of the paper in tray 1 ……………………………………………………………………………………………… 5.5
Using the manual feeder ……………………………………………….. .. …………………………………. … …………………………. 5.6
Output tray information ………………………………………………………………………………………………………………………… 5.7

6. Basic printing
Printing a document ……………………………………………………………………………………………………………………………… 6.1
Canceling a print job …………………………………………………………………………………………………………………………….. 6.1
7. Ordering supplies and accessories
Print cartridge ……………………………………………………………………………………………………………………………………… 7.1
Accessories ………………………………………………………………………………………………………………………………………… 7.1
How to purchase …………………………………………………………. … ………………………………… …………………………………. 7.1
8. Maintenance
Cleaning the printer ……………………………………………………………………………………………………………………………… 8.1
Cleaning the outside of the printer ……………………………………………………………………………………………………… 8.1
Cleaning the inside of the printer ……………………………………………………………………………………………………….. 8.1
Maintaining the print cartridge …………………………………………………… … … ……………………….. …………………………… 8.2
Redistributing toner in the print cartridge …………………………………………………………………………………………….. 8.2
Replacing the print cartridge ……………………………………………………………………………………………………………… 8.3
Printing a configuration page …………………………………………………………………………………………………….. ………….. 8.4
Maintenance parts ……………………………………………………………………………………………………………………………….. 8.4
9. Troubleshooting
Clearing paper jams …………………………. … ……………………………. .. ……………………………. …………………………………. 9.1
In paper feed area ……………………………………………………………………………………………………………………………. 9.1
Areas near the print cartridge …………………………………………………………………………………………………………….. 9.2
In the paper exit area ……………………………………………………………………………………………………………………….. 9.3
In the duplex unit area ………………………………………… …………………………………. … ……………………………………… 9.3
Tips for avoiding paper jams ……………………………………………………………………………………………………………… 9.4
Troubleshooting checklist ……………………………………………………………………………………………………………………… 9.5
Solving general printing problems ………………………………………………………………………………………………………….. 9.5
Solving print quality problems ………………………………………………………………………………………………………………… 9.7
Common Windows problems …………………………………………………………………………………………………………………. 9.9
Common PostScript problems ……………………………………………………………………………………………………………… 9.10
Common Linux problems ……………………………………………………………………………………………………….. …………… 9.10
Common Macintosh problems …………………………………………………………………………………………… … ……………… 9.11
10. Installing additional memory
Precautions to take when installing memory ………………………………………………………………………………………….. 10.1
Installing a memory module …………………………………………………………………………………………………. … …………… 10.1
Activating the added memory in the PS printer properties ………………………………………………………………… …. 10.2
11. Specifications
Printer specifications ………………………………………………………………………………………………………… ………………… 11.1
12. Glossary
Safety
Safety Introduction
Notices and Safety
Please read the following instructions carefully before operating the
machine and refer to them as needed to ensure the continued safe
operation of your machine.
Y our Xerox product and supplies have been designed and tested to meet
strict safety requirements. These include safety agency evaluation and
certification, and compliance with electromagnetic regulations and
established environmental standards.
The safety and environment testing and performance of this product have
been verified using Xerox materials only.
WARNING
new functions or connection of external devices, may impact the product
certification. Please contact your Xerox representative for more
information.
Symbols
: Unauthorized alterations, which may include the addition of
Marks and Labels
These limits are designed to provide reasonable protection against
harmful interference in a residential installation. This equipment
generates, uses and can radiate radio frequency energy and, if not
installed and used in accordance with the instructions, may cause
harmful interference to radio communications. However, there is no
guarantee that interference will not occur in a particular installation. If this
equipment does cause harmful interference to radio or television
reception, which can be determined by turning the equipment off and on,
the user is encouraged to try to correct the interference by one or more
of the following measures:
— Reorient or relocate the receiving antenna.
— Increase the separation between the equipment and receiver.
— Connect the equipment into an outlet on a circuit different from that to
which the receiver is connected.
— Consult the dealer or an experienced radio/TV technician for help.
Changes or modifications to this equipment not specifically approved by
the Xerox Corporation may void the user’s authority to operate this
equipment.
EME Compliance for Canada
This Class «B» digital apparatus complies with Canadian ICES-003.
Cet appareil numérique de la classe « B » est conforme à la norme
NMB-003 du Canada.
All warnings and instructions marked on or supplied with the product
should be followed.
WARNING
where there is the possibility of personal injury.
WARNING
where there are heated or hot surfaces, which should not be
touched.
CAUTION
which require special attention to avoid the possibility of
personal injury or damage to the equipment.
WARNING
equipment and alerts the user to refer to the appropriate safety
information.
NOTE
emphasized and is important for you to remember.
: This symbol alerts users to areas of the equipment
: This symbol alerts users to areas of the equipment
: This symbol alerts users to areas of the equipment
: This symbol indicates a Laser is being used in the
: This symbol identifies information that is being
Radio Frequency Emissions
FCC Notices For The USA
NOTE
: This equipment has been tested and found to comply with the
limits for a Class B digital device, pursuant to Part 15 of the FCC Rules.
Laser Safety Introduction
Laser Safety
CAUTION
procedures other than those specified in this guide may result in
hazardous light exposure.
This equipment complies with international safety standards
and is classified as a Class 1 Laser Product.
With specific reference to lasers, the equipment complies with
laser product performance standards set by governmental,
national, and international agencies as a Class 1 Laser Product.
It does not emit hazardous light, as the beam is totally enclosed
during all phases of customer operation and maintenance.
: Use of controls, adjustments, or performance of
Operational Safety Information
Operational Safety Information
Your Xerox equipment and supplies have been designed and tested to
meet strict safety requirements. These include safety agency
examination, approval, and compliance with established environmental
standards.
i
To ensure the continued safe operation of your Xerox equipment, follow
these safety guidelines at all times:
sure that your electrical supply meets the requirements, please
consult your local power company or an electrician for advice.
Do These
• Always follow all warnings and instructions that are marked on or
supplied with the equipment.
• Before cleaning this product, unplug the product from the electrical
outlet. Always use materials specifically designated for this product,
the use of other materials may result in poor performance and create a
hazardous situation.
• Do not use aerosol cleaners, they may be explosive and flammable
under certain conditions.
• Always exercise care when moving or relocating equipment. Please
contact your local Xerox Service Department to arrange relocation of
the copier to a location outside of your building.
• Always loca te the machine on a solid support surface (not on plush
carpet) that has adequate strength to support the weight of the
machine.
• Always loca te the machine in an area that has adequate ventilation
and room for servicing.
• Always unplu g this equipment from the electrical outlet before
cleaning.
NOTE
: Your Xerox machine is equipped with an energy saving device
•
to conserve power when the machine is not in use. The machine may
be left on continuously.
WARNING
•
use caution when removing paper jams from this area and avoid
touching any metallic surfaces.
: The metallic surfaces in the fuser area may be hot. Please
2 The socket outlet shall be installed near the equipment and shall be
easily accessible.
3 Use the power cable that is supplied with your machine. Do not use
an extension cord or remove or modify the power cord plug.
4 Plug the power cable directly into a correctly grounded electrical
outlet. If you are not sure whether or not an outlet is correctly
grounded, consult an electrician.
5 Do not use an adapter to connect any Xerox equipment to an
electrical outlet that lacks a ground connection terminal.
6 Do not place this equipment where people might step or trip on the
power cable.
7 Do not place objects on the power cable.
8 Do not override or disable electrical or mechanical interlock devices.
9 Do not push objects into slots or openings on the machine. Electrical
shock or fire may result.
10 Do not obstruct ventilation openings. These openings are used to
provide proper cooling to the Xerox machine.
Disconnect Device
11
this equipment. It is attached to the back of the machine as a plug-in
device. To remove all electrical power from the machine, disconnect
the power cable from the electrical outlet.
: The power cable is the disconnect device for
Do Not Do These
• Never use a ground adapter plug to connect the equipment to a power
outlet that lacks a ground connection terminal.
• Never attempt any maintenance function that is not specifically
described in this documentation.
• Never obstr uct ventilation openings. They are provided to prevent
overheating.
• Never remove covers or guards that are fastened with screws. There
are no operator serviceable areas within these covers.
• Never locate the machine near a radiator or any other heat source.
• Never push objects of any kind into the ventilation openings.
• Never overr ide or «cheat» any of the electrical or mechanical interlock
devices.
• Never place this equipment where people might step on or trip on the
power cord.
• This equipment should not be placed in a room unless proper
ventilation is provided. Please contact your local Authorized dealer for
further information.
Warning — Electrical Safety Information
1 The power receptacle for the machine must meet the requirements
stated on the data plate on the rear of the machine. If you are not
Electrical Supply
1 This product shall be operated from the type of electrical supply
indicted on the product’s data plate label. If you are not sure that
your electrical supply meets the requirements, please consult your
local power company for advice.
2
3 Always connect equipment to a correctly grounded power outlet. If
WARNING
earth circuit. This equipment is supplied with a plug that has a
protective earth pin. This plug will only fit into an earthed electrical
outlet. This is a safety feature. If you are unable to insert the plug
into the outlet, contact your electrician to replace the outlet.
in doubt, have the outlet checked by a qualified electrician.
: This equipment must be connected to a protective
Disconnect Device
The power cable is the disconnect device for this equipment. It is
attached to the back of the machine as a plug-in device. To remove all
electrical power from the equipment, disconnect the power cable from the
electrical outlet.
ii
Emergency Power Off
If any of the following conditions occur, turn off the machine immediately
disconnect the power cable(s) from the electrical outlet(s)
and
an authorized Xerox Service Representative to correct the problem:
• The equipment emits unusual odors or makes unusual noises.
• The power cable is damaged or frayed.
• A wall panel circuit breaker, fuse, or other safety device has been
tripped.
• Liquid is spilled into the machine.
• The machine is exposed to water.
• Any part of the machine is damaged.
. Contact
Product Safety Certification
This product is certified by the following Agency using the Safety
standards listed;
Agency Standard
Underwriters
Laboratory Inc.
Intertek ETL
Semko
UL60950-1 1st (2003) First Edition (USA/
Canada)
IEC60950-1: 2001 First Edition
Ozone Information
This product produces ozone during normal operation. The ozone
produced is heavier than air and is dependent on copy volume. Install the
system in a well-ventilated room. Providing the correct environmental
parameters will ensure that the concentration levels meet safe limits.
If you need additional information about ozone, please request the Xerox
publication Facts About Ozone (part number 610P64653) by calling
1-800-828-6571 in the United States and Canada. In other markets,
please contact your local Xerox representative.
Maintenance Information
1 Any operator product maintenance procedures will be described in
the customer documentation supplied with the product.
2 Do not carry out any maintenance on this product which is not
described in the customer documentation.
3 Do not use aerosol cleaners. The use of cleaners that are not
approved may cause poor performance of the equipment, and could
cause a dangerous condition.
4 Use supplies and cleaning materials only as directed in this manual.
5 Do not remove covers or guards that are fastened with screws.
There are no parts behind these covers that you can maintain or
service.
6 Do not perform any maintenance procedures unless you have been
trained to do them by an authorized local dealer or unless a
procedure is specifically described in the user manuals.
Consumables Information
1 Store all consumables in accordance with the instructions given on
the package or container.
Regulatory Information
Certification in Europe
CE
The CE mark applied to this product, symbolizes XEROX’s
declaration of conformity with the following applicable European Union
Directives, as of the dates indicate d:
December 12, 2006
Approximation of the laws of the member states related to low voltage
equipment.
December 15, 2004
Approximation of the laws of the member states related to
electromagnetic compatibility.
A full declaration of conformity, defining the relevant directives and
referenced standards, can be obtained from your XEROX Limited
representative or by contacting:
Environment, Heath and Safety
Xerox Limited
Bessemer Road
Welwyn Garden City
Herts
AL7 1BU
England, Telephone +44 (0) 1707 353434
WARNING
Industrial, Scientific and Medical (ISM) equipment, the external radiation
from the ISM equipment may have to be limited or special mitigation
measures taken.
WARNING
maintain compliance with Council Directive 2004/108/EC.
: In order to allow this equipment to operate in proximity to
: Shielded interface cables must be used with this product to
: Council Directive 2006/95/EC as amended.
: Council Directive 2004/108/EC as amended.
2 Keep all consumables away from the reach of children.
3 Never throw toner, print cartridges or toner containers into an open
flame.
iii
Product Recycling & Disposal
Energy program compliance
USA & Canada
Xerox operates a worldwide equipment take back and reuse/recycle
program. Contact your Xerox sales representative (1-800-ASK-XEROX)
to determine whether this Xerox product is part of the program. For more
information about Xerox environmental programs, visit
www.xerox.com/environment.html
If your product is not part of the Xerox program and you are managing its
disposal, please note that the product may contain lead and other
materials whose disposal may be regulated due to environmental
considerations. For recycling and disposal information, contact your local
authorities. In the United States, you may also refer to the Electronic
Industries Alliance web site: www.eiae.org
.
.
European Union
WEEE Directive 2002/96/EC
Some equipment may be used in both a domestic/household and a
professional/business application.
Professional/Business Environment
Application of this symbol on your equipment is confirmation
that you must dispose of this equipment in compliance with
agreed national procedures. In accordance with European
legislation, end of life electrical and electronic equipment
subject to disposal must be managed within agreed
procedures.
Domestic/Household Environment
Application of this symbol on your equipment is confirmation
that you should not dispose of the equipment in the normal
household waste stream. In accordance with European
legislation, end of life electrical and electronic equipment
subject to disposal must be segregated from household
waste.
Private households within EU member states may return used
electrical and electronic equipment to designated collection
facilities free of charge. Plea se In some member st ates, when
you purchase new equipment, your local retailer may be
required to take back your old equipment free of charge.
Please ask your retailer for information.
Prior to disposal, please contact your local dealer or Xerox
representative for end of life takeback information.
USA
ENERGY STAR
As an ENERGY ST AR® partner, Xerox Corporation has determined that
this product meets the ENERGY STAR guidelines for energy efficiency.
The ENERGY STAR and ENERGY ST AR MARK are
registered United States trademarks. The ENERGY
STAR Imaging Equipment Program is a team effort
between U.S., European Union and Japanese
governments and the office equipment industry to
promote energy-efficient copiers, printers, fax,
multifunction machine, personal computers, and
monitors. Reducing product energy consumption
helps combat smog, acid rain and long-term
changes to the climate by decreasing the emissions
that result from generating electricity.
Xerox ENERGY STAR equipment is preset at the
factory. Your machine will be delivered with the timer
for switching to Power Save Mode from the last copy/
print out, set at 15 minutes. A more detailed
description of this feature can be found in the
Machine Setup Section of this guide.
EH&S Contact Information
Contact Information
For more information on Environment, Health, and Safety in relation to
this Xerox product and supplies, please contact the following customer
help lines:
USA:1-800 828-6571
Canada:1-800 828-6571
Europe:+44 1707 353 434
iv
1 Introduction
Congratulations on the purchase of your printer!
This chapter includes:
• Special features
• Printer overview
• Control panel overview
• Understanding the LEDs
• Finding more information
• Setting up the hardware
• Altitude adjustment
• Changing the font setting
Special features
Your new printer is equipped with several special features that improve
the print quality. You can:
Print with excellent quality and high speed
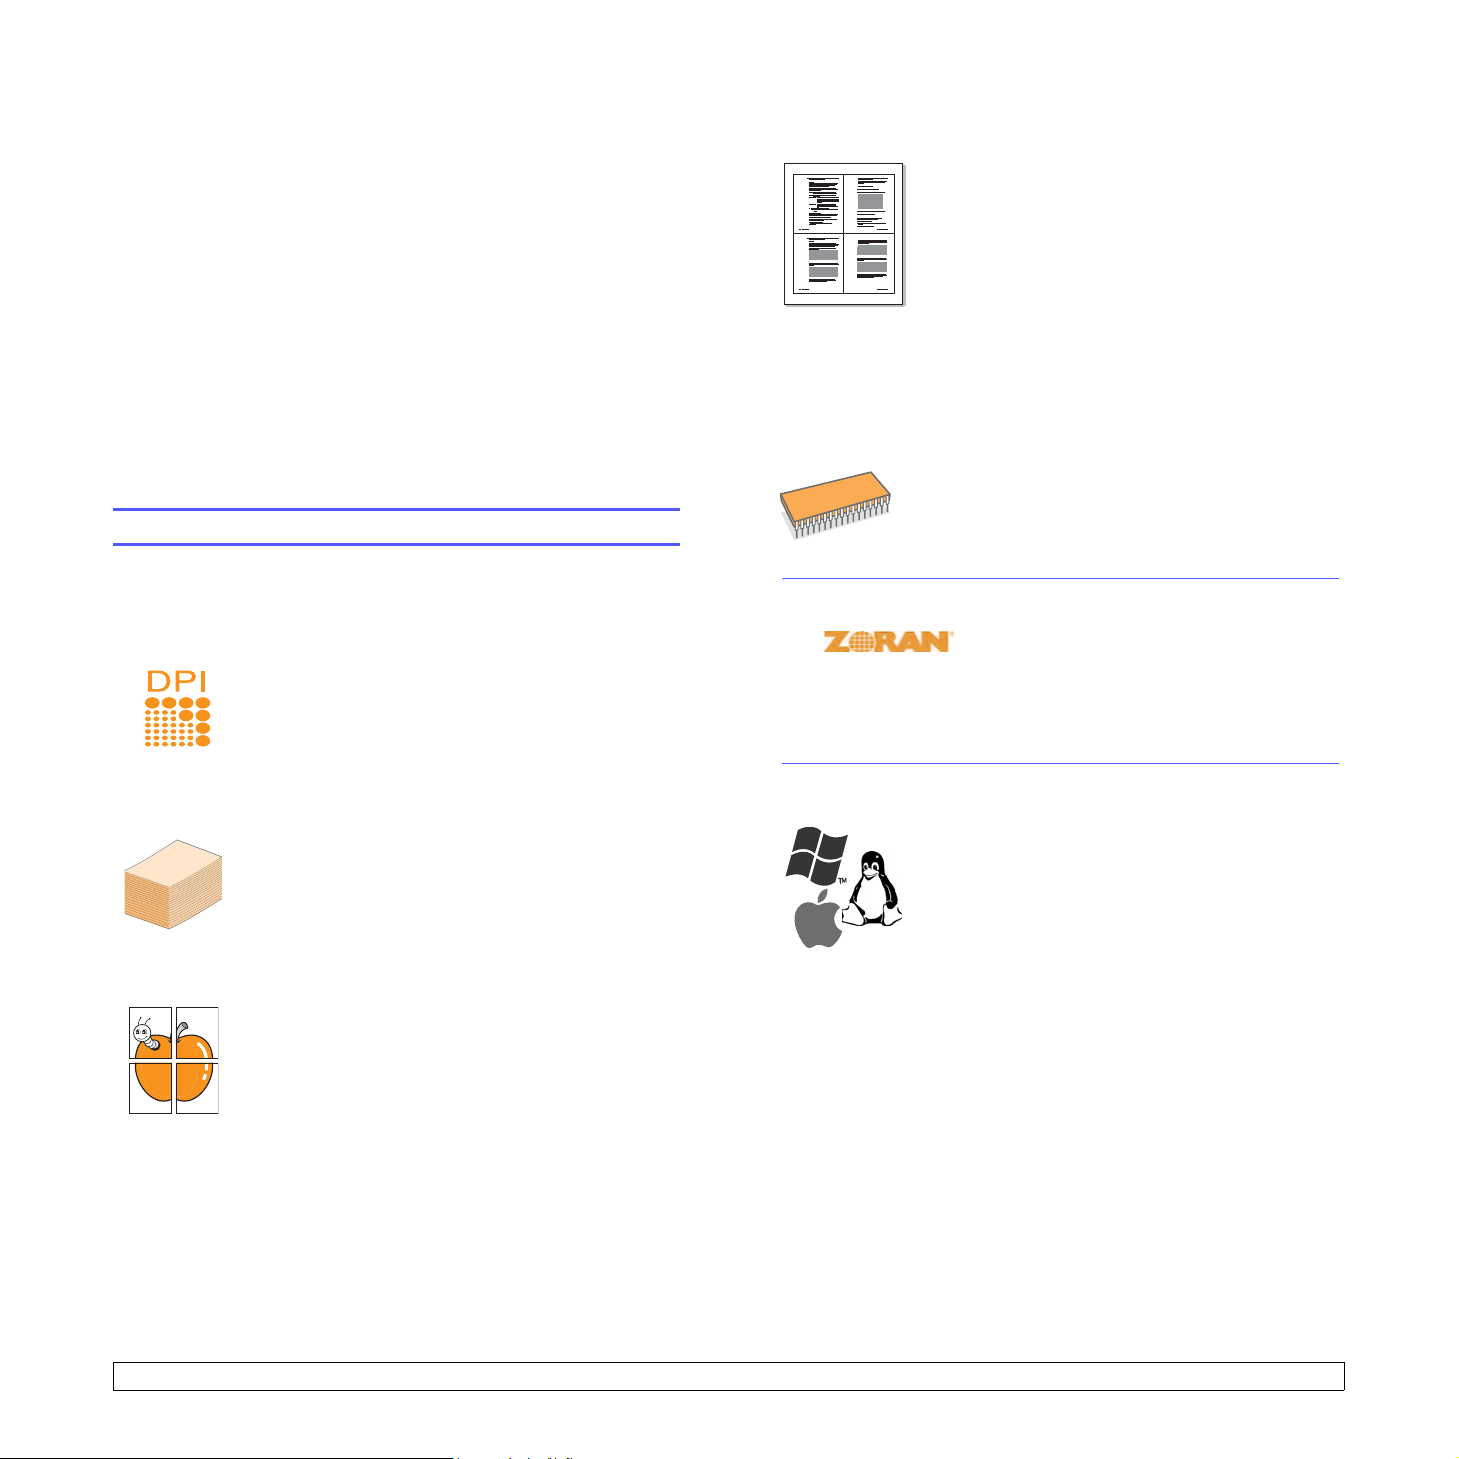
• You can print up to 1200 x 1200 dpi effective
output. See the Software Section.
• Your printer prints A4-sized paper at up to 28 ppm
and letter-sized paper at up to 30 ppm. For duplex
printing, your printer print s A4 -sized paper at up to
14 ipm and letter-sized paper at up to 14.5 ipm.
Handle paper flexibly
• Manual tray supports one sheet of envelopes,
labels, transparencies, custom-sized materials,
postcards and heavy paper.
• Standard 250-sheet tray supports plain paper.
• 150-sheet output tray supports convenient access.
Create professional documents
•Print Watermarks. You can customize your
documents with words, such as “Confidential”. See
the Software Section.
•Print Booklets. This feature enables you to easily
print a document to create a book. Once printed, all
you have to do is fold and staple the pages. See
the Software Section.
•Print Posters. The text and pictures of each page
of your document are magnified and printed across
the sheet of paper and can then be taped together
to form a poster. See the Software Section.
Save time and money
• Your printer allows you to use toner save mode to
1 2
3 4
Expand the printer capacity
* Zoran IPS Emulation compatible with PostScript 3
* 136 PS3 fonts
• Contains UFST and MicroType from Monotype Imaging Inc.
Print in various environments
save toner. See the Software Section.
• You can print on both sides of the paper to save
paper. See the Software Section.
• You can print multiple pages on a single sheet of
paper to save paper. See the Software Se ction.
• You can use preprinted forms and letterhead with
plain paper. See the Software Section.
• Your prin ter automatically conserves electricity
by substantially reducing power consumption when
not in use.
• Your printer has 32 MB of memory which can be
expanded to 160 MB. See page 10.1.
• You can add a 250-sheet optional tray 2 to your
printer. This tray lets you add paper to the printer
less often.
•© Copyright 1995-2005, Zoran Corporation.
All rights reserved. Zoran, the Zoran logo,
IPS/PS3 and OneImage are trademarks of
Zoran Corporation.
• You can print in Windows 2000/XP/2003/Vista.
• Your printer is compatible with Linux and
Macintosh.
• Your printer comes with USB interfaces.
1.1 <
Introduction>
Machine features
The table below lists a general overview of features supported by your
printer.
(I: Installed, O: Option, NA: Not Available)
Features Phaser 3250D Phaser 3250DN
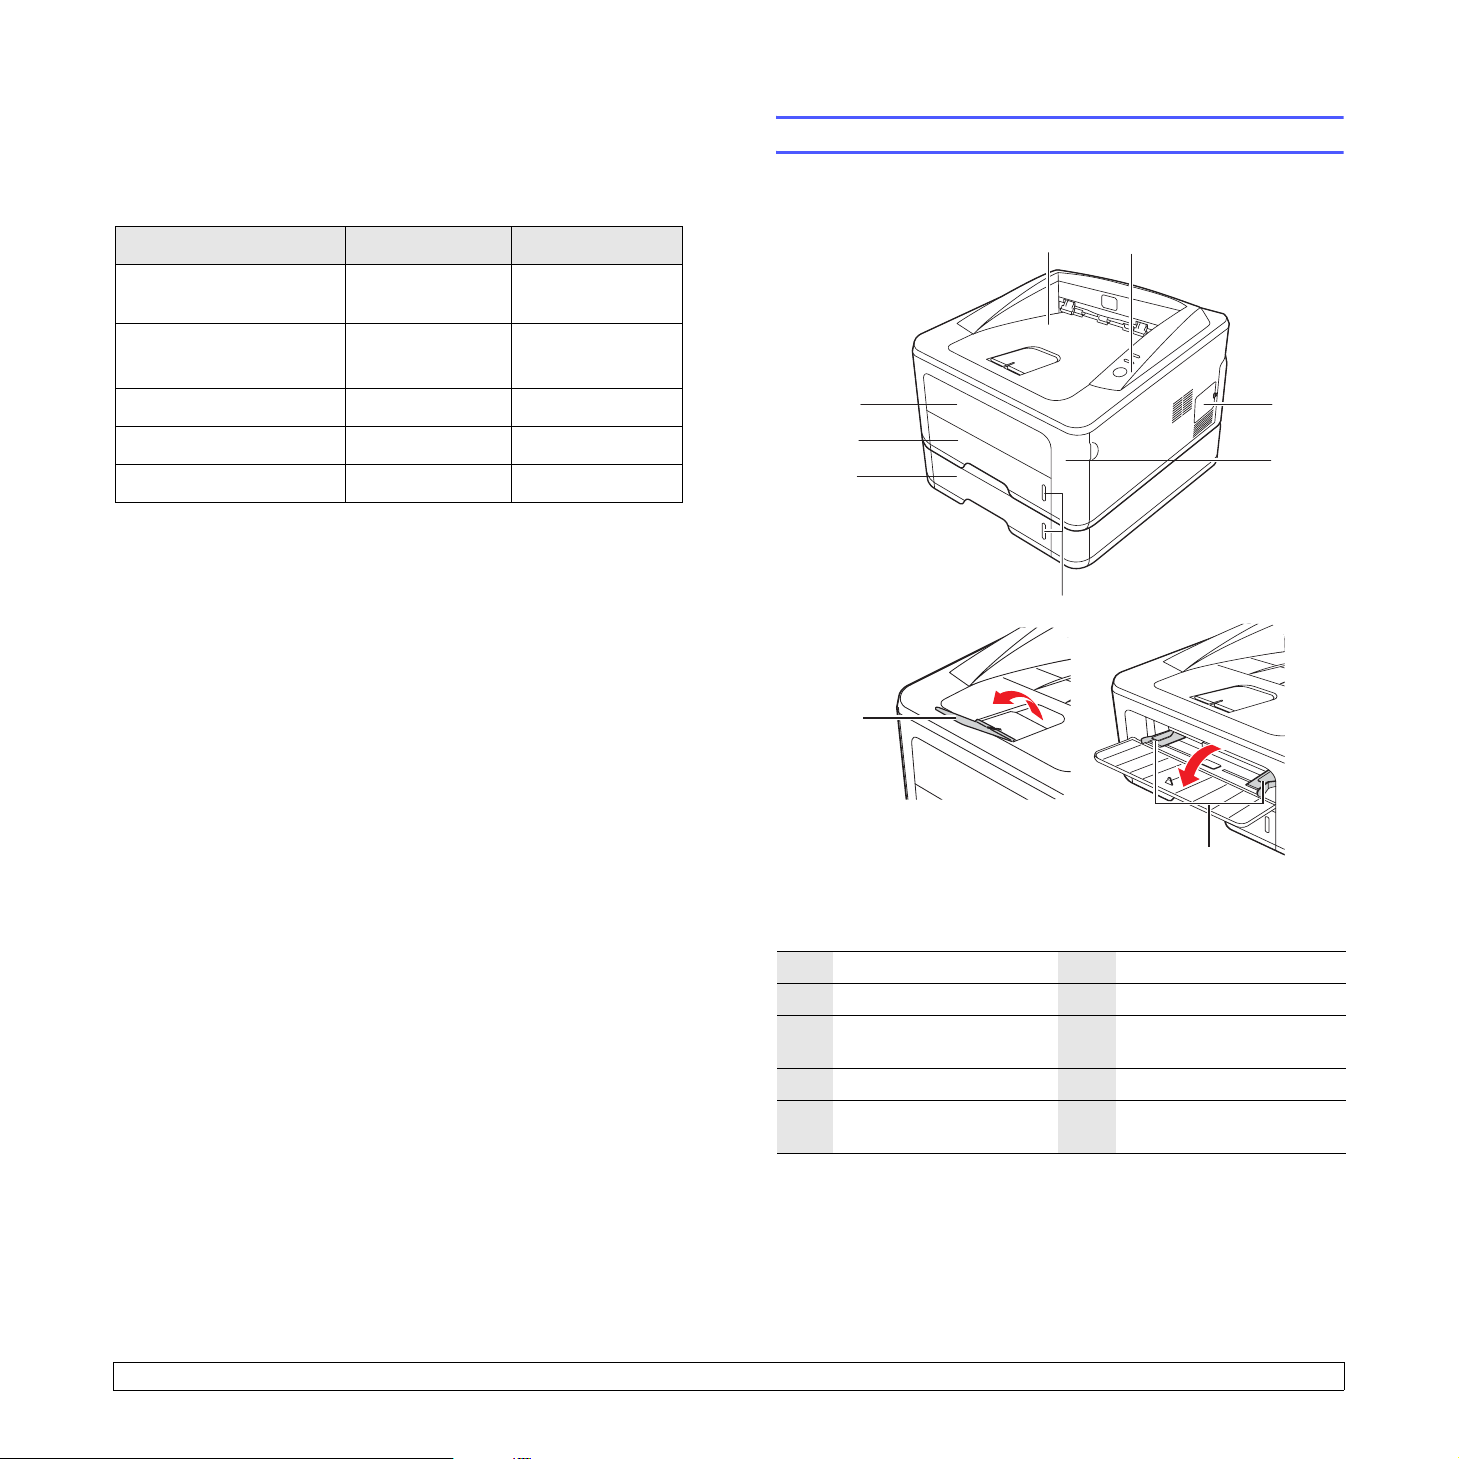
Printer overview
Front view
USB 2.0
(USB 2.0: Hi-Speed USB 2.0)
Network Interface
(Ethernet 10/100 Base TX)
PCL Emulation
PostScript Emulation
Duplex printing
a. Printing on both sides of paper.
a
II
NA I
II
II
II
* The figure above shows a Phaser 3250DN.
1
output tray
2
control panel
3
expansion memory
6
tray 1
7
optional tray 2
8
paper level indicator
cover
4
5
front cover
manual tray
9
output support
10
manual tray paper wid th
guides
1.2 <
Introduction>
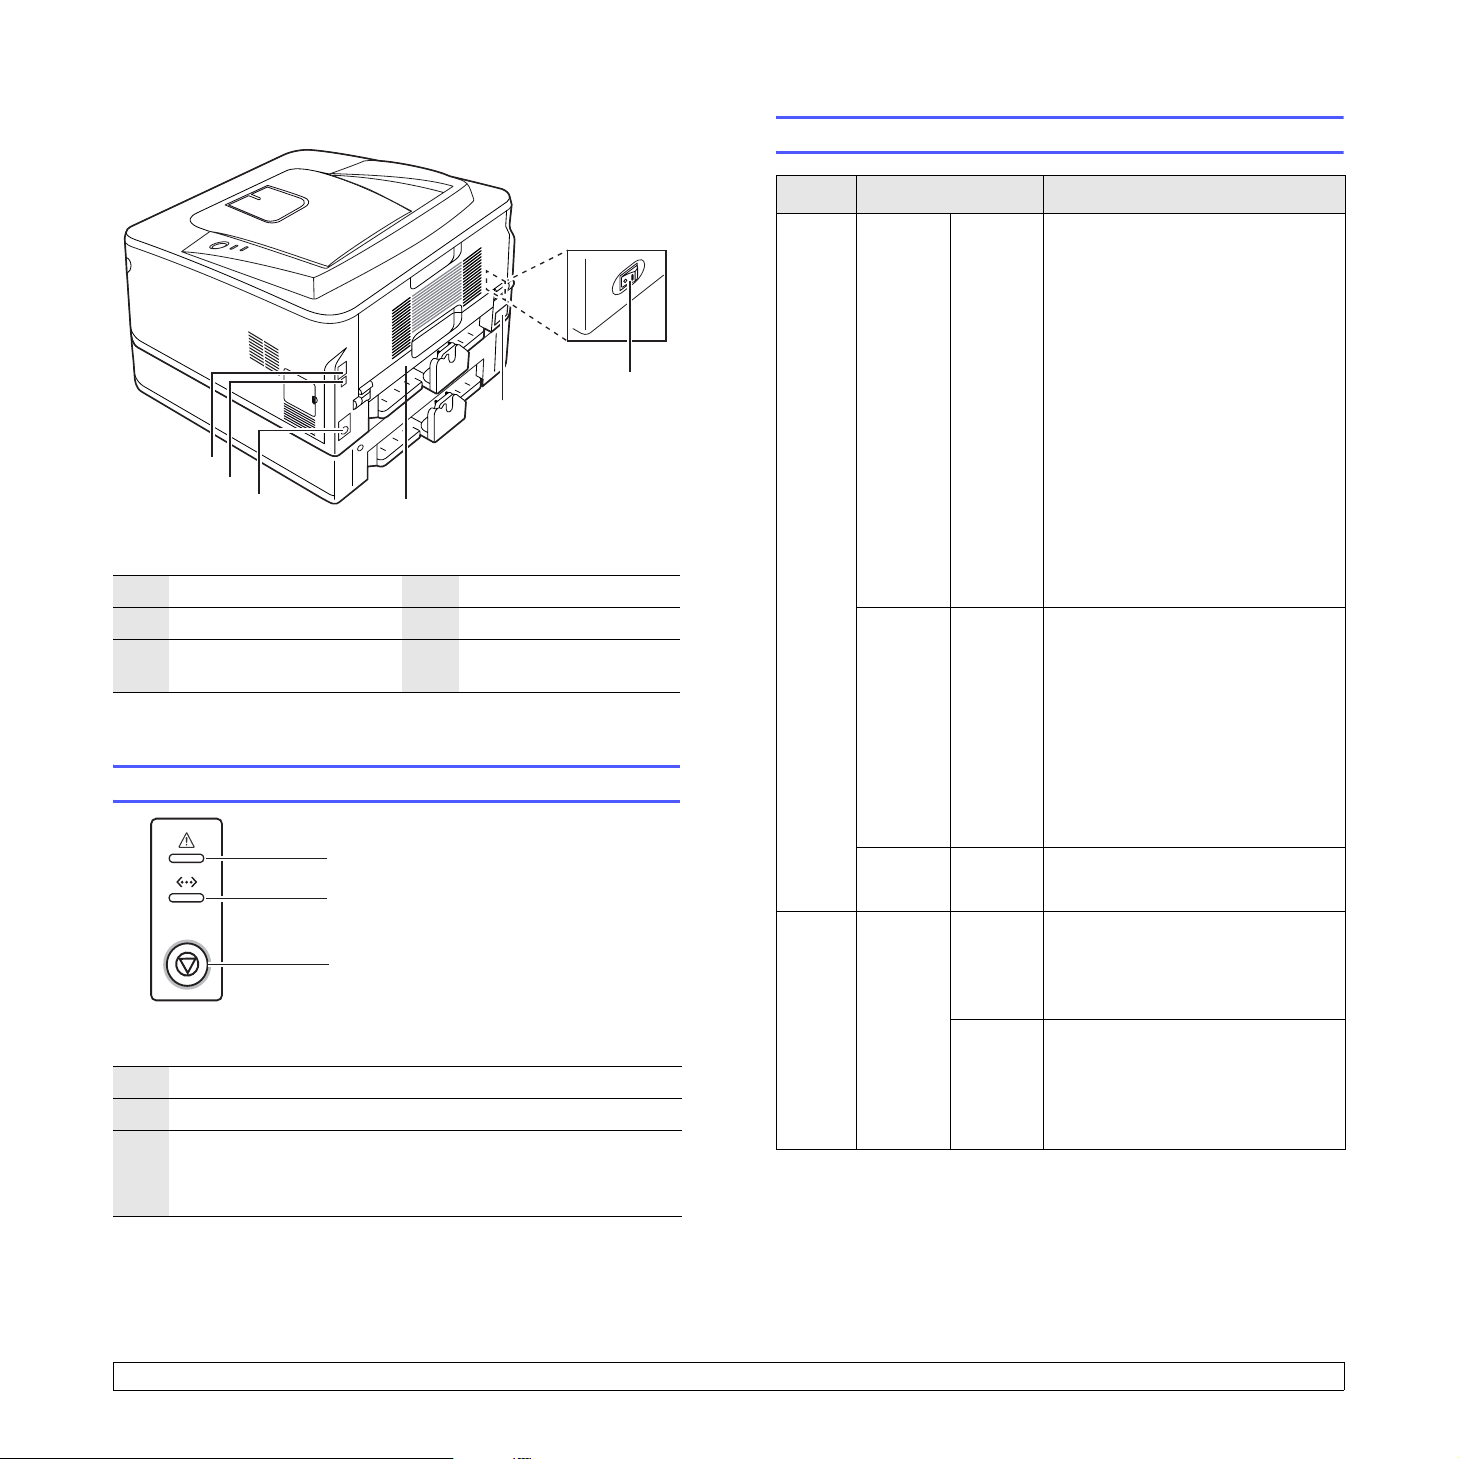
Rear view
1
2
3
1
network port
2
USB port
3
optional tray 2 cable
connector
a. Phaser 3250DN only.
Control panel overview
5
4
* The figure above shows a Phaser 3250DN.
a
4
duplex unit
5
power receptacle
6
power switch
6
3250-038
Understanding the LEDs
LED Status Description
Error Red On • The cover is open. Close the
cover.
• There is no paper in the tray.
Load paper in the tray.
• The printer has stopped printing
due to a major error.
• The print cartridge is not
installed. Install the print
cartridge.
• Your system has some
problems. If this problem
persists, contact your service
representative.
• The toner is totally exhausted.
Remove the old print cartridge
and install a new one. See page
8.3.
Blinking • A minor error is occurring and
the printer is waiting for the error
to be cleared. When the problem
is cleared, the printer resumes
printing.
• The print cartridge is low. Order
a new print cartridge. You can
temporarily improve print quality
by shaking the toner. See page
8.2.
1
2
3
3250-031
1
Error: Indicates the status of your printer. See page 9.5.
2
Online: Indicates the status of your printer. See page 9.5.
3
Start/Stop: Prints a demo page or configuration page.
Cancels the print job.
Resumes a print job.
1.3 <
Orange On • A paper jam has occurred. To
solve the problem, see page 9.1.
Online Green On • The printer is in power save
mode.
• The printer is on-line and can
receive data from the computer.
Blinking • Blinks slowly indicates that the
printer is receiving data from the
computer.
• Blinks quickly indicates that the
printer is printing data .
Introduction>
Finding more information
Setting up the hardware
You can find information for setting up and using your printer from the
following resources, either printed or onscreen.
Quick Install
Guide
quick install guide
1
1
2
2
1 2 3
4
Item(s) with * mark may not be supplied depending on your model and country
6
5
3
3
1 2 3
4
4
4
5
5
Online User
Guide
5
Provides information on setting up your
printer, therefore, be sure to follow the
instructions in the guide to get the printer
ready.
6
6
6
Provides you with step-by-step instructions for
using your printer’s full features, and contains
information for maintaining your printer,
troubleshooting, and installing accessories.
This user guide also contains a Software
Section providing you with information on how
to print documents with your printer on various
operating systems, and how to use the
supplied software utilities.
Note
You can access the user guides in other
languages from the Manual folder on the
printer driver CD.
Printer Driver
Help
Provides you with help information on printer
driver properties and instructions for setting up
the properties for printing. To access a printer
driver help screen, click Help from the printer
properties dialog box.
This section shows the steps to set up the hardware which is explained
in the Quick Install Guide. Make sure you read Quick Install Guide and
complete following steps.
1 Select a stable location.
Select a level, stable place with adequate space for air circulation.
Allow extra space to open covers and trays.
The area should be well-ventilated and away from direct sunlight or
sources of heat, cold, and humidity. Do not set the machine close to
the edge of your desk or table.
Website If you have Internet access, you can get help,
support, printer drivers, manuals, and order
information from the Xerox website,
www.xerox.com
.
1.4 <
Printing is suitable for altitudes under 1,000 m (3,281 ft). Refer to
the altitude setting to optimize your printing. See page 1.5 for more
information.
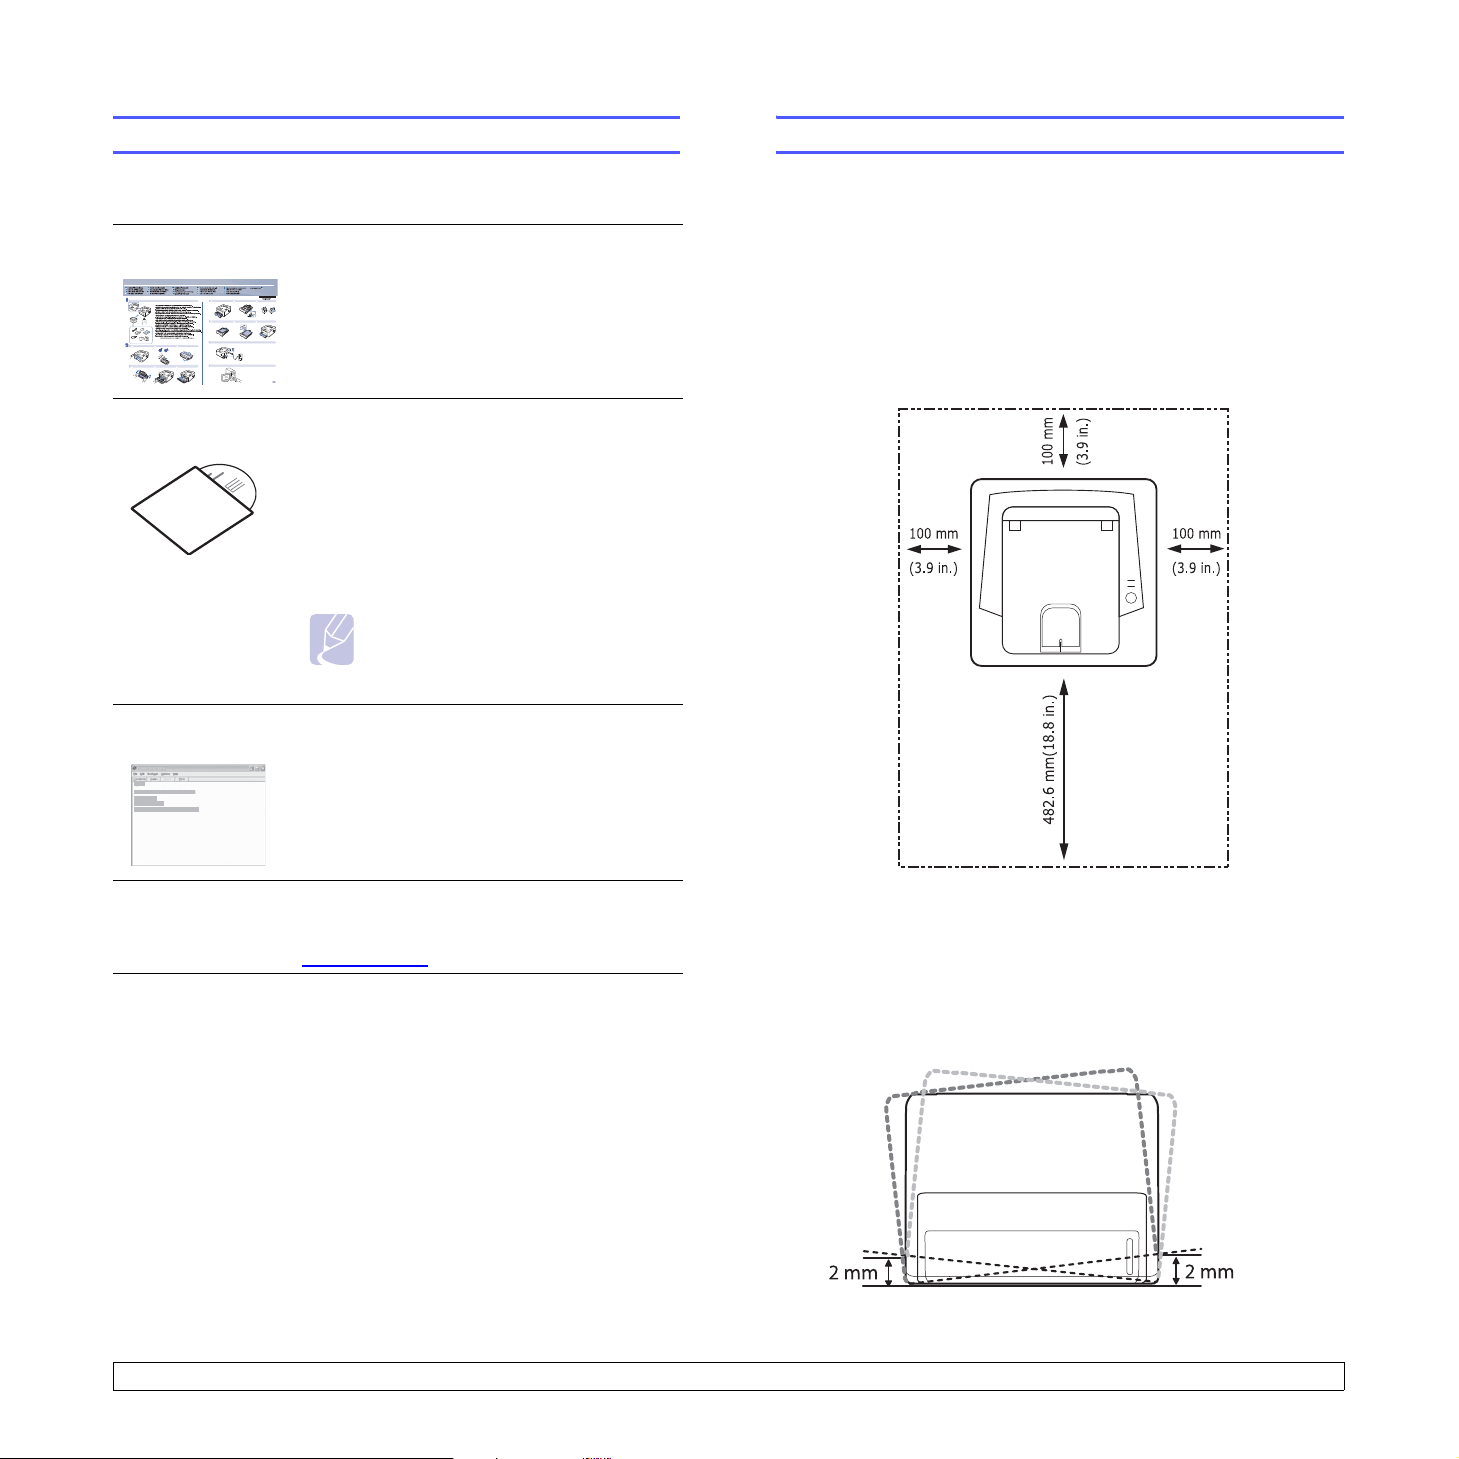
Place the machine on a flat and stable surface so there is no more
than a 2 mm (0.08 inches) tilt. Otherwise, it may affect the printing
quality.
Introduction>
2 Unpack the machine and check all the enclosed items.
3 Remove the tape holding the machine tightly.
4 Install the print cartridge.
5 Load paper. (See «Loading paper» on page 5.4.)
6 Make sure that all the cables are connected to the machine.
7 Turn the machine on.
Caution
• When you move the machine, do not tilt or turn it upside
down. Otherwise, the inside of the machine may be
contaminated by toner, which can cause damage to the
machine or bad print quality.
• During installation of the print driver, your operating system is
automatically detected and the common paper size you use is
set. If you change operating systems, you will have to change
the paper size through the printer properties page.
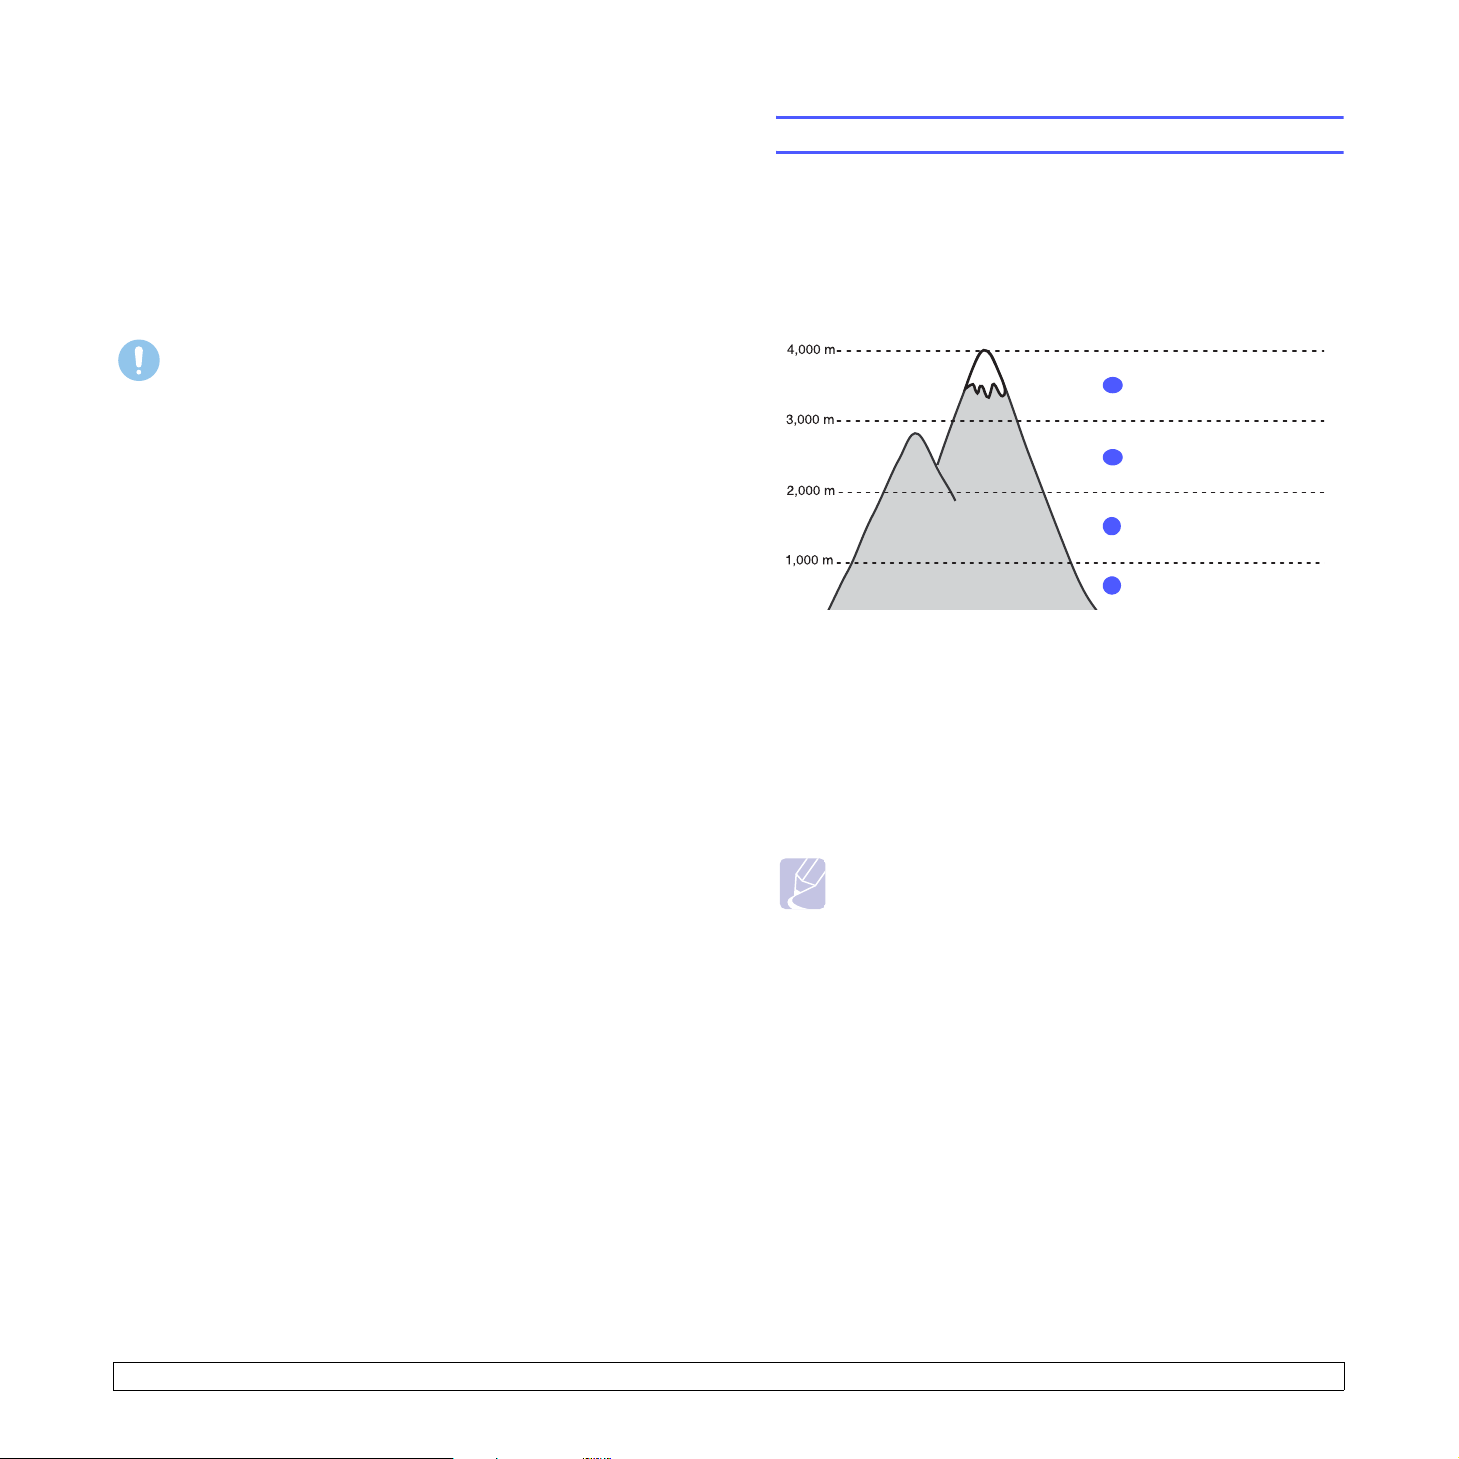
Altitude adjustment
The print quality is affected by at mo sp he ri c pre ssure, which is
determined by the height of the machine above sea level. The following
information will guide you on how to set your machine to the best print
quality or best quality of print.
Before you set the altitude value, find the altitude where you are using
the machine.
Value
High 3
1
High 2
2
3
High 1
Normal
4
1 Ensure that you have installed the printer driver with the provided
Printer Software CD.
2 Double-click the Status Monitor icon on the Windows task bar (or
Notification Area in Linux).
You can also click Status Monitor on the status bar in Mac OS X.
3 Click Printer Setting.
4 Click Setting > Altitude Adjustment. Select the appropriate value
from the dropdown list, and then click Apply.
Note
If your machine is connected to a network, CWIS (CentreWare Internet
Service) screen appears automatically. Click Machine Settings >
Setup (or Machine Setup) > Altitude Adj. Select the appropriate
altitude value, and then click Apply.
1.5 <
Introduction>

Changing the font setting
Your machine has preset th e font for your region or country.
If you want to change the font or set the font for special conditions such
as DOS environment, you can change the font setting as follows:
1 Ensure that you have installed the printer driver from the provided
software CD.
2 Double-click the Status Monitor icon on the Windows task bar (or
Notification Area in Linux). You can also click Status Monitor on
the status bar in Mac OS X.
3 Click Printer Setting.
4 Click Emulation.
5 Confirm if PCL is selected in Emulation Setting.
6 Click Setting.
7 Select your preferred font in the Symbol set list.
8 Click Apply.
Note
Following information shows the proper font list for corresponding
languages.
• Russian: CP866, ISO 8859/5 Latin Cyrillic
• Hebrew: Hebrew 15Q, Hebrew-8, Hebrew-7 (Israel only)
• Greek: ISO 8859/7 Latin Greek, PC-8 Latin/Greek
• Arabic & Farsi: HP Arabic-8, Windows Arabic, Code Page 864,
Farsi, ISO 8859/6 Latin Arabic
• OCR: OCR-A, OCR-B
1.6 <
Introduction>
2 Basic setup
This chapter includes:
• Printing a demo page
• Using toner save mode
Printing a demo page
After setting up your printer, print a demo page to make sure that the
printer is operating correctly.
Press and hold the Start/Stop button for about 2 seconds.
A demo page prints out.
Using toner save mode
Toner save mode allows the printer to use less toner on ea ch page.
Activating this mode extends the life of your print cartridge and reduces
your cost per page beyond what one would experience in the normal
mode, but it reduces print quality.
You can set the toner save mode from the printer properties window on
your printer driver. See the Software Section.
2.1 <
Basic setup>
3 Software overview
This chapter gives you an overview of the software that comes with your
printer. Further details about installing and using the software are
explained in the Software Section.
This chapter includes:
• Supplied software
• Printer driver features
• System requirements
CD Contents
Macintosh • Printer driv er: Use this driver to run
your printer from a Macintosh
computer and print documents.
• Status Monitor: This program allows
you to monitor the printer’s status and
alerts you when an error occurs during
printing.
Printer driver features
Supplied software
You must install the printer software using the supplied CD after you
have set up your printer and connected it to your computer.
The CD provides you with the following software:
CD Contents
Printer
software
CD
Windows • Printer driver: Use this driver to take
full advantage of your printer’s
features.
• Status Monitor: This program allows
you to monitor the printer’s status and
alerts you when an er ror occurs durin g
printing.
• Printer Settings Utility: This program
is automatically installed when you
install the Status Monitor.
• PCL6 driver: Use this driver to print
documents in the PCL6, PCL5e
language.
• PostScript Printer Description
(PPD) file: Use the PostScript driver to
print documents with complex fonts
and graphics in the PostScript
language.
• Set IP: Use this program to set your
printer’s TCP/IP addresses.
• User Guide in PDF
Linux • Printer driver: Use this driver to run
your printer from a Linux computer
and print documents.
• Status Monitor: This program allows
you to monitor the printer’s status and
alerts you when an er ror occurs durin g
printing.
Your printer drivers support the following standard features:
• Paper source selection
• Paper size, orientation and type
• Number of copies
In addition, you can use various special printing features. The following
table shows a general overview of features supported by your printer
drivers:
Feature
Toner save O O O O
Print quality
option
Poster
printing
Multiple
pages per
sheet (N-up)
Fit to page
printing
Scale printing O O O O
Watermark O
Overlay O
PCL 6 PostScript
Windows Windows Macintosh Linux
OO OO
O
O O O O
OO OO
X X X
(2, 4)
X X X
X X X
3.1 <
Software overview>
System requirements
Before you begin, ensure that your system meets the following
requirements:
Windows
Item Requirements Recommended
Operating
system
CPU Windows 200 0 Pentium II
Windows 2000/XP/2003/Vista
400 MHz or
higher
Windows XP/
2003/Vista
Pentium III
933 MHz or
higher
Pentium III
933 MHz
Pentium IV
1GHz
Linux
Item Requirements
Operating system Various Linux OS including
• Red Hat 8~9
• Fedora Core 1~4
• Mandrake 9.2~10.1
• SuSE 8.2~9.2
Processor Pentium IV 1 GHz or higher
RAM 256 MB or higher
Free disk page 1 GB or higher
Software • Linux Kernel 2.4 or higher
• Glibc 2.2 or higher
•CUPS
RAM Windows 2000 64 MB or more 128 MB
Free disk
space
Internet
Explorer
Windows XP/
2003
Windows Vista 512 MB or more 1 GB
Windows 2000 600 MB or more 1 GB
Windows XP/
2003
Windows Vista 15 GB 15 GB or more
Windows 2000/
XP/2003
Windows Vista 7.0 or higher
128 MB or more
1 GB or more 5 GB
5.0 or higher
256 MB
Note
• For Windows 2000/XP/2003/Vista, users who have an
administrator right can install the software.
Macintosh
Operating
system
Mac OS X 10.4
or lower
Mac OS X 10.5
Requirement (Recommended)
CUP RAM
•PowerPC
G4/G5
•Intel
processors
• 867 MHz or
faster
PowerPC
G4/G5
•Intel
processors
• 128 MB for a
• 512 MB for an
512 MB (1 GB) 1 GB
Free HDD
space
1GB
PowerPC based
MAC (512 MB)
Intel based
MAC (1 GB)
3.2 <
Software overview>

4 Network setup (Phaser 3250DN
only)
This chapter gives you basic information for setting up your printer for
network connections.
This chapter includes:
• Introduction
• Supported operating systems
• Using SetIP program
Item Requirements
Network operating
system
Network protocols • TCP/IP
• Windows 2000/XP (32/64 bit)/2003/Vista
• Various Linux OS including Red Hat 8~9,
Fedora Core 1~4, Mandrake 9.2~10.1,
SuSE 8.2~9.2
• Mac OS 10.3~10.5
•EtherTalk
•HTTP 1.1
•SNMP
Introduction
Once you have connected your printer to a network with an RJ-45
Ethernet cable, you can share the printe r wi th other network users.
Switch the printer on.
Note
Holding the button down for 7~8 seconds (green light will blink
fast) then releasing it, will print a configuration page with the IP
address.
You need to set up the network protocols on the printer to use it as your
network printer. Protocols can be set up by the following programs:
• CWIS (CentreWare Internet Service): A web-based printer
management solution for network administrators. CWIS (CentreWare
Internet Service) provides you with an efficient way of managing
network devices and lets you remotely monitor and troubleshoot
network printers from any site with corporate intranet access. You can
download this program from www.xerox.com
• CWIS (CentreWare Internet Service): A web server embedded to
your network print server, which allows you to configure the network
parameters necessary for the printer to connect to various network
environments.
• SetIP: A utility program allowing you to select a network interface and
manually configure the addresses for use with the TCP/IP protocol.
This program is on the software CD that comes with your printer.
.
Dynamic
addressing server
• TCP/IP: Transmission Control Protocol/Internet Protocol
• DHCP: Dynamic Host Configuration Protocol
• BOOTP: Bootstrap Protocol
• DHCP, BOOTP
Using SetIP program
This program is for the network IP setting using the MAC address which
is the hardware serial number of the network printer card or interface.
Especially, it is for the network administrator to set several network IPs
at the same time.
Note
If you want to setup DHCP network protocol, go to the http://
developer.apple.com/networking/bonjour/download/, select
the program Bonjour for Windows due to your computer
operating system, and install the program. This program will
allow you to fix the network parameter automatically. Follow
the instruction in the installation window. This program does
not support Linux.
1 Insert the driver CD provided along with your machine.
2 Open the X drive. (X represents your CD-ROM drive.)
3 Double click Application > SetIP
4 Open the language folder you want to use.
Supported operating systems
The following table shows the network environments supported by the
printer:
Item Requirements
Network interface • 10/100 Base-TX
5 Double click Setup.exe to install this program.
6 From the Windows Start menu, select Programs > Xerox Phaser
3250 > SetIP > SetIP.
7 Select the name of your printer and click “ ”.
Note
If you cannot find your printer name click “ ” to refresh the
list.
4.1 <
Network setup (Phaser 3250DN only)>

8 Enter the network card’s MAC address, IP address, subnet mask,
default gateway, and then click Apply.
Note
If you do not know the network card’s MAC address, print the
machine’s network information report.
9 Click OK to confirm the settings.
10 Click Exit to close the SetIP program.
4.2 <
Network setup (Phaser 3250DN only)>
5 Loading print media
This chapter will help you understand the types of paper you can use
with your printer and how to properly load paper in the different paper
trays for the best print quality.
This chapter includes:
• Selecting print media
• Loading paper
• Output tray information
Selecting print media
Y ou can print on a variety of print media, such as plain paper, envelopes,
labels, and transparencies. Always use print media that meet the
guidelines for use with your printer. Print media that does not meet the
guidelines outlined in this user guide may cause the following problems:
• Poor print quality
• Increased paper jams
• Premature wear of the output tray components
Properties, such as weight, composition, grain, and moisture content,
are important factors that affect the machine’s performance and the
output quality. When you choose print materials, consider the following:
• The type, size and weight of the print media for your machine are
described later in this section.
• Desired outcome: The print media you choose should be appropriate
for your project.
• Brightness: Some print media are whiter than others and produce
sharper, more vibrant images.
• Surface smoothness: The smoothness of the print media affects how
crisp the printing looks on the paper.
Notes
• Some print media may meet all of the guidelines in this section
and still not produce satisfactory results. This may be the
result of improper handling, unacceptable temperature and
humidity levels, or other variables over which Xerox has no
control.
• Before purchasing large quantities of print media, ensure that
it meets the requirements specified in this user guide.
5.1 <
Caution
• Using print media that does not meet these specifications may
cause problems, requiring repairs. Such repairs are not
covered by Xerox’s warranty or service agreements.
Loading print media>
Supported sizes of paper
Type Size Dimensions Weight
Letter 216 x 279 mm (8.5 x 11inches)
Legal 216 x 356 mm (8.5 x 14 inches)
Folio 216 x 330.2 mm (8.5 x 13 inches)
• 60 to 105 g/m
bond) for the tray
• 60 to 163 g/m
bond) for the manual feed
Oficio 216 x 343 mm (8.5 x 13.5 i nches)
A4 210 x 297 mm (8.26 x 11.69 inches)
Plain paper
JIS B5 182 x 257 mm (7.18 x 10.12 inches)
ISO B5 176 x 250 mm (6.93 x 9.84 inches )
Executive 184 x 267 mm (7.25 x 10.5 inches)
A5 148 x 210 mm (5.82 x 8.26 inches)
A6 105 x 148 mm (4.13 x 5.82 inches)
Envelope B5 176 x 250 mm (6.93 x 9.84 inches )
Envelope Monarch 98.4 x 190.5 mm (3.88 x 7.5 inches)
Envelope
Envelope COM-10 105 x 241 mm (4.12 x 9.5 inches)
75 to 90 g/m
2
Envelope DL 110 x 220 mm (4.33 x 8.66 inches)
Envelope C5 162 x 229 mm (6.38 x 9.02 inches)
Envelope C6 114 x 162 mm (4.49 x 6.38 inches)
Transparency Letter, A4 Refer to the Plain paper section 138 to 146 g/m
Letter, Legal, Folio,
Labels
Oficio, A4, JIS B5,
ISO B5, Executive,
Refer to the Plain paper section 120 to 150 g/m
A5, A6
a
2
(16 to 28 lb
2
(16 to 43 lb
Capacity
• 250 sheets of 75 g/m
(20 lb bond) paper for the
tray
b
2
• 1 sheet for manual feeding
(20 to 24 lb) 1 sheet for manual feeding
2
(37 to 39 lb) 1 sheet fo r manual feeding
2
(32 to 40 lb) 1 sheet fo r manual feeding
Letter, Legal, Folio,
Card stock
Oficio, A4, JIS B5,
ISO B5, Executive,
Refer to the Plain paper section 60 to 163 g/m
A5, A6
Minimum size (custom) 76 x 127 mm (3.86 x 5.83 inches)
Maximum size (custom) 215.9 x 356 mm (8.5 x 14 inches)
a. If media weight is over 24 lb (90 g/m2), use the manual feed.
b. Maximum capacity may differ depending on media weight, thickness, and environmental conditions.
5.2 <
Loading print media>
2
(16 to 43 lb) 1 sheet for manual feeding
60 to 163 g/m
2
(16 to 43 lb bond)
1 sheet for manual feeding
Media sizes supported in each mode
Guidelines for special print media
Mode Size Source
Single side
printing
Duplex printing
a. 75 to 90 g/m2 (20 to 24 lb) only.
All sizes supported by
the machine
a
Letter, A4, Legal, Folio,
Oficio
•tray1
• manual feed
•tray1
• manual feed
Guidelines for selecting and storing print media
When selecting or loading paper, envelopes, or other print media, keep
these guidelines in mind:
• Always use print media that conform with the specifications listed on
the next column.
• Attempting to print on damp, curled, wrinkled, or torn paper can caus e
paper jams and poor print quality.
• For the best print quality, use only high quality copier grade paper
specifically recommended for use in laser printers.
• Avoid using the following print media types:
— Paper with embossed lettering, perforations, or a texture that is too
smooth or too rough
— Erasable bond paper
— Multi-paged paper
— Synthetic paper and thermally reactive paper
— Carbonless paper and Tracing paper.
• Use of these types of paper could result in paper jams, chemical
smells, and damage to your printer.
• Store print media in its ream wrapper until you are ready to use it.
Place cartons on pallets or shelves, not on the floor. Do not place
heavy objects on top of the paper, whether it is packaged or
unpackaged. Keep it away from moisture or other conditions that can
cause it to wrinkle or curl.
o
• Store unused print media at temperatures between 15 and 30
o
F). The relative humidity should be between 10 and 70%.
to 86
• Store unused print media in a moisture-proof wrap, such as a plastic
container or bag, to prevent dust and moisture from contaminating
your paper.
• Load special print media types one sheet at a time through the
manual tray to avoid paper jams.
• T o prevent print media, such as transparencies and label sheets, from
sticking together, remove them as they print out.
Caution
• If you print 20 envelopes in succession, the surface of the top
cover may become hot. Please exercise caution.
C (59
Type Guidelines
Envelopes • Successful printing on envelopes depends
upon the quality of the envelopes. When
selecting envelopes, consider the following
factors:
— Weight: The weight of the envelope paper
should not exceed 90 g/m
2
(24 lb) or jamming
may occur.
— Construction: Prior to printing, envelopes
should lie flat with less than 6 mm
(0.25 inches) curl, and should not contain air.
— Condition: Envelopes should not be wrinkled,
nicked, or otherwise damaged.
— Temperature: You should use envelopes that
are compatible with the heat and pressure of
the printer during operation.
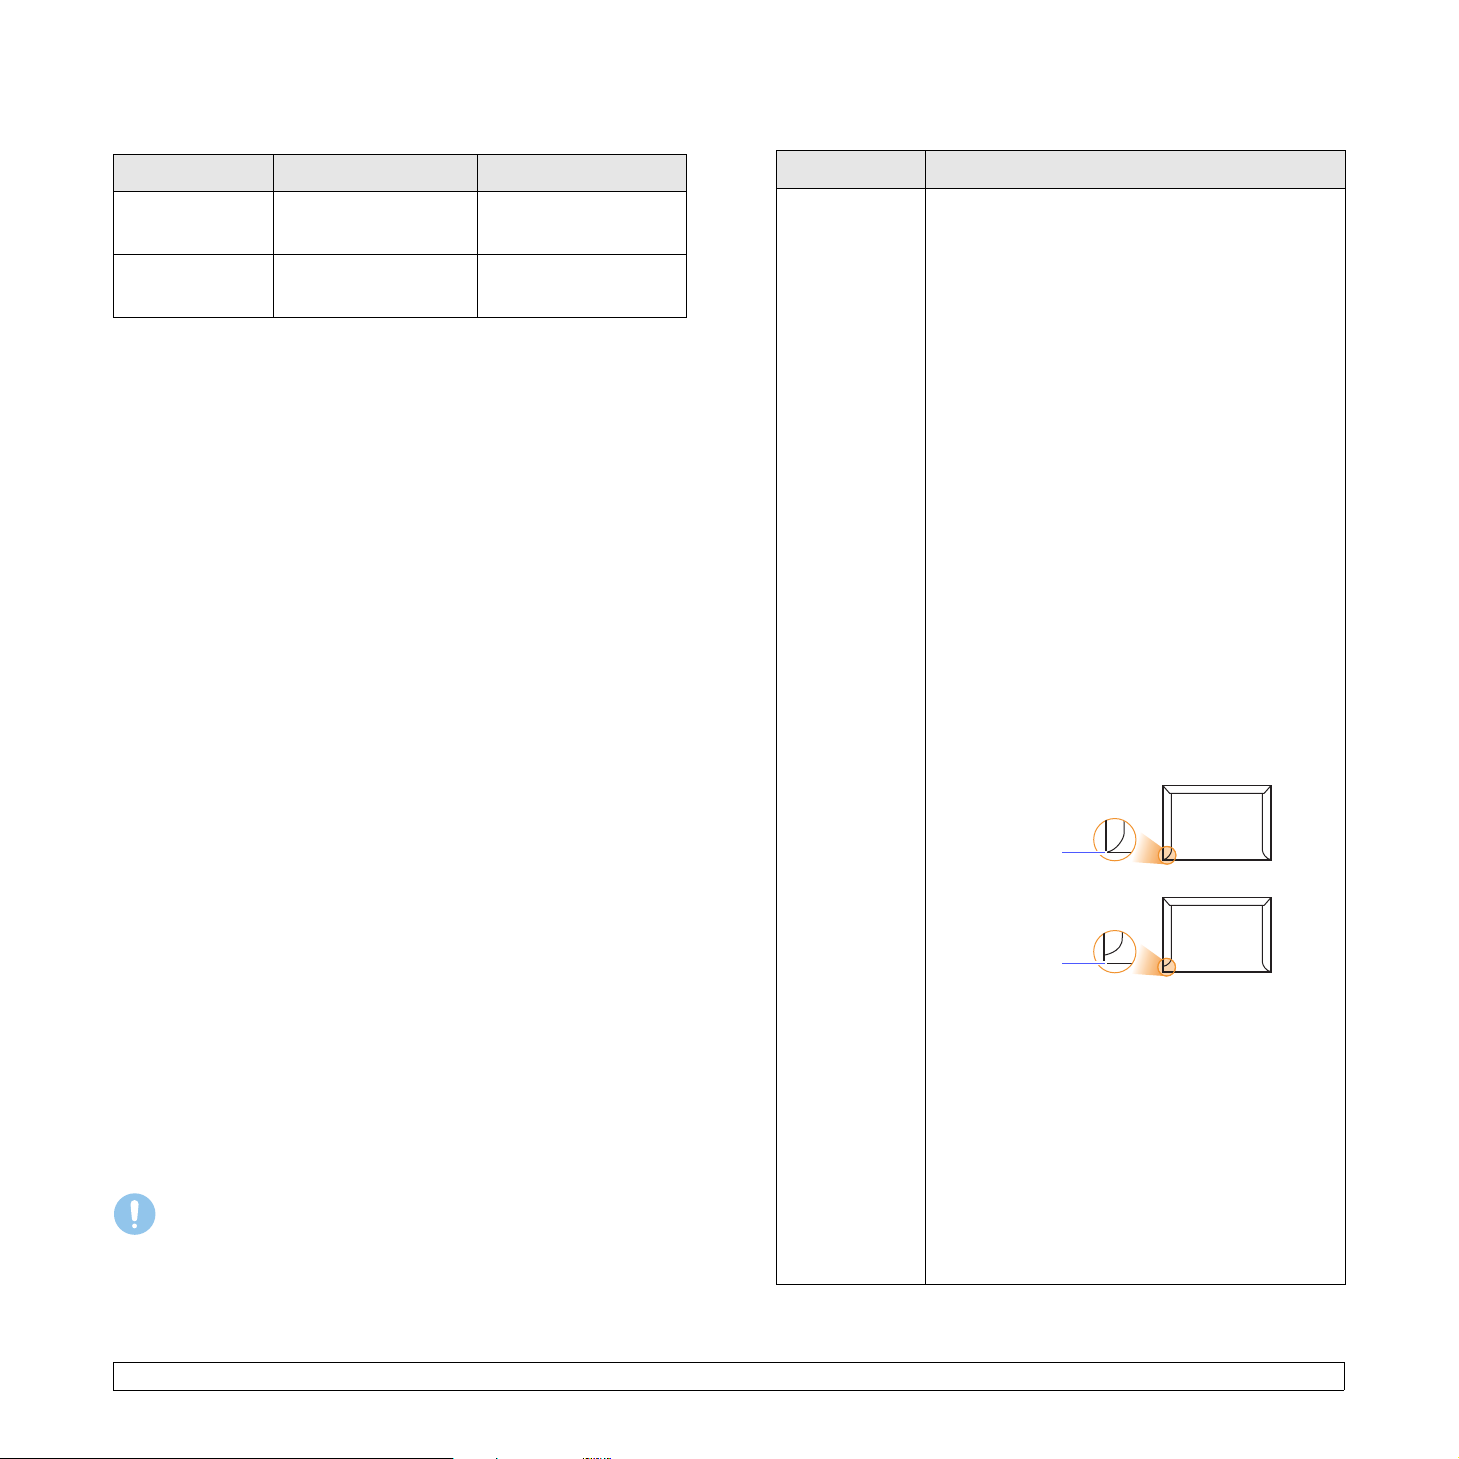
• Use only well-constructed envelopes with sharp
and well creased folds.
• Do not use stamped enve l op es.
• Do not use envelopes with clasps, snaps,
windows, coated lining, self-adhesive seals, or
other synthetic materials.
• Do not use damaged or poorly made
envelopes.
• Be sure the seam at both ends of the envelope
extends all the way to the corner of the
envelope.
Acceptable
Unacceptable
• Envelopes with a peel-off adhesive strip or with
more than one flap that folds over to seal must
use adhesives compatible with the printer’s
fusing temperature for 0.1 second. Check your
machine’s specification to view the fusing
temperature, see page 11.1. The extra flaps
and strips might cause wrinkling, creasing, or
jams, and may even damage the fuser.
• For the best print quality, position margins no
closer than 15 mm (0.6 inches) from the edges
of the envelope.
• Avoid printing over the area where the
envelope’s seams meet.
5.3 <
Loading print media>
Type Guidelines
Type Guidelines
Transparencies • To avoid damaging the printer, use only
transparencies designed for use in laser
printers.
• Transparencies used in the printer must be able
to withstand the machine’s fusing temperature.
Check your machine’s specification to view the
fusing temperature, see page 11.1.
• Place them on a flat surface after removing
them from the printer.
• Do not leave them in the paper tray for long
periods of time. Dust and dirt may accumulate
on them, resulting in spotty printing.
• To avoid smudging caused by fingerprints,
handle them carefully.
• To avoid fading, do not expose printed
transparencies to prolonged sunlight.
• Ensure that transparencies are not wrinkled,
curled, or have any torn edges.
Labels • To avoid damaging the printer, use only labels
designed for use in laser printers.
• When selecting labels, consider the following
factors:
— Adhesives: The adhesive material should be
stable at 180° C (356° F), the printer’s fusing
temperature.
— Arrangement: Only use labels with no
exposed backing between them. Labels can
peel off sheets that have spaces between the
labels, causing serious jams.
— Curl: Prior to printing, labels must lie flat with
no more than 13 mm (5 inches) of curl in any
direction.
— Condition: Do not use labels with wrinkles,
bubbles, or other indications of separation.
• Make sure that there is no exposed adhesive
material between labels. Exposed areas can
cause labels to peel off during printing, which
can cause paper jams. Exposed adhesive can
also cause damage to printer components.
• Do not run a sheet of labels through the printer
more than once. The adhesive backing is
designed for only a single pass through the
printer.
• Do not use labels that are separating from the
backing sheet or are wrinkled, bubbled, or
otherwise damaged.
Preprinted
paper
• Letterhead must be printed with heat-resistant
ink that will not melt, vaporize, or release
hazardous emissions when subjected to the
printer’s fusing temperature for 0.1 second.
Check your machine’s specification to view the
fusing temperature, see page 11.1.
• Letterhead ink must be non-flammable and
should not adversely affect printer rollers.
• Forms and letterhead should be sealed in a
moisture-proof wrapping to prevent changes
during storage.
• Before you load preprinted paper, such as
forms and letterhead, verify that the ink on the
paper is dry. During the fusing process, wet ink
can come off preprinted paper, reducing print
quality.
Loading paper
Load the print media you use for the majority of your print jobs in the tray
1. The tray 1 can hold a maximum of 250 sheets of 20 l b plain paper.
You can purchase an optional tray (tray 2) and attach it below the
standard tray to load an additional 250 sheets of paper. For order
information for an optional tray, see 7.1.
The paper level indicator on the front of the tray 1 and the optional tray
2 shows the amount of paper currently left in the tray. When the tray is
empty, the indicator bar is completely lowered.
3250-033
Full ▲
▲ Empty
Card stock or
custom-sized
materials
• Do not print on print media smaller than 76 mm
(3 inches) wide or 127 mm (5 inches) long.
• In the software application, set margins at least
6.4 mm (0.25 inches) away from the edges of
the material.
5.4 <
Loading print media>
Using tray 1 or the optional tray 2
Use the print material you use for the majority of your print jobs in tray 1.
Tray 1 can hold a maximum of 250 sheets of 75 g/m
Y ou can purchase an optional tray 2 and attach it below tray 1 to load an
additional 250 sheets of paper.
To load paper, pull open the tray and load paper with the side to be
printed on face down.
2
3250-030
paper.
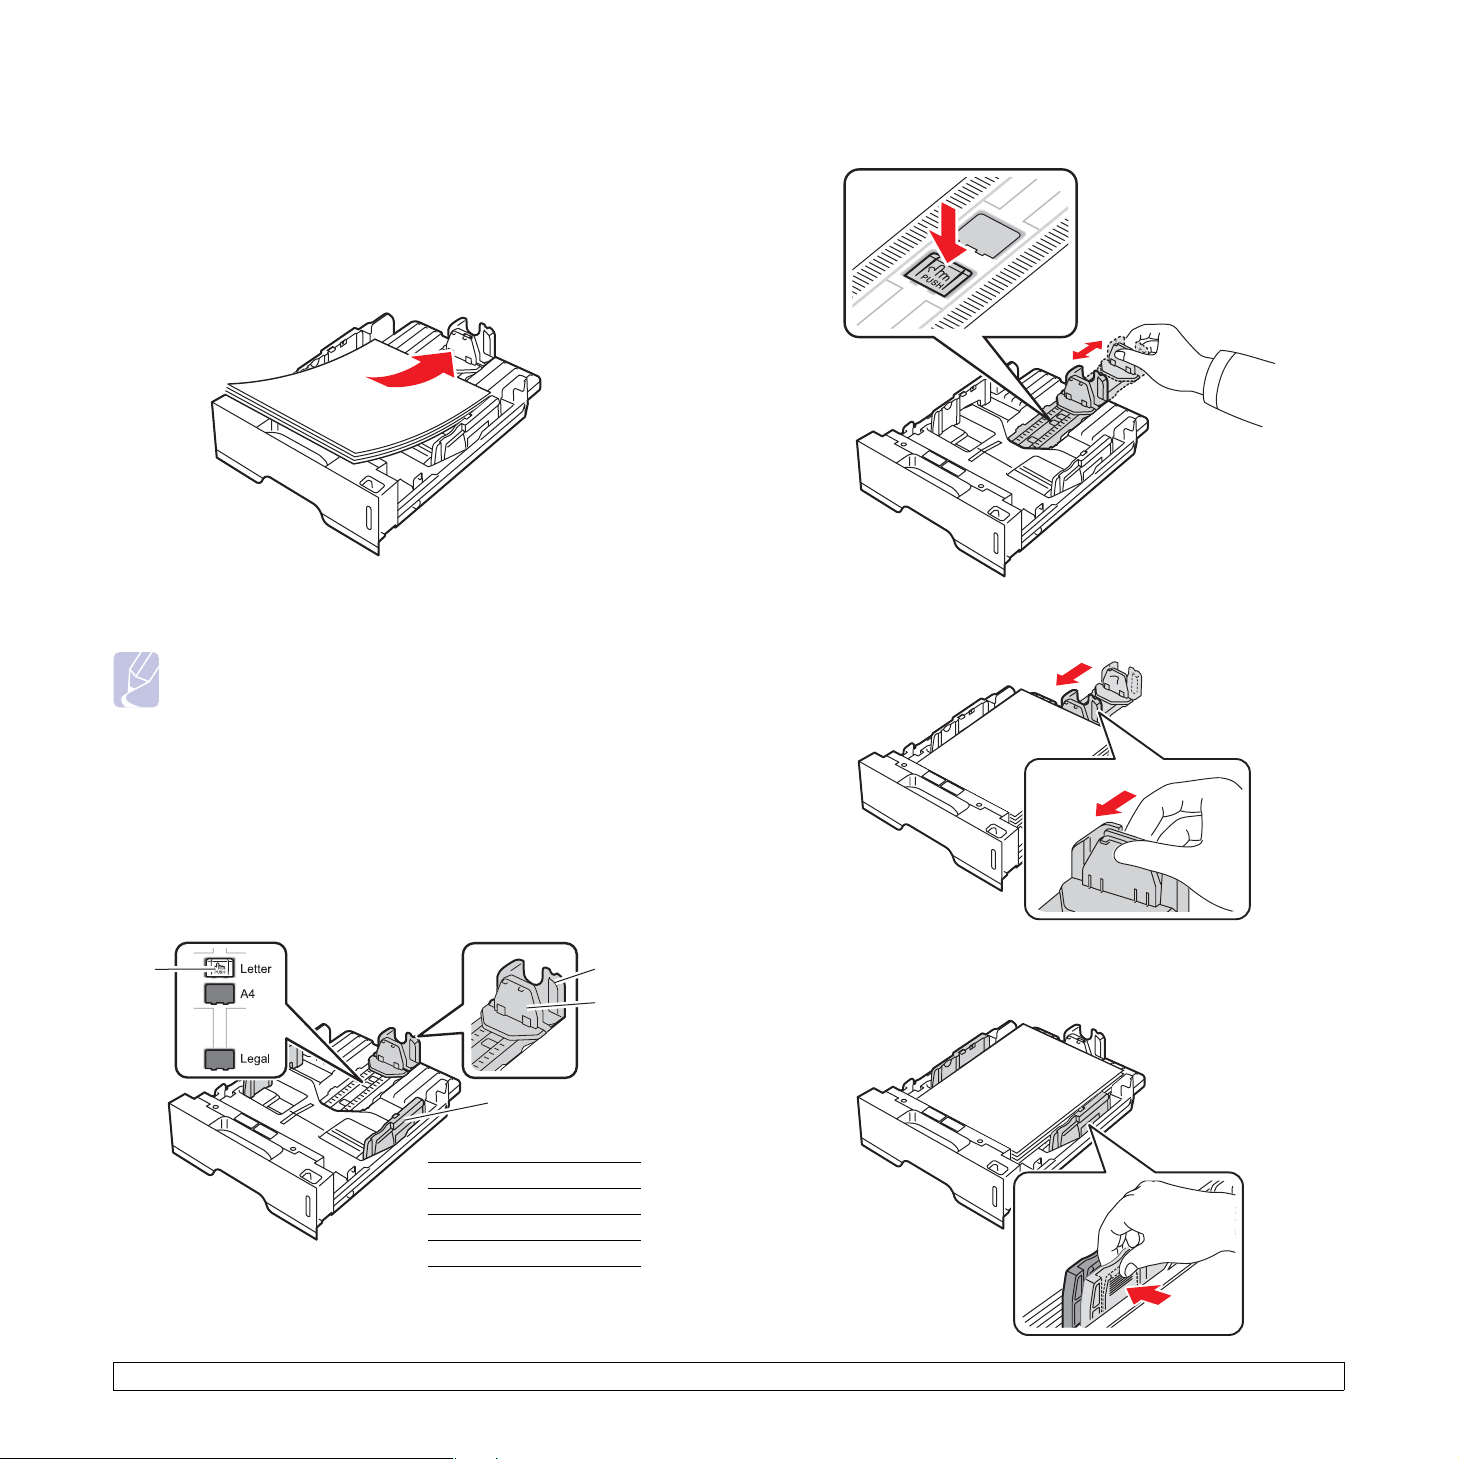
1 Press and hold the guide lock, and slide the paper length guide to
locate it in the correct paper size slot.
You can load letterhead paper with the design side face down. The top
edge of the sheet with the logo should be placed at the front of the tray.
Notes
• If you experience problems with paper feed, place one sheet
at a time in the manual feed.
• You can load previously printed paper. The printed side
should be facing up with an uncurled edge at the front. If you
experience problems with paper feed, turn the paper around.
Note that the print quality is not guaranteed.
Changing the size of the paper in tray 1
To load longer sizes of paper, such as Legal-sized paper, you need to
adjust the paper guides to extend the paper tray.
3
1
2
4
paper length guide
1
support guide
2
guide lock
3250-042
3
paper width guides
4
2 After inserting paper into the tray , adjust the support guide so that it
lightly touches the paper stack.
3250-028
3 Squeeze the paper width guides, as shown and slide them to the
stack of paper until they lightly touch the side of the stack.
5.5 <
3250-029
Loading print media>
Notes
• Do not push the paper width guide far enough to cause the
material to warp.
• If you do not adjust the paper width guide, it may cause paper
jams.
Using the manual feeder
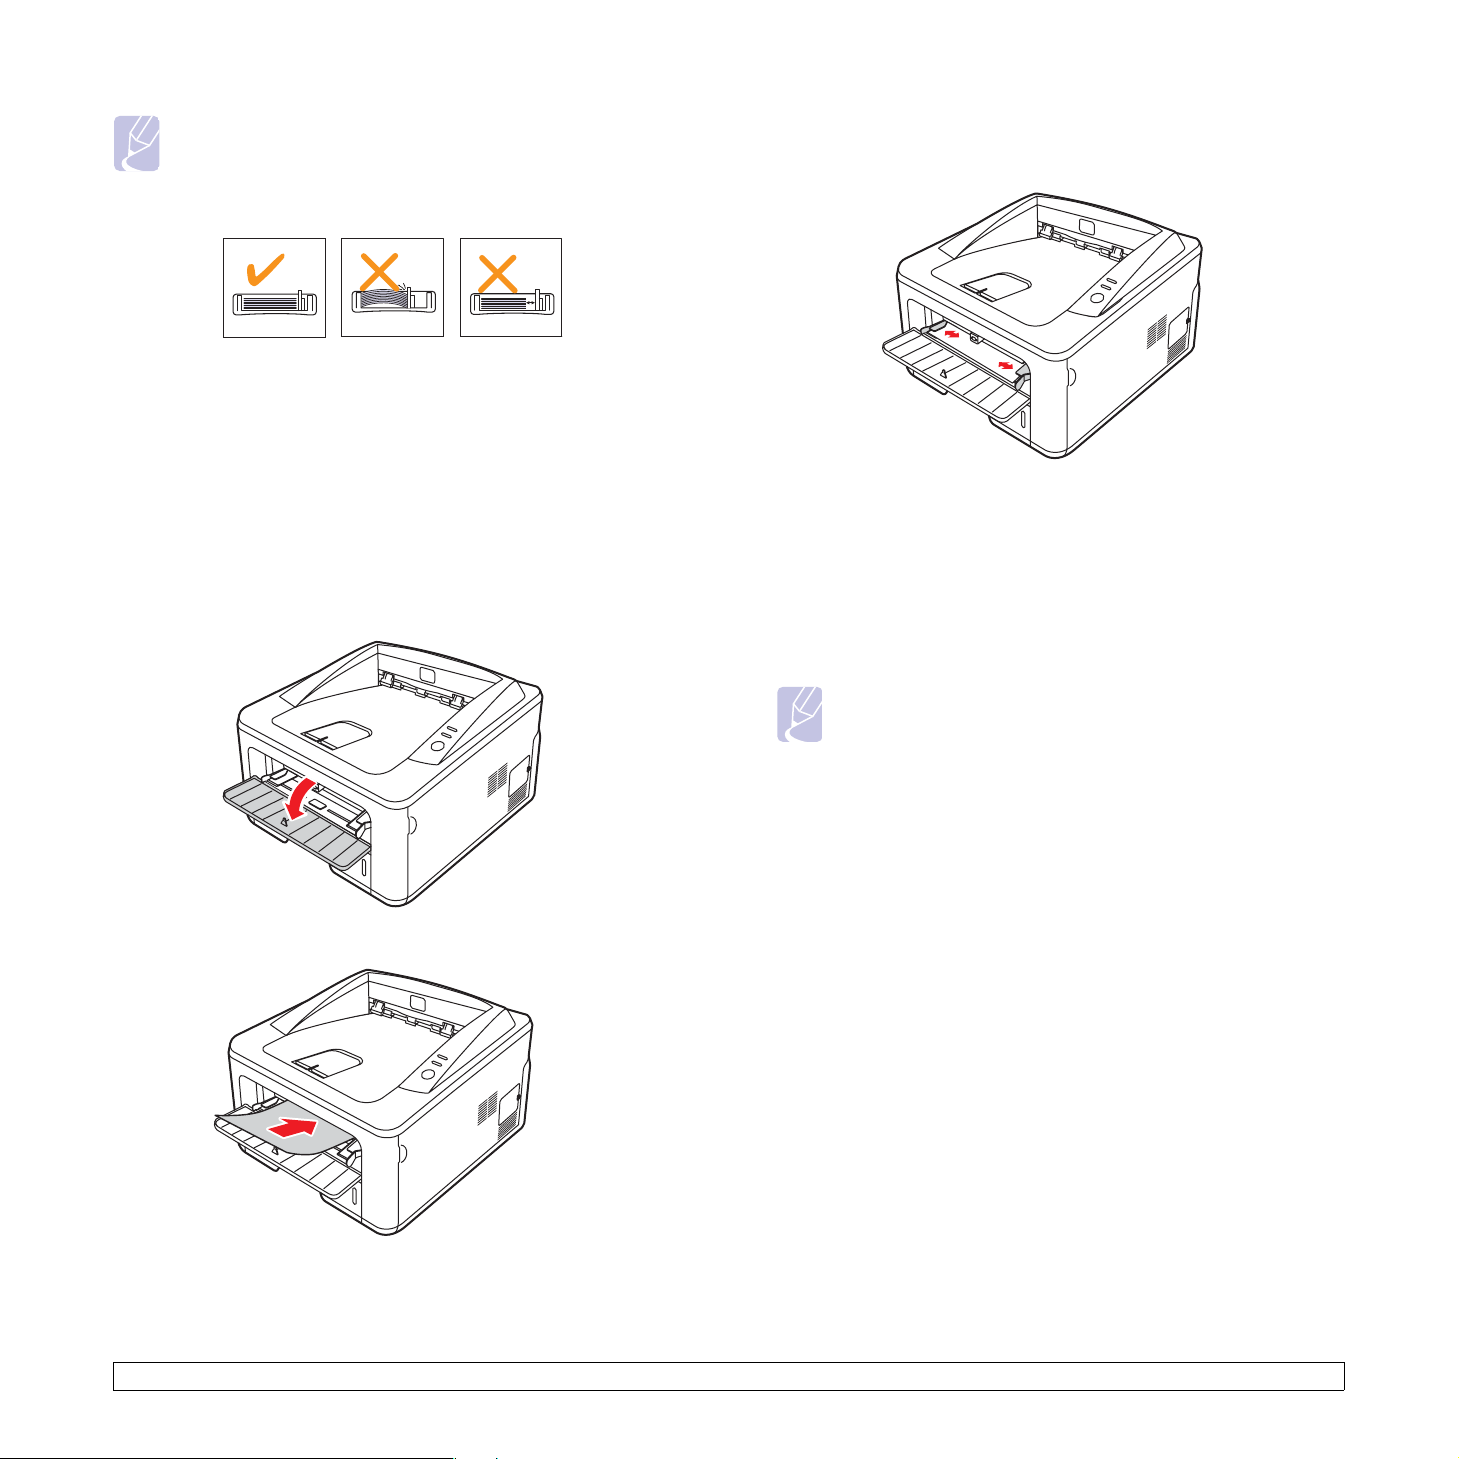
You can manually load a sheet of print media in the manual tray if you
select Manual Feeder in the Source option from the Paper tab when you
change print settings to print a document. See the Software Section.
Manually loading paper can be helpful when you want to check the print
quality after each page is printed.
Load paper sheet-by-sheet in the manual tray, send print data to print the
first page, and press the Start/Stop button on the control panel to print
each following page.
3 Adjust the manual tray paper width guides to the width of the paper.
Do not force too much, or the paper will bend, which could result in
a paper jam or skew.
3250-026
4 When you print a document, set the paper source to Manual
Feeder and select the appropriate paper size and type in the
software application. See the Software Section.
5 Print a document.
1 Open the manual feed door.
3250-024
2 Load the paper with the side to be printed on facing up.
6 Press the Start/Stop button.
The printer feeds the next sheet.
Note
• If you do not press the Start/Stop button, after a pause the
printer will automatically feed the print media.
7 Insert the next sheet into the manual tray and press the Start/Stop
button.
Repeat this step for every page to be printed.
3250-025
5.6 <
Loading print media>
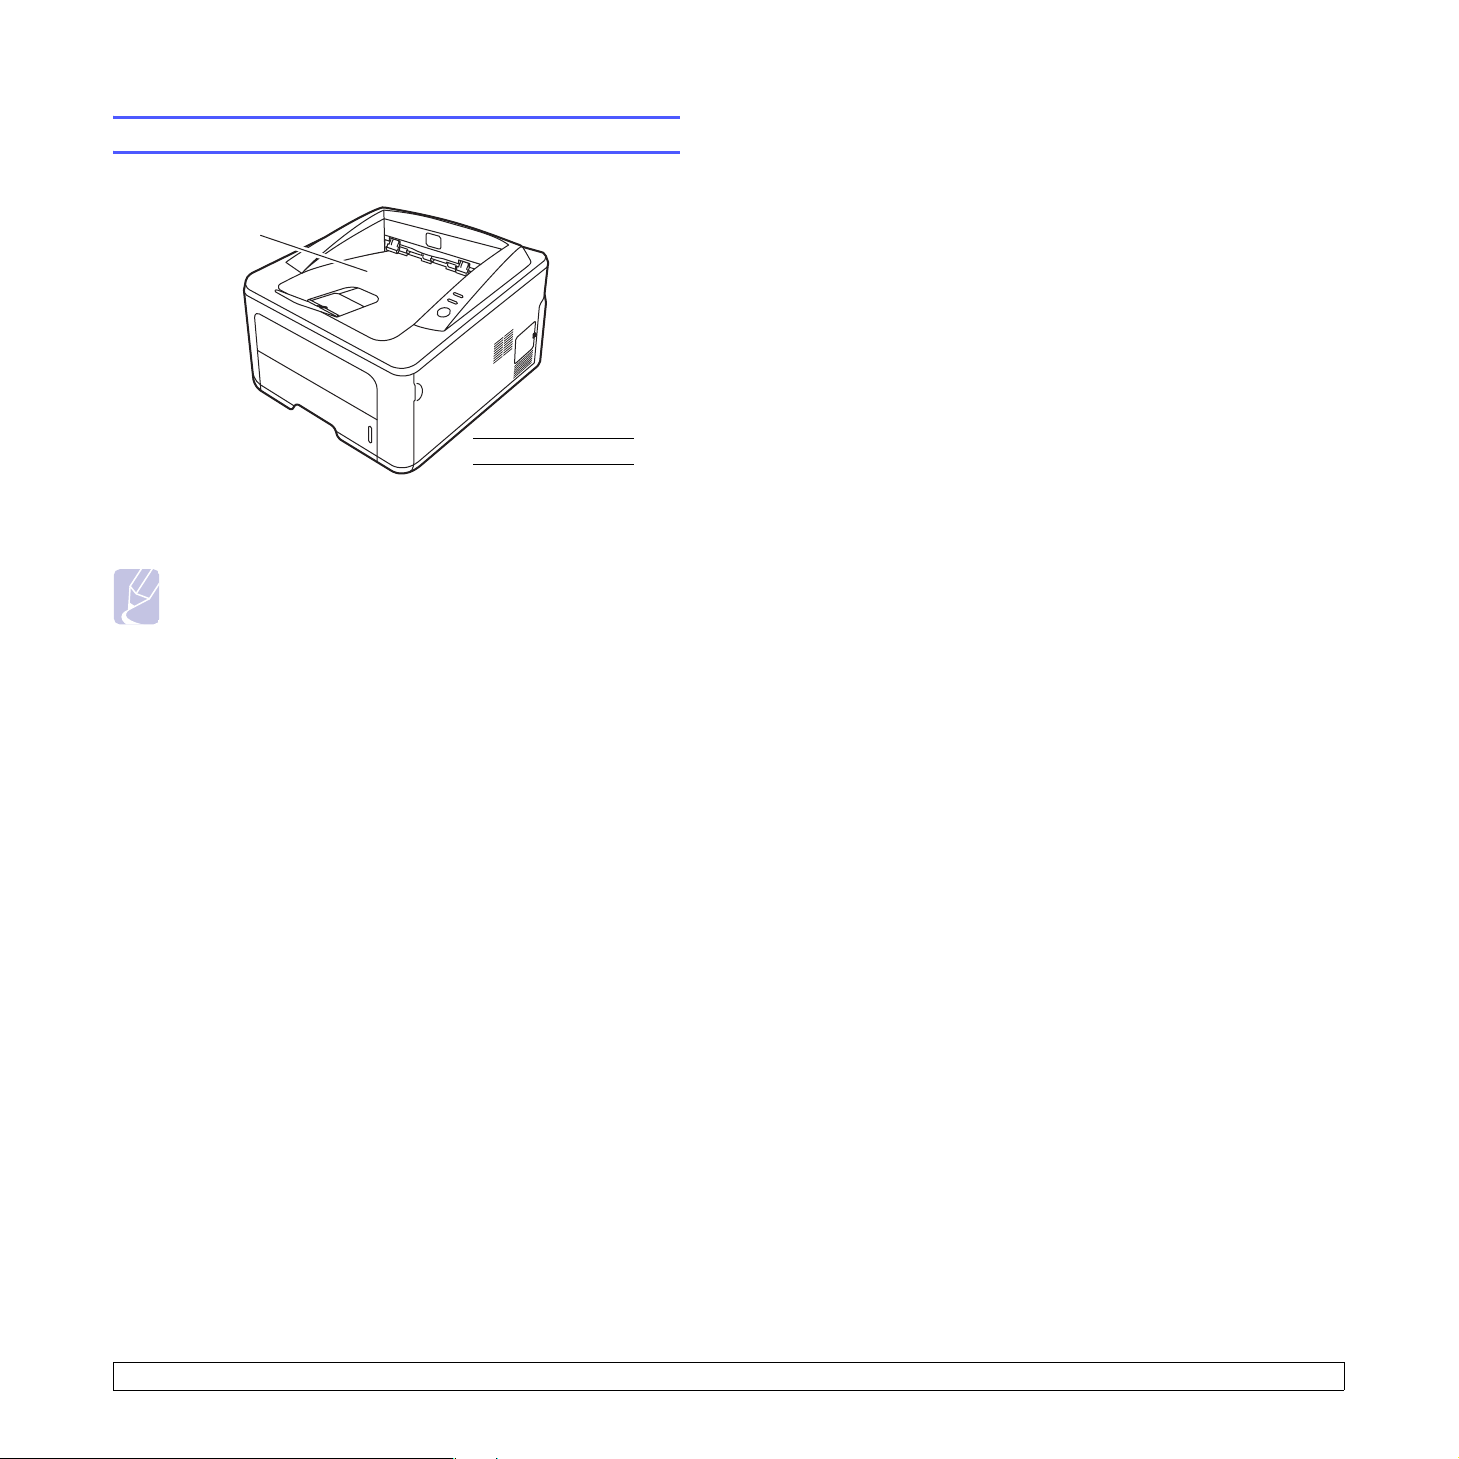
Output tray information
1
output tray
3250-043
The output tray collects paper face down, in the order in which the sheets
were printed.
Notes
• If you continuously print many pages, the surface of the output
tray may become hot. Be careful not to touch the surface, and
especially keep children away from the surface.
• The output tray can hold up to 150 sheets of 75 g/m
plain paper. Remove the pages so that the tray is not
overloaded.
1
2
(20 lb)
5.7 <
Loading print media>
6 Basic printing
This chapter explains common printing tasks.
This chapter includes:
• Printing a document
• Canceling a print job
Printing a document
This printer allows you to print from variou s Wind ows, Macintosh, or
Linux applications. The exact steps for printing a document may vary
depending on the application you use.
For details about printing, see the Software Section.
Canceling a print job
If the print job is waiting in a print queue or print spooler, such as the
printer group in Windows, delete the job as follows:
1 Click the Windows Start button.
2 For Windows 2000, select Settings and then Printers.
For Windows XP (32/64 bit)/2003, select Printers and Faxes.
For Windows Vista, select Control Panel > Hardware and Sound
> Printers.
3 Double-click the Xerox Phaser 3250 icon.
4 From the Document menu, select
Note
• You can access this window simply by double-clicking the
printer icon at the bottom right corner of the Windows desktop.
Y ou can also ca ncel the current job by pressing the Start/Stop button on
the control panel of your printer.
Cancel.
6.1 <
Basic printing>
Loading…
- Инструкции и руководства
- Бренды
- Xerox
- Phaser 3250
- Руководство Пользователя
Руководство пользователя

Данное руководство предназначено только для ознакомления. Лю…
Страница 2 Чат поддержки
- Текст
Данное руководство предназначено только для ознакомления. Любая информация, содержащаяся в нем, может быть изменена без
предупреждения. Корпорация Xerox Corporation не несет ответственности за какие-либо убытки, прямые или косвенные, понесенные в результате
использования данного руководства или связанные с ним.
© Xerox Corporation, 2008.
Все права защищены.
• Phaser 3250D
и Phaser 3250DN являются названиями моделей корпорации Xerox Corporation.
• Xerox
и логотип Xerox являются товарными знаками корпорации Xerox Corporation.
• IBM
и IBM PC являются товарными знаками корпорации International Business Machines.
• PCL
и PCL 6 являются товарными знаками корпорации Hewlett-Packard.
• Microsoft, Windows
и Windows Vista являются зарегистрированными товарными знаками или товарными знаками корпорации Microsoft.
• PostScript 3
является товарным знаком корпорации Adobe System, Inc.
• UFST®
и MicroType™ являются зарегистрированными товарными знаками Monotype Imaging Inc.
• TrueType, LaserWriter
и Macintosh являются товарными знаками корпорации Apple Computer, Inc.
•
Остальные торговые марки и названия продуктов являются товарными знаками соответствующих компаний или организаций.

i
Меры предосторожности
Введение в технику безопасности
Замечания и техника безопасности
Перед эксплуатацией устройства внимательно прочтите приведенные
ниже инструкции. При необходимости обращайтесь к ним, чтобы
обеспечить безопасную работу устройства в течение всего срока
его службы.
Данное устройство Xerox и расходные материалы к нему разработаны
с учетом строгих требований в отношении безопасности и проверены
на соответствие этим требованиям, в том числе прошли испытания
на соответствие требованиям агентства оценки и сертификации,
удовлетворяют нормам электромагнитной безопасности
и действующим стандартам экологической безопасности.
Проверка эксплуатационных характеристик устройства, а также его
соответствия требованиям безопасности и экологичности проводилась
исключительно с использованием материалов XEROX.
ВНИМАНИЕ! Несанкционированная модификация устройства путем
расширения его функций или подключения внешних устройств
может повлиять на условия сертификации. Дополнительную
информацию можно получить в представительстве Xerox.
Знаки и маркировка
Символы
Следуйте предупреждениям и инструкциям, имеющимся на самом
устройстве и в прилагаемой к нему документации.
ВНИМАНИЕ! Данный символ предупреждает пользователей
о потенциально опасных для здоровья компонентах
устройства.
ВНИМАНИЕ! Данный символ предупреждает пользователей
об опасности прикосновения к горячим компонентам
устройства.
ПРЕДУПРЕЖДЕНИЕ. Данный символ предупреждает
пользователей о компонентах устройства, требующих
повышенного внимания во избежание травм или
повреждения оборудования.
ВНИМАНИЕ! Данный символ указывает на то, что
в устройстве используется лазер, и предупреждает
пользователей о необходимости придерживаться
определенных требований безопасности.
ПРИМЕЧАНИЕ. Данный символ акцентирует внимание
на информации, которую важно помнить.
Излучение радиоволн
Замечания Федеральной комиссии связи США
ПРИМЕЧАНИЕ
.
Настоящее устройство прошло испытания,
показавшие его соответствие ограничениям, относящимся к части 15
правил Федеральной комиссии по средствам связи США для
цифровых устройств класса B. Эти ограничения введены, чтобы
в разумных пределах обеспечить защиту от вредных помех в жилых
помещениях. Данное оборудование генерирует, использует и может
излучать радиоволны, а в случае установки и эксплуатации
с нарушением инструкций — создавать помехи на линиях радиосвязи.
Однако отсутствие помех в конкретном случае установки
не гарантируется. Если устройство создает помехи радио-
и телевизионному приему (что можно определить путем его
выключения и включения), пользователю рекомендуется попытаться
устранить помехи одним из указанных ниже способов.
—
Переориентировать или переместить приемную антенну.
—
Увеличить расстояние между устройством и приемником.
—
Подключить оборудование и приемное устройство к разным
ветвям сети электропитания.
—
Проконсультироваться с продавцом, радиотехником или
телемастером.
Внесение не санкционированных корпорацией Xerox изменений
в конструкцию оборудования может повлечь за собой лишение
прав на его использование.
Электромагнитная совместимость для Канады
Данное цифровое устройство класса B соответствует требованиям
действующего в Канаде стандарта ICES-003.
Cet appareil numérique de la classe « B » est conforme à la norme
NMB-003 du Canada.
Введение в технику безопасности при работе
с лазерным излучением
Техника безопасности при работе с лазерным
излучением
ПРЕДУПРЕЖДЕНИЕ. Использование элементов управления
и настроек или выполнение операций, не описанных
в настоящем руководстве, может подвергнуть пользователя
воздействию опасного излучения.
Данное устройство соответствует международным
стандартам безопасности для лазерных устройств класса 1.
Данное устройство соответствует государственным,
международным и национальным стандартам для
лазерных устройств класса 1. Поскольку на всех этапах
работы луч экранируется корпусом устройства, его внешняя
поверхность не пропускает опасного излучения.

ii
Информация о безопасной эксплуатации
Информация о безопасной эксплуатации
Данное оборудование Xerox и расходные материалы к нему
разработаны с учетом строгих требований безопасности и проверены
на соответствие этим требованиям, в том числе прошли испытания на
соответствие требованиям агентства безопасности и действующим
стандартам экологической безопасности.
Для безопасной эксплуатации оборудования Xerox всегда следуйте
данным инструкциям.
Рекомендации
•
Следуйте предупреждениям и инструкциям, имеющимся на
самом устройстве и в прилагаемой к нему документации.
•
Перед чисткой устройство необходимо отключить от
электрической розетки. Не используйте средства, специально
не предназначенные для данного устройства. Это может
отрицательно повлиять на его производительность и привести
к возникновению опасных ситуаций.
•
Не используйте аэрозольные очистители. При определенных
обстоятельствах они могут быть взрыво- и пожароопасными.
•
Проявляйте осторожность при перемещении устройства.
По вопросам транспортировки копировального аппарата
обращайтесь в местный отдел сервисного
обслуживания Xerox.
•
Аппарат следует устанавливать на твердую поверхность
(
не на ковровое покрытие), обладающую необходимой
прочностью.
•
Устанавливайте устройство в хорошо проветриваемой зоне.
Окружающее свободное пространство должно быть
достаточным для обслуживания.
•
Всегда отключайте устройство от электрической розетки на
время чистки.
•
ПРИМЕЧАНИЕ. Устройство Xerox оснащено системой
экономии электроэнергии во время простоя. Оно может
постоянно находиться во включенном состоянии.
•
ВНИМАНИЕ! Расположенные вблизи термофиксатора
металлические поверхности могут сильно нагреваться.
Поэтому соблюдайте осторожность при устранении замятия
бумаги в этой зоне и избегайте соприкосновения с любыми
металлическими поверхностями.
Запрещенные действия
•
Запрещается использовать заземляющий штепсель-переходник
при включении оборудования в розетку, не имеющую
заземляющего контакта.
•
При обслуживании устройства не производите операции,
не перечисленные в данном руководстве.
•
Во избежание перегрева запрещается перекрывать
вентиляционные отверстия аппарата.
•
Не снимайте щитки и кожухи, закрепленные винтами.
Расположенные под ними компоненты устройства не
предназначены для обслуживания пользователем.
•
Не устанавливайте устройство вблизи радиаторов или других
источников тепла.
•
Не допускайте попадания посторонних предметов
в вентиляционные отверстия устройства.
•
Не блокируйте и не отключайте электрические и механические
блокировки.
•
При установке устройства убедитесь в том, что шнур питания
расположен в безопасной зоне и не может быть случайно задет.
•
Не допускается установка устройства в помещениях,
не оборудованных средствами вентиляции. Для получения
дополнительной информации обратитесь к местному
торговому представителю.
Сведения об электрической безопасности
1
Электрическая розетка для подключения аппарата должна
удовлетворять требованиям, указанным на табличке
технических данных, расположенной на задней поверхности
аппарата. При возникновении сомнений в соответствии
характеристик сети питания этим требованиям обратитесь
к поставщику электроэнергии или электрику.
2
Электрическая розетка должна располагаться в легкодоступной
зоне рядом с устройством.
3
Используйте сетевой шнур из комплекта поставки. Запрещается
использовать удлинитель, заменять или модифицировать
оригинальный шнур питания.
4
Подключайте шнур питания напрямую к заземленной
электрической розетке. Чтобы проверить правильность
заземления розетки, обратитесь к квалифицированному
электрику.
5
Запрещается использовать переходники для подключения
любого оборудования Xerox к розеткам, не имеющим
заземляющего контакта.
6
При установке устройства убедитесь в том, что шнур питания
расположен в безопасной зоне и не может быть случайно задет.
7
Не ставьте предметы на шнур питания.
8
Не препятствуйте действию устройств электрической или
механической блокировки.
9
Не допускайте попадания посторонних предметов в пазы
или отверстия в корпусе устройства. Это может привести
к поражению электрическим током или возгоранию.
10
Не перекрывайте вентиляционные отверстия. Они обеспечивают
правильное охлаждение устройства Xerox.
11
Устройство отключения. Функцию устройства отключения
для данного оборудования выполняет шнур питания.
Он подключается к задней панели устройства. Для того
чтобы полностью обесточить устройство, отключите шнур
питания от розетки.

Информация об обслуживании, Сертификаты безопасности устройства, Электропитание
Устройство отключения, Аварийное отключение питания, Информация об озоне, Информация о расходных материалах Чат поддержки
- Изображение
- Текст
iii
Электропитание
1
Характеристики сети питания, необходимой для данного
устройства, указаны на наклейке с техническими данными. За
информацией о соответствии характеристик сети питания
установленным требованиям обратитесь в местное отделение
Энергонадзора.
2
ВНИМАНИЕ! Данное оборудование должно быть подключено
к заземленной сети электропитания. Штепсельная вилка данного
оборудования снабжена контактом заземления. Она совместима
только с розетками заземленных сетей электропитания. Это
сделано в целях безопасности. Если не удается вставить вилку
в розетку, обратитесь к электрику для замены розетки.
3
Данное оборудование должно быть подключено к правильно
заземленной электрической розетке. Для проверки
электрической розетки обратитесь к квалифицированному
электрику.
Устройство отключения
Функцию устройства отключения для данного оборудования
выполняет шнур питания. Он подключается к задней панели
устройства. Для того чтобы полностью обесточить устройство,
выньте шнур питания из электрической розетки.
Аварийное отключение питания
При возникновении одной из описанных ниже ситуаций немедленно
выключите устройство и отключите шнур(ы) питания от
электрической розетки (розеток). Для того чтобы устранить
проблему, свяжитесь с уполномоченным представителем
сервисного центра Xerox.
•
От устройства исходит несвойственный запах или
посторонний шум.
•
Шнур питания поврежден.
•
Сработали настенный выключатель, предохранитель
или другое защитное устройство.
•
В аппарат попала жидкость.
•
Устройство подверглось воздействию влаги.
•
Один из компонентов устройства поврежден.
Информация об озоне
В ходе работы данного устройства выделяется озон. Озон тяжелее
воздуха, а интенсивность его выделения зависит от объема
копирования. Устанавливайте устройство в хорошо проветриваемом
помещении. При обеспечении правильных условий окружающей
среды концентрация озона не превышает безопасные значения.
Дополнительную информацию об озоне вы можете получить в
местном представительстве Ксерокс.
Информация об обслуживании
1
Процедуры обслуживания устройства описаны в документации,
входящей в комплект поставки.
2
Любые типы обслуживания, не указанные в пользовательской
документации, запрещены.
3
Не используйте чистящие аэрозоли. Использование
нерекомендованных очистителей может отрицательно
сказаться на производительности устройства и повлечь
возникновение опасных ситуаций.
4
При использовании расходных материалов и чистящих средств
следуйте указаниям данного руководства.
5
Не снимайте щитки и кожухи, закрепленные винтами.
Расположенные под ними компоненты устройства не
предназначены для обслуживания или ремонта пользователем.
6
Выполнение процедур обслуживания устройства допускается
только при условии прохождения обучения в авторизованном
представительстве или наличия описания в настоящем
руководстве.
Информация о расходных материалах
1
Храните расходные материалы в соответствии с инструкциями
на их упаковке.
2
Храните расходные материалы в недоступном для детей месте.
3
Не подвергайте тонер, контейнер для его сбора или картриджи
воздействию открытого огня.
Сертификаты безопасности устройства
Ниже перечислены агентства, которые сертифицировали
устройство в соответствии с указанными стандартами безопасности.
Сертификация в России.
Аппарат сертифицирован в системе сертификации ГОСТ Р
ГОССТАНДАРТА России.
Устройство изготовлено на производстве с системой контроля
качества ISO 9001.
Агентство
Стандарт
Underwriters
Laboratory Inc.
UL60950-1 1st (2003),
первая редакция
(
США/Канада)
Intertek ETL Semko
IEC60950-1: 2001,
первая редакция

iv
Нормативная информация
Сертификация в Европе
CE:
маркировка CE указывает на заявление корпорации XEROX
о соответствии требованиям перечисленных ниже директив
Европейского союза от указанных дат.
12
декабря 2006 г.: директива Совета 2006/95/EC с поправками.
Сближение законодательства государств-членов в отношении
низковольтного оборудования.
15
декабря 2004 г.: директива Совета 2004/108/EC с поправками.
Сближение законодательства государств-членов в отношении
электромагнитной совместимости.
Полный текст заявления о соответствии с указанием
соответствующих директив и стандартов можно получить у местного
торгового представителя.
ВНИМАНИЕ! Для обеспечения работоспособности данного
изделия вблизи промышленного, научного и медицинского
оборудования могут потребоваться меры по ограничению
воздействия внешнего излучения.
ВНИМАНИЕ! В соответствии с директивой Совета 2004/108/EC
для подключения данного изделия должны использоваться
экранированные кабели.
Утилизация и переработка изделия
Европейский союз
Директива WEEE 2002/96/EC
Некоторые виды оборудования могут использоваться как в бытовых,
так и в профессиональных целях.
Профессиональное использование
Наличие данного символа на оборудовании
обязывает владельца утилизировать его в соответствии
с положениями национального законодательства. Согласно
законодательству Европейского союза, по истечении срока
службы электротехнического и электронного оборудования
его необходимо утилизировать в соответствии
с установленными процедурами.
Бытовое использование
Наличие данного символа означает запрет на утилизацию
этого оборудования как бытовых отходов. Согласно
законодательству Европейского союза, по истечении
срока службы электротехнического и электронного
оборудования его необходимо утилизировать отдельно
от бытовых отходов.
В некоторых странах Европейского союза домовладельцы
могут бесплатно возвращать использованное
электротехническое и электронное оборудование
в организации, уполномоченные для сбора таких отходов.
В некоторых странах Европейского союза при покупке
нового устройства продавец обязан бесплатно взять
на себя ответственность за утилизацию бывшего
в употреблении оборудования. Дополнительную
информацию можно получить у розничного продавца.
Перед утилизацией свяжитесь с местным дилером или
представителем корпорации Xerox и получите
информацию о возврате оборудования по истечении
срока его службы.
Соответствие стандартам
потребления энергии
США
ENERGY STAR
Корпорация Xerox является партнером ENERGY STAR®. Данное
изделие соответствует нормам эффективного использования
электроэнергии ENERGY STAR.
ENERGY STAR
и эмблема ENERGY STAR
являются зарегистрированными в США торговыми
марками. ENERGY STAR Imaging Equipment
Program —
это совместная инициатива
правительств США, Японии, стран Европейского
союза и производителей офисного оборудования,
касающаяся производства энергосберегающих
копировальных и факсимильных аппаратов,
принтеров, многофункциональных устройств,
персональных компьютеров и мониторов.
Сокращая количество выбросов с предприятий,
вырабатывающих электроэнергию, снижение
уровня энергопотребления устройств помогает
бороться с такими явлениями, как смог, кислотные
дожди и долгосрочное изменение климата.
Оборудование Xerox, соответствующее стандарту
ENERGY STAR,
проходит заводскую настройку.
Данное устройство оснащено таймером для
переключения в режим энергосбережения.
По умолчанию таймер включается через 15 минут
после выполнения последнего задания печати или
копирования. Дополнительные сведения об этой
функции см. в разделе «Настройка» данного
руководства.

v
Контактная информация EH&S
Контактная информация
Дополнительную информацию об охране окружающей среды,
здоровья и безопасности жизнедеятельности, относящуюся к
данному продукту Xerox и его расходным материалам, можно
получить в местном представительстве Ксерокс.

1.1
<
Введение>
1
Введение
Поздравляем с покупкой принтера!
В главу входят указанные ниже разделы.
•
Специальные функции
•
Внешний вид принтера
•
Внешний вид панели управления
•
Индикаторы
•
Дополнительные сведения
•
Установка оборудования
•
Настройка высоты
•
Изменение шрифтов
Специальные функции
Этот принтер обладает указанными ниже специальными
возможностями, позволяющими улучшить качество печати.
Печать с отличным качеством и высокой скоростью
•
Принтер может печатать с разрешением
до 1 200 x 1 200 тчк/дюйм. См. раздел
«
Программное обеспечение».
•
На бумаге формата A4 печать выполняется со
скоростью до 28 стр./мин., а на бумаге формата
Letter —
до 30 стр./мин. При двусторонней печати
принтер печатает на бумаге формата A4 со
скоростью до 14 изобр./мин., а на бумаге
формата Letter — до 14,5 изобр./мин.
Поддержка различных типов бумаги
•
Лоток ручной подачи поддерживает печать
на конвертах, наклейках, прозрачной пленке,
материалах нестандартных размеров, открытках
и плотной бумаге по одному листу.
•
Стандартный лоток на 250 листов поддерживает
печать на обычной бумаге.
•
Выходной лоток на 150 листов обеспечивает
удобный доступ к бумаге.
Создание профессиональных документов
•
Печать водяных знаков. В документ можно
добавлять различные надписи, например
«
Секретно». См. раздел «Программное
обеспечение».
•
Печать брошюр. Эта функция позволяет без
затруднений распечатать документ в виде,
удобном для брошюровки. После печати нужно
просто согнуть страницы и скрепить их.
См. раздел «Программное обеспечение».
•
Печать плакатов. Текст и изображение на каждой
странице документа можно увеличить, распечатав
на нескольких листах бумаги и затем склеив из
этих листов плакат. См. раздел «Программное
обеспечение».
Экономия средств и времени
•
Принтер может работать в режиме экономии
тонера. См. раздел «Программное обеспечение».
•
Для экономии бумаги можно печатать на обеих
сторонах листа. См. раздел «Программное
обеспечение».
•
Для экономии бумаги можно печатать несколько
страниц на одном листе. См. раздел «Программное
обеспечение».
•
Готовые формы и фирменные бланки можно
печатать на обычной бумаге. См. раздел
«
Программное обеспечение».
•
Принтер автоматически экономит электроэнергию,
снижая ее потребление в ждущем режиме.
Расширение возможностей принтера
•
Объем памяти принтера (32 Мб) можно увеличить
до 160 Мб. См. стр. 10.1.
•
Принтер можно оснастить дополнительным
лотком 2 емкостью 250 листов. Это позволит
реже загружать бумагу в принтер.
*
Эмуляция Zoran IPS, совместимая с языком PostScript 3
• © Zoran Corporation, 1995—2005.
Все права
защищены. Zoran, эмблема Zoran, IPS/PS3
и OneImage являются товарными знаками
корпорации Zoran.
* 136
шрифтов PS3
•
Содержит UFST и MicroType компании Monotype Imaging Inc.
Печать в различных средах
•
Печать может выполняться в ОС Windows 2000/
XP/2003/Vista.
•
Принтер совместим с ОС Linux и компьютерами
Macintosh.
•
Принтер поддерживает интерфейсы USB.
1
2
3
4

22:46
Инструкция как разобрать Xerox Phaser 3250 (Чистка печки)
11:55
Вечная прошивка принтера Xerox Phaser 3250 без программатора и чипа
01:38
xerox phaser 3250 printer
04:34
Как подключить принтер к wifi сети
01:54
Замена чипа в картридже xerox phaser 3250.
06:53
Заправка картриджа xerox phaser 3250.
07:08
Xerox Phaser 3140 — замятие бумаги на выходе из принтера, чистка лазера
Нажмите на кнопку для помощи
View the manual for the Xerox Phaser 3250 here, for free. This user manual comes under the category printers and has been rated by 1 people with an average of a 8.8. This manual is available in the following languages: English. Do you have a question about the Xerox Phaser 3250?
Ask your question here
Xerox Phaser 3250 specifications
Below you will find the product specifications and the manual specifications of the Xerox Phaser 3250.
Processor frequency
400 MHz
Maximum input capacity
501 sheets
Media size (tray 1)
(76 x 127)mm — (216 x 356)mm
Compatible operating systems
Fedora Core 1, Red Hat 9, SUSE 9\nWindows 2000/Vista
Dimensions (WxDxH)
364 x 369 x 239.2 mm
General
| Brand | Xerox |
| Model | Phaser 3250 | 3250V_D |
| Product | printer |
| EAN | 95205740905, 5051964288718, 5051964285250, 5052178282882 |
| Language | English |
| Filetype | User manual (PDF) |
Printing
| Colour | No |
| Maximum resolution | 600 x 600 DPI |
| Print speed (black, normal quality, A4/US Letter) | 28 ppm |
| Time to first page (black, normal) | 8.5 s |
| Print technology | Laser |
| Warm-up time | 20 s |
| Warm-up time (from sleep mode) | 15 s |
Performance
| Processor frequency | 400 MHz |
| Internal memory | 32 MB |
| Sound power level (standby) | 29 dB |
| Sound pressure level (printing) | 54 dB |
| Maximum internal memory | 160 MB |
Input & output capacity
| Maximum input capacity | 501 sheets |
| Total input capacity | 251 sheets |
| Maximum output capacity | 150 sheets |
| Total output capacity | 150 sheets |
Paper handling
| Media size (tray 1) | (76 x 127)mm — (216 x 356)mm |
| Paper tray media types | Bond paper, Envelopes, Labels, Plain paper, Recycled paper, Transparencies |
Other features
| Compatible operating systems | Fedora Core 1, Red Hat 9, SUSE 9\nWindows 2000/Vista |
| Input capacity for envelopes (primary tray) | 250 sheets |
| Power requirements | 240 V, 50/60 Hz |
| Power consumption (active) | 400 W |
| Non-operating relative humidity (non-condensing) | 20 — 80 % |
| Technical features | Epson, IBM Pro Printer, PCL 5/6 |
| I/O ports | USB 2.0 |
| Weight (imperial) | 26.19 lbs |
| Acoustic pressure emissions | 54 dB |
| Functions | |
| Hardware scan resolution | 1200 x 1200 DPI |
| Storage drive type | N/A |
| One-year on-site | |
| Device manager | Printer Setting Utility for Windows |
| Depth (imperial) | 14.5 « |
| Height (imperial) | 9.4 « |
| Width (imperial) | 14.3 « |
| Storage temperature (T-T) | 32 — 104 °F |
| Package length | 561.33 mm |
| Printer features | Booklet printing, N-up, Overlays, Poster printing |
| Print memory (standard) | 32 MB |
Weight & dimensions
| Dimensions (WxDxH) | 364 x 369 x 239.2 mm |
| Weight | 11880 g |
| Depth | 369 mm |
| Height | 239.2 mm |
| Width | 364 mm |
Features
| Maximum duty cycle | 30000 pages per month |
| Recommended duty cycle | 4000 pages per month |
| Country of origin | China |
Sustainability
| Sustainability certificates | ENERGY STAR |
Power
| Power consumption (PowerSave) | 11 W |
| Power consumption (standby) | 70 W |
Operational conditions
| Operating relative humidity (H-H) | 10 — 80 % |
| Storage temperature (T-T) | 0 — 35 °C |
| Operating temperature (T-T) | 10 — 32 °C |
| Operating temperature (T-T) | 50 — 90 °F |
Design
| Certification | CE, UL 60950-1/CSA 60950-1-03, EMC 2004/108/EC, 2006/95/EC |
Packaging data
| Package weight | 11884.3 g |
| Package height | 342.89 mm |
| Package width | 472.43 mm |
show more
Frequently asked questions
Can’t find the answer to your question in the manual? You may find the answer to your question in the FAQs about the Xerox Phaser 3250 below.
What is the weight of the Xerox Phaser 3250?
The Xerox Phaser 3250 has a weight of 11880 g.
What is the height of the Xerox Phaser 3250?
The Xerox Phaser 3250 has a height of 239.2 mm.
What is the width of the Xerox Phaser 3250?
The Xerox Phaser 3250 has a width of 364 mm.
What is the depth of the Xerox Phaser 3250?
The Xerox Phaser 3250 has a depth of 369 mm.
What is the best way to remove jammed paper from my printer?
It is best to gently pull the paper out of the printer. Turn the printer off, and make sure that the printhead is not hanging over the paper and that no paper remains in the printer.
How come my prints are of poor quality?
There can be various reasons for poor print quality. Check if the cartridges or toners are full. If so, inkjet printers often require cleaning the printer, the cartridges have dried out, or the print head is broken. With laser printers, calibrating the laser printer is recommended.
How come my printer does not accept original cartridges?
Non-genuine cartridges may not be recognised by the printer. In that case you will receive a message that the cartridge is empty. The manual of the purchased cartridge usually contains the solution, if this does not work, it is advisable to contact the seller.
What certifications does the Xerox Phaser 3250 have?
The Xerox Phaser 3250 has the following certifications: CE, UL 60950-1/CSA 60950-1-03, EMC 2004/108/EC, 2006/95/EC.
How come my inkjet printer has black stripes?
In most cases, the inkjet printer cartridge is broken and the cartridge needs to be replaced.
What is the difference between a laser printer and an inkjet printer?
A laser printer prints with a toner and an inkjet printer prints with ink.
What does DPI stand for?
DPI stands for Dots Per Inch and is the number of ink droplets (per inch) that end up on the paper when printing.
Is the manual of the Xerox Phaser 3250 available in English?
Yes, the manual of the Xerox Phaser 3250 is available in English .
Is your question not listed? Ask your question here