
Добрый день, уважаемые читатели. Сегодня снова радиоуправляемые модели, точнее нужные аксессуары для них.
Мини-обзор регулятора для коллекторного мотора.
В обзоре 540го мотора я писал, что купил на али регуль для апгрейда Wltoys 10428, а он оказался с браком — машина назад ехала быстрее чем вперед и реверс и перестановка проводов не исправили ситуацию.
Вот решил попробовать этот ESC регулятор GoolRC WP-1040.
Особых требований у меня не было — главное что бы был для коллекторного мотора и влагозащитный. Ампер много не нужно, у модели аккум 2S.
Нужно это устройство для управления мотором модели. Их покупают для апгрейда моделей (подойдет например для популярных моделек Wltoys 10428 и 12428) и для оснащения шасси самодельного проекта.
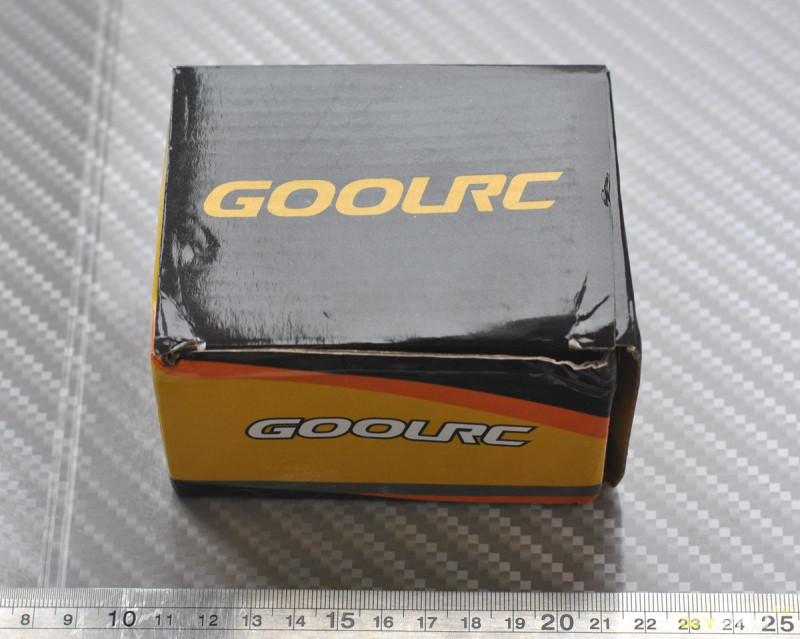
Коробка:
Характеристики:
Бренд: GoolRC
Подходит для: лодок и машин 1/10
Водозащита
Защиты от: КЗ, перегрева, пониженного напряжения аккумулятора, потери сигнала управления
Ток: 40 A вперед, 20 А назад
Мотор: 280, 370, 380, 540 или 550 размер
Максимальные обороты: <30000 об/мин
Максимальный ток: 180A
Питание: 2~3S LiPo, 5~9S NiMh аккумуляторы
BEC: 6 В/1 A
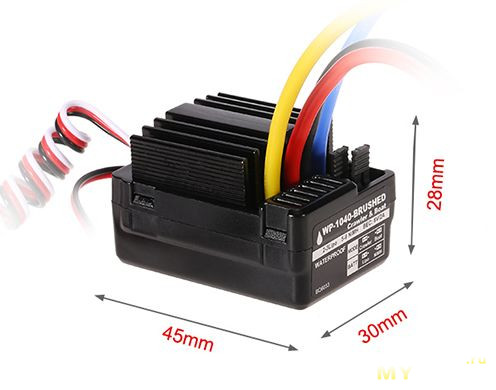
Размеры: 45 * 30 * 28 мм (без кабелей)
Силовой разъем:
Масса: 67 г
Комплектация:
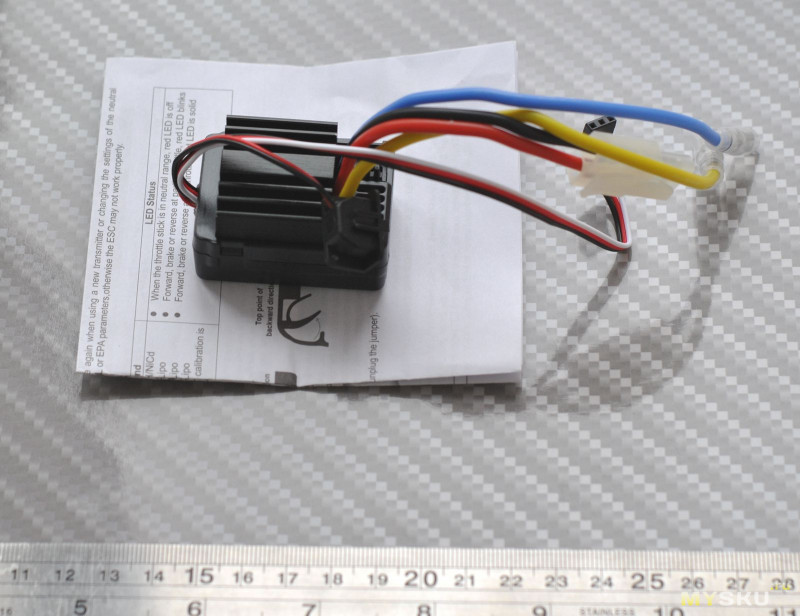
Регулятор и инструкция, просто и лаконично.
Инструкция
Внешний вид устройства:
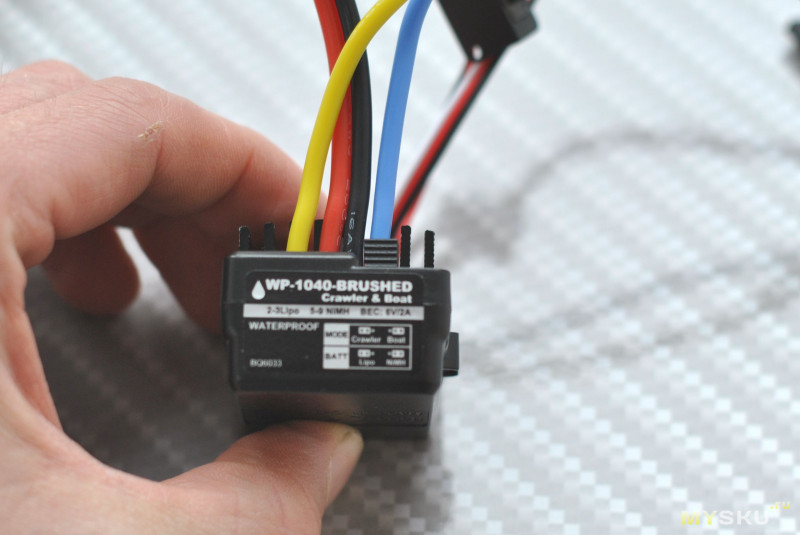
Обращает на себя внимание надпись «waterproof» — т.е. водозащита.
Регулятор управляется двумя перемычками: 1я — выбирает режим работы (вездеход или лодка), 2я — устанавливает тип аккумулятора литий или NiMh.
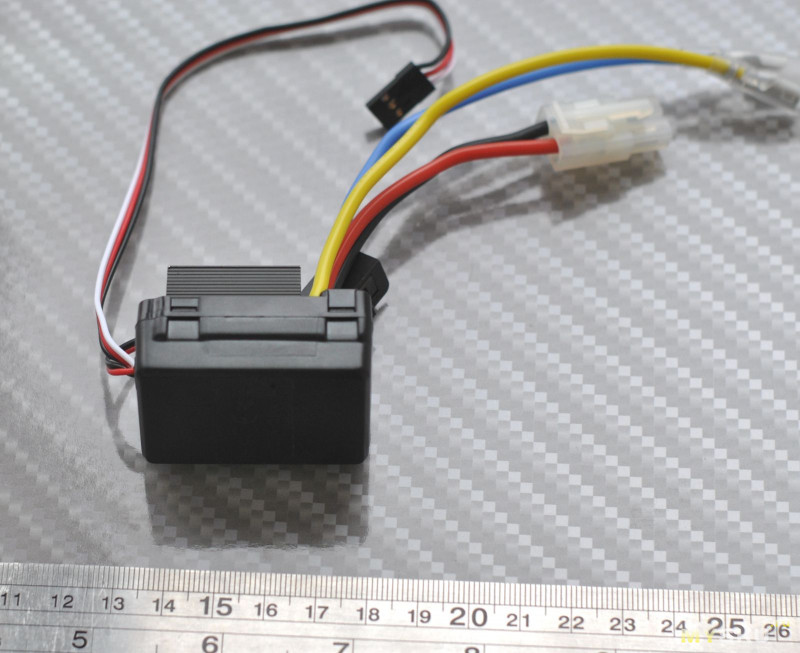
Из кабелей у нас: силовой разъем на аккум типа tamiya, кабели для подключения двигателя (желтый +), вынесенный выключатель и стандартный разъем в приемник.
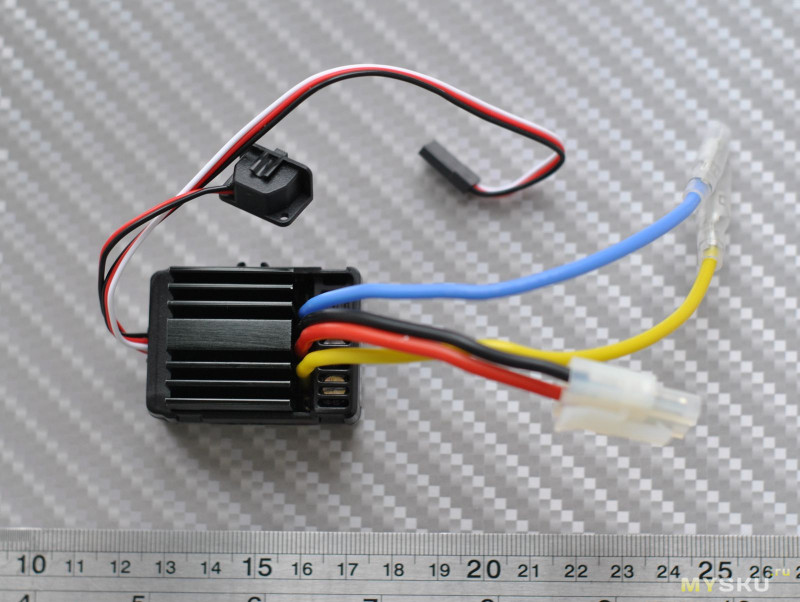
Силовой кабель как всегда короткий, это не удобно.
Плата залита пластиком, сверху радиатор для охлаждения ключей.
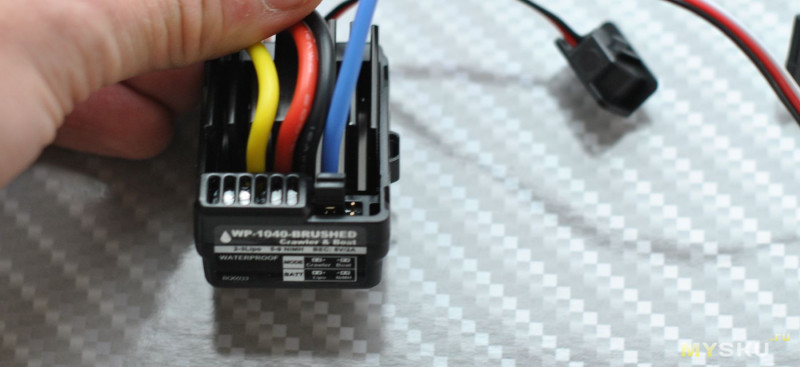
Дно гладкое:
Рассчитано под крепление на двухсторонний скотч. Я креплю на термоклей, скотч от песка быстро отлипает.
Размеры:
Особенности устройства:
Battery Elimination Circuit (BEC) — устройство в регуляторе, которое преобразует напряжение силовой батареи для питания бортовой электроники. У нас 6 вольт соответственно напряжение на выходе регулятора, 1 ампер — максимальная нагрузка по току, которую он может выдержать. Это хороший результат, этот выход идет на питание бортовой электроники, в моем случае приемника и рулевой сервы. Серве лучше 6 В чем 5.
Разница в режиме вездеход/лодка:
У лодки нет стоп мотора между вперед и назад.
Мощность заднего хода больше у вездехода.
Порог отключения мотора для лодки выше.
Защита от пониженного напряжения:
На 2S при 6,5 В напряжения аккумулятора гасится на 50% мощность, а при 6 В мотор отключается. (На 3S на 9,75 В и 9 В соответственно).
Защита от перегрева — 100 C отключение.
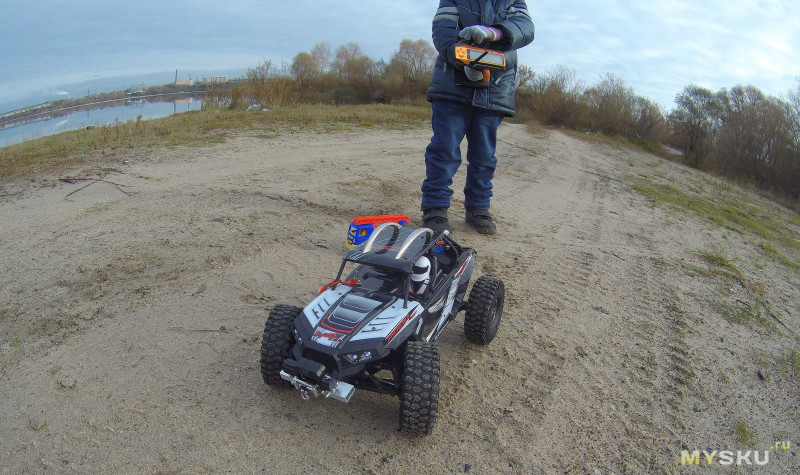
Установлен на Wltoys 10428-B2:
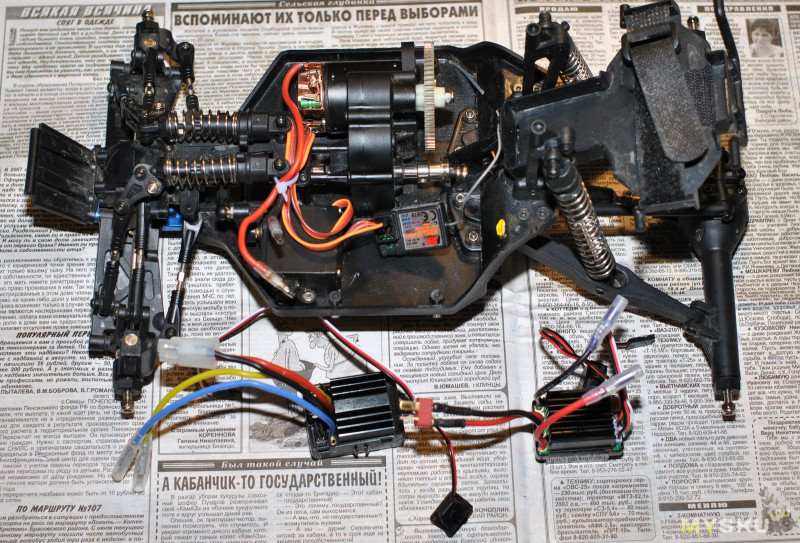
Это у меня полигон для испытания новых девайсов для RC.
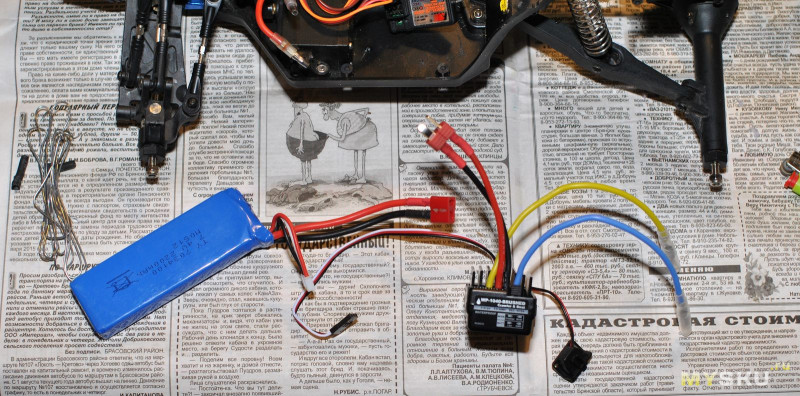
Меняем разъем на тип Т:
Закрепляем на дне рамы:
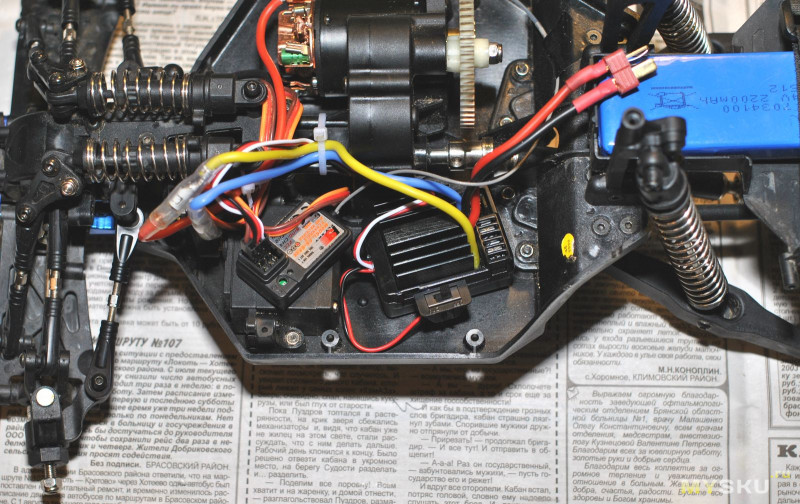
Приемник такой.
Машина готова к испытаниям:

Радиатор греется, но не больше чем мотор, если что есть защита от перегрева или можно купить мелкий вентилятор 5 В.
Я доволен регулятором. На модели 10428 с 2S аккумулятором его достаточно.
Есть купон на скидку 3$: RPT727
Спасибо за внимание! Удачных покупок!
Table of Contents
- ASSOCIATED ELECTRICS WP-1040-BRUSHED Car Brushed Speed Control Load
- FEATURES
- SPECIFICATIONS
- BEGIN TO USE
- BEEP SOUND AND LED STATUS
- THROTTLE STICK POSITION
- PROTECTION FUNCTIONS
- TROUBLESHOOTING
- Read User Manual Online (PDF format)
- Download This Manual (PDF format)
ASSOCIATED ELECTRICS WP-1040-BRUSHED Car Brushed Speed Control Load

Thanks for purchasing our electronic speed controller(ESC). The power system
for RC model can be very dangerous, please read this manual carefully. In that
we have no control over the correct use, installation, application, or
maintenance of our products, no liability shall be assumed nor accepted for
any damages, losses or costs resulting from the use of the product.
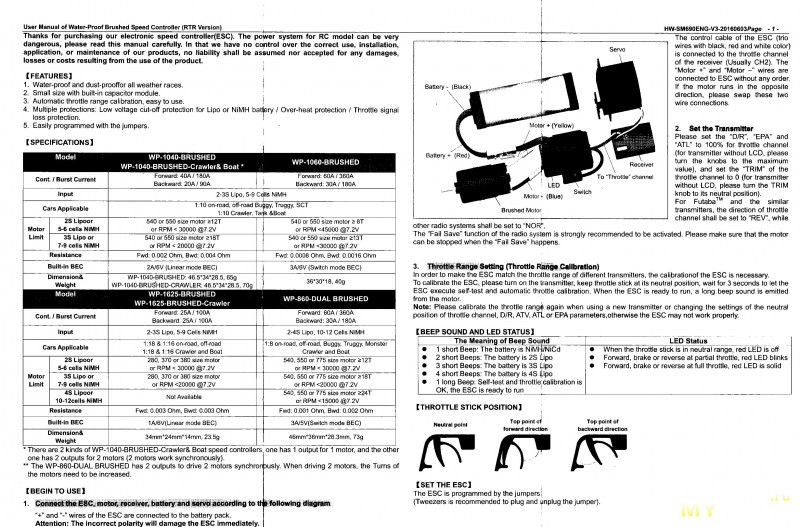
FEATURES
- Water-proof and dust-proof for all-weather races.
- mall size with built-in capacitor module.
- Automatic throttle range calibration, easy to use.
- Multiple protections: Low voltage cut-off protection for Lipo or NiMH battery / Over-heat protection / Throttle signal loss protection.
- Easily programmed with the jumpers.
SPECIFICATIONS
Model| WP-1040-BRUSHED
**WP-1040-BRUSHED-Crawler & Boat ***
| WP-1060-BRUSHED
—|—|—
Cont. / Burst Current| Forward: 40A / 180A
Backward: 20A / 90A
| Forward: 60A / 360A
Backward: 30A / 180A
Input| 2-3S Lipo, 5-9 Cells NiMH
Cars Applicable| 1:10 on-road, off-road Buggy, Truggy, SCT
1:10 Crawler, Tank &Boat
Motor Limit
| 2S Lipoor
5-6 cells NiMH
| 540 or 550 size motor ≥12T
or RPM < 30000 @7.2V
| 540 or 550 size motor ≥ 8T
or RPM <45000 @7.2V
3S Lipo or
7-9 cells NiMH
| 540 or 550 size motor ≥18T
or RPM < 20000 @7.2V
| 540 or 550 size motor ≥13T
or RPM <30000 @7.2V
Resistance| Fwd: 0.002 Ohm, Bwd: 0.004 Ohm| Fwd: 0.0008 Ohm, Bwd: 0.0016
Ohm
Built-in BEC| 2A/6V (Linear mode BEC)| 3A/6V (Switch mode BEC)
Dimension &
Weight
| WP-1040-BRUSHED: 46.53428.5, 65g
WP-1040-BRUSHED-CRAWLER: 46.53428.5, 70g
| 363018, 40g
Model| WP-1625-BRUSHED
WP-1625-BRUSHED-Crawler
| WP-860-DUAL BRUSHED
Cont. / Burst Current| Forward: 25A / 100A
Backward: 25A / 100A
| Forward: 60A / 360A
Backward: 30A / 180A
Input| 2-3S Lipo, 5-9 Cells NiMH| 2-4S Lipo, 10-12 Cells NiMH
Cars Applicable| 1:18 & 1:16 on-road, off-road
1:18 & 1:16 Crawler and Boat
| 1:8 on-road, off-road, Buggy, Truggy, Monster
Crawler and Boat
Motor Limit
| 2S Lipoor
5-6 cells NiMH
| 280, 370 or 380 size motor
or RPM < 30000 @7.2V
| 540, 550 or 775 size motor ≥12T
or RPM < 30000 @7.2V
3S Lipo or
7-9 cells NiMH
| 280, 370 or 380 size motor
or RPM <20000 @7.2V
| 540, 550 or 775 size motor ≥18T
or RPM <20000 @7.2V
4S Lipoor
10-12cells NiMH
| Not Available| 540, 550 or 775 size motor ≥24T
or RPM <15000 @7.2V
Resistance| Fwd: 0.003 Ohm, Bwd: 0.003 Ohm| Fwd: 0.001 Ohm, Bwd: 0.002
Ohm
Built-in BEC| 1A/6V(Linear mode BEC)| 3A/5V(Switch mode BEC)
Dimension &
Weight
| 34mm24mm14mm, 23.5g| 46mm36mm26.3mm, 73g
There are 2 kinds of WP-1040-BRUSHED-Crawler& Boat speed controllers, one has
1 output for 1 motor, and the other one has 2 outputs for 2 motors (2 motors
work synchronously).
The WP-860-DUAL BRUSHED has 2 outputs to drive 2 motors synchronously. When
driving 2 motors, the Turns of
the motors need to be increased.
BEGIN TO USE
-
Connect the ESC, motor, receiver, battery and servo according to the following diagram “+” and “-” wires of the ESC are connected to the battery pack. Attention: The incorrect polarity will damage the ESC immediately. The control cable of the ESC (trio wires with black, red and white color) is connected to the throttle channel of the receiver (Usually CH2). The “Motor +” and “Motor –” wires are connected to ESC without any order. If the motor runs in the opposite direction, please swap these two wire connections.

-
Set the Transmitter
Please set the “D/R”, “EPA” and “ATL” to 100% for throttle channel (for
transmitter without LCD, please turn the knobs to the maximum value), and set
the “TRIM” of the throttle channel to 0 (for transmitter without LCD, please
turn the TRIM knob to its neutral position). For FutabaTM and the similar
transmitters, the direction of throttle channel shall be set to “REV”, while
other radio systems shall be set to “NOR”. The “Fail Save” function of the
radio system is strongly recommended to be activated. Please make sure that
the motor can be stopped when the “Fail Save” happens. -
Throttle Range Setting (Throttle Range Calibration)
In order to make the ESC match the throttle range of different transmitters,
the calibrationof the ESC is necessary.
To calibrate the ESC, please turn on the transmitter, keep throttle stick at
its neutral position, wait for 3 seconds to let the ESC execute self-test and
automatic throttle calibration. When the ESC is ready to run, a long beep
sound is emitted from the motor.
Note: Please calibrate the throttle range again when using a new transmitter
or changing the settings of the neutral position of throttle channel, D/R,
ATV, ATL or EPA parameters,otherwise the ESC may not work properly.

BEEP SOUND AND LED STATUS
The Meaning of Beep Sound
- 1 short Beep: The battery is NiMH/NiCd
- 2 short Beeps: The battery is 2S Lipo
- 3 short Beeps: The battery is 3S Lipo
- 4 short Beeps: The battery is 4S Lipo
- 1 long Beep: Self-test and throttle calibration is OK, the ESC is ready to run
LED Status
- When the throttle stick is in neutral range, red LED is off
- Forward, brake or reverse at partial throttle, red LED blinks
- Forward, brake or reverse at full throttle, red LED is solid
THROTTLE STICK POSITION
SET THE ESC
- The ESC is programmed by the jumpers
(Tweezers is recommended to plug and unplug the jumper).

PROTECTION FUNCTIONS
- Low voltage Cut-off (LVC) protection: If the voltage of battery pack is lower than the threshold for 2 seconds, the ESC will enter the protection mode.
When the car stops, the red LED blinks to indicate the low voltage cut-off
protection has been activated.
Table A: LVC protection for WP-1060-BRUSHED, WP-1040-BRUSHED, WP-860-DUAL
BRUSHED (F/B/R or F/B mode). 2S Lipo| 3S Lipo| 4S Lipo| 5-9
cells NiMH
—|—|—|—
Output reduces 50% at 6.5V Output cuts off at 6.0V,
cannot be recovered| Output reduces 50% at 9.75V Output cuts off at 9.0V,
cannot be recovered| Output reduces 50% at 13V Output cuts off at 12V, cannot
be recovered| Output reduces 50% at 4.5V Output cuts off at 4.0V, cannot be
recovered
Table B: LVC protection for WP-1625-BRUSHED-Crawler, WP-1040-BRUSHED-
Crawler&Boat, WP-860-DUAL BRUSHED (Crawler or Boat mode).
| 2S Lipo | 3S Lipo | 4S Lipo | 5-9 cells NiMH |
|---|
Output cuts off at 6.5V.
If the throttle stick moves to neutral and then up again, the output can be
recovered to 50%.
If the voltage drops to 6.5V again, the above process
repeats in circles.
| Output cuts off at 9.75V.
If the throttle stick moves to neutral and then up again, the output can be
recovered to 50%.
If the voltage drops to 9.75V again, the above process
repeats in circles.
| Output cuts off at 13V.
If the throttle stick moves to neutral and then up again, the output can be
recovered to 50%.
If the voltage drops to 13V
again, the above process repeats in circles
| Output cuts off at 4.5V.
If the throttle stick moves to neutral and then up again, the output can be
recovered to 50%.
If the voltage drops to 4.5V again, the above process
repeats in circles.
-
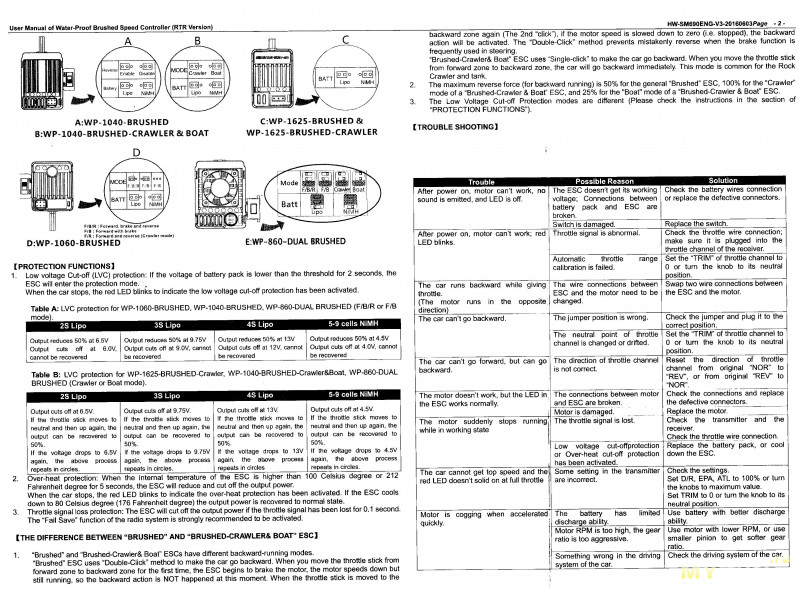
Over-heat protection: When the internal temperature of the ESC is higher than 100 Celsius degree or 212 Fahrenheit degree for 5 seconds, the ESC will reduce and cut off the output power.
When the car stops, the red LED blinks to indicate the over-heat protection
has been activated. If the ESC cools down to 80 Celsius degree (176 Fahrenheit
degree) the output power is recovered to normal state. -
Throttle signal loss protection: The ESC will cut off the output power if the throttle signal has been lost for 0.1 second. The “Fail Save” function of the radio system is strongly recommended to be activated.
THE DIFFERENCE BETWEEN “BRUSHED” AND “BRUSHED-CRAWLER & BOAT” ESC
-
“Brushed” and “Brushed-Crawler& Boat” ESCs have different backward-running modes.“Brushed” ESC uses “Double-Click” method to make the car go backward. When you move the throttle stick from forward zone to backward zone for the first time, the ESC begins to brake the motor, the motor speeds down but still running, so the backward action is NOT happened at this moment. When the throttle stick is moved to the backward zone again (The 2nd “click”), if the motor speed is slowed down to zero (i.e. stopped), the backward action will be activated. The “Double-Click” method prevents mistakenly reverse when the brake function is frequently used in steering.
“Brushed-Crawler& Boat” ESC uses “Single-click” to make the car go backward.
When you move the throttle stick from forward zone to backward zone, the car
will go backward immediately. This mode is common for the Rock Crawler and
tank. -
The maximum reverse force (for backward running) is 50% for the general “Brushed” ESC, 100% for the “Crawler” mode of a “Brushed-Crawler & Boat” ESC, and 25% for the “Boat” mode of a “Brushed-Crawler & Boat” ESC.
-
The Low Voltage Cut-off Protection modes are different (Please check the instructions in the section of “PROTECTION FUNCTIONS”).
TROUBLESHOOTING
| Trouble | Possible Reason | Solution |
|---|---|---|
| After power on, motor can’t work, no sound is emitted, and LED is off. | The |
ESC doesn’t get its working voltage; Connections between battery pack and ESC
are
broken.
| Check the battery wires connection or replace the defective connectors.
Switch is damaged.| Replace the switch.
After power on, motor can’t work; red LED blinks.| Throttle signal is
abnormal.| Check the throttle wire connection; make sure it is plugged into
the
throttle channel of the receiver.
Automatic throttle calibration is failed.| range| Set
the “TRIM” of throttle channel to
0 or turn the knob to its neutral position.
The car runs backward while giving throttle.
(The motor runs in the opposite direction)
| The wire connections between ESC and the motor need to be changed.| Swap two
wire connections between the ESC and the motor.
The car can’t go backward.| The jumper position is wrong.| Check the jumper
and plug it to the
correct position.
The neutral point of throttle channel is changed or drifted.| Set the “TRIM”
of throttle channel to
0 or turn the knob to its neutral position.
The car can’t go forward, but can go backward.| The direction of throttle
channel is not correct.| Reset the direction of throttle channel from original
“NOR” to “REV”, or from original “REV” to
“NOR”.
The motor doesn’t work, but the LED in the ESC works normally.| The
connections between motor
and ESC are broken.
| Check the connections and replace
the defective connectors.
Motor is damaged.| Replace the motor.
The motor suddenly while in working state| stops| running| The throttle signal
is lost.| Check the transmitter and the receiver.
Check the throttle wire connection.
Low voltage cut-offprotection or Over-heat cut-off protection
has been activated.
| Replace the battery pack, or cool down the ESC.
The car cannot get top speed and the red LED doesn’t solid on at full
throttle| Some setting in the transmitter are incorrect.| Check the settings.
Set D/R, EPA, ATL to 100% or turn the knobs to maximum value.
Set TRIM to 0 or turn the knob to its neutral position.
Motor quickly.| is| cogging| when| accelerated| The battery discharge
ability.| has| limited| Use battery with better discharge ability.
Motor RPM is too high, the gear ratio is too aggressive.| Use motor with lower
RPM, or use
smaller pinion to get softer gear ratio.
Something wrong in the driving
system of the car.
| Check the driving system of the car.
Read User Manual Online (PDF format)
Read User Manual Online (PDF format) >>
Download This Manual (PDF format)
Download this manual >>
Hobbywing WP-1040-BRUSHED Controller PDF User Guides and Manuals for Free Download: Found (1) Manuals for Hobbywing WP-1040-BRUSHED Device Model (Operation & User’s Manual)
Hobbywing WP-1040-BRUSHED Operation & User’s Manual
Details:
- Manufacturer: Hobbywing
- Product Name/ID: Hobbywing WP-1040-BRUSHED / #1912860
- Category: Controller
- File Path: hobbywing/wp-1040-brushed_1912860.pdf
- Last Updated: 08 May 2025
- Description: The Hobbywing WP-1040-BRUSHED manual offers a thorough overview of setup, operational guidelines, and maintenance practices to help you get the most out of your device and avoid common issues.
- Document Type: User Manual
- Pages: 2
|
Pages Preview: |
Download PDF
Read Online
The Hobbywing WP-1040-BRUSHED is a standout choice for enthusiasts and hobbyists looking for a reliable and efficient brushed ESC (Electronic Speed Controller). Designed specifically to meet the demands of off-road RC vehicles, this product brings a blend of power, precision, and performance. Its robust features and easy-to-use interface make it a popular choice for both newcomers and experienced users. Let’s dive deeper into what makes the WP-1040-BRUSHED an excellent addition to your RC setup.
One of the first aspects that impresses with the Hobbywing WP-1040-BRUSHED is its impressive performance. The ESC can handle voltage inputs of up to 3S LiPo, allowing for a maximum current rating of 40A. This means that even in the most demanding conditions, users can expect a smooth and powerful drive. The advanced thermal protection ensures that the ESC doesn’t overheat, thereby prolonging its lifespan and ensuring reliability during those intense RC sessions.
Setup is an area where the Hobbywing WP-1040-BRUSHED truly shines. With its simple programming options, even users who are new to the hobby can configure the ESC quickly. It features multiple preset options that can be easily changed through a programming card or by using the throttle trigger method. This allows you to customize the ESC’s settings based on your vehicle type, making it highly versatile.
Another noteworthy feature is the compatibility of the WP-1040-BRUSHED. This ESC works seamlessly with a variety of brushed motors. Additionally, its waterproof design enhances the durability of the product, allowing you to tackle various terrains, whether it’s mud, sand, or snow. Having a product that withstands the elements adds significant value for outdoor enthusiasts.
Users appreciate the Hobbywing WP-1040-BRUSHED for its smooth throttle response and excellent braking capabilities. This ESC offers multiple profiles for driving style, including options for beginners or competition-level control. Such flexibility means that it can cater to users looking for a casual experience as well as those who require high-performance tuning for competitive settings.
In terms of installation, the WP-1040-BRUSHED is straightforward. It comes with standard connectors, making it easy to fit into most models. The included instructions are clear and helpful, ensuring that even those who are less experienced can set it up without a hitch.
Finally, let’s look at customer feedback. Many users have reported their satisfaction with the performance and durability of the Hobbywing WP-1040-BRUSHED. Common praises include:
- Excellent power delivery, even under heavy load.
- Reliable thermal management even during long runs.
- Impressive waterproofing, which adds versatility for all-weather use.
- User-friendly programming that allows customization to fit personal preferences.
- Great overall value for money compared to competitors.
In conclusion, the Hobbywing WP-1040-BRUSHED is a formidable ESC that caters to a wide range of RC enthusiasts. Its combination of power, durability, and versatility makes it a top choice for anyone serious about performance. Whether you’re just starting or looking to upgrade your current setup, the WP-1040-BRUSHED is certainly worth considering.
User Manual of Water-Proof Brushed Speed Controller (RTR Version) SM690ENG-20121217 Page — 1 —
Thanks for purchasing our electronic speed controller (ESC). The power system for RC model can be very
dangerous, please read this manual carefully. In that we have no control over the correct use, installation,
application, or maintenance of our products, no liability shall be assumed nor accepted for any damages,
losses or costs resulting from the use of the product.
【FEATURES】
1. Water-proof and dust-proof for all weather races.
2. Small size with built-in capacitor module.
3. Automatic throttle range calibration, easy to use.
4. Multiple protections: Low voltage cut-off protection for Lipo or NiMH battery / Over-heat protection / Throttle signal
loss protection.
5. Easily programmed with the jumpers.
【SPECIFICATIONS】
【BEGIN TO USE】
1. Connect the ESC, motor, receiver, battery and servo according to the following diagram
“+” and “—” wires of the ESC are connected to the
battery pack.
Attention: The incorrect polarity will damage
the ESC immediately.
The control cable of the ESC (trio wires with
black, red and white color) is connected to the
throttle channel of the receiver (Usually CH2).
The “Motor +” and “Motor –” wires are
connected to ESC without any order. If the motor
runs in the opposite direction, please swap
these two wire connections.
2. Set the Transmitter
Please set the “D/R”, “EPA” and “ATL” to 100% for throttle channel (for transmitter without LCD, please turn the knobs to
the maximum value), and set the “TRIM” of the throttle channel to 0 (for transmitter without LCD, please turn the TRIM
knob to its neutral position).
For Futaba
TM
and the similar transmitters, the direction of throttle channel shall be set to “REV”, while other radio
systems shall be set to “NOR”.
The “Fail Save” function of the radio system is strongly recommended to be activated. Please make sure that the motor
can be stopped when the “Fail Save” happens.
3. Throttle Range Setting (Throttle Range Calibration)
In order to make the ESC match the throttle range of different transmitters, the calibration of the ESC is necessary.
To calibrate the ESC, please turn on the transmitter, keep throttle stick at its neutral position, wait for 3 seconds to let the
ESC execute self-test and automatic throttle calibration. When the ESC is ready to run, a long beep sound is emitted
from the motor.
Note: Please calibrate the throttle range again when using a new transmitter or changing the settings of the neutral
position of throttle channel, D/R, ATV, ATL or EPA parameters, otherwise the ESC may not work properly.
【BEEP SOUND AND LED STATUS】
The Meaning of Beep Sound LED Status
1 short Beep: The battery is NiMH/NiCd
2 short Beeps: The battery is 2S Lipo
3 short Beeps: The battery is 3S Lipo
1 long Beep: Self-test and throttle calibration is
OK, the ESC is ready to run
When the throttle stick is in neutral range, red LED is off
Forward, brake or reverse at partial throttle, red LED blinks
Forward, brake or reverse at full throttle, red LED is solid
【THROTTLE STICK POSITION】
【SET THE ESC】
The ESC is programmed by the jumpers (Tweezers is recommended to plug and unplug the jumper).
【PROTECTION FUNCTIONS】
1. Low voltage cut-off protection: If the voltage of battery pack is lower than the threshold for 2 seconds, the ESC will
reduce and finally cut off the output power. The threshold for Lipo battery is listed below:
2S Lipo,: 6.2V; 3S Lipo: 9.3V; 5 to 9 cells NiMH/NiCd: 4.5V.
When the car stops, the red LED blinks to indicate the low voltage cut-off protection has been activated.
2. Over-heat protection: When the internal temperature of the ESC is higher than a factory preset threshold for 5
seconds, the ESC will reduce and cut off the output power.
When the car stops, the red LED blinks to indicated the over-heat protection has been activated. If the ESC cools
down to 80 Celsius degree, the output power is recovered to normal state.
3. Throttle signal loss protection: The ESC will cut off the output power if the throttle signal has been lost for 0.1
second. The “Fail Save” function of the radio system is strongly recommended to be activated.
【THE DIFFERENCE BETWEEN “BRUSHED” AND “BRUSHED-CRAWLER” ESC】
1. “Brushed” and “Brushed—Crawler” ESCs have different backward-running modes.
“Brushed” ESC uses “Double—Click” method to make the car go backward. When you move the throttle stick from
forward zone to backward zone for the first time, the ESC begins to brake the motor, the motor speeds down but
WP-1040-BRUSHED
WP-1040-BRUSHED-CRAWLER
WP-1625-BRUSHED
WP-1625-BRUSHED-CRAWLER
FWD Cont. / Burst Current
BWD Cont. / Burst Current
Forward: 40A / 180A
Backward: 20A / 90A
Forward: 25A / 100A
Backward: 25A / 100A
Input
2-3S Lipo, 5-9 Cells NiMH/NiCd
Cars Applicable
1:10 on-road, off-road Buggy, SCT, Truggy
1:10 Crawler, Tank & Boat
1:18 & 1:16 on-road, off-road Buggy, SCT, Truggy
1:18 & 1:16 Crawler, Tank and Boat
Motor
Limit
2 Lipo or 6 NiMH
540 or 550 size motor ≥12T
RPM < 30000 @7.2V
280, 370 or 380 size motor
RPM < 30000 @7.2V
3 Lipo or 9 NiMH
540 or 550 size motor ≥18T
RPM < 20000 @7.2V
280,370 or 380 size motor
RPM < 20000 @7.2V
Resistance
FWD: 0.002 Ohm; BWD: 0.004 Ohm FWD: 0.003 Ohm; BWD: 0.003 Ohm
Built-in BEC
2A/5V (Linear mode BEC) 1A/5V(Linear mode BEC)
PWM Frequency
1KHz
Dimension
46.5mm*34mm*28.5mm 34mm*24mm*14mm
Weight
WP-1040-BRUSHED: 65g
WP-1040-BRUSHED-CRAWLER: 70g
23.5g
FAQ: Types of Manuals and Their Contents
Hobbywing WP-1040-BRUSHED Manuals come in various types, each serving a specific purpose to help users effectively operate and maintain their devices. Here are the common types of Hobbywing WP-1040-BRUSHED User Guides and the information they typically include:
- User Manuals: Provide comprehensive instructions on how to use the device, including setup, features, and operation. They often include troubleshooting tips, safety information, and maintenance guidelines.
- Service Instructions: Designed for technicians and repair professionals, these manuals offer detailed information on diagnosing and repairing issues with the device. They include schematics, parts lists, and step-by-step repair procedures.
- Installation Guides: Focus on the installation process of the device, providing detailed instructions and diagrams for proper setup. They are essential for ensuring the device is installed correctly and safely.
- Maintenance Manuals: Provide guidance on routine maintenance tasks to keep the device in optimal condition. They cover cleaning procedures, part replacements, and regular servicing tips.
- Quick Start Guides: Offer a concise overview of the essential steps needed to get the device up and running quickly. They are ideal for users who need immediate assistance with basic setup and operation.
Each type of Hobbywing WP-1040-BRUSHED instruction is designed to address specific needs, ensuring users have the necessary information to use, maintain, and repair their devices effectively.
Related Instructions for Hobbywing WP-1040-BRUSHED:
1
Platinum 60A V4
2
603
115
2
Quicrun 16BL30
Operation & user’s manual Hobbywing Controller Operation & user’s manual (File: hobbywing-quicrun-16bl30-operation-user-s-manual-1, Wednesday 05-02-2025)
1
160
36
3
Skywalker Quattro 20A*4-UBEC Series
Manual Skywalker Quattro 20A*4-UBEC Series Manual — LBI8AX
3
130
21
4
SEAKING Series
2
550
138
5
XRotor Series
2
1091
273
6
Platinum HV 200A SBEC V4.1
1
496
120
7
EZRUN MAX10 SCT
1
1158
197
8
XERUN-SCT PRO
3
1471
324
9
XERUN XR8 Pro G2
1
170
43
10
SkyWalker Series
Instruction manual PDF Manual (@H9L112), Hobbywing SkyWalker Series Controller (Friday 11-10-2024)
16
312
75
Controller Devices by Other Brands:
|
Eaton MFD-Titan MFD-80 Series Instruction Leaflet MFD-Titan MFD-80 Series (Controller ePDF Manual, #K8483Y) Instruction Leaflet 25 Mar 2025 | 6 |
|
|
GE Fanuc IC695PBM300 Manual GE Fanuc Controller Manual (File: ge-fanuc-ic695pbm300-manual-5, 28/03/2025) PACSystems* RX3i 28 Mar 2025 | 5 |
|
|
J+J J4C Series Installation Instructions J4C Series Installation instructions — 1AE3H3 INSTRUCCIONES DE INSTALACIÓN J4C 20 A 300 21 Feb 2025 | 2 |
|
|
CoCo ASUN-650 Quick Installation Manual #BM1QW5: ASUN-650 Controller Quick installation manual controlled comfort 29 Nov 2024 | 38 |
Categories:
Control Unit
Network Card
Motorized Toy Car
Motherboard
Toy
Engine