
Как зарегистрироваться на Visit Japan Web
Устали стоять в очереди после самолета? Чтобы быстрее пройти паспортный контроль в Японии, воспользуйтесь системой Visit Japan Web. Получите QR-код на сайте и пройдите все процедуры в течение часа.
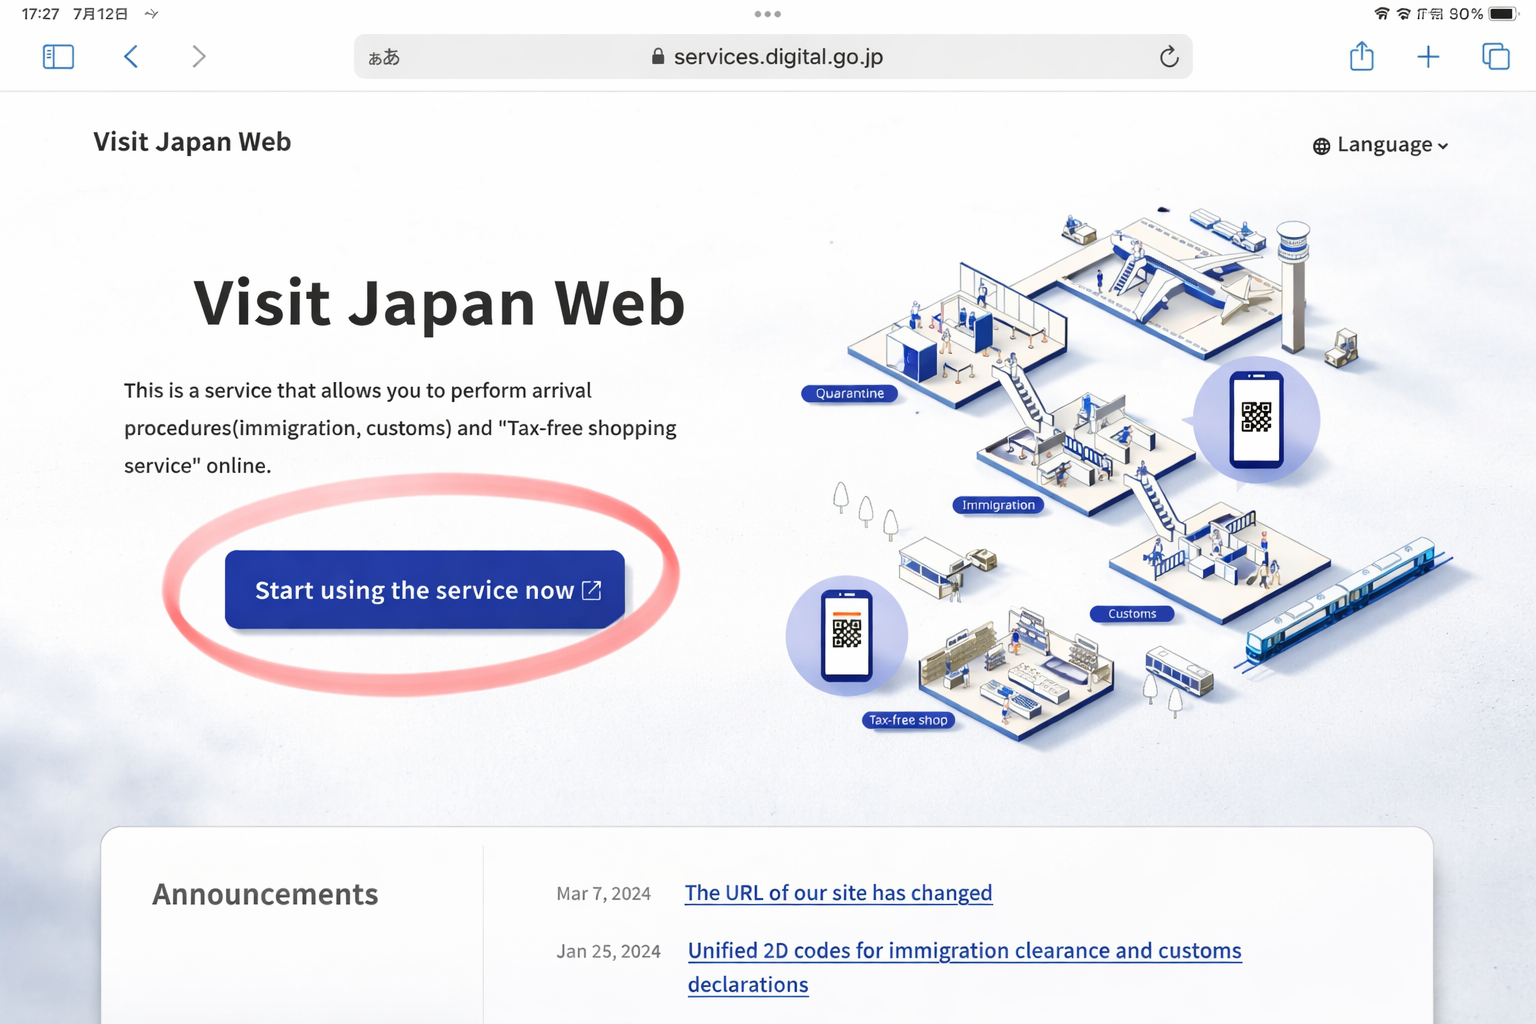
Первым делом откройте сайт Visit Japan Web на английском языке. Если автоматически открылся японский, с правом верхнем углу есть языковое меню Language. Пока на сайте не добавили русский язык, поэтому попробуем зарегистрироваться на английской. Нажмите “Начать использовать сервис”.
Чтобы начать использовать сервис, необходимо зарегистрировать аккаунт, поэтому нажмите “Создать новый аккаунт.

Согласитесь с условиями пользования, поставив две галочки, и нажмите “Далее”.

В поле Email введите действующий электронный адрес, к которому у вас есть доступ. Ниже введите пароль дважды и подтвердите, что вы не робот. Требования к паролю:
— От 10 символов
— В пароле обязательно должны быть заглавные и прописные латинские буквы, цифры и символы
Далее нажмите “Создать аккаунт”.

На указанный вами Email придет пароль, который нужно ввести на следующей странице. Если пароль не пришел, проверьте корректность электронного адреса и папку “Спам”.
Далее нажмите “Проверить” и подтвердите действие на следующей странице.

Далее вам предложат улучшить защите аккаунта, но в этом нет необходимости, поэтому выбирайте “Нет” и нажимайте кнопку “Далее”.

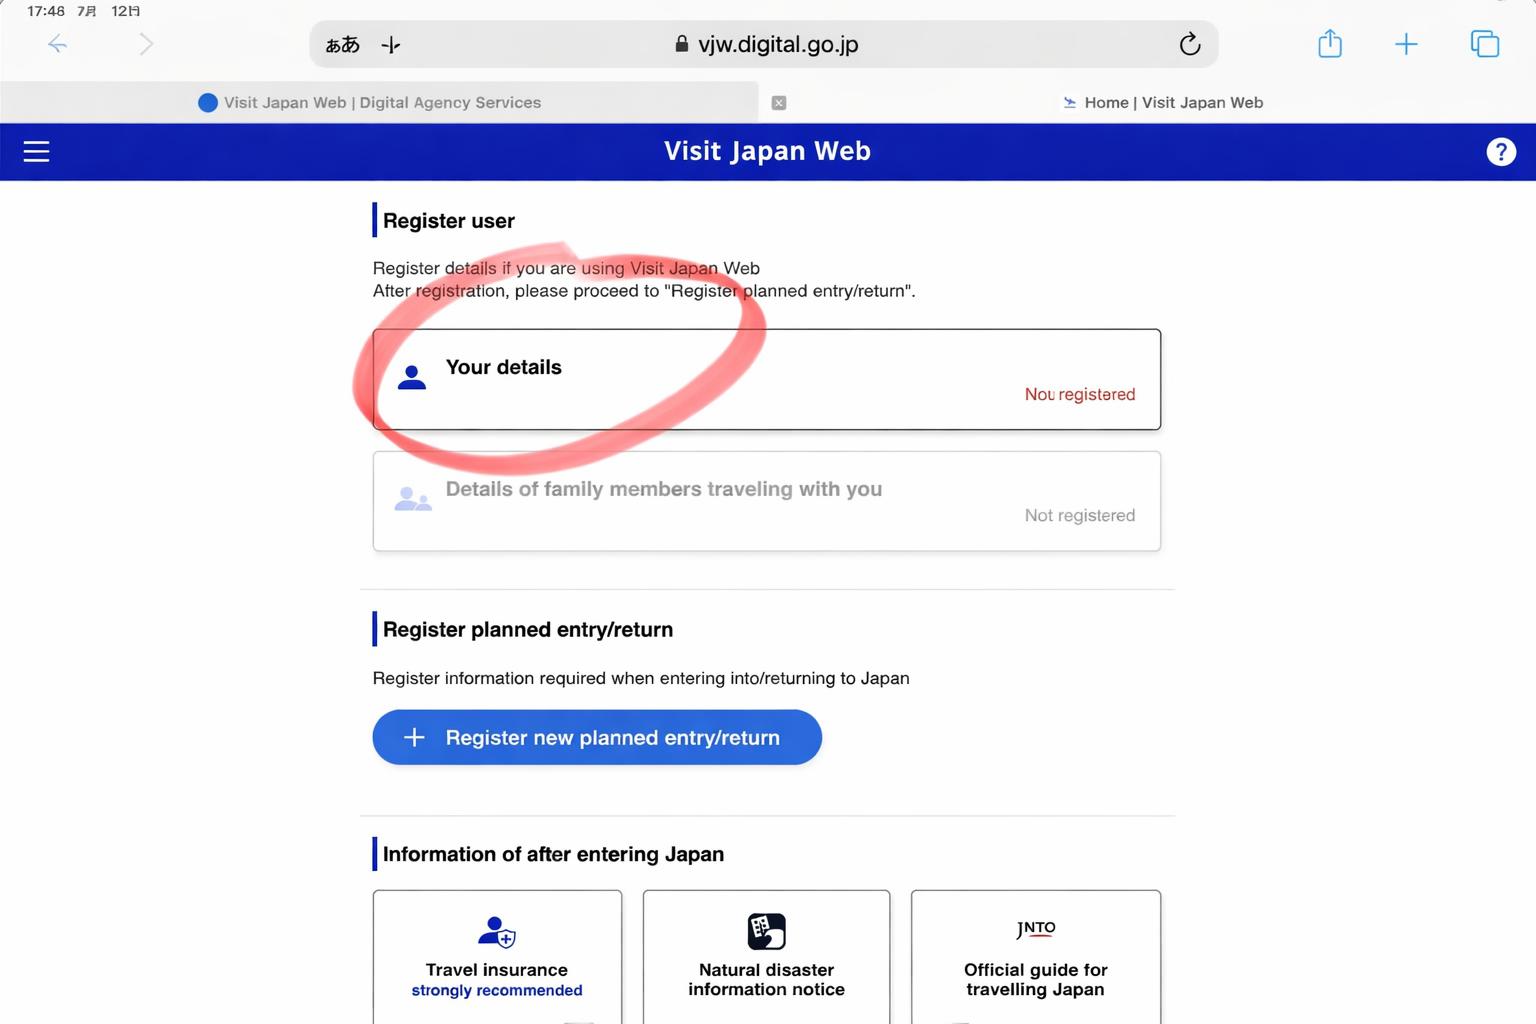
В личном кабинете необходимо зарегистрировать себя и членов семьи, которые путешествуют вместе с вами. Для этого нажмите “Детали”.
На первой странице отметьте, что у вас нет японского паспорта или резидентства в Японии. Сайт также предложит сделать QR-код для беспошлинной торговли, но он не заменяет билет и паспорт в аэропорту, поэтому тоже отмечаем “Нет”.

Данные паспорта можно отсканировать, чтобы поля заполнились автоматически. Разберем, как вводить данные вручную, если паспорта под рукой нет или не получилось отсканировать документ. Выберите второй пункт и нажмите “Далее”.

Первое поле — номер паспорта без пробелов. Далее — фамилия и имя большими латинскими буквами как в загранпаспорте. В следующем поле выберете страну, далее — дата рождения.

Ниже по желанию можно указать род деятельности, страну и город проживания. После заполнения нажмите “Далее”, проверьте информацию и подтвердите ее.

Далее сайт уточнит, есть ли у вас виза, отмечайте “Да” и возвращайтесь в личный кабинет.

На главной странице зарегистрируйте таким же способом членов семьи, а после выберите “Зарегистрировать поездку”.

Визу тоже можно отсканировать, но разберем, как зарегистрировать данные вручную. Выбирайте второй пункт и “Далее”.

В первой графе можно присвоить поездке название на случай, если планов посетить Японию несколько. Далее укажите дату прилета в Японию, выберите авиалинии и номер рейса. Обратите внимание, что рейс нужно указать конечный, которым вы прилетите в Японию.

В конце укажите город вылета самолета в Японию и нажмите “Далее”.

На следующей странице введите адрес проживания в Японии. Если останавливаетесь в нескольких местах, выберите первый отель. Почтовый индекс введите без тире, все остальное — заглавными латинскими буквами.

В конце укажите мобильный номер телефона без знаков “+” и “-”, после нажмите “Подтвердить”. На следующей странице проверьте информацию и подтвердите ее.

После подтверждения в личном кабинете появится информация о поездке. Нажмите на нее.

Внизу страницы нажмите “Паспортный и таможенный контроль”, после чего — “Далее”. Первые две страницы заполнятся автоматически, поэтому просто нажмите “Далее”.

Цель визита — “Туризм”, в последней строке укажите длительность пребывания в днях.

На четвертой странице опросник о нарушении законов Японии. Отметьте во всех пунктах “Нет” и двигайтесь дальше.

До одиннадцатой страницы отмечайте “Нет” во всех пунктах, касающихся провоза в Японию запрещенных предметов. Если у вас с собой будет более 1000 000 иен на человека, то укажите “Да” на 11 странице. Если меньше — “Нет”. Следующая страница — снова “Нет”.

На последней странице не забудьте поставить галочку, что информация корректна. Далее нажмите “Зарегистрироваться”.

На странице путешествия станет доступна кнопка с QR-кодом. Сохраните его на телефон или распечатайте для того, чтобы показать на границе.

Код покажите на паспортном и таможенном контроле. Приятного полета!
Все тексты на сайте Kiselev.Jp являются собственностью Kiselev JP 合同会社. Запрещается копирование любой части сайта с целью продажи или распространения с целью наживы, а также ее модификация или включение в другую работу, публикацию или интернет-сайт.
If you’re planning a trip to Japan, you’re in for an exciting adventure. To make your arrival process smoother and more efficient, Japan has introduced Visit Japan Web, a digital platform that streamlines the arrival procedures. While travelers can still opt for manual forms, completing the necessary information on Visit Japan Web in advance will save you valuable time upon arrival.
Here’s how Visit Japan Web works:
Registering Visit Japan Web Account
Step 1 – Your passport must be valid for at least 6 months beyond your return travel date. Malaysian passport holders can enjoy visa-free entry to Japan for stays of up to 90 days.
Step 2 – To access Visit Japan Web, visit https://vjw-lp.digital.go.jp/en/
Step 3 – Click “Login/Register” on the top of the page.
Step 4 – Click “Sign Up for a New Account“
Step 5 – Tick the boxes for the Terms of Use and Privacy Policy
Step 6 – Fill in your Email, a strong Password, tick the “I am human” to solve the captcha challenge and click “Create Account“.
Step 7 – You will receive an email containing a confirmation code. Enter the confirmation code and click “Confirm Email“.
Step 8 – Click “Go To Login Screen” to log in using your account credentials.
Registering Your User
Note: We recommend using your mobile phone to register your user since it requires taking a photo of your passport and uploading it.
Step 1 – Login to your Visit Japan Web Account – https://www.vjw.digital.go.jp/main/
Step 2 – Click “Your Details” to start entering your passport details.
Step 3 – Answer Questions and click “Next“
Step 4 – Click “Next” to activate your camera and take a photo of your passport. If you’re prompted to grant permission for camera usage, simply click “Allow“.
Step 5 – Align your passport within the frame displayed on the screen, ensuring it fits properly, and then click “Take Photo of Passport” to capture the image.
Step 6 – Your passport details will be automatically populated in the designated fields. Please take a moment to carefully review this information for accuracy. If any corrections are required or if there is any missing information, kindly make the necessary adjustments. Click “Next” to continue.
Step 7 -Review the summary to ensure that all the information you have entered is correct. If you need to make any corrections, simply click the “Edit” button. Otherwise, if everything is accurate, proceed by clicking “Register.”
Your details are now registered. If you are traveling with other family members, you can register them under the same account for added convenience.
Register Your New Planned Entry
In the next section, we will guide you through the process of registering your trip to Japan.
Step 1 – Click on “Register new planned entry/return“.
Step 2 – Click “Proceed to registration without copying details“.
Step 3 – Enter Trip Name, Arrival Date, Airline Name and Flight Number.
Step 4 – Enter the Postal Code to automatically fill in the Prefecture and City.
Club Med Kiroro Peak
Postal Code: 0460571
Address: 650 Tokiwa, Akaigawa
Phone: 810088217008
Club Med Kiroro Grand
Postal Code: 0460571
Address: 650 Tokiwa, Akaigawa
Phone: 81135353131
Club Med Tomamu
Postal Code: 0792204
Address: 2171-2 Nakatomamu
Phone: 81167569800
Club Med Sahoro
Postal Code: 0810039
Address: Nishi 6 Sen, 147-1 Niinai
Phone: 81156646667
Fill in your address and phone number, and then click “Confirm Entered Details” to proceed.
Step 5 – Your trip has been successfully registered. Click on the trip name to proceed and issue your embarkation card.
Step 6 – To continue with the next steps and issue your embarkation card, please click on “Disembarkation Card For Foreigner“.
Step 7 – Click “Next” to continue.
Step 8 – Enter Country Name and City Name of your home address and click “Next“.
Step 9 – Enter the number of “Duration of Stay in Days” and then click “Next.”
Step 10 – Answer the questionnaires and click “Confirm Entered Details“.
Step 11 – Review the information entered and make any corrections by clicking the “Edit” button. Otherwise, click “Register“.
Your disembarkation card is now complete. To view the QR code, simply click on “Display QR Code“. For your convenience, we recommend taking a screenshot of the QR code and storing it on your mobile phone for safekeeping.
Custom Declaration
In the next step, we will guide you through the process of filling out the custom declaration form.
Step 1 – Click on the “Declaration of Personal Effects and Unaccompanied Articles“
Step 2 – Complete all the required fields with the necessary information and click “Next”
Step 3 – If you have other family members traveling with you, please indicate and click “Next” to proceed.
Step 4 – Your hotel information will be automatically populated based on the details provided in your disembarkation card. Please review this information for accuracy. If any corrections are needed, make them and then click “Next” to continue.
Step 5 – Answer the Custom Declaration Questions thoroughly, and after each section, click “Next.” Be aware that there are a total of 8 pages of questions to complete.
Step 6 – Carefully review the questions and your answers in the Custom Declaration. If any corrections are necessary, please make them. Otherwise, click “Register” to finalize the process.
Your custom declaration has been successfully completed. To view the QR code, simply click on “Display QR Code.” For your convenience and peace of mind, we recommend taking a screenshot of the QR code and storing it on your mobile phone. This will ensure you have easy access to it when needed.
Create Tax Free QR Code
Once you’ve arrived in Japan, you have the option to create a tax-free QR Code, which allows you to enjoy tax-free shopping at participating stores. This QR code is your key to expediting the tax-free shopping process and maximizing your shopping experience in Japan.
Step 1 – To begin the process, click on “Create a Tax-Free QR Code.”
Step 2 – To proceed, click “Next” to activate your mobile phone’s camera and capture a photo of your “Landing Permission” seal in your passport.
With Visit Japan Web, your journey to Japan becomes not only more straightforward but also more enjoyable, allowing you to focus on experiencing the beauty and culture of this captivating country.
Starting November 1, 2022, you can use Visit Japan Web, short for VJW, for express entry into Japan. All handwritten information that was previously required, such as immigration information and customs declaration forms, can be filled out in advance through Visit Japan Web, reducing the time required for entry into Japan.
We have already explained how to create a VJW account in this article (New Rules for Japanese Immigration: mySOS to be retired in favor of VJW. If you need it, please click the previous link to see it. This article will lead you step by step to fill out the VJW.
In addition, Visit Japan Web can only be used at several major airports in Japan: Narita International Airport (Tokyo/Chiba), Haneda Airport (Tokyo), Kansai International Airport (Osaka), Chubu Centrair International Airport (Nagoya), Fukuoka Airport (Fukuoka), New Chitose Airport (Hokkaido/Sapporo), and Naha Airport (Okinawa). If the airport you plan to land at is not one of the above seven airports, you cannot use VJW for expedited customs clearance and must use paper documents instead.
All picture from VJW Official Website・デジタル庁
Visit Japan Web User Registration Procedure
Registration of Your Details
Click “Your Details” on the “Home Screen”, and register your details using Visit Japan Web.
Differentiate between entry/return procedures
Answer the question of entry and return procedures.
※ Confirmation of re-entry permission
If you have a long-term visa to Japan (e.g., for study, employment, permanent residence, etc.), which means you will enter Japan with a re-entry permitselect “Yes”.
If you are traveling to Japan, then select “No”.
Passport details in Visit Japan Web
Intended address in Japan (optional)
This item is optional, but if you have an address or a place to stay in Japan that you use frequently, enter it here.
Visit Japan Web Registration complete
The display shows “Registration complete” to complete the registration.
Register your planned entry/return trip to Japan in Visit Japan Web
Register the information required for entry/return procedures when arriving in Japan here.
New registration for planned entry and return
Click “New registration” on the Home Screen, and proceed to “Register Planned Entry/Return – Planned Entry/Return Screen”.
You can register a maximum of 5 entries.
If there are more than 5 reservations, the oldest reservation in “Arrival in Japan” will be deleted.
Registering Planned Entry/Return
Enter your planned entry/return.
The follows are required fields:
- Trip name
- Planned arrival date in Japan
- Airline company name
- Flight number (numbers only)
- Boarded flight number
Intended Address in Japan
Enter your intended address in Japan.
The follows are required fields:
- Postal code
- Prefecture
- City
- Address
- Hotel name, place of stay
- Contact phone number
Select family members traveling with you
If you have family members accompanying you, select “Family member accompanying you”.
Confirm the entered details
Registration of planned entry/return complete
Visit Japan Web: Entry/return procedures
Quarantine Procedures (Fast Track)
Disembarkation Card(As of December 28, 2022, abolished)
Updated April 28, 2023
Starting from April 29, 2023, individuals entering Japan on or after April 29, 2023, are not required to present valid vaccination certificates or pre-departure testing certificates. In accordance with the above-mentioned regulations, the “Quarantine Procedures (Fast Track)” button will be removed from midnight on April 29 (Japan time).
Click “Quarantine Procedures (Fast Track)” in the “Japan Entry/Return Procedure Screen”, and proceed to the “Quarantine procedures (Fast Track) Screen”.
Disembarkation Card For Foreigner registration
Registration of foreigner’s entry record is required for landing application.
For Japanese nationals and foreign residents re-entering the country (i.e., permanent residents, holders of work visas, or study visas, etc., and foreign nationals holding a residence card), the “Disembarkation Card For Foreigner” in the “Japan Entry/Return Procedure” will be grayed out, and no data entry is required.
After registering the foreigner’s entry record, you can present the QR code to the immigration officer for landing.
Basic information
- Name
- Date of Birth
- Country
- City
Immigration information to Japan
- Purpose of visit
- Specific purpose for visit
- Last flight No.
- Intended length of stay in Japan (number of years, months, days)
Intended address in Japan
- Postal code
- Prefecture
- City
- Address
- Hotel name, place of stay
- Contact phone number
If you are staying at a friend’s house, you can ask him/her how to fill in the address, or if you have a hotel reservation, you can send an email to ask how to fill in the hotel.
Finally, there are some questions to fill out
After confirming all the information, you can finish filling out the form.
Customs Declaration
Preparation for customs declaration
Click “Declaration of Personal Effects and Unaccompanied Articles” in the “Japan Entry/Return Procedure Screen”, and proceed to the “Declaration of Personal Effects and Unaccompanied Articles – Operation Selection Screen”.
Fill in the following basic information
- Passport number
- Name
- Occupation
- Date of Arrival
- Name of flight (ship)
- Point of embarkation
If you are traveling with someone, please select the number of people you are traveling with.
Intended address in Japan
- Postal code
- Prefecture
- City
- Address
- Hotel name, place of stay
- Contact phone number
After confirming all the information, you will finish filling out the form.
Preparation for entry into Japan
Show the QR code (different from the above QR code for quarantine!) to the immigration officer at the time of entry. You will be able to clear customs quickly.
※Update January 25
Starting from 3:00 on January 25, 2024 (Japan time), the QR codes for immigration clearance (entry record for foreigners) and customs declaration (declaration of personal effects and unaccompanied articles) procedures will be unified. Afterward, one QR code can be used to handle both immigration inspection and customs declaration procedures.

(Visited 21,272 times, 14 visits today)
Japan has finally reopened to the world, and we can now visit and explore all of the new attractions that have opened since the pandemic. Thankfully, many of Japan’s entry restrictions have been lifted, but the country still encourages visitors to prepare for their trip by pre-registering all Covid-19 documents before entering.
This can be done through the official Visit Japan Web.
What is Visit Japan Web?
Visit Japan Web a new website that replaces the MySOS app and lets tourists pre-register the required documents before entering Japan.
You can also pre-register your disembarkation card for immigration (which is not required for Japanese citizens and foreign residents with re-entry permission) as well as your customs declaration on the website.
After entering all of the required information, you will be given a QR code, which you must show when you arrive at the airport. If you do not register your information prior to your arrival, you must do so at the airport. So, to save time and hassle, we strongly advise you to pre-register before your flight.
What’s the difference between the MySOS app and Visit Japan Web?
Previously, this expedited pre-registration on Visit Japan Web was done via the MySOS app. If your COVID-19 info was previously registered in the app, you will be able to use MySOS until January 13, 2023. Otherwise, you must submit all of your documents through Visit Japan Web.
How do I complete a Visit Japan Web registration?
Registration for Japan might be a bit confusing especially if it’s your first time. But don’t stress, we’ve put together an easy step-by-step guide to help you with your Visit Japan Web registration.
Before you start
The Visit Japan Web registration process requires tourists to upload several documents (e.g., passport details and your vaccination certificate).
#Klooktip: to save time, upload all your documents to your computer or have them in the photo gallery of your phone before starting the application process
Step 1: User Registration of Visit Japan Web
To start your Visit Japan Web registration, you must first create an account with Visit Japan Web (email address and password creation). When you’ve logged into Visit Japan Web, click «Your Details» on the «Home Screen» and fill out the below —
-
Entry/return procedure category
Q1: Do you have a passport issued by the Japanese government?
Q2: Will you enter Japan with a (special) re-entry permission?
If you’re an Australian citizen, the answer will most likely be «no» for both.
-
Passport Details
Provide the following info: Surname, Given Name, Date of Birth, Nationality, Gender and Passport Number.
-
Intended address in Japan (optional)
-
Confirm Details Provided
Applicants must submit their own entry information. For applicants who are unable to do so themselves (for example, infants), you may click on «Details on family members travelling with you» and add their information to your application.
Step 2. Arrival Schedule Registration on Visit Japan Web
Click on “Registering Planned Entry/Return” then “New Registration”.
-
Planned entry/return
Give your holiday a nickname then enter your planned arrival date in Japan, Airline company name, and light number (without letters).
-
Intended Address in Japan
If you’ve entered your Intended address in Japan during Step 1, this field will be automatically populated.
-
Select family members traveling with you (optional)
This is only applicable if you’ve clicked «Details on family members travelling with you» in Step 1.
-
Confirm Details Provided
Step 3. Arrival Procedure Information Registration for Visit Japan Web
Go to the «Japan Entry/Return Procedure Screen» and select the «Quarantine Procedures (Fast Track)» option. The first thing you’ll notice is a red screen (not yet registered).
When the application is finished, your screen will turn blue (review completed) and a QR code will pop up.
-
Upload your passport information page
Take a pic of your passport information page or upload one. The tag next to «Passport» will change to «scanning». This will take about 10 minutes. You’ll receive an email confirmation once completed.
Afterward, «please verify» will replace the «scanning» tag. To confirm your scanned information, click on the tag. Return to the previous main page and continue to the next step.
-
Questionnaire WEB
Tap the «please register» button. The majority of the information required here would have been automatically populated with the details you’ve entered in previous steps. Double-check the info and fill in any blanks.
-
Vaccination certificate
Note: from May 8 2023 onwards, you will no longer be required to provide proof of vaccination to enter Japan.
Tap the «Vaccination Certificate» link then select “Will submit”. If your vaccination certificate details are in Japanese or English, tap “yes”.
Step 4. Display QR Code on Visit Japan Web
In preparation for immigration clearance at any aiport in Japan, here’s what you have to do.
Select «Disembarkation Card for Foreigners» from the drop-down menu.
Your home address (country name and city name), purpose of visit, intended length of stay in Japan, and Declaration is all required here. Click «confirm registration» to verify your information and «Register» to submit it.
Once you’ve registered, you will see «Display QR Code» appearing beneath «Disembarkation Card for Foreigners».
When you land in Japan, click «Display the QR code» to show your QR code to immigration officers at the airport.
What happens if I haven’t had 3 doses of COVID-19 vaccinations or am unvaccinated? Will I be denied entry into Japan?
Visitors visiting Japan won’t need to show confirmation of vaccination or have a negative COVID-19 test upon arrival as of May 8, 2023.
Your applications will be reviewed once you have completed all applicable sections. When your application is accepted, you will be notified via email. Return to the portal, and a blue screen with a QR code should appear.
What else should I do before travelling to Japan?
Here are some additional travel essentials you should grab to ensure a hassle-free Japan holiday:
-
A Japan Rail Pass
The JR Pass gives you unlimited access to all Japan Rail National trains, JR bus services, ferry services, and airport transfers. If you’re still figuring out whether buying a JR Pass is worth it for the itinerary you’re planning, here’s an easy guide on how to calculate if a JR Pass is worth it.
-
SIM cards
Finding free WiFi hotspots on your holiday in Japan can sometimes be challenging. Your best option as a tourist is to pre-buy an unlimited data 4G SIM card for Japan and pick it up at your airport of choice in Japan. There are a few SIM card and portable WIFI options to choose from so here’s a list of the best prepaid travel SIM cards for Japan.
-
Multi-Attractions Passes for Japan
Klook Passes are the easiest way to bundle and save on top activities in Tokyo and Osaka.
One digital pass gives you access to up to 7 of each of the city’s top activities and save up to 48% with the Klook Passes. The pass is valid for 30 days and gives you the flexibility to pick and choose depending on when and where you’d like to go!
Сейчас этот форум просматривают: нет зарегистрированных пользователей и гости: 5
Заполнение данных на сайте Visit Japan Web
Сообщение: #1
Здравствуйте. Есть какие то гайды по заполнению данных на сайте Visit Japan Web? Например при заполнение просят ввести первый город с которого вылетаешь, а в списке есть только Москва и Новосибирск. Так же после внесения номера визы, выходит ошибка о том что регистрационные данные не верны, хотя и данные все верны кроме даты вылетов. Так как при подаче на визу, даты были другие, сейчас в связи с работой было необходимо перенести даты вылетов, и они отличаются от тех что подавались на визу. Возможно из за этого и ругается сайт? И можно ли просто проигнорировать данную ошибку?
- Diamond1985
- новичок
- Сообщения: 7
- Регистрация: 14.03.2018
- Город: Набережные Челны
- Благодарил (а): 0 раз.
- Поблагодарили: 0 раз.
- Возраст: 39
- Пол: Мужской
Re: Заполнение данных на сайте Visit Japan Web
Сообщение: #2
Galina_v » 17 фев 2025, 11:59
Гайд есть, в том числе и на русском, поищите, я ввела номер визы и данные все подтянулись, посмотрите внимательно, может номер ввели неверно, буквы должны быть заглавные. у меня в номере есть буква B, ее обязательно вводить заглавную.
Я за право народов решать свою судьбу самостоятельно, без вторжений извне, и за суверенитет каждой страны
-
Galina_v - почетный путешественник
- Сообщения: 3124
- Регистрация: 03.02.2012
- Город: Владивосток
- Благодарил (а): 56 раз.
- Поблагодарили: 679 раз.
- Возраст: 56
- Отчеты: 3
- Пол: Женский
Re: Заполнение данных на сайте Visit Japan Web
Сообщение: #3
Typha_latifolia » 09 мар 2025, 17:49
Diamond1985 писал(а) 16 фев 2025, 17:44: Так же после внесения номера визы, выходит ошибка о том что регистрационные данные не верны, хотя и данные все верны
Присоединяюсь к вопросу, у вас получилось решить его?
Также ввожу номер визы, выдает ошибку, что данные не корректны. Номер введен корректно, с учетом заглавных букв и т.д.
- Typha_latifolia
- участник
- Сообщения: 109
- Регистрация: 29.10.2018
- Город: Москва
- Благодарил (а): 43 раз.
- Поблагодарили: 10 раз.
- Возраст: 28
- Страны: 23
Список форумов ‹ АЗИЯ форум ‹ ЯПОНИЯ форум ‹ Виза в Японию самостоятельно. Таможня