
View the manual for the Avaya 1616-I here, for free. This user manual comes under the category phones and has been rated by 2 people with an average of a 9.9. This manual is available in the following languages: English. Do you have a question about the Avaya 1616-I?
Ask your question here
Frequently asked questions
Can’t find the answer to your question in the manual? You may find the answer to your question in the FAQs about the Avaya 1616-I below.
What is the screen size of the Avaya 1616-I?
The screen size of the Avaya 1616-I is 3.5 «.
What certifications does the Avaya 1616-I have?
The Avaya 1616-I has the following certifications: HTTP.
Is the manual of the Avaya 1616-I available in English?
Yes, the manual of the Avaya 1616-I is available in English .
Is your question not listed? Ask your question here

Avaya™ Quick Edition
Release 4.0
1616 IP Telephone User Guide
16-602948
Release 4.0
June 2008
Issue 1

© 2007 Avaya Inc.
All Rights Reserved.
Notice
While reasonable efforts were made to ensure that the infor mation in this
document was complete and accurate at the time of printing, Avaya Inc. can
assume no liability for any errors. Changes and corrections to the information
in this document may be incorporated in future releases.
For full legal page information, please see the complete document, A vaya
Legal Page for Software Documentation, Document number 03-600758.
To locate this document on the website, simply go to
http://avaya.com/support and search for the document number in the
search box.
Documentation disclaimer
Avaya Inc. is not responsible for any modifications, addition s, or deletions to
the original published version of this documentation unless such modifications,
additions, or deletions were performed by Avaya. Customer and/or End User
agree to indemnify and hold harmless Avaya, Avaya’s agents, servants and
employees against all claims, lawsuits, demands and judgments arising out of,
or in connection with, subsequent modifications, additions or deletions to this
documentation to the extent made by the Customer or End User.
Link disclaimer
Avaya Inc. is not responsible for the contents or reliability of any linked Web
sites referenced elsewhere within this documentation, and Avaya does not
necessarily endorse the products, services, or informa tion described or o ff ered
within them. We cannot guarantee that these links will work all of the time and
we have no control over the availability of the linked pages.
Warranty
Avaya Inc. provides a limited warranty on this product. Refer to your sales
agreement to establish the terms of the limited warran ty. In addition, Avaya’s
standard warranty language, as well as information regarding support for this
product, while under warranty, is available through the following Web site:
http://avaya.com/support
Copyright
Except where expressly stated otherwise, the Product is protected by copyrigh t
and other laws respecting proprietary rights. Unauthorized reproduction,
transfer, and or use can be a criminal, as well as a civil, offense un der the
applicable law.
Avaya support
Avaya provides a telephone number for you to use to report pro blems or t o ask
questions about your product. The support telephone number
1-800-242-2121 in the United States. For additional support telephone
is
numbers, see the Avaya Web site:
http://avaya.com/support
Software License
USE OR INSTALLATION OF THE PRODUCT INDICATES THE END USER’S
ACCEPTANCE OF THE TERMS SET FORTH HEREIN AND THE GENERAL
LICENSE TERMS AVAILABLE ON THE AVAYA WEBSITE AT
http://support.avaya.com/LicenseInfo/ (“GENERAL LICENSE TERMS”). IF
YOU DO NOT WISH TO BE BOUND BY THESE TERMS, YOU MUST
RETURN THE PRODUCT(S) TO THE POINT OF PURCHASE WITHIN TEN
(10) DAYS OF DELIVERY FOR A REFUND OR CREDIT.
Avaya grants End User a license within the scope of the license types
described below. The applicable number of licenses and units of capacity for
which the license is granted will be one (1), unless a different number of
licenses or units of capacity is specified in the Documentation or other
materials available to End User. For purposes of this Software License, the
following capitalized terms shall have the meanings set forth herein:
“Designated Processor” means a single stand-alone computing device.
“Software” means the computer programs in object code, orig inally lice nsed by
Avaya and ultimately utilized by End User, whether as stand- alone Prod uct s or
pre-installed on hardware. “Product(s)” means the combination of hardware
and Software comprising the Avaya Quick Edition product line.
License Type(s):
(a) Designated System(s) License (DS). End User may install and use each
copy of the Software on only one Designated Processor, unless a different
number of Designated Processors is indicated in the Documentation or other
materials available to End User. Avaya may require the Designated
Processor(s) to be identified by type, serial number, feature key, location or
other specific designation, or to be provided by End User to Avaya through
electronic means established by Avaya specifically for this purpose.
(b) Shrink-wrap License (SR). With respect to Software that contains elements
provided by third party suppliers, End user may install and use the Software in
accordance with the terms and conditions of the applicable license
agreements, such as “shrink-wrap” or “clickwrap” license accompanying or
applicable to the Software (“Shrink-wrap License”). Th e text of the Shrink-wra p
License will be available from Avaya upon End User’s request.
Third-party Components
Certain software programs or portions thereof included in the Product may
contain software distributed under third party agreements (“Third Party
Components”), which may contain terms that expand or limit rights to use
certain portions of the Product (“Third Party Terms”). Information identifying
Third Party Components and the Third Party Terms that apply to them is
available on Avaya’s web site at:
http://support.avaya.com/ThirdPartyLicense/

Contents
Contents
Using Quick Edition 1616 IP Telephones. . . . . . . . . . . . . . . . . . . . . . . . . . . . 1
Introduction . . . . . . . . . . . . . . . . . . . . . . . . . . . . . . . . . . . . . . . . . 1
Call LED State . . . . . . . . . . . . . . . . . . . . . . . . . . . . . . . . . . . . . . 2
Handset, Speaker, Headset Behavior . . . . . . . . . . . . . . . . . . . . . . . . . 3
Making Calls . . . . . . . . . . . . . . . . . . . . . . . . . . . . . . . . . . . . . . . . . 4
Receiving Calls . . . . . . . . . . . . . . . . . . . . . . . . . . . . . . . . . . . . . . . 5
Ending Calls . . . . . . . . . . . . . . . . . . . . . . . . . . . . . . . . . . . . . . . . . 6
Call Pickup . . . . . . . . . . . . . . . . . . . . . . . . . . . . . . . . . . . . . . . . . . 6
Putting a Call on Hold . . . . . . . . . . . . . . . . . . . . . . . . . . . . . . . . . . . . 7
Transferring Calls . . . . . . . . . . . . . . . . . . . . . . . . . . . . . . . . . . . . . . 7
Parking and Retrieving Calls . . . . . . . . . . . . . . . . . . . . . . . . . . . . . . . . 8
Conference Calls . . . . . . . . . . . . . . . . . . . . . . . . . . . . . . . . . . . . . . 9
Using Call Logs . . . . . . . . . . . . . . . . . . . . . . . . . . . . . . . . . . . . . . . 10
Call Forwarding . . . . . . . . . . . . . . . . . . . . . . . . . . . . . . . . . . . . . . . 11
Zero-Redirect. . . . . . . . . . . . . . . . . . . . . . . . . . . . . . . . . . . . . . . . . 12
Using Voicemail . . . . . . . . . . . . . . . . . . . . . . . . . . . . . . . . . . . . . . . 13
Record Your Name and Greeting . . . . . . . . . . . . . . . . . . . . . . . . . . . 13
Listening to Voicemail Messages. . . . . . . . . . . . . . . . . . . . . . . . . . . . 14
Using Directories . . . . . . . . . . . . . . . . . . . . . . . . . . . . . . . . . . . . . . 17
Status. . . . . . . . . . . . . . . . . . . . . . . . . . . . . . . . . . . . . . . . . . . . . 19
Status — Icons and Button LED States . . . . . . . . . . . . . . . . . . . . . . . . . 19
My Status. . . . . . . . . . . . . . . . . . . . . . . . . . . . . . . . . . . . . . . . . 20
Do Not Disturb . . . . . . . . . . . . . . . . . . . . . . . . . . . . . . . . . . . . . . . . 21
Paging . . . . . . . . . . . . . . . . . . . . . . . . . . . . . . . . . . . . . . . . . . . . 21
Speed Dial . . . . . . . . . . . . . . . . . . . . . . . . . . . . . . . . . . . . . . . . . . 21
Telephone Menu Navigation . . . . . . . . . . . . . . . . . . . . . . . . . . . . . . . . 23
Programmable Feature Buttons . . . . . . . . . . . . . . . . . . . . . . . . . . . . . . 24
Accessing User Options . . . . . . . . . . . . . . . . . . . . . . . . . . . . . . . . . . 26
Setting Password Options . . . . . . . . . . . . . . . . . . . . . . . . . . . . . . . . . 26
Adjusting the Volume . . . . . . . . . . . . . . . . . . . . . . . . . . . . . . . . . . . . 27
Muting the Active Microphone . . . . . . . . . . . . . . . . . . . . . . . . . . . . . . . 27
Changing the User Language. . . . . . . . . . . . . . . . . . . . . . . . . . . . . . . . 27
Choosing a Personalized Ringer Tone . . . . . . . . . . . . . . . . . . . . . . . . . . 27
Setting the Call Waiting Tone . . . . . . . . . . . . . . . . . . . . . . . . . . . . . . . . 28
Setting the Contrast Level of the Display . . . . . . . . . . . . . . . . . . . . . . . . . 28
Avaya Quick Edition Release 4.0 1616 IP Telephone User Guide June 2008
i

Contents
Web-based System Administration. . . . . . . . . . . . . . . . . . . . . . . . . . . . . 28
Options Menus. . . . . . . . . . . . . . . . . . . . . . . . . . . . . . . . . . . . . . . . . . 29
Index . . . . . . . . . . . . . . . . . . . . . . . . . . . . . . . . . . . . . . . . . . . 31
Avaya Quick Edition Release 4.0 1616 IP Telephone User Guide June 2008
ii
Using Quick Edition 1616 IP Telephones
Introduction
Avaya Quick Edition Release 4.0 1616 IP Telephone User Guide June 2008 1
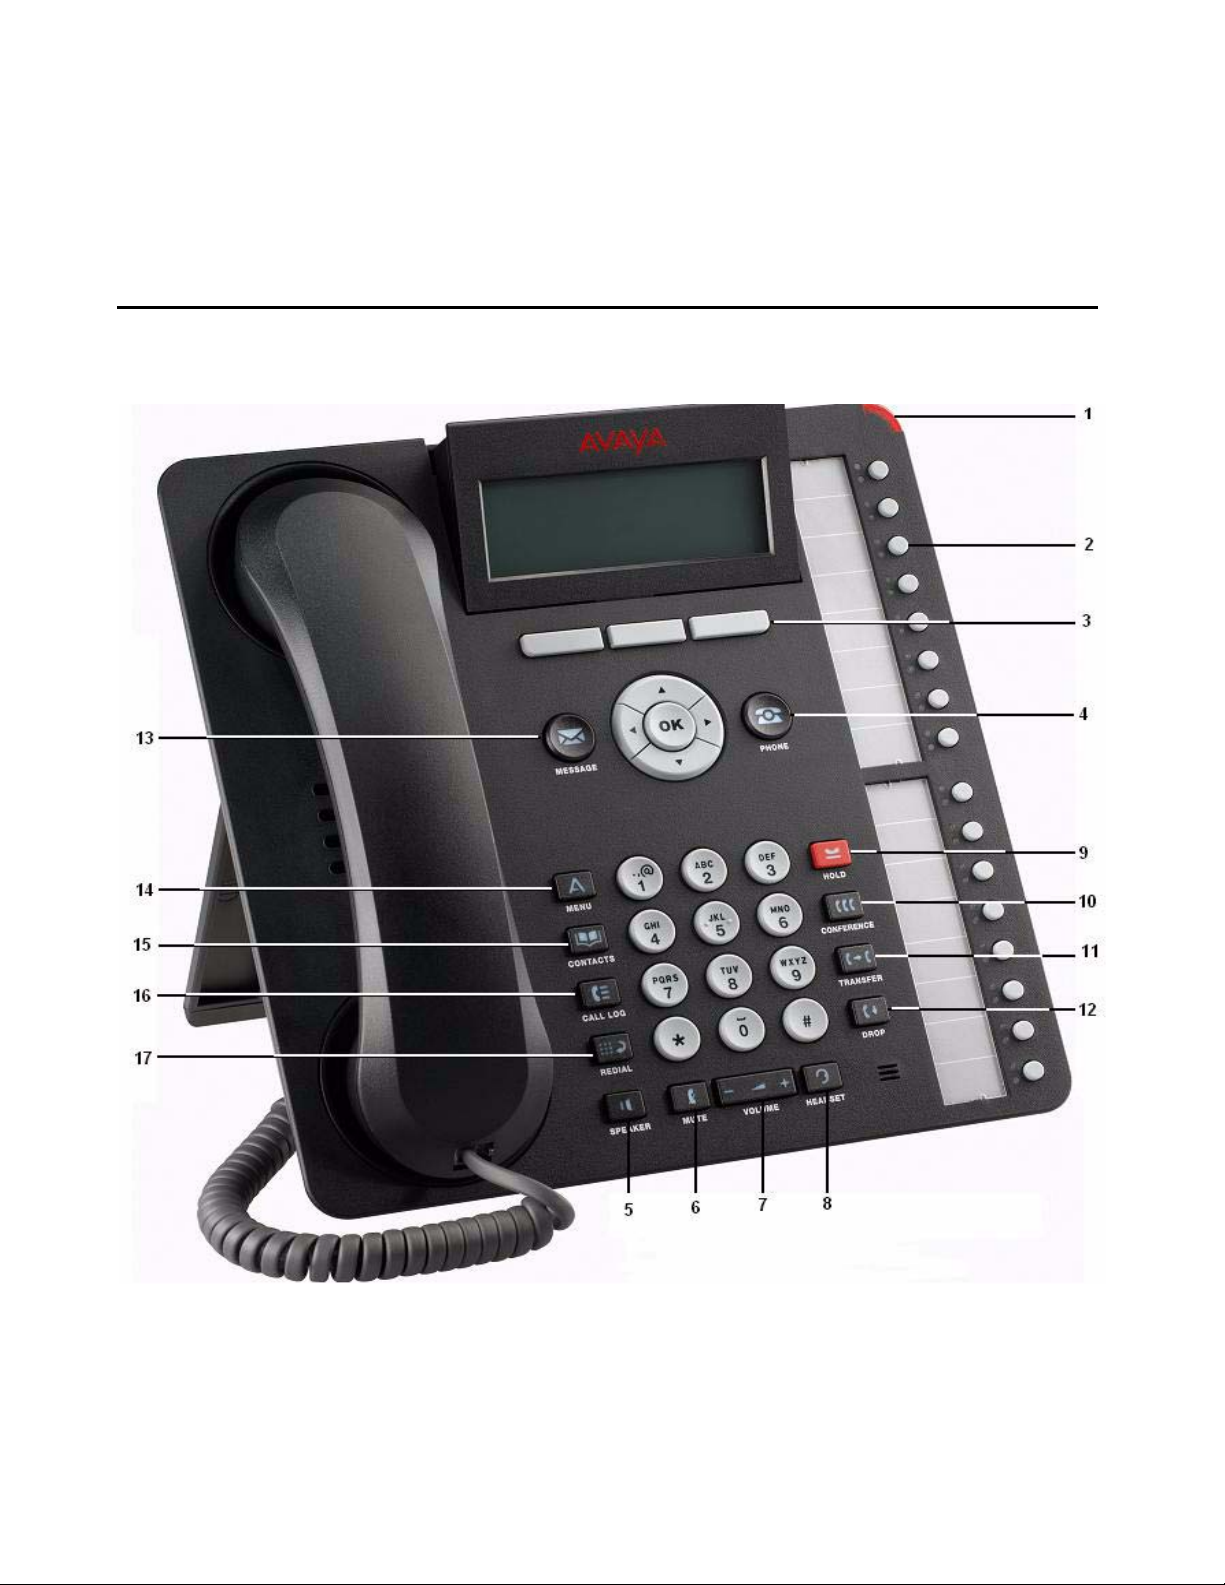
Using Quick Edition 1616 IP Telephones
1 Message Waiting
Message en attente
Message en attente
Nachrichtenanzeige
2 Call Appearance or Feature
Boutons Ligne/Fonction
Boutons Ligne/Fonction
Leitungs-/Funktionstasten
3 Softkeys
Touches programmables
Touches programmables
Softkeys
4 Phone/Exit
Téléphone/Quitter
Téléphone/Quitter
Telefon/Beenden
5 Speaker
Haut-parleur
Haut-parleur
Lautsprecher
6 Mute
Discrétion
Discrétion
Stumm
7 Volume
Volume
Volume
Lautstärke
8 Headset
Casque d’écoute
Casque d’écoute
Headset
9 Hold
Attente
Attente
Halten
10 Conference
Conférence
Conférence
Konferenz
11 Transfer
Transfert
Transfert
Weiterleiten
12 Drop
Conférence
Conférence
Trennen
13 Message
14 Avaya menu
15 Contacts
16 Call logs
17 Redial
Laisser
Laisser
Wahlwiederholung
Call LED State
The phone supports up to sixteen (16) simultaneous calls (an expansion module adds 32 buttons). By
selecting the button, the call associated with that button becomes the active call, and this call
information is displayed in the application line of the screen. The call information for other calls
assigned to other call appearance buttons could be viewed in the application line by using the
navigation buttons to scroll through the list. See Status
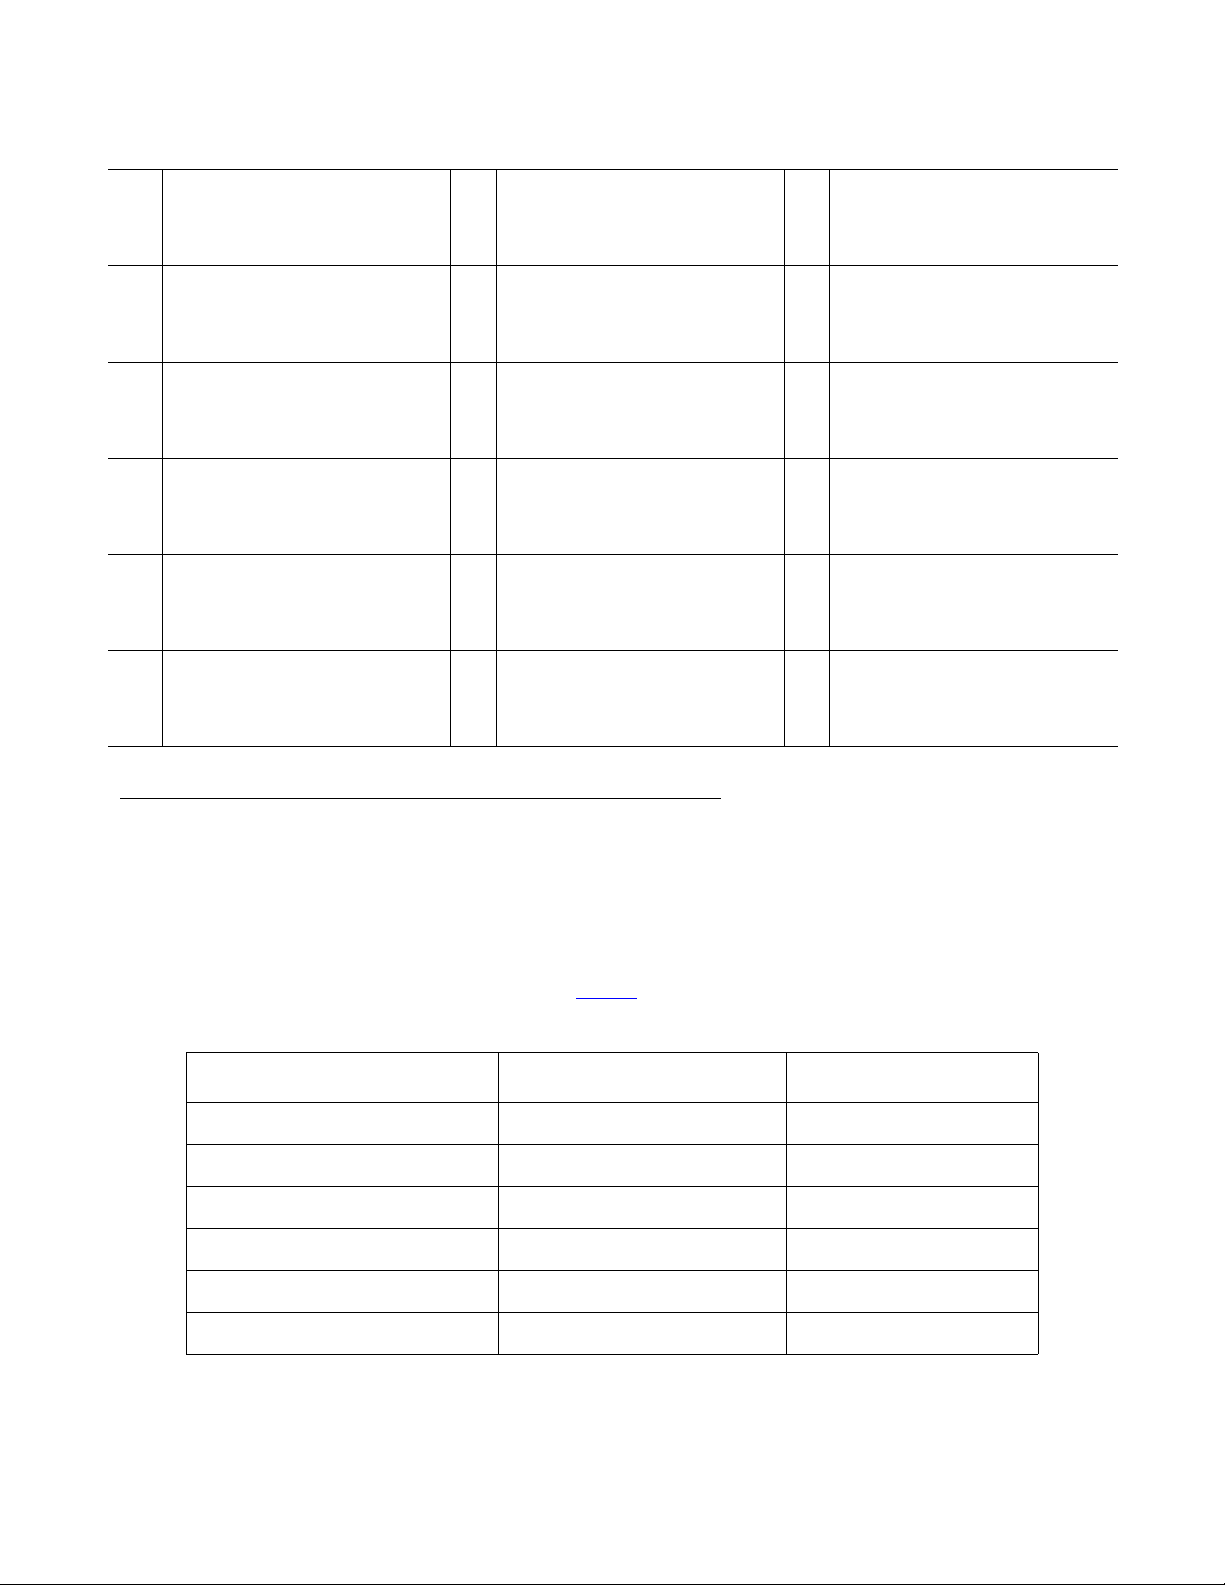
The table below lists call LED states.
State Red LED Green LED
No calls Off Off
Ringing call Fast blinking Off
Dialing On Off
Connected Off On
Local hold Slow blinking Off
Remote hold Slow blinking On
on page 19 for Feature/Status LED states.
2 Avaya Quick Edition Release 4.0 1616 IP Telephone User Guide June 2008

Using Quick Edition 1616 IP Telephones
Local park On Off
Remote park Slow blinking On
Handset, Speaker, Headset Behavior
Action Active Device Result
Lift handset Speaker or headset Handset becomes active device
Replace handset Handset Terminate the call
Speaker or headset No effect
Press speaker button Handset or headset Speaker becomes active device
Speaker Terminate the call
Press headset Handset or speaker Headset becomes active device
Headset Terminate the call
Avaya Quick Edition Release 4.0 1616 IP Telephone User Guide June 2008
3

Using Quick Edition 1616 IP Telephones
Making Calls
To make calls manually
1. Pick up the handset, press SPEAKER, press HEADSET, or press a Call Appearance button.
2. Dial the number.
OR
1. Pre-dial the digits. You can edit the number if necessary.
2. Pick up the handset, press SPEAKER, press HEADSET, or press a Call Appearance button.
To make a call using a speed dial
You must first create speed dial entries (see Speed Dial on page 21).
● Press and hold, for two seconds, the number button that corresponds to the speed dial entry.
OR
1. Press MENU and press Select on the Phone Settings screen.
2. Press the Page Down button to navigate to Speed Dial and press Select.
3. Navigate to the selected entry and pick up the handset or press OK.
To make a call directly to a voice mailbox
1. Press the programmable feature button assigned to Voicemail Dialing.
2. Pick up the handset, or press SPEAKER, or press HEADSET, dial handsfree.
3. Dial the number.
To make a call from your voice mailbox
1. Press MESSAGE and enter your password.
2. Press Next and scroll to the selected message.
3. Press Select and pick up the handset, or press SPEAKER, or press HEADSET.
To make a call using REDIAL
1. Pick up the handset, or press SPEAKER, or press HEADSET.
2. Press REDIAL to dial the last number that you dialed.
Note:
Note: Redial will dial the telephone, not the voicemail.
4 Avaya Quick Edition Release 4.0 1616 IP Telephone User Guide June 2008

Using Quick Edition 1616 IP Telephones
To make a call from the list of call logs
You must subscribe to Caller ID service for the name and number of incoming calls to be recorded in
the Incoming list.
1. Press CALL LOG.
2. Press the Page Right button to switch between Outgoing and Incoming lists.
3. Press the Page Up and Page Down buttons to navigate to the entry that you want to dial.
Press Detail to view additional information.
4. Press Dial or OK. If the call is long distance, you must insert the international dial code.
To make calls using the corporate or personal directory
1. Press CONTACTS.
2. Press the Page Right button to switch between Corp Contacts and Pers Contacts.
3. Press the Page Up and Page Down buttons to navigate to the directory entry that you wan t to dial.
Press Detail to view additional information.
4. Press Dial or OK.
To make a restricted call using an authorization code
The system may be configured with dialing restrictions that require you to enter an authorization code.
1. Dial the external number.
2. After hearing a tone, dial the 6-10 digit authorization code provided by the system administrator.
Receiving Calls
To answer an incoming call
● Press Answer, press the blinking button, pick up the handset, press SPEAKER, or press
HEADSET.
To answer or ignore a second incoming call
● Press Answer or Ignore or press the Call Appearance key while the telephone is ringing.
If you choose to answer, the first call is put on hold.
Avaya Quick Edition Release 4.0 1616 IP Telephone User Guide June 2008
5

Using Quick Edition 1616 IP Telephones
Ending Calls
To end a telephone call
Do one of the following:
● Press EndCall, press DROP, replace the handset, press SPEAKER, or press HEADSET.
Call Pickup
Call pickup permits a user to answer a call that is ringing on another telephone in the same pickup
group. You will hear a reorder tone if you are not allowed to pick up a call or if there is no alerting call.
Note:
Note: See page 24 for instructions to program a feature button for Call Pickup List, Call Pickup
Any, or Call Pickup Extension.
To display the list of calls available for pickup in your group
1. Press Call Pickup List to display all calls available for pickup.
2. Navigate to the call that you want to answer and press Select.
To pick up any call within your group
● Press Call Pickup Any; the system selects the telephone and the call targeted for pickup.
To pick up a call on a specific extension within your group
● Press Call Pickup Extension and then dial the ringing extension
OR
press Call Pickup List and select an extension in the list of calls available for pickup.
To pick up a call when audio or visual alert is enabled
With audio alert enabled, a call to your telephone will override a pickup alert. With visu al alert enabled,
a call to your telephone will return a busy signal to the caller if all call display lines are consumed by
unanswered call pickup calls.
1. Visual alert — the interface will display the calling party number and the called party name.
Audio alert — the telephone will provide an audible (page tone) ring.
2. Press Answer to answer the call; press Ignore to ignore the call.
6 Avaya Quick Edition Release 4.0 1616 IP Telephone User Guide June 2008

Using Quick Edition 1616 IP Telephones
To enable or disable an audio or visual alert
1. Press MENU and press Select on the Phone Settings screen.
2. Press the Page Down button to navigate to Call Pickup Alert and press Select.
3. Press the Page Up and Page Down buttons to switch between Audio Alert or Visual Alert.
4. Enable or disable (ON or OFF).
5. Press the PHONE/EXIT button.
Putting a Call on Hold
To put a single call on hold
● Press HOLD. You can replace the handset without losing the call.
To retrieve a held call
● Pick up the handset and press HOLD, or Resume, or OK, or the Call Appearance button.
To put an active call on hold while you place a new call
1. Press HOLD.
2. Press a Call Appearance button.
3. Place and conclude the new call.
4. Retrieve the held call.
To put an active call on hold while you answer a second call
1. When a call comes in, press the button that corresponds to the incoming call. The active call is
automatically put on hold.
2. Conclude the new call.
3. To retrieve the held call, press Resume, HOLD, or Call Appearance.
Transferring Calls
To transfer a call and speak to the receiving party
1. With the calling party on the line, press TRANSFER.
Avaya Quick Edition Release 4.0 1616 IP Telephone User Guide June 2008
7

Using Quick Edition 1616 IP Telephones
2. When you hear the dial tone you can call the next party in one of several ways:
—
dial the number
—
press CONTACTS, CALL LOG, or REDIAL, select the number and press OK.
3. After the dialed party answers your call, announce the caller.
4. When you are ready to transfer the call, press Complete and press TRANSFER.
To transfer a call without speaking to the receiving party
1. With the calling party on the line, press TRANSFER.
2. When you hear the dial tone you can call the next party in one of several ways:
—
dial the number
—
press CONTACTS, CALL LOG, or REDIAL, select the number and press OK.
3. When the telephone at the far end begins to ring, press TRANSFER or Complete, and hang up.
To transfer a call directly to voicemail for the receiving party
1. With the calling party on the line, press VmTsf.
2. Dial the number, or press Contact and select the number.
3. Hang up.
Note:
Note: A long delay before dialing the number will result in fast-busy tone. Press Cancel or Exit
and then press HOLD to remove the original caller from hold and start the transfer
process again.
Parking and Retrieving Calls
To park a call
1. While the call is active, press Park.
2. Hang up.
To retrieve a parked call from the telephone that was used to park the call
1. At the telephone that was used to park the call, go off-hook.
2. Do one of the following:
—
to retrieve a single parked call, press UnPark.
—
to retrieve one of several parked calls, navigate to the selected call and Select.
8 Avaya Quick Edition Release 4.0 1616 IP Telephone User Guide June 2008
Loading…

Avaya 1616/1616-I IP Deskphone User
Guide
16-601448
Issue 2
February 2010
Avaya 1616/1616-I IP Deskphone User Guide
Issue 2 February Avaya 1616/1616-I IP Deskphone User Guide February
Logging in to and out of your telephone
Features menu
Introduction to the 1616/1616-I IP Telephone
Overview of phone buttons and features Description
Name Overview of phone buttons and features
LEDs
Feature Button LEDsCall/Line Appearance Button LEDs
Scrolling and navigation
Icons in the telephone displayIcon Description
Paper labels
Logging in to your telephone
Logging in to and out of your telephoneLogging out of your telephone
Page
Making a call
Making callsClearing a number
Redialing a number Calling a person from the call log
Calling a person from the contacts list Answering a call
Handling calls Ignoring an incoming call
Sending an incoming call directly to voice mailMuting a call
Putting a call on hold Transferring a call
Page
Making a conference call
Conference callsAdding a person on hold to a conference call
Viewing conference details
Putting a conference call on holdDropping the last person added from a conference call
Silencing a person on a conference call
Dropping a person from a conference callPage
Logging into your voice mail
Getting your messagesPage
Answering a call on a bridged call appearance
Bridged call appearancesJoining a call on a bridged call appearance
Making an outgoing call on a bridged call appearance
Answering a call on a shared line appearance
Shared line appearancesJoining a call on a shared line appearance
Making an outgoing call on a shared line appearance
Viewing contacts details
ContactsAdding a new contact
Deleting a contact
Editing a contactPress More Delete
Deleting a contact
Contacts Avaya 1616/1616-I IP Deskphone User Guide February
Viewing the call log
Call logViewing call log details
Removing an entry from the call log
Adding an entry from the call log to your contacts listClearing all entries from the call log
Select Applications
Turning call logging on or off Call log Avaya 1616/1616-I IP Deskphone User Guide February
Forwarding a call
Advanced telephone features Calling a person from the corporate directory
Send all callsActivating Extension to Cellular EC500
Activating Extension to Cellular EC500
Page
Accessing the Features menu
Features menuPage
Avaya Menu
Adjusting the brightness or contrast of the display Turning button click sounds on and off
Changing the ring pattern Turning the call timer on or off
Turning error tones on or offSelect Call Timers
Turning visual alerting on or off Setting the audio path
Setting redial optionsSelect Audio Path
Turning show incoming call on or off
Setting automatic gain controlSelect Show Incoming Call
Select Automatic Gain Control Viewing network information
Changing the language Index
Index Features
Скачать
Avaya 1616/1616-I IP Deskphone User
Guide
16-601448
Issue 2
February 2010