
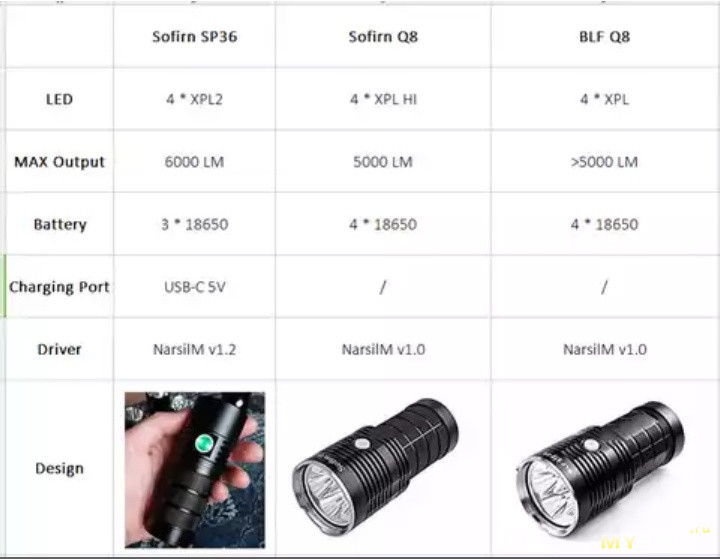
Добрый день. Давно у меня лежит этот фонарь от Sofirn, все ни как не хватает времени написать монолог о нем. По сути — это уменьшенный Q8, с небольшими различиями — другие светодиоды, количество аккумулуяторов снизилось с 4-х до 3-х… и прикрутили зарядку. Обзор закончен, всем спасибо))))
Чуть фоточек, чуть описания ниже.
Поехали ©
Так же имеется вторая версия фонаря. Отличается от обозреваемого — другая прошивка (Anduril) и другие светодиоды (Samsung LH351D) с высоким индексом цветопередачи — 90 едениц
Upd от 27.07.19 вр.7:18 мск. Третья версия фонаря, под индексом SP36S. Отличается от обозреваемого — «облегченная прошивка» (классическое софирновское управление — предустановленные режимы и рампинг) и установленными светодиодами — Samsung LH351D с высоким индексом цветопередачи — 90 едениц
Ни в коем случае не отключайте контроль по температуре или временной степдаун! Фонарь очень горяч в высоких режимах. Можно нанести себе увечья этим действием!
Мой личный вывод о фонаре, моя хвалебная ода этому фонарю. Кого тошнит от слова Sofirn, кто считает, что фонарь не может стоить более 3 баксов — не нужно открывать, это может быть опасно для вашей психики
Мне довелось этим фонарем попользоваться около полугода, поэтому представление свое составил. Это отличный, очень яркий, с гибкой настройкой под себя фонарь. Всего одна кнопка, а настроек на три страницы. Основные моменты:
— компактность. Это уже фонарь, который удобно держать в руке. В карман сложно впихнуть, но держать удобно.
— большой запас емкости аккумуляторов. Работает на трёх параллельных ячейках. Умеет так же работать от одной и двух.
— яркость. Отличный запас яркости. Нужен ночник или светануть — он это умеет.
— встроенная зарядка. Она нужна не всем, но она есть. Боитесь залить во внутрь жижи — заливаем дырку герметиком и забыли.
— огромное количество настроек. Хочешь плавное изменение яркости? Вот держи. Хочется чтоб были фиксированная яркость — конечно, 12 разных вариаций на выбор. Не нравится, что кнопка всегда светится — отключили, или может мунлайт слишком яркий — на выбор 7 уровней яркости…)) И все это настраивается одной кнопкой.
— не нужны стробы? Отключили. Хочется узнать напряжение аккумуляторов? Посмотрели.
— хочется изменить настройки термостепдауна или таймера по сбросу максимальной яркости? Он это тоже умеет!
— умеет светить от юсб, без батарей.
— цена. Как не крути, это хорошая цена за эту турбопушку.
Да, конечно, есть и минусы:
— забыли стабилизацию завести… Только на одной яркости в 3 процента (за счёт одного 7135 стабилизатора).
— жаль, но анодирование оставляет желать лучшего.
— дикий нагрев. Это даже как бэ и не минус, это данность.
— не разборная конструкция.
— нет дырки ни под темляк, ни под ремень, ни резьбы под рым-болт, как в Q8
Технические характеристики (из описания лота)
Светодиод CREE 4*XP-L2
• Цветовая температура: 5350–5700 K (белый)
• Тип питания: 1-3*18650
• Размеры: 126,7 мм × 50 мм
• Вес: 300 г (без аккумулятора)
• Память режимов: есть (настраиваемо).
• Режимы управления: предустановленные, либо режим рампинг (плавное изменение яркости)
• Гладкий рефлектор
• Произведено из аэрокосмического алюминиевого сплава класса 6061, с применением анодирования III типа. Как результат, фонарь отличается твердым корпусом, защитой от повреждений и лучшим теплообменом
• Стекло с высокой пропускной способностью
• Класс водонепроницаемости: IPX8
• Механическая защита от неправильной установки аккумулятора.
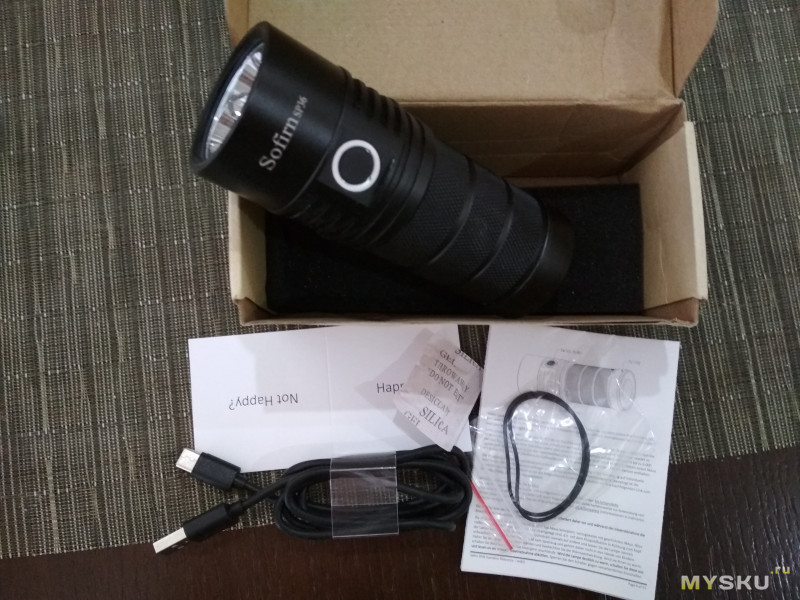
Упаковка, комплектация
ссылка на инструкцию в pdf, русский язык
Светло-коричневая коробка, пара уплотнительных колец, провод, пакетик силикагеля, инструкция на трех языках (включая русский) и небольшая карточка, вопрошающая о вашем душевном счастье, при получении фонаря…
Осмотр фонаря, сравнение
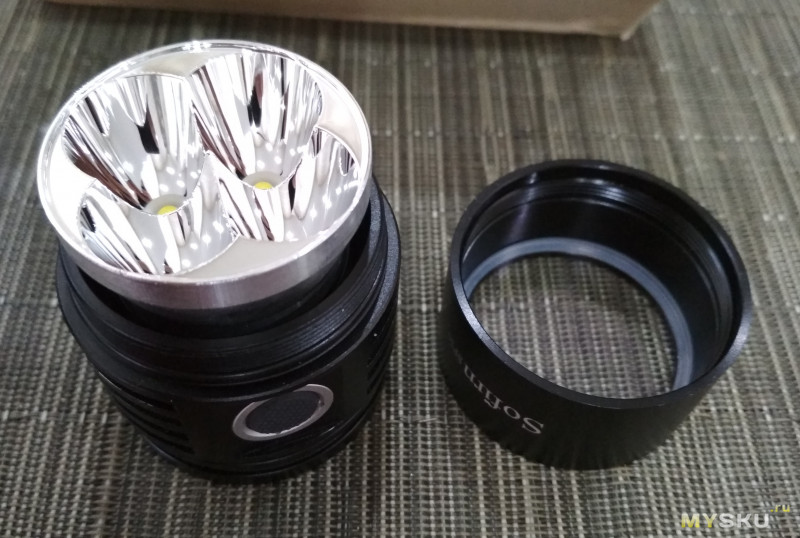
Фонарь представляет собой цилиндр, раскручивающийся на две основные части — трубу для аккумуляторов и голову.
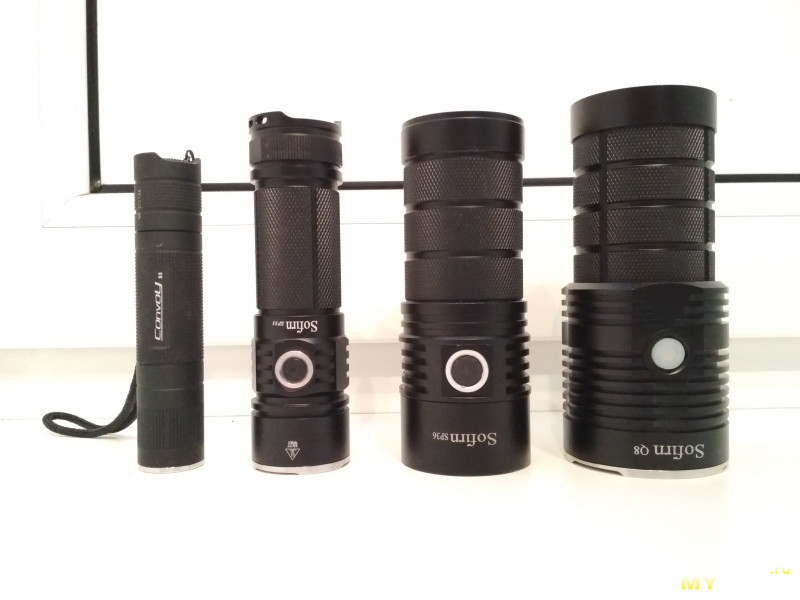
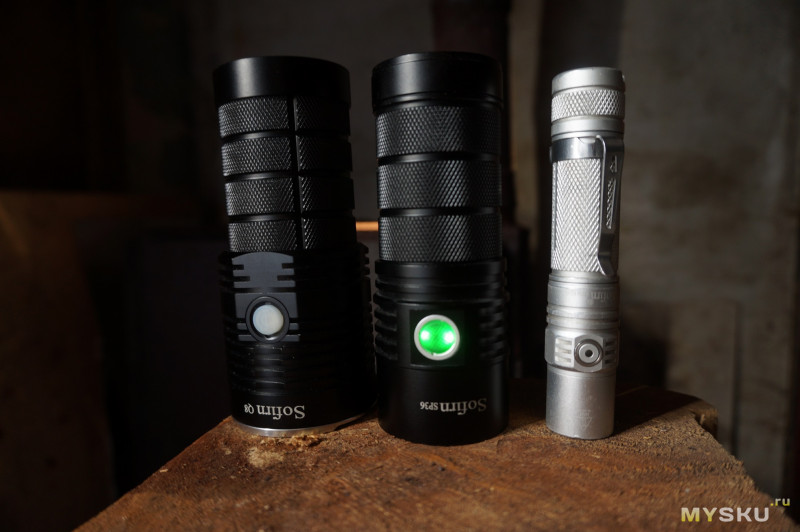
Сравнение размеров Convoy s2+, sp33, sp36, q8
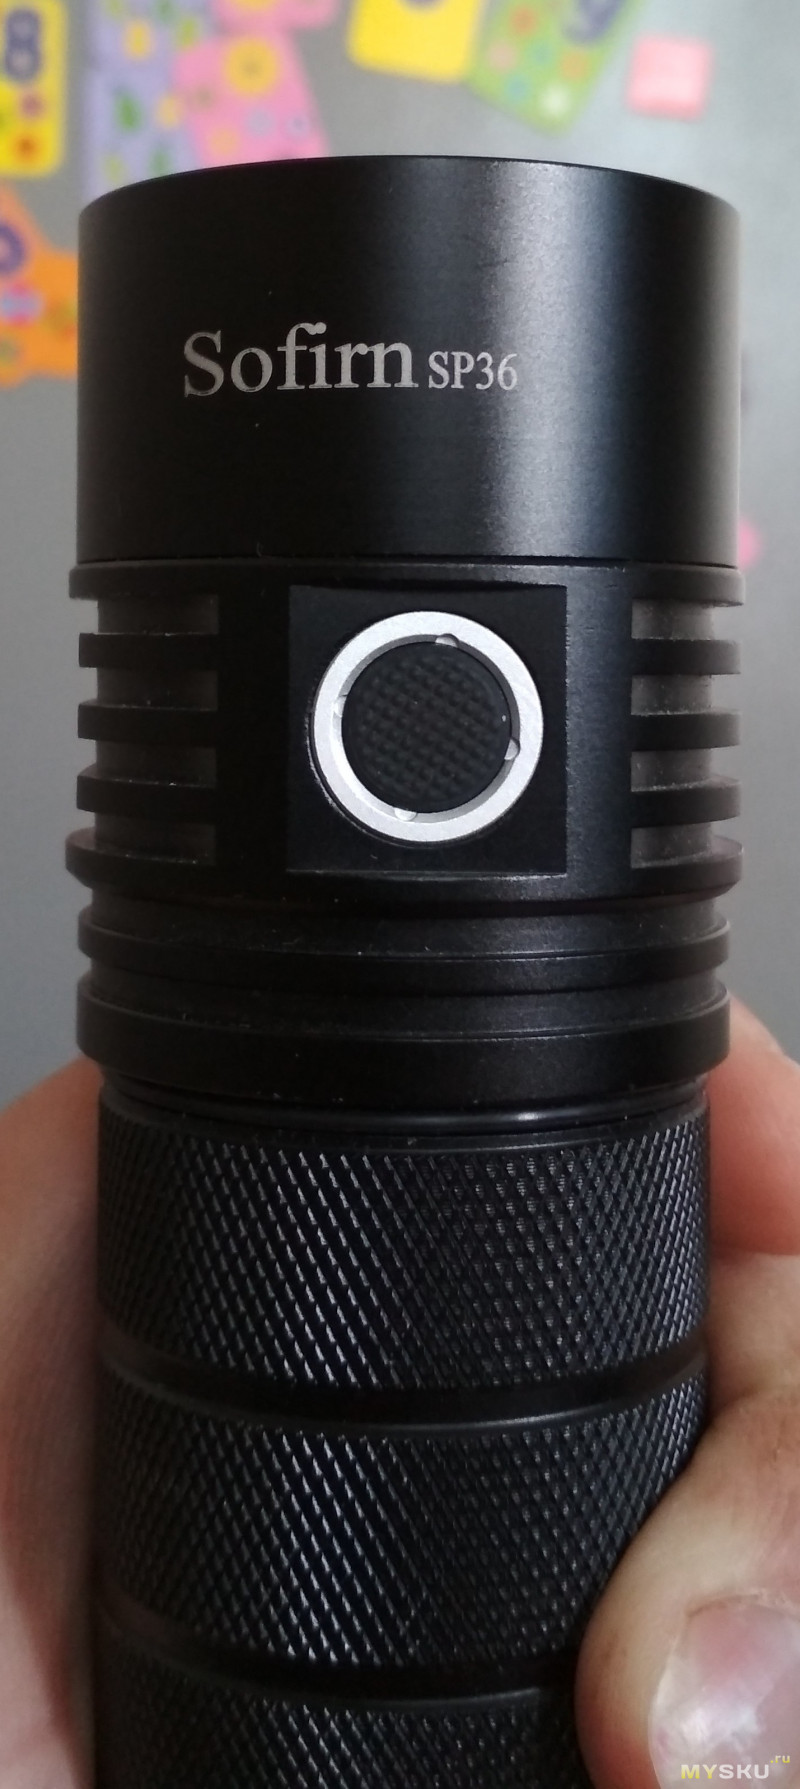
С одной стороны — кнопка с подсветкой, с другой — USB порт для зарядки.

Светодиоды — четыре xpl2.
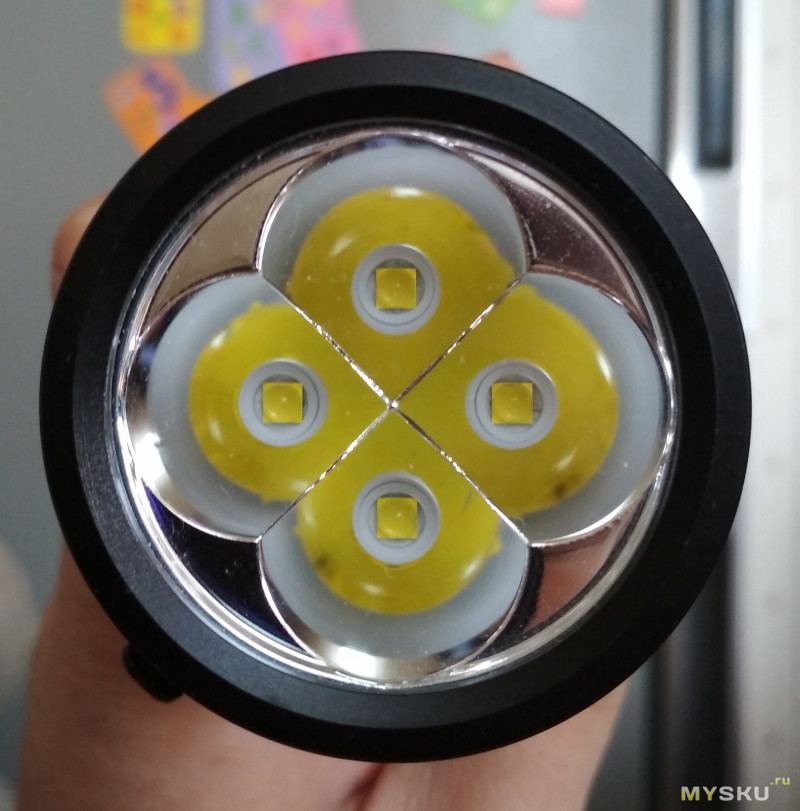
Стекло с легким просветлением
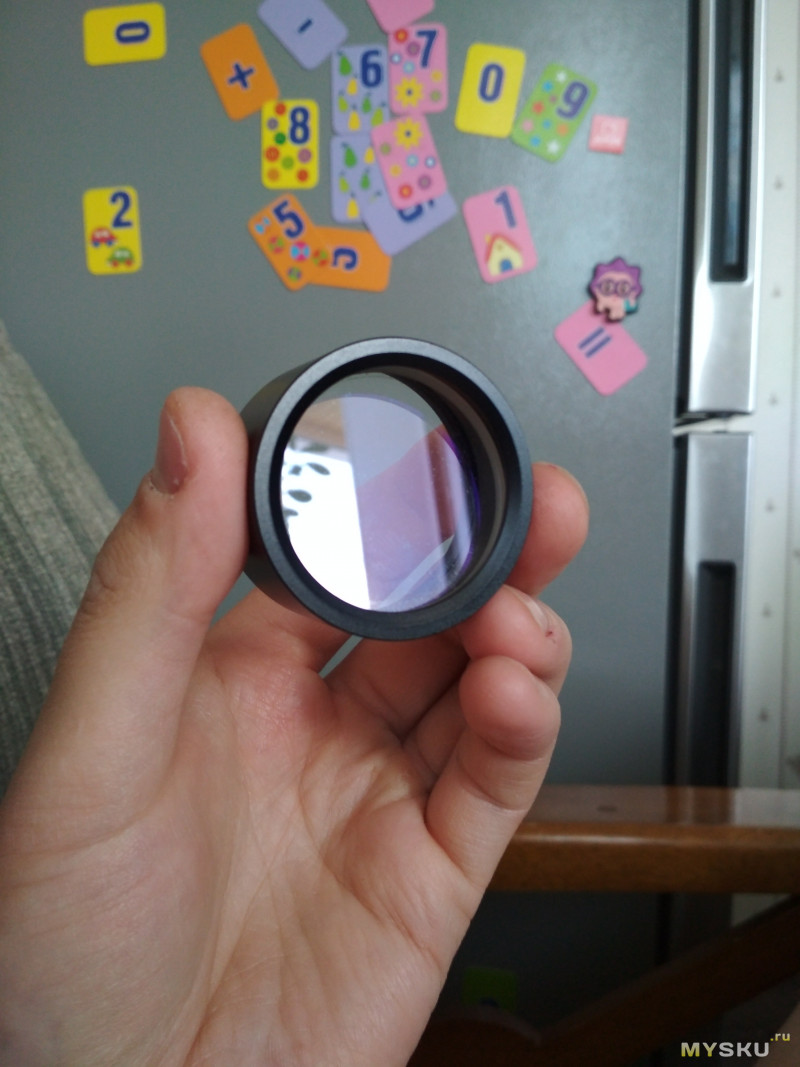
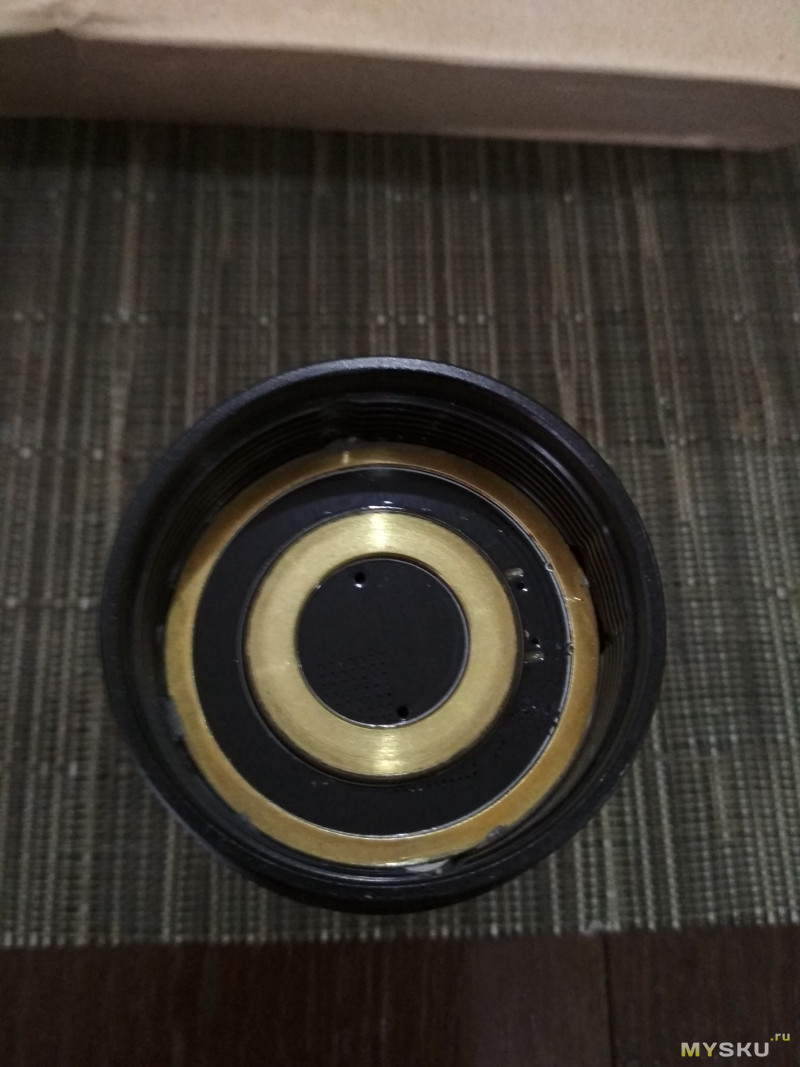
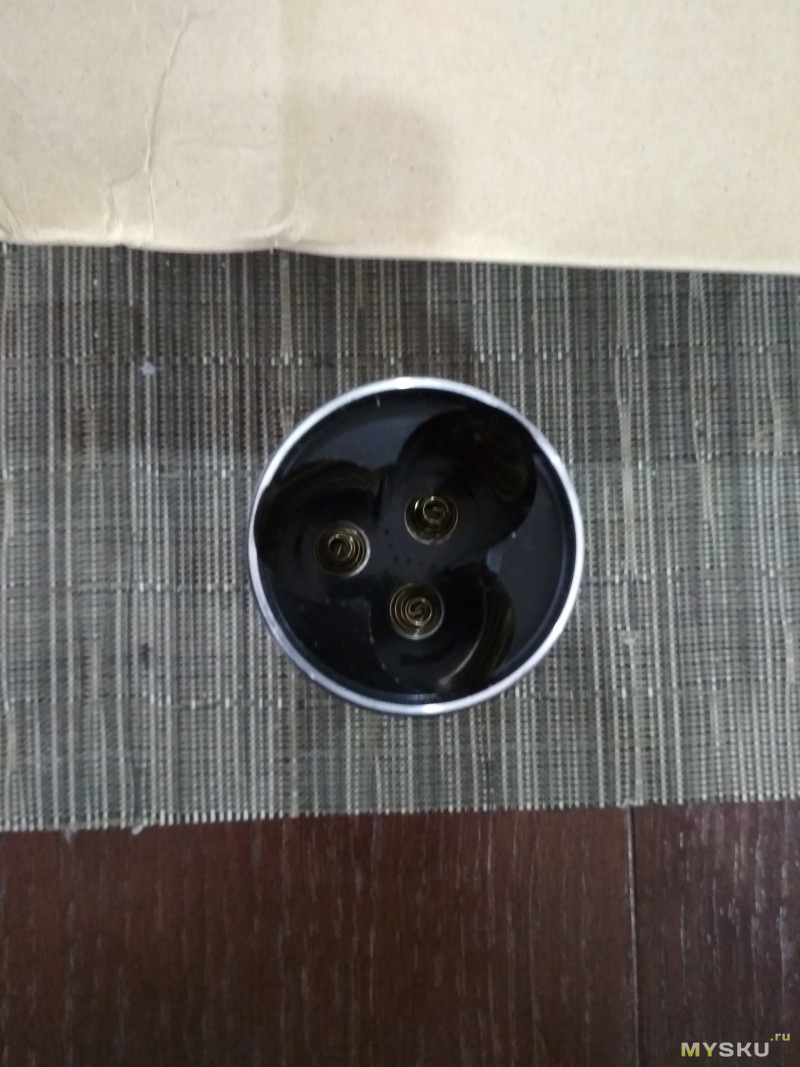
С обратной стороны — вклеенный драйвер.
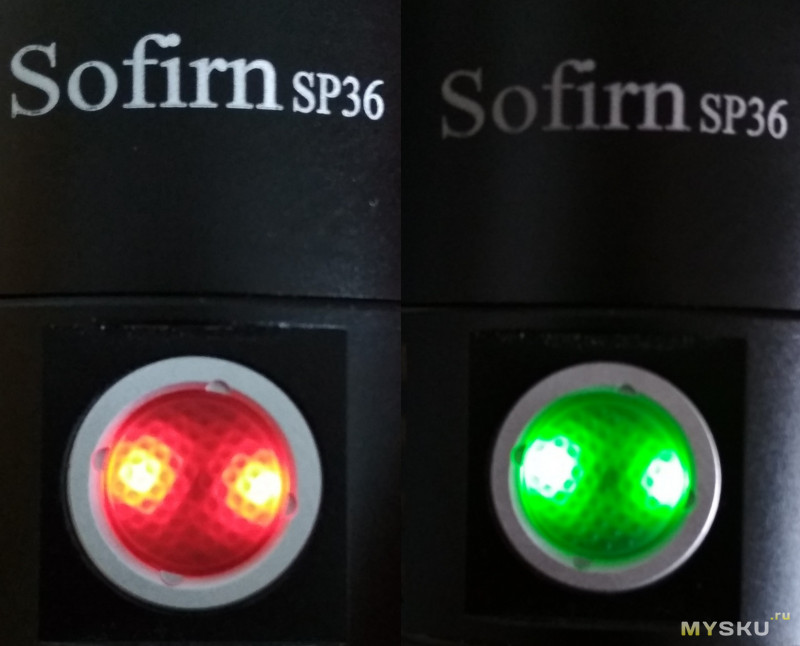
Кнопка с индикацией, умеет сигнализировать зеленым и красным цветом. Зеленый выполняет функцию маяка (которую благодаря прошивке можно отключить), красная — разряженность аккумуляторов и режим заряда (после полной зарядки — горит зеленым)
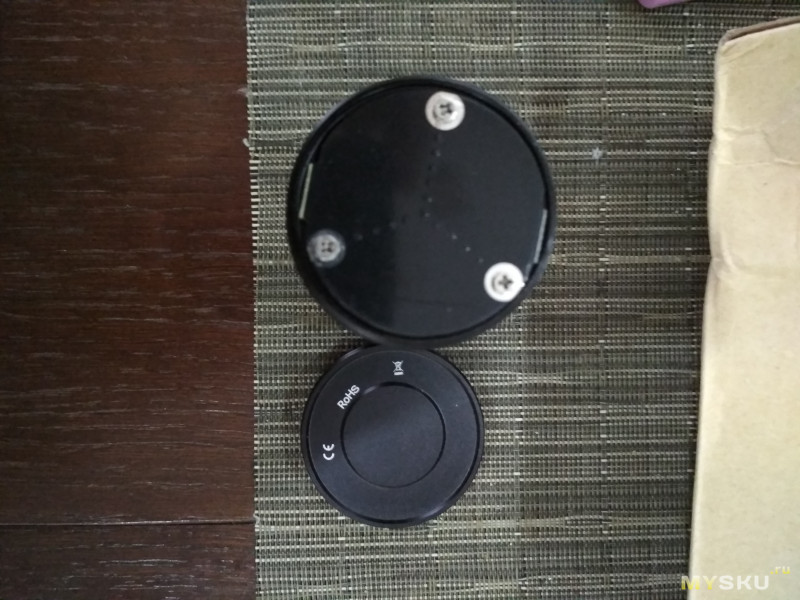
Заглушка с язычком, держится только на силе трения и в случае запихивания фонаря в плотный карман — может и выйти из выточки.
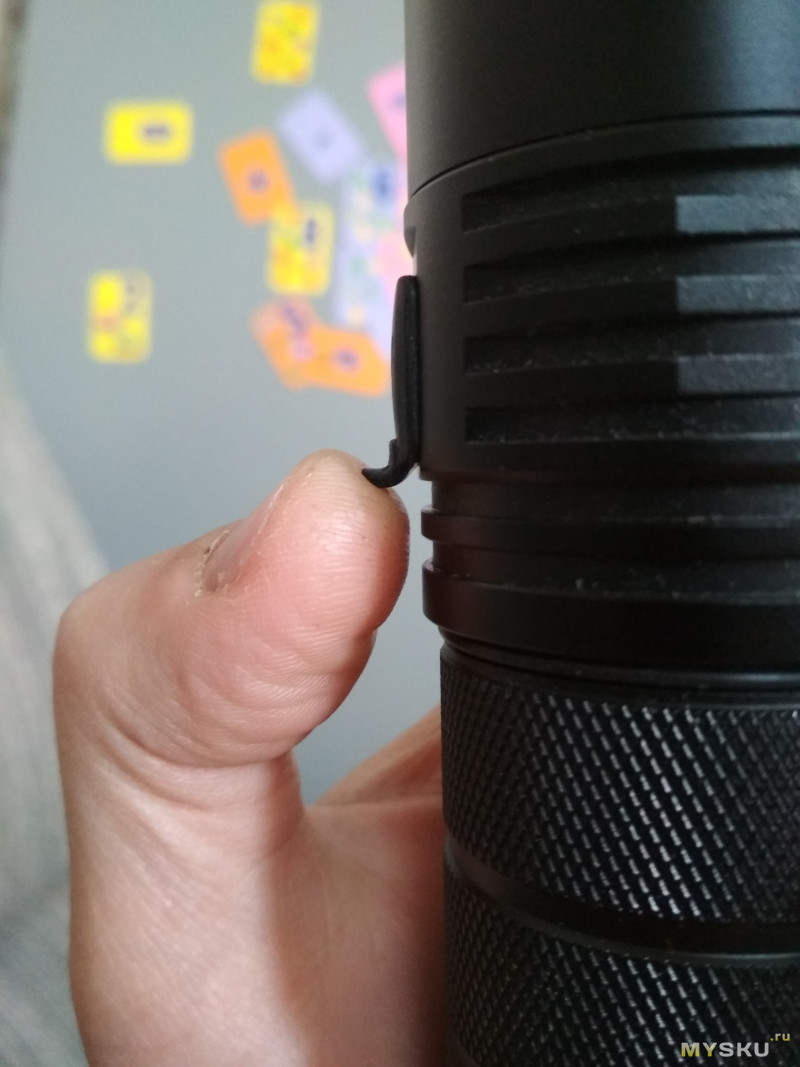
Труба для аккумуляторов: цепная накатка, с накручивающейся пробкой-заглушкой. Устанавливается три аккумулятора 18650.
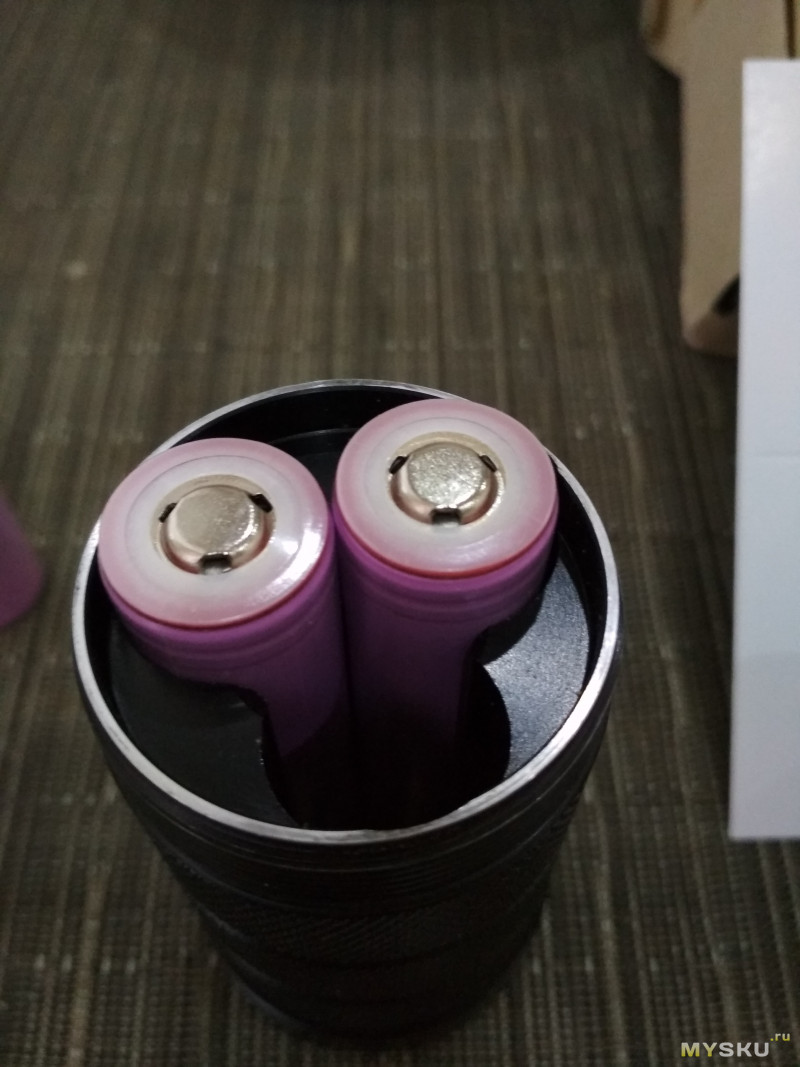
Пружины двойные
Краткое сравнение фонарей Blf Q8, Sofirn Q8 и Sofirn SP36
Разбор фонаря
Вскрытие фонаря с друженственного форума BLF
По-факту — с фонарем, кроме как заменить стекло, ни чего не сделать… Очень жаль, ведь даже до светодиодов не добраться.
О встроенном зарядном
Исходные данные: 3-х портовое зарядное устройство Tronsmart, легко отдающие 2,4А на порт, с QС3.0, шнурочек из коробки. В фонаре установлен порт USB type-C.
— Ток заряда составляет 1,7А… Разрядив фонарь (напряжение на аккумуляторах было 3В, фонарь уходил практически в мунлайт), я поставил его на зарядку в час ночи. В шесть утра кнопка весело светилась зеленым светом. Конечное напряжение на аккумуляторах составило 4,172В, что очень не плохо (на БЛФ проскакивала информация о перезаряде аккумуляторов до 4,25В).
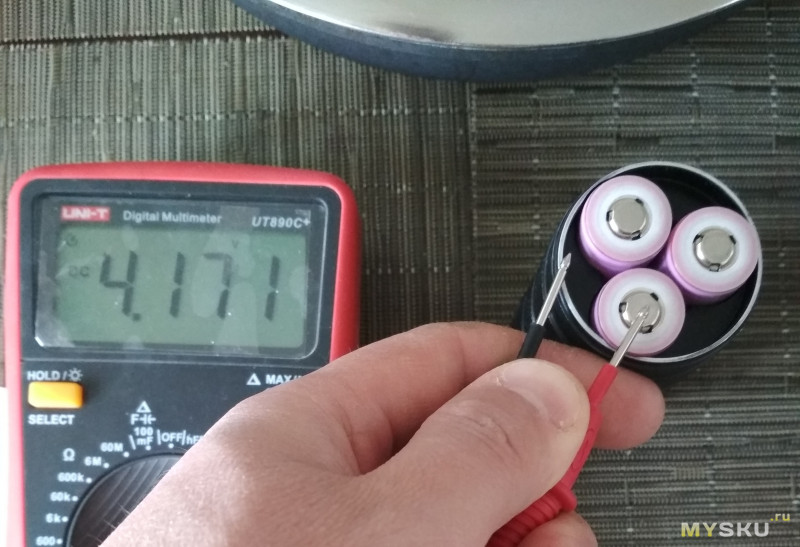
Предостережение: при зарядке аккумуляторов в фонаре, мы их заряжаем параллельно и соответственно не знаем, что в один прекрасный момент одна из банок могла помереть. Считаю, что хоть иногда банки нужно заряжать в стационарном устройстве (для контроля живости банок).
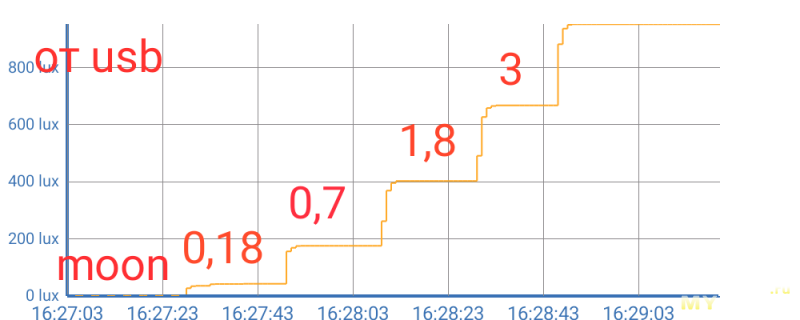
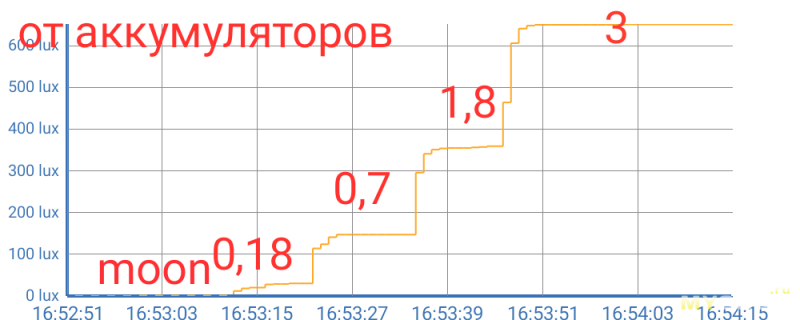
При установленном в зарядку проводе умеет светить от мунлайта до 3% яркости. Выше — кратковременно поднимается процентов до 4 и отключается.
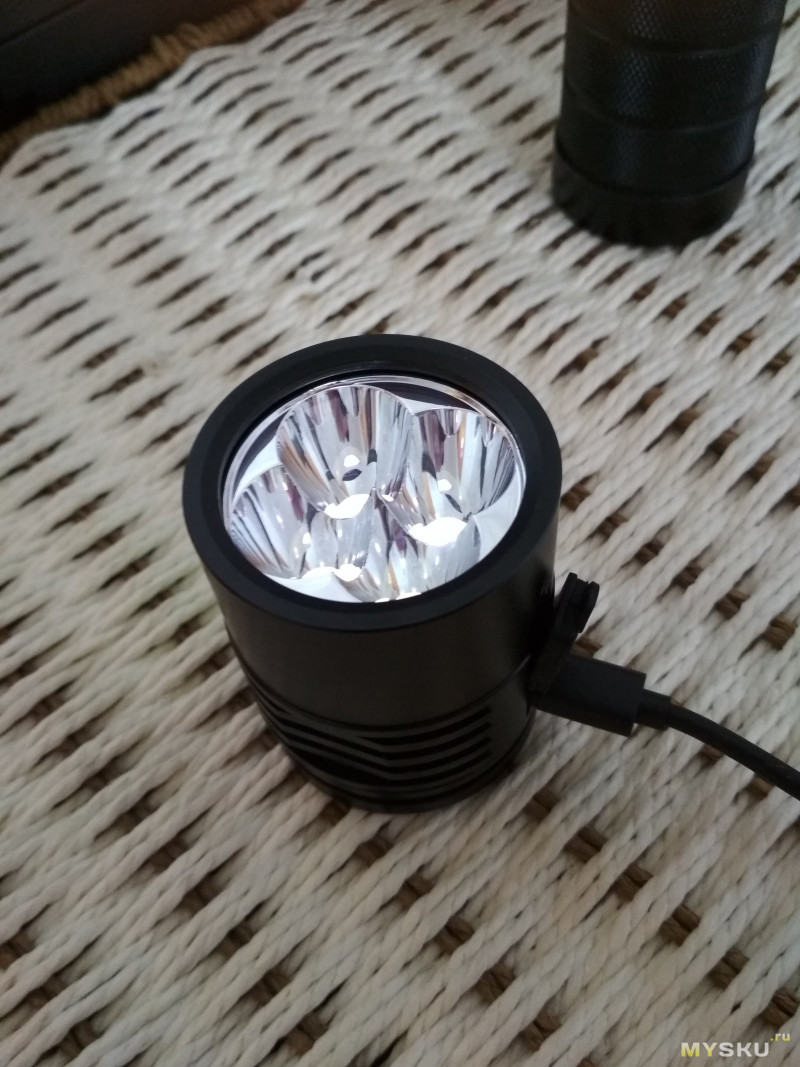
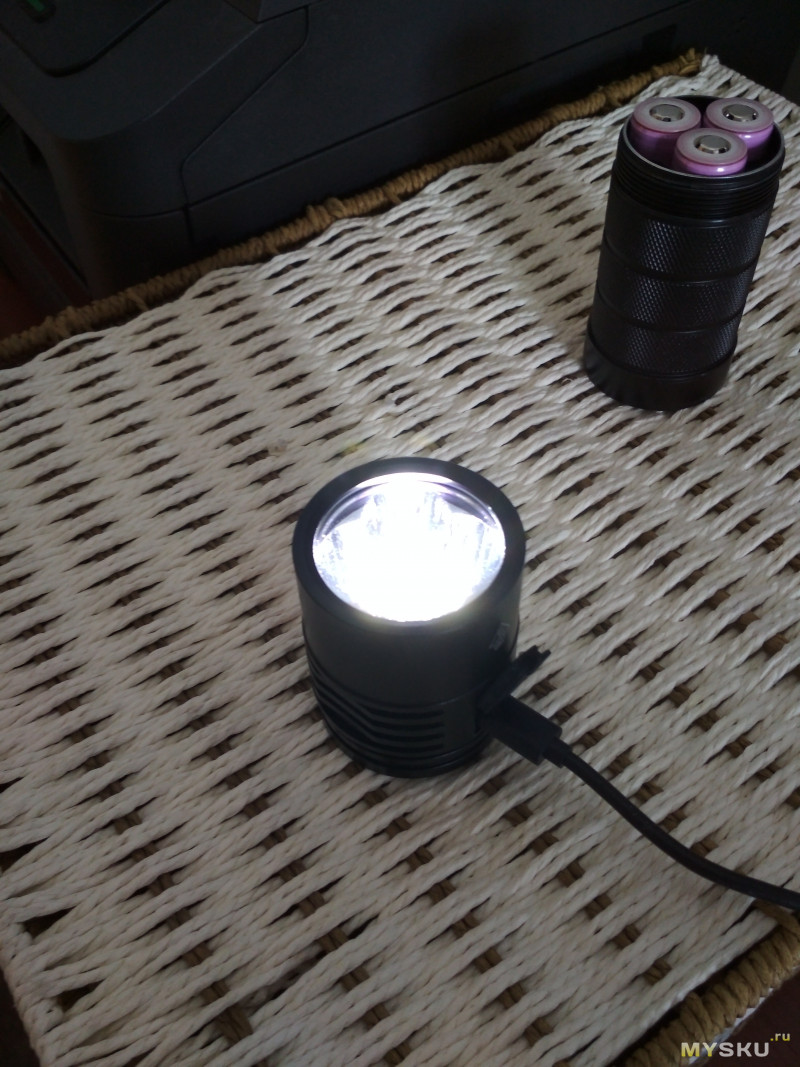
график яркости первых режимов от юсб и акков
Управление
Краткие возможности прошивки
Ramping — режим плавного изменения яркости.
Быстрый доступ к самым низким и самым высоким режимам
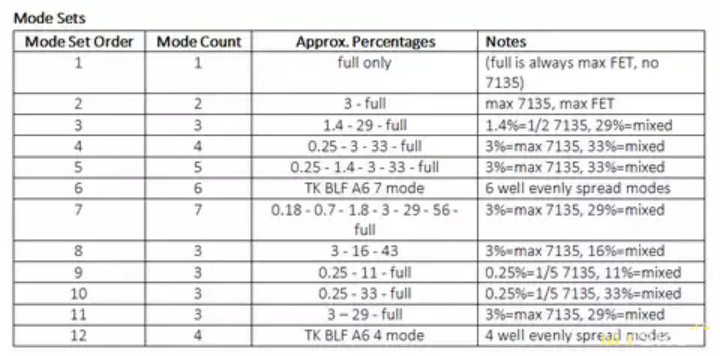
На выбор 12 режимов предустановленной яркости.
Отключаемый лунный свет. Возможность выбора направления переключения режимов яркости (от тусклого к яркому, либо от яркого к самому тусклому).
5 специальных сигналов (18 Гц строб, строб полиции, велосипедный строб, 2 и 10 секундный маяк), которые могут быть отключены.
Защита от низкого напряжения — уменьшение яркости фонаря, начиная с 3,0В, отключение при напряжении 2.8В, предупреждающие сигналы
Термоконтроль, либо снижение яркости по времени (работает в режиме турбо как предустановленных, так и в режиме рампинга)
Светодиодный индикатор кнопки, используется как маяк фонаря, для быстрого его поиска в темноте (имеется возможность программно отключить).
Возможность проверки напряжения батареи и температура фонаря.
Все параметры конфигурации могут быть сброшены к заводским установкам
В фонаре имеется 12 режимных линеек и диммирование (плавное изменение яркости).
Один раз выбрал оптимальные режимы для себя — да и пользуйся.
Возможные предустановленные режимы
В режиме диммирования — короткий клик — вкл\выкл на запомненной яркости, удержание — увеличение либо уменьшение яркости, включение удержанием — включение с самой малой яркости. Дабл клик — турбо. Три клика — показание напряжения акков (если опять кликнуть два раза — будет показана температура фонаря).
В режиме фиксированной яркости — короткий клик — вкл. с яркости, которая настроена (минимальная, максимальная, с запомненной яркости), короткий клик — повышение яркости, длинный клик — уменьшение яркости… Если в определенном режиме светить более двух секунд — коротким кликом фонарь отключается. При переборе яркости — выкл-мин-средний-яркий-выкл.
Контроль температуры — корректен (замер при нагреве в турбо режиме совпадает), контроль напряжения аккумуляторов — точен (при напряжении на аккумуляторах 4,1, фонарик показывает 4 и 1 мигов)
Фото и сравнение
В фотофиксации участвуют:
Sofirn Q8, Sofirn SP32A v.2.0, Sofirn SP36.
Форма и цвет луча:
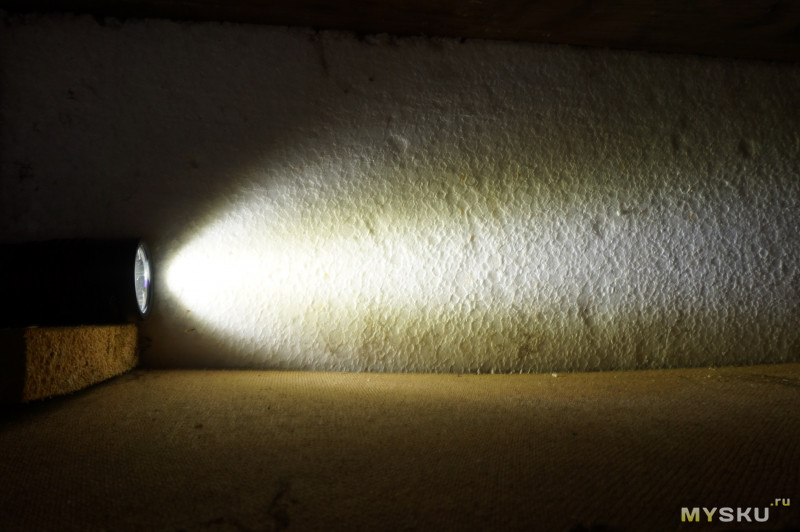
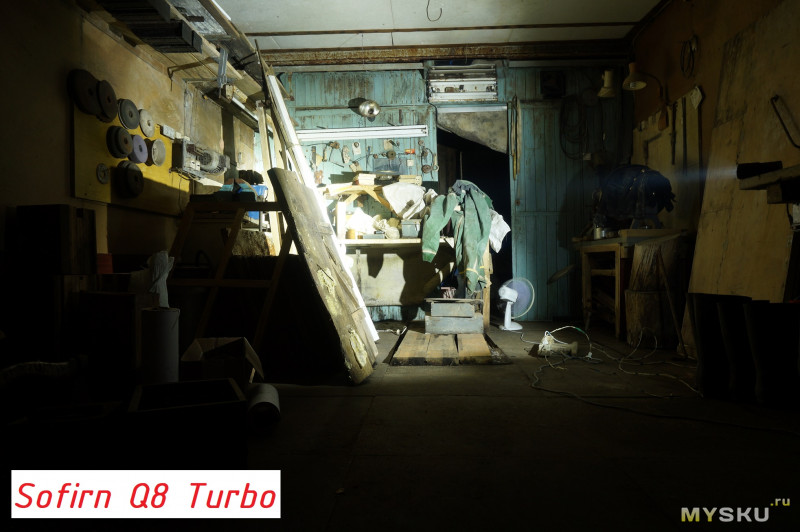
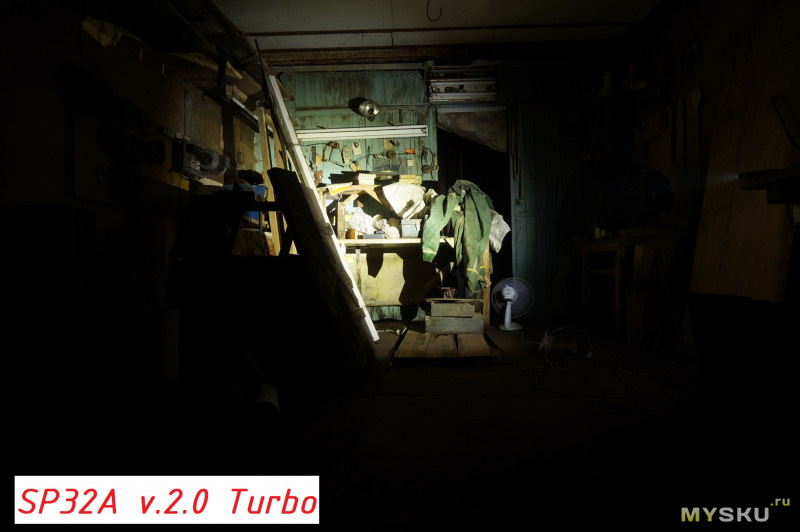
Фото максимума в помещении:
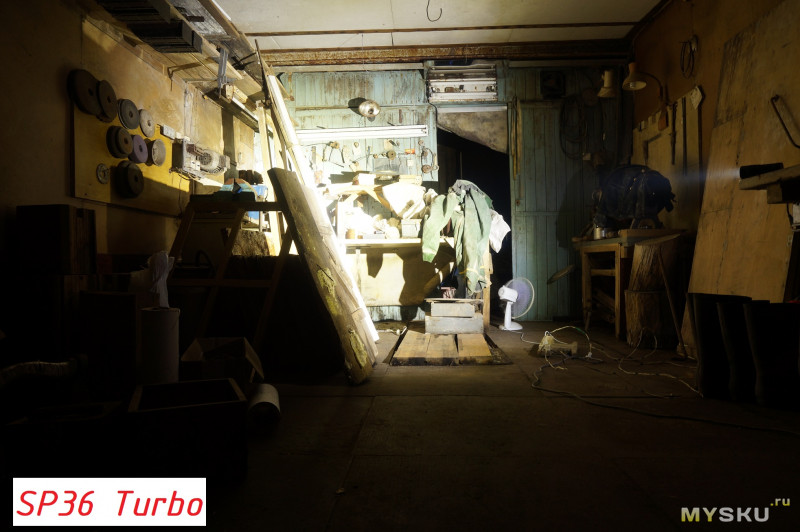
Фото Q8 и SP32A в максимуме
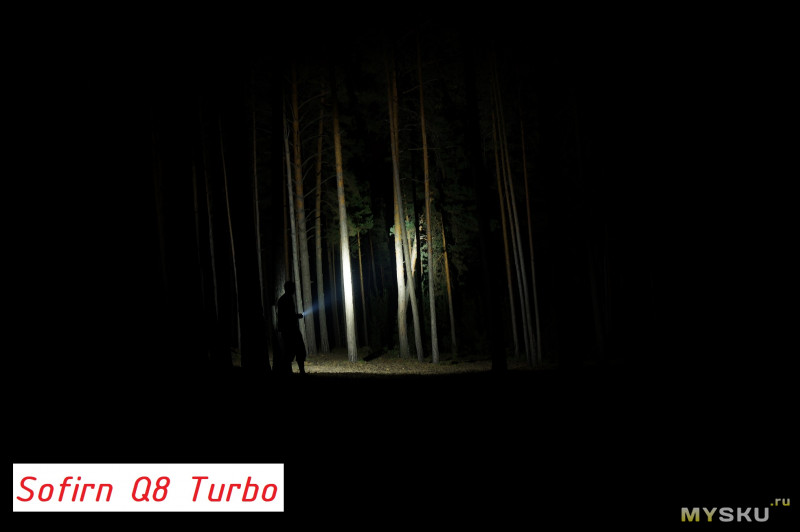
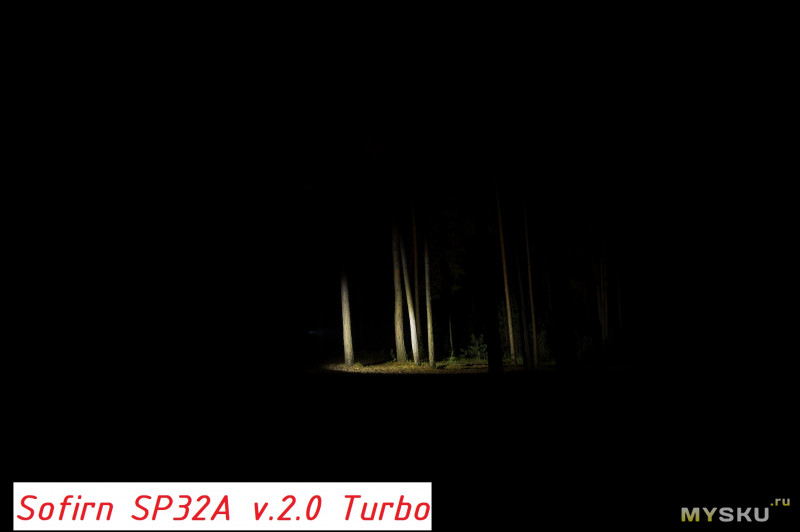
А теперь погнали в лес:
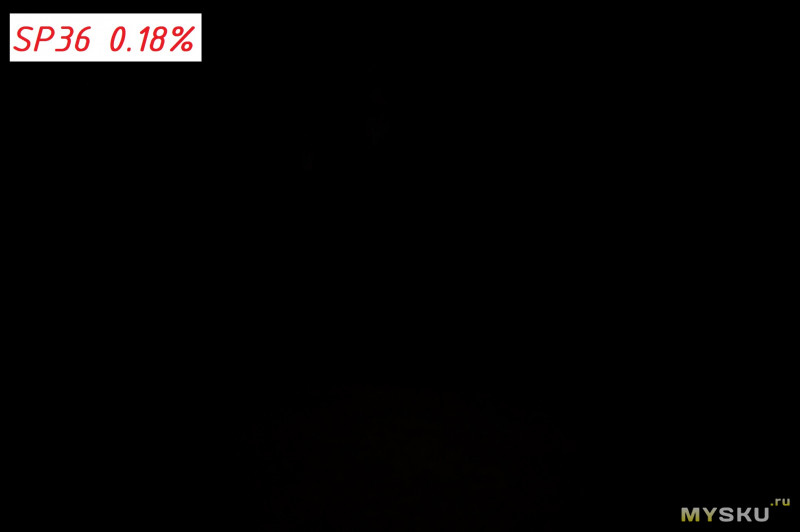
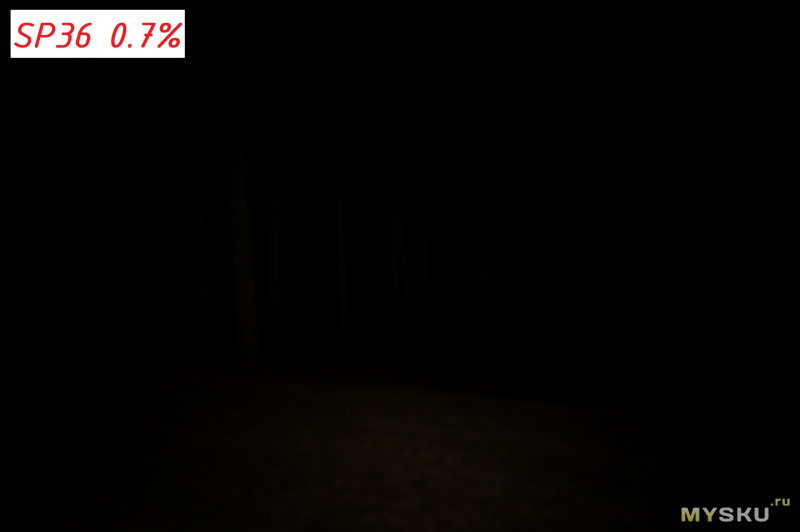

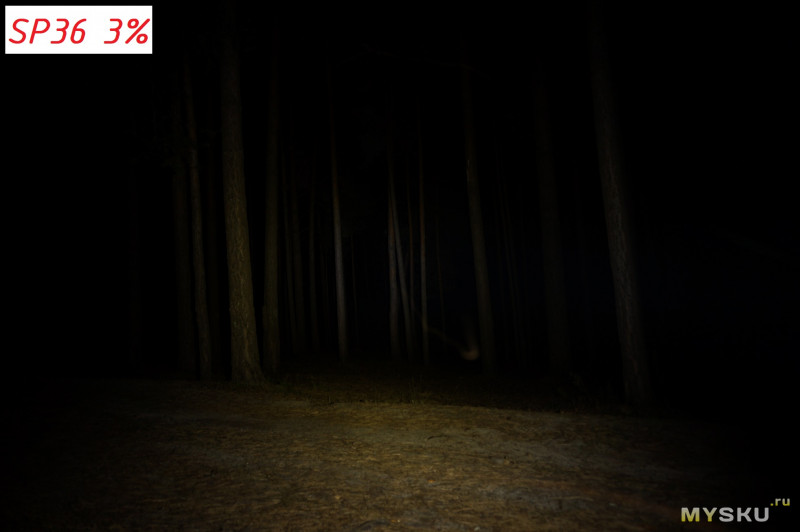
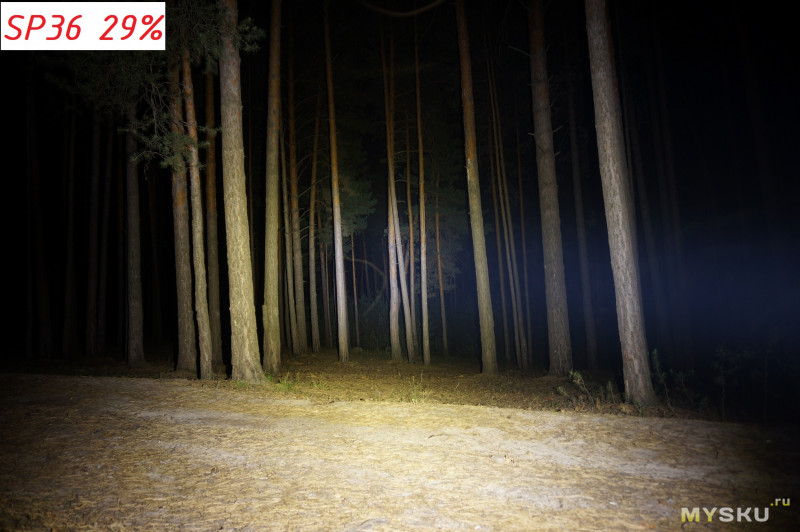
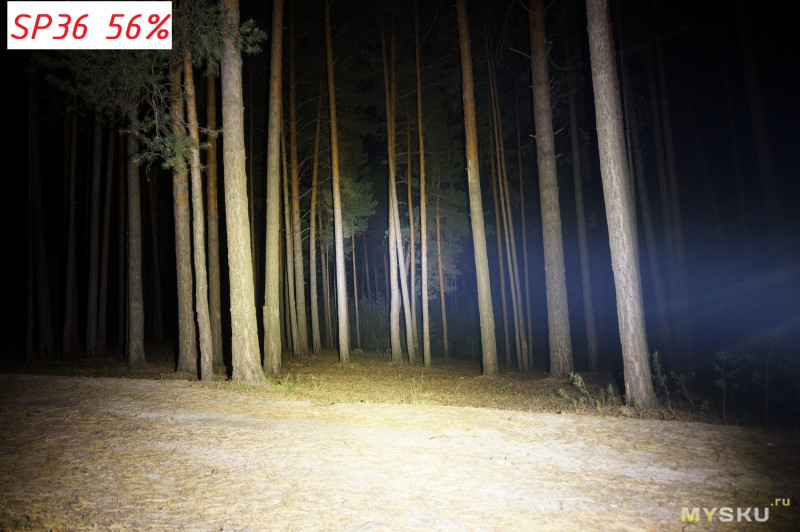
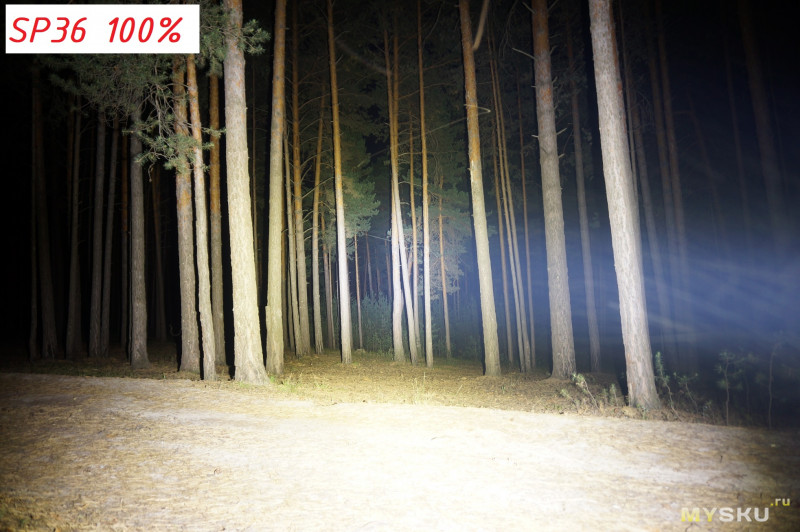
Фото Q8 и SP32A в максимуме
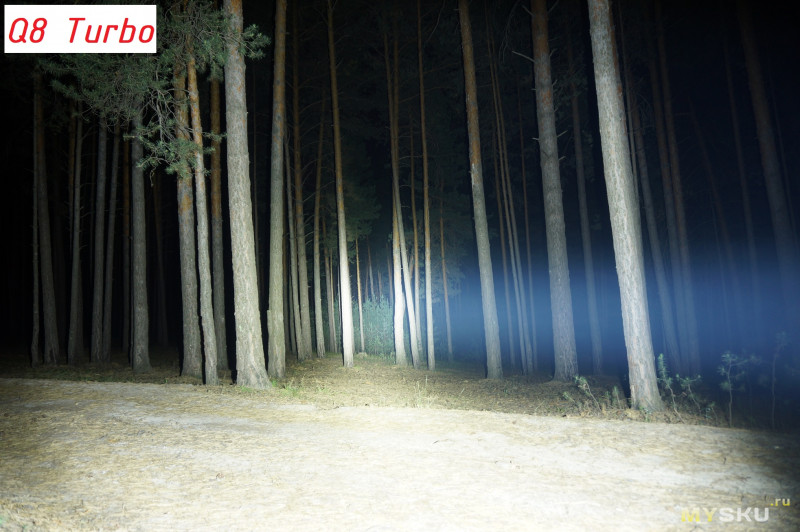
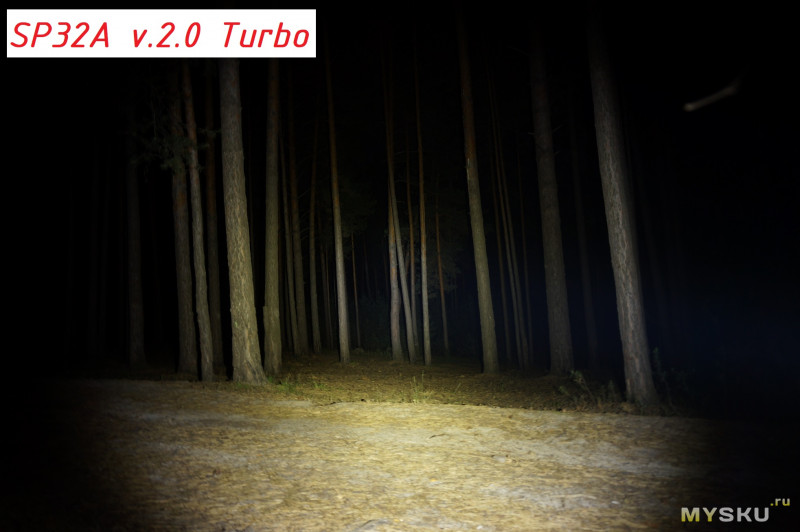
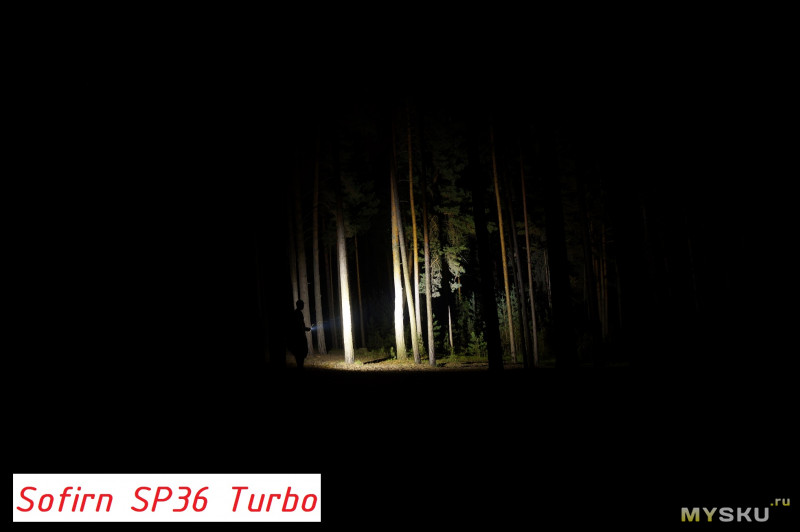
Фото Q8 и SP32A в максимуме на этой же дистанции
Ну как то так. Соотношение цена-яркость просто отличное. Альтернатив в трехбаночном исполнении — есть, но они дороже в пару раз. Хочется вау — этого в фонаре достаточно. Спасибо. Пользуюсь — доволен.
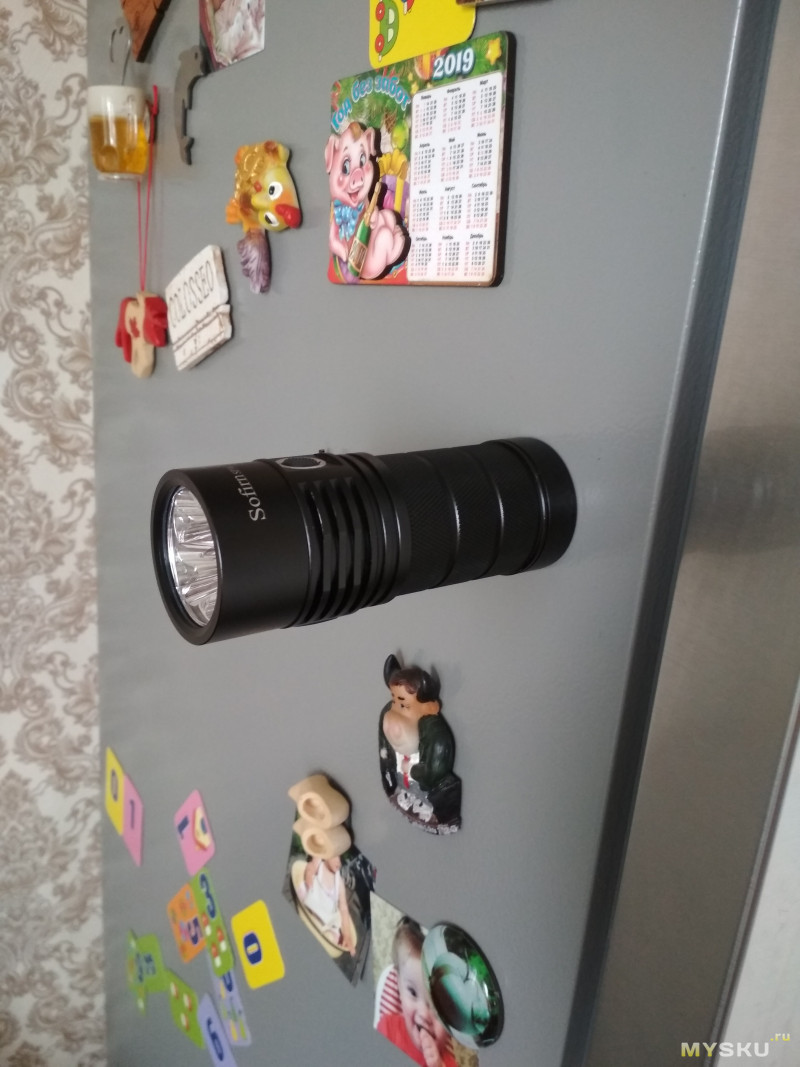
Upd от 27.07.19, вр.6.41 по мск. (Забыл сразу написать)
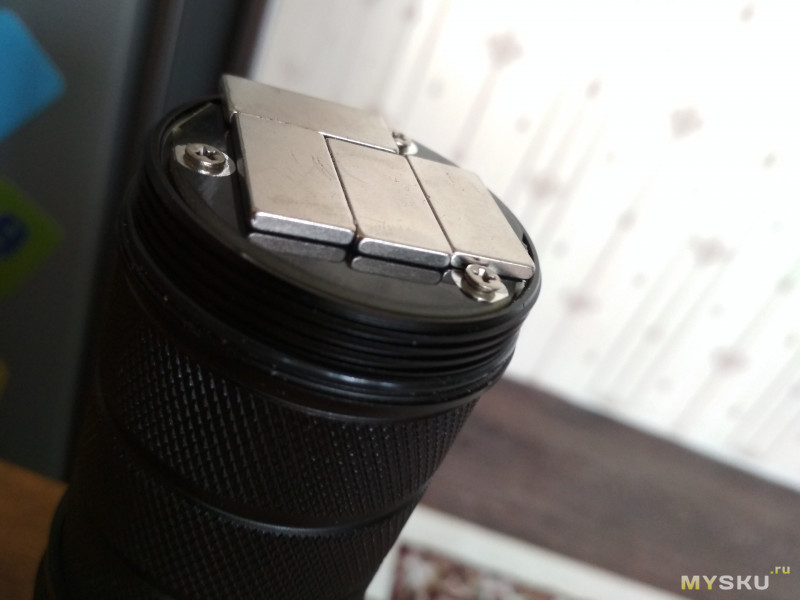
В фонаре есть крышка, под которую в ку8 была идея вкладывать краткую инструкцию. У меня возникла идея вложить туда магниты. И результат двоякий:
— без аккумуляторов фонарь держится на вертикальной поверхности.
— с аккумуляторами — фонарь на вертикальной поверхности не держится (сползает), но хорошо держится на горизонтальной, головой вниз. Если использовать магниты помощнее (я не думаю, что у меня они n52), то думаю удержит.
upd от 27.07.2019: скидка от магазина Sofirn
Идём на али в магазин Софирн. Выбираем один из трёх фонарей: sp36 на xpl2, sp36 на самсунгах, либо sp36s — это фонарь на самсунгах, но с облегченной прошивкой (т.е без андурила). Заказываем, но не оплачиваем, в комментариях пишем волшебное слово —
пожалуйста
mysku и ждём изменение цены. Цена на XPL2 будет 42$, на самсунгах — 39$. Как только цена изменится — оплачиваем
Table of Contents
- Sofirn SP36 User Manual
- Safety precautions
- Integrated charger
- Specifications
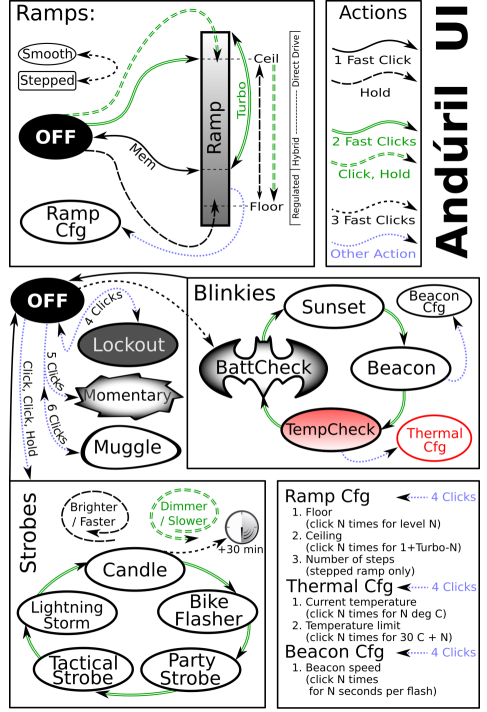
- UI Diagram
- Default UI: Smooth ramping
- UI: Stepped ramping
- UI: Momentary mode
- UI: Muggle mode
- UI: Electronic Lockout
- Blinkies
- General configuration
- Ramp configuration
- Thermal configuration
- Switch Back Light
- Protection Features
- Usage of the flashlight
- Links
- FAQ SP36
- Troubleshooting and Maintenance:
- Read User Manual Online (PDF format)
- Download This Manual (PDF format)
Sofirn SP36 User Manual
Safety precautions
- Use only reputable 18650 cells of known origin. Quality high drain cells (over 10A) protected, button top type cells, from Samsung, Panasonic/Sanyo, Sony or LG are recommended. The supported maximum length is 71 mm.
- Remove and recharge the cell when the low voltage indication is given by the Lamp (repeated step-downs in light level and eventual shutdown of the light).
- The extraordinary energy density that 18650 cells offers also means that hazardous conditions are created when a cell is short-circuited or damaged. Always treat cells with respect and properly dispose of damaged cells.
- The SP36 is a very high-intensity flashlight. Do not point directly at a person, animal, moving vehicles or flammable materials.
- When running at higher output levels the head of the Lamp will quickly heat. This is normal. In warmer ambient conditions this temperature may exceed 50ºC depending on your settings, so please take the necessary precautions when handling the Lamp.
Quick start
- Use 3 18650 cells. Please note that the SP36 requires button top cells.
- Unscrew the head and insert the battery. Take care with the polarity: Plus points toward the head.
- Screw the head back. The SP36 blinks once to confirm it has power and is now operational. Tighten the head. Do not over-tighten.
- When you change the batteries the lamp starts always at the regulated level at ~125 lm (1×7135).
- All functions are performed using the electronic side switch. And basic usage is very simple: Click for on/off, hold to change brightness. Release and hold again to change brightness the other way.
- From OFF , hold the button. The light output will ramp up from a very low level to Ceiling-Of-TheRamp. Release the button when the required light level is reached. (The full ramp takes about 3 s.) Use a single-click at any time to turn the SP36 OFF. Please see below for further details.
- While ramping it does subtle blinks to signal: Max regulated level (1×7135) and CEILING.
- The SP36 has two different ramps: SMOOTH RAMP and STEPPED RAMP. You can change between them when the lamp is ON with three clicks. Each ramp has its own individual settings – for floor (lowest level), ceiling (highest level). And the stepped ramp can also have a configurable number of steps.
- TURBO is only for short times. At around a minute you may notice it dims slowly down! The user should use it only for short periods instead of relying on thermal regulation to prevent heat damage. Full turbo is powerful enough to start fires in just a few seconds, especially when aimed at dark-colored materials.
Integrated charger
The SP36 has a USB-C charging port. Please us a premium cable and a power
adapter with 5V, 2A to charge your lamp.
While charging the switch LED is reed. It goes green when charging is
finished.
While charging you can use BattCheck mode from the Group 1 Blinkies to check
the voltage level and all other flashlight functions can be used normally when
charging.
Specifications
A 18650 quad LED lamp with side switch and a great, easy user interface.
Emitter : Four LEDs on a copper DTP MCPCB e.g. Samsung LH351D
Reflector : 43 mm ID, aluminum, smooth finish
Lens : High transmittance glass
Flux : ~5600 lm (LH351D) Throw: ~350 m (LH351D)
Firmware : The SP36 uses free software called Andúril, distributed under
the terms of the GPL v3. Code is available from
http://tiny.cc/TKAnduril
User interfaces :
- By default the SP36 is set to use SMOOTH RAMPING. Instant access to TURBO mode is also provided.
- A more conventional STEPPED RAMPING UI is available if you like discrete modes level. You can choose how many steps you want.
- MOMENTARY mode is useful for signaling purposes or rapidly/briefly lighting up targets. To exit this mode, physically disconnect power
- MUGGLE mode uses a reduced output.
- It has an electronic LOCKOUT for safety, but acts also as momentary low light.
Other functions : Battery check, sunset, beacon, tactical strobe, party
strobe, bike flasher, candlelight, lightning storm
Battery : Three button-top 18650 cells. Unprotected cells are
recommended. Max. length 71 mm. Cells are not included.
Charging : Integrated charger via USB-C
Driver : FET+1 driver. Low parasitic drain while OFF
Body : Aluminum with HA III anodizing
Switch : Electronic side switch
Ingress rating : Equivalent to IPX8
Weight : Approximately 300 g without cells
Size : 50 mm Ø head x 126.7 mm length.
Manual design and concept by J. Hollmann. Content from budgetlightforum,
collected over time. Many thanks to ToyKeeper for her great software!
UI Diagram
Not everything is covered in the diagram, please read the text.

Default UI: Smooth ramping
This UI provides smooth dimming of the light output between FLOOR (lowest
level) and CEILING (highest level), with an easily accessible 100%
TURBO mode.
Switch to STEPPED RAMP : If the lamp is ON : Three clicks (Hint: If
you use 3 clicks from OFF you engage battery check)
Turn the lamp ON : single-click the button, the SP36 turns ON using
the previously used light output level (MEM)
Ramp up; brighter : hold the button Reverse ramp: while ramping in one
direction, release button briefly and hold again
Ramp down; darker : Click, hold, when ON (means: double-click, but
hold the second click a bit longer) If you do this when the lamp is OFF ,
it ramps down from the CEILING (dashed double lines)
Instant top CEILING : from OFF : double-click (double lines)
TURBO : from ON : double-click toggles between turbo and the
memorized level from OFF (You must first switch ON): Click, then double-
click
FLOOR / MOON mode : from OFF : Hold turns on at the FLOOR level, it
makes a subtle “blink” to provide a timing hint if you want to stay there. If
you keep holding, it ramps up
Battery check : from OFF : triple-click (4 blinks, a short pause,
then 1 blink would indicate 4.1 V)
Turn the SP36 OFF : single-click
UI: Stepped ramping
Using this UI the output does not ramp, it steps from one mode to the next
using hold. The firmware tries to optimize these steps as equally-spaced on a
cube-root curve (considered an ideal mode-spacing by many). In STEPPED
RAMPING you can choose how many steps you want. (See Ramp configuration for
details).
All operations are the same as in smooth ramping
Switch to SMOOTH RAMP : when the lamp is ON : Three clicks (Hint: If
you use 3 clicks from OFF you engage battery check)
UI: Momentary mode
5 clicks from OFF to enter Momentary mode To exit this mode, physically
disconnect power (unscrew the light).
This mode locks the flashlight into a single-mode interface where the LEDs are
only on when the button is held down. It is intended for Morse code and other
signaling tasks.
Brightness is the last-ramped level, so adjust that before entering momentary
mode.
UI: Muggle mode
Muggle mode is for lending the SP36 to others. It has a reduced output to make
sure somebody won’t start a fire. An extremely simple interface with a limited
brightness range — ~5 lm to ~240 lm, with slow smooth ramping and no blinkies.
Persists after a battery change.
MUGGLE mode ON : from OFF 6 clicks to enter
MUGGLE mode OFF : 6 clicks to exit
One click ON / OFF and HOLD to ramp up / down.
UI: Electronic Lockout
4 clicks form OFF to disable the SP36, same to reenable the lamp.
Lockout makes the light safe to carry in a pocket or a bag or anywhere else it
might be pressed by accident. Lockout doubles also as a momentary moonlight
mode, so the user can do quick tasks without having to unlock the light. It
uses the FLOOR of the current ramp.
Blinkies
Two groups worth of blinkies are included. To reach them, do “click click
click” from OFF or a “click click hold” from OFF. To change to the
next blinky use a double-click. These include:
Group 1 Blinkies / utility modes:
(starts always at battcheck) from OFF: “click click click”
-
BattCheck:
Shows the remaining charge in volts and tenths. E.g. 4 blinks, then pause, 1
blink are 4.1 Volt. A “zero” is represented by a very quick blink. -
Sunset / Goodnight mode:
Starts at a low level, then slowly dims down to moon for an hour, then shuts
off. It is intended for use when going to bed. -
Beacon:
Beacon mode uses the last ramped level for its brightness. You must adjust the
brightness before you turn beacon on. It blinks at a slow speed: Once every N
seconds at the last-ramped level.
N is configurable in beacon config mode : Click 4 times to enter beacon
config mode, wait for the light to stutter, then click to enter the number of
seconds per blink. For example, to do a 10-second alpine beacon, click 10
times. Hint: If you want faster blinks per second use party strobe mode and
set it to three blinks per second or more -
TempCheck:
Blinks out the current temperature in degrees C. and optionally configure
settings for thermal regulation. E.g. 3 blinks, then pause, 4 blink are 34
degrees Celsius. A “zero” is represented by a very quick blink.
This number should be pretty close to what a real thermometer says. If not, it
would be a good idea to click 4 times to enter thermal config mode, and
calibrate the sensor.
Group 2 Strobes:
(remembers the last-used mode) from OFF: “click click hold”
Click three times, but hold the third click for a moment.
To change to the next blinky use a double-click.
To set adjustments you can use:
-
Hold : Increase brightness, or strobe faster. (except lightning)
-
Click, hold : Reduces brightness, or strobe slower. (except lightning)
-
Candle mode:
Simulates a flickering candle or fireplace, until you switch it OFF. Or you
add timer for 30min: Each triple click adds 30 min including a burn down
simulation at the end. Candle mode timer can go for up to 4.5 hour. Adjustable
brightness. -
Bike flasher:
Steady output with a “stutter” once per second. Designed to be more visible
than a normal ramping mode, but otherwise works mostly the same. Adjustable
brightness. -
Party strobe:
Motion-freezing strobe. Can be used to freeze spinning fans and falling water.
Adjustable speed. -
Tactical strobe:
Bright, disorienting strobe light. Can be used to irritate people. Adjustable
speed, and the duty cycle is always 33%. -
Lightning storm mode:
Flashes at random brightness and random speed to simulate lightning strikes
during a busy lightning storm. Do not look directly at the flashlight when
this mode is running, because it may suddenly go to full power without
warning.
General configuration
Every config mode use the same interface. It has one or more options the user
can set, and it will go through its configuration numbers in order. The SP36
confirms each click with a blink.
For each menu item, the light will follow the same pattern:
-
Blink one or more times = configuration number
To indicate which setting you are in. All config menus “fall through” with
no changes if you don’t press the button. -
“buzz” = The lamp waits for input
Buzz is a stutter quickly between two brightness levels for a few seconds.
The User can click one or more times to enter a number. It will keep buzzing
until the user stops clicking, so there is no need to hurry. -
Pause, and then go to the next option
After the light has gone through all of the menu options, it should return
to whatever mode the light was in before entering the config mode.
Ramp configuration
Both the SMOOTH RAMP and the STEPPED RAMP are configurable. The user
can set the lowest level, the highest level, and (STEPPED only) the number of
steps.
While the light is ON in one of the ramping modes, click 4 times to enter
RAMP CONFIGURATION for the current ramp.
For SMOOTH RAMPING , there are 2 menu options:
- Floor (default level = 1/150)
- Ceiling (default = 120/150)
For the STEPPED RAMPING , there are 3 menu options:
- Floor (default level = 20/150)
- Ceiling (default = 120/150)
- Number of steps (default = 7)
To configure the floor level, click the button equal to the number of ramp
levels (out of 150) at which the floor should be. To set the lowest possible
level, click once. (MOON)
To configure the ceiling level, each click goes one level lower. So 1 click
sets the highest possible level, 2 clicks is the 2nd-highest, 3 clicks is the
3rd-highest level, etc. Ceiling clicks: 151 – ( level you want ) = Clicks
To set the default of 120/150, click 31 times.
When configuring the number of steps , the value can be anything from 2 to
150.
If you want to change the floor and ceiling to the lowest and highest values,
you click once for each.
Defaults settings SP36
| SP36 | SMOOTH | STEPPED |
|---|---|---|
| Level | ca. lm | Level |
| max FET | 150 | 5600 |
| Default Ceiling | 120 | 2800 |
| single 7135 max | 65 | 125 |
| Default Floor | 1 | Moon |
| Default Steps | – | 7 |
Thermal configuration
Look at a thermometer to check the current room temperature. Let us assume it
says 21 Celsius.
Turn the light off and wait for its temperature to settle to room temperature.
Go to TempCheck (from OFF: “Click Click Click”. Ascend with double-clicks
three times)
When you are in TempCheck, then click 4 times to enter thermal config mode,
and calibrate the sensor.
°C| °F|
—|—|—
100| 212| Boiling Water
60| 140|
55| 131|
50| 122| Touch limit
45| 111| [Default]
40| 104|
37,4| 99| Body temp.
25| 77|
20| 68|
0| 32| Frozen Water
MaxTemp. – 30°C = Clicks
Thermal config mode has two settings:
- Current temperature Calibration. Click once per degree C to calibrate the sensor. For our example, the ambient temperature is 21 C = click 21 times.
- Temperature limit. This sets the maximum temperature the light can reach before it will start doing thermal regulation to keep itself from overheating. Click once per degree C above 30. For example, to set the limit to 50 C, click 20 times. The default is 45 C (15 clicks).
Hint : If you don’t click, the lamp will leave the value unchanged. The
lowest value the user can set is 31 C, by clicking once.
Switch Back Light
The switch LED can be configured to do different things while the main
emitters are off. There is one mode for the regular OFF mode, and another
mode for LOCKOUT mode. This allows the user to see at a glance whether the
light is locked.
Switch LED modes typically include:
- Off
- Low
- High
- Blinking
To configure the LEDs, go to the mode you want to configure and then click the
button a few times:
- OFF mode: 7 clicks.
- LOCKOUT mode: 3 clicks.
This change the LEDs to the next mode on this light.
The switch LED stays on while the main emitters are on. Its brightness level
is set in a way which mirrors the main LED — off, low, or high.
Control of Switch LEDs – Defaults SP36
Setting| Regular OFF| In LOCKOUT
Change setting via| 7 clicks| 3 clicks
Off-Low-High-Beacon| Low| Beacon
Protection Features
Some features which aren’t visible on the diagram: Andúril includes low
voltage protection (LVP) and thermal regulation.
LVP makes the light step down to a lower level when the battery is low,
and if the light is already at the lowest level, it shuts itself off.
This activates at 2.8V. LVP adjustments happen suddenly, in large steps.
Thermal regulation attempts to keeps the light from overheating and
otherwise adjusts output to stay as close as possible to the user-configured
temperature limit. Thermal adjustments happen gradually, in steps so small
they are difficult for humans to perceive. It ramps smoothly across 512
internal steps (from 1×7135 to full power) to adjust output while it searches
for the highest level it can maintain without overheating.
Usage of the flashlight
You can do a little bit more with your new light …
Because the SP36 is a high powered light, it is recommended to use lockout. It
can burn things! Backside is, a normal lockout is awkward if you need quick
little illumination for the keyhole or in your bag.
SP36 LOCKOUT mode doubles as a momentary moon mode. That way, after
locking it and tossing it in a bag, it can still be used to look around inside
the bag without unlocking it.
Lockout uses as moonlight the floor of the current ramp. If you have two
different settings for this, you can have different illumination also.
Or you can use Muggle Mode if you want a safer way to carry your lamp with a
reduced output and don’t want lock out.
While on, a double click toggles between turbo and the memorized level. So, if
you hear a noise and want full power for a moment, double click. When you’re
done, double click again to return to the original brightness. This is handy
for walking the dog : With low you can stroll, and when your dog runs
away: TURBO, when he comes back, low again.
You can have full power in one ramp and a lower ceiling in the other. By
default, both ramps only go up to ~2800 lm. And one starts at moon, while the
others starts at ~4 lm. But you can change this.
Now you can play with FLOOR, CEILING and two ramps e.g.: Let’s say your
favorite is smooth ramping and you don’t like the quick step down from a
ceiling at level 130. You can choose level 101 (50 clicks) for the smooth ramp
ceiling. This keeps the ceiling at a reasonable cooler level. Smooth floor on
level 1 for a really dim moonlight. You can set 20 clicks for stepped floor
for a usable low outdoors. And 130 for stepped ceiling if you also like to
have a powerful ceil.
An option against too much heat can be different ceilings for SMOOTH RAMP and
STEPPED RAMP. Lower for your preferred ramp the ceiling and with 3 clicks you
can switch to the other ramp, where you can have full power if you need it.
If you click zero times, the floor or ceiling value doesn’t change. This is
great because you can change just the floor or just the ceiling without
reprogramming the other.
The SP36 has a nice candlelight mode, the effect is bigger if you use a
diffuser.
Lightning storm is also more fun with a diffuser.
Searching things:
If you drop a little piece, lay your light flat on the ground and rotate it
like a lighthouse. The small piece should cast a long shadow and it is easier
to find.
In case you lose your light, you can store a piece of paper in the tube with:
“This Lamp belongs to NAME. If found please call: 1234 or Name@mail.com.
General voltage level of a LiIon battery
| Voltage | Note for a 18650 |
|---|---|
| 4.2 V | fully charged |
| 3.7 V | half full ***** |
| 3.1 V | below 10% capacity, time to charge ***** |
| 2.8 V | low voltage protection from a lamp should start |
| 2.5 V | begin of deep discharge |
Pay attention that the voltage level under load is lower than without load.
*on these two entries, please note smaller battery sizes (e.g. 16350, 18350) have a bit higher voltages.
There are also some other interfaces available for this hardware, but it
requires the user to flash different firmware. You can make it work like other
brands. However, these are not tested and not officially supported.
Links
SP36 main thread:
http://budgetlightforum.com/node/66002
Discussion on TLF in German, XP-L2 / LH351D Version:
https://www.taschenlampen-forum.de/threads/sofirnsp36.65923/
Changes in Andúril: Commit log (instead a change log):
https://bazaar.launchpad.net/~toykeeper/flashlightfirmware/fsm/changes
UI Diagram from ToyKeeper:
http://toykeeper.net/torches/fsm/anduril-
ui.png
Stable firmware from: Bazaar Launchpad resp.
http://tiny.cc/TKAnduril Newest HEX
from: http://toykeeper.net/torches/fsm/
FSM Thread:
Andúril is part of a bigger framework called FSM. You can choose from
different user interfaces.
http://budgetlightforum.com/node/56105
A Youtube Video with a Andúril walk through: How to use and set up ToyKeeper’s
Andúril flashlight firmware from Tech-test
Hoops Flashing Firmware thread:
http://budgetlightforum.com/node/36216
FAQ SP36
-
You tried to configure your lamp and now it is only working if you press the button.
When you press 4x from OFF you lock out the lamp. Press four times again
to unlock. When you want to config the lamp must be ON , and then click
four times. -
If I turn on using moon shortcut, it won’t memorize moon.
In short: the SP36 has only memory if you ramp to a value.
It doesn’t memorize the floor, ceiling, or turbo levels when they’re reached
by a shortcut. This is on purpose, because people didn’t like losing their
memorized level after using moon or turbo. To make it remember moon, the user
must ramp to it… typically, by ramping up a little then back down. Basically,
it behaves that way because that’s what people asked for.
Troubleshooting and Maintenance:
- Disassembling the sealed head can cause damage to the light and void the warranty.
- Sofirn recommends using high-quality batteries. Damage by battery leakage voids warranty.
- If the flashlight will not be used for an extended period, please remove the battery.
- Please unscrew the head one-half turn or take out the battery to prevent accidental activation during storage or transportation.
- Please use cleaning cloth to clean the thread every 6 months, and it will be better. Do use silicone grease to oil thread.
- Long-term usage can result in O-ring wear. To maintain a proper water seal, replace the ring with an approved spare.
- Periodic cleaning of the battery contacts improves the flashlight’s performance as dirty contacts may cause the flashlight to flicker, shine intermittently or even fail to illuminate for the following reasons: Reason A: The battery needs replacement. Solution: please replace battery. Please confirm the correct installation
Reason B: The threads, PCB board contact or other contacts are dirty.
Solutions: please clean the contact points with a cotton swab soaked in
rubbing alcohol.
If the above methods do not work, please refer to the warranty policy before
contacting your authorized distributor.
Sofirn Limited
Tel: +86-755-23440047 Fax: +86-755-23440141
Web: www.sofirnlight.com
Email: us@sofirnlight.com
eu@sofirnlight.com
Please contact us is you have any questions.
If your product is defective, please contact us for refund or replacement
within warranty.
Manufacturer
Shenzhenshi Jinba Technology Co.,Ltd
Address: 1/F to 9/F, 1st Building, NO.110 Tenglong Industrial Center, Guanlan
Street, Longhua New District, Shenzhen 518000, China
Made in China
Sofirn SP36 User Manual – Download [optimized]
Sofirn SP36 User Manual – Download
Read User Manual Online (PDF format)
Read User Manual Online (PDF format) >>
Download This Manual (PDF format)
Download this manual >>
Sofirn SP36 User Manual
Safety precautions
- Use only reputable 18650 cells of known origin. Quality high drain cells (over 10A) protected, button top type cells, from Samsung, Panasonic/Sanyo, Sony or LG are recommended. The supported maximum length is 71 mm.
- Remove and recharge the cell when the low voltage indication is given by the Lamp (repeated step-downs in light level and eventual shutdown of the light).
- The extraordinary energy density that 18650 cells offers also means that hazardous conditions are created when a cell is short-circuited or damaged. Always treat cells with respect and properly dispose of damaged cells.
- The SP36 is a very high-intensity flashlight. Do not point directly at a person, animal, moving vehicles or flammable materials.
- When running at higher output levels the head of the Lamp will quickly heat. This is normal. In warmer ambient conditions this temperature may exceed 50ºC depending on your settings, so please take the necessary precautions when handling the Lamp.
Quick start
- Use 3 18650 cells. Please note that the SP36 requires button top cells.
- Unscrew the head and insert the battery. Take care with the polarity: Plus points toward the head.
- Screw the head back. The SP36 blinks once to confirm it has power and is now operational. Tighten the head. Do not over-tighten.
- When you change the batteries the lamp starts always at the regulated level at ~125 lm (1×7135).
- All functions are performed using the electronic side switch. And basic usage is very simple: Click for on/off, hold to change brightness. Release and hold again to change brightness the other way.
- From OFF, hold the button. The light output will ramp up from a very low level to Ceiling-Of-TheRamp. Release the button when the required light level is reached. (The full ramp takes about 3 s.) Use a single-click at any time to turn the SP36 OFF. Please see below for further details.
- While ramping it does subtle blinks to signal: Max regulated level (1×7135) and CEILING.
- The SP36 has two different ramps: SMOOTH RAMP and STEPPED RAMP. You can change between them when the lamp is ON with three clicks. Each ramp has its own individual settings – for floor (lowest level), ceiling (highest level). And the stepped ramp can also have a configurable number of steps.
- TURBO is only for short times. At around a minute you may notice it dims slowly down! The user should use it only for short periods instead of relying on thermal regulation to prevent heat damage. Full turbo is powerful enough to start fires in just a few seconds, especially when aimed at dark-colored materials.
Integrated charger
The SP36 has a USB-C charging port. Please us a premium cable and a power adapter with 5V, 2A to charge your lamp.
While charging the switch LED is reed. It goes green when charging is finished.
While charging you can use BattCheck mode from the Group 1 Blinkies to check the voltage level and all other flashlight functions can be used normally when charging.
Specifications
A 18650 quad LED lamp with side switch and a great, easy user interface.
Emitter: Four LEDs on a copper DTP MCPCB e.g. Samsung LH351D
Reflector: 43 mm ID, aluminum, smooth finish
Lens: High transmittance glass
Flux: ~5600 lm (LH351D) Throw: ~350 m (LH351D)
Firmware: The SP36 uses free software called Andúril, distributed under the terms of the GPL v3. Code is available from http://tiny.cc/TKAnduril
User interfaces:
- By default the SP36 is set to use SMOOTH RAMPING. Instant access to TURBO mode is also provided.
- A more conventional STEPPED RAMPING UI is available if you like discrete modes level. You can choose how many steps you want.
- MOMENTARY mode is useful for signaling purposes or rapidly/briefly lighting up targets. To exit this mode, physically disconnect power
- MUGGLE mode uses a reduced output.
- It has an electronic LOCKOUT for safety, but acts also as momentary low light.
Other functions: Battery check, sunset, beacon, tactical strobe, party strobe, bike flasher, candlelight, lightning storm
Battery: Three button-top 18650 cells. Unprotected cells are recommended. Max. length 71 mm. Cells are not included.
Charging: Integrated charger via USB-C
Driver: FET+1 driver. Low parasitic drain while OFF
Body: Aluminum with HA III anodizing
Switch: Electronic side switch
Ingress rating: Equivalent to IPX8
Weight: Approximately 300 g without cells
Size: 50 mm Ø head x 126.7 mm length.
Manual design and concept by J. Hollmann. Content from budgetlightforum, collected over time. Many thanks to ToyKeeper for her great software!
UI Diagram
Not everything is covered in the diagram, please read the text.
Default UI: Smooth ramping
This UI provides smooth dimming of the light output between FLOOR (lowest level) and CEILING (highest level), with an easily accessible 100% TURBO mode.
Switch to STEPPED RAMP: If the lamp is ON: Three clicks (Hint: If you use 3 clicks from OFF you engage battery check)
Turn the lamp ON: single-click the button, the SP36 turns ON using the previously used light output level (MEM)
Ramp up; brighter: hold the button Reverse ramp: while ramping in one direction, release button briefly and hold again
Ramp down; darker: Click, hold, when ON (means: double-click, but hold the second click a bit longer) If you do this when the lamp is OFF, it ramps down from the CEILING (dashed double lines)
Instant top CEILING: from OFF: double-click (double lines)
TURBO: from ON: double-click toggles between turbo and the memorized level from OFF (You must first switch ON): Click, then double-click
FLOOR / MOON mode: from OFF: Hold turns on at the FLOOR level, it makes a subtle “blink” to provide a timing hint if you want to stay there. If you keep holding, it ramps up
Battery check: from OFF: triple-click (4 blinks, a short pause, then 1 blink would indicate 4.1 V)
Turn the SP36 OFF: single-click
UI: Stepped ramping
Using this UI the output does not ramp, it steps from one mode to the next using hold. The firmware tries to optimize these steps as equally-spaced on a cube-root curve (considered an ideal mode-spacing by many). In STEPPED RAMPING you can choose how many steps you want. (See Ramp configuration for details).
All operations are the same as in smooth ramping
Switch to SMOOTH RAMP: when the lamp is ON: Three clicks (Hint: If you use 3 clicks from OFF you engage battery check)
UI: Momentary mode
5 clicks from OFF to enter Momentary mode To exit this mode, physically disconnect power (unscrew the light).
This mode locks the flashlight into a single-mode interface where the LEDs are only on when the button is held down. It is intended for Morse code and other signaling tasks.
Brightness is the last-ramped level, so adjust that before entering momentary mode.
UI: Muggle mode
Muggle mode is for lending the SP36 to others. It has a reduced output to make sure somebody won’t start a fire. An extremely simple interface with a limited brightness range — ~5 lm to ~240 lm, with slow smooth ramping and no blinkies. Persists after a battery change.
MUGGLE mode ON: from OFF 6 clicks to enter
MUGGLE mode OFF: 6 clicks to exit
One click ON / OFF and HOLD to ramp up / down.
UI: Electronic Lockout
4 clicks form OFF to disable the SP36, same to reenable the lamp.
Lockout makes the light safe to carry in a pocket or a bag or anywhere else it might be pressed by accident. Lockout doubles also as a momentary moonlight mode, so the user can do quick tasks without having to unlock the light. It uses the FLOOR of the current ramp.
Blinkies
Two groups worth of blinkies are included. To reach them, do “click click click” from OFF or a “click click hold” from OFF. To change to the next blinky use a double-click. These include:
Group 1 Blinkies / utility modes:
(starts always at battcheck) from OFF: “click click click”
- BattCheck:
Shows the remaining charge in volts and tenths. E.g. 4 blinks, then pause, 1 blink are 4.1 Volt. A “zero” is represented by a very quick blink. - Sunset / Goodnight mode:
Starts at a low level, then slowly dims down to moon for an hour, then shuts off. It is intended for use when going to bed. - Beacon:
Beacon mode uses the last ramped level for its brightness. You must adjust the brightness before you turn beacon on. It blinks at a slow speed: Once every N seconds at the last-ramped level.
N is configurable in beacon config mode: Click 4 times to enter beacon config mode, wait for the light to stutter, then click to enter the number of seconds per blink. For example, to do a 10-second alpine beacon, click 10 times. Hint: If you want faster blinks per second use party strobe mode and set it to three blinks per second or more - TempCheck:
Blinks out the current temperature in degrees C. and optionally configure settings for thermal regulation. E.g. 3 blinks, then pause, 4 blink are 34 degrees Celsius. A “zero” is represented by a very quick blink.
This number should be pretty close to what a real thermometer says. If not, it would be a good idea to click 4 times to enter thermal config mode, and calibrate the sensor.
Group 2 Strobes:
(remembers the last-used mode) from OFF: “click click hold”
Click three times, but hold the third click for a moment.
To change to the next blinky use a double-click.
To set adjustments you can use:
- Hold: Increase brightness, or strobe faster. (except lightning)
- Click, hold: Reduces brightness, or strobe slower. (except lightning)
- Candle mode:
Simulates a flickering candle or fireplace, until you switch it OFF. Or you add timer for 30min: Each triple click adds 30 min including a burn down simulation at the end. Candle mode timer can go for up to 4.5 hour. Adjustable brightness. - Bike flasher:
Steady output with a “stutter” once per second. Designed to be more visible than a normal ramping mode, but otherwise works mostly the same. Adjustable brightness. - Party strobe:
Motion-freezing strobe. Can be used to freeze spinning fans and falling water. Adjustable speed. - Tactical strobe:
Bright, disorienting strobe light. Can be used to irritate people. Adjustable speed, and the duty cycle is always 33%. - Lightning storm mode:
Flashes at random brightness and random speed to simulate lightning strikes during a busy lightning storm. Do not look directly at the flashlight when this mode is running, because it may suddenly go to full power without warning.
General configuration
Every config mode use the same interface. It has one or more options the user can set, and it will go through its configuration numbers in order. The SP36 confirms each click with a blink.
For each menu item, the light will follow the same pattern:
- Blink one or more times = configuration number
To indicate which setting you are in. All config menus “fall through” with no changes if you don’t press the button. - “buzz” = The lamp waits for input
Buzz is a stutter quickly between two brightness levels for a few seconds. The User can click one or more times to enter a number. It will keep buzzing until the user stops clicking, so there is no need to hurry. - Pause, and then go to the next option
After the light has gone through all of the menu options, it should return to whatever mode the light was in before entering the config mode.
Ramp configuration
Both the SMOOTH RAMP and the STEPPED RAMP are configurable. The user can set the lowest level, the highest level, and (STEPPED only) the number of steps.
While the light is ON in one of the ramping modes, click 4 times to enter RAMP CONFIGURATION for the current ramp.
For SMOOTH RAMPING, there are 2 menu options:
- Floor (default level = 1/150)
- Ceiling (default = 120/150)
For the STEPPED RAMPING, there are 3 menu options:
- Floor (default level = 20/150)
- Ceiling (default = 120/150)
- Number of steps (default = 7)
To configure the floor level, click the button equal to the number of ramp levels (out of 150) at which the floor should be. To set the lowest possible level, click once. (MOON)
To configure the ceiling level, each click goes one level lower. So 1 click sets the highest possible level, 2 clicks is the 2nd-highest, 3 clicks is the 3rd-highest level, etc. Ceiling clicks: 151 – ( level you want ) = Clicks To set the default of 120/150, click 31 times.
When configuring the number of steps, the value can be anything from 2 to 150.
If you want to change the floor and ceiling to the lowest and highest values, you click once for each.
Defaults settings SP36
| SP36 | SMOOTH | STEPPED | ||
| Level | ca. lm | Level | ca. lm | |
| max FET | 150 | 5600 | 150 | 5600 |
| Default Ceiling | 120 | 2800 | 120 | 2800 |
| single 7135 max | 65 | 125 | 65 | 125 |
| Default Floor | 1 | Moon | 20 | 4 |
| Default Steps | – | 7 |
Thermal configuration
Look at a thermometer to check the current room temperature. Let us assume it says 21 Celsius.
Turn the light off and wait for its temperature to settle to room temperature.
Go to TempCheck (from OFF: “Click Click Click”. Ascend with double-clicks three times)
When you are in TempCheck, then click 4 times to enter thermal config mode, and calibrate the sensor.
| °C | °F | |
| 100 | 212 | Boiling Water |
| 60 | 140 | |
| 55 | 131 | |
| 50 | 122 | Touch limit |
| 45 | 111 | [Default] |
| 40 | 104 | |
| 37,4 | 99 | Body temp. |
| 25 | 77 | |
| 20 | 68 | |
| 0 | 32 | Frozen Water |
| MaxTemp. – 30°C = Clicks |
Thermal config mode has two settings:
- Current temperature Calibration. Click once per degree C to calibrate the sensor. For our example, the ambient temperature is 21 C = click 21 times.
- Temperature limit. This sets the maximum temperature the light can reach before it will start doing thermal regulation to keep itself from overheating. Click once per degree C above 30. For example, to set the limit to 50 C, click 20 times. The default is 45 C (15 clicks).
Hint: If you don’t click, the lamp will leave the value unchanged. The lowest value the user can set is 31 C, by clicking once.
Switch Back Light
The switch LED can be configured to do different things while the main emitters are off. There is one mode for the regular OFF mode, and another mode for LOCKOUT mode. This allows the user to see at a glance whether the light is locked.
Switch LED modes typically include:
- Off
- Low
- High
- Blinking
To configure the LEDs, go to the mode you want to configure and then click the button a few times:
- OFF mode: 7 clicks.
- LOCKOUT mode: 3 clicks.
This change the LEDs to the next mode on this light.
The switch LED stays on while the main emitters are on. Its brightness level is set in a way which mirrors the main LED — off, low, or high.
| Control of Switch LEDs – Defaults SP36 | ||
| Setting | Regular OFF | In LOCKOUT |
| Change setting via | 7 clicks | 3 clicks |
| Off-Low-High-Beacon | Low | Beacon |
Protection Features
Some features which aren’t visible on the diagram: Andúril includes low voltage protection (LVP) and thermal regulation.
LVP makes the light step down to a lower level when the battery is low, and if the light is already at the lowest level, it shuts itself off.
This activates at 2.8V. LVP adjustments happen suddenly, in large steps.
Thermal regulation attempts to keeps the light from overheating and otherwise adjusts output to stay as close as possible to the user-configured temperature limit. Thermal adjustments happen gradually, in steps so small they are difficult for humans to perceive. It ramps smoothly across 512 internal steps (from 1×7135 to full power) to adjust output while it searches for the highest level it can maintain without overheating.
Usage of the flashlight
You can do a little bit more with your new light …
Because the SP36 is a high powered light, it is recommended to use lockout. It can burn things! Backside is, a normal lockout is awkward if you need quick little illumination for the keyhole or in your bag.
SP36 LOCKOUT mode doubles as a momentary moon mode. That way, after locking it and tossing it in a bag, it can still be used to look around inside the bag without unlocking it.
Lockout uses as moonlight the floor of the current ramp. If you have two different settings for this, you can have different illumination also.
Or you can use Muggle Mode if you want a safer way to carry your lamp with a reduced output and don’t want lock out.
While on, a double click toggles between turbo and the memorized level. So, if you hear a noise and want full power for a moment, double click. When you’re done, double click again to return to the original brightness. This is handy for walking the dog: With low you can stroll, and when your dog runs away: TURBO, when he comes back, low again.
You can have full power in one ramp and a lower ceiling in the other. By default, both ramps only go up to ~2800 lm. And one starts at moon, while the others starts at ~4 lm. But you can change this.
Now you can play with FLOOR, CEILING and two ramps e.g.: Let’s say your favorite is smooth ramping and you don’t like the quick step down from a ceiling at level 130. You can choose level 101 (50 clicks) for the smooth ramp ceiling. This keeps the ceiling at a reasonable cooler level. Smooth floor on level 1 for a really dim moonlight. You can set 20 clicks for stepped floor for a usable low outdoors. And 130 for stepped ceiling if you also like to have a powerful ceil.
An option against too much heat can be different ceilings for SMOOTH RAMP and STEPPED RAMP. Lower for your preferred ramp the ceiling and with 3 clicks you can switch to the other ramp, where you can have full power if you need it.
If you click zero times, the floor or ceiling value doesn’t change. This is great because you can change just the floor or just the ceiling without reprogramming the other.
The SP36 has a nice candlelight mode, the effect is bigger if you use a diffuser.
Lightning storm is also more fun with a diffuser.
Searching things:
If you drop a little piece, lay your light flat on the ground and rotate it like a lighthouse. The small piece should cast a long shadow and it is easier to find.
In case you lose your light, you can store a piece of paper in the tube with: “This Lamp belongs to NAME. If found please call: 1234 or [email protected]
General voltage level of a LiIon battery
| Voltage | Note for a 18650 |
| 4.2 V | fully charged |
| 3.7 V | half full * |
| 3.1 V | below 10% capacity, time to charge * |
| 2.8 V | low voltage protection from a lamp should start |
| 2.5 V | begin of deep discharge |
Pay attention that the voltage level under load is lower than without load.
*on these two entries, please note smaller battery sizes (e.g. 16350, 18350) have a bit higher voltages.
There are also some other interfaces available for this hardware, but it requires the user to flash different firmware. You can make it work like other brands. However, these are not tested and not officially supported.
Links
SP36 main thread:
http://budgetlightforum.com/node/66002
Discussion on TLF in German, XP-L2 / LH351D Version:
https://www.taschenlampen-forum.de/threads/sofirnsp36.65923/
Changes in Andúril: Commit log (instead a change log):
https://bazaar.launchpad.net/~toykeeper/flashlightfirmware/fsm/changes
UI Diagram from ToyKeeper:
http://toykeeper.net/torches/fsm/anduril-ui.png
Stable firmware from: Bazaar Launchpad resp.
http://tiny.cc/TKAnduril Newest HEX from: http://toykeeper.net/torches/fsm/
FSM Thread:
Andúril is part of a bigger framework called FSM. You can choose from different user interfaces.
http://budgetlightforum.com/node/56105
A Youtube Video with a Andúril walk through: How to use and set up ToyKeeper’s Andúril flashlight firmware from Tech-test
Hoops Flashing Firmware thread:
http://budgetlightforum.com/node/36216
FAQ SP36
- You tried to configure your lamp and now it is only working if you press the button.
When you press 4x from OFF you lock out the lamp. Press four times again to unlock. When you want to config the lamp must be ON, and then click four times. - If I turn on using moon shortcut, it won’t memorize moon.
In short: the SP36 has only memory if you ramp to a value.
It doesn’t memorize the floor, ceiling, or turbo levels when they’re reached by a shortcut. This is on purpose, because people didn’t like losing their memorized level after using moon or turbo. To make it remember moon, the user must ramp to it… typically, by ramping up a little then back down. Basically, it behaves that way because that’s what people asked for.
Troubleshooting and Maintenance:
- Disassembling the sealed head can cause damage to the light and void the warranty.
- Sofirn recommends using high-quality batteries. Damage by battery leakage voids warranty.
- If the flashlight will not be used for an extended period, please remove the battery.
- Please unscrew the head one-half turn or take out the battery to prevent accidental activation during storage or transportation.
- Please use cleaning cloth to clean the thread every 6 months, and it will be better. Do use silicone grease to oil thread.
- Long-term usage can result in O-ring wear. To maintain a proper water seal, replace the ring with an approved spare.
- Periodic cleaning of the battery contacts improves the flashlight’s performance as dirty contacts may cause the flashlight to flicker, shine intermittently or even fail to illuminate for the following reasons: Reason A: The battery needs replacement. Solution: please replace battery. Please confirm the correct installation
Reason B: The threads, PCB board contact or other contacts are dirty.
Solutions: please clean the contact points with a cotton swab soaked in rubbing alcohol.
If the above methods do not work, please refer to the warranty policy before contacting your authorized distributor.
Sofirn Limited
Tel: +86-755-23440047 Fax: +86-755-23440141
Web: www.sofirnlight.com
Email:
Please contact us is you have any questions.
If your product is defective, please contact us for refund or replacement within warranty.
Manufacturer
Shenzhenshi Jinba Technology Co.,Ltd
Address: 1/F to 9/F, 1st Building, NO.110 Tenglong Industrial Center, Guanlan Street, Longhua New District, Shenzhen 518000, China
Made in China
Skip to content
Manuals+
User Manuals Simplified.
Sofirn SP36 User Manual
Home » Sofirn » Sofirn SP36 User Manual
Contents [ hide
1 Sofirn SP36 User Manual
1.1 Safety precautions
1.2 Integrated charger
1.3 Specifications
1.4 UI Diagram
1.5 Default UI: Smooth ramping
1.6 UI: Stepped ramping
1.7 UI: Momentary mode
1.8 UI: Muggle mode
1.9 UI: Electronic Lockout
1.10 Blinkies
1.11 General configuration
1.12 Ramp configuration
1.13 Thermal configuration
1.14 Switch Back Light
1.15 Protection Features
1.16 Usage of the flashlight
1.17 Links
1.18 FAQ SP36
1.19 Troubleshooting and Maintenance:
1lumen selects and reviews products personally. We may earn affiliate commissions through our links, which help support our testing.
Sofirn SP36 Pro Specifications
| Brand/model | Sofirn SP36 Pro |
|---|---|
| LED | 4 x Luminus SST40 |
| Lumens | 8,000 lm |
| Beam intensity | 2,250 cd |
| Battery config. | 3*18650 |
| Material | Aluminum |
| Modes | Many (Anduril) |
| Blinkies | Many (Anduril) |
| Reflector | Quad Smooth reflector |
| Waterproof | IPX8 |
| Review date | July 2021 |
Review intro:
Sofirn knows flashlights, and more importantly, makes good ones at attractive prices, so they’re no stranger to the flashlight enthusiast nexus. They became even more so after assuming production (from Throfire) for the BLF Q8, which was introduced in late 2017 as the do-all, end-all enthusiast flashlight. The Q8 was designed from the beginning with input from enthusiasts from the Budget Light Forum (BLF), and produced by Thorfire. It retained the SkyRay King four 18650 cells and quad emitter format, but was a completely new design with integrated MCPCB shelf, proper FET driver, and a very advanced UI in TomE’s NarsilM. With 4 Cree XP-L HDs (the Sofirn version used the XP-L HI), it could manage 5000+ Lumens, sustain high output, and could be had for around $40 with discounts. Fast-forward to 2019 and enthusiasts were calling for a smaller and more modern version of the Q8. Sofirn, active listener that they are, took the Q8, dropped a battery, added type C onboard charging, and redesigned the body into a more compact form factor.
Voila! The Sofirn SP36 was born. With three 18650’s on board and the same quad emitters (Cree’s infamous XP-L2 this time) it retained the high output (bumped to 6000 Lumens) and decent sustainability for around $50 US (see a trend?). Sofirn followed enthusiast requests and introduced versions featuring ToyKeeper’s Anduril, and a special Sofirn SP36 BLF Edition with Samsung LH351D high CRI emitters, which Owen reviewed. Apparently, Sofirn must be able to read minds (like mine), so they stuck in some Luminus SST40s, put ‘Pro’ on it, and abracadabra; the SP36 Pro was introduced in early 2021. Today I’ll be taking a look at the latest version of the Sofirn SP36 and seeing just how ‘Pro’ it really is.
Package quality.
I own a couple Sofirn lights and let me tell you that Sofirn doesn’t invest heavily in packaging. Like Astrolux, Wurkkos, and Convoy, the boxes are well, pretty much boxes and not much else. The SP36 Pro arrived in a plain, recycled cardboard box with Sofirn on the top, some QR codes on the bottom, and a single sticker with the emitter CCT on it. That’s it. No fanfare or fufu packaging, and that’s fine because it brings the cost down. Besides, unless you’re like me, the boxes get tossed anyway. Inside, the SP36 was wrapped in protective bubble wrap and the bottom of the box was cushioned with foam. No damage whatsoever, so a win for the packaging. Here’s what you get:
- Sofirn SP36 Pro flashlight
- USB A to C charging cable
- 2 spare o-rings
- 3 Sofirn-branded 18650 button top batteries (loaded in the light)
- User manual
The batteries are optional, so if you don’t have 3 matching batteries, it’s a good idea to get the bundled cells since they seem pretty good quality and will be cheaper than buying them separately. This is a nice kit, and with the batteries, is everything you need to get going. The included accessories are high quality, and here’s a tip: Sofirn’s bundled USB cables are some of the best I’ve come across, even better than ‘name brand’ cables I paid too much money for. Bonus! The cells were loaded in the light upside down, but thankfully there was a dark plastic isolator to keep them from shorting out!
Flashlight in use, Build Quality, and Warranty
The Sofirn SP36, like the Q8, is based on the ‘soda can’ form factor, which is three or four 18650 batteries behind a multi-LED reflector/optic. The SP36 has three 18650 cells in parallel which makes the body a little slimmer than the Q8. It’s not lightweight by any means but is lighter than the Q8, and much lighter than my modded SRK. For comparison, the SRK weighs 355.8 grams without batteries compared to the SP36 Pro at 297.4 grams. Despite the girth and weight, I will say it handles nicely. There’s plenty of gripping surface between the smartly-designed battery tube and generous fins on the head. In addition, the balance point is nearly in the center, and that helps limit hand fatigue during prolonged use. The battery tube is covered in diamond pattern knurling that’s very grippy and nicely cut. No issues with handling, but I have large hands so your mileage may vary.
There’s no lanyard hole or attachment points, so you’re limited to pocket carry, a holster, or pouch. It fits fine in cargo pants or jacket pockets, but smaller pockets would be pretty tight. I would at the very least like to see a means to attach a lanyard (hint, hint, Sofirn). The front e-switch is a real gem, one of the nicer ones I’ve come across. It has a silicone rubber cover that’s really grippy and the click action is nice and positive with just the right amount of travel and great feedback. It’s easy to find by feel as well since it sits a little proud from the side and does have LED indicators for finding in the dark.
Besides the slightly proud charging port cover, there’s no anti-roll cuts anywhere, so nothing to stop it from becoming a rolling stone. Tail standing is no issue at all thanks to the flat tailcap, and with a diffuser stuck on (yep, Sofirn thought of that and sells one for the SP36), it would make an excellent lantern.
Although I consider Sofirn a budget brand, their lights certainly don’t reflect that. In fact, for the money you really get a nice light. Build quality is perfectly acceptable for the price. It’s not Acebeam or Fenix-level quality for fit and finish, but definitely commensurate for the asking price. The machining is well done, but I can tell where Sofirn left out certain finishing steps to keep costs down. Although most edges are beveled and chamfered, there were some pretty abrupt/mildly sharp edges on the cooling fins and the cutout where the switch is located. Otherwise, there are no major tool marks or machining defects to be found. The parts all fit together and lined up with no gaps or odd angles. The finish is also well done, and it’s the same decently tough semi-gloss type III HA I’m used to from Sofirn, and I didn’t notice any bare spots, knicks, dings, or coverage issues.
Just like the Q8, the SP36 Pro can be easily disassembled, and this is what sets a true enthusiast light apart from a consumer grade flashlight. The bezel, tailcap, tail spring PCB, battery tube, reflector, MCPCB, driver, and switch PCB are all easily accessible and removable. I had no trouble unscrewing the bezel, and getting the driver out is as easy as screwing the switch button bezel with some needle nose pliers or snap ring pliers and finagling out the switch PCB. Although the driver and switch PCB are held on with a little bit of weak glue, it’s not hard to defeat and everything else comes apart without much effort.
The reflector is held to the integrated shelf by some screws, and the MCPCB is also screwed down for an excellent thermal interface. The LED’s can be swapped for any 5050-size emitter (hmmm, SFT-40-W, XHP50.2 perhaps?), you can tweak or replace the driver, bypass the tail springs, change the front lens, etc. The springs in the tail are gold-plated and decently thick, but this light doesn’t pull high amps from a single cell due to the parallel configuration, so thick springs aren’t needed. The driver-side has a brass ring for the positive battery contact. The threads are very nice rectangular cut deals and look very durable. They were adequately lubed also and pretty smooth. Accessibility sometimes comes at an ingress protection penalty, but Sofirn puts o-rings in all the right places: One sealing the tailcap, one sealing the head to the battery tube, and two in the bezel. The silicone rubber flap sealing the USB port is nice and tight, and I noticed it made a pfftt noise when opening it up after replacing the battery tube (nice hiss). Yep, it’s sealed nicely. Sofirn gives the SP36 an IPX8 rating, so it should be good for temporary immersion at the least.
Warranty? Sofirn’s warranty is pretty decent. From Sofirnlight.com: If your Sofirn product has any defect as the result of the materials or workmanship we want to make it right! Within 30 days of purchase: Contact the original seller for repair or replacement. Within 2 years of purchase: Contact Sofirn for repair or replacement. This warranty does not cover normal wear and tear, modifications, misuse, disintegrations, negligence, accidents, improper maintenance, or repair by anyone other than an Authorized retailer or Sofirn itself. Batteries are currently under a 1 year warranty.
LED/LEP/HID, Lens, Bezel, Reflector, and Beam
As mentioned previously, the SP36 is a quad emitter light. The original featured Cree XP-L2 emitters in roughly 5300-5700K. They were great for output, but suffered from tint shift and the typical gen 2 Cree corona. The later editions replaced the XP-L2 with Samsung LH351D emitters (in 2700, 4000, and 5000K up to 90 CRI), which took the beam quality to another level for a reflector-based multi-emitter light. The Pro version swaps the Samsungs and Crees for the Luminus SST40. This is a 5050-footprint 3 volt LED with a low forward voltage and is capable of very high output and decent beam quality. The SST40’s are available in 5000 or 6500K CCT’s. My sample features the 5000K variety.
The LEDs are perfectly centered in their respective reflector cups in the flawless quad SMO (smooth) reflector array. It’s topped with a decently thick toughened mineral glass lens with AR coating. It’s set a few millimeters behind the non-crenulated bezel for protection from drops.
The beam is about what I expected, with the typical quad reflector “flower petal” shape, but it’s not at all obtrusive and only noticeable up close on white walls. What I did find obtrusive was the bright ring artifact around the inner part of the spill, which kind of mucked up the otherwise nice beam since it’s very obvious no matter what you’re illuminating. The beam itself looks a lot like the beam from my modded SkyRay King with (you guessed it) quad SST40s. There’s a defined hotspot and decent throw with generous spill. Overall this is an extremely useful beam that I think is suitable for any task. The 5000K emitters aren’t high CRI by any means, but still make for a nice beam (aside from the artifact and some subtle green at very low output).
Dimensions and its competition
- Head diameter: 5.0 cm / 1.96 inches
- Overall length: 12.67 cm / 4.98 inches
Weight:
- Without batteries: 297.4 grams / 10.49 oz.
- With three 3000 mAh 18650 cells: 436.6 grams / 15.4 oz.
Flashlight size comparison
Group 1 left to right: Imalent R30C, Sofirn SP36 Pro, Astrolux FT02S, Thorfire C8.
Group 2 left to right: Sofirn SP36 PRO, Skyray King
Group 3 left to right: SkyRay King, Sofirn SP36 Pro, 12 oz. can of soda.
UI : User interface and driver
The SP36 uses the same FET+7135 driver as the SP36 BLF Aduril Edition, so performance is largely dependent on the battery you’re using. High drain batteries will give much higher output, but it will only be noticeable once the FET kicks in in the higher modes (ramping or stepped).
The UI is the familiar Anduril we’ve all come to know and love. This particular model is sporting the 03/18/2020 version (verified with version check- 15 clicks from off…it will blink out the date).
Forthrightly, I am more a fan of simpler UI’s, but once getting used to it, I really enjoy the versatility Anduril offers. There’s tons of modes available, and you can tweak a lot of settings. By default, the UI is set to smooth ramping with instant access to turbo, but you can also opt for stepped ramping with the number of steps and discrete brightness levels being configurable. Other options include a momentary mode for emulating forward clicky action, and a “muggle” mode, which runs the light at a lower output. You also get the mandatory electronic lockout, temperature check, and battery check.
This is the image of the UI, but forget about the bottom part, because this particular light has no AUX LEDs.
From OFF:
- Single-click: ON
- Double click: High (Top of ramp, to get to Turbo, you need to do another double click)
- 3 clicks: Access the blinky/utility modes.
Enter Special/Fun modes from OFF:
- 2 clicks + hold: Strobe modes
- 4 clicks: Lock Out mode
- 5 clicks: Momentary on
- 6 clicks: Muggle mode
From ON:
- Single-click: Off
- Double click: Turbo
- 3 clicks: change ramping mode.. Instead of a smooth increase, it has 6 little steps between Lowest and Max.
- 4 clicks: change to ramping configuration mode
- Press and hold: brightness ramps up.. release and press and hold again to ramp down.
INTERESTING, SPECIAL, AND FUN MODES:
Please read the manual carefully to know how to access or customize these modes. Also see the firmware picture, above.
- Blinky Utility mode:
- Battery check
- Sunset Mode
- Beacon mode
- Temperature check
Strobe / Mood modes:
When in the strobes mode, double-click to rotate between them – all modes except party strobe are brightness, changed the same way as a normal ramp. In party strobe mode, ramping up and down will increase and decrease the frequency of the strobe, for incredible effects.
- Candle
- Bike flasher
- Party strobe
- Tactical Strobe
- Lightning mode
- Lockout mode (can’t use the light)
- Lockout mode is available by clicking four times from off – while in lockout mode, click-and-hold will light up at bottom of the ramp, and a double-click-and-hold will light up somewhat brighter. This is to give you a way to quickly use the light if necessary, but if it activates in your pocket, it will only be at very low modes, and only for as long as the button is pressed. No more holes in pants!
- Momentary mode (signaling/ morse coding)
- Muggle mode: (safer for children)
- Configuration mode
- Ramp config mode
Andruil is a very advanced UI, and can be as easy to use or as complicated as you want it to be. In fact, since Anduril2 has come out with its UI within a UI deal to complicate things, I think a novice could easily learn how to use Anduril quickly. A couple of things to consider though: Check the thermal configuration, since it might be off and this impacts how fast the light throttles back. The thermal calibration was way off for the SP36 Pro by about 15 degrees C, and this has been the case with every Anduril light I’ve reviewed to date. To calibrate the sensor, use a thermometer to check the ambient temperature and make sure the light is more or less equal to that number. Enter the temp check mode by clicking 3 times from off, then double click 3 times to enter the temp check mode. The light will blink a series of blinks that tells you what temperature it thinks it is. If it’s way off from the thermometer, go to the configuration mode (4 more clicks) and set the ambient temperature along with the maximum step down temperature.
LVP works fine and the batteries were discharged down to 2.92 volts after my runtime tests, which is well within the acceptable limit for lithium-ion cells. Once again, well done ToyKeeper!
Charging and batteries
The original Q8 utilized four 18650 cells in parallel, but the SP36 series makes do with three (also in parallel). The design of the driver is generally conducive to button top cells, and no surprise that Sofirn recommends (and bundles) them. That didn’t stop me from trying some solder-blobbed Sony VTC6 flat top 18650’s and they fit fine. Note that protected cells or ones with integrated charging probably won’t work here due to the length. You wouldn’t need to use protected cells anyway because Anduril has LVP built into the firmware and on turbo you may trip most protection circuits, but nonetheless, I tried a protected button top Acebeam 18650 with USB charging and it was too long at 71 mm.
One of the additions Sofirn made to the SP36 that the Q8 lacked was onboard charging. It’s USB type C and that’s awesome, but in my opinion, it’s more of a convenience feature. Here’s why: At around 1.8 amps according to my USB meter, three 3000 mAh batteries in parallel (9 Ah) will take a long, long time to charge since the charge current is divided between those 3 cells (about 700 mAh after counting for losses in the charging buck circuit). You are better off getting a $10 four-bay charger that does 1 amp per slot, or better yet drop $40 or so on one that does 2 amps or more. I know, I know, most enthusiasts probably already have a charger like that (or two, or three), but I really wish more manufacturers would implement type C PD and QC charging for these high capacity lights (hint, hint, Sofirn and others) since it’s so much faster, but again, it adds complexity and cost, which would raise the price higher and the goal from the get-go was to make a smaller Q8 without raising the price too much. Beggars can’t be choosers, even with flashlights I guess.
Alas, the built-in USB charging works fine, and it took around 4-5 hours to recharge the light after a runtime test on a 2.1 amp wall adapter. The termination voltage was right at 4.20 volts on the nose.
Bonus time! When connected to the charger, the light works, and you have some modes, but expect around 250 Lumens max out of it.
Performance test
Sofirn put the SST40’s in the SP36 for a reason, not just to call it “Pro.” I’m expecting good output from this light with high output on the FET and long runtimes on the 7135.
Amp measurement
Measuring the current on this light was an exercise in caution and acrobatics. The best way is using single battery, balancing it on the positive ring of the driver, somehow maneuvering your loop of wire in to make contact with the negative ring on the driver and the negative pole of the battery, all while getting the clamp meter on it without shorting anything out and manipulating the switch. Whew! This is where a third arm and hand would be beneficial. On turbo with the included batteries, I got 11 amps before I gave up. Switching to the VTC6, I got 18.7 amps on turbo.
Battery Life: Runtime graphs
How Runtimes are Measured: Understanding ANSI FL1 Standards
About ANSI FL1 runtime standards: The runtime is measured until the light drops to 10% of its initial output (30 seconds after turning on). This does not mean that the flashlight is not usable anymore. The last column shows how long the light actually works till it shuts off. If there is a + symbol, it means that the test was stopped at that particular point, but the light was actually still running. This happens on certain occasions, with certain drivers, firmware, or batteries.
I conducted the runtime test using the 30 centimeter integrating sphere with the Digi-Sense 20250-00 data logging lux meter and tested stepped levels 4, 5, 6, 7, and Turbo. The temperature was calibrated to ambient 23 C and the thermal ceiling set to 60 C. For consistency, I used the fully charged Sofirn-branded 3000 mAh 18650s that came with the light. For all Anduril tests, I end the test when the output drops for the last time because this is technically the LVP and the light will keep running at this low output for a very long time.
Turbo started at a hair over 5800 Lumens, and held that for about 10 seconds before the temperature started rising. Once again, Anduril works its magic with temperature control and starts throttling the output at around 45 seconds. By 60 seconds, the head temperature is 57.4 C and the output is 5325 Lumens. From 60 seconds on, the output is falling, but it’s still over 5000 Lumens at 90 seconds, and over 4000 Lumens at the 115 second mark. At 2 minutes in the head is 56.5 C, but the body is still-hand-friendly 43.8 C. Not bad heat management. By the 5 minute mark, the output is 1349 Lumens, and by 10 minutes it’s down to 568 where it sits for another 9 minutes before throttling back up to 710 Lumens where it sat for a few minutes, then settled at 639 Lumens. At 30 minutes, the output is back up to 852 Lumens, and this behavior continued for the next 2 hours, cresting 1000 Lumens at the 1 hr. 27 minute mark before throttling way down as LVP started kicking in at the 3 hour 10 minute mark when it dropped very low (off the lux meter scale) and I ended the test a short time later. Total runtime (measurable) was 3 hr. 13 minutes.
Level 7 through 5 are nearly identical (aside from higher output), and not surprising since these modes are using the FET on the driver (direct drive) controlled by PWM, so the behavior is similar. As the batteries drain, the output decreases. Level 7 started at 2840 Lumens, and held that for several seconds before a slight decrease to 2769 by 20 seconds. The light heats slowly, only getting above 50 C by the 3 minute mark where the output is over 2600 Lumens. The output doesn’t go below 2000 Lumens until the 5 minute 20 second mark when the temperature is 56.6 C. From there, the output is following Turbo, with the same fluctuations in output as the light heats/cools. The last step down to under 10 Lumens happened at 3 hours 35 minutes, with another drop to under 3 Lumens (which doesn’t register on the graph since the output went below the lux meter scale) at which point I ended the test.
Level 6 started at 1562 Lumens and was pretty consistent with that for over 2 minutes before throttling back to under 1000 Lumens at the 13 minute, 20 second mark. It exhibited the same throttling behavior and held on until 3 hours 55 minutes when the output dropped below 3 Lumens and I ended the test. The highest temperature I observed at 1 hour into the test was 54.2 C. Level 5 is more of the same steadily decreasing output as the batteries drain, albeit at lower output than Level 6. Start was 759 Lumens, steadily dropping in a consistent manner until the 6 hr. 9 minute mark when the output dropped under 50 Lumens, with a final drop to 28, then to 7 Lumens 10 minutes later when I ended the test a short time later 6 hours 33 minutes. Heating was negligible and barely 20C above ambient.
Level 4 was pretty boring, as expected, and no drama whatsoever. The test started at 225.07 Lumens, and held around 222 Lumens for a long time, 30 minutes to be exact, but the output didn’t drop under 200 Lumens for over 9 hours. The output was over 190 Lumens for over 13 hours, finally dropping below 100 Lumens at the 19 hour 6 minute mark. Talk about endurance! I let the test run until the output dropped to under 2 Lumens and I ended the test at the 21 hours and 12 minute mark.
It’s business as usual for the SP36 Pro because it behaves like any FET+1 light running Anduril (FT02S, EA01, EC03, Lumintop FWAA). I am a bit surprised Sofirn doesn’t publish runtime figures because they bundle their own branded cells with the light and testing that wouldn’t be a big deal. Oh well. The thermal performance is quite good, with the nice thermal path, thick shelf, and DTP MCPCB really pulling the heat away from the SST40s. On lower modes, the performance is even better. I have no doubt this light would run for many, many hours on high capacity cells (like the Sanyo 3350 mAh 18650 GA). It will hold high output for long periods, and the thermal regulation is good and the tube stays relatively cool even during long runs on higher modes. Lastly, the light is still usable after the runtime tests at reduced output (around 230 lumens at the top end) which is still plenty bright and won’t leave you in the dark.
Lumen measurements
How Lumens are Measured: Understanding ANSI FL1 Standards
How Lumens are Measured: Understanding ANSI FL1 Standards: The ANSI FL1 standards specify that output in lumens should be measured 30 seconds after turning on, as this is the standardized time for measuring brightness according to the industry standard. This is why we focus on this part in our measurements. The ANSI FL1 standards require an ambient temperature of 22 ± 3°C. We record the ambient the ambient temperature to identify potential reasons for any observed discrepancies.
For the lumen tests, I used my home made 30 cm integrating sphere calibrated with a light of known output using the Digi-Sense 20250-00 data logging lux meter. I used the fully charged included Sofirn branded 3000 mAh 18650s.
| Step | Measured Lumens |
|---|---|
| 1 | 6.39 |
| 2 | 32.66 |
| 3 | 88.75 |
| 4 | 225.07 |
| 5 | 759.70 |
| 6 | 1562 |
| 7 | 2698 (2840 at turn on) |
| Turbo (spec 8000lm) | 5325 (5751 at turn on) |
Sofirn only advertises a single Lumen figure, and I can only assume it’s for Turbo. I didn’t get anywhere near their 8000 Lumen figure (off almost 2300 Lumens), but I know the SST40 is capable of more since the harder you drive it, the better, especially in multi emitter setups. I grabbed 3 married (fully charged) Sony VTC6 and tested the light on Turbo again. The result? How’s 7100 Lumens sound? You could postulate the SP36 Pro is capable of 8000 Lumens, but you need some high-end batteries to do it (and maybe some unicorn pee or pixie dust).
Peak beam intensity and beam distance measurements
About Peak beam intensity: Understanding ANSI FL1 Standards
About peak beam intensity The calculated value of distance in meters at which the flashlight produces a light intensity of 0.25 lux. (0.25 lux is about the brightness of a full moon shining on an object). This means that the intensity has decreased so much, it becomes difficult to see darker objects, or objects that don’t reflect light. The columns ‘Meters’ and ‘Yards’ use rounded numbers.
Measurements taken at 5 meters indoors using the Uni-t UT383S lux meter. I used the fully charged included Sofirn-branded 3000 mAh 18650 batteries. I tested the 7 stepped modes and Turbo. All readings taken at 30 seconds.
| Step | Measured Throw |
|---|---|
| 1 | N/A- too low |
| 2 | 350 cd, 37.41 m |
| 3 | 950 cd, 61.6 m |
| 4 | 3050 cd, 110.45 m |
| 5 | 7950 cd, 178.32 m |
| 6 | 17,175 cd, 262.10 m |
| 7 | 33,025 cd, 363.45 m |
| Turbo (spec: 429m) | 68,000 cd, 521.53 m |
Sofirn doesn’t list any throw figures in the product description, but there is, however, a “429 meters throwing” blurb on the Sofirn website with no candela number to be found. I obviously got way higher than that, so I’ll take it. Honestly, it’s not surprising for this setup since in my preliminary testing the throw distance is very good.
Beamshots
I tested the SP36 Pro against some other high output lights: Astrolux FT02S (4x XHP50.2, 12k Lumens), Wurkkos DL70 (4x XHP50.2, 13k Lumens), Imalent R30C (3x SST70, 8000 Lumens), Astrolux EC03 (3x SST40, 5100 Lumens). I threw in the (unmodified) SRK and it has the blues (literally)/ At around 2300 Lumens (4X XM-L U2 bin) against the modern lights, it struggles.
The fence is about 95 meters away. This is a good illustration of the beam characteristics each multi-emitter setup has. The SP36 Pro has a pretty “messy” beam.
Please note that the following beamshots are mainly intended to showcase the beam pattern and beam quality, rather than overall performance. These images are typically taken directly after activation, and in different seasons or weather conditions, and therefore do not fully represent its overall performance. In few cases the camera settings are even different and therefore not meant for performance comparisons. For accurate performance metrics, such as output, beam distance, and runtimes, you need to look at the performance section of this review.
Disclaimer: I bought this flashlight with my own money. Nobody paid me to review this flashlight, nor have I been holding back on problems or defects.
Final Verdict
Pros
Decent quality and well made
Compact and easy to handle
Great throw and versatile beam
Long runtimes
Easy to disassemble and mod
Anduril UI
Cons
Artifact-ridden beam
Didn’t reach the specified output
Thermal calibration was off
Some sharp edges
No lanyard attachment points
Slow charging
Explanation on star ratings:
1: Avoid: my phone flashlight would be a better choice – 2: Poor: significant defect or issues; almost unusable – 3: Average: some defects or issues; but still usable 4: Good: recommended (minor issues) – 5: Great: highly recommended
4.5 stars: ★★★★⋆
While our star rating provides a reliable indicator, we encourage you to read the full review to make an informed decision based on your own needs and preferences.
Before I wrap up this review, let’s go back in time a bit. Before the Thorfire/Sofirn Q8, if you wanted a high output soda-can style light for cheap, you were stuck with the many iterations of the SkyRay King/Kungs, and although some were fairly decent, they all had issues with poor thermal performance, fake emitters, and rudimentary UI’s. Unless you could mod, knew someone who could, or had disposable income to spend on flashlight stuff, they were really the only budget option. The Q8 wasn’t the first multi emitter light to generate a lot of Lumens in a relatively small host, but it was the first to do it reliably at a very affordable price (often under $50). This kind of performance at that price was unheard of in 2017, so yah, the Q8 was extremely important for the enthusiast market, another Genesis light really, the progenitor of an entire market of affordable high powered lights.
I like the SP36 Pro a lot, and it takes me back a ways because a SkyRay Kung was among the first real flashlights I owned. I swapped out the old XM-Ls for SST40s, added copper and aluminum plates to the screw-in shelf, a big brass screw to hold the reflector, and lots of thermal paste. Lastly, I swapped the old 2 mode FET driver with a Mountain Electronics SRK driver. However, even after all that, it’s still not as nice as an off-the-shelf SP36 Pro. So even if you don’t mod, Sofirn has you covered.
They really did their homework when designing the SP36, built on the experience and feedback from enthusiasts, and it’s continually evolved over the last few years into a highly versatile light. Want more throw? Swap in the XP-L Hi, (or SFT-40s). Need 11,000 Lumens? Reflow some XHP50.2 3 volts. Don’t like Anduril 3-18-2020? if you have the skill, flash another Attiny85 compatible UI on there. Lots of options. It’s well-made, has convenient USB C charging, decent output, nice handling, and it’s pretty versatile to boot, with long runtimes and good thermal management (once calibrated properly).
I can’t really bash the light too hard for the machining/finishing oversights since it keeps the price down, but is worth mentioning. The bigger issues are there’s nowhere to attach a lanyard, the beam has blatant anomalies, and the output with the included batteries is down…a lot. The thermal calibration was off quite a bit also, and a novice user might have trouble managing that (and other Anduril-isms), but overall, the SP36 Pro does and embodies everything we loved about the Q8 in a smaller package. 4.5 stars.
Buy your Sofirn SP36 Pro here
1lumen selects and reviews products personally. We may earn affiliate commissions through our links, which help support our testing.