
Перейти к контенту
Русские электронные инструкции по эксплуатации
Постоянно обновляемый большой каталог документации по эксплуатации и использованию современных устройств и оборудования на русском языке. Бесплатное скачивание файлов.
Поиск:
Главная
♥ В закладки
Просмотр инструкции в pdf
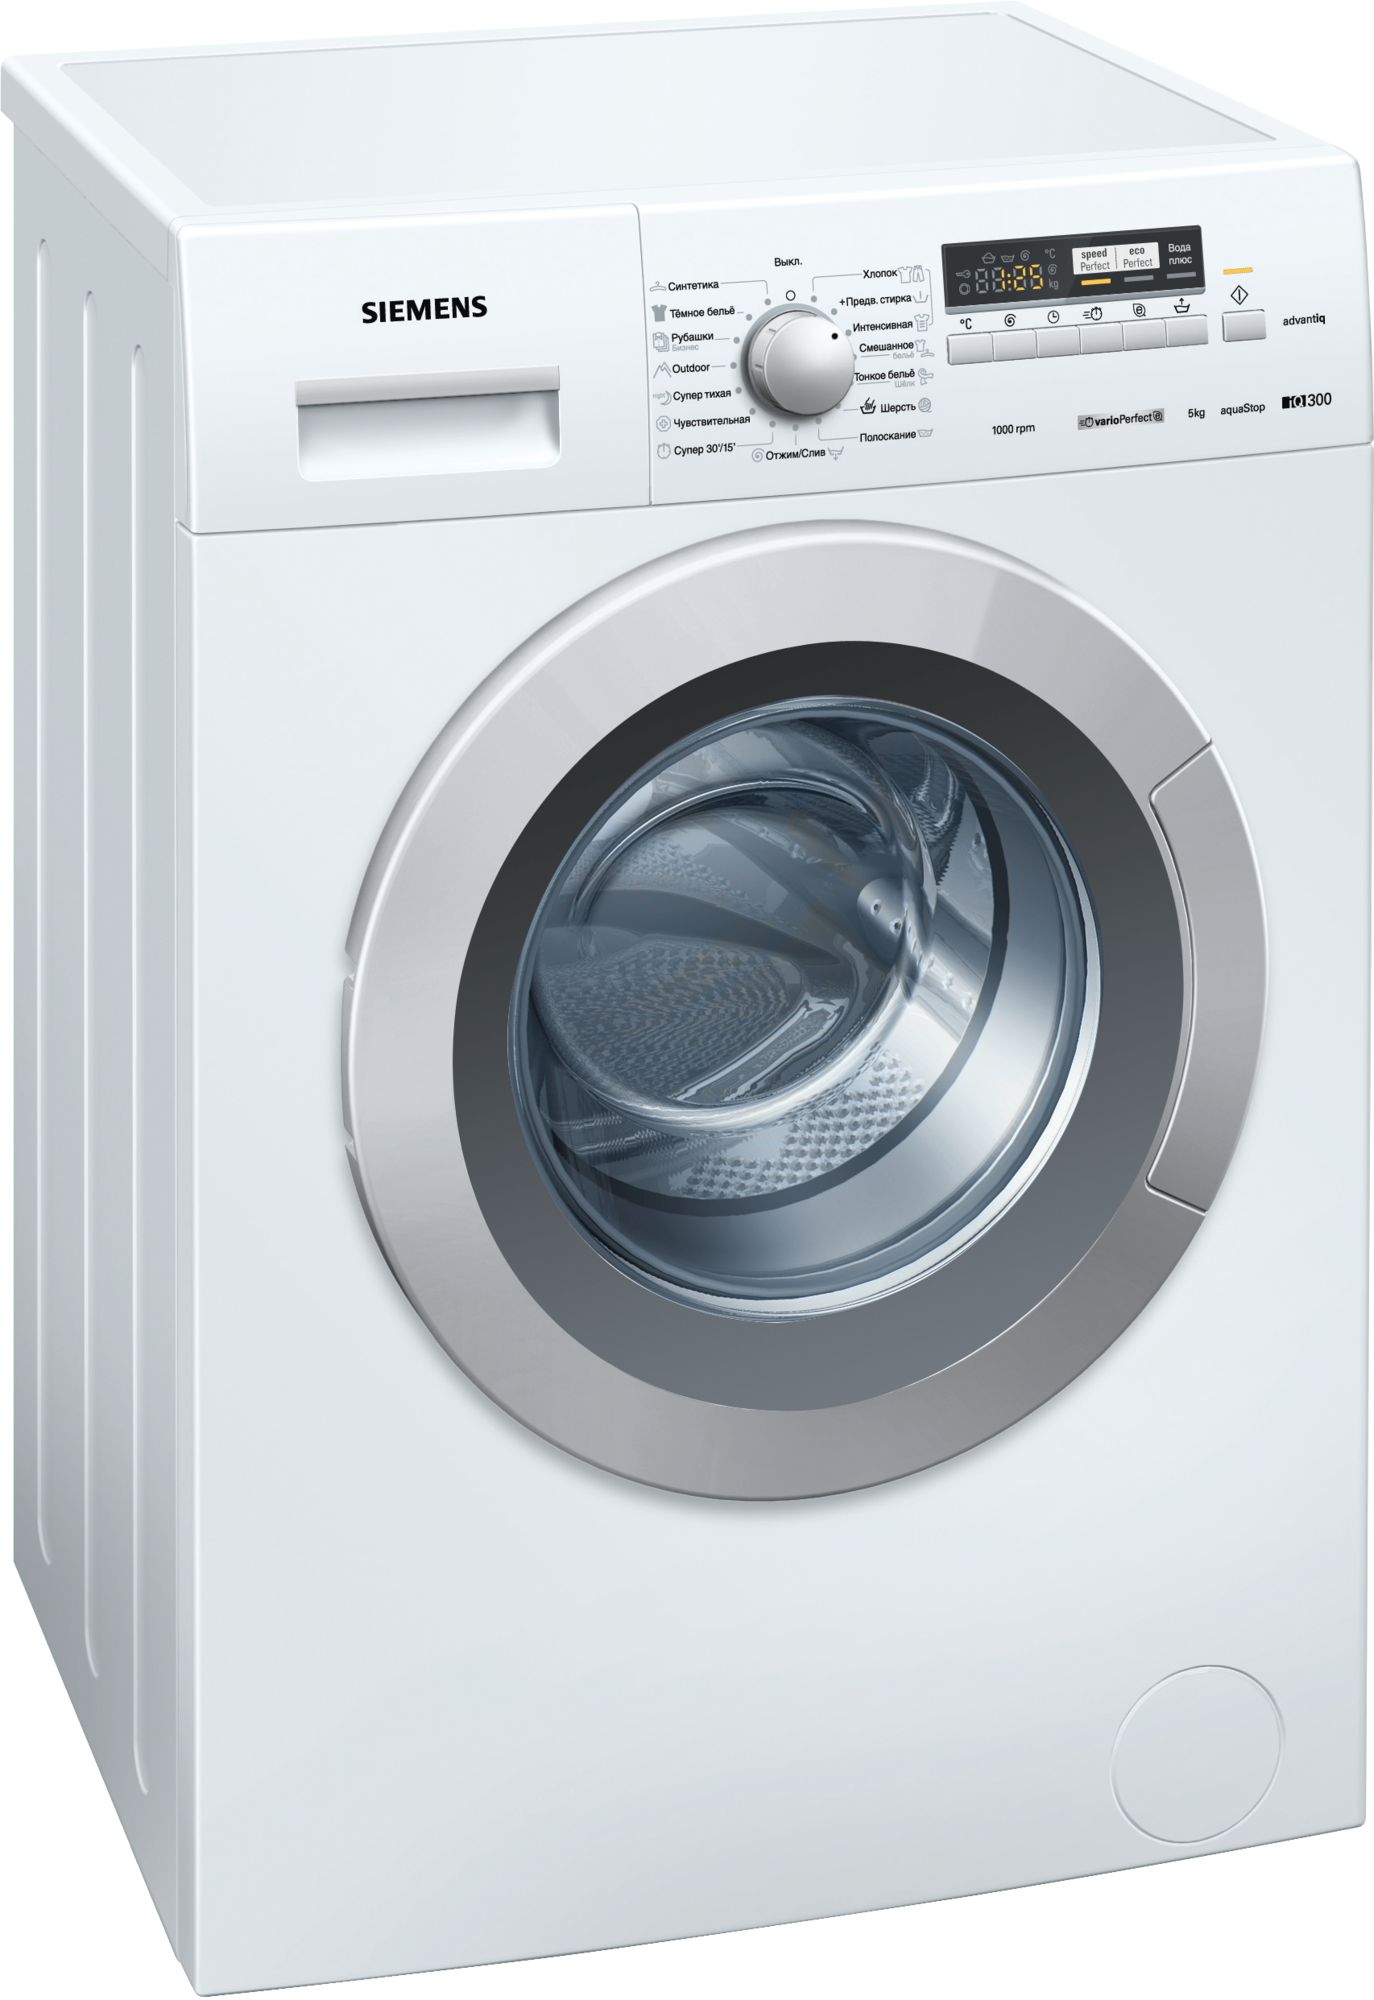
Инструкция по эксплуатации стиральной машины Siemens iQ300 WM12N290OE.
Скачать инструкцию к стиральной машине Siemens iQ300 WM12N290OE (3,08 МБ)
Инструкции по эксплуатации стиральных машин Siemens
« Инструкция к стиральной машине Siemens iQ500 VarioPerfect WS12K240OE
» Инструкция к стиральной машине Jacky’s JW 6W 12 I0
Вам также может быть интересно

Инструкция к стиральной машине Siemens WS10G240OE
Инструкция к стиральной машине Siemens WS 10X47 AOE
Инструкция к сушильной машине Siemens WT 47Y780 OE

Инструкция к холодильнику Siemens KG49NH70RU
Инструкция к стиральной машине Siemens WS 12K240 OE
Инструкция к стиральной машине Siemens WM16W640OE
Инструкция к газовой варочной панели Siemens ER 626PB90R

Инструкция к холодильнику Siemens KG 36VXL20 R
Добавить комментарий
Имя *
Email *
Сайт
Комментарий
Сохранить моё имя, email и адрес сайта в этом браузере для последующих моих комментариев.
- Добавить инструкцию
- Заказать инструкцию
- Политика конфиденциальности
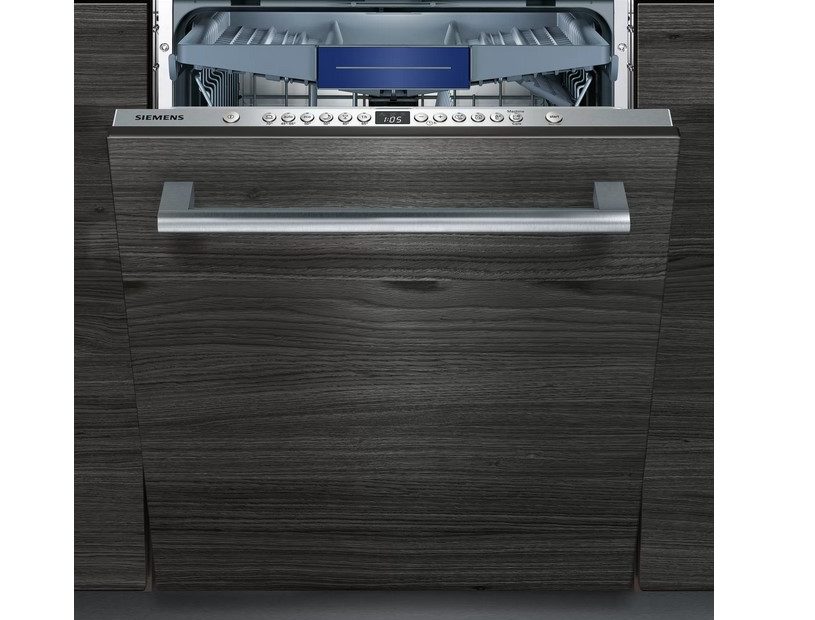
Dishwasher
SR…
User manual
en
Register your product on My Siemens and discover
exclusive services and offers.
siemens-home.bsh-group.com/welcome
The future moving in.
Siemens Home Appliances

en
Table of contents
Safety………………………………………..4
General information……………………..4
Intended use……………………………….4
Restriction on user group……………..4
Safe installation …………………………..5
Safe use …………………………………….6
Damaged appliance …………………….8
Risk to children …………………………..9
Safety systems ………………………….10
Preventing material damage ……..11
Safe installation …………………………11
Safe use …………………………………..11
Childproof lock1……………………….12
Electric childproof lock……………….12
Environmental protection and
saving energy…………………………..12
Disposing of packaging ……………..12
Saving energy……………………………12
AquaSensor1……………………………..13
Installation and connection……….13
Scope of supply ………………………..13
Installing and connecting the ap-
pliance ……………………………………..13
Drainage connection ………………….14
Drinking water connection ………….14
Electrical connection ………………….14
Familiarising yourself with
your appliance………………………….15
Appliance …………………………………15
Controls ……………………………………16
Programmes …………………………….18
Information for test institutes ……….20
Additional functions …………………20
Features…………………………………..21
Top basket ……………………………….22
Bottom basket …………………………..23
Cutlery basket …………………………..24
Cutlery drawer …………………………..24
Etagere …………………………………….25
Folding prongs ………………………….25
Small items holder …………………….26
Knife shelf…………………………………26
Baking sheet spray head ……………26
Basket heights…………………………..27
Before using for the first time ……28
Performing initial start-up ……………28
Water softening system…………….28
Overview of water hardness set-
tings…………………………………………28
Setting water softening system ……29
Special salt ……………………………….29
Switching off water softening
system ……………………………………..30
Regeneration of the water
softening system ……………………….30
Rinse aid system………………………31
Rinse aid ………………………………….31
Setting the amount of rinse aid……31
Switching rinse aid system off …….32
Detergent …………………………………32
Suitable detergents ……………………32
Unsuitable detergents ………………..33
Information on detergents …………..33
Adding detergent ………………………34
Tableware ………………………………..35
Damage to glass and tableware ….35
Arrange tableware ……………………..36
Removing tableware…………………..37
1
Depending on the appliance specifications
2

en
Basic operation ………………………..37
Opening appliance door …………….37
Switching on the appliance …………37
Setting a programme …………………37
Setting additional functions …………37
Setting timer programming …………37
Starting the programme ……………..38
Interrupting programme ……………..38
Terminate programme………………..38
Switching off appliance ………………38
Basic settings…………………………..39
Overview of basic settings ………….39
Changing basic settings……………..41
Cleaning and servicing……………..41
Cleaning the tub ………………………..41
Self-cleaning interior1………………….41
Cleaning products ……………………..42
Tips on appliance care……………….42
Machine Care 1………………………42
Filter system ……………………………..43
Cleaning spray arms ………………….44
Troubleshooting……………………….45
Appliance safety………………………..45
Error code / Fault display / Sig-
nal……………………………………………47
Washing results…………………………49
Information on display panel……….55
Malfunctions ……………………………..56
Mechanical damage…………………..57
Noise ……………………………………….57
Clean wastewater pump……………..58
Customer Service……………………..59
Product number (E-Nr.) and pro-
duction number (FD) ………………….60
AQUA-STOP guarantee1……………..60
Technical specifications……………60
Transportation, storage and
disposal …………………………………..58
Removing the appliance …………….58
Protect appliance from frost………..59
Transporting the appliance …………59
Disposing of old appliance …………59
1
Depending on the appliance specifications
3

en Safety
Safety
Please read the safety information to ensure that you use the appliance safely.
General information
¡ Read this instruction manual carefully. Only this will ensure you
use the appliance safely and efficiently.
¡ Keep the instruction manual and the product information safe
for future reference or for the next owner.
¡ Check the appliance after unpacking it. Do not connect the ap-
pliance if it has been damaged in transit.
Intended use
Read the information on intended use to ensure that you use the
appliance correctly and safely.
Only use this appliance:
¡ For cleaning household tableware.
¡ In private households and in enclosed spaces in a domestic en-
vironment.
¡ Up to an altitude of max. 4000m above sea level.
Restriction on user group
Avoid risks to children and vulnerable persons.
This appliance may be used by children aged 8 or over and by
people who have reduced physical, sensory or mental abilities or
inadequate experience and/or knowledge, provided that they are
supervised or have been instructed on how to use the appliance
safely and have understood the resulting dangers.
Children must not play with the appliance.
Cleaning and user maintenance must not be performed by children unless they are being supervised.
Keep children under the age of 8 years away from the appliance
and power cable.
4

Safety en
Safe installation
Follow these safety instructions when installing the appliance.
WARNING‒Risk of injury!
Improper installation may cause injury.
▶
When installing and connecting the appliance, follow the instructions in the manual and installation instructions.
WARNING‒Risk of electric shock!
¡ Improper installation is dangerous.
▶
Connect and operate the appliance only in accordance with
the specifications on the rating plate.
▶
Connect the appliance to a power supply with alternating
current only via a properly installed socket with earthing.
▶
The protective conductor system of the domestic electrical
installation must be properly installed.
▶
Never equip the appliance with an external switching
device, e.g. a timer or remote control.
▶
When the appliance is installed, the mains plug of the
power cord must be freely accessible. If free access is not
possible, an all-pole isolating switch must be installed in the
permanent electrical installation according to the installation
regulations.
▶
When installing the appliance, check that the power cable is
not trapped or damaged.
¡ Cutting through the supply hose or immersing the Aqua-Stop
valve in water is dangerous.
▶
Never immerse the plastic housing in water. The plastic
housing on the supply hose contains an electric valve.
▶
Never cut through the supply hose. The supply hose contains electric power cables.
WARNING‒Risk of fire!
It is dangerous to use an extended power cord and non-approved adapters.
▶
Do not use extension cables or multiple socket strips.
▶
If the power cord is too short, contact Customer Service.
5

en Safety
▶
Only use adapters approved by the manufacturer.
WARNING‒Risk of injury!
Hinges move when opening and closing the appliance door
and can cause injury.
▶
If built-under or integrable appliances are not in a cavity so
that one side is accessible, the hinge area must be covered
at the side. Covers are available from Customer Service or
specialist outlets.
WARNING‒Risk of tipping!
Improper installation may cause the appliance to tip up.
▶
Only install built-under or integrable appliances under a
continuous worktop that is securely connected to adjacent
cabinets.
WARNING‒Risk of burns!
If the appliance is not installed properly, this may result in
burns.
▶
With free-standing appliances, ensure that they are installed
with the back panel against a wall.
Safe use
WARNING‒Risk of serious harm to health!
Failure to comply with safety instructions and directions for
use on packagings of detergent and rinse aid products may
cause serious harm to health.
▶
Follow the safety instructions and directions for use on the
packagings of detergent and rinse aid products.
WARNING‒Risk of explosion!
¡ Adding solvents to the interior of the appliance may cause ex-
plosions.
▶
Never add solvents to the interior of the appliance.
6

Safety en
¡ Highly caustic alkaline or highly acidic cleaning agents in con-
junction with aluminium parts in the interior of the appliance
may cause explosions.
▶
Never use highly caustic alkaline or highly acidic cleaning
agents, in particular commercial or industrial products, in
conjunction with aluminium parts (e.g. grease filters of extractor hoods or aluminium pans), e.g. for the Machine Care
programme.
WARNING‒Risk of injury!
¡ Leaving the appliance door open may result in injury.
▶
Only open the appliance door to load or unload tableware
in order to prevent accidents, e.g. through tripping.
▶
Do not sit or stand on the appliance door when open.
¡ Knives and utensils with sharp points can cause injuries.
▶
Arrange knives and utensils with sharp points in the cutlery
basket with the points downwards, on the knife shelf or in
the cutlery drawer.
WARNING‒Risk of scalding!
If you open the appliance door while the programme is running, hot water may splash out of the appliance.
▶
Open the appliance door carefully if the programme is still
running.
WARNING‒Risk of tipping!
Overfilling the Baskets may cause the appliance to tip up.
▶
Never overfill the Baskets with free-standing appliances.
WARNING‒Risk of electric shock!
¡ An ingress of moisture can cause an electric shock.
▶
Only use the appliance in enclosed spaces.
▶
Never expose the appliance to intense heat or humidity.
▶
Do not use steam- or high-pressure cleaners to clean the
appliance.
7

en Safety
¡ If the insulation of the power cord is damaged, this is danger-
ous.
▶
Never let the power cord come into contact with hot appliance parts or heat sources.
▶
Never let the power cord come into contact with sharp
points or edges.
▶
Never kink, crush or modify the power cord.
Damaged appliance
Follow the safety instructions if the appliance is damaged.
WARNING‒Risk of electric shock!
¡ If the appliance or the power cord is damaged, this is danger-
ous.
▶
Never operate a damaged appliance.
▶
Never operate an appliance with a cracked or fractured surface.
▶
Never pull on the power cord to unplug the appliance. Always unplug the appliance at the mains.
▶
If the appliance or the power cord is damaged, immediately
unplug the power cord or switch off the fuse in the fuse box
and turn off the water tap.
▶
«Call Customer Service.» →Page59
▶
Repairs to the appliance should only be carried out by
trained specialist staff.
¡ Incorrect repairs are dangerous.
▶
Repairs to the appliance should only be carried out by
trained specialist staff.
▶
Only use genuine spare parts when repairing the appliance.
▶
If the power cord of this appliance is damaged, it must be
replaced with a special connection cable, which is available
from the manufacturer or his Customer Service.
8

Safety en
Risk to children
Follow the safety instructions if there are children in your home.
WARNING‒Risk of suffocation!
¡ Children may put packaging material over their heads or wrap
themselves up in it and suffocate.
▶
Keep packaging material away from children.
▶
Do not let children play with packaging material.
¡ Children may breathe in or swallow small parts, causing them
to suffocate.
▶
Keep small parts away from children.
▶
Do not let children play with small parts.
WARNING‒Risk of harm to health!
Children can lock themselves in the appliance, thereby putting
their lives at risk.
▶
With redundant appliances, unplug the power cord. Then
cut through the cord and damage the lock on the appliance
door beyond repair so that the appliance door will no longer
close.
WARNING‒Risk of crushing!
With higher-level appliances, children can become crushed
between the appliance door and cabinet doors underneath.
▶
Keep an eye on children when opening and closing the appliance door.
WARNING‒Risk of chemical burns!
Rinse aid and detergent may cause chemical burns to the
mouth, throat and eyes.
▶
Keep children away from detergent and rinse aid products.
▶
Keep children away from the appliance when open. The water in the interior of the dishwasher is not drinking water. It
may contain residues of detergents and rinse aid.
9

en Safety
WARNING‒Risk of injury!
Children may get their fingers caught in the slots of the tablet
collecting tray and injure themselves.
▶
Keep children away from the appliance when open.
WARNING‒Risk of suffocation!
Children may become trapped in the appliance and suffocate.
▶
Use the childproof lock if fitted.
▶
Never let children play with or operate the appliance.
Safety systems
Protect children from possible hazards resulting from the appliance.
Depending on the features of the model, the appliance comes
with a
→«Childproof lock», Page12.
10

Preventing material damage en
Preventing material damage
Preventing material damage
Preventing material damage
Safe installation
Follow the instructions when installing
the appliance.
ATTENTION!
¡ Improper installation of the appli-
ance may cause damage.
▶
If the dishwasher is installed
above or below other domestic
appliances, follow the information on installation in combination with a dishwasher in the installation instructions for the individual appliances.
▶
If there is no information or if the
installation instructions do not include the relevant information,
contact the manufacturer of
these appliances to check that
the dishwasher can be installed
above or below these appliances.
▶
If no information is available
from the manufacturer, the dishwasher should not be installed
above or below such appliances.
▶
To ensure the safe operation of
all domestic appliances, continue following the installation instructions for the dishwasher.
▶
Do not install the dishwasher under a hob.
▶
Do not install the dishwasher
near heat sources, e.g. radiators, heat storage tanks, ovens
or other appliances that generate heat.
¡ Modified or damaged water hoses
may result in material damage and
damage to the appliance.
▶
Never kink, crush, modify or cut
through water hoses.
▶
Only use the water hoses supplied with the appliance or genuine spare hoses.
▶
Never re-use water hoses that
have been used before.
¡ If the water pressure is too high or
too low, this may impair functioning of the appliance.
▶
Make sure that the water pressure in the water supply system
is min. 50kPa (0,5bar) and
max. 1000kPa (10bar).
▶
If the water pressure exceeds
the maximum value specified, a
pressure-reducing valve must be
installed between the drinking
water connection and the hose
set of the appliance.
Safe use
Follow the instructions when using
the appliance.
ATTENTION!
¡ Escaping water vapour can dam-
age fitted units.
▶
When the programme ends,
leave the appliance to cool
down for a while before opening
the door.
¡ Special salt can damage the tub
due to corrosion.
▶
To make sure that any special
salt that escapes is washed out
of the tub, add the special salt
to the dispenser for special salt
immediately before the programme starts.
¡ Detergent may damage the water
softening system.
▶
Only fill the dispenser of the water softening system with special
dishwasher salt.
¡ Unsuitable cleaning agents may
damage the appliance.
▶
Do not use a steam cleaner.
11

en Childproof lock
▶
So as not to scratch the finish
on the appliance, do not use
sponges with a rough surface or
abrasive cleaning agents.
▶
To prevent corrosion, do not use
sponge cloths on dishwashers
with a stainless steel front or
rinse such cloths thoroughly
several times before using them
for the first time.
Childproof lock
Childproof lock
Childproof lock
The childproof lock lets you protect
1
children from possible hazards resulting from the appliance.
Depending on the features of the appliance model, the appliance comes
with an electric childproof lock.
Electric childproof lock
The electric childproof lock makes it
more difficult to open the appliance
door.
You can activate or deactivate the
electric childproof lock in the «Basic
settings» →Page39.
WARNING
Risk of suffocation!
Children may become trapped in the
appliance and thus suffocate.
▶
Activate the electric childproof lock
and close the appliance door.
→«Opening appliance door»,
Page37
Environmental protection and saving energy
Environmental protection
and saving energy
Environmental protection and saving energy
Help protect the environment by using your appliance in a way that conserves resources and by disposing of
reusable materials properly.
Disposing of packaging
The packaging materials are environmentally compatible and can be recycled.
▶
Sort the individual components by
type and dispose of them separately.
Information about current disposal
methods are available from your
specialist dealer or local authority.
Saving energy
If you follow these instructions, your
appliance will use less electricity and
less water.
Use the Eco 50° programme.
The Eco 50° programme is energy efficient and environmentally
friendly.
→«Programmes», Page18
If you do not have much tableware to
wash, use the additional Half Load
function.
1
The programme will adjust to a
lower load and consumption will
be reduced.
→«Additional functions», Page20
1
Depending on the appliance specifications
12

AquaSensor
1
The AquaSensor is an optical measuring device (light barrier) which
measures the turbidity of the washing
water. You can save water with the
AquaSensor.
Use of the AquaSensor depends on
the programme. If the soiling level is
low, the washing water is used in the
next wash cycle, so reducing water
consumption by 3-6 litres. If the soiling level is is greater, the washing
water is drained off and replaced with
fresh water. In the automatic programmes the temperature and running time are additionally adjusted to
the level of soiling.
Installation and connection
Installation and connection
Installation and connection
Scope of supply
After unpacking all parts, check for
any damage in transit and completeness of the delivery.
If you have any complaints, contact
the dealer who sold you the appliance or our Customer Service.
Note:The appliance was tested at
the factory to check it is in working
order. It is possible that water has left
marks on the appliance. These
marks will disappear after the first
wash cycle.
The delivery consists of the following:
¡ Dishwasher
¡ Instruction manual
¡ Installation instructions
¡ Warranty
¡ Installation material
¡ Steam guard plate
1
1
Installation and connection en
¡ Rubber apron
¡ Mains cable
¡ Quick reference guide
1
1
Installing and connecting the
appliance
You can position your built-under or
integrable appliance in a fitted kitchen between wooden and plastic
walls. If you subsequently install your
dishwasher as a free-standing appliance, you must stop it from tipping
over, e.g. by screwing it to the wall or
installing it under a continuous worktop that is securely connected to adjacent cabinets.
1. «Follow the safety instructions.»
→Page4
2. «Follow the instructions for elec-
trical connection.» →Page14
3. Check the «Scope of supply»
→Page13 and the condition of
the appliance.
4. Consult the installation instructions
for the installation dimensions required.
5. Make the appliance level using the
height-adjustable feet.
Make sure that the appliance is
standing on the floor securely.
6. «Install the drainage connection.»
→Page14
7. «Install the drinking water connec-
tion.» →Page14
8. Connect the appliance to the
power supply.
1
Depending on the appliance specifications
13

en Installation and connection
Drainage connection
Connect your appliance to drainage
connection so dirty water is discharged via the wash cycle.
Installing the drainage connection
1. Consult the installation instructions
supplied for the steps required
here.
2. Connect the wastewater hose to
the outlet connection of the siphon
using the enclosed parts.
3. When doing so, check that the
wastewater hose is not kinked,
crushed or twisted.
4. Also check that there is no cover
in the drainage system preventing
the wastewater from being discharged.
Drinking water connection
Connect your appliance to a drinking
water connection.
Installing the drinking water
connection
Note
¡ If you are replacing the appliance,
you must use a new water supply
hose.
1. Consult the installation instructions
supplied for the steps required
here.
2. Connect the appliance to the drink-
ing water connection using the enclosed parts.
Observe the «Technical data»
→Page60.
3. When doing so, check that the
drinking water connection is not
kinked, crushed or twisted.
Electrical connection
Connect your appliance to the power
supply.
Connecting the appliance to the
electricity supply
Notes
¡ Follow the «Safety instructions»
→Page5.
¡ Connect the appliance to alternat-
ing current only, in the range of
220 — 240V and 50Hz or 60Hz.
¡ Please note that the water safety
system is only functional if there is
a power supply.
1. Insert the non-heating appliance
plug of the power cable into the
appliance.
2. Insert the mains plug of the appli-
ance into a nearby socket.
The connection data for the appli-
ance can be found on the rating
plate.
3. Check that the mains plug is inser-
ted properly.
14
Familiarising yourself with your appliance en
1
2
3
5
6
7
8
9
10
11
12
13
14
4
Familiarising yourself with your appliance
Familiarising yourself with your appliance
Familiarising yourself with your appliance
Appliance
You can find an overview of the parts of your appliance here.
Rating plate Rating plate with «E number and FD number»
1
Depending on the appliance specifications
→Page60.
The data you need for «Customer Service»
→Page59.
15
en Familiarising yourself with your appliance
Detergent dispenser «Detergent» →Page32 is added to the detergent
dispenser.
Bottom basket «Bottom basket» →Page23
Filter system «Filter system» →Page43
Dispenser for special salt Add special salt for the «Water softening system»
→Page28 to the dispenser for special salt.
Tablet collecting tray During the wash cycle tablets automatically fall out of
the detergent dispenser into the tablet collecting tray
where they can fully dissolve.
Top basket «Top basket» →Page22
Cutlery drawer
EmotionLight
Etagere «Etagere» →Page25
Upper spray arms The upper spray arms wash the tableware in the top
Lower spray arm The lower spray arm washes the tableware in the bot-
Cutlery basket
1
1
1
«Cutlery drawer» →Page24
Interior lighting of the appliance.
→«Overview of basic settings», Page39
basket.
If the tableware has not been washed properly, clean
the spray arms.
→«Cleaning spray arms», Page44
tom basket.
If the tableware has not been washed properly, clean
the spray arms.
→«Cleaning spray arms», Page44
«Cutlery basket» →Page24
Dispenser for rinse aid Add rinse aid for the «Rinse aid system» →Page31
1
Depending on the appliance specifications
to the dispenser for rinse aid.
Controls
The controls are used to configure all functions of your appliance and to obtain
information about the operating status.
With some buttons you can perform different functions.
16
Familiarising yourself with your appliance en
ON/OFF button «Switching on the appliance» →Page37
«Switching off the appliance» →Page38
Programme buttons «Programmes» →Page18
Water supply display «Display for water supply lights up» →Page48
Special salt refill indicator «Water softening system» →Page28
Rinse aid refill indicator «Rinse aid system» →Page31
Programme buttons and additional
functions
Start button and reset button «Starting the programme» →Page38
Timer programming «Setting timer programming» →Page37
Door opener
Display The display shows information about the remain-
1
Depending on the appliance specifications
1
«Programmes» →Page18
«Additional functions» →Page20
«Terminating the programme» →Page38
«Opening the appliance door» →Page37
ing running time or the basic settings. You can
change the basic settings via the display and the
setting buttons.
→«Changing basic settings», Page41
17
en Programmes
Programmes
Programmes
Programmes
You can find an overview of the programmes that can be selected here.
Different programmes, which can be
found on the control panel of your
appliance, are available depending
on the appliance configuration.
The running time may vary depending on the programme selected. The
running time depends on the water
temperature, the quantity of dishes,
the level of soiling and the «Additional
function» →Page20 selected. The
running time will change if the rinse
aid system is switched off or rinse
aid needs to be added.
The consumption values can be
found in the quick reference guide.
The consumption values relate to
normal conditions and a water hardness of 16-20°E. Different influencing factors such as water temperature or pipe pressure may result in
deviations.
Programme Use Programme se-
quence
Intensive 70°
Tableware:
¡ Washing pots and
pans, non-fragile
tableware and cutlery.
Level of soiling:
Intensive:
¡ PreRinse
¡ Cleaning 70°C
¡ Intermediate rinse
¡ Rinsing 69°C
¡ Drying
¡ Removing stubborn
burned or dried-on
food remnants containing starch and
protein.
When using powder detergent, you can also
apply a little to the inside of the appliance
door.
Auto 45-65°
Tableware:
¡ Cleaning mixed
tableware and cutlery.
Level of soiling:
Sensor-controlled:
¡ Optimised by
sensors depending
on the soiling of the
washing water.
¡ Removing common
household food remnants lightly driedon.
Additional functions
All
→«Additional functions», Page20
All
→«Additional functions», Page20
18
Programmes en
Programme Use Programme se-
quence
Eco 50°
Silence 50
Tableware:
¡ Cleaning mixed
tableware and cut-
lery.
Level of soiling:
¡ Removing common
household food rem-
nants lightly dried-
on.
Tableware:
¡ Cleaning mixed
tableware and cut-
lery.
Level of soiling:
¡ Removing common
Most economical programme:
¡ Pre-Rinse
¡ Cleaning 50°C
¡ Intermediate rinse
¡ Rinsing 60°C
¡ Drying
¡ Automatic opening
of appliance door
Reduced noise:
¡ PreRinse
¡ Cleaning 50°C
¡ Intermediate rinse
¡ Rinsing 65°C
¡ Drying
household food rem-
nants lightly dried-
on.
Glass 40°
Tableware:
¡ Cleaning delicate
tableware, cutlery,
temperature-sensit-
ive plastics, glasses
and stemware in the
Particularly gentle:
¡ PreRinse
¡ Cleaning 40°C
¡ Intermediate rinse
¡ Rinsing 60°C
¡ Drying
stemware basket.
Level of soiling:
¡ Removing lightly ad-
hering fresh food
remnants.
Quick 65°
Tableware:
¡ Cleaning mixed
tableware and cut-
lery.
Level of soiling:
Time-optimised:
¡ Cleaning 65°C
¡ Intermediate rinse
¡ Rinsing 70°C
¡ Drying
¡ Removing common
household food rem-
nants lightly dried-
on.
Additional functions
All
→«Additional functions», Page20
IntensiveZone
Half Load
HygienePlus
ExtraDry
Shine & Dry
→«Additional functions», Page20
IntensiveZone
VarioSpeedPlus
Half Load
ExtraDry
Shine & Dry
→«Additional functions», Page20
ExtraDry
Shine & Dry
→«Additional functions», Page20
19

en Additional functions
Programme Use Programme se-
quence
1 hr Programme
Tableware:
¡ Cleaning mixed
tableware and cut-
lery.
Level of soiling:
Time-optimised:
¡ Cleaning 65°C
¡ Intermediate rinse
¡ Rinsing 70°C
¡ Drying
¡ Removing common
household food rem-
nants lightly dried-
on.
Quick 45°
Tableware:
¡ Cleaning delicate
tableware, cutlery,
temperature-sensit-
Time-optimised:
¡ Cleaning 45°C
¡ Intermediate rinse
¡ Rinsing 55°C
ive plastics and
glasses.
Level of soiling:
¡ Removing lightly ad-
hering fresh food
remnants.
Tableware:
¡ Cleaning all types of
Cold rinse suitable:
¡ Pre-Rinse
tableware.
PreRinse
Level of soiling:
¡ Cold rinsing, inter-
mediate cleaning.
— Machine Care 70°C None
Machine Care
Additional functions
ExtraDry
Shine & Dry
→«Additional functions», Page20
ExtraDry
Shine & Dry
→«Additional functions», Page20
None
Information for test institutes
Test institutes are provided with information for comparability tests, e.g.
according to EN60436.
These are the conditions for conducting the tests, however they are not
the results or consumption values.
E-mail enquiries to: dishwasher@testappliances.com
The product number (E-Nr.) and the
production number (FD) are required
here. They can be found on the rating plate on the appliance door.
20
Additional functions
Additional functions
Additional functions
You can find an overview of the additional functions that can be selected
here. Different additional functions,
which can be found on the control
panel of your appliance, are available
depending on the appliance configuration.
Additional function
VarioSpeedPlus
Use
¡ The running time is
shortened by 20% to
66% depending on the
washing programme.
Loading…
Siemens IQ300 SN636X00MR
Встраиваемая посудомоечная машина 60 cm SN636X00MR Загрузить Руководство Пользователя: Siemens IQ300 SN636X00MR в формате PDF: SN636X00MR-RU Полноразмерная встраиваемая посудомоечная машина с пятью уровнями распределения воды обеспечивает превосходный результат мытья. VarioSpeed Plus: новая программа, ускоряющая мытье… Siemens IQ300 SN636X00MR
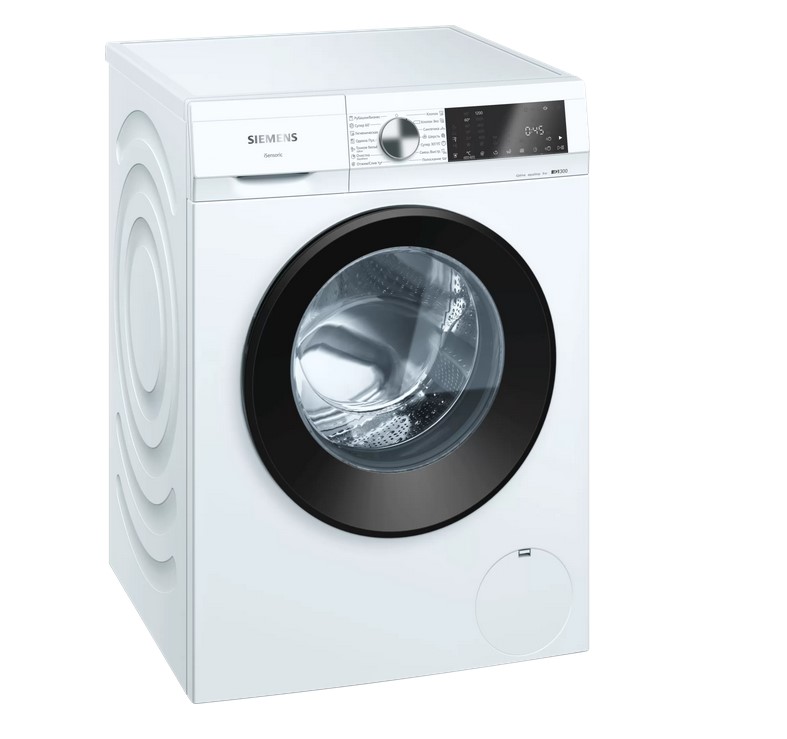
Siemens WG42A2X4OE IQ300
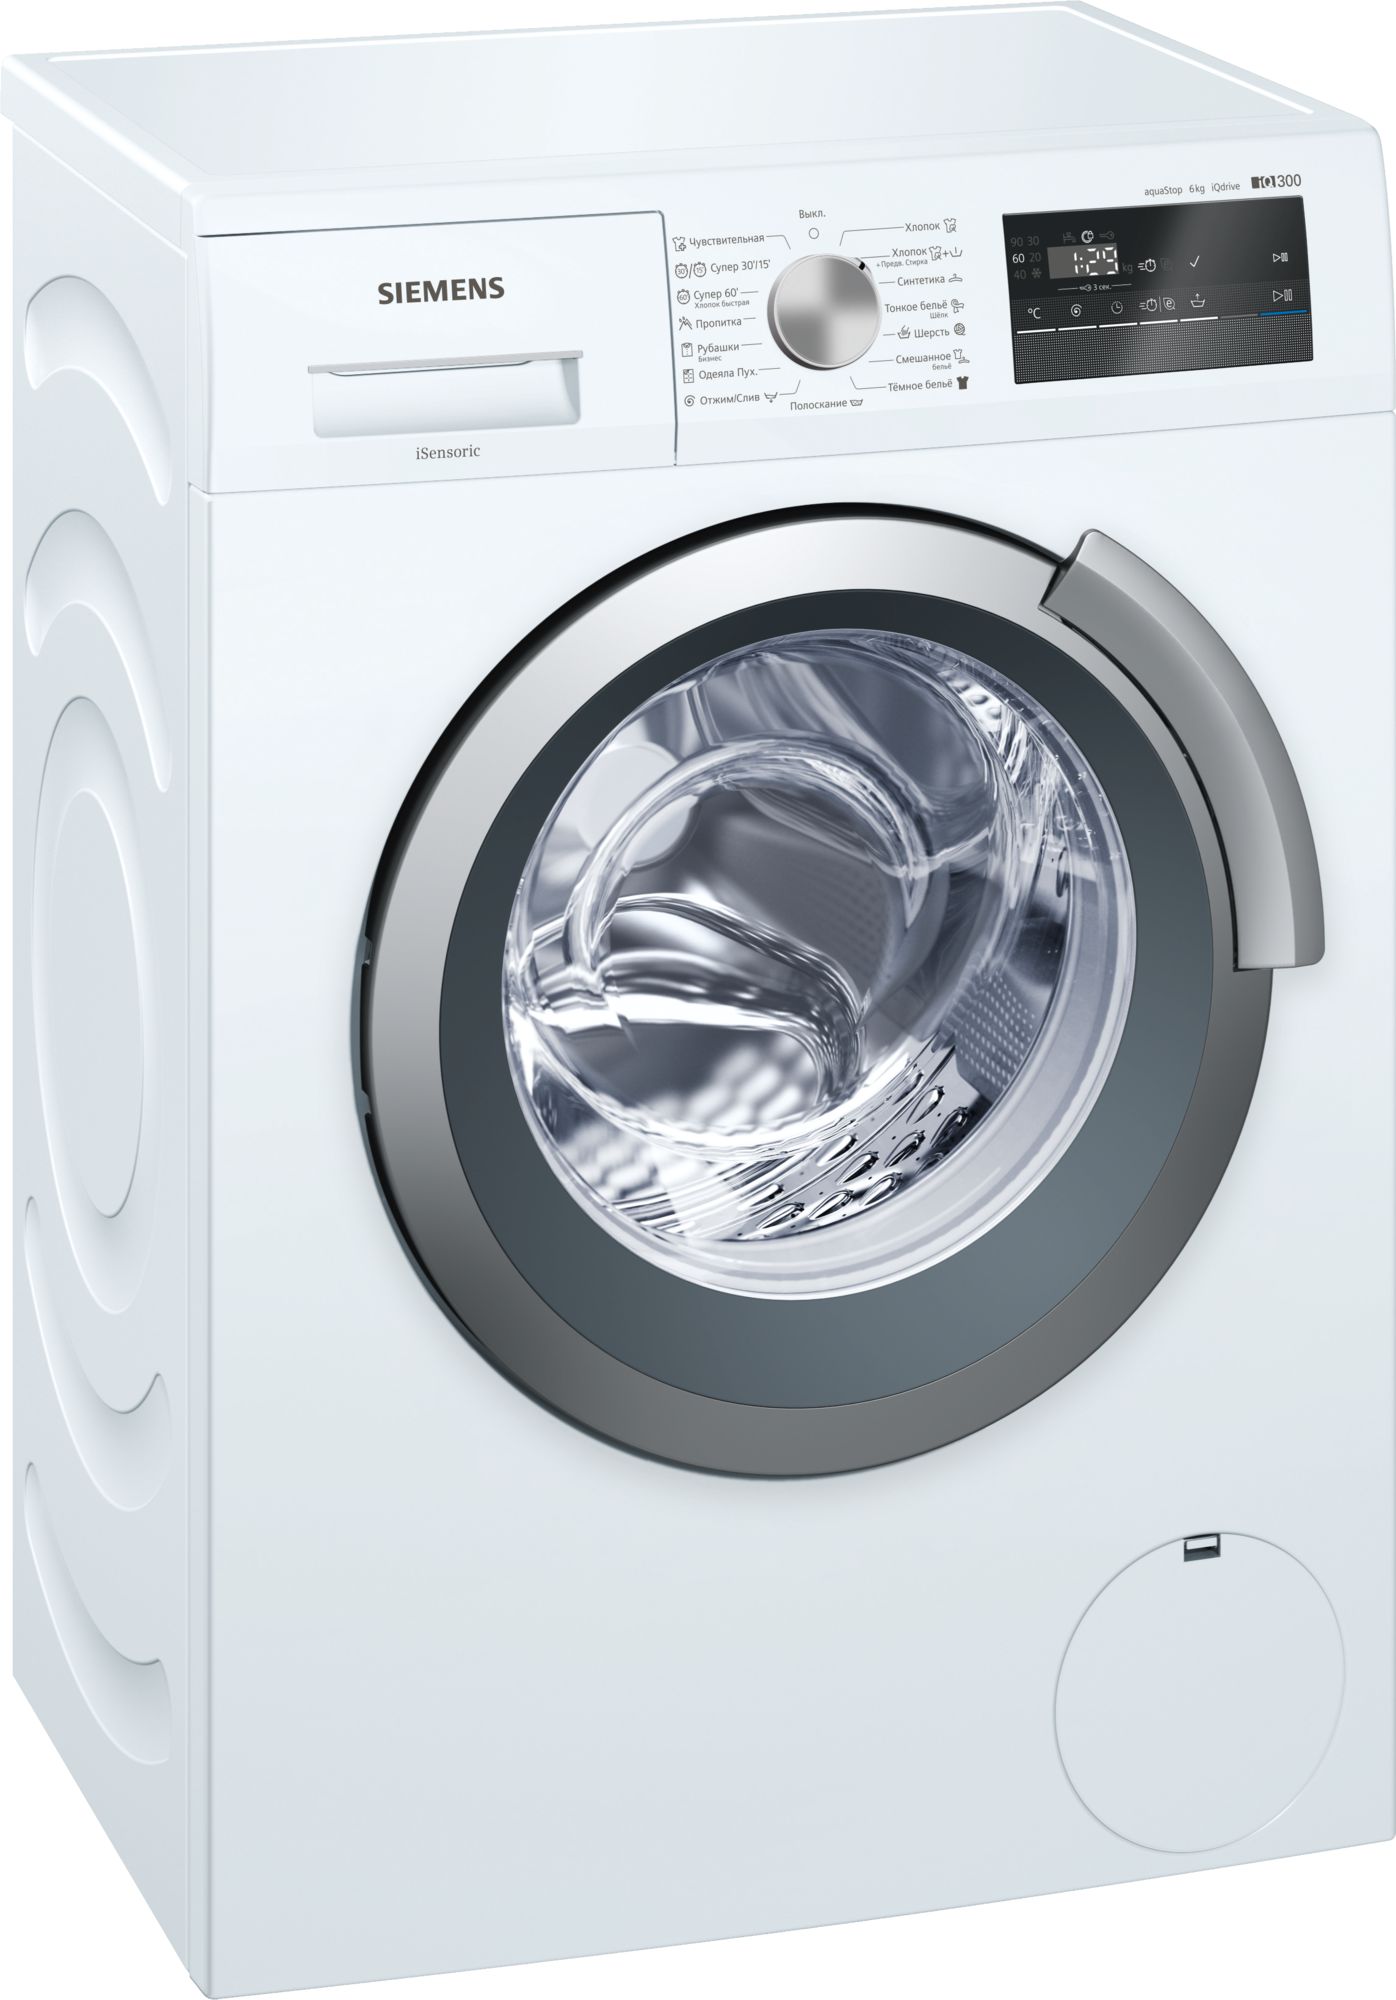
iQ300 Стиральная машина с фронтальной загрузкой 9 kg 1200 об/мин Загрузить Руководство Пользователя: Siemens WG42A2X4OE IQ300 в формате PDF: WG42A2X4OE_RU Новая стиральная машина с технологией iSensoric и умным двигателем iQdrive. Система aquaStop: гарантированная защита от… Siemens WG42A2X4OE IQ300
Cтиральная машина Siemens WS10G240OE
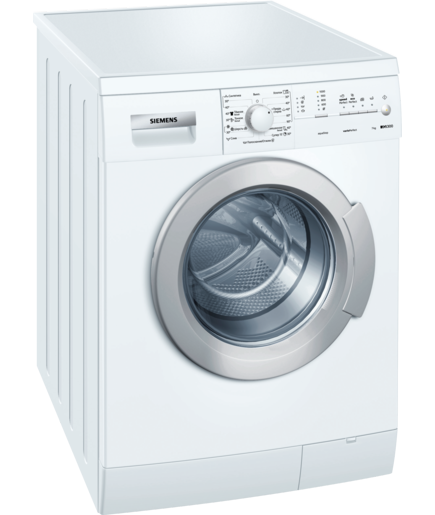
iQ300 Узкая стиральная машина 5 kg 1000 об/мин Стиральная машина с программой «Outdoor»: ваша одежда для активного отдыха будет чистой и сохранит свои специальные свойства. Загрузить Руководство Пользователя: Siemens WS10G240OE в формате PDF: WS10G240OE_RU Уход… Cтиральная машина Siemens WS10G240OE
Стиральная машина Siemens WS12L142OE
iQ300 Стиральная машина Загрузить Руководство Пользователя: Siemens WS12L142OE в формате PDF: WS12L142OE Стиральная машина с бесщеточным мотором нового поколения iQdrive: бережная стирка дорогих вам вещей в течение многих лет. Бережная стирка благодаря бесщеточному… Стиральная машина Siemens WS12L142OE
Инструкция по эксплуатации Siemens WM10E145OE
Стиральная машина iQ300 — Siemens WM10E145OE Загрузить Руководство Пользователя Siemens WM10E145OE в формате PDF: WM10E145OE Стиральная машина iQ300 с функцией varioPerfect™: сокращает время выполнения программы при сохранении высокого качества стирки. Система waterPerfect обеспечивает наивысший класс… Инструкция по эксплуатации Siemens WM10E145OE
Стиральная машина Siemens WM12E444OE — Руководство пользователя
Руководство пользователя Siemens WM12E444OE Загрузить Руководство: Стиральная машина Siemens WM12E444OE в формате PDF:WM12E444OE-RU iQ300 varioPerfect Класс стирки A / Класс отжима B На 20% (0,15 кВтч/кг) экономичнее класса «А» (0,19 кВтч/кг) Параметры потребления: 1.05 кВт/ч/47 л… Стиральная машина Siemens WM12E444OE — Руководство пользователя
View the manual for the Siemens iQ300 WM14N0G1 here, for free. This manual comes under the category washing machines and has been rated by 17 people with an average of a 8.2.
This manual is available in the following languages: English. Do you have a question about the Siemens iQ300 WM14N0G1 or do you need help?
Ask your question here
Siemens iQ300 WM14N0G1 specifications
Below you will find the product specifications and the manual specifications of the Siemens iQ300 WM14N0G1.
The Siemens iQ300 WM14N0G1 washing machine is an energy-efficient product with an Energy Efficiency Class rating of A+++. With an annual energy consumption of 157 kWh and an annual water consumption of 9020 L, it offers efficient performance while minimizing resource usage. The washing machine has a rated capacity of 7 kg, making it suitable for average-sized laundry loads.
In terms of noise levels, the spin cycle produces a noise level of 74 dB, while the wash cycle operates at 53 dB. This ensures a relatively quiet operation during the washing process. The appliance also features a delayed start timer, allowing users to set a specific time for the machine to start automatically.
The energy consumption per wash cycle is 0.84 kWh, providing users with an estimate of the energy required for each washing cycle. The half-load option is available, providing flexibility for users with smaller laundry loads. Additionally, users can adjust the spin speed and temperature settings according to their specific requirements.
The washing machine includes an AquaStop function, which is designed to prevent water leaks and provide added protection against potential water damage. It also features a viewing window, allowing users to monitor the progress of their laundry without opening the machine.
Overall, the Siemens iQ300 WM14N0G1 washing machine offers energy-efficient performance and convenient features such as a delayed start timer, adjustable spin speed and temperature settings, as well as an AquaStop function for added protection. Its reliable construction and durability guarantee long-lasting usage.
Annual energy consumption washing
157 kWh
Remaining time indication
Yes
General
| Brand | Siemens |
| Model | iQ300 WM14N0G1 | WM14N0G1 |
| Product | washing machine |
| EAN | 4242003802304 |
| Language | English |
| Filetype | User manual (PDF) |
Power
| A+++ | |
| Energy consumption washing per cycle | 0.84 kWh |
| Power consumption (off) | 0.12 W |
| Power consumption (standby) | 0.5 W |
| Connected load | 2300 W |
| Current | 10 A |
| AC input voltage | 220 — 240 V |
| AC input frequency | 50 Hz |
Other features
| Annual energy consumption washing | 157 kWh |
| Annual water consumption washing | 9020 L |
| Washing class | A |
Performance
| Drum capacity | 7 kg |
| Spin-drying class | B |
| Noise level (spin) | 74 dB |
| Noise level (wash) | 53 dB |
| Delayed start timer | Yes |
| Number of washing programs | — |
| Half-load | Yes |
| Adjustable spin speed | Yes |
| AquaStop function | Yes |
| Adjustable temperature | Yes |
| Maximum spin speed | 1390 RPM |
| Residual moisture | 53 % |
| Cycle time (quick washing program) | 15 min |
| Cotton, Easy care, Hand/wool, Hand, Wool, Mix, Quick, Delicate/silk | |
| Add garment (pause) function | Yes |
| Delay start (max) | 24 h |
| Load balancing system | Yes |
| Foam control system | Yes |
| Rinse Plus function | Yes |
Design
| Viewing window | Yes |
| Water fill | Cold |
| Control type | Rotary, Touch |
| Door opening angle | 180 ° |
| Appliance placement | Freestanding |
| Loading type | Front-load |
| Product color | White |
| Built-in display | Yes |
| Door hinge | Left |
| Cord length | 2.1 m |
| Drum material | Stainless steel |
| Tub material | Plastic |
| Certification | CE, VDE |
| Drum volume | 55 L |
| Display type | LED |
| Lower built-in capability (topless) | Yes |
Ergonomics
| Remaining time indication | Yes |
| Buzzer | Yes |
| Child lock | Yes |
| Adjustable feet | Yes |
| Feet adjustment | 12 mm |
Weight & dimensions
| Door diameter | 300 mm |
| Height | 848 mm |
| Width | 598 mm |
| Depth | 550 mm |
| Depth with door open | 1017 mm |
| Weight | 71000 g |
| Installation compartment height | 850 mm |
show more
Frequently Asked Questions
Can’t find the answer to your question in the manual? You may find the answer to your question in the FAQs about the Siemens iQ300 WM14N0G1 below.
How to Resolve Siemens iQ300 Washing Machine Error Code E29
Does Siemens iQ300 WM14N0G1 have a delayed start timer?
Yes, Siemens iQ300 WM14N0G1 has a delayed start timer. This feature allows the user to set a specific time for the washing machine to start, which can be convenient for scheduling laundry cycles.
Why is my Siemens iQ300 washing machine not turning on?
Ensure that the washing machine is securely plugged into a working power outlet and that the power switch is turned on. Additionally, check if the circuit breaker for the washing machine has not tripped.
What can cause my Siemens iQ300 washing machine to leak water?
Inspect the water supply hoses for any leaks, proper connections, and potential kinks or blockages. Also, check if the detergent dispenser drawer is closed correctly, as it shouldn’t cause any leaks.
How can I resolve excessive vibration or loud noise during the wash cycle?
Verify that the washing machine is level and stable on the floor, as unbalanced loads can cause vibrations. Make sure the transit bolts (if originally installed) have been removed. Also, try redistributing the laundry evenly within the drum to achieve a balanced load.
Why is the door of my Siemens iQ300 washing machine not opening after the wash cycle?
Ensure that the wash cycle has completed entirely, as there may still be water inside the machine causing a safety lock. If the door remains stuck, check for any error codes displayed on the control panel and follow the instructions for troubleshooting.
How can I resolve clothing items coming out of the wash cycle still wet?
Verify that you have selected an appropriate spin speed for the load size and fabric type. Avoid overloading the machine, as this can prevent effective water extraction. If the problem persists, perform regular maintenance tasks such as cleaning the drain filter to ensure proper drainage and optimal performance.
Is Siemens iQ300 WM14N0G1 energy efficient?
Yes, Siemens iQ300 WM14N0G1 has an energy efficiency class of A+++, which is the highest rating and means it consumes very little energy per cycle.
Does Siemens iQ300 WM14N0G1 have a high spin-drying class?
No, Siemens iQ300 WM14N0G1 has a spin-drying class of B, which is not the highest rating. This means it may not be as effective in removing water from clothes compared to washing machines with higher spin-drying ratings.
Is Siemens iQ300 WM14N0G1 noisy during spin cycles?
Yes, Siemens iQ300 WM14N0G1 has a noise level of 74 dB during spin cycles. This means it can be quite loud and may cause some noise disturbance.
Can the spin speed be adjusted in Siemens iQ300 WM14N0G1?
Yes, Siemens iQ300 WM14N0G1 has an adjustable spin speed. This means the user can select a higher or lower spin speed depending on their laundry needs, such as delicate fabrics requiring a lower spin speed.
What is the weight of the Siemens iQ300 WM14N0G1?
The Siemens iQ300 WM14N0G1 has a weight of 71000 g.
What is the height of the Siemens iQ300 WM14N0G1?
The Siemens iQ300 WM14N0G1 has a height of 848 mm.
What is the width of the Siemens iQ300 WM14N0G1?
The Siemens iQ300 WM14N0G1 has a width of 598 mm.
What is the depth of the Siemens iQ300 WM14N0G1?
The Siemens iQ300 WM14N0G1 has a depth of 550 mm.
What temperature should I use for my laundry?
The washing label of your garment shows the recommended washing temperature.
How do I prevent my washing machine from smelling?
Unpleasant odours can be avoided by occasionally washing at 60 degrees and using the recommended amount of detergent per wash.
Do I need to use an anti-scaling agent for my washing machine?
It is not necessary to use an anti-scaling agent. Scale deposits can be prevented by limiting washing at high temperatures and using the recommended amount of detergent per wash.
What certifications does the Siemens iQ300 WM14N0G1 have?
The Siemens iQ300 WM14N0G1 has the following certifications: CE, VDE.
Is the manual of the Siemens iQ300 WM14N0G1 available in English?
Yes, the manual of the Siemens iQ300 WM14N0G1 is available in English .
Is your question not listed? Ask your question here
View the manual for the Siemens iQ300 SN236I03ME here, for free. This manual comes under the category dishwashers and has been rated by 35 people with an average of a 7.8. This manual is available in the following languages: English. Do you have a question about the Siemens iQ300 SN236I03ME or do you need help?
Ask your question here
Siemens iQ300 SN236I03ME specifications
Below you will find the product specifications and the manual specifications of the Siemens iQ300 SN236I03ME.
The Siemens iQ300 SN236I03ME is a freestanding dishwasher with a full-size design measuring 60 centimeters. It features a control panel with buttons for easy operation and includes a built-in LED display for clear visibility of settings. The dishwasher comes with a 1.75-meter long power cord, ensuring convenient placement within a suitable distance from the power source. In addition, it has a 1.65-meter long inlet hose and a 1.9-meter long outlet hose for hassle-free connection to the water supply and drainage system.
One of the standout features of the Siemens iQ300 SN236I03ME dishwasher is its sensor program selection capability. This innovative technology automatically adjusts the washing parameters based on the level of dirt and load size, ensuring optimal cleaning results while saving water and energy. The dishwasher also includes a self-cleaning filter, which helps to prevent food particles from clogging the system and improves overall efficiency.
For added safety, the Siemens iQ300 SN236I03ME comes with a child lock function, preventing accidental activation or access to the dishwasher during operation. The dishwasher offers adjustable placement of baskets, both in the lower and upper sections, allowing for flexible arrangement of dishes and utensils based on individual needs. Additionally, it is equipped with adjustable feet, enabling easy leveling and stability on uneven surfaces.
In summary, the Siemens iQ300 SN236I03ME is a versatile and reliable dishwasher that offers convenient features such as sensor program selection, a self-cleaning filter, and adjustable placement options. With its user-friendly controls and durable construction, this dishwasher is designed to provide efficient and effective cleaning performance for everyday use.
Appliance placement
Freestanding
Sensor program selection
Yes
Number of place settings
14 place settings
Energy efficiency class (old)
A+
General
| Brand | Siemens |
| Model | iQ300 SN236I03ME | SN236I03ME |
| Product | dishwasher |
| EAN | 4242003770207 |
| Language | English |
| Filetype | User manual (PDF) |
Design
| Appliance placement | Freestanding |
| Product size | Full size (60 cm) |
| Door colour | Stainless steel |
| Control panel colour | Stainless steel |
| Control type | Buttons |
| Built-in display | Yes |
| Display type | LED |
| Cord length | 1.75 m |
| Inlet hose length | 1.65 m |
| Outlet hose length | 1.9 m |
| Baskets adjustable placement | Lower, Upper |
| Cutlery compartment type | Basket |
| Lower built-in capability (topless) | Yes |
| Tub material | Stainless steel |
Ergonomics
| Sensor program selection | Yes |
| Self-cleaning filter | Yes |
| Child lock | Yes |
| Adjustable feet | Yes |
| Feet adjustment | 20 mm |
Performance
| Number of place settings | 14 place settings |
| Noise level | 44 dB |
| Number of washing programs | 6 |
| Temperature (max) | 70 °C |
| Cycle time | 210 min |
| Delayed start timer | Yes |
| Delay start (max) | 24 h |
| Integrated timer | Yes |
| AquaStop function | Yes |
| AquaSensor function | Yes |
| Dishwashing programs | 3-in-1, Auto, Auto 45-65°C, Eco, Glass/delicate, Intensive, Pre-wash |
| Drying system | Heat exchanger |
| Number of temperature settings | 5 |
Other features
| Drying class | A |
| Annual energy consumption | 266 kWh |
| Annual water consumption | 2660 L |
| Washing class | A |
Power
| Energy efficiency class (old) | A+ |
| Energy consumption per cycle | 0.93 kWh |
| Water consumption per cycle | 9.5 L |
| Connected load | 2400 W |
| AC input voltage | 220 — 240 V |
| AC input frequency | 50 — 60 Hz |
| Current | 10 A |
| Power consumption (off) | 0.5 W |
Weight & dimensions
| Width | 600 mm |
| Depth | 600 mm |
| Height | 815 mm |
| Weight | 52000 g |
Packaging data
| Package width | 660 mm |
| Package depth | 680 mm |
| Package height | 880 mm |
| Package weight | 54000 g |
show more
Frequently Asked Questions
Can’t find the answer to your question in the manual? You may find the answer to your question in the FAQs about the Siemens iQ300 SN236I03ME below.
How to Activate Drying Function on Siemens iQ300 SN236I03ME Dishwasher
Does the {dishwasher} {Siemens} {iQ300} {SN236I03ME} have a {child lock} feature?
Yes, the Siemens iQ300 SN236I03ME has a child lock feature. This ensures that children cannot accidentally open or tamper with the dishwasher while it is in use.
Why is my dishwasher not starting?
Make sure the dishwasher is properly plugged into a functioning power outlet, the door is fully closed, and the selected program has been properly set.
Why is there water pooling at the bottom of the dishwasher?
Check if the dishwasher’s filter and drain pump are clean and free from any debris or blockages. Also, ensure that the dishwasher is level to avoid water accumulation.
Why is my dishwasher not effectively cleaning dishes?
Ensure that dishes and utensils are loaded correctly, with adequate space between them. Check if the spray arms and nozzles are clean and not obstructed. Also, ensure that you are using the appropriate detergent and selecting the suitable wash program.
Why is my dishwasher making loud noises during operation?
Inspect the dishwasher’s interior for any items or debris that may have fallen and are obstructing the spray arms. Additionally, check if the dishes are properly loaded without any items that may cause rattling noises.
Why is my dishwasher displaying error codes?
Error codes may indicate various issues, such as water supply problems, clogged filters, or malfunctioning sensors. Try resetting the dishwasher by turning it off and on again, and if the error persists, consult a certified technician for further assistance.
Does the Siemens iQ300 SN236I03ME have a built-in display?
Yes, the Siemens iQ300 SN236I03ME has a built-in LED display. This means that users can easily see and control the settings of the dishwasher.
Can the Siemens iQ300 SN236I03ME adjust its baskets’ placement?
Yes, the Siemens iQ300 SN236I03ME has adjustable placement for both the lower and upper baskets. This allows users to customize the dishwasher’s interior to fit their specific needs.
Does the Siemens {dishwasher} have a self-cleaning filter?
Yes, the Siemens iQ300 SN236I03ME has a self-cleaning filter. This means that users don’t have to manually clean the filter, saving them time and effort.
How many washing programs does the Siemens iQ300 SN236I03ME have?
The Siemens iQ300 SN236I03ME has 6 different washing programs. This provides users with a variety of options to choose from, allowing them to select the most suitable program for their specific cleaning needs.
What is the weight of the Siemens iQ300 SN236I03ME?
The Siemens iQ300 SN236I03ME has a weight of 52000 g.
What is the height of the Siemens iQ300 SN236I03ME?
The Siemens iQ300 SN236I03ME has a height of 815 mm.
What is the width of the Siemens iQ300 SN236I03ME?
The Siemens iQ300 SN236I03ME has a width of 600 mm.
What is the depth of the Siemens iQ300 SN236I03ME?
The Siemens iQ300 SN236I03ME has a depth of 600 mm.
How do I add softening salt to my dishwasher?
Each dishwasher has a separate compartment for softening salt. It opens when you turn the knob on the compartment. The softening salt can then be poured into the compartment by means of a funnel.
What do I do about a smelly dishwasher?
In the case of a smelly dishwasher, you can take the following steps:
— Clean the filters
— Clean the spray arms
— Clean the door rubbers
— Run a hot wash program
— Run an empty machine with a dishwasher cleaner
Do you have to pre-rinse the dishes?
It is not recommended to rinse dirty dishes before placing them in the dishwasher.
For the life cycle of the machine, it is better to put everything dirty in the dishwasher.
The grease on the dirty dishes is the lubrication for the pump in the machine.
How much dishwashing detergent should I use?
The average amount used is about 25 grams of dishwashing detergent. It is recommended to follow the advice on the packaging.
Is the manual of the Siemens iQ300 SN236I03ME available in English?
Yes, the manual of the Siemens iQ300 SN236I03ME is available in English .
Is your question not listed? Ask your question here