

3x
2x
Kompernaß Handelsgesellschaft mbH · Burgstraße 21 · D-44867 Bochum
www.kompernass.com
E-2073/05-2004
Automatic Free-Arm
Sewing Machine 270 E
Operating instructions
UK

Operating instructions
Victoria Automatic Free-Arm Sewing Machine
Contents
1. Intended Use ………………………… 3
2. Technical Data …………………….. 3
3. Delivery contents…………………… 3
4. Safety Instructions ……………….. 4
5. Setting up …………………………….5
6. Switching On / Off ……………….. 5
7. Threading……………………………… 6
8. Attaching accessories ………….. 12
9. Settings ……………………………… 14
10. Sewing……………………………….. 16
11. Care ……………………………………27
12. Is there a problem? ……………. 29
13. Warranty and Service …………….30
14. Disposal ……………………………. 30
2. Technical Data
Power supply …………..: 230 V / ~50 Hz
Power consumption….: 85 W max
Motor output …………..: 70 W
Bulb rating ………………: 15 W
Bulb voltage…………….: 230 V / ~50 Hz
Bulb thread …………….: E14 thread
Protection class ……….: II
Dimensions …………….: 160 x 380 x
315 mm
Weight ……………………: 6 kg approx.
3. Content of package
(see foldout page)
● 1 sewing machine
1 foot switch
3 bobbins
1. Intended Use
The sewing machine is intended …
— for use as a movable machine,
— for sewing normal household fabrics
— for private use only.
The sewing machine is not intended …
— to be installed at a fixed location,
— for processing other materials (for
example leather, canvas,
and similar heavy materials)
— for use in commercial or industrial
applications.
2 felt wheels
● 1 zigzag foot (attached)
1 buttonhole foot
1 blind hem foot
1 button foot
1 zipper foot
1 seam guide
1 darning plate
1 knife
1 sew foot
1 set of needles
1 oil tube
2 screwdrivers
● Operating instructions
Keep this manual for future reference and pass it on with
the equipment to any future users.
3

4. Notes on safety
4. Notes on safety
Like any other electrical device, a
sewing machine can cause serious,
even life-threatening injuries. To avoid
this, and in order to work safely:
• Always pull out the power plug
when you are not at the machine.
This will prevent the risk of accidents
if the machine is switched on accidentally.
• Pull out the power plug before
replacing the bulb, or when carrying out maintenance work on the
machine.
This will prevent possibly life-threatening electric shocks.
• Only use the sewing machine in
dry rooms.
Warning!
Possible injury and material damage:
As a user of electrical appliances,
you are legally required to prevent
possible accidents by taking the
appropriate safety measures:
• Keep your work space tidy. An
untidy workplace can lead to accidents.
• Provide adequate lighting when
working!
• Do not wear loose clothing or jew-
ellery, as these can be caught in the
moving parts. For the same reason,
you should also wear a hair net if
you have long hair.
• If damage is visible on the sewing
machine, or the foot switch, or the
power cord: Have the damage
repaired by Customer Service, before
using the sewing machine again.
• Do not allow children or elderly
persons to handle the machine
unsupervised – these are not always
able to recognize potential dangers.
Keep electrically powered tools out
of the reach of children.
• Avoid adopting any unusual pos-
ture. Remain steady and in a wellbalanced position at all times.
• Be alert! Pay attention to what you
are doing. Always take a rational
approach to your work. Never work
with the sewing machine if you are
unable to concentrate or if you are
feeling unwell!
If accidents occur as a result of handling the machine with insufficient care,
or failure to follow the safety instructions in this manual, then the manufacturer cannot accept liability.
4
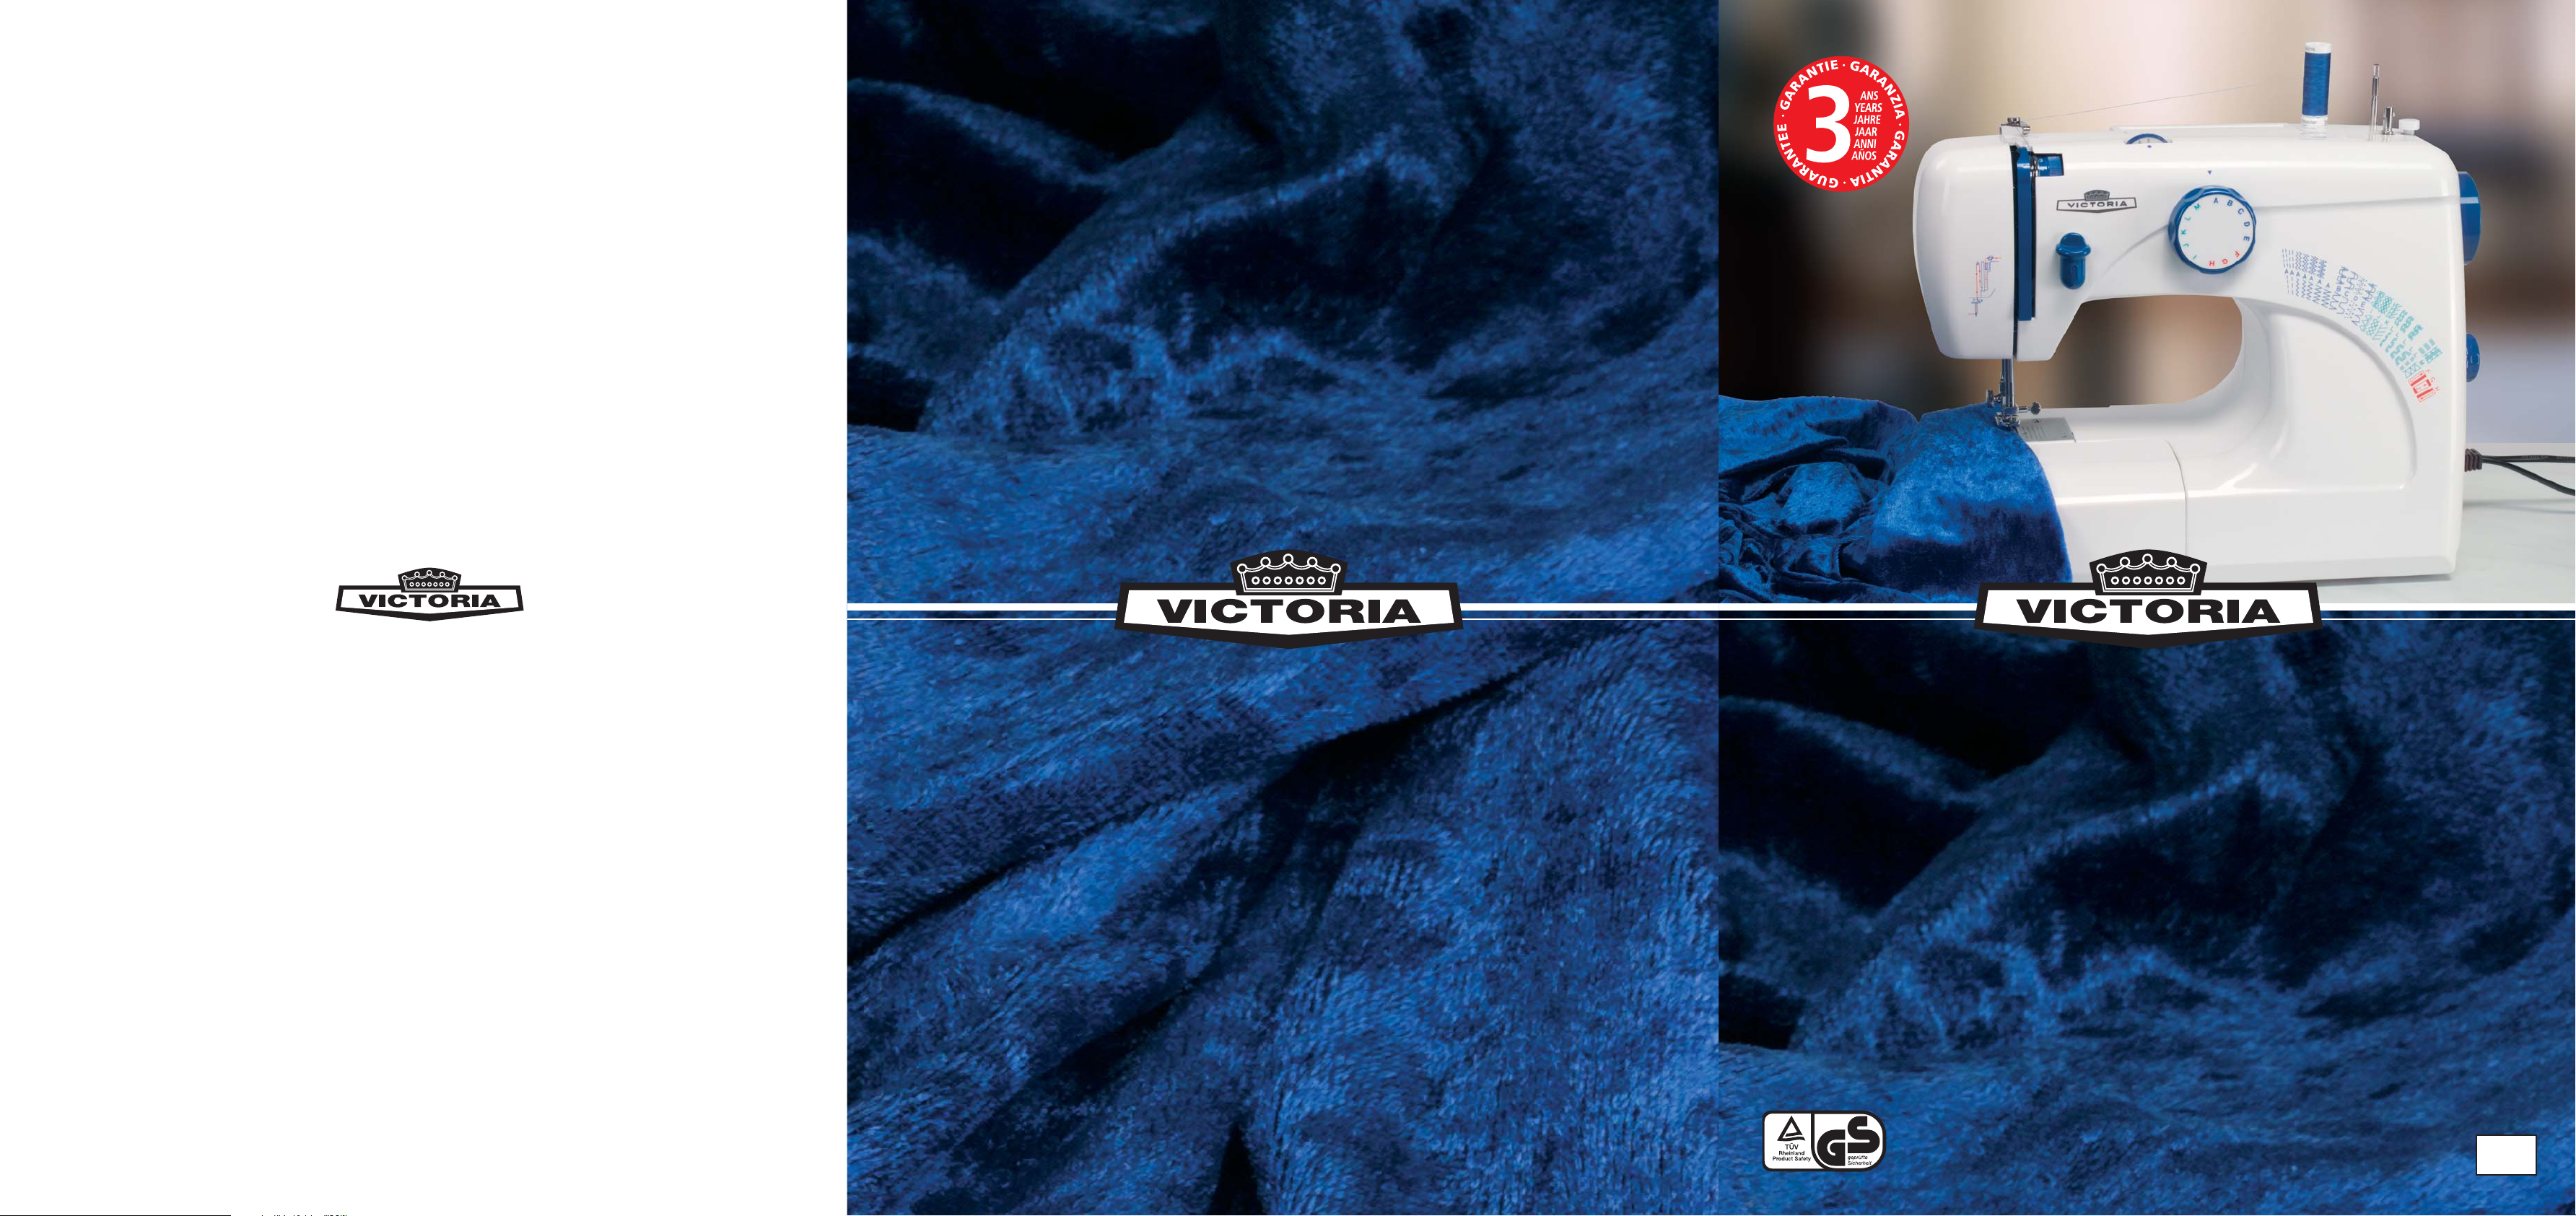
5. Setting up
• Place the sewing machine on a
steady worktop.
Connect the foot switch to the
machine
Insert the power plug in a power
socket.
If the worktop is not completely even,
you can compensate for slight unevenness as follows:
Pull out the box compartment to the
side, as shown.
The adjusting foot should now be
visible underneath. This can be
adjusted by turning in either direction, to ensure that the sewing
machine is steady.
The box compartment can now be simply pushed back – for example if you
need it as an ‘extension flap’ for sewing
larger areas of material.
However, you can also leave the
compartment box detached, for example for free-arm sewing on sleeves,
trouser legs, etc.
6. Switching On / Off
You should familiarize yourself with
these methods of switching on and off,
so that you can take the correct action
in the event of an emergency:
The lamp can be turned on and off
by using the switch.
Pulling out the foot switch plug cuts
off power to the machine.
Pulling out the power plug from the
power socket cuts off power to both
the machine and the foot switch.
5
7. Threading
Warning!:
Before threading, make sure that the
sewing machine is switched off, or
that the power plug has been pulled
out of the power socket, as accidents
may be caused if the machine is started
unintentionally.
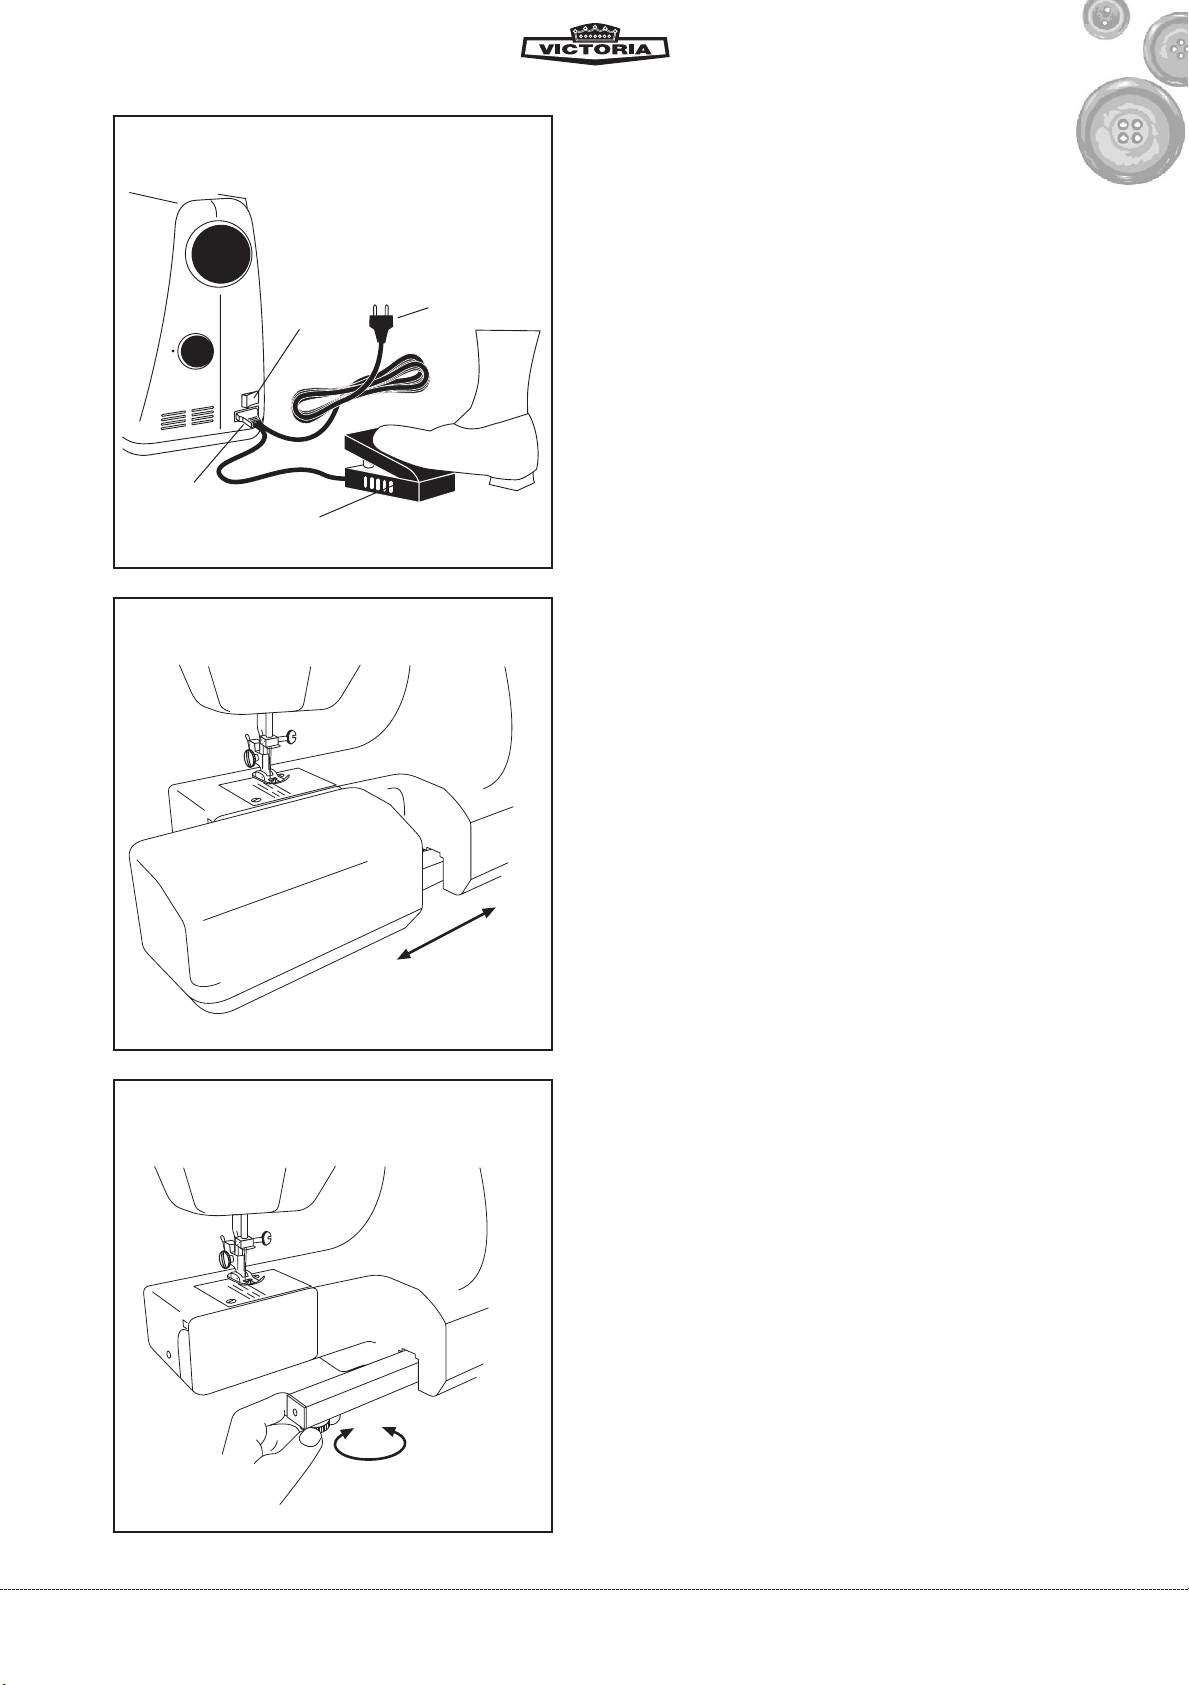
a) Threading the lower bobbin
To fill the lower bobbin with thread:
Pull out one of the two roll pins and
put on a spool of thread.
You can put a felt pad under the
spool of thread, to protect the
machine casing.
Place an empty bobbin on the
winder spindle and wind the loose
end of the thread on, giving several
turns anticlockwise.
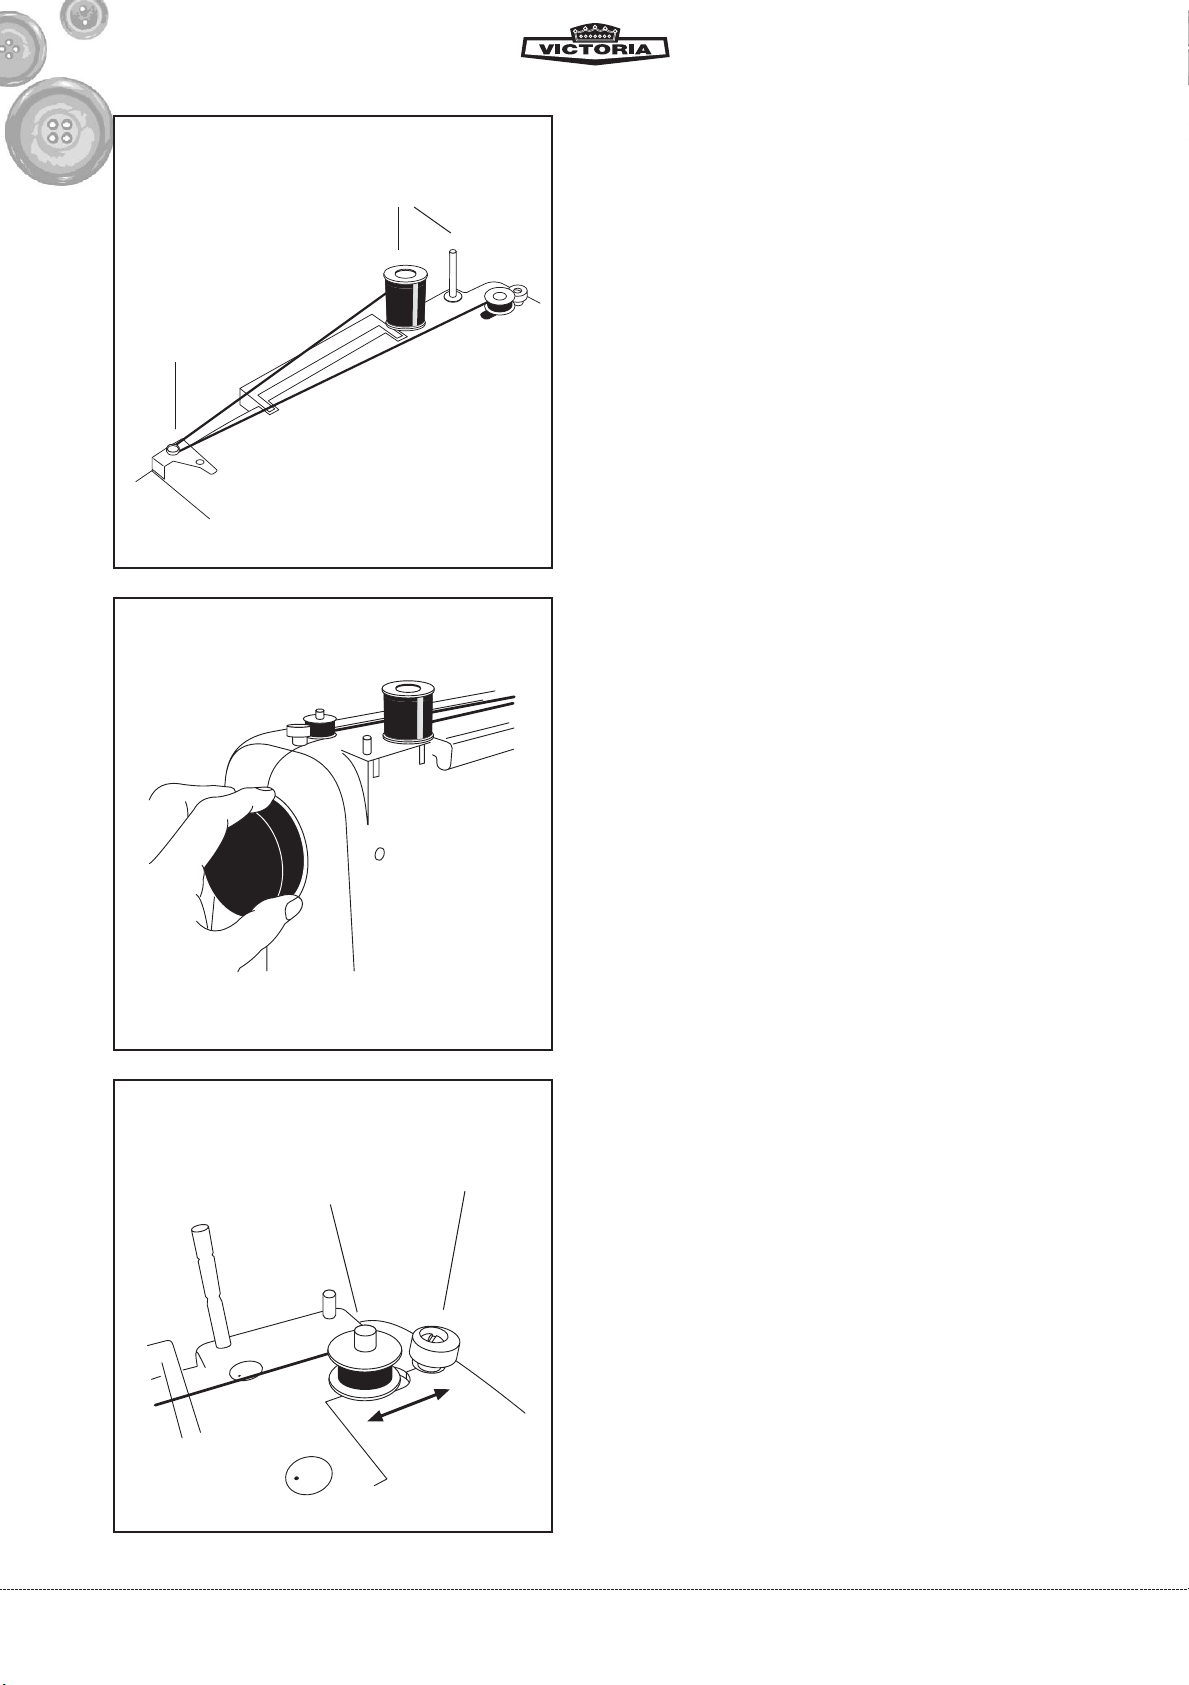
Pull out the handwheel slightly, to
disengage the sewing mechanism
from the motor.
Pull the thread through the thread
guide for the winder tension.
After the first few turns of thread are
taut on the bobbin, press the bobbin
against the winder stopper.
• Now switch on the sewing machine
and step on the foot switch. When
the bobbin is full, cut the thread.
Press the winder spindle forward
again and take out the full bobbin.
Do not forget to press the handwheel
back in, otherwise the sewing mechanism remains disengaged from the
motor.
6
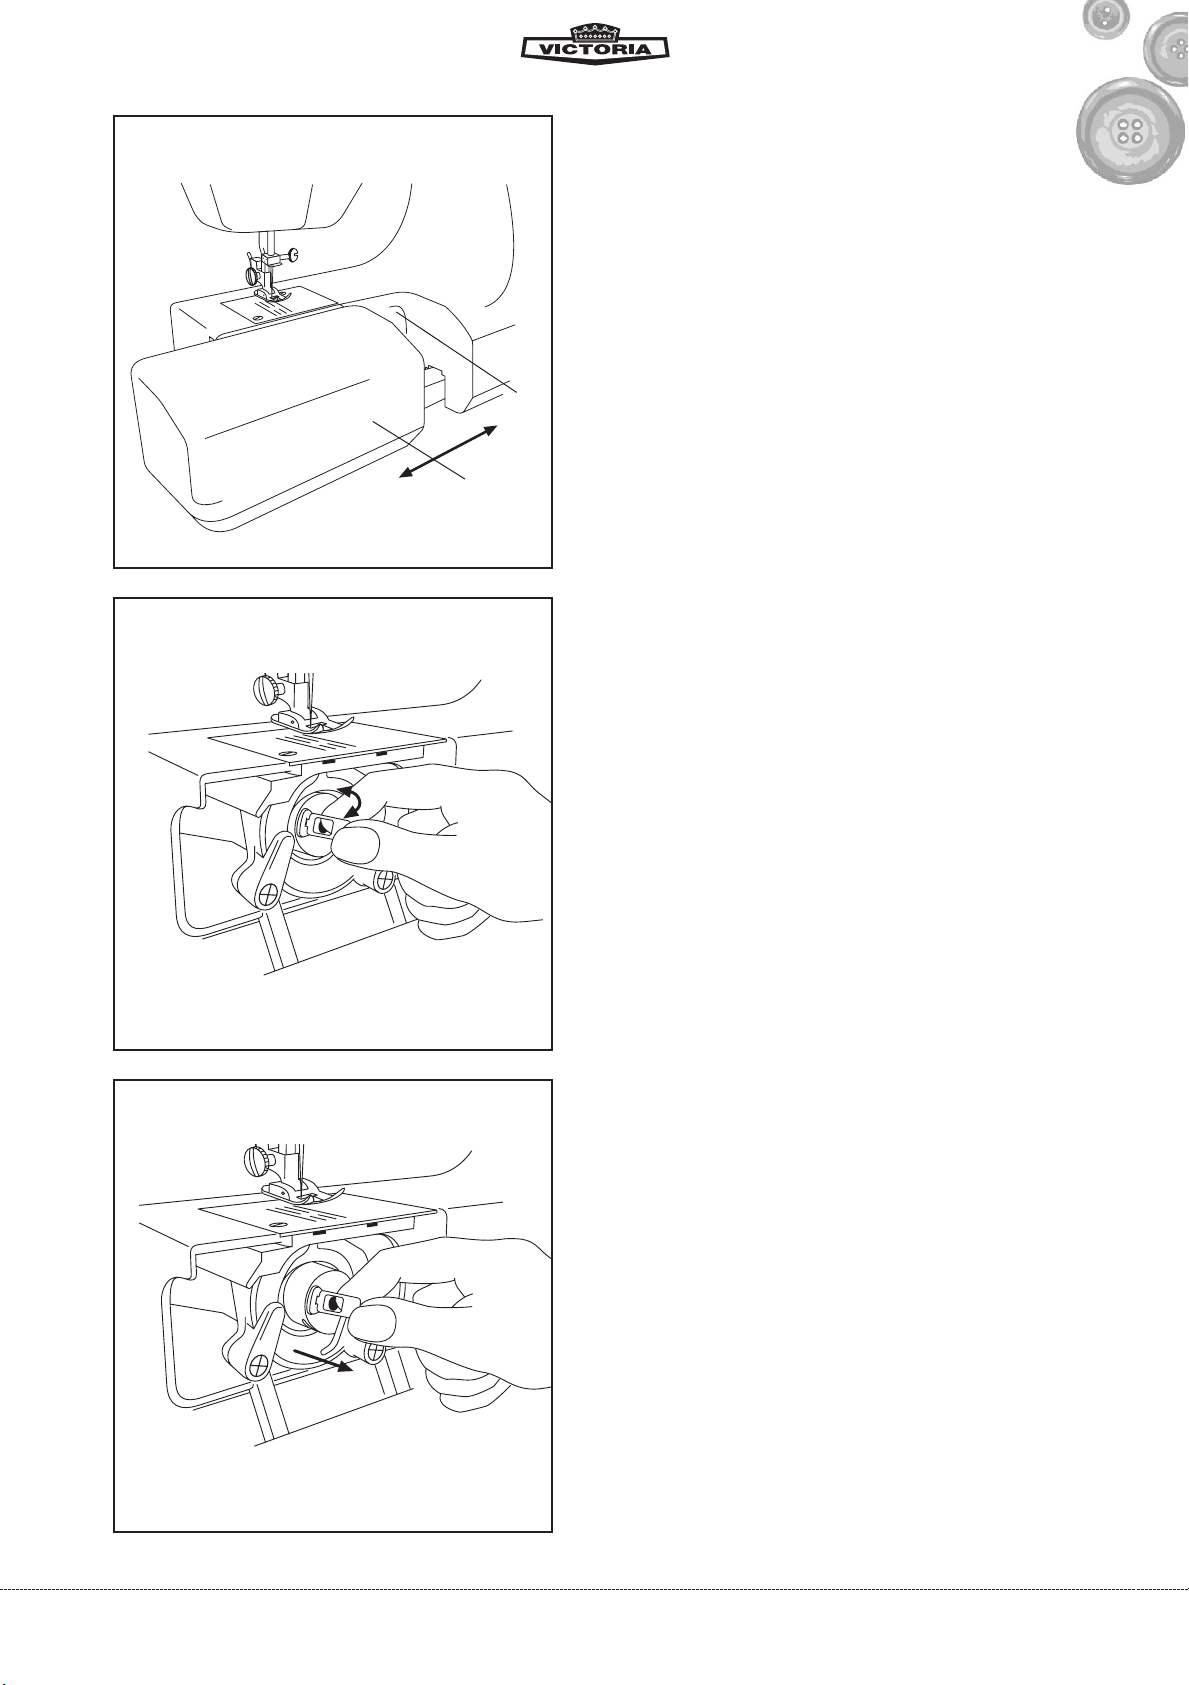
b) Threading the lower thread
First raise the needle fully, by turning
the handwheel.
Pull out the box compartment to the
side, as shown.
Open the gripper flap located
behind.
Fold out the lever arm from the
bobbin case.
Take out the bobbin case as shown.
7
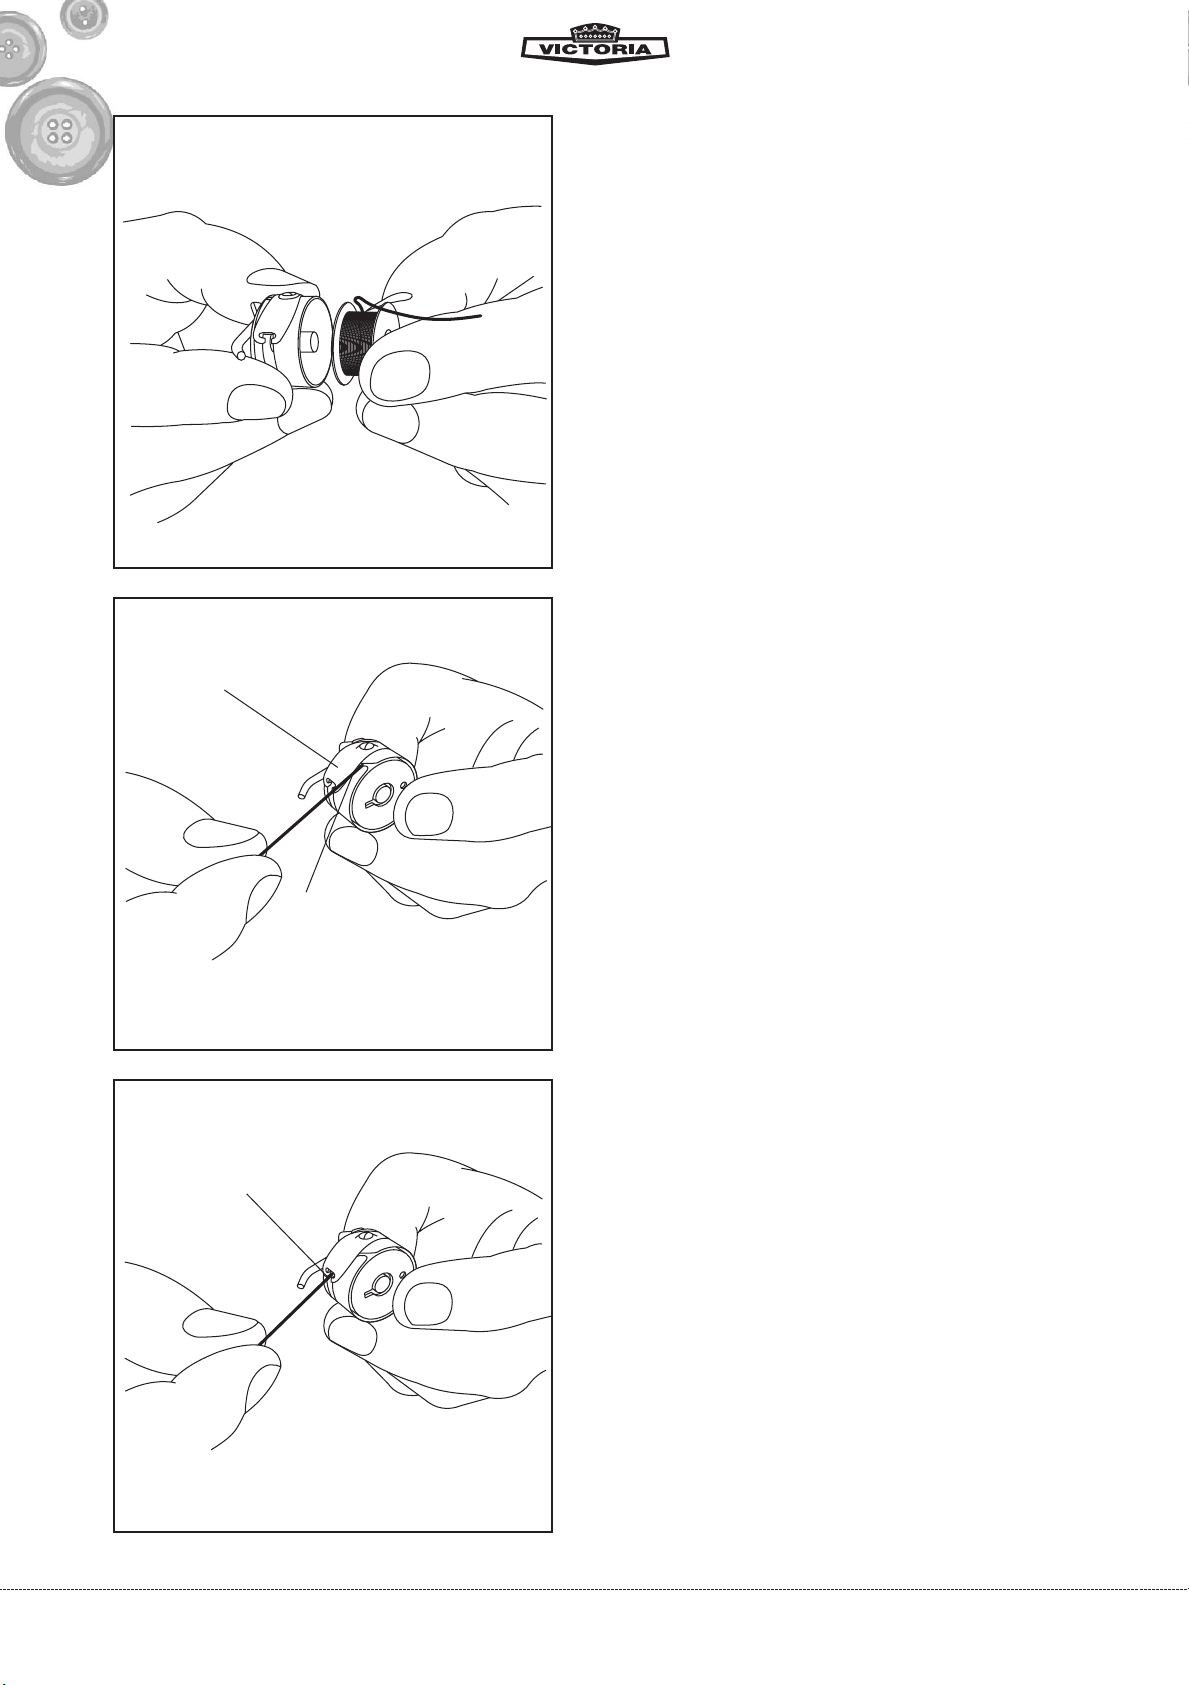
Wind about 10 cm of thread away
from the bobbin and feed this into
the bobbin case.
Pull the loose end of the thread
through the gap in the side of the
bobbin case
under the tension spring
until the thread passes out of the slit
in the bobbin case.
8

Place the bobbin case on the pin
Turn the bobbin case until the feed
dog engages in the recess.
• Place the excess thread so that it
does not catch anywhere
• Close the gripper flap.
The box compartment can now be
simply pushed back in, for example if
you need it as an ‘extension flap’ for
sewing larger areas of material.
However, you can also leave the box
detached, for example forfree-arm
sewing on sleeves, trouser legs, etc.
9
Loading…

ạ
Ả
ả
Ấ
ấ
Ầ
ầ
Ẩ
ẩ
Ẫ
Ạ
2x
ậ
Ậ
3x
ẫ
IB_Sewingmachine_cover_UK.qxd 21.07.2004 14:13 Uhr Seite 1
Report abuse
Libble takes abuse of its services very seriously. We’re committed to dealing with such abuse according to the laws in your country of residence. When you submit a report, we’ll investigate it and take the appropriate action. We’ll get back to you only if we require additional details or have more information to share.
Product:
Get your user manual by e-mail
Enter your email address to receive the manual of Victoria 270E in the language / languages: English as an attachment in your email.
The manual is 1,47 mb in size.
You will receive the manual in your email within minutes. If you have not received an email, then probably have entered the wrong email address or your mailbox is too full. In addition, it may be that your ISP may have a maximum size for emails to receive.
The manual is sent by email. Check your email
If you have not received an email with the manual within fifteen minutes, it may be that you have a entered a wrong email address or that your ISP has set a maximum size to receive email that is smaller than the size of the manual.
FREE ENGLISH VICTORIA 270 E (01) PDF USER GUIDE
FREE ENGLISH VICTORIA 270 E (01) PDF USER MANUAL
FREE ENGLISH VICTORIA 270 E (01) PDF OWNER GUIDE
FREE ENGLISH VICTORIA 270 E (01) PDF OWNER MANUAL
FREE ENGLISH VICTORIA 270 E (01) PDF REFERENCE GUIDE
FREE ENGLISH VICTORIA 270 E (01) PDF INSTRUCTION GUIDE
FREE ENGLISH VICTORIA 270 E (01) PDF REFERENCE MANUAL
FREE ENGLISH VICTORIA 270 E (01) PDF INSTRUCTION MANUAL
FREE ENGLISH VICTORIA 270 E (01) PDF OPERATING INSTRUCTIONS
CLICK HERE TO DOWNLOAD VICTORIA 270 E (01) PDF MANUAL
If this is not the document you want for this product, click here to see if we have any other documents for this product.
CLICK HERE TO DOWNLOAD VICTORIA 270 E (01) PDF MANUAL
Инструкции Victoria из категории Машина для шитья
Нажмите на букву алфавита ниже, чтобы перейти в список моделей, которые начинаются с данного знака
- 1
- 7
- F