
RXN-400, памятка по правилам постановки и снятия объекта с охраны
Для постановки объекта под охрану необходимо проделать следующее:
- Убедиться, что в помещении никого не осталось, закрыты все двери и окна.
- Нажать на клавиатуре клавишу «END» («Отмена»). На экране не должно быть символов « █ ».
- Символ « █ » означает, что зона нарушена и не готова к постановке под охрану.
- Ввести индивидуальный код пользователя.
- Индикатор «Охрана» замигает, клавиатура подаст звуковой сигнал и начнется обратный отсчет времени.
- За время, отведенное на выход, покинуть помещение.
Для снятия объекта с охраны необходимо:
- Открыть входную дверь (клавиатура подаст звуковой сигнал).
- Нажать на клавиатуре клавишу «END» («Отмена»).
- Ввести индивидуальный код пользователя.
- Индикатор «Охрана» погаснет, клавиатура замолчит.
При входе в помещение первым делом снимите объект с охраны, так как истечение времени «на вход» или дальнейшие передвижения по объекту вызовут срабатывание сигнализации и последующее прибытие группы задержания.
В случае, если Вы не уверены в правильности постановки/снятия охраны, свяжитесь:
- с «Call-центром» (90-10-24)
- с оператором централизованной охраны ( +7-913-964-51-82)
< Вернуться к списку инструкций
- Инструкция пользователя
- Способы оплаты
- Мобильное приложение
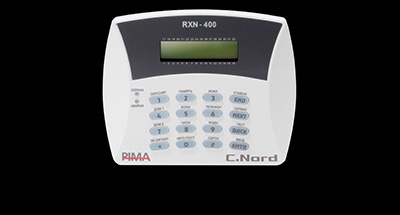
Клавиатура RXN-400
Подробнее
3 344 ₽/шт
В наличии
—
+
В корзину
Цена действительна только для интернет-магазина и может отличаться от цен в розничных магазинах
- Описание
- Задать вопрос
Описание
RXN-400 Клавиатура с ЖК-дисплеем (LCD) для контрольных панелей серии «Норд», Captain-I, Hunter-Pro
Характеристики
|
Функционал |
|
|
Производитель |
|
Документы
Руководство по эксплуатации RXN-400
946,5 кб
Задать вопрос
Вы можете задать любой интересующий вас вопрос по товару или работе магазина.
Наши квалифицированные специалисты обязательно вам помогут.
- June 13, 2024
- PIMA
Table of Contents
- PIMA RXN-400 Keypad Hunter-Pro Security System
- Product Information
- Product Usage Instructions
- Technical specifications
- References
- Read User Manual Online (PDF format)
- Download This Manual (PDF format)
PIMA RXN-400 Keypad Hunter-Pro Security System
Product Information
The RXN-400/410 Hunter-Pro keypads are silicon-rubber keys LCD keypads
designed specifically for the Hunter-Pro security system. They are part of the
product package and come with a limited warranty. For complete information on
the installation and usage of the keypads, please refer to the Hunter-Pro’s
Installation Guide.
Technical Specifications
- Keypad Type: Silicon-rubber keys LCD keypad
- Compatibility: Designed for use with the Hunter-Pro security system
Content of the Product Package
- RXN-400/410 Keypads
Ordering Information
- RXN-400: [Insert specific ordering information]
- RXN-410: [Insert specific ordering information]
Limited Warranty
Please read the enti e guide before attempting to program or operate your
system. If you have any misunderstandings or questions regarding any part of
the guide, please contact the supplier or installer of this system.
Manufactured by PIMA Electronic Systems Ltd.
Website: www.pima-alarms.com
Addres 5 Hatzoref Street, Holon 5885633, Israel
Tel +972.3.6506411
Email support@pima-alarms.com
Product Usage Instructions
- Insert a slotted screwdriver into the notches on the bottom of the keypad, press gently, and remove the backplate.
- Pass the BUS wires through the opening at the backplate.
- Using the mounting holes, mount the backplate on a flat surface.
- Connect four wires (not supplied) between the keypad 1-4 terminals and the control panel’s SecuBus BUS terminals. Each wire should connect between terminals with the same number (1 1, 2-2, etc.).
- Attach the keypad to the mounted backplate, starting with the top side, and press until it clicks into place.
RXN-400/410 Keypads
- RXN-400/410 are silicon-rubber keys LCD keypads, designed for the Hunter-Pro security system.
- The only difference between RXN-400 and RXN-410 is the LCD size – RXN-410 has larger LCD display. In the following paragraphs the term RXN-400 refers to RXN-410 also.
- The two keypads connect over the bus. Up to 16 keypads can be connected to the Hunter-Pro.
- The RXN-400 has a modern and sleek design that fits every indoor decoration.
- The keypad has two LEDs – Arm and Fault – and a buzzer for various panel status indications.
- The keypad has settings for backlight, buzzer on/off and ID No., and a tamper switch for detecting the opening of the enclosure. For complete information, see the Hunter-Pro’s Installation Guide.
Technical specifications
- Screen size: 2X16 lines
- Data Voltage levels: 0, +12V
- Operating Voltage Range: 9-14 VDC
- Current Consumption: 50mA idle, 90mA max.
- Sizes: 15 x 12 x 3cm
- Weight: 235gr
- CE compliance
- Operating Temperature: °C -10 to +55
Content of the product package
• RXN-400/410 keypad • Installation guide
How to install the RXN400/410 keypad Follow the next steps to connect the
keypads.
- Insert a slotted screwdriver to the notches on the keypad’s bottom, press gently and remove the backplate.
- Pass the BUS wires through the opening at the backplate.
- Use the mounting holes and mount the backplate on a flat surface.
- Use the supplied terminal block and connect four wires (not supplied) between the keypad 1-4 terminals and the control panel’s SecuBus BUS terminals: each wire connects between terminals with the same number (1-1, 2-2, etc.).
- Attach the keypad to the mounted backplate, top side first, and press until clicked.
Ordering Information
RXN-400
- Spanish P/N 8410022
- English P/N 8410019
RXN-410
- P/N 8410027
- P/N 8410024
Limited Warranty
PIMA Electronic Systems Ltd. does not represent that its product may not be
compromised and/or circumvented, or that the Product will prevent any death,
personal and/or bodily injury and/or damage to property resulting from
burglary, robbery, fire or otherwise, or that the Product will in all cases
provide adequate warning or protection. The User understands that a properly
installed and maintained equipment may only reduce the risk of events such as
burglary, robbery, and fire without warning, but it is not insurance or a
guarantee that such will not occur or that there will be no death, personal
damage and/or damage to property as a result. Read this guide in its entirety
before attempting to program or operate your system. Should you misunderstand
any part of this guide, please contact the supplier or installer of this
system. Copyright © 2023 PIMA Electronic Systems Ltd. All rights reserved.
E&OE
Manufactured by
PIMA Electronic Systems Ltd.
WWW.PIMA-ALARMS.COM
5 Hatzoref Street, Holon 5885633, Israel.
Tel +972.3.6506411
Email support@pima-alarms.com
References
- Alarms.com
- Pima Electronic Systems | Residential & Commercial Security Systems
- Pima Electronic Systems | Residential & Commercial Security Systems
Read User Manual Online (PDF format)
Read User Manual Online (PDF format) >>
Download This Manual (PDF format)
Download this manual >>
Поддержка
RXN-400, памятка по правилам постановки и снятия объекта с охраны
Для постановки объекта под охрану необходимо проделать следующее:
- Убедиться, что в помещении никого не осталось, закрыты все двери и окна.
- Нажать на клавиатуре клавишу «END» («Отмена»). На экране не должно быть символов « █ ».
- Символ « █ » означает, что зона нарушена и не готова к постановке под охрану.
- Ввести индивидуальный код пользователя.
- Индикатор «Охрана» замигает, клавиатура подаст звуковой сигнал и начнется обратный отсчет времени.
- За время, отведенное на выход, покинуть помещение.
Для снятия объекта с охраны необходимо:
- Открыть входную дверь (клавиатура подаст звуковой сигнал).
- Нажать на клавиатуре клавишу «END» («Отмена»).
- Ввести индивидуальный код пользователя.
- Индикатор «Охрана» погаснет, клавиатура замолчит.
При входе в помещение первым делом снимите объект с охраны, так как истечение времени «на вход» или дальнейшие передвижения по объекту вызовут срабатывание сигнализации и последующее прибытие группы задержания.
В случае, если Вы не уверены в правильности постановки/снятия охраны, свяжитесь:
- с «Call-центром» (90-10-24)
- с оператором централизованной охраны ( +7-913-964-51-82)
Источник
Rxn 400 инструкция пользователя
Главная Прибор приемно контрольный НОРД LAN
Далее приводится описание действий, доступных пользователю, которые можно выполнить, нажимая кнопки на клавиатуре, либо из основного экрана (нажатие кнопки с удержанием, до возникновения звукового сигнала зуммера клавиатуры, без ввода Главного Кода), либо из Меню Пользователя (после ввода Главного Кода).
Описание программируемых функций и отображаемых параметров контрольной панели на клавиатурах типа RXN-400 LCD / RXN-410 LCD/ RX-6/RX-406:
Таблица 1 — Таблица функций и действий после ввода Главного Кода
после ввода Главного Кода
после нажатия с удержанием
Постановка на охрану / снятие с охраны первой области
RX-6 RX-406 RXN-200
Просмотр памяти событий
Временное исключение зон
Включение в режим Дом 1 (частичная постановка на охрану)
Включение в режим
Дом 1 (введите Код Пользователя после нажатия с удержанием кнопки)
RX-6 RX-406 RXN-200
Программирование текущего времени и даты
Кнопка управления и программирования
Ручная переустановка дымовых датчиков (сброс + 12 В с выхода SMOKE на 6 сек) и выключение сирены при неисправности ШС
RX-6 RX-406 RXN-200
после ввода Главного Кода
после нажатия с удержанием
Отмена ввода кода. Выход из любой опциии меню без сохранения введенных данных и Меню Пользователя
Перемещение по позициям ввода данных (при списковом отображении информации) при редактировании параметров или вход в Меню Техника после последующего ввода кода техника
Перемещение по позициям ввода данных (при списковом отображении информации) или при редактировании параметров
Ввод (сохранение) введеных данных
Таблица 2 — Описание возможных состояний индикаторов клавиатур
Индикатор Описание Модель
Индикация состояния системы на LED клавиатуре
Индикация состояния системы: Отображение неисправностей системы
Описание см. ниже.
Описание см. ниже.
Светодиод — Постоянно горит в режиме охраны; мигает во время задержки на вход / выход.
RXN-400 / RXN-410 RX-6 / RX-406
Светодиод — Мигает при любой неисправности. Описание неисправности выводится на дисплей.
RXN-400 / RXN-410 RX-6 / RX-406
— Одновременное нажатие кнопок ENTR и NEXT или ENTR и BACK изменяет яркость дисплея клавиатуры (для моделей RX-400/RX-410);
— Одновременное нажатие кнопок ENTR и END включает/выключает зуммер;
— Одновременное нажатие с удержанием кнопок * ( ЗВ. СИГНАЛ ) и # ( СБРОС ) является нажатием тревожной кнопки (вызов Тревоги) с формированием передачи сообщения на ЦСМ и включения сирены.
П р и м е ч а н и е — Сброс питания дымовых датчиков, выключение сирены и отключение зуммера клавиатуры при неисправности системы может быть осуществлен нажатием с удержанием кнопки # ( СБРОС ).
1.3 Индикация на ЖК дисплее LCD клавиатуры (RXN-400/RXN-410)
Верхняя строка является строкой состояние прибора. В правой части строки состояния прибора высвечивается текущее время.
В ее левой части попеременно высвечиваются системные неисправности прибора:
в случае отсутствия сети переменного тока — неисправность 220 В
в случае неисправности аккумуляторной батареи — неисправность АКБ
в случае нарушения тампера — нарушение Тампера (если ШС6 запрограммирован, как тамперная зона)
в случае отсутствия установки системных часов — неисправность часов
в случае неисправности энергонезависимой памяти EEPROM
Состояние областей — номера областей, стоящих под охраной (область, не стоящая под охраной индицируется символом подчеркивания ).
При чем, после устранения всех перечисленных выше неисправностей и нарушения ТАМПЕРА, в строке состояния прибора высвечивается только состояние областей.
Нижняя строка дисплея является строкой состояния сигнальных шлейфов прибора.
В строке состояния сигнальных шлейфов прибора попеременно каждую секунду высвечивается информация о текущем состоянии шлейфов (нормальное состояние, нарушения, неисправности, исключенные из охраны ШС) и память нарушений и исключенных ШС за предыдущий охраняемый период, если область снята с охраны, и произошедшие нарушения и исключенные ШС в текущем охраняемом периоде.
Причем состояние шлейфа определяются следующими символами:
Источник
Клавиатура RXN-400 PIMA
- YouTube
- Вконтакте
- YouTube
- Вконтакте
- О компании
- Наши бренды
- Успешные проекты
- Благодарности
- Куб безопасности
- ITTechLab
- Корпоративная жизнь
- Вакансии
- Как купить
- Заказать
- Оплата
- Получение товара
- Прайс
- Новости
- Новости компании
- Новости поставщиков
- Вебинары
- Статьи
- Контакты
- Отдел продаж
- Отдел маркетинга
- Отдел персонала
- Тех.поддержка
- Реквизиты компании
- Тех.специалисту
- Калькуляторы
- Каталоги оборудования
- Типовые решения
- Обучение
- ВИПАКС-сервис
- Гарантии и сервис
- Проверка статуса ремонта
- Авторизованный сервисный центр
- Тех.поддержка
- Обратная связь
- Партнеры
- Бренды
- Сертификаты
ООО «Випакс», Пермь | © 2018
614015, Россия, Пермь, ул. Краснова, 24
тел. +7 (342) 206-04-22
Вся представленная на сайте информация, касающаяся комплектаций, технических характеристик, а также стоимости продукции носит информационный характер и ни при каких условиях не является публичной офертой, определяемой положениями пункта 2 статьи 437 Гражданского кодекса Российской Федерации. Указанные цены являются рекомендованными розничными ценами и могут отличаться от действительных цен.
Информация, опубликованная на настоящем сайте, предназначена исключительно для ознакомительных целей. Все права на материалы и новости, опубликованные на сайте, охраняются в соответствии с законодательством Российской Федерации.
Источник
RX 150,160, 400 инструкция — панель Hunter Pro клавиатура
Имструкция
Проверка готовности для сдачи объекта под охрану СЦМ.
Закрыть все окна и двери на фиксаторы, защелки, стопора и т. д., отключить вентиляторы, кондиционеры и электронагревательные приборы в помещениях, в которых установлены датчики движения, а также увести домашних животных в помещения, где нет датчиков движения.
Проверить работоспособность технических средств охраны, для чего посмотрите на дисплее клавиатуры RX 150/160/ 400 текущее состояние оборудования.
Если система готова к постановке на охрану, то на дисплее напротив значка № каждой зоны( ) нет значка(ов) “ ” (информирующих о том, что зона(ы) нарушена(ы)) выполните п.4.2 3.1. Если зона нарушена и не удается ее восстановить, имеется возможность постановки на охрану с исключенными зонами. Порядок описан в п. 4.2.
При наличии каких-либо неисправностей в сигнализации на клавиатуре RX 150/160/ 400
начинает мигать красный индикатор “Авария”, а также на дисплее клавиатуре появится соответствующая надпись:
“220 В” — отсутствие питающего напряжения (220 в);
“АКБ” — разрядка аккумулятора (ниже 10 в);
“ТЕЛЕФОН” — нарушение телефонной линии;
“КОММ-ТОР” – не передан рапорт на СЦМ по телефону;
“ЧАСЫ” – не установлено время.
При устранении соответствующих неисправностей данные надписи автоматически исчезнут.
Замечание. Для проверки исправности телефонной линии введите Главный код (код директора) — на дисплее появится надпись:
нажмите клавишу [ТЕСТ (BACK)]. При этом начинается самодиагностика контрольной панели. Для выхода из этого режима нажмите клавишу [ОТМЕНА (END)]. 1.2.2. При появлении на дисплее клавиатуры RX 150/160/ 400 других надписей (“ПАМЯТЬ (EPPROM)” и др.) и мигании красного индикатора “Авария”, информируйте об этом техническую службу ООО “Торнадо-техносервис” по тел. 325-71-17 или оперативного дежурного по тел. 252-1808,252-7420.
Постановка объекта под охрану СЦМ.
Для постановки на охрану введите Ваш код.
Замечание. Если код введен неправильно, то нажмите клавишу [ОТМЕНА (END)] и повторите предыдущий пункт.
Если код введен правильно, то на экране появится сообщение “ЖДИТЕ ОТВЕТА . . .”. При получении от СЦМ подтверждения по телефону на экран выводится сообщение “ПРИНЯТО”, включается зеленый индикатор клавиатуры “Охрана” и начинается отсчет задержки на выход. Этот процесс сопровождается прерывистыми звуковыми сигналами клавиатуры, миганием зеленого индикатора клавиатуры “Охрана” и на дисплей выводится время, оставшееся до окончания задержки: “Время на выход. ”. За время выходной задержки покиньте объект. По окончанию выходной задержки на на клавиатуре горит зеленый индикатор клавиатуры “Охрана”, а на дисплее клавиатуры RX 150/160/ 400 горит надпись:
Скачать инструкцию на панель RX 150, 160, 400
Источник
Rxn 400 инструкция пользователя
5 Установка даты
и времени (только для клавиатур
Время и дата отображаются на экране, используется для ведения журнала событий в памяти прибора и т.д.
Для установки времени и даты войдите в меню пользователя, нажмите
введите дату в формате ДЕНЬ/МЕСЯЦ/ГОД . Год указывается дву-
мя цифрами. Подтвердите сделанные изменения нажатием клавиши
Ввод времени в Ввод некорректной даты/вр(
4-часовом формате. емени будет блокирован. Чтобы
и повторите заново.
коммуникатора (только для клавиатур
В ППКОП Captain-I возможно запрограммировать дозвон на 4 частных телефонных номера.
При тревоге, на каждый запрограммированный телефонный номер дозвон осуществляется дважды. После снятия трубки, прибор воспроизводит тревожное сообщение (тональный сигнал тревоги, или, если подключен VU-20, записанное голосовое сообщение), затем разрывает связь.
Чтобы запрограммировать дозвон по частным телефонным номерам, в меню пользо-
вателя нажмите 1, введите телефонный номер, подтвердите ввод нажатием дите второй телефонный номер,
третий телефонный номер,
фонный номер. Подтвердите сделанные изменения клавишей
Если необходимо запрограммировать меньшее, чем четыре, количество телефонов,
то вместо ввода остальных номеров нажимайте
Для удаления введенного телефонного номера нажмите
вместо ввода номера.
7 Звуковое сопровождение зон (только для клавиатур RXN-400/RXN-410)
При включенном звуковом сопровождении зон, любое нарушение зоны (даже при снятом с охраны приборе) будет сопровождаться звуковым сигналом клавиатуры. Для включения данной опции войдите в меню пользователя, нажмите tD. При появлении приглашения Выбор зоны введите номер зоны, которая будет сопровождаться звуковым сигналом.
Для отмены звукового сопровождения повторите действия.
8 Пользовательские опции
8.1 Тревожная кнопка
Чтобы активизировать тревожную кнопку (например, при вторжении), нажмите одно-
временно с удержанием клавиши
Для экстренного вызова медицинской помощи нажмите одновременно с удержанием
Для экстренного вызова пожарной команды нажмите одновременно с удержанием клавиши CJJ и tD.
Реакция прибора (сирена, реле, передача сообщения на ЦС и т.д.) на нажатие этих клавиш, а так же действия при нажатии этих клавиш необходимо уточнить в обслуживающей
8.2 Ручной сброс питания дымовых датчиков
В случае срабатывания шлейфа дымовых или пожарных датчиков, шлейф будет в тревожном состоянии до пересброса питания датчиков. Для ручного пересброса нажмите
8.3 Тест прибора
При проведении теста прибор теститрует состояние аккумулятора, сирену и состояние подключенной телефонной линии. Состояние аккумулятора тестируется только в случае, если подключено основное питание.
Для проведения теста войдите в меню пользователя и нажмите 3 с удержанием.
8.4 Динамик клавиатуры ( БИПЕР )
Встроенный динамик клавиатуры воспроизводит различные звуки в зависимости от ситуации (нажатие клавиш, тревога, отсчет задержек и т.д.). Для отключения динамика наи Для последующего включения повторите нажатие этих клавиш.
При выключенном динамике клавиатура не будет издавать
Источник
If this is not the document you want for this product, click here to see if we have any other documents for this product.
PIMA RXN-400 (01) PDF SUMMARY:
What are some safety instructions for the CAPTAIN-i alarm system?
Your CAPTAIN-i alarm system has been registered in accordance with EN60950 and its rules. EN 60950 requires the following safety information be shared:
- This alarm system has hazards of fire and electric shock. To reduce the risk of fire or electric shock, do not expose this alarm system to rain or moisture. Pay attention: Telephone cords could be a good conductor for lightning energy.
- Do not open the door of the alarm system. Dangerous high voltages are present inside of the enclosure. Refer servicing to qualified personnel only.
- This alarm system should be used with AC 230V50Hz, protected by anti-electric shock breaker. To prevent electric shocks and fire hazards, do NOT use any other power source.
- Do not spill liquid of any kind onto the unit. If liquid is accidentally spilled onto the unit, immediately consult qualified service.
- Install this product in a protected location where no one can trip over any line or power cord. Protect cords from damage or abrasion.
- Disconnect all sources of power supply before proceeding with the installation. Pay attention: do not install low voltage wires nearby AC power wires, they should be separated.
- Connect the AC transformer output to the terminal block on the control panel as marked.
- Connect the AC line cord to line power terminals as marked. (GND; N; L)
What are the main features of the CAPTAIN-i alarm system?
The CAPTAIN-i alarm system has the following main features:
- 6 programmable zones
- Two partitions
- Dialer: Up to three preset private telephone numbers and four Monitoring Station numbers
- Various modes of arming and disarming: keypad, key, remote control, automatic
- Four types of keypads: A simple LED keypad (RX-406 or RX-6), LCD keypads (RXN-400 or RXN-410) and Anti-vandal keypad RX/N-200
- Up to six different keypads, connected in parallel
- Two operating modes: Full or Home
- System Events are registered in memory (40 non-volatile)
- Various operating codes: Master Code, up to eight User Codes, and Short Code
- User Code #8 can function as DURESS code
- Optional temporary bypass of zones
- “Chime” mode per zone: operates the keypad buzzer when a zone is opened (e.g., to monitor a back door when the system is disarmed)
- Monitoring Station Communicator: built-in dialer (private & CMS), integrated Long-Range Radio and Cellular Transmitters
- Inhibit system from arming in case of failure (optional)
- Short-keys for DURESS and FIRE codes
What are the Access and Operation Codes for the CAPTAIN-i alarm system?
The following codes are used to access and operate the CAPTAIN-i Alarm System:
- Master Code: Use this code when programming system parameters. The default factory Master Code is 5555. For security reasons, it is not recommended to use the default code to arm or disarm the system.
- User Code: 4-6 digit code. Up to eight User Codes can be programmed, User Code 1 to User Code 8.
- Short Code: A convenient, two-digit code used only to arm the system.
- Duress Code: 4-6 digit code used for disarming the system in case it is armed, and sending a duress event to MS, or sends silent duress event to MS in case the system is disarmed.
What are the differences between the RXN-400 and RXN-410 LCD keypads?
PIMA’s LCD keypads RXN-400 and RXN-410 were especially designed for maximum simplicity, durability, and decorative design. The keypad is used for arming, disarming, and programming the system, as well as displaying time and date, system status information, events and defaults, memory log, and more. Up to six keypads can be connected to the CAPTAIN-i system. Both keypad models are identical, except for the size of the display screen:
| RXN-400 | Normal screen 15 x 60 mm |
|---|---|
| RXN-410 | Large screen 23 x 97 mm |
Both keypads must be powered by nominal 12VDC (9VDC-13.8VDC tolerance) from Limited Power Source power supply. Compliant with Clause 2.5 of EN 60950-1:2006 Standard.
What does the Display screen on the RXN-410 keypad show?
- The upper line: displays the System Fault, System Status and Time.
- System Status:
- P – System communicating or testing PSTN line
- T – System reporting to Monitoring Station via radio transmitter
- System Status:
- The lower line: displays information about the zones’ status. Each of the following characters signifies a certain status. The characters appear above the zone number on the display.
-
- Closed zone
- _ Opened zone
- B Bypassed zone
- A Alarm zone (zone triggering alarm)
- C Chime zone
- F Failed zone (disconnected or shortened)
-
How do I arm the entire alarm system?
Enter any of the following:
- Any User Code (User Code #1 to #8) that was allocated by the installer to both partitions
- Master Code
- Short code.
How do I disarm the entire alarm system?
Enter any of the following:
- Any User Code (User Code #1 to #8) that was allocated by the installer to both partitions
- Master Code
What happens when I enter the Master Code when one of the partitions is armed?
Entering the Master Code when one of the partitions is armed will arm the other partition as well.
What happens when I enter the Master Code when both partitions are armed?
Entering the Master Code when both partitions are armed will disarm the entire system.
How do I arm the alarm system to HOME mode?
Press and hold (or ) [ Any User Code / OR [ Short code.
How do I disarm the alarm system?
[ Any User Code (User Code #1 to #8)
How do I arm/disarm Partition #1?
[ Any User Code that was allocated by the installer to partition #1 (toggle mode)
How do I arm/disarm Partition #2?
[ Any User Code that was allocated by the installer to partition #2 (toggle mode)
What should users know about arming and disarming partitions?
- Users can arm/disarm only partitions allocated to them by the installer (partitions #1, #2, or both).
- All keypads connected to the system share the same display, even if they are allocated to different partitions.
Can I arm the system in case of failure?
If the installer enabled the “Failure Inhibits Arming” feature, the user will not be able to arm the system in case of failure (i.e. AC, Battery, etc.) For further information on this feature turn to CAPTAIN-I Ver.5 Installation Manual.
How do I bypass/reactivate an alarm zone?
You can bypass/reactivate an alarm zone by doing one of the following:
- [ Master Code [ zone number [ .
-
Hold and press until you receive the following screen:
Enter Code[Enter User Code and receive the following screen:
Zone:
[Enter zone number to be bypassed and receive the following confirmation screen (example):
02:29
–B—
1 2 3 4 5 6 7 8 9 10 11 12 13 14 15 16
Bypassed zone
(in this example-
zone 3)
Time
To bypass different zones, repeat the process. To cancel the bypass and reactivate the zone, repeat the bypass activation process with the zone’s number (toggle operation).
What happens to bypassed zones?
Every bypassed zone is logged in the system’s memory, including the time and date. Bypass mode is effective until you disarm the system.
How do I manually reset the smoke or fire detector?
Press and hold for 3 seconds.
How do I identify the zone that is causing the alarm?
The letter A is displayed above any Alarm Zone that was triggered while the system was last armed.
How do I enable the Chime mode?
Press and hold . The message CHIME ON is displayed for about 3 seconds on the LCD display.
What does Chime mode do?
This mode activates a buzzer in the keypad when a Chime Zone is triggered. This feature can be used to monitor unauthorized entry or exit in the defined zone when the system is not armed.
How do I disable the Chime mode?
Press and hold . The message CHIME OFF is displayed for about 3 seconds on the LCD display.
How do I view system events in memory?
To view system events, you can do one of the following:
- [ Master Code [ , and then scroll using the or keys [ to exit.
- Press and hold
How do I temporarily cancel the Entry Delay Time?
Press and hold and receive the following message: “DELAY OFF”. Press and hold again: “DELAY ON”. This feature is effective only until the system is disarmed.
How do you report a PANIC event to CMS/Private Dialer?
Press and hold the and keys simultaneously for two seconds.
What should I know about customizing the keypad’s panic event response?
You can customize your system’s response to the keypad’s panic event. You may be able to program it to report to the Monitoring Station, call a private telephone number, or sound the siren. Consult your installer about programming keypad’s Panic Response.
What happens if the installer programmed User Code 8 as the “Panic Code”?
Entering user code 8 will report a panic event to CMS, which is logged in memory as “Panic” with the time and date. It will also disarm the panel, a single partition, or both partitions.
How do you report a DURESS Event to CMS/Private Dialer?
Press and hold the and keys simultaneously until you hear a confirmation beep from the keypad.
What happens when you report a DURESS event?
The event is logged in memory as “Duress” and includes the time and date.
How do you report a FIRE Event to CMS?
Press and hold the and keys simultaneously until you hear a confirmation beep from the keypad.
What happens when you report a FIRE event?
The event is logged in memory as “Fire” and includes the time and date.
How do you disable a keypad’s audible tones?
Press and hold the and keys simultaneously.
What happens when the keypad’s Audible Tone feature is disabled?
All audible tones and indications, including those from the keypad, are silenced.
How do you enable a keypad’s audible tones?
Press and hold the and keys simultaneously until you hear a beep.
What does the Green-ARMED LED indicate?
The Green-ARMED LED will indicate the system status.
What do the different Green-ARMED LED signals mean?
- Blinking: The system is in Entry (before disarming) or Exit (after arming) Delay Time mode.
- Steady Light: The system is armed.
What does the Green LED indicate in the case of partitions?
| Armed Partition/s | LCD Screen Display | Green LED |
|---|---|---|
| Partition #1 armed | Part1 ON | 1 blink every 4 seconds |
| Partition #2 armed | Part2 ON | 2 blinks every 4 seconds |
| Both partitions armed (entire system) | **** ON **** | Stays lit constantly |
What is important to do before beginning to program the CAPTAIN-i Alarm System?
You must first enter the Master Code. (The default factory code is 5555). When “Select” appears on the LCD display, you may proceed with programming your system.
How do you cancel a command?
Press the key three times to start the programming procedure from the beginning.
How do you program a Master Code?
Press the following keys in the order presented: [Initial Master Code] [] [new Master Code (4-6 digits)] [] [].
How do you program User Code #1?
Press the following keys in the order presented: [Master Code] [] [] [new User Code (4-6 digits)] [] [] [].
How do you delete User Code #1?
Press the following keys in the order presented: [Master Code] [] [] [] [] [] [].
How do you program User Codes #2 to #8?
Press the following keys in the order presented: [Master Code] [] (as many times as the User Code number) [new User Code (4-6 digits)] [] [] [].
How do you delete User Code #2 to #8?
Press the following keys in the order presented: [Master Code] [] (as many as the User Code number) [] [] [].
Can you provide an example of programming or deleting User Code #6?
When programming or deleting User Code #6, enter the Master Code, press the key, followed by pressing the key six times.
How do you program a Short Code?
Press the following keys in the order presented: [Master Code] [] [] [new Short Code (2 digits)] [] [] [].
How do you delete a Short Code?
Press the following keys in the order presented: [Master Code] [] [] [] [] [].
How do you program Automatic Arming?
Press the following keys in the order presented: [Master Code] [(HH:MM 24 hour format)] [].
How do you program telephone number(s)?
Press the following keys in the order presented:
- [Master Code] []
- [Enter the first telephone number including area code] []
- [Enter the second telephone number including area code] []
- [Enter the third telephone number including area code] [] [].
What are some notes about programming telephone numbers?
- You can program up to three telephone numbers into the system memory, which will be called in an emergency or when in Alarm Event.
- To skip a number (i.e., leave the programmed number or leave it empty), simply press . Press to exit the mode.
- If the CAPTAIN Alarm System is connected behind a PBX, you must enter the outside line prefix digit and an asterisk before the telephone number. For example: 9*555-5555.
- When the CAPTAIN Alarm System calls to one of the programmed telephone numbers, a siren tone is heard on the subscriber telephone.
- For playing a pre-recorded message, a VU-20 unit (optional) is required. Consult your installer for this option.
- It is also possible to connect the microphone unit MIC-200.
How do you delete telephone number(s)?
With the telephone number(s) to keep, press the key, and with the one(s) to delete, press the key. Press the key to exit.
How do you delete all the telephone numbers?
Press the following keys in the order presented: [Master Code] [] [] x3 [].
How do you set the time and date for the system?
Press the following keys in the order presented: [Master Code] [] [current time (HH:MM 24 hours format)] [] [current date (YY MM DD format)] [] [].
What are some notes about setting the time and date?
- It is important to set the correct time and date to ensure the proper functioning of your CAPTAIN Alarm System.
- If NO time is entered, the red Fault LED will blink and a CLOCK message is displayed.
How do you program/cancel a Chime Zone?
Press the following keys in the order presented: [Master Code] [] [zone number] [].
What does programming/canceling a Chime Zone do?
This mode activates a buzzer in the keypad when a Chime Zone is triggered. Chime Zones are indicated by the letter C in the display above the programmed zone number (in “Select” mode).
What are the Fault Indications and their descriptions?
| Display | Description |
|---|---|
| Battery | Low battery power |
| Phone | No dial tone detected |
| AC line | AC power failure |
| Clock | Appears after initial power input or after total power reset (AC and battery) |
| Low DC | Very low DC supply to the alarm card (PCB) |
| Trouble | Detector was shorten or cutoff |
| DC FUSE | Detectors power line (+/-) was shorten |
| Communic | Failure to communicate with Central Monitoring Station (CMS) |
| GSM Unit | GSM unit is not identified by system |
| GSM Sgnl | Low GSM signal |
| GSM SIM | SIM card failure |
| GSM Com. | GSM communication to CMS failure |
| KEYBOARD NOT CONNECTED | A problem with keypad connection to the panel |
What are some general notes about the Fault Indications?
- Wait 24 hours. If the fault persists, contact the installer.
- Contact the installer.
- Check the phone line at the premises.
- Set the system time and date.
- Contact the Central Monitoring Station.
- Check with the cellular carrier.
What information should be filled out in the Zone Names section?
| No. | Name | Note |
|---|---|---|
| 1 | ||
| 2 | ||
| 3 | ||
| 4 | ||
| 5 | ||
| 6 | ||
What information should be filled out in the Installer Information section?
Company
Name
Tel.
Cell phone
Email
What should users understand about the security system?
PIMA Electronic Systems Ltd. does not represent that its product may not be compromised and/or circumvented, or that the Product will prevent any death, personal and/or bodily injury and/or damage to property resulting from burglary, robbery, fire or otherwise, or that the Product will in all cases provide adequate warning or protection. The User understands that a properly installed and maintained equipment may only reduce the risk of events such as burglary, robbery, and fire without warning, but it is not insurance or a guarantee that such will not occur or that there will be no death, personal damage and/or damage to property as a result.
PIMA Electronic Systems Ltd. shall have no liability for any death, personal and/or bodily injury and/or damage to property or other loss whether direct, indirect, incidental, consequential or otherwise, based on a claim that the Product failed to function.
Where can I find the warranty statement?
The separate warranty statement can be found on PIMA’s website at: http://www.pima-alarms.com/site/Content/t1.asp?pid=472&sid=57.
What are some warnings for users?
The user should follow the installation and operation instructions and among other things test the Product and the whole system at least once a week. For various reasons, including, but not limited to, changes in environment conditions, electric or electronic disruptions and tampering, the Product may not perform as expected. The user is advised to take all necessary precautions for his/her safety and the protection of his/her property.
What should I know about duplicating this PDF?
This document may not be duplicated, circulated, altered, modified, translated, reduced to any form or otherwise changed unless PIMA’s prior written consent is granted.
What should I know about the accuracy of this PDF?
All efforts have been made to ensure that the content of this manual is accurate. Pima retains the right to modify this manual or any part thereof, from time to time, without serving any prior notice of such modification.
What should I do before attempting to program or operate the system?
Read this manual in its entirety before attempting to program or operate your system. Should you misunderstand any part of this manual, please contact the supplier or installer of this system.
What is the copyright information for this PDF?
Copyright © 2010 PIMA Electronic Systems Ltd. All rights reserved.
How do I contact PIMA Electronic Systems Ltd.?
PIMA Electronic Systems Ltd.
5 Hatzoref Street, Holon 58856, Israel
Tel: +972.3.6506414
Fax: +972.3.5500442
Email: support@pima-alarms.com
Web: http://www.pima-alarms.com