
Downloading, Installing and Updating RetroArch for Switch
| WARNING |
|---|
| You need to have Atmosphère custom firmware to run RetroArch on your Switch. Hardware or software changes on your device may damage your device. |
Prerequisites
Neither RetroArch nor LibRetro support or recommend that your device run CFW.
- Atmosphère 1
- FAT32 formatted SD card
Downloading and installing
There are multiple ways of downloading RetroArch for your Switch.
Using the stable bundle (recommended)
You can find a bundle with RetroArch, all the cores and all the assets here.
Just extract the archive to the root of your SD card to install or update your copy of RetroArch (overwrite any existing file).
Using the nightlies and/or the online updater (advanced users)
If you don’t want to download all cores at once, you can go here and only pick the ones you want. Put the downloaded NROs in retroarch/cores on your SD card. You can run them directly using the homebrew menu.
Alternatively, you can download only one core and use the Online Updater inside of RetroArch to download or update additional cores later.
Running RetroArch using title takeover
The preferred way of running RetroArch is to use Atmosphère’s title takeover feature. This allows you to (temporarily) replace a game with the homebrew loader, which will then be used to load RetroArch. Make sure to use the latest version of Atmosphère before continuing.
| WARNING |
|---|
| You need at least one title on the console (whether it’s a digitally puchased game or a demo or a cartridge game or even an homebrew NSP). If you can pick an up to date game that’s better as you won’t be nagged everytime you run it. |
Atmosphère now contains everything needed to run homebrews out of the box. To do so, simply run any game while holding the R key. Make sure to hold the key until you can actually see the homebrew menu. Select RetroArch in the list to start!
If you wish to change the key, you can edit /atmosphere/loader.ini and change override_key here. You can add a ! in front of the key to flip the condition («run homebrew if the key is pressed» versus «run homebrew if the key isn’t pressed»).
Updating
Updating RetroArch is the same as installing it, download a higher or lower version (in this case, downgrade) than the version you have and overwrite existing files.
Glossary
«Atmosphère»
Atmosphère is a work-in-progress customized firmware for the Nintendo Switch.
«NRO»
An NRO file is an executable file used by the Nintendo Switch. It contains compiled code for an application or game. NRO files may also store assets for Homebrew Launcher, such as a icon and metadata.
Nintendo Switch with Custom Firmware
- The RetroArch homebrew application requires a hacked switch with CFW such as Atmosphere
- You cannot run homebrew applications with unhacked or stock Switch consoles
- This guide assumes you have all the basic requirements to enter RCM and boot into CFW
MicroSD Card (128GB or Larger Recommended)
- ROMs will be stored on the MicroSD card
- 128GB or more is recommended for storing games
Internet Connection
- RetroArch requires an internet connection during initial setup to update certain files such as the cheats database
Set Up RetroArch
Guide Information
RetroArch is a frontend for emulators, game engines and media players. It enables you to run classic games on a wide range of computers and consoles through its slick graphical interface. Settings are also unified so configuration is done once and for all. RetroArch has advanced features like shaders, netplay, rewinding, next-frame response times, runahead, machine translation, blind accessibility features, and more!
-
20+ Minutes
-
You will need to add BIOS files for some systems to work.
What You Need
-
Unpatched/Modchipped Switch -
MicroSD Card (64GB+) -
RetroArch
Set Up RetroArch
-
Click the link below, scroll down to the Nintendo Switch icon and click on download to download the RetroArch files.
- Extract the RetroArch.7z to the root of your microSD card.
Adding ROMS
-
Create a roms folder on your microSD card.
- Create subfolders inside the roms folder for the different systems you want to emulate.
-
roms
-
N64
-
NES
-
SNES
-
- Place your ROMs into the correct subfolders.
- Boot into Atmosphere CFW.
- Hold the R button whilst launching a game to take you to the hbenu without being in applet mode.
- Once you are in the hbenu you can release the R button, and then launch the RetroArch app.
-
You can learn more about using RetroArch on their website.
⚠️ Warning ⚠️
Modifying your Switch is dangerous. It can lead to account bans, which will prevent you from accessing Nintendo’s online services and can also lead to potential console bricks. If you decide to modify your Switch in any way, we take no responsibility for any damage you cause to your switch. If you have any questions, or need help getting started, you can join our discord server by clicking the link above.
| RetroArch | |
|---|---|
| General | |
| Author | Libretro |
| Type | Other Emulators |
| Version | 1.21.0 |
| License | GPL-3.0 |
| Last Updated | 2025/04/30 |
| Links | |
| Stable — Nightly Download | |
| Website | |
| Source | |
| Support Author | |
RetroArch is an open source cross-platform frontend for emulators, game engines, and media players. It provides a user-friendly graphical interface for running classic games on a wide range of computers and consoles. The application unifies settings, simplifying the configuration process by allowing users to set them up once and for all.
RetroArch offers advanced features such as shaders for visual enhancements, netplay for online multiplayer gaming, rewinding to undo mistakes or retry challenging sections, next-frame response times for precise inputs, runahead to reduce input lag, machine translation, blind accessibility features, and many more.
Features
- OpenGL support.
- Touchscreen support (for MaterialUI/etc).
- Full networking support.
- RetroAchievements support.
- Game scanning.
- Split Joy-Con support.
- Core downloader.
- Runahead support.
Installation
Prerequisites:
- Atmosphère CFW.
- FAT32 formatted SD card.
Using the stable bundle (recommended):
- You can find a bundle with RetroArch, all the cores and all the assets here.
- Just extract the archive to the root of your SD card to install or update your copy of RetroArch (overwrite any existing file).
Using the nightlies (advanced users):
- If you don’t want to download all cores at once, you can go here and only pick the ones you want.
- Put the downloaded NROs in
retroarch/cores/on your SD card. You can run them directly using the homebrew menu. - Alternatively, you can download only one core and use the Online Updater inside of RetroArch to download or update additional cores later.
Updating RetroArch is the same as installing it, download a higher or lower version (in this case, downgrade) than the version you have and overwrite existing files.
Note that some Cores need BIOS files in order to correctly emulate hardware and/or software as needed by the content (usually /retroarch/cores/system/), refer to this list for core specific BIOS information.
User guide
Running RetroArch
The preferred way of running RetroArch is to use Atmosphère’s title takeover feature. This allows you to (temporarily) replace a game with the homebrew loader, which will then be used to load RetroArch. Make sure to use the latest version of Atmosphère before continuing.
Note: You need at least one title on the console (whether it’s a digitally purchased game or a demo or a cartridge game or even an homebrew NSP). If you can pick an up to date game that’s better as you won’t be nagged every time you run it.
Atmosphère now contains everything needed to run homebrews out of the box. To do so, simply run any game while holding the R key. Make sure to hold the key until you can actually see the homebrew menu. Select RetroArch in the list to start!
If you wish to change the key, you can edit /atmosphere/loader.ini and change override_key here. You can add a ! in front of the key to flip the condition («run homebrew if the key is pressed» versus «run homebrew if the key isn’t pressed»).
Setting up XMB
If the menu icons are not loaded when you start RetroArch, you’re missing the assets package. Navigate the menu and go to «Online Updater» and select «Download Assets». Otherwise, download the assets here and extract it to sdmc:/retroarch/assets/. The next time you open RetroArch, all should be well.
The default directory for the XMB assets is sdmc:/retroarch/assets/, you can change it to any other path you like under Settings > Directory.
Supported cores
The cores listed below are known to work well on Switch. There may be other experimental cores not listed here, but they are not recommended for most users.
Amstrad Cores:
- Amstrad — CPC (Caprice32)
- Amstrad — CPC (CrocoDS)
Atari Cores:
- Atari — 2600 (Stella / Stella2014)
- Atari — 7800 (ProSystem)
- Atari — Lynx (Beetle Handy)
- Atari — Jaguar (Virtual Jaguar)
Commodore Cores:
- Commodore C64/C128/VIC20/PET/PLUS4/ CBM-5×0/6×0/7×0 /SID (VICE)
Game Cores:
- 2048 (2048)
- Bomberman (MrBoom)
- Cave Story (NXEngine)
- Dinothawr
- Doom & Doom 2 (PrBoom)
- Doom 3 (boom3)
- Flashback (Reminiscence)
- Game & Watch (GW)
- OutRun (Cannonball)
- Quake (TyrQuake)
- Quake 2 (VitaQuake2)
- Quake 3 (VitaQuake3)
- Rick Dangerous (XRick)
- Star Trek: Voyager (VitaVoyager)
- Tomb Raider (OpenLara)
Multi System Cores:
- Arcade (MAME 2000)
- Arcade (MAME 2003)
- Arcade (MAME 2003 Plus)
- Arcade (FBNeo)
Misc Cores:
- 3DO Company — 3DO (4DO)
- Amiga (P-UAE)
- Bandai — WonderSwan/Color (Beetle WonderSwan [Cygne])
- DOS (DOSBox SVN)
- Game Music Library (GME)
- GCE — Vectrex (vecx)
- Magnavox — Odyssey2 / Phillips Videopac+ (O2EM)
- Mattel — Intellivision (FreeINTV)
- Microsoft — MSX (fMSX)
- MP3 Karaoke Music Player (Pocket CDG)
- NeoGeo CD (NeoCD)
- Palm OS (Mu)
- RPG Maker 2000/2003 (EasyRPG)
- Sharp X68000 (PX68k)
- ScummVM
- Sinclair — ZX 81 (81/EightyOne)
- SNK — Neo Geo Pocket / Color (Beetle Neo Geo Pocket [NGP])
- Thomson — TO8D (Theodore)
- Uzebox (Uzem)
- ZX Spectrum (Fuse)
Nintendo Cores:
- Nintendo — Nintendo DS (DeSmuME)
- Nintendo — Nintendo DS (MelonDS)
- Nintendo — Nintendo 3DS (Citra)
- Nintendo — Game Boy / Color (Gambatte)
- Nintendo — Game Boy / Color (GearBoy)
- Nintendo — Game Boy / Color (SameBoy)
- Nintendo — Game Boy / Color (TGB Dual)
- Nintendo — Game Boy Advance (mGBA)
- Nintendo — Game Boy Advance (VBA Next)
- Nintendo — NES / Famicom (FCEUmm)
- Nintendo — NES / Famicom (Mesen)
- Nintendo — NES / Famicom (Nestopia UE)
- Nintendo — NES / Famicom (QuickNES)
- Nintendo — Nintendo 64 (Mupen64 Plus)
- Nintendo — Nintendo 64 (Mupen64 Plus Next)
- Nintendo — Pokemon Mini (PokeMini)
- Nintendo — SNES / Super Famicom (BSNES HD)
- Nintendo — SNES / Super Famicom (Snes9x 2010)
- Nintendo — SNES / Super Famicom (Snes9x)
- Nintendo — Virtual Boy (Beetle VB)
NEC Cores:
- NEC — PC-98 (Neko Project II Kai)
- NEC — PC Engine / CD (Beetle PCE FAST)
- NEC — PC Engine SuperGrafx (Beetle SGX)
Sega Cores:
- Sega — Dreamcast (Flycast)
- Sega — MS/GG (GearSystem)
- Sega — MS/GG/MD/CD (Genesis Plus GX)
- Sega — MS/GG/MD/32X (PicoDrive)
- Sega — Saturn (Yabause)
Sony Cores:
- Sony — PlayStation (Beetle PSX)
- Sony — PlayStation (PCSX ReARMed)
- Sony — PlayStation Portable (PPSSPP)
Inputs and controls
See the RetroArch documentation for setting the controls.
USB keyboards and mice:
- All keyboards seem to work.
- Not all mice seem to work. Mouse compatibility sheet.
Touch mouse emulation:
- Single finger drag — Move the mouse pointer (indirectly like on a touchpad)
- Single short tap — Left mouse click
- Dual finger short tap* — Right mouse click
- Dual finger drag — Drag’n’Drop (left mouse button is held down)
- Three finger drag — Drag’n’Drop (right mouse button is held down)
(*: hold one finger, short tap with another)
Notes
How to use split Joy-Configurations for 2 players:
- First, set your Joy-Cons as two players in the Switch home menu.
- Then go to Settings > Input in RetroArch and set split joycons to 2.
- You should also set a new Menu-open key combo.
Recommended settings for optimal performance:
- Try enabling Audio and Video to switch_thread/thread, and also enable 1:1 PAR so that each core has their proper given aspect ratio.
- Also, don’t forget to always launch from a game using title takeover.
In case PCSX ReARMed is running too slowly:
- Go to Settings > Video and enable Threaded Video. Threaded Video can also help with certain demanding shaders.
- Please note that Threaded Video can tend to introduce some judder to frame pacing which isn’t there with non-threaded video, so for all other cores you might want to leave this off.
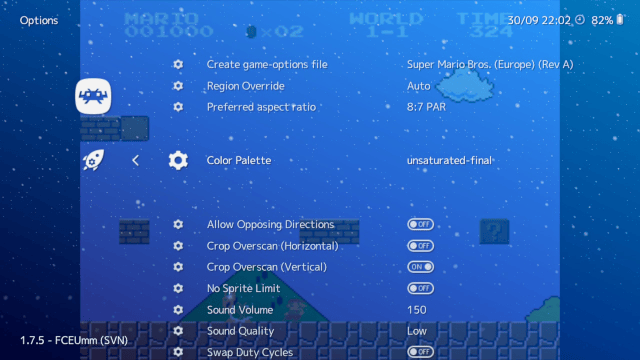
Screenshots
Media
RetroArch — How to Install: Switch (LibRetro)
RetroArch Quick: How to Update for Switch (LibRetro)
External links
- Official website — https://retroarch.com/index.php
- GitHub — https://github.com/libretro/RetroArch
- Documentation — https://docs.libretro.com/
- Release page — https://www.libretro.com/index.php/retroarch-1-7-5-introducing-libnx-switch-version/
- GBAtemp — https://gbatemp.net/threads/retroarch-switch.492920/
RetroArch NSP takes center stage, elevating the emulator experience like never before. The Ultimate Nintendo Switch RetroGaming Experience with RetroArch
RetroArch NSP is about to become your new best friend on the Nintendo Switch, serving up a heaping helping of nostalgia by making it possible to play retro games from a multitude of consoles. Whether you’re chasing the retro high or settling in for a marathon gaming session, this comprehensive emulator puts the likes of SNES, Sega Genesis, and PlayStation at your fingertips,-ready to be played whenever, wherever. Ready to level up your gaming experience with RetroArch NSP? We’ve got you covered, from the initial install to fine-tuning the perfect settings.
What is RetroArch NSP?
RetroArch NSP is a version of the RetroArch emulator tailored for the Nintendo Switch. Delivered as an NSP file, it integrates directly into the Switch’s homebrew ecosystem, allowing you to play retro games efficiently while leveraging the console’s power and portability.
Prerequisites for Using RetroArch NSP
Before setting up RetroArch NSP, ensure the following:
-
A Modded Nintendo Switch: Your console must be modded with custom firmware like Atmosphère.
-
MicroSD Card: A high-speed card with sufficient storage for ROMs and the RetroArch NSP file.
-
RetroArch NSP File: Download the latest version from trusted sources like retroarchemu.gitlab.io.
-
Homebrew Tools: Tools like Tinfoil or Goldleaf for installing NSP files.
Step-by-Step Installation Guide for RetroArch NSP
Step 1: Prepare Your Nintendo Switch
-
Boot into RCM (Recovery Mode) using a jig or similar tool.
-
Launch your custom firmware (e.g., Atmosphère).
Step 2: Download and Transfer Files
-
Visit retroarchemu.gitlab.io to download the latest RetroArch NSP.
-
Extract the files and place them in the appropriate folder on your microSD card:
-
RetroArch Folder:
/switch/retroarch/. -
Cores: Place
.infoand.dllfiles in/switch/retroarch/cores/.
- Add your ROMs to a folder like
/roms/.
Step 3: Install RetroArch NSP
-
Insert the microSD card into your Nintendo Switch.
-
Open your homebrew installer (e.g., Tinfoil or Goldleaf).
-
Navigate to the RetroArch NSP file and select Install.
-
Wait for the installation to complete.
Step 4: Launch RetroArch
Once installed, RetroArch will appear as an icon on your Switch’s home screen. Open it to begin configuration.
Configuring RetroArch NSP for Optimal Performance
Set Up Core Preferences
-
Launch RetroArch and navigate to Load Core.
-
Download or select cores for your desired platforms (e.g., SNES9x for SNES games, PCSX-ReARMed for PlayStation games).
-
Save your settings to avoid reconfiguring each time.
Input Configuration
-
Go to Settings > Input and map your buttons for comfort.
-
Enable hotkeys for quick actions like saving states or accessing the RetroArch menu:
- Menu Hotkey: Map it under Settings > Input > Hotkeys.
Graphics and Audio Optimization
-
Under Settings > Video, configure the aspect ratio and enable filters for enhanced visuals.
-
In Settings > Audio, ensure the sample rate matches your system for optimal sound quality.
Adding and Managing ROMs
RetroArch NSP supports a wide range of ROMs. Here’s how to add and organize them:
-
Place ROMs in the
/roms/folder on your microSD card. -
Use the Scan Directory option in RetroArch to automatically detect and organize your games.
-
Rename files clearly to identify games easily.
Troubleshooting Common RetroArch NSP Issues
Issue: RetroArch NSP Fails to Launch
-
Ensure your NSP file isn’t corrupted by re-downloading it.
-
Verify that your Switch is running the latest version of its custom firmware.
Issue: Games Not Loading
-
Check if the correct core is loaded for the game.
-
Ensure ROMs are not encrypted or in unsupported formats.
Issue: RetroArch No Sound
-
Go to Settings > Audio and switch the audio driver to OpenAL or SDL.
-
Test different sample rates until the issue resolves.
Enhancing the RetroArch Experience on Nintendo Switch
Shaders and Filters
RetroArch supports shaders that enhance game graphics. To enable them:
-
Go to Quick Menu > Shaders while a game is running.
-
Select a shader preset for your desired effect.
Achievements and Online Play
-
Create an account on RetroAchievements.org to unlock achievements in supported games.
-
Use RetroArch’s Netplay feature to connect with friends for multiplayer gaming.
Overlays and Custom Themes
Customize your RetroArch interface with overlays and themes:
-
Download overlays from RetroArch’s content directory.
-
Apply them under Settings > Onscreen Overlay.
Why Use RetroArch NSP on Nintendo Switch?
-
Versatility: Emulate multiple systems on one device.
-
Portability: Enjoy retro games anywhere.
-
Customization: Tailor settings to suit your preferences.
-
Performance: The Nintendo Switch’s hardware ensures smooth gameplay.
FAQs about RetroArch NSP
Is RetroArch NSP Safe to Use?
Yes, provided you download it from trusted sources like retroarchemu.gitlab.io. Always exercise caution when downloading NSP files.
Can I Play Multiplayer Games on RetroArch NSP?
Yes, RetroArch supports local and online multiplayer through its Netplay feature.
What File Formats Does RetroArch NSP Support?
RetroArch supports a wide variety of ROM formats, including .zip, .iso, .nes, .sfc, and more.
Conclusion
RetroArch NSP transforms your Nintendo Switch into a powerful retro gaming hub. Fire up your retro gaming experience by following this expert-approved guide to get RetroArch running like a dream. For more guides and updates, visit retroarchemu.gitlab.io. Start your retro gaming journey today and relive the classics like never before.