
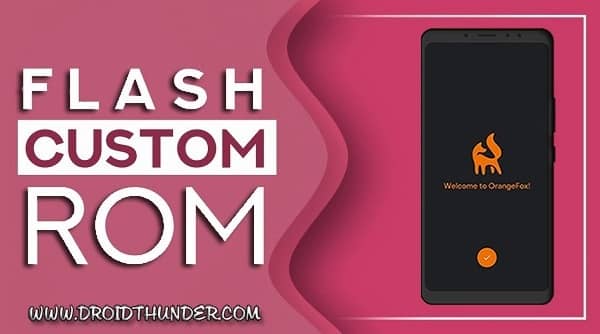
OrangeFox Recovery is one of the most popular custom recoveries, with amazing additional features and support for a large number of devices. It is so much better than Android stock recovery or TWRP Recovery as it comes with many additional features which both of these lack. It can easily install ZIP or IMG files. Some of its features are:
- Auto updates in background.
- Ability to create and edit OpenRecoveryScripts.
- Password protection
- Clean and easy to use UI.
- No analytics/ads, small apk size.
In this guide, we will show you how to install OrangeFox Recovery onto your Xiaomi/Mi/Redmi/POCO device. Follow along the detailed instructions to install.
Step by Step Guide on how to Flash OrangeFox Recovery on Xiaomi Devices
There are two methods via which you can flash OrangeFox Recovery on your Xiaomi device. The first one is via TWRP Recovery. This is a direct and pretty easy method. But you need to have TWRP installed already to continue.
If you don’t have TWRP installed, then you might want to install it via ADB and Fastboot commands. Follow this step by step guide to flash OrangeFox Recovery on your Xiaomi device.
Pre-requisites:
- You will need a PC or computer and a USB cable to connect your smartphone.
- Enable USB debugging and OEM unlocking on your device from developer options.
 - The Android Rush")
- You Xiaomi device’s bootloader has to be unlocked. If you haven’t unlocked the bootloader yet, read our guide on how to it.
- Download OrangeFox Recovery file from the official site. Use the left menu bar to either search your device or find it under the Xiaomi menu.
 - The Android Rush")
Method 1: Via TWRP Recovery
If you have TWRP Recovery installed, then I highly recommend you go with this method without any thought. It is easier to perform and faster than the second method.
- Connect your phone to your PC via USB cable while enabling USB debugging.
- On your PC, open a command prompt. To open command prompt head over to the platform-tools folder, type in CMD in the address bar, and hit Enter.
- Type in the following commands:
- This will reboot your device to TWRP.
- Click install, select OrangeFox Recovery ZIP file and right swipe to complete the action.
- Once done, boot your device using the following command:
You have successfully installed OrangeFox Recovery on your Xiaomi device.
Method 2: via ADB and Fastboot
If you don’t have any TWRP Recovery installed, then it’s better to use ADB and Fastboot method to install OrangeFox Recovery on your Xiaomi device. Follow these steps to install.
- Extract the OrangeFox Recovery ZIP file into your PC or computer. This will give you recovery.img file.
- Transfer the recovery.img file to the platform-tools folder on your PC.
- Connect your phone to your PC via USB cable while enabling USB debugging.
- On your PC, open a command prompt. To open command prompt head over to the platform-tools folder, type in CMD in the address bar, and hit Enter.
- Type in the following command in the CMD window to boot your device to Fastboot Mode.
- Type in the following command to flash OrangeFox Recovery.
- Reboot into OrangeFox by pressing the power + volume up keys together, until you see the OrangeFox splash screen.
- Now find and select OrangeFox ZIP file on your phone and swipe right to flash it. This is done because OrangeFox needs some files from the ZIP.
- After installation, your device will automatically reboot to OrangeFox. After this you may reboot your device and you have successfully flashed OrangeFox Recovery on your Xiaomi device.
Join Our Official Telegram Group Now For Any Doubts/Queries
If you have any queries, feel free to drop them in the comment section. Turn on the notification bell to never miss any posts from us.
Make sure to follow/join us on YouTube, Google News, Instagram, Facebook, Twitter, Telegram, & Pinterest to receive the latest news and updates!
More articles to check out:
- How to Unlock Bootloader on Xiaomi Devices 2022
- How to Enable Memory Extension on Xiaomi Phones [Mi, Redmi & Poco]
- Download Google Camera for Redmi Note 11 & 11 Pro/Pro+
- List of Xiaomi, Redmi, & Poco Smartphones that are likely to get MIUI 13.5 Update
Amit Kukreja is a content creator, website developer, & tech geek. He writes technically-driven articles regarding android, rooting, news, updates, & more. He is a supporter of technology in the country. He also Posts Tech Videos On The Android Rush YouTube Channel
Maybe you are wondering what Orangefox Recovery is. Like you, many Android gig users are recently known about this remarkable Android recovery platform. If you’re one of them, you’re probably familiar with TWRP and CWM Recovery. For quite a long time, TWRP Recovery has been the most popular Android recovery method.

But, as humans, we tend to become bored with anything after a while. As a result, to provide you with something fresh and new, the OrangeFox developer designed this platform, offering exclusive features that can help you get access to your Android phone again.
During today’s discussion, we will share some vital insights on using OrangeFox, what does it, and how you can get it for free for Android smartphone recovery.
What Is OrangeFox For Android Smartphone?
OrangeFox, like TWRP and CWM, is a 100% open-sourced custom recovery tool. This recovery method is in practice for almost 2.5 years in the Custom Recovery market.
Notwithstanding its age, this recovery method is up to date with all of TWRP’s newest patches and includes Magisk’s upgrades and optimizations. So, if you’re tired of the previous TWRP Recovery and want to start something different, this is an all-new and up-to-date OrangeFox Recovery V10.1.
Fastboot commands ADB Mode

MTP driver for windows 10 Vivo USB driver

UMT dongle setup latest version download
Why Should You Try OrangeFox Features?
- Completely free and open-source
- Synced with the most recent TWRP modifications
- Material design two principles were used to create this design.
- Flyme and MIUI OTA support has been added.
- Patches that come pre-installed, such as Magisk and password, can be used to reset the patch.
- Personalization is allowed: The primary aim of a custom Recovery is to provide users with the ability to tailor their phone according to their preferences.
- Password security: Because your security is one of OrangeFox Recovery’s top objectives, you’ll be offered authentication, which is unusual for a bespoke recovery.
- Constantly updated: Despite its infancy, OrangeFox Recovery is often updated. As a result, your Android smartphone will have the strongest and most up-to-date features.
OrangeFox Latest Features:
- Older records (encrypted and zipped) will be saved to the /sdcard/Fox/logs/ directory, including other logs.
- On the latest smartphones, additional MIUI OTA support has been included.
- Improved system rooting support.
- Compatibility for Android 10 has been enhanced.
- Compatibility for MIUI 11 has been upgraded.
- A new version of the Magisk plugin has been released.
- Accept communications from the “Android Rescue Party.”
- More data about the loaded ROM is now available.
- Stock Team Win recovery can be used to synchronize certain sources.
- Encryption: if you don’t require it, don’t use a wrapped key.
- Encryption: cryptfs: compatibility for key master two has been added.
- Problems with the app management have been resolved.
- Excessive alerts for modified ROMs have been disabled.
- Ukrainian, Vietnamese, and French have been added.
- All additional languages have been updated.
Several minor adjustments have been made.
How To Download OrangeFox Recovery For Android?
The download link to the most recent OrangeFox Recovery V10.1 is provided here. OrangeFox Recovery V11, the most recent version, is presently undergoing work and will be released shortly.
The new version is intended to include Android 10 gestures and design principles and an improved user interface. Its C code can create the battery icon. Also, it is anticipated to receive Magisk updates and repairs. This version, like all others, will be synced with TWRP modifications!
Download Orange Fox Recovery(official website)
After visiting the official page of OrangeFox, search for your mobile brand and model number (optional) to get the software.
How To Install OrangeFox Tool With Fastboot?
To start, take the first step. Copy recovery.img to your computer ADB folder after extracting recovery.img from the OrangeFox zipped file.
Step 1: Use USB connections to plug your Android smartphone into your computer, then restart it into fastboot/bootloader mode.
Step 2: On your Windows computer, launch the command program, or on a Mac OS, run the terminal screen.
For Windows users:
Head over to the folder where you have installed the ADB and Fastboot utilities.
Next, while holding down the SHIFT key on the computer, right-click on any empty area within this folder.
Select the option to open the PowerShell window there.
For Mac OS X and Linux:
Change the location of the Terminal Screen (using the “cd” line) to the location in which the ADB and Fastboot utilities are located.
Step 3: Navigate to your computer’s ADB folder.
Step 4: Flash OrangeFox Recovery using the code underneath –
fastboot flash recovery recovery.img
Step 5: Finally, restart in recovery mode by hitting the volume up + power keys until the OrangeFox logo appears. Please keep in mind that the buttons may differ based on your device.
Step 6: After OrangeFox has started up, check to see whether it’s all operating correctly, such as the data drive being mounted successfully and the screen functioning.
Step 7: Locate and select the OrangeFox zipped file. Install it by tapping or swiping on it.
Step 8: When the installation is finished, the device will restart into OrangeFox Recovery instantly.
That is all there is to it. You’re now ready to experience the newest and most amazing OrangeFox Recovery.
How To Install OrangeFox Tool Via TWRP/ Custom Recovery?
If your smartphone already has Custom Firmware loaded, just follow the steps below to deploy OrangeFox Recovery:
Step 1: First, get the OrangeFox Recovery Zipped file from the above-mentioned sources.
Step 2: Launch the TWRP recovery homepage on your Android smartphone.
Step 3: From the main TWRP interface, click the Install button.
Step 4: Select the OrangeFox Recovery Download file from the list of items.
Step 5: After you’ve loaded the file, slide right to flash everything.
Just after that, restart your phone to get all the customization to work perfectly.
FAQ
How Do I Get Rid Of Orangefox?
You can remove the application by going to Programs and Features in the Control Panel.
- Go to the Programs and Features menu. To remove software, go to Start, input “uninstalls a program” in the Search Initiatives and Folders box, then select the match. Or you can push the Windows and X buttons together to bring up the WinX interface, then select Programs and Features.
- In the list, find OrangeFox, select it, and afterward, pick Uninstall to begin the removal.
Which Custom Recovery Is Best?
Thanks to the incoming technology revolution, which is introducing constant effective tools for custom recovery. Among them, the below recovery tools are the best, according to our expert team.
- OrangeFox Recovery
- TWRP (TeamWin) Recovery
- Red Wolf Recovery
- Pitch Black Recovery
- SKY HAWK Recovery Project
Closure
We’re assuming you’ve downloaded and installed OrangeFox Recovery on your Android phones. If you’ve any concerns or are having trouble with any of the procedures mentioned, please leave them in the comments area here. Also, please share your OrangeFox recovery tale as well. We would love to find you are helped through our tech insights. Take care.
Based on the TWRP source code, OrangeFox is an upcoming custom recovery. Like TWRP, you can use OrangeFox Recovery to flash custom ROM, take Nandroid backup, Wipe Data and Cache partitions, etc.
Yes, TWRP is indeed the most used and preferred custom recovery. However, users often get bored with all things at a certain point. Just like CWM and TWRP, OrangeFox is an open-source custom recovery with plenty of advanced features.
Besides, it is also considered the best alternative to the Redwolf recovery. Moreover, it comes with an in-built init.d functionality support. Most importantly, it even supports MIUI OTA updates, Magisk, SuperSU, etc.
OrangeFox was initially developed for Xiaomi Redmi Note 4X Snapdragon. But later many Xiaomi phones received this custom recovery update. As compared to TWRP, OrangeFox is mostly used on Xiaomi smartphones and tablets.
There are many similarities between TWRP and OrangeFox. But the only difference is that TWRP comes with a simple and easy-to-use UI. Whereas Orange Fox features some complicated and advanced functions.
However, when it comes to a Custom ROM flashing process, it is quite similar in both recoveries. There are times when TWRP shows a status 7 error while installing any custom or official stock firmware.
At such times, you can use the ADB sideload method to flash the Android firmware. But what if it doesn’t work? Then the only way to escape this problem is to install stock firmware using any flash tool.
But, if you own the OrangeFox recovery, then you can easily flash custom ROM on any Android device. Additionally, you can also gain root access with the in-built Magisk and SuperSU features.
If you ever face any error while flashing custom ROM in TWRP, you can always go for OrangeFox as an alternative. Moreover, many Android OEMs are releasing Orange Fox for their devices instead of the TWRP recovery.
How to Flash Custom ROM using OrangeFox Recovery
Are you ready to use Orange Fox Recovery to install custom ROM on your Android device? Then let’s start the flashing process.
Disclaimer
Note that this custom ROM flashing process is risky. There are chances of complete damage. Hence, it is necessary to follow the steps carefully. Moreover, this will void your phone’s warranty and wipe out your entire phone data. We at Droid Thunder will not be responsible for any damage while/after following this guide.
Caution
Make sure that you are installing the correct custom ROM on your Android phone. Do NOT flash incompatible firmware as it might brick your device.
Pre-Requisites
- Charge your phone to a minimum of 65%.
- Take a complete Android backup of your phone data.
- Unlock your phone’s bootloader before going further.
- Enable USB debugging, OEM Unlock, and Advance reboot mode.
- At last, root your phone and install the latest OrangeFox Recovery.
Steps to Install Custom ROM using OrangeFox Recovery
Follow the step-by-step guide given ahead.
1. Download Custom ROM on Android
- First, download the custom ROM zip file on your handset.
- Ensure to download your device-specific firmware.
2. Boot Android phone into Recovery
- Power off your Android phone.
- Now, reboot it into OrangeFox recovery mode.
- Each phone has different ways to restart into recovery.
- You can simply Google it or use the Recovery Reboot app from the Play Store.
3. Take Nandroid backup with OrangeFox
- As soon as you boot into recovery, create a Nandroid backup of your current Android system.
- This is essential because if something goes wrong, you can easily restore the saved version.
4. Wipe Data and Cache Partitions
- Click on the Wipe button.
- On the next screen, select Dalvik / ART cache, System, Cache, Data, and Vendor options.
- Swipe right to initiate the factory reset wiping process.
- Remember that this step will delete your complete phone data. Therefore, don’t forget to take a backup first.
- Upon completion, a message saying, ‘Wipe completed successfully’ will appear.
5. Install Custom ROM with OrangeFox
- Let’s start the Android ROM flashing process.
- For that, press the Files option on the recovery.
- Navigate to the downloaded custom ROM zip package file and select it.
- On the next screen, swipe right to start the custom ROM flashing process.
- Wait until the installation is completed.
6. Finishing the installation process
- The process will be completed within a few minutes.
- You’ll see a successful message on the screen.
- Similarly, you can install Google Apps (GApps) using OrangeFox.
7. Reboot your Android device
- To restart your device, just click on the Reboot System button.
- In case, if you face the boot loop problem, just wipe data/cache partitions.
- Also, remember that the first boot will take more time to start than usual.
Conclusion
I hope that this easy steps tutorial will assist you in installing custom ROMs using OrangeFox recovery on any Android smartphone and tablet. If you liked this article, then kindly share it on your social media platforms. As always, if you find any difficulty during the process, then please do not hesitate to comment below.

How to Flash Orange Fox Recovery: A Comprehensive Guide
When it comes to custom recoveries for Android, Orange Fox Recovery stands out as one of the most feature-rich and reliable options available. If you’re not afraid to get a little tech-savvy, this expert-grade toolkit gives you the creative freedom to reboot your device with custom ROMs, customize partitions, and squeeze every last bit of speed from your system. In this guide, we will walk you through a step-by-step process on how to flash Orange Fox Recovery, ensuring that you are equipped with all the information needed to make the process smooth and successful.
Why Choose Orange Fox Recovery?
Before diving into the installation process, it’s essential to understand what makes Orange Fox Recovery a preferred choice for many Android enthusiasts. One glance and you’ll notice the standout attributes that give this thing an edge.
-
Compatibility with a wide range of devices, including popular models such as the Redmi Note 7, Redmi Note 8, Redmi 4A, Redmi Note 5, and Redmi 5 Plus.
-
User-friendly interface with extensive customization options.
-
Support for OTA updates, encryption, and built-in Magisk.
-
Powerful backup and restore features, including Nandroid backups.
-
Advanced tools for partition management, file transfer, and script automation.
With these advantages, Orange Fox Recovery is a must-have tool for users who wish to take full control of their Android devices. Now, let’s proceed with the detailed instructions on how to flash Orange Fox Recovery.
Preparing for the Installation
1. Prerequisites
Before we start, it is important to meet the following requirements to ensure a successful flashing process:
-
A compatible Android device (e.g., Redmi Note 7, Redmi Note 8, Redmi 4A, Redmi Note 5, or Redmi 5 Plus).
-
A PC with ADB and Fastboot tools installed.
-
A USB cable to connect your device to the PC.
-
Bootloader unlocked on your device. (Note: Unlocking the bootloader will erase all data, so backup your files.)
-
Orange Fox Recovery download for your specific device model. Make sure to download the correct build to avoid compatibility issues.
2. Backup Your Data
Flashing a custom recovery carries the risk of data loss. To avoid any potential problems, we strongly recommend that you perform a full backup of your data. This can include using Google Backup, a Nandroid backup, or simply copying important files to an external storage device.
3. Enable Developer Options and USB Debugging
To proceed with the installation, you will need to enable Developer Options and USB Debugging on your Android device:
-
Go to Settings > About Phone and tap Build Number seven times to enable Developer Options.
-
Go back to Settings, select Developer Options, and enable USB Debugging.
How to Flash Orange Fox Recovery Using Fastboot
The most reliable method to flash Orange Fox Recovery is through Fastboot mode. Follow these steps to install the custom recovery:
Step 1: Download and Install Fastboot Tools
Ensure that ADB and Fastboot tools are installed on your PC. If not, download and install the Minimal ADB and Fastboot package from a trusted source.
Step 2: Download the Orange Fox Recovery Image
Visit the official Orange Fox Recovery download page, and download the appropriate recovery image for your device. Make sure the file has the .img extension.
Step 3: Boot Your Device into Fastboot Mode
-
Power off your device.
-
Press and hold the Volume Down + Power button simultaneously until the Fastboot screen appears.
-
Connect your device to the PC using a USB cable.
Step 4: Flash Orange Fox Recovery via Fastboot
-
Navigate to the folder where you downloaded the Orange Fox Recovery image.
-
Open a command prompt or terminal in that folder by right-clicking and selecting “Open command window here.”
-
Type the following command to verify that your device is detected:
fastboot devices
If your device is listed, proceed to the next step.
- Now, flash the recovery image by entering:
fastboot flash recovery orangefox_recovery.img
(Replace orangefox_recovery.img with the actual file name if it differs.)
- Once the flashing process completes, reboot your device into Orange Fox Recovery:
fastboot reboot recovery
Alternative Method: How to Install Orange Fox Recovery via TWRP
If you already have TWRP Recovery installed on your device, you can install Orange Fox Recovery through TWRP. This is a straightforward process that involves downloading the Orange Fox ZIP file and flashing it directly in TWRP. Here’s how you can do it:
-
Download the Orange Fox Recovery ZIP file for your device.
-
Boot into TWRP Recovery by holding the Volume Up + Power button.
-
In TWRP, go to Install, locate the Orange Fox ZIP file, and swipe to confirm the flash.
-
After the installation completes, reboot into Orange Fox Recovery.
This method is especially useful if you want to how go install Orange Fox in TWRP as it provides a familiar interface and an easy way to flash the new recovery.
How to Use Orange Fox Recovery for Common Tasks
1. Installing Custom ROMs
Orange Fox Recovery is widely used for installing custom ROMs. If you own a Redmi Note 7, Redmi Note 8, Redmi 4A, Redmi Note 5, or Redmi 5 Plus, you can follow these steps:
-
Download the custom ROM ZIP file and GApps (if required) to your device.
-
Boot into Orange Fox Recovery.
-
Wipe the System, Data, Cache, and Dalvik Cache partitions.
-
Go to Install, select the ROM ZIP file, and swipe to confirm.
-
Optionally, flash GApps or other ZIP files like Magisk for root access.
-
Reboot to the system and set up your device.
2. Creating and Restoring Backups
Performing a Nandroid backup in Orange Fox Recovery allows you to create a complete snapshot of your device, including the system, boot, and data partitions. Here’s how you can do it:
-
Boot into Orange Fox Recovery.
-
Select Backup, choose the partitions you want to back up, and swipe to confirm.
-
To restore a backup, go to Restore, select the backup file, and swipe to restore.
3. Managing Magisk and Modules
With the built-in Magisk support, Orange Fox Recovery makes it easy to flash Magisk ZIPs, install modules, or uninstall problematic modules:
-
Flash the Magisk ZIP file through the Install menu.
-
Install Magisk modules by locating the module ZIP file and flashing it.
-
If a module causes issues, go to the Modules section in Orange Fox and remove the problematic module.
Troubleshooting Common Orange Fox Recovery Issues
1. Recovery Not Booting
If you are unable to boot into Orange Fox Recovery, try the following solutions:
-
Re-flash the recovery image using Fastboot.
-
Make sure your bootloader is unlocked.
-
Wipe the Cache and Dalvik Cache through an alternative recovery like TWRP, then try booting again.
2. Unable to Mount Partitions
If you encounter errors such as “Failed to mount /data”, follow these steps:
-
Format the Data partition through Orange Fox Recovery’s Wipe menu.
-
Reboot the recovery after formatting.
-
If the problem persists, re-flash the stock ROM and try again.
3. Orange Fox Recovery Reverts to Stock Recovery
If the device reverts back to the stock recovery after rebooting, this may be due to OEM recovery protection. To fix this:
-
Disable the “Auto Update Recovery” option in your device settings.
-
Flash the recovery image again using Fastboot.
Conclusion
Learning how to flash Orange Fox Recovery is essential for anyone looking to unlock the full potential of their Android device. With Orange Fox Recovery, you’re always in control — effortlessly flashing ROMs, creating backups, and fine-tuning performance for a frustration-free experience. By following this guide, you will be well-prepared to install and use Orange Fox Recovery effectively on devices like the Redmi Note 7, Redmi Note 8, Redmi 4A, Redmi Note 5, and Redmi 5 Plus.
| Recovery Adı | İndir |
|---|---|
| Xiaomi 13T (aristotle) OrangeFox Recovery | Download |
| Xiaomi 13 Lite (Ziyi) OrangeFox Recovery | Download Download 2 |
| Redmi Note 12 4G (tapas) OrangeFox Recovery | Download |
| Redmi Note 13 Pro (garnet) OrangeFox Recovery | Download |
| Xiaomi 11T (agate) OrangeFox Recovery | Download |
| Xiaomi 11T Pro (vili) OrangeFox Recovery | Download |
| Xiaomi Mi 9T Pro/ Redmi K 20 Pro OrangeFox Recovery | Download |
| Xiaomi Mi9T/K20 OrangeFox Recovery | Download |
| Mi 8 OrangeFox Recovery | Download |
| Xiaomi Mi 8 Lite OrangeFox Recovery | Download |
| Mi 6 OrangeFox Recovery | Download |
| Mi 6x OrangeFox Recovery | Download |
| Mi 4c OrangeFox Recovery | Download |
| Xiaomi Mi A2 OrangeFox Recovery | Download |
| Xiaomi A2 Lite OrangeFox Recovery | Download |
| Mi Max 3 OrangeFox Recovery | Download |
| Mi Max 2 OrangeFox Recovery | Download |
| Mi MIX 2S OrangeFox Recovery | Download |
| Mi MIX 2 OrangeFox Recovery | Download |
| Redmi Note 10 OrangeFox Recovery | Download |
| Redmi Note 11 Pro 4G (viva) OrangeFox Recovery | Download |
| Redmi Note 11S 4G (fleur) OrangeFox Recovery | Download |
| Redmi Note 8 OrangeFox Recovery | Download |
| Xiaomi Redmi Note 7 Pro OrangeFox Recovery | Download |
| Redmi Note 7 OrangeFox Recovery | Download |
| Redmi Note 6 Pro OrangeFox Recovery | Download |
| Xiaomi Redmi Note 5/Plus (Vince) OrangeFox Recovery | Download |
| Xiaomi Redmi Note 5 (Whyred) OrangeFox Recovery | Download |
| Redmi Note 5 Pro (Whyred) OrangeFox Recovery | Download |
| Redmi Note 4X / Redmi Note 4 (Qualcomm) OrangeFox Recovery | Download |
| Redmi Note 3 (Qualcomm)/Redmi Note 3 Pro — Kenzo OrangeFox Recovery | Download |
| Redmi Note 2 OrangeFox Recovery | Download |
| Xiaomi Redmi 6 OrangeFox Recovery | Download |
| Redmi 5 Plus / Redmi Note 5 India OrangeFox Recovery | Download |
| Redmi 5 OrangeFox Recovery | Download |
| Redmi 9C OrangeFox Recovery | Download |
| Redmi 5A OrangeFox Recovery | Download |
| Redmi 4x / Redmi 4 India OrangeFox Recovery | Download |
| Redmi 4 PRO OrangeFox Recovery | Download |
| Redmi 4A OrangeFox Recovery | Download |
| Redmi 3S/3X/3S Prime OrangeFox Recovery | Download |
| Pocophone F1 OrangeFox Recovery | Download |
| Poco X3 Pro OrangeFox Recovery | Download |
| Poco X3 NFC (surya) OrangeFox Recovery | Download |
| POCO M2 Pro OrangeFox Recovery | Download |
| Redmi Note 9S/Pro/Pro Max Pro OrangeFox Recovery | Download |
| Redmi Note 9 Pro | Android 12 Download |
| Redmi 12C (earth) OrangeFox Recovery | Download |
| POCO F5 Pro (mondrian) | Download |