
Система Wireless GO третьего поколения состоит из пары передатчиков и одного приёмника. Каждый передатчик улавливает звук с помощью встроенного микрофона или внешнего микрофона, например петличного, который можно подключить через вход 3,5 мм. Этот звук передаётся по беспроводной сети на приёмник, который подключается к вашей камере, смартфону, компьютеру или другому записывающему устройству через USB или выход 3,5 мм. Звук также можно записывать непосредственно на передатчики, что обеспечивает максимальную гибкость.
Включение Wireless GO
Включите передатчики и приемник, нажав и удерживая кнопку «Ø». Передатчики Wireless GO автоматически отключаются через 15 минут, если они не сопряжены и не выполняют запись. Приемник не отключается автоматически.

Понимание отображения и навигация по нему
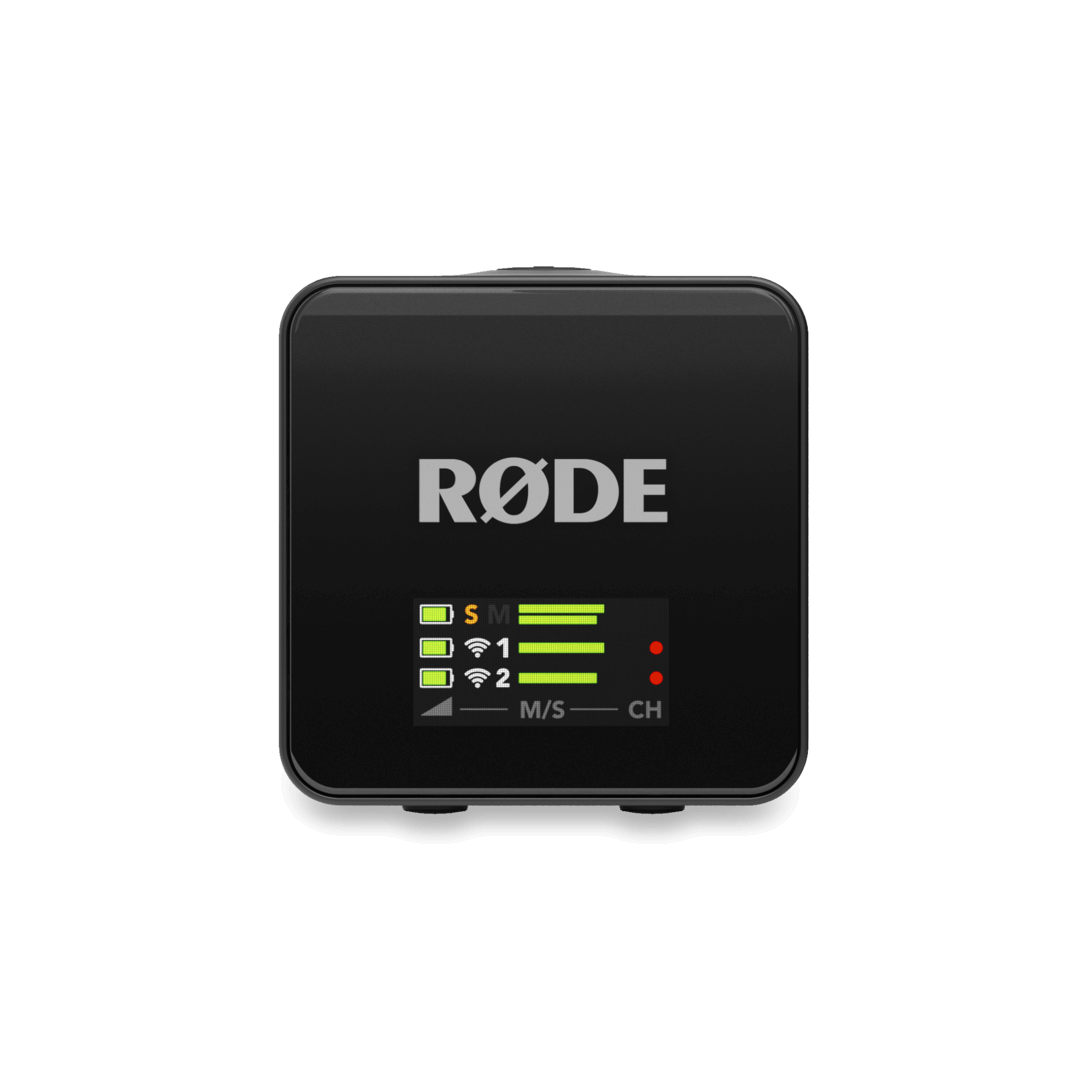
На ЖК-дисплее приёмника Wireless GO отображается важная информация об уровне звука, подключении, статусе записи и многом другом. Он также позволяет перемещаться по различным настройкам системы. Для перемещения по этим настройкам используйте кнопки «Влево» и «Вправо» на приёмнике, нажимая их кратковременно (менее 1 секунды) или длительно (1 секунда или более).
Эти кнопки выполняют разные функции в зависимости от того, на каком экране вы находитесь, но они соответствуют символам на экране и настройкам, которые находятся ближе всего к ним для быстрой идентификации. Например, на экране регулировки усиления звука (на изображении) кнопка «Левая навигация» снижает уровень усиления, так как находится ближе всего к символу «–» на экране, а кнопка «Правая навигация» повышает его, так как находится ближе всего к символу «+».

Сопряжение вашего беспроводного устройства GO
При первом включении Wireless GO передатчик и приёмник автоматически сопрягутся. При необходимости вы также можете выполнить сопряжение вручную.
Ручное сопряжение
- Когда все устройства будут включены, нажмите и удерживайте кнопку «Правая навигация» на приёмнике, чтобы перейти к первому экрану передатчика, а затем нажмите и удерживайте кнопку «Правая навигация», чтобы войти в режим сопряжения. На дисплее появится надпись «СОПРЯЖЕНИЕ TX СЕЙЧАС»
- Нажмите и удерживайте кнопку Ø на одном из ваших передатчиков, чтобы войти в режим сопряжения. Индикатор сопряжения на передатчике начнёт быстро мигать синим, пока не загорится ровным синим светом после успешного сопряжения
- Перейдите на следующую страницу передатчика на приёмнике, коротко нажав кнопку «Правая навигация», и повторите процедуру для второго передатчика
Примечание: чтобы отвязать передатчик, нажмите и удерживайте кнопку «Правая навигация» на приемнике, чтобы перейти на нужный экран передатчика, а затем нажмите и удерживайте кнопку «Правая навигация». После этого вам нужно будет вручную выполнить повторное сопряжение передатчика.
Сопряжение с RØDE Central
Если ваш приемник Wireless GO подключен к компьютеру, на котором установлено приложение RØDE Central (подробнее о RØDE Central можно узнать здесь), вы можете увидеть, сопряжены ли передатчики с вашим приемником, в правом верхнем углу приложения. Если передатчик не сопряжен, включите его, коротко нажмите кнопку Ø, а затем нажмите «сопряжение» в приложении. Здесь вы также можете отключить передатчики от сопряжения.
Аккумулятор и Зарядка
В каждом приёмнике и передатчике есть перезаряжаемый литий-ионный аккумулятор, который при полной зарядке обеспечивает до семи (7) часов работы. Вы можете заряжать каждый передатчик и приёмник по отдельности через порт USB-C устройства с помощью компьютера или другого USB-устройства для зарядки, а также одновременно с помощью прилагаемого зарядного устройства SC33.
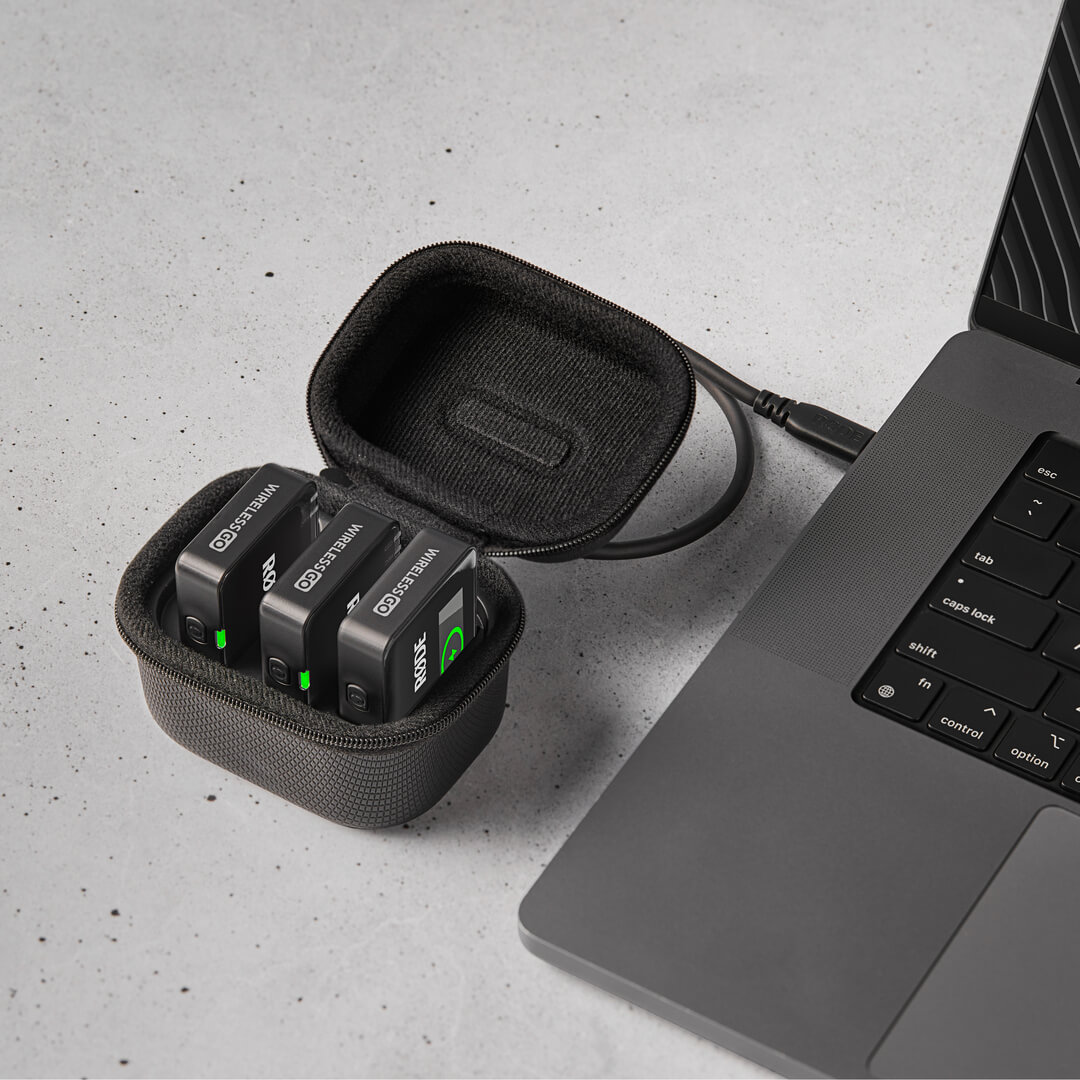
Чехол для зарядки +

Чехол для зарядки+ — это компактный чехол для Wireless GO (продается отдельно), который обеспечивает дополнительную зарядку системы в течение 21 часа, а также доступ ко всем устройствам для передачи записей и настройки параметров. Чтобы зарядить Wireless GO с помощью чехла для зарядки+, просто поместите все три устройства в чехол, убедившись, что приемник находится в слоте с маркировкой «RX», а порт USB-C каждого устройства совпадает с разъемами USB-C в чехле.
Когда зарядный футляр не подключен к источнику питания, его индикатор будет гореть ровным синим светом, когда футляр заряжает любой из находящихся внутри него устройств. Нажатие на кнопку рядом с индикатором отобразит уровень заряда футляра. Если заряд достаточный, индикатор будет гореть ровным зеленым светом, при низком заряде — желтым, при очень низком — красным, а при критическом — мигать красным. Если зарядный футляр разрядится, вы можете зарядить его, одновременно заряжая установленные передатчики и приемники, подключив футляр к источнику питания через USB-C.
Индикаторы Уровня Заряда Батареи

На дисплее приёмника Wireless GO слева от главного экрана отображается уровень заряда батареи каждого передатчика, а также самого приёмника.
На каждом передатчике есть специальный светодиодный индикатор уровня заряда батареи. Когда уровень заряда батареи снижается, этот светодиод меняет цвет с зелёного на жёлтый, а при очень низком уровне заряда — с жёлтого на красный. При критическом уровне заряда батареи светодиод мигает красным. Во время зарядки этот светодиод мигает зелёным, пока не загорится ровным зелёным светом при полной зарядке.
Подключение или монтирование устройства Wireless GO
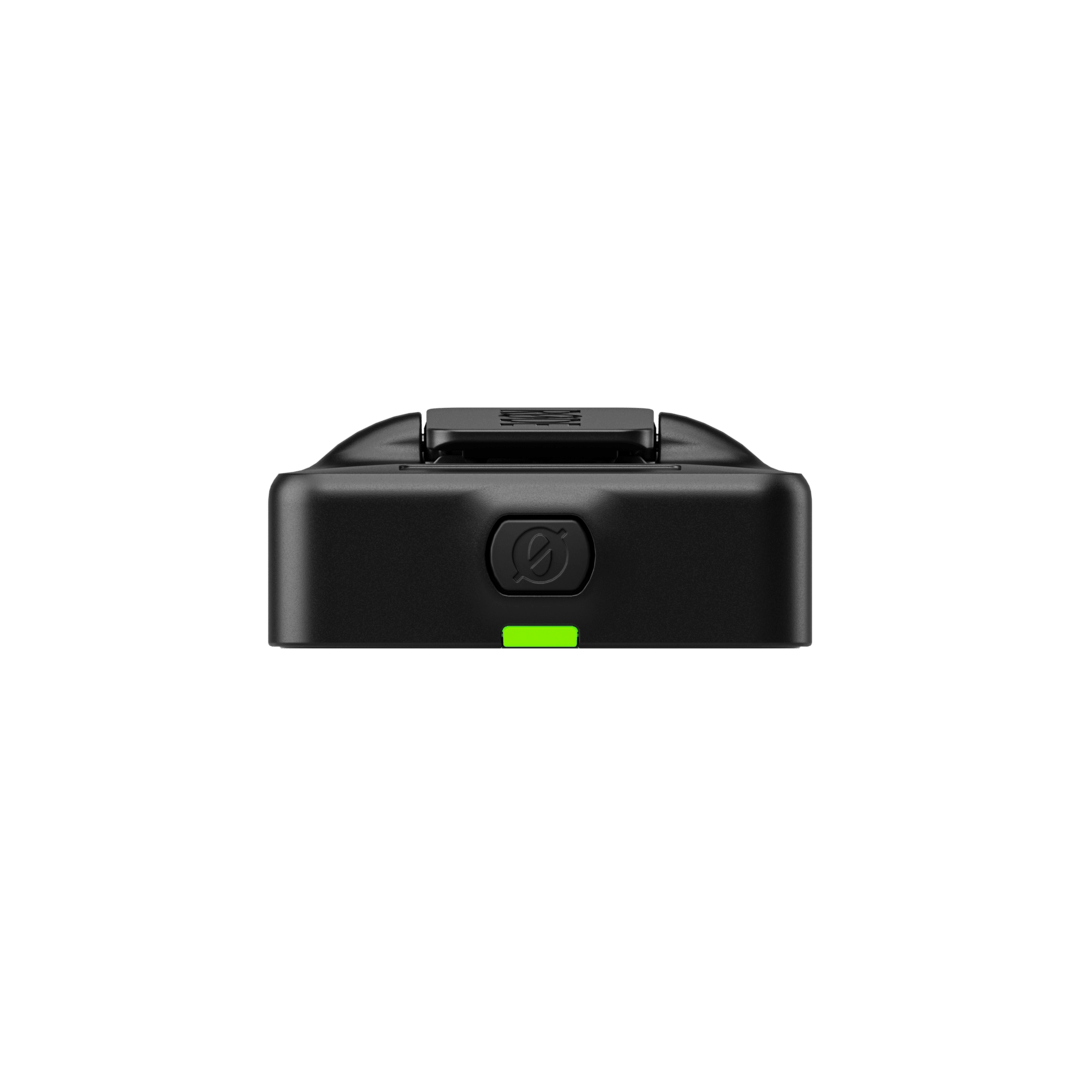
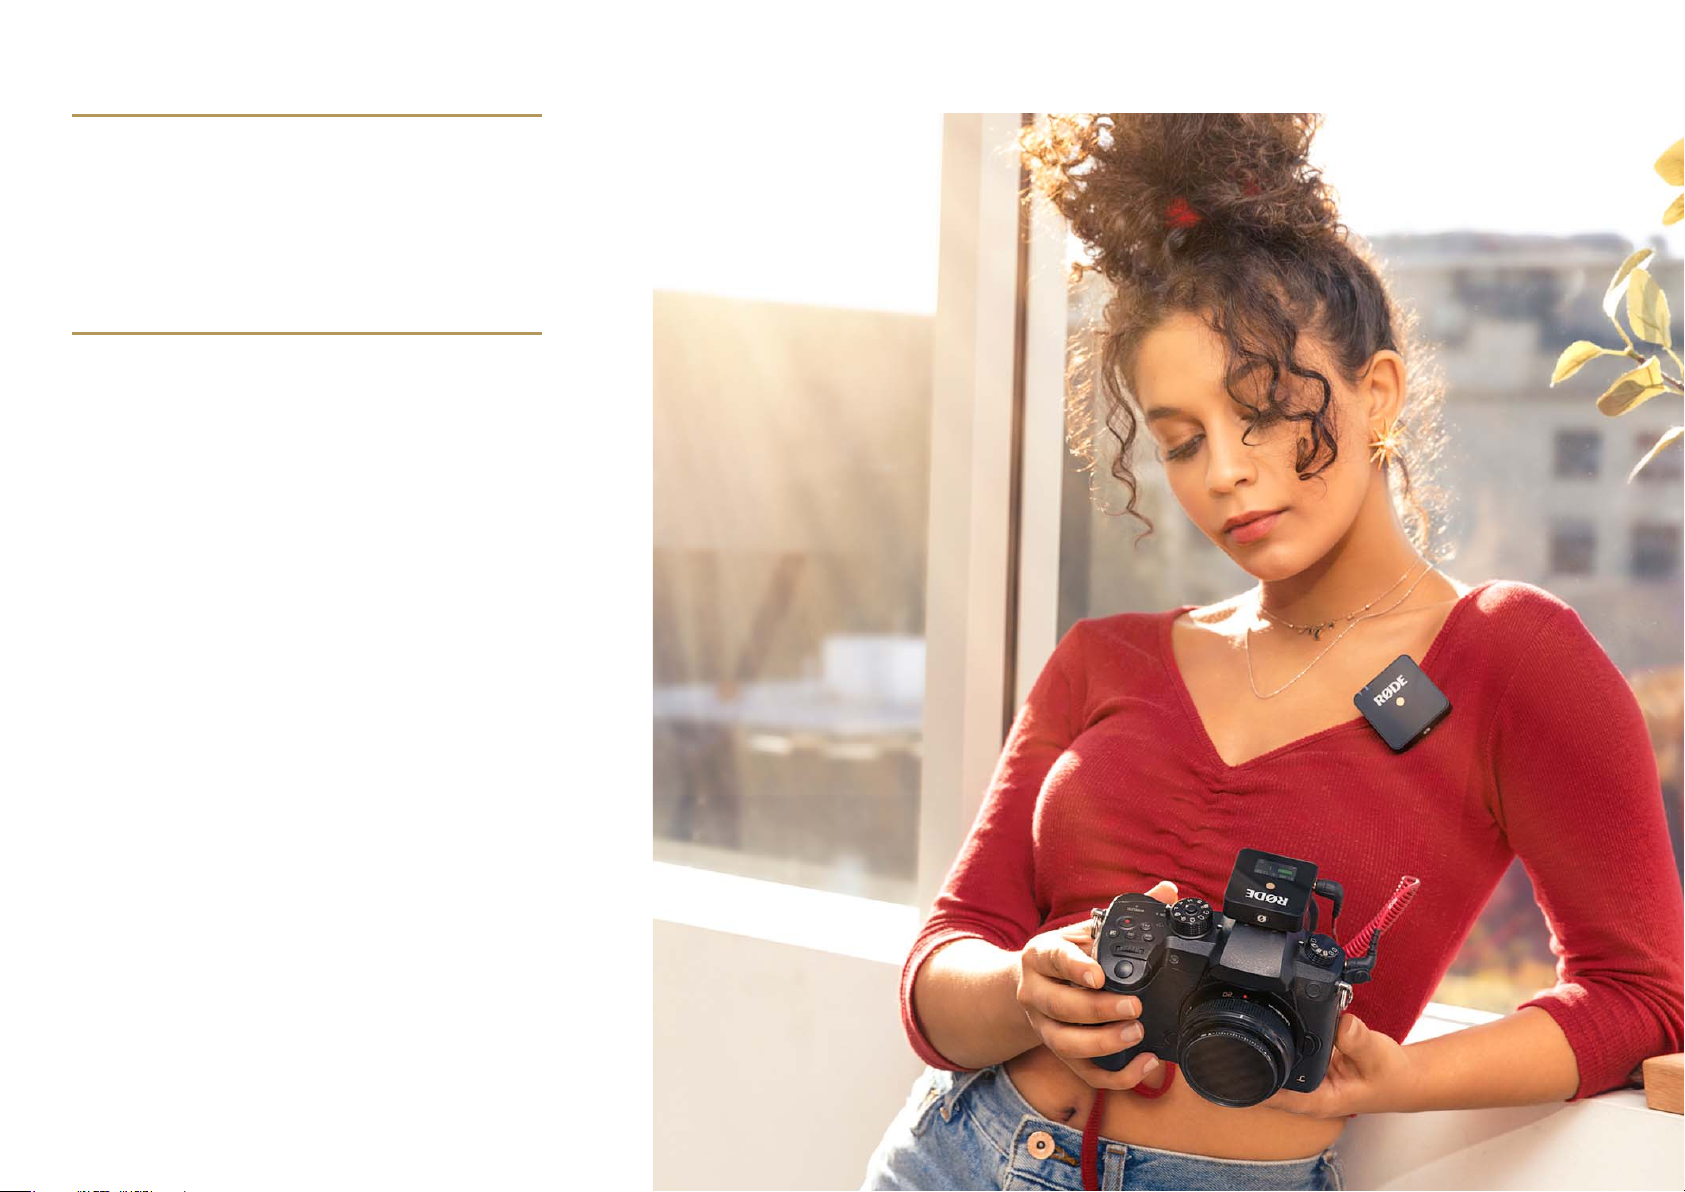
И передатчик, и приёмник Wireless GO оснащены встроенным зажимом. С его помощью можно прикрепить передатчик к одежде или другим предметам, а приёмник — к штативному креплению камеры или аналогичного устройства, чтобы надёжно зафиксировать его.
Подключение внешнего микрофона
Помимо встроенных микрофонов, передатчики Wireless GO также оснащены 3,5-миллиметровыми входами для подключения внешних микрофонов, таких как lavaliers и RØDE VideoMics. При подключении внешнего микрофона он заменит встроенный микрофон в качестве источника входного сигнала.
Фиксирующие Соединители
На 3,5-миллиметровых входах двух передатчиков есть фиксирующие резьбы для микрофонов с фиксирующими разъёмами, такими как Lavalier II. Это позволяет надёжно закрепить микрофон, чтобы его нельзя было случайно отсоединить во время использования. Просто вставьте 3,5-миллиметровый разъём микрофона, затем поверните золотое фиксирующее кольцо по часовой стрелке, чтобы закрепить кабель. Чтобы отсоединить кабель, выполните те же действия в обратном порядке.
ВидеоМика и другие 3,5-мм Аудиоисточники
К Wireless GO можно подключить любой микрофон или источник звука с разъёмом 3,5 мм TRS, в том числе накамерные микрофоны-пушки, такие как VideoMic NTG. При необходимости можно подключить питание.
Подключение беспроводной сети к камере
Вы можете подключить приёмник Wireless GO к выходу 3,5 мм с помощью прилагаемого кабеля TRS-TRS или через USB с помощью прилагаемого кабеля USB-C-USB-C, если у вашей камеры есть аудиовход USB. Просто подключите один конец кабеля к приёмнику Wireless GO, а другой — к аудиовходу вашей камеры.
Если вы используете выход 3,5 мм, сначала убедитесь, что режим усиления звука на выходе установлен на «Ручной», что является настройкой по умолчанию. Для этого:
- Нажимайте правую кнопку навигации до тех пор, пока не перейдете к экрану режима усиления
- Нажмите кнопку «Левая навигация», чтобы переключаться между вариантами, пока не выберете «Ручной режим» (обозначается значком «уровень»)
Вы также можете использовать режим усиления «Предустановки камеры» (обозначается значком камеры).
Подключение устройства Wireless GO к смартфону
Чтобы подключить Wireless GO к смартфону или планшету, подключите приёмник с помощью прилагаемого кабеля USB-C — Lightning или кабеля USB-C — USB-C, в зависимости от типа подключения вашего устройства.
Подключение беспроводной сети к компьютеру
Вы также можете подключить Wireless GO к компьютеру и использовать его в качестве беспроводного аудиоинтерфейса. Для этого просто подключите приёмник к USB-порту вашего компьютера с помощью прилагаемого кабеля USB-C — USB-C, затем перейдите в настройки звука и выберите «Wireless GO RX» в качестве устройства ввода. Вам также нужно будет сделать то же самое в любом используемом вами аудиопрограммном обеспечении. Если на вашем компьютере есть только порт USB-A, используйте кабель USB-C — USB-A, например SC18.
Подключение к компьютеру также позволяет экспортировать записи с передатчиков, настраивать параметры и заряжать устройства. Используйте прилагаемый кабель USB-C и зарядный концентратор SC33 для одновременного подключения всех трех устройств.
Подключение наушников или гарнитур к приемнику
3,5-миллиметровое гнездо TRRS на приёмнике Wireless GO очень универсально и позволяет подключать различные устройства ввода и вывода звука, например наушники и микрофоны.
Если 3,5-миллиметровый разъём не используется для подключения приёмника к камере (например, если вы используете разъём USB-C или только функцию записи на борту передатчика), вы можете подключить наушники, например NTH-100, для прослушивания звука или гарнитуру, например NTH-100M. Подключение гарнитуры позволяет одновременно прослушивать звук и записывать голос с помощью микрофона гарнитуры.
Прежде чем подключать наушники или гарнитуру к приёмнику, убедитесь, что режим усиления звука установлен на «наушники» или «гарнитуру». Для этого нажимайте кнопку «Правая навигация» до тех пор, пока не перейдёте на экран «Режим усиления звука», а затем нажимайте кнопку «Левая навигация», чтобы переключаться между вариантами, пока не отобразится «наушники» или «гарнитура», а затем нажмите кнопку «Правая навигация», чтобы выбрать режим. После выбора вы можете настроить уровень громкости наушников, нажав кнопку «Левая навигация» на главном экране Wireless GO, а затем используя кнопки «Левая навигация» и «Правая навигация» для регулировки громкости.
Примечание: в Wireless GO используется мощный усилитель для наушников с достаточным выходным сигналом для наушников с высоким сопротивлением, которым требуется высокая громкость.
Использование ветрозащиты

В передатчиках Wireless GO используются высококачественные встроенные всенаправленные конденсаторные микрофоны. Это чувствительные микрофоны, которые предназначены для улавливания звука со всех сторон с высокой детализацией. При записи на открытом воздухе или в ветреную погоду рекомендуется использовать прилагаемые ветрозащитные экраны, чтобы защитить капсулы и уменьшить влияние ветра или фонового шума на запись.
В комплект Wireless GO входят три ветрозащитных экрана с мехом. Они были разработаны для обеспечения чрезвычайно надёжного соединения и не оторвутся от ваших передатчиков даже при интенсивном использовании. Чтобы надёжно закрепить их, совместите две белые точки на ветрозащитном экране с чёрными точками на передатчике, затем опустите ветрозащитный экран и поверните его, чтобы зафиксировать. Чтобы снять их, выполните те же действия в обратном порядке.
Getting Started
The third-generation Wireless GO system consists of a pair of transmitters and a single receiver. Each transmitter picks up audio via its built-in microphone, or an external mic such as a lavalier, which can be connected via the 3.5mm input. This audio is transmitted wirelessly to the receiver unit, which connects to your camera, smartphone, computer or other recording device either via USB or its 3.5mm output. Audio can also be recorded directly to the transmitters, giving you maximum flexibility.
Turning on Your Wireless GO
Power on your transmitters and receiver with a long-press of the ‘Ø’ button. The Wireless GO transmitters will automatically power down after 15 minutes if they are unpaired and not recording. The receiver does not power down automatically.
Understanding and Navigating the Display
The Wireless GO receiver features an LCD display that shows you critical information about your audio levels, connectivity, recording status and more. It also allows you to navigate the system’s various settings. To navigate these options, you use the Left and Right Navigation buttons on the receiver, either with a short-press (less than 1 second) or long-press (1 second or more).
These buttons will perform different functions depending on which screen you are currently on, but they correspond to the on-screen symbols and settings that are physically closest to them for quick identification. For instance, when in the output gain adjustment screen (pictured), the Left Navigation button lowers the gain level as it is closest to the on-screen ‘–’ symbol, while the Right Navigation button raises it as it is closest to the ‘+’ symbol.

Pairing Your Wireless GO
When you first power on your Wireless GO, the transmitters and receiver will automatically pair. You can also manually pair them if required.
Manual Pairing
- With all your units powered on, short-press the Right Navigation button on the receiver to cycle to the first transmitter screen and then long-press the Right Navigation button to enter pairing mode – the display will read “PAIR TX NOW”
- Short-press the Ø button on one of your transmitters to enter pairing mode – the pairing LED on the transmitter will start quickly flashing blue until it turns solid blue when successfully paired
- Navigate to the next transmitter page on the receiver with a short-press of the Right Navigation button and repeat the process for your second transmitter
Note
To unpair a transmitter, short-press the Right Navigation button on the receiver to cycle to the desired transmitter screen and then long-press the Right Navigation button. You will need to manually re-pair the transmitter after doing this.
Pairing in RØDE Central
With your Wireless GO receiver connected to a computer running RØDE Central (learn more about RØDE Central here), you can see if transmitters are currently paired to your receiver in the top-right section of the app. If a transmitter isn’t paired, turn it on, short-press its Ø button, and then click ‘pair’ in the app. Here, you can also unpair your transmitters.
Battery and Charging
The receiver and transmitters each contain a rechargeable lithium-ion battery capable of up to seven (7) hours of use when fully charged. You can charge each transmitter and receiver individually via the unit’s USB-C port using computer or other USB charging device, or simultaneously using the included SC33 charging hub.
Charge Case+
The Charge Case+ is a compact case for the Wireless GO (sold separately) that provides an extra two recharges of the system for up to 21 hours of runtime, as well as access to all units for transferring recordings and adjusting settings. To recharge your Wireless GO using the Charge Case+ simply place all three units in the case, ensuring the receiver is placed in the slot marked ‘RX’ and that the USB-C port for each unit lines up with the USB-C connections in the case.
When the Charge Case+ isn’t connected to power, its LED will be solid blue when the case is charging any of the units placed inside of it. Pressing the button next to the LED will display the case’s battery status. This will be solid green when it has a healthy charge, amber when low, red when very low, and flashing red when critical. If the charging case runs out of battery, you can top it up while simultaneously charging your mounted transmitters and receivers by connecting the case to a power source via USB-C.
Battery Level Indicators
The display on the Wireless GO receiver will show you the battery level of each transmitter as well as the receiver itself, on the left of the home screen.
Each transmitter features a dedicated battery level LED indicator. When the battery is getting low, this LED will change from green to amber, and from amber to red when it is very low. The LED will flash red when the battery level is critical. When charging, this LED will flash green until it turns solid green when fully charged.
Attaching or Mounting Your Wireless GO
Both the Wireless GO’s transmitters and receiver feature an integrated clip. These can be used to attach the transmitter units to clothing and other items, and slot the receiver into the cold shoe mount of a camera or similar device to firmly secure it in place.
Connecting an External Microphone
Alongside the built-in microphones, the Wireless GO transmitters also feature 3.5mm inputs for connecting external microphones such as lavaliers and RØDE VideoMics. When you connect an external microphone, it will replace the built-in mic as the input source.
Locking Connectors
The 3.5mm inputs on the two transmitters feature locking threads for microphones that feature locking connectors, such as the Lavalier II. This allows you to securely attach your microphone so it can’t be accidentally unplugged while in use. Simply insert the microphone’s 3.5mm jack then twist the golden locking ring clockwise to secure the cable in place. Reverse the process to disconnect.
VideoMics and Other 3.5mm Audio Sources
You can connect any microphone or audio source that features a 3.5mm TRS output to the Wireless GO, including on-camera shotgun microphones such as the VideoMic NTG. Plug-in power will be provided if needed.
Connecting Your Wireless GO to a Camera
You can connect the Wireless GO’s receiver via the 3.5mm output using the included TRS to TRS cable, or via USB using the included USB-C to USB-C cable, if your camera has a USB audio input. Simply connect one end of the cable into the Wireless GO receiver and the other end to your camera’s audio input.
If you are using the 3.5mm output, you’ll need to first ensure the output gain mode is set to ‘Manual’, which is the default setting. To do this:
- Press the Right Navigation button until you cycle through to the Gain Mode screen
- Press the Left Navigation button to cycle through the options until you have ‘Manual’ (indicated by the ‘level’ icon)
You can also use the ‘Camera Preset’ gain mode (indicated by the camera icon) – see the ‘Camera Preset’ section for more information.
Connecting Your Wireless GO to a Smartphone
To connect the Wireless GO to a smartphone or tablet, connect the receiver using the included USB-C to Lightning cable or USB-C to USB-C cable, depending on what connection type your device has.
Connecting Your Wireless GO to a Computer
You can also connect the Wireless GO to a computer and use it as a wireless audio interface. To do this, simply connect the receiver to your computer’s USB port using the supplied USB-C to USB-C cable, then go to your audio settings and select “Wireless GO RX» as your input device. You will also need to do the same in any audio software you are using. If your computer only features a USB-A port, use a USB-C to USB-A cable like the SC18.
Connecting to a computer is also how you export on-board recordings from the transmitters, adjust settings, and charge the units. Use the included USB-C cable the SC33 Charging Hub to connect all three of your units at once. See the ‘Configuring Wireless GO with RØDE Central’ and ‘On-Board Recording and 32-bit Float’ sections for more information.
Connecting Headphones or Headsets to the Receiver
The 3.5mm TRRS connection on the Wireless GO receiver is super versatile and able to connect to a number of different audio input and output devices, such as headphones and microphones.
When the 3.5mm output is not being used to connect the receiver to a camera (such as when you’re using the USB-C output or only using the transmitters’ on-board recording function), you can connect headphones like the NTH-100 for monitoring your audio, or a headset like the NTH-100M. Connecting a headset allows you to both monitor your audio as well as record your voice via the headset microphone – for more information on how this third channel of audio (RX Mic) is routed, please see the ‘Audio Routing’ section.
Before plugging your headphones or headset into the receiver, ensure the output gain mode is set to either “Headphones” or “Headset”. To do this, press the Right Navigation button until you cycle through to the Gain Mode screen, and then press the Left Navigation button to cycle through the options until you have either ‘headphones’ or ‘headset’ displayed, and then press the Right Navigation button to select the mode. Once selected, you can adjust the headphone output level by pressing the Left Navigation button from the Wireless GO’s home screen, and then use the Left and Right Navigation buttons to adjust the volume.
Note
The Wireless GO features a high-power headphone amplifier with enough output for high-impedance headphones that require a lot of volume.
Using the Windshields
The Wireless GO’s transmitters feature high-quality in-built omnidirectional condenser microphones. These are sensitive microphones that are designed to pick up sound from all around in great detail. When recording outdoors or in windy environments, it’s recommended you use the supplied furry windshields to help protect the capsules and reduce any wind or background noise in your recording.
The Wireless GO comes with three furry windshields. These have been designed to ensure an extremely strong connection and will not fall off your transmitters, even with vigorous use. To attach them securely, align the two white dots on the windshield with the black dots on the transmitter, then push the windshield down and twist to lock it in place. Reverse the process to remove them.

View the manual for the Røde Wireless Go here, for free. This manual comes under the category microphones and has been rated by 4 people with an average of a 8.8.
This manual is available in the following languages: English. Do you have a question about the Røde Wireless Go or do you need help?
Ask your question here
Røde Wireless Go specifications
Below you will find the product specifications and the manual specifications of the Røde Wireless Go.
The Rode Wireless Go is a lavalier microphone that offers RF wireless connectivity. It features a bodypack receiver and a bodypack transmitter with a built-in display. The microphone operates at a frequency of 2400 MHz and includes one receiver, one microphone, and one transmitter.
The microphone is equipped with volume control buttons for easy adjustment. It comes with a microphone clip for secure attachment. Additionally, it has a 3.5 mm (1/8-inch) audio input for compatibility with various devices.
With a dynamic range of 100 dB, the Rode Wireless Go delivers clear and reliable audio. Its compact and lightweight design makes it portable and convenient for use in a variety of situations. The microphone is designed to provide high-quality sound capture for interviews, presentations, vlogging, and other applications.
The Rode Wireless Go is constructed with quality materials to ensure durability and longevity. Its sleek design and black color make it visually appealing. The microphone offers versatility and flexibility in capturing audio, allowing users to move freely without being restricted by cables.
Overall, the Rode Wireless Go is a reliable and practical lavalier microphone that provides wireless connectivity and easy volume control. It is suitable for a range of audio recording needs and offers a compact and durable solution for professionals and enthusiasts alike.
Microphone type
Lavalier microphone
Receiver type
Bodypack receiver
Transmitter type
Bodypack transmitter
Operating frequency
2400 MHz
Number of receivers included
1
General
| Brand | Røde |
| Model | Wireless Go | WIRELESS GO |
| Product | microphone |
| EAN | 0698813005611, 0698813006472 |
| Language | English |
| Filetype | User manual (PDF), Datasheet (PDF) |
Microphone
| Microphone type | Lavalier microphone |
| Microphone connectivity | RF Wireless |
| Volume control | Buttons |
| Microphone frequency response | 50 — 20000 Hz |
Receiver
| Receiver type | Bodypack receiver |
| Receiver display | No |
Transmitter
| Transmitter type | Bodypack transmitter |
| Transmitter display | Yes |
Features
| Operating frequency | 2400 MHz |
| 3.5 mm (1/8-inch) in | Yes |
| Dynamic range | 100 dB |
Packaging content
| Number of receivers included | 1 |
| Number of microphones included | 1 |
| Number of transmitters included | 1 |
| Microphone clip | Yes |
Battery
| Operating time | 7 h |
| Battery type | Built-in battery |
show more
Frequently Asked Questions
Can’t find the answer to your question in the manual? You may find the answer to your question in the FAQs about the Røde Wireless Go below.
How do I connect the Rode Wireless Go to my camera or recording device?
To connect the Rode Wireless Go to your camera or recording device, you need to ensure that both the transmitter and receiver units are powered on. Then, connect the output cable provided with the Wireless Go to the output socket on the receiver unit, and the other end of the cable to the input socket on your camera or recording device.
How do I properly position the Rode Wireless Go’s transmitter and receiver for optimal performance?
For optimal performance, it is recommended to mount the transmitter unit on your subject, ideally on their clothing or using the included clip. Ensure that it is positioned close to the sound source, such as near their mouth if they are speaking. The receiver unit can be attached to your camera or recording device using the included cold shoe or the included adhesive pad for versatility.
How can I adjust the audio levels to avoid distortion or low volume issues?
To adjust the audio levels on the Rode Wireless Go, locate the gain control on the receiver unit. Turning the gain control clockwise will increase the audio level, while turning it counterclockwise will decrease it. Make sure to monitor the audio levels using the appropriate meters on your camera or recording device to achieve clear audio without distortion or low volume issues.
How do I pair the transmitter and receiver units if they are not already connected?
If the transmitter and receiver units are not already paired, you can easily pair them by following these steps. First, ensure that both units are powered on. Then, press and hold the pairing button on the receiver unit until the LED starts flashing. Finally, press and hold the pairing button on the transmitter unit until the LED also starts flashing. Once they successfully pair, the LEDs on both units will become solid.
What is the maximum range of the Rode Wireless Go and what factors can affect its performance?
The Rode Wireless Go has a maximum range of approximately 70 meters (229 feet) in optimal conditions. However, certain factors can affect its performance. Obstructions such as walls, buildings, or other objects can significantly reduce the range. Additionally, wireless interference from other devices operating on similar frequencies may also impact performance. It is important to maintain line-of-sight between the transmitter and receiver units and minimize interference to achieve the best results.
Is the Rode Wireless Go a lavalier microphone?
Yes, the Rode Wireless Go is a lavalier microphone. This means that it is designed to be clipped onto clothing or other objects for hands-free use.
Does the Rode Wireless Go have RF Wireless connectivity?
Yes, the Rode Wireless Go has RF Wireless connectivity. This allows for a reliable wireless connection between the microphone and the receiver, providing flexibility in movement.
Does the Rode Wireless Go have volume control buttons?
Yes, the Rode Wireless Go has volume control buttons. This allows the user to easily adjust the microphone’s audio levels for optimal recording.
Is the receiver of the Rode Wireless Go a bodypack receiver?
Yes, the receiver of the Rode Wireless Go is a bodypack receiver. This compact design allows for easy attachment to clothing or a belt, providing convenience during use.
Does the Rode Wireless Go have a transmitter display?
Yes, the Rode Wireless Go has a transmitter display. This display provides important information such as battery life, audio levels, and channel selection, allowing for easy monitoring and control during operation.
Is the manual of the Røde Wireless Go available in English?
Yes, the manual of the Røde Wireless Go is available in English .
Is your question not listed? Ask your question here
OVERVIEW
The Wireless Go is a compact wireless microphone
system that operates in the 2.4GHz spectrum. The
kit includes a transmitter with an internal microphone
and a reciever with 3.5mm TRS output.
SET UP
Press and hold the power button for 3
seconds to turn on the the RX (receiver).
Press and hold the power button for 3
seconds to turn on the TX (transmitter).
The units will already be paired and start
transmitting audio, the transmitter will
be using the internal microphone.
Clip on the supplied windshield if required
If desired, plug in a compatible external microphone
and the TX will automatically switch the audio input.
Connect the 3.5mm TRS output of the RX to a
camera’s microphone input or similar audio device.
Wireless Go User Guide V01 RØDE MICROPHONES – MAY 2019