
Table of Contents
- CAMERA COMPONENTS
- TECHNICAL SPECIFICATIONS
- INSTALLING THE BATTERIES
- BATTERY LIGHT INDICATION
- LOADING THE FILM
- SELECT A SHOOTING MODE
- A. AUTO SHOOTING MODE
- B. BULB MODE
- 1/30 FIXED SHUTTER SPEED MODE
- AUTO OFF FUNCTION
- FLASH ON/ OFF BUTTON
- PC-SYNC
- SHOOTING PHOTOS
- FRAMING WITH VIEW FINDER
- EXPOSURE COMPENSATION
- COLORED GEL FILTERS
- MULTIPLE EXPOSURES
- SELF-PORTRAIT MIRROR
- FILTER THREAD
- TRIPOD THREAD
- REMOTE CONTROL LENS CAP
- TROUBLESHOOTING
- CARE AND WARRANTY
- References
- Read User Manual Online (PDF format)
- Download This Manual (PDF format)
LOMO’INSTANT WIDE Camera
Instructions for Use


LOMO’INSTANT WIDE Camera
Instructions for Use
Welcome to the WIDE world of the Lomo’Instant Wide Camera! With its
unparalleled features, the LOMO’INSTANT WIDE o f f e r s you unprecedented
creative control over your instant photography. From the fully programmatic
shutter and the PC-Sync socket to the remote control lens cap and unlimited
long and multiple exposure options, you can take your instant experience to
the next level with the LOMO’INSTANT WIDE!
CAMERA COMPONENTS
| 1 Battery Door | 9 Flash On/Off Button | 17 MX mode Indication Light |
|---|---|---|
| 2 Shooting Mode Lever | 10 Flash Indication Light | 18 Self-Portrait Mirror |
| 3 Film Counter Window | 11 PC-Sync Socket | 19 Filter Thread |
| 4 Camera Back Door | 12 Focusing Ring | 20 Tripod Thread |
| 5 Back Door Lock | 13 Viewfinder | 21 Light Sensor |
| 6 Yellow Mark | 14 Exposure Compensation | |
| Switch | 22 Flash Light Sensor | |
| 7 Shutter Release Button | 15 Colored Gel Filter Slot | 23 Close-up Frame |
| 8 Film Ejection Slot | 16 MX Button | 24 Battery Indication Light |
REMOTE CONTROL COMPONENTS
| 25 Infrared Transmitter | 28 Battery Door |
|---|---|
| 26 INSTANT Button | 29 Remote Control Front Receiver |
| 27 TIME Button | 30 Remote Control Back Receiver |
TECHNICAL SPECIFICATIONS
| Film Format: | Fujifilm Instax Wide Film |
|---|---|
| Exposure Area: | 62 mm × 99 mm |
| Lens Focal Length: | 90 mm (35 mm equivalent) |
| Auto Exposure Type: | Programmed Automatic |
| Aperture: | f /8, f/22 |
| Shutter Speed Range: | Bulb (Bulb Mode), 8 s-1/250 |
(Auto Shooting Mode), 1/30
(Fixed Shutter Speed Mode)
Exposure Compensation:| +1/-1 Exposure Values (Ambient)
Ejection Mechanism:| Motorized
Multiple Exposures:| Yes
Built-in Flash Guide Number:| 13 (m)
Built-in Flash:| Automatic Electronic Flash & Flash Off Mode
Closet Focusing Distance:| 0.6 m
Zone Focusing Setting:| 0.6 m / 1-2 m / infinite
Tripod Mount:| Yes
Remote Control Transmission:| Infrared
Battery Supply:| 4 × AA batteries (4 × 1.5 V)
Remote Control Battery Supply:| 1 × 2025 batteries (3 V)
Filter Thread:| 49 mm
INSTALLING THE BATTERIES
- The Battery Door 1 is located at the bottom left of the camera. Openby sliding it.
- Install four AA batteries (1.5 V) into the battery chamber and close the Battery Door 1 .
- Switch on the camera by turning the Shooting Mode Lever 2 to any shooting mode besides “Off”. You will see the battery light turn on in the Film Counter Window 3 .
BATTERY LIGHT INDICATION
Next to the Exposure Compensation Switch 14, there is a Battery Indication
Light 24 which will indicate the battery condition:
Blue light on: The battery condition is normal and the camera is ready to
shoot.
Blue light blinking: The batteries are low and need to be changed.
LOADING THE FILM
- Open the Camera Back Door 4 by pressing the Back Door Lock 5 down.
- Install a fresh pack of Fujifilm Instax Wide film into the film chamber. Make sure that the yellow mark 6 inside the film chamber matches the yellow mark on the film pack.
- Close the Camera Back Door 4 .
- Turn on the camera by switching the Shooting Mode Lever 2 to either “Auto Shooting Mode”, “Bulb Mode”, or “Fixed Shutter Speed Mode”. Press the Shutter Release Button 7 once to eject the dark slide of your new film pack. Please make sure not to block the Film Ejection Slot 8 when the dark slide is coming out.
SELECT A SHOOTING MODE
The Lomo’Instant Wide has three different shooting modes to choose between.
You can easily select your preferred shooting mode by moving the Shooting Mode
Lever 2 .
A. AUTO SHOOTING MODE
When the Auto Shooting Mode is selected, you will get perfectly exposed photos
in all situations. The Lomo’Instant Wide determines aperture and shutter speed
automatically (and flash output if flash is on) for perfect exposures. This is
the perfect mode for shooting all hours of the day and night! The Flash is
enabled by default in Auto Shooting Mode.
B. BULB MODE
When the Bulb Mode is selected, the Lomo’Instant Wide will be set at B shutter
at all times. The shutter will remain open as long as the Shutter Release
Button 7 is held down. As the aperture value default is f/8, Bulb Mode is
perfect for shooting fun long exposures, night time shots and light paintings!
The Flash is enabled by default under Bulb Mode.
1/30 FIXED SHUTTER SPEED MODE
When the Fixed Shutter Speed Mode is selected, the Lomo’Instant Wide will be
set at 1/30 shutter at all times. The default aperture value in this mode is
f/8.
1/30 shutter speed is useful in flash photography when you do not want ambient
light to affect your exposure too much. A fixed shutter speed of 1/30 is
especially useful when an external flash is connected or when photographing
with studio lighting. Flash is on as default under Fixed Shutter Speed Mode.
AUTO OFF FUNCTION
When the Lomo’Instant Wide hasn’t been operated for five minutes, regardless
of the shooting mode, it will switch off automatically to save battery power.
To re-activate the camera, simply press any button on the Lomo’Instant Wide.
FLASH ON/ OFF BUTTON
In all modes (except “Off”), the Flash is “On” by default. This means every
time you switch on your camera, the flash will automatically be “On”. If you
want to shoot without the flash, press the Flash On/ Off Button 9 once and
the built-in flash will be switched off until the camera is turned off.
There is a Flash indication light 10 above the Flash On/Off Button 9 :
Green light on: The Flash is fully charged and ready to shoot.
Red light on: The Flash is recharging.
No light on: The Flash is off and the camera will automatically expose
according to ambient light in Auto Shooting Mode.
PC-SYNC
There is a PC-Sync Socket 11 on Lomo’Instant Wide which allows you to connect
external flash with PC connection to your camera. To connect external flash,
simply plug the PC-Sync connection of your flash into the PC-Sync Socket 11
on Lomo’Instant Wide.
With an external flash connected, there is no interference with the built-in
flash on the Lomo’Instant Wide. You can still set the internal flash as “On”
or “Off” as normal.
SHOOTING PHOTOS
When your film is properly installed and you have selected your shooting mode,
you are ready to shoot! Here’s how to make the instant magic happen:
- Take off the lens cap.
- Determine your subject’s distance and set the suitable Zone Focusing Setting to 0.6 m / 1-2 m / Infinity, by turning the Focusing Ring 12.
- Look through the Viewfinder 13 and compose your photo.
- Press the Shutter Release Button 7 to take a photo. Once you have pressed the Shutter Release Button 7, the film will be automatically ejected.
- Now wait for the photo to develop in your hands!
FRAMING WITH VIEW FINDER
When you look through the Viewfinder, you will see a close-up frame 23 in the
bottom left corner, which is for compensating parallax.
- When the Focusing Ring 12 is set to 0.6 m, compose your photo within the close-up frame 23 in order to correct framing.
- When the Focusing Ring 12 is set to 1-2 m or infinity, simply ignore the Close-Up Frame and compose your photo using the entire viewfinder area.
EXPOSURE COMPENSATION
There is an Exposure Compensation Switch 14 above the Shooting Mode Lever 2 ,
which allows you to override the ambient exposure compensation while the
camera is in Auto Shooting Mode. Set the Exposure Compensation Switch 14 to
“+1” if a brighter image is required, or set the Exposure Compensation Switch
14 to “-1” if a darker image is required. If the switch is set to “0”, auto
exposure will be correct in general situations.
Note: Exposure Compensation Switch 14 is only for Auto ShootingMode, not
for Bulb mode, or Fixed Shutter Speed Mode.
COLORED GEL FILTERS
There are four colored gel filters included in the Lomo’Instant Wide package.
You can insert a colored gel filter in the Colored Gel Filter Slot 15 in front
of the flash to produce different color effects.
MULTIPLE EXPOSURES
With the Lomo’Instant Wide, you can shoot unlimited multiple exposures! To use
this cool function, first press the MX Button 16 once to activate the MX Mode.
There is an MX Mode Indication Light 17 above the MX Button 16. When the MX
Mode is turned on, the MX Mode Indication Light 17 will shine orange. Then
take your first exposure or multiple exposures if you desire. When you have
finished your last exposure, press the MX Button 16 again to eject the film.
SELF-PORTRAIT MIRROR
The Lomo’Instant Wide includes a little convex Self-Portrait Mirror 18 next to
the camera lens to make it easier to compose your self-portrait shots.
FILTER THREAD
The Lomo’Instant Wide includes a 49 mm standard Filter Thread 19 in front of
the camera lens for applying any kind of filter or lens attachments.
TRIPOD THREAD
The Lomo’Instant Wide comes with a standard ¼ ” tripod thread. To mount the
camera on a tripod, simply screw the tripod screw into the Tripod Thread 20 in
the bottom of the camera.
REMOTE CONTROL LENS CAP
The lens cap of Lomo’Instant Wide works as a remote shutter release by
infrared transmission. There are two buttons on the remote lens cap
functioning for Auto Shooting Mode, Bulb Mode and Fixed Shutter Speed Mode. To
use the remote shutter release function, point the Infrared Transmitter 25 of
the remote control lens cap toward the Remote Control Front Receiver 29 or
Remote Control Back Receiver 30, and simply press the corresponding button on
the lens cap.
- INSTANT Button 26: Under Auto Shooting Mode and Fixed Shut- ter Speed Mode, press INSTANT Button 26 for normal shutter release.
- TIME Button 27: under Bulb Mode, press TIME Button 27 once to open the camera shutter for exposure, then press the button once more to close the camera shutter and end of exposure.
To change the batteries of the remote control lens cap, simply open the
Battery Door 28 at the bottom of the remote control lens cap by sliding it.
Then install one 2025 battery (3 V) and close the Battery Door 28 .
TROUBLESHOOTING
Q. The camera is functioning but the film does not eject after the Shutter
Release Button 7 is pressed.
A . Please check the following:
- Make sure that there is film installed in the camera.
- Check the Film Counter Window 3 to see if your film has come to an end.
- Make sure that the proper shooting mode is enabled and ensure the camera is not set to “Off”.
- Check if the MX Mode Indication Light 17 above the MX Button 16 is on. If it is, that means you are in the MX Mode. Press the MX Button 16 again to switch off the MX Mode.
- Check the battery power by checking the battery light inside the Film Counter Window 3 . If it is blinking green, that means your camera is running out of battery. You should insert fresh batteries.
Q. The Auto exposure seems to be incorrect, my subject is under- or
overexposed.
A. Firstly check if anything is blocking the Light Sensor 21 and Flash Light
Sensor 22, then check if the camera is correctly set to Auto Shooting Mode.
The ambient exposure value and auto flash output may also be affected by a
very bright or very dark background. Set the Exposure Compensation Switch 14
to “+1” and shoot again if your image is too dark, or if your image is too
bright, set the Exposure Compensation Switch 14 to “-1”.
CARE AND WARRANTY
Your Lomo’Instant Wide has a 2-year warranty against any manufacturer defects.
In the event of a defect, the Lomographic Society will repair or replace the
item at our discretion. For the warranty service, please contact your closest
Lomographic Office.
Lomographic Society International
Kaiserstrasse 34/12, A–1070 Vienna, Austria
Tel: +43–1–899 44 0, Fax: +43–1–899 44 22
info@lomography.com
www.lomography.com
Lomography Offices
www.lomography.com/about/contact
Lomography Stores
www.lomography.com/about/stores
References
- Lomography
Read User Manual Online (PDF format)
Read User Manual Online (PDF format) >>
Download This Manual (PDF format)
Download this manual >>
Сегодня мы с тобой будем смотреть камеру Lomo’Instant Wide — самого большого представителя линейки моментальных фотоаппаратов от Lomography как по габаритам, так и по формату кадра.

Эргономика и управление фотоаппаратом
Камера действительно достаточно большая, её формы угловаты, и по ощущениям она напоминает большой кирпич. Но эти габариты компенсируются её возможностями. Тем не менее, по весу Lomo’Instant Wide выигрывает у аналогичных камер производства Fujifilm. Носить с собой камеру легко, как и снимать на неё.
Съемка интуитивно понятна и не вызывает особых сложностей. Кнопка спуска затвора находится на передней части аппарата, а все остальные элементы управления нашей камерой расположены сзади. Это очень удобно, потому что менять настройки и режимы и фотографировать можно одной рукой.

Режимы съемки
Если к управлению и тактильным ощущениям камеры можно привыкнуть, то где она себя раскрывает полностью, так это в своих возможностях. Аналогов моментальной камеры широкого формата с такими возможностями на рынке, наверное, больше и нет.

Пройдемся по режимам:
-
Простой авто — режим выбирает все настройки за тебя.
-
Bulb режим — длинная выдержка для твоих ночных кадров.
-
Постоянная выдержка 1/30 поможет в сложных световых условиях.
К каждому из этих режимов ты можешь включить или отключить вспышку и функцию мультиэкспозиции.
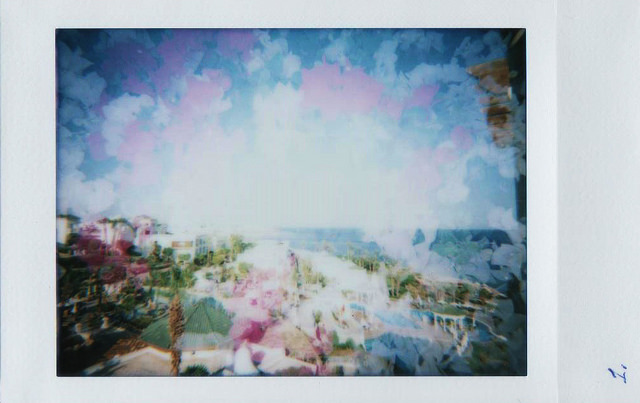
Мультиэкспозиция — это одна из моих самых любимых функций в этой камере. С её помощью ты можешь создавать ещё более интересные кадры, накладывая вместе две, три, четыре — да сколько хочешь экспозиций.

Кадр снят с помощью двойной мультиэкспозиции
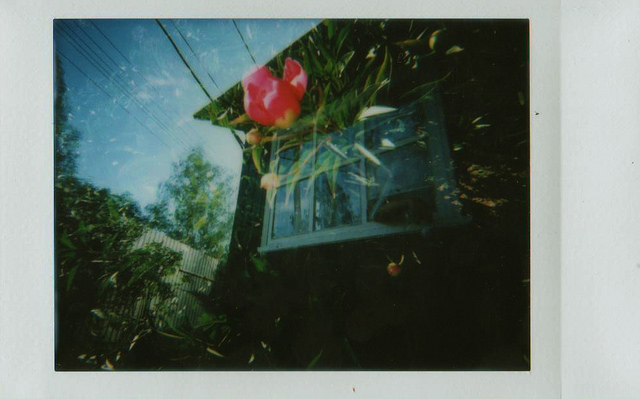
Также в комплекте с фотоаппаратом есть четыре цветовых фильтра для вспышки, которые можно комбинировать как между собой, так и с функцией мультиэкспозиции.

Фото снято со вспышкой и с синим фильтром

Слева мультиэспозиция + желтый и синий фильтры
Справа мультиэкспозиция + красный и синий фильтры
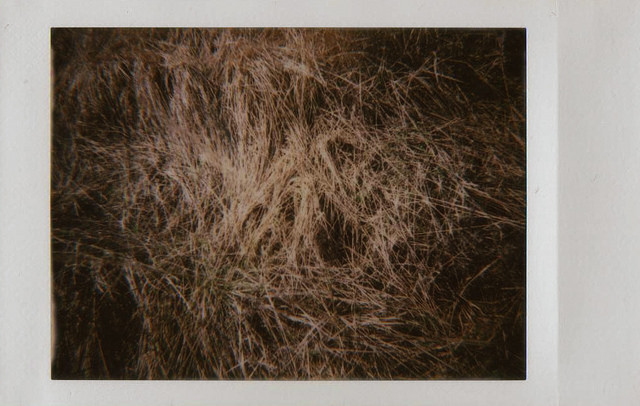
С режимом фиксированной выдержки в 1/30 секунды можно снимать в помещении и проводить эксперименты с движущимися объектами.

1\30
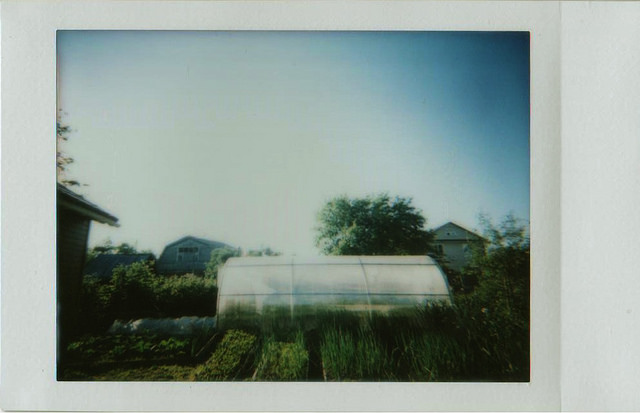
Также, одной из очень интересных особенностей Lomo’Instant Wide хочу отметить её чудесную крышечку для объектива, которая вместе с этим выполняет функцию пульта дистанционного управления затвором камеры. С ним делать автопортреты и снимать со штативом станет намного проще. Главное — не забывать перед съемкой эту крышечку снять, иначе вместо фотографии камера выдаст тебе чудесныыый серый прямоугольник  Да, гнездо для штатива и даже разъем для синхронизатора в камере также присутствуют.
Lomo’Instant Wide — это фотоаппарат, который поощряет твою креативность и предлагает экспериментировать со всем: светом, цветом и композицией. Пускай я не остался фанатом его дизайна, но мне действительно было весело снимать на него, не думая о выдержке, диафрагме и глубине резкости, а просто фотографировать с мыслью “а что будет если…”.
После всех этих зеркалок и прочих “серьёзных” камер я почувствовал, что моментальная фотография — это совершенно другой класс эмоций и ощущений. Это фотография для веселья. А что может быть важное в этой жизни, если не веселье и радость?

15
Instant photography is becoming the new favorite medium and is a great way to introduce any analogue enthusiast to all things film. Being able to have the best of both worlds – as with instant gratification and the physical photograph – is a wonderful way to further the future of film. Using the beautiful city of Paris as our backdrop, we listed down 10 tips and functions of your Lomo’Instant Wide so you can unlock your full creative potential!


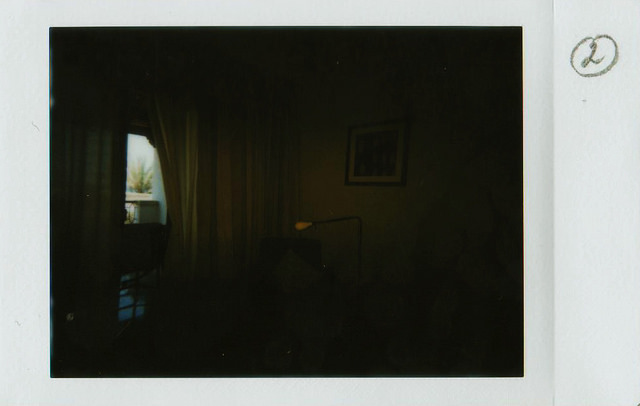
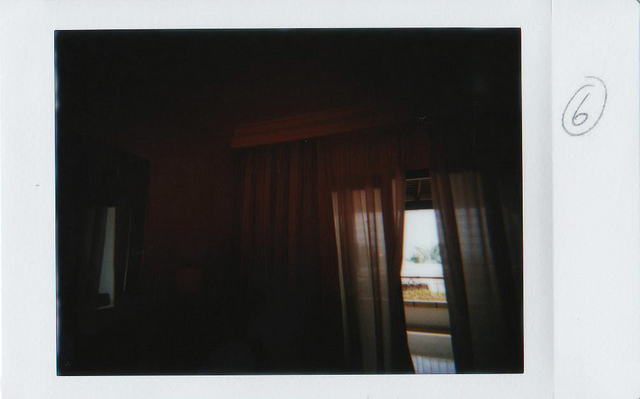
The Normal Picture
Try using the Lomo’Instant Wide as it is because it was designed to make your instant journey easy! When I took the following pictures, the brightness was good enough so I did not do any particular adjustment aside from disabling the flash. These photos can show you what you can do very simply with the Lomo’Instant Wide. The basic angle of the camera is perfect to capture all of your memories.


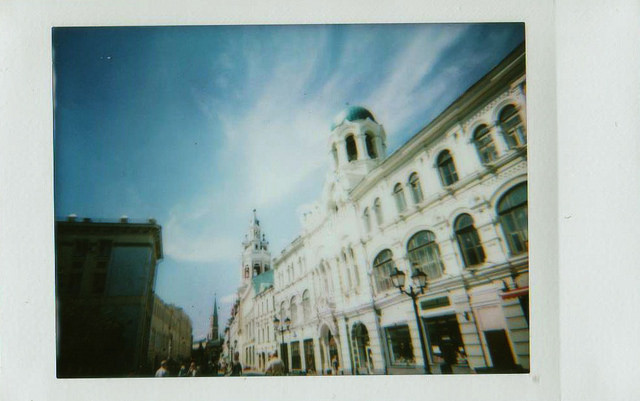
Ultra Wide-Angle
The Lomo’Instant Wide Camera & Lenses package includes an attachable ultra-wide lens and a special wide-angle viewfinder to help you frame your images better.
The first picture below was taken with the basic lens of the camera, which is already good! The second one was taken with the ultra-wide lens, and it revealed elements of the building that were not seen previously. You can use the ultra-wide lens in many more situations, like when you are too close to a subject and want to take a step back. They’re also great for landscapes and group shots.


Multiple Exposures
To achieve multiple exposures, you just have to press the MX button and shoot. The camera will continue to take and layer the photos until you press the MX button again. Since the Lomo’Instant Wide allows you to take unlimited multiple exposures, you can practice your creative freedom as you plan and decide!
The picture on the left is composed of two exposures, them being leaves of a tree and the front of a building. The picture on the right has two exposures as well. I felt inspired by the pyramid of the Louvre Museum and thought it would be an interesting subject. Why have only one pyramid when you can have two using a double exposure, right? The sun was at the top that time, so I compensated by underexposing.
For multiple exposures, don’t forget to underexpose so that your photos are not too bright! The Lomo’Instant Wide has an exposure button that you can set to -1 (which is what I did here), zero or +1.


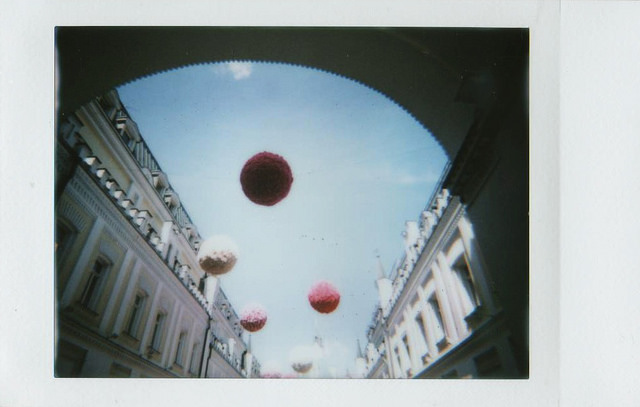
The Splitzer
Coming from its name, the Splitzer is an accessory that splits the frame into individually exposed sections. It goes in front of the lens and can be adjusted based on the parts that you want to cover or expose – it depends on what you want. By combining it with the MX function, you can get pretty cool shots!
Take the first instant picture here for example. I took a shot of the door while the upper part of the lens was covered with the Splitzer. After this, I moved the Splitzer to cover the bottom half, then took a picture of the umbrellas hanging in the sky.
For the second one, I wanted to mix two different elements present on the City Hall Square. Facing me were some trees that I shot with the Splitzer covering the right side of the lens. I then completed my image with the City Hall building seen on the opposite side. This is a way to redefine the landscape based on what you want to show.


Close-up Images
The Lomo’Instant Wide package is also equipped with an attachable macro lens, which is best used for close-ups. I tested it on flowers because it is springtime and the parks of Paris are full of beautiful flowers.
For the photo of the yellow flowers, I set the distance to the minimum, specifically 0.6 m, and I put the camera lens 10 cm away from the flower that I wanted to focus on. I pressed the button and here’s the result!
The second photo was taken one morning when the sun was not yet well installed in the sky. I used the same settings as the previous image with only one difference – the brightness was less evident at this time so I added +1 of exposure to make my picture sufficiently bright.


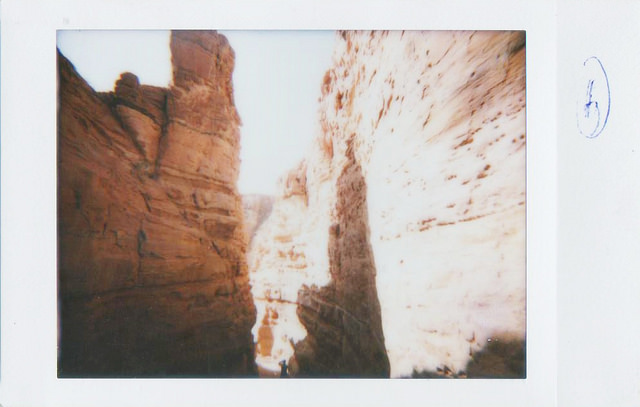
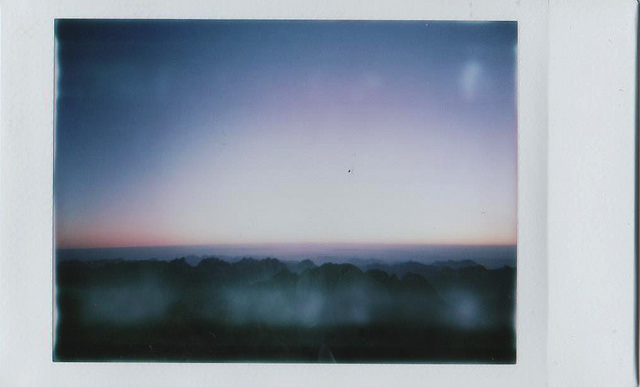
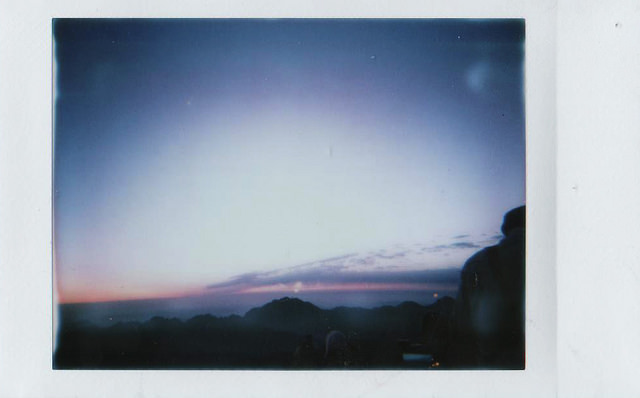
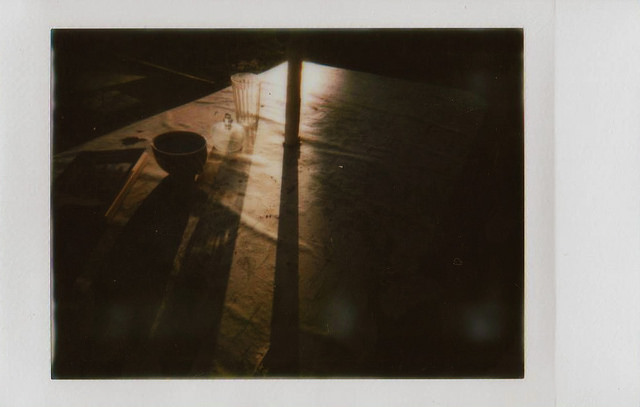
Long Exposures
The Lomo’Instant Wide has a Bulb function that allows for long exposures. For these photos, I wanted to get the streams of light from the cars. Being at a bus stop, I tried to find a stable surface to position the device on. The barrier was luckily wide enough for the camera, although a tripod is always better in these cases. I proceeded to set the distance to infinity because I wanted to have all the elements as sharp as possible. Afterwhich, I just waited for the cars to pass and pressed the shutter for a few seconds. Both photos had the shutter open for around three to five seconds.


Colored Gel Flash Filters
I wanted to explore by playing with the colors and transforming the atmosphere, and colored gel flash filters help with just that! For the first and third photos, I used blue to give a cooler aura. I wanted to achieve the opposite for the second photo, so I used pink for a warmer vibe! The colored gel flash filters are very easy to use – just slide one (or more!) in front of the flash to give color to your photos.


External Flash
The Lomo’Instant Wide is the only instant camera that has a PC Sync Socket. For this picture, I used the Fritz the Blitz Flash that I connected to the camera using a cable. I activated the MX function because I wanted to do a double exposure. For the base shot, I oriented the flash in a way that it would lighten the top of the face. For the second exposure, I put on a yellow filter in front of the flash to make it warmer, and I oriented it from below. I set the speed of the camera at 1/30 because there was no light in the room. With this option, you can realize pictures using a standard flash or your preferred studio flash kits.

Selfie Mode
If you want to have a picture of yourself in a particular place and you are alone, do not fear because Lomography is here! The integrated mirror of the Lomo’Instant Wide makes it safe to say goodbye to bad selfies. Simply hold your camera, frame your selfie by looking in the small mirror next to the lens, and shoot! Another great solution is to use the self-timer and the remote shutter found in the lens cap. I set up the focusing distance based on where I was going to be, put the camera on a stable surface, and then triggered with the remote control. This tool can be very useful to take group pictures too without having to sacrifice one person’s presence!


Portraits
This instant camera really allows you to create any type of picture! Feel free to use it for portraits because its wide angle allows you to capture them even in unusual places. You can also get closer to make the portraits tighter. For this photo, I was two meters away from my subject, so I set the focusing distance in regards to that, framed it, and got this result!

Now that you know all the tricks, it’s up to you to have fun and explore your experimental freedom! If you do not already have it, visit our Online Shop to get your Lomo’Instant Wide and its creative accessories!
written by Anna Carestia on 2019-06-25 #gear #tutorials #splitzer #inspiration #creativity #lomo-instant-wide
translated by Anna Carestia
Mentioned Product
Lomo’Instant Wide

We’re thrilled to introduce the Lomo’Instant Wide — the world’s most creative instant wide camera and lens system! Combining high quality craftsmanship with versatile features, the Lomo’Instant Wide is the instant camera for any and every person who revels in capturing every beautiful, bizarre and bewildering moment in a creative, super wide, crisply sharp and perfectly exposed way.
15 Likes
ricoinbrooklyn, polaroidlove, hannah_brown, weekendering, noemiamorphous, gailycu, fredinlisbon, brine, lizkoppert, hoozuki, jaunman, lomodesbro, rdetoyato, birgitbuchart & icequeenubia.
More Interesting Articles
-
Behind the Scenes of Viktor Barougier’s Music Video With Artist Ykoner
2025-05-26
#gear #culture #people #videos
Embark on a journey of mystical and medieval influences, captured in Ykoner’s LomoApparat and Lomography B&W photographs of Viktor Barougier’s upcoming music video.
-
Minsu Kim Captures the Color of Jeju Island With the Lomomatic 110
written by suy0909 on 2025-05-25 #gear #people #places
In this interview South Korean Photographer Minsu Kim shares some colorful moments of Jeju island captured with the Lomomatic 110 and talks to us about his photographic inspirations and creative process.
1
-
Developing Film Soup at Home: Simone Savo’s Experience with the Lomo Daylight Developing Tank
written by melissaperitore on 2025-05-24 #gear #people
LomoAmigo Simone Savo recently tested the new Lomo Daylight Development Tank to develop a color film using the film soup technique. Check out the results!
-
Your Quick Guide to Analogue Photography

Don’t know your 35 mm from your 110? Never heard of medium format? Confused about cross-processing? This guide gives a brief overview of everything analogue and you’ll be an expert in no time! Get a head start with film photography with our downloadable 12-page PDF guide.
-
Community Gallery: Party with the LomoApparat
written by francinegaebriele on 2025-05-23 #gear #culture
As seen from photos uploaded by our community members, our LomoApparat is the ultimate life of the party. Check out this gallery and see what makes this camera perfect for your next night out.
3
-
The Panoramic Magic of Daniel Maurer’s 3D Printed Camera
written by francinegaebriele on 2025-05-22 #culture #people
For film photographers there’s often a sense of sentimentality when it comes to gear. Some cameras are given to us by a special person, others are bought using hard-earned money, and sometimes, they’re built from the ground up to capture magic in just the way we envisioned.
4
-
LomoAmigo Lou’s Daylight Developing Tank Adventures
written by chloefuller on 2025-05-21 #gear #people
Lou, aka Sweet Lou Photography, reviews the Lomo Daylight Developing Tank. He recommends it for beginners and travelers, highlighting the rewarding process of self-developing film at home.
4
-
Shop News
Lomomatic 110 Glass Lens Camera

The Lomomatic 110 is your compact companion for every adventure! Featuring a glass lens, automatic exposure, day and night aperture modes, controllable ISO settings and a flash, get ready to capture your memories in vibrant, super-sharp 110 frames, with a depth of field you’ve never seen on a 110 image ever before!
-
37000: Guy Pinhas’ First Photobook on Shadow, Light & Memory
written by sylvann on 2025-05-20 #culture #people #places
Striking contrasts, intrigue and nostalgia merge in film photographer Guy Pinhas’ photobook, 37000, a visual diary of his trips to and from Tours, Paris. We talked with Guy about the inspirations behind the book, his creative process and more.
11
-
The Spirit of Skijoring with Mark LaRowe and the Sprocket Rocket
written by chloefuller on 2025-05-19 #gear #people #places
Montana-based photographer Mark LaRowe traded his digital gear for the analogue charm of the Sprocket Rocket camera at the Teton Valley Skijoring Competition, embracing slower, more intentional storytelling amid the chaos of high-speed equine sports.
10
-
Women on Film: The Photographic Art of Rosa Scipion on LomoChrome Films (NSFW)
written by ludovicazen on 2025-05-18 #gear #people #places
In this interview, Rosa Scipion talks about the magic of analogue photography and her commitment to female empowerment, creative collaboration and connection with nature as part of her art.
4
-
Shop News
Bundle Up and Save!
On the look for a great deal? In need for the perfect gift? Not sure what film to get with your camera? Worry not and discover our budget friendly bundles including sweet discounts and freebies for many different products! Don´t miss a great deal and check them out now!
-
A Glimpse Into @Thegoldenhourgirl’s Creative Process and Her Experience With the Lomomatic 110
written by ainethuici on 2025-05-17 #gear #people
In this interview we chat with Beatriz, a Madrid-based photographer and winner of our «Layers of Love» competition, about her dreamy double exposures, creative process, and why she’s loving the Lomomatic 110 for capturing spontaneous, colorful moments.
3
-
Community Gallery: Streaks of Sunlight
written by sylvann on 2025-05-16 #culture
Sunlight streaks – an evocative phenomenon and a cinematic appeal. This occurrence in nature, when captured on film, brings out the soul in images. In this community gallery, we’re marvelling at the power of natural light in elevating photographs.
7
-
Lomography Community Recap: April 2025
written by bydenise on 2025-05-15
Here’s your monthly dose of the latest happenings in the Lomography Community! Curious as to what your fellow Lomographers have been up to? Or want the latest scoop on our ongoing Competitions? Find all this and more in our monthly recap!
6
-
Find Out More About


В предыдущем посте был обзор фотоаппарата в этом – результаты теста.
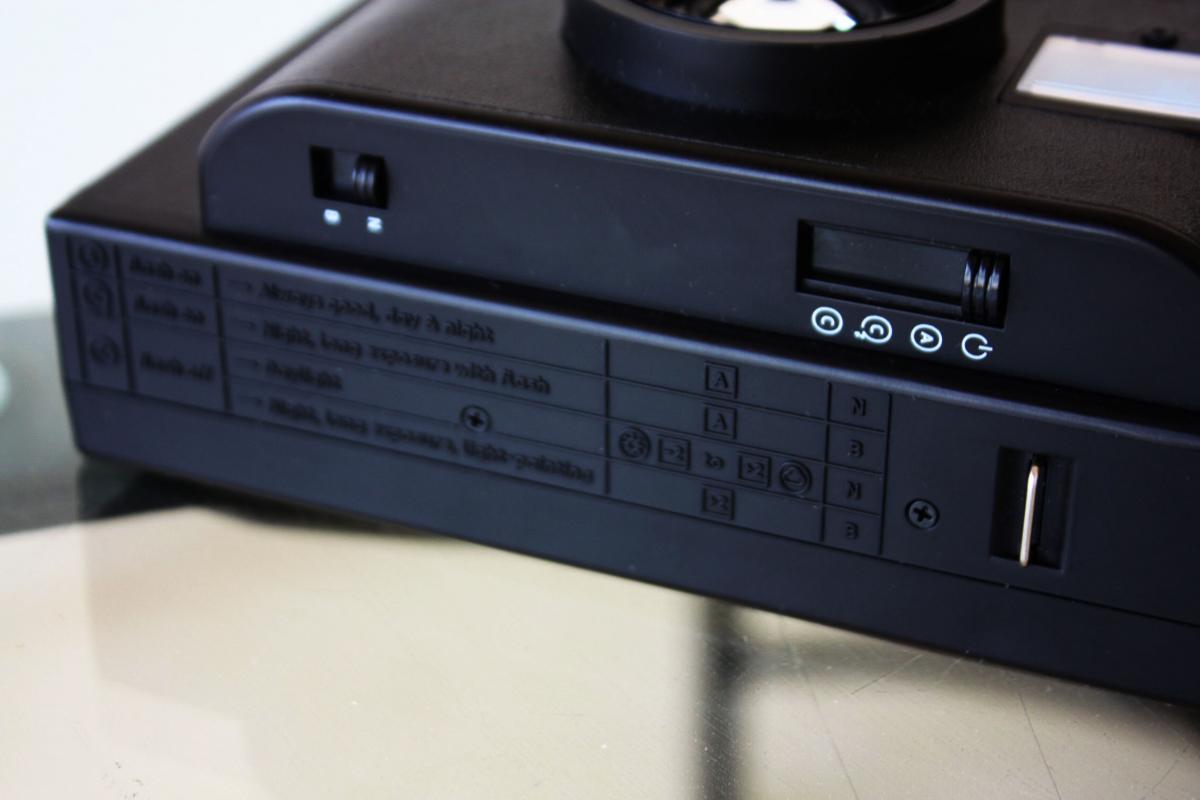
Итак, у меня вариант Lomo`Instant Black с цветными фильтрами. Для начала фото основных настроек.
Режимы и Выдержки:
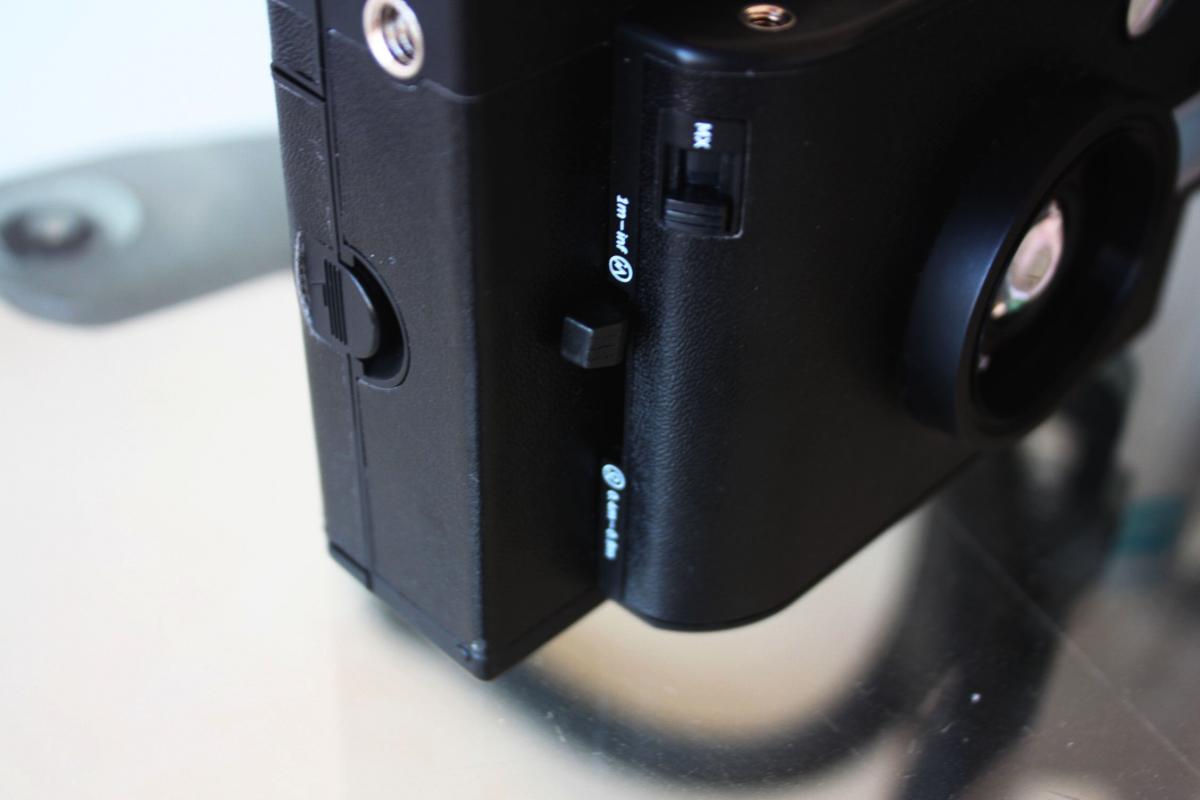
Регулировка «дальности» и настройка мультиэкспозиции:
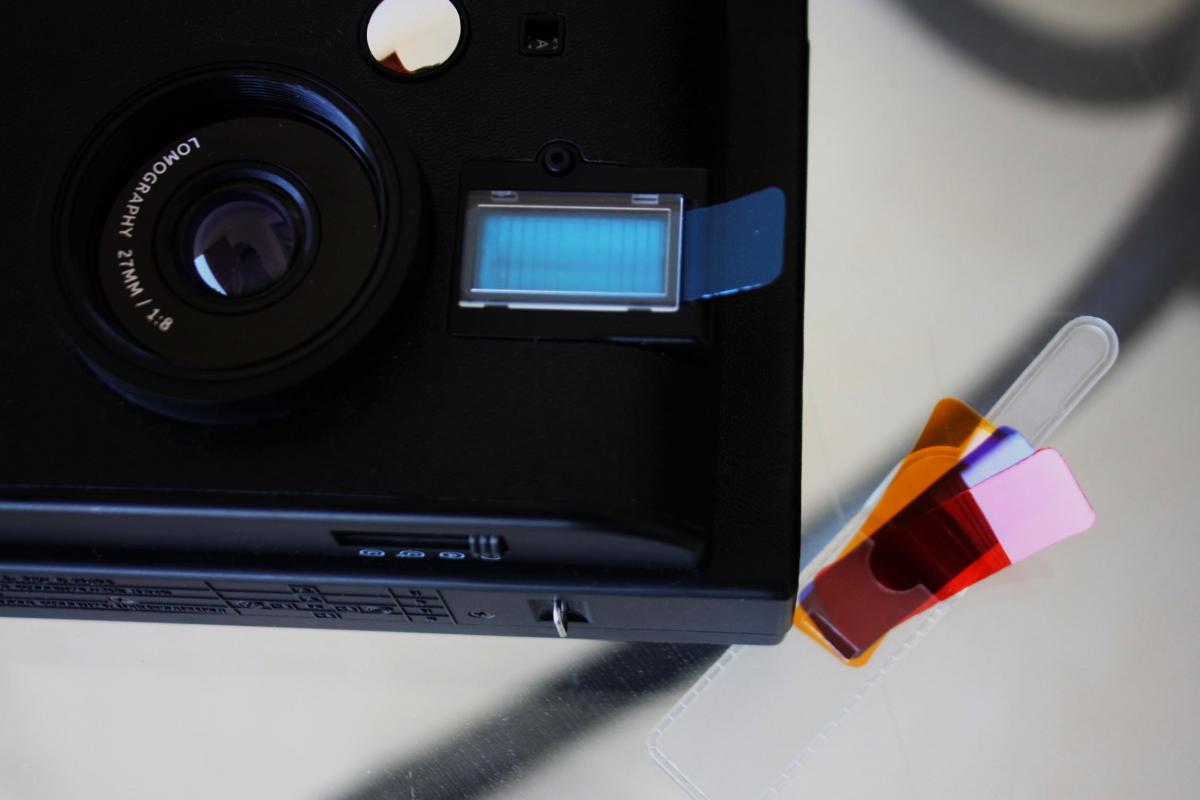
Разъем для фильтров и вспышка, зеркальце на объективе:
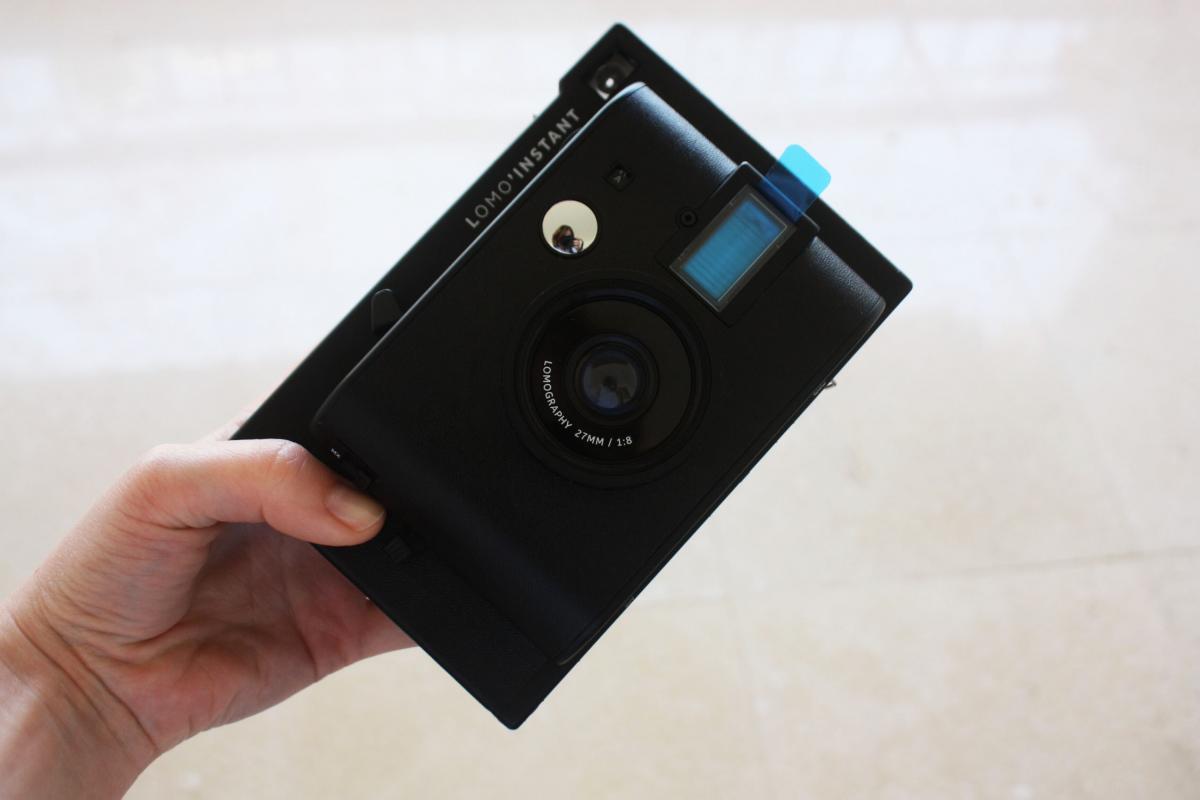
Общий вид ( в левом верхнем углу видна настройка диафрагмы):
Из инструкции, которая дается к камере, в общем-то, все понятно: как пользоваться, куда нажимать. Если вы новичок, то инструкция обязательна к прочтению, если любитель – с настройками разберетесь в два счета. Оговорюсь сразу, что знание основ фотографии не всегда спасет вас от неудач, результат подчас немного удивляет. Настройками пользоваться нужно активно, потому что, если вы просто будете щелкать кадр за кадром – это, во-первых, не интересно, во-вторых, не гарантирует отличного результата. Также помните, что светочувствительность пленки Fuji Instax Mini – 800 единиц, а это значит, что режим «без вспышки» годен только для хорошего солнечного света.
Однако разберемся со всем по порядку.
Краткий комментарий к настройкам.
Режимов съемки у камеры три. Первый – со вспышкой – подойдет для съемок днем и ночью, но вспышка, очевидно, рассчитана на близкие расстояния. Второй режим тоже со вспышкой, но вспышка здесь сильнее, и режим рассчитан на вечерние-ночные съемки, длинную выдержку. Режим номер три – без вспышки и подходит исключительно для хорошего дневного освещения.
Две другие настройки — выдержка и диафрагма – очевидно, призваны помочь импровизировать в данных режимах. Выдержка есть «дневная» N и «ночная» B. Если долго жать на кнопку спуска в режиме выдержки B, получается длинная выдержка для ночных съемок. С диафрагмой все вроде более или менее понятно: + 1, + 2 ставится в условиях слабого освещения и -1, — 2 при ярком солнце.
Для тех, кто хочет углубиться в материал, привожу технические характеристики:
— выдержка: автоматическая ,- ∞ to 1/125 (N), Bulp (B)
— диафрагма: автоматическая f8 , f11 , f16 , f22 , f32
— экспонометр: есть
— фокусировка: автоматическая
— дистанция фокусировки: нет
Результаты теста приведены ниже. Под каждым фото указаны исполльзованные при съемке настройки.
1) Интереснее всего, конечно, снимать без вспышки. Особенно учитывая то, что на других похожих фотоаппаратах (Fujifilm Instax/Polaroid PIC 300) такого режима нет. Если снимать в этом режиме, то пользоваться настройками диафрагмы — обязательное условие. Лучшие кадры получаются при хорошем солнечном свете, но не слишком активном.
Явный «пересвет». Режим С, настройки выдержки и диафрагмы стандартные. Активный солнечный свет.
Режим С, стандартные настройки. Умеренное дневное освещение, солнечно.
Режим С, настройка диафрагмы +1,+2, выдержка N. «Предрассветный» свет, без солнца.
Режим С, диафрагма +2, выдержка В. Вечерний неяркий солнечный свет.
2) Цветные фильтры удатся применить только в режимах со вспышкой. Всего фильторов четыре — синий, голубой, желтый красный. Я фотографировала в режиме А.
Режим А, стандратные настройки выдержки и диафрагмы, желтый фильтр.
Режим А, стандартные настройки выдержки и диафрагмы, красный фильтр.
Цветные фильтры делают изображение темнее, так, что даже вспышка не всегда спасает. Больше всего «темнят» синий и голубой фильтры. При использовании выдержки В есть риск немного смазать изображение. Поэтому имеет смысл диафрагму ставить на более открытые режимы.
3) Съемка с близкого расстояния (0.4 — 0.9 м)
Как такого макро у камеры нет. Есть только макро-объектив в комплекте с тремя линзами. Но 0.4 метра — это тоже довольно неплохо. Подойдет для портретов или съемки предметов крупным планом.
Режим С, стандартная выдержка, диафрагма +1.
Особых деталей на таких фото видно не будет, четкость тоже ожидать не следует (у полароидов вообще это понятие отсутствует). Зато на фото выше виден странный эффект от объектива — размытие по краям. Видимо все дело в пластмассе, из которой сделан объектив. Ну, и Ломография без таких штучек — это не Ломография вовсе.
4) Еще одна фишка, которая безумно радует, — мультиэкспозиции. Делать наложение одного кадра на другой можно бесконечно.
Я делала по два, потому что в других случаях обычно получается каша.
Режим С, диафрагма -2, выдержка N.
Режим С, стандартные настройки.
5) Объектив с широким углом обзора — тоже типичная для Ломографии тема. Есть почти у всех фотоаппаратов, Lomo Instant — не исключение. Замечательно подходит для съемки архитектуры, пейзажей и т.п., правда, не на слишком далеком расстоянии, т.к. детализация изображения и четкость, повторюсь, не самая высокая.
Режим С, выдержка N, диафрагма — 1.
Выводы. Интересный фотоаппарат с расширенным (по сравнению с Fuji) набором настроек. Из 30 кадров хорошо получились штуки 22-25 (лучшие см. выше). При грамотном пользовании настройками в 90% случаев все будет получаться. У меня не сложилось только с синими фильтрами и длинной выдержкой. Последняя опция явно рассчитана на близкие расстояния и для работы со штативом.
В наличии
34 990 ₽
39 990 ₽ Акция
Ваш город:
Доставка Почтой России ~ 450 ₽
Lomo’Instant Central Park — моментальная камера с большим размером кадра и ручными настройки экспозиции. Длинные выдержки, экспокоррекция и несколько режимов съемки, эта камера даст вам все, что нужно для творчества.
Независимо от того, хотите ли вы захватить широкие и яркие пейзажи или получить с близкого расстояния фото прекрасной улыбки вашего лучшего друга, двухсекционный объектив позволит вам увидеть мир с любой точки зрения.
Фотокамера Central Park от проекта Lomography вышла ограниченным тиражом! Убедитесь что вы стали одним из немногих счастливых обладателей этой редкой расцветки!
В комплект входит: фотокамера, цветные гелевые фильтры, широкоугольный объектив и видоискатель, Close-Up линза насадка на объектив, линза насадка на объектив Splitzer, пульт дистанционного управления, инструкция по эксплуатации.
Обратите внимание: фотокамера питается от четырех батареек АА (в комплект не включены).