
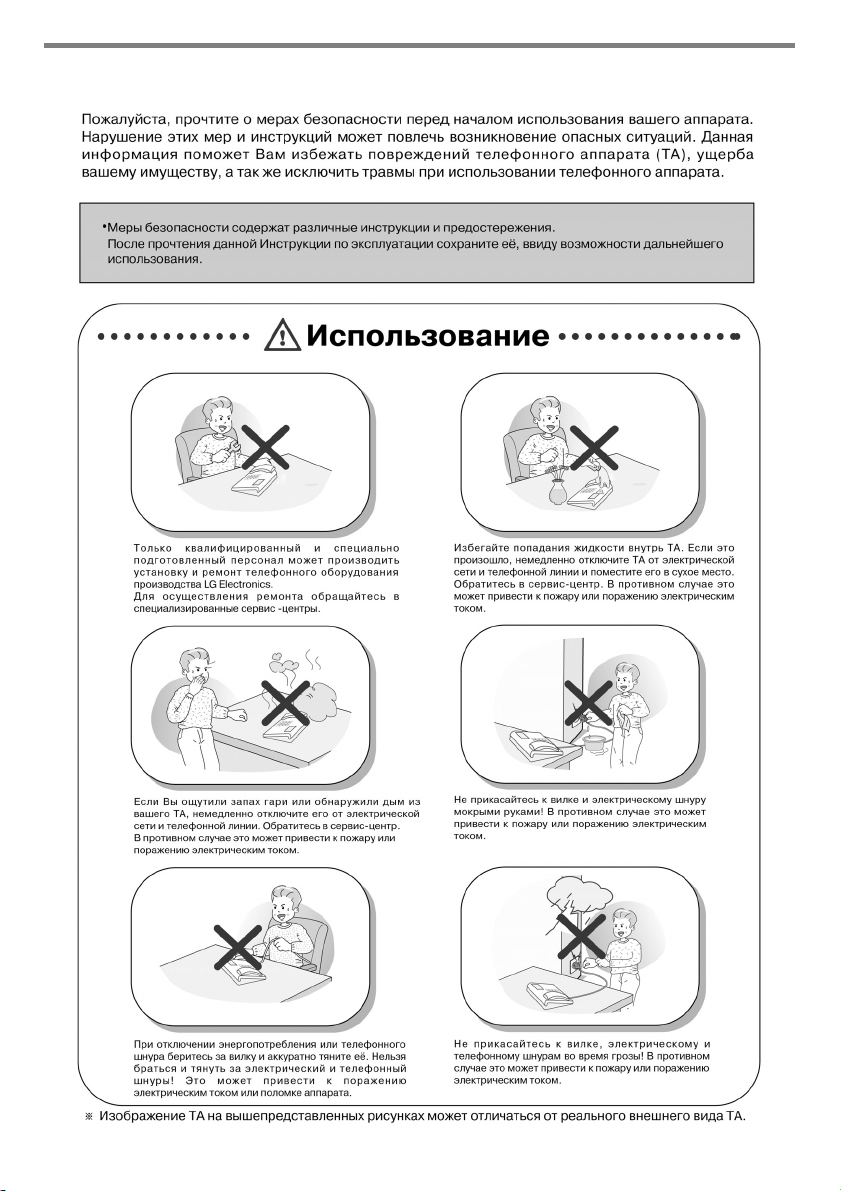
Меры безопасности
3
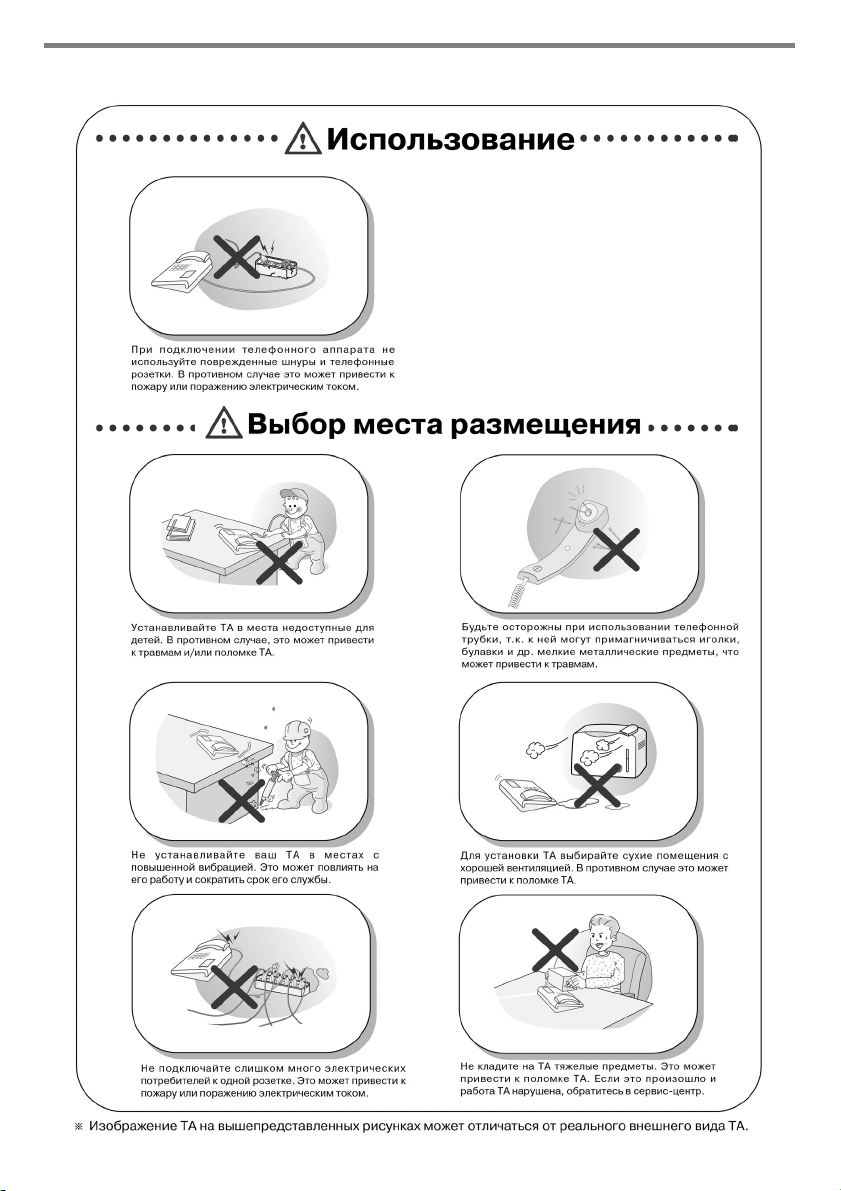
Меры безопасности
4
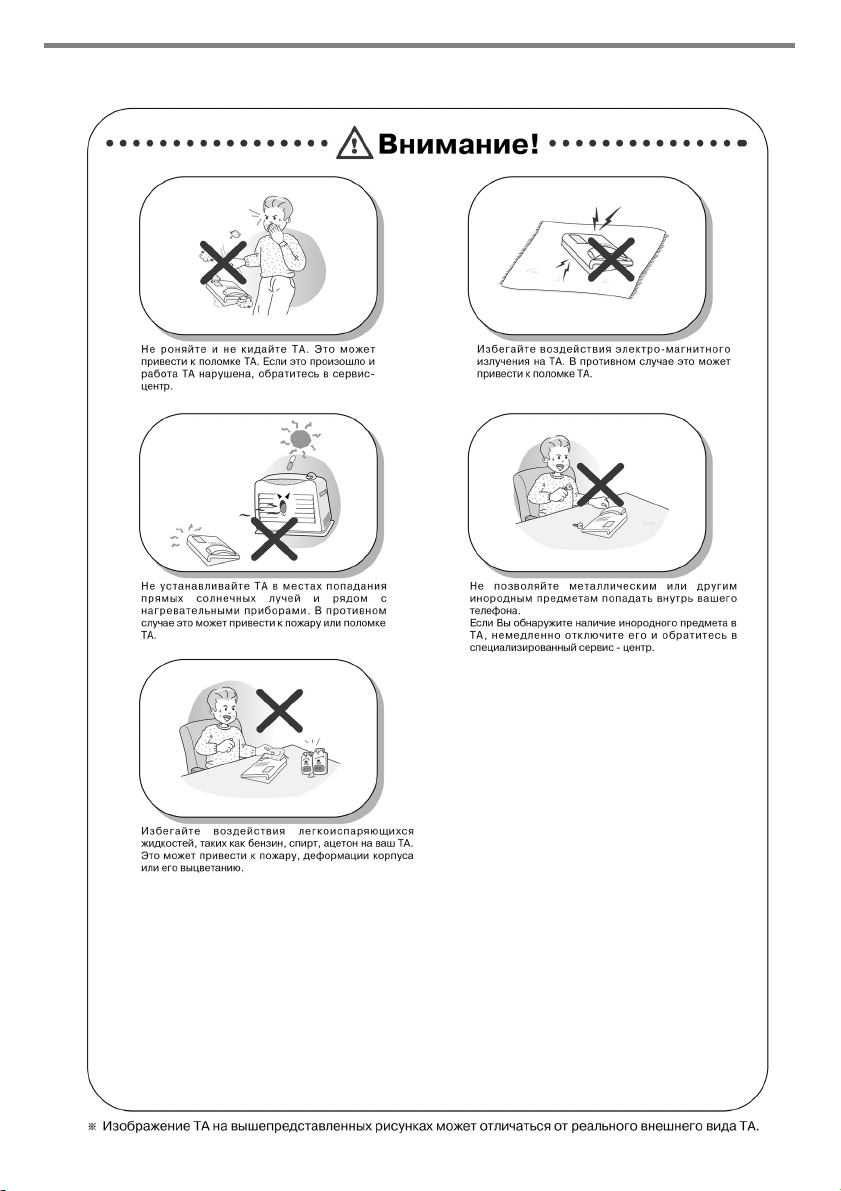
Меры безопасности
5

Содержание
Обзор
Модели 7016D и 7024D серии LDP-7000
Внешний вид и описание кнопок
Схема кабельных соединений
Порт для включения дополнительного устройства — ADP (Additional Device Port)
Вызовы
1. Исходящий вызов
2. Входящий вызов
3 Кнопки управления и Клавиша навигации
Основные функции
1. В исходном состоянии
1.1 Перехват вызова в группе
1.2 Конференция
1.3 Повторный набор номера
2. При снятой трубке
3. При внутреннем наборе
4. При вызове незанятого внутреннего абонента
5. При вызове занятого внутреннего абонента
6. При вызове внутреннего абонента в режиме DND
7. При ошибке в наборе
8. При поступлении внутреннего вызова
9. При разговоре с внутренним абонентом
10. Постановка в очередь на получение доступа к CO линии
11. При наборе/разговоре по CO линии
12. Воспроизведение сообщений
13. Поисковый вызов
8
8
9
11
12
14
14
14
15
16
16
16
17
18
18
18
18
19
19
19
19
20
20
20
21
21
Список вызовов
1. Входящие вызовы
2. Исходящие вызовы
3. Пропущенные вызовы
3.1 Ответить
3.2 Удалить текущую запись
3.3 Удалить все записи
3.4 Сохранить
3.5 Просмотреть Имя / Телефонный номер
22
22
23
24
24
24
25
25
25
6

Содержание
Меню
1. Основное программирование
1.1 Программирование собственного имени абонента
1.2 Программирование сигнала вызова
1.2.1 Выбор типа сигнала
1.2.2 Выбор мелодии сигнала
1.3 Программирование режима ответа
1.4 Программирование пароля
1.4.1 Регистрация пароля
1.4.2 Изменение пароля
1.5 Выбор языка
1.6 Установка режима блочной передачи номера
2. Расширенное программирование
2.1 Установка будильника
2.1.1 Установка
2.1.2 Отмена
2.2 Программирование сообщений об отсутствии
2.2.1 Выбор сообщения
2.2.2 Отмена/Изменение
2.3 Установка класса обслуживания абонента
2.3.1 Понижение класса
2.3.2 Восстановление класса
2.3.3 Удаленное использование класса обслуживания абонентов
2.4 Установка режима спикерфон/ гарнитура
2.5 Установка режима работы с проводной гарнитурой
3. Программирование ускоренного набора номера
4. Программирование функции «мобильный абонент»
4.1 Установка номера мобильного абонента
4.2 Активизация переадресации вызовов на мобильного абонента
5. Програмирование групповой конференции
5.1 Создание групповой конференции
5.2 Удаление групповой конференции
6. Программирование виртуальных абонентов
6.1 Регистрация виртуального номера
6.2 Отмена виртуального номера
26
27
27
28
29
29
30
31
31
32
33
33
34
34
34
35
36
36
37
38
38
39
40
41
41
42
43
43
43
44
44
44
45
45
46
Телефонная книга
1. Набор по ICM имени
2. Индивидуальный сокращенный набор
3. Системный сокращенный набор
Ввод символов
Словарь терминов
47
47
48
48
49
50
7
Обзор
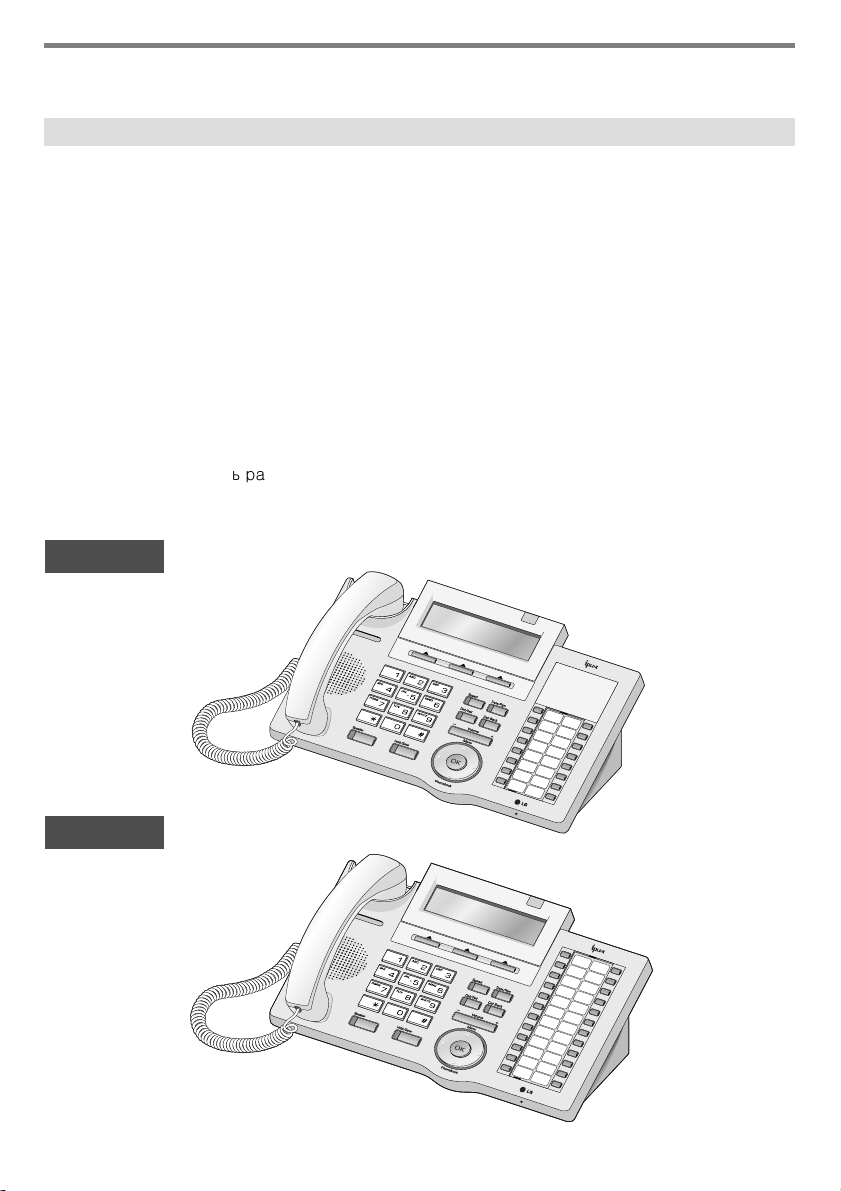
Модели 7016D и 7024D серии LDP-7000
Модели LDP-7016D/7024D представляют собой усовершенствованные, удобные для
пользователя системные аппараты, имеющие 3 управляющие кнопки и клавишу
навигации.
• Основные характеристики
— Стильный и ультрамодный дизайн
-3-х строчный (3х24) жидко-кристаллический дисплей
— Программируемые кнопки с двухцветными светодиодными индикаторами (16/24)
— Порт для включения дополнительного устройства (ADP — Additional Device Port ),
такого, как аналоговый телефон (SLT) или факс
— Возможность просмотра входящих и исходящих вызовов
— Запись разговоров – только для модели 7024D (при наличии модуля расширения
USB).
— Hands-Free решения – только для модели 7024D
(при наличии модуль расширения Blue-Tooth).
— Возможность настенного монтажа (при наличии комплекта для настенного монтажа)
LDP-7016D
LDP-7024D
8
Обзор
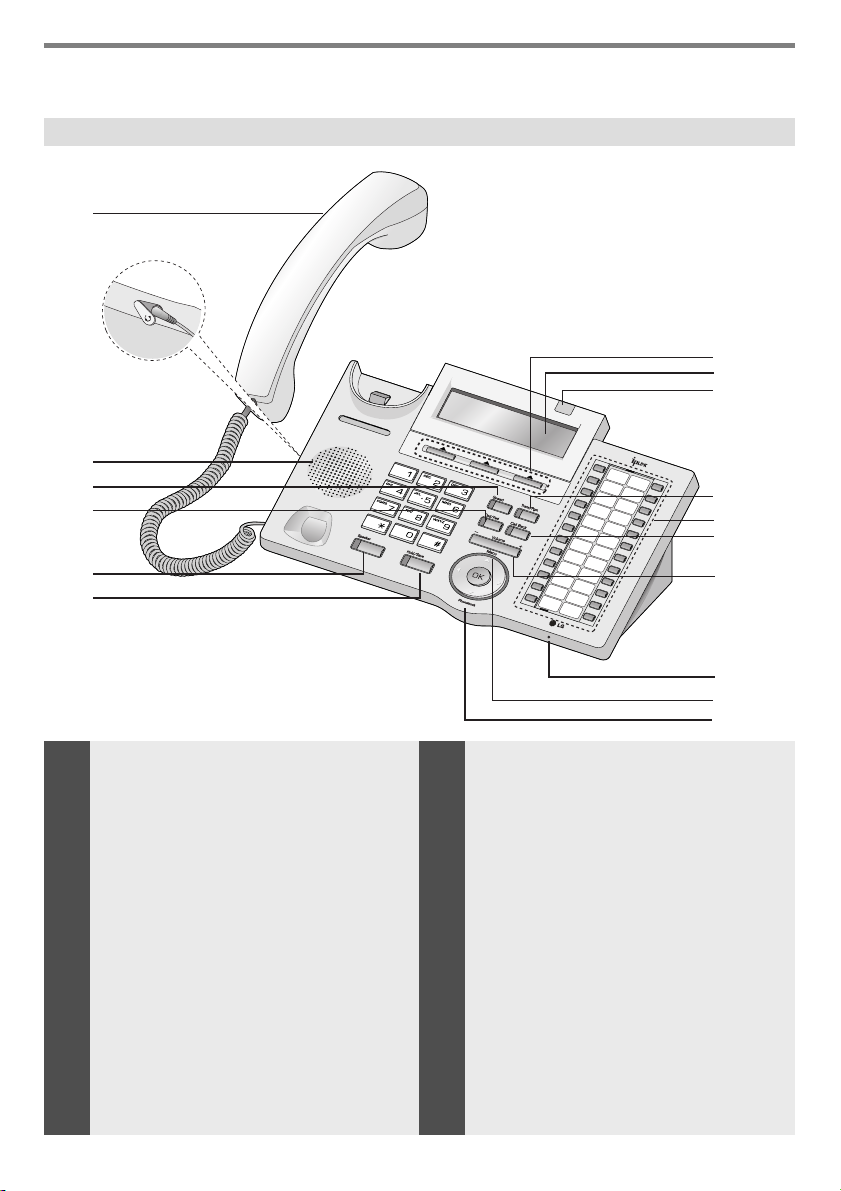
Внешний вид и описание кнопок
1
2
3
4
5
8
9
10
11
12
13
6
7
1
Телефонная трубка
2
Разъем для проводной
Гарнитуры
3
Динамик
4
Кнопка быстрого доступа — Speed
5
Кнопка — DND/FWD
6
Кнопка спикерфона — Speaker
7
Кнопка удержания/
сохраниения — Hold/Save
8
3 Кнопки управления
9
ЖКД
(Жидко-кристаллический дисплей)
14
15
16
17
10
Индикатор поступления вызова
11
Кнопка перевода вызовов/
программирования -Trans/PGM
12
Программируемые кнопки
13
Кнопка обратного вызова — Call back
14
Клавиша регулирования громкости
15
Микрофон — Hands-free
16
Сектор Меню клавиши навигации
17
Сектор выбора Телефонной книги
9

Обзор
1
2
3
4
5
6
7
8
9
10
11
12
Телефонная трубка
Разъем для проводной
Кнопка быстрого
Кнопка — DND / FWD
Кнопка спикерфона —
удержания/сохранения-
3 Кнопки управления
кристаллический
Индикатор поступления
Кнопка перевода
программирования —
Программируемые
гарнитуры
Динамик
доступа— Speed
Speaker
Кнопка
Hold/Save
ЖКД (Жидко-
дисплей)
вызова
вызовов/
Trans/PGM
кнопки
Используется для разговора.
Используется для подключения гарнитуры к телефонному аппарату
для режима Hands-free.
Транслирует сигнал вызова и голос.
Используется для сокращенного набора номера, для
программирования, для запоминания последнего набранного
номера и т.д.
Используется для блокировки входящих вызовов. Если функция
блокировки активна, индикатор этой кнопки горит красным
цветом.
Также используется для переадресации вызовов на другой номер
или на голосовой ящик. Если функция переадресации активна,
индикатор этой кнопки мерцает.
Активизирует режим громкой связи, о чем свидетельствует
красный цвет индикатора.
Используется для удержания вызова или для сохранения
информации во время программирования.
Используются для выбора функций, отображаемых на дисплее
прямо над этими кнопками.
На дисплее отображаются набираемые номера и входящие номера,
статус абонентской линии и различные сообщения.
Горит во время поступления вызова на телефонный аппарат.
Используется для перевода вызовов (TRANS) или для входа в режим
программирования (PGM)
Некоторые из программируемых кнопок предварительно
запрограммированы как кнопки резервирования соединительной
линии (группы линий) или для выхода в город (кнопки Loop).
Программируемые кнопки, могут быть запрограммированы
пользователем в соответствии с его предпочтениями.
13
14
15
16
17
Кнопка обратного
вызова — Call back
Клавиша регулирования
Микрофон Hands-free
Телефонной книги
громкости
Сектор Меню
Сектор выбора
Используется для обратного вызова номера, исходящий звонок с
которого не был принят по причине занятости телефонной линии.
Используется для регулирования громкости сигнала вызова,
громкости трубки и громкости режима спикерфона.
Используется при активном режиме спикерфона.
Используется для выбора пунктов меню и опций
Используется для быстрого набора номера, сохранения последнего
набранного номера и других номеров, в процессе
программирования программируемых кнопок.
10
Обзор
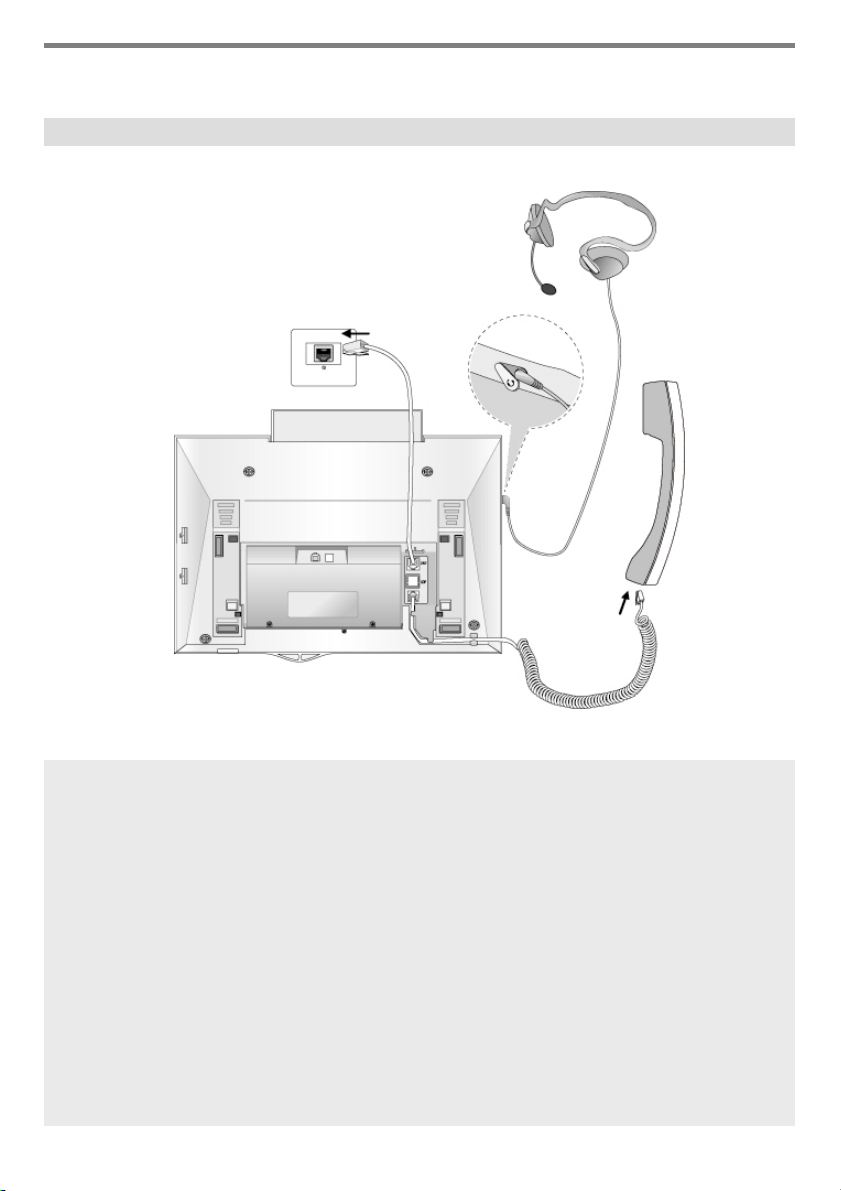
Схема кабельных соединений
B
C
A
Кабельные соединения
A–Один конец спирального провода вставляется в разъем Телефонной
трубки, другой — вразъем, находящийся в нижней части корпуса
Телефонного аппарата.
B – Один конец телефонного кабеля вставляется в разъем, находящийся в
нижней части корпуса Телефонного аппарата, другой – в телефонную
розетку.
C–Соединительный шнур проводной гарнитуры вставляется в
специальный разъем, находящийся с левой строны корпуса
Телефонного аппарата.
11
Обзор
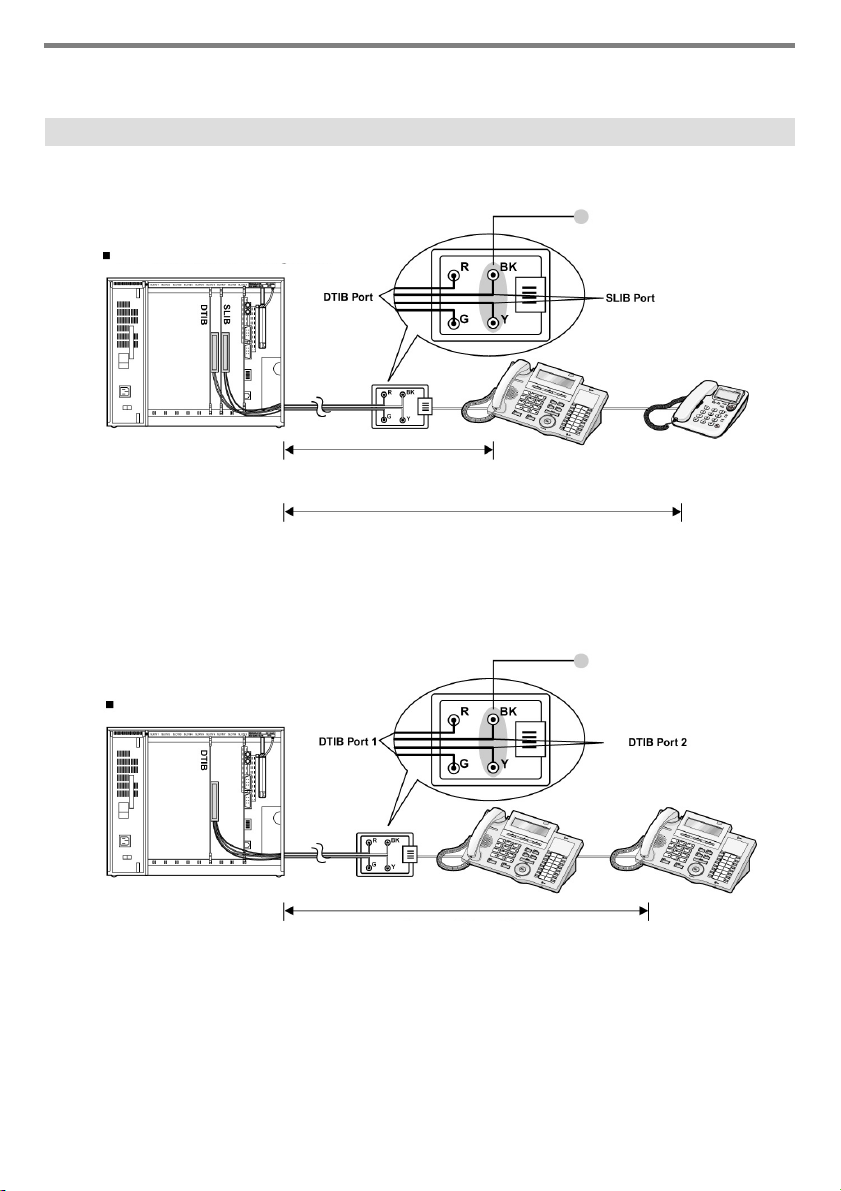
Порт для включения дополнительного устройства ADP (Additional Device Port)
Разводка KSU для ADP
Подключение аналогового ТА через ADP
Тип Максимальное расстояние
AWG22 до 500 м
AWG24 до 330 м
Тип Максимальное расстояние
AWG22 до 2500 м
AWG24 до 1600 м
Подключение цифрового ТА через ADP
Тип Максимальное расстояние
AWG22 до 500 м
AWG24 до 330 м
Разводка KSU для ADP
12

Обзор
Порт для включения дополнительного устройства ADP (Additional Device Port)
Порт для подключения дополнительного устройства — ADP (Additional Device port)
С помощью рабочего конца отвертки выломайте заглушку
на нижней части корпуса системного аппарата. В
открывшийся ADP разъем вставьте кабель
дополнительного устройства.
13
или
Вызовы
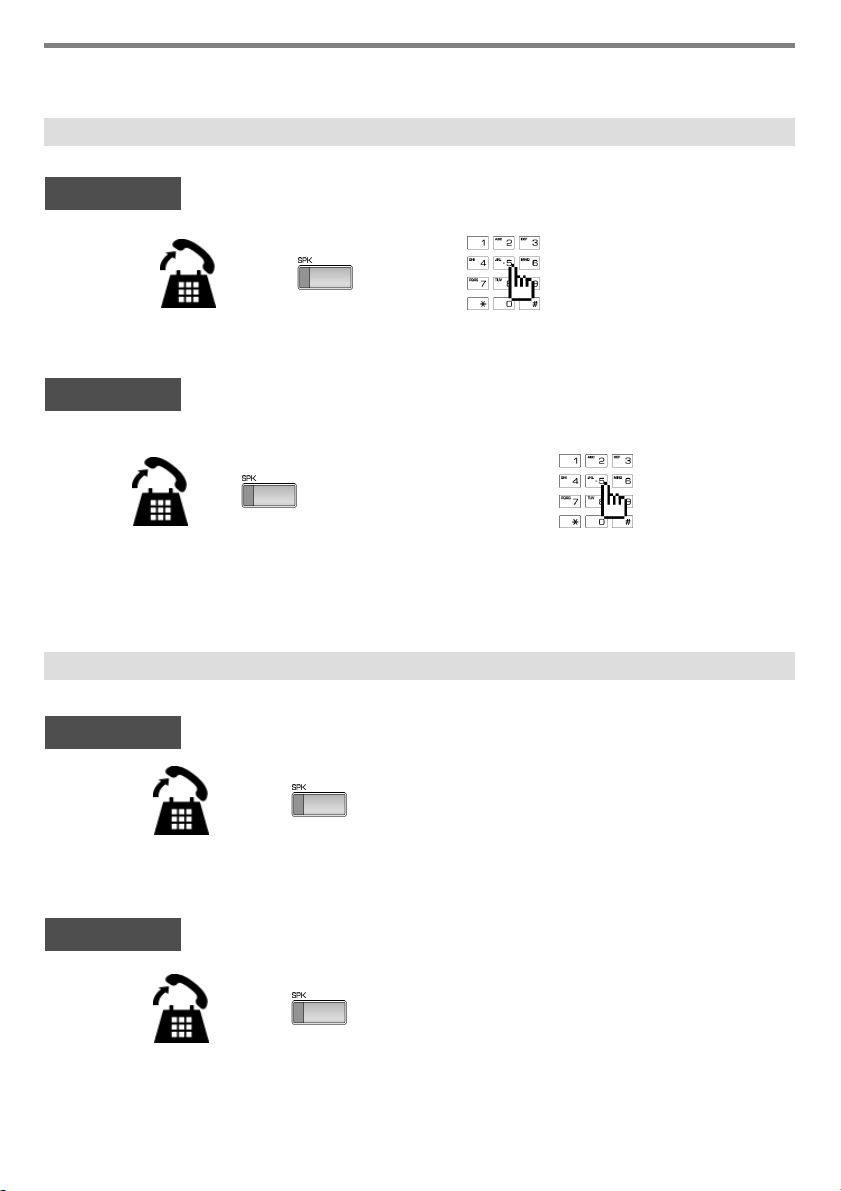
1. Исходящий вызов
Внутренний
Поднимите трубку
Внешний
или
Поднимите трубку
2. Входящий вызов
Внутренний
или
или
▶
Наберите номер внутреннего абонента
Наберите 9 или
нажмите кнопку
▶
резервирования
СО линии.
▶
говорите
▶
Наберите городской номер
▶
говорите
▶
говорите
Поднимите трубку
Внешний
Поднимите трубку
или
Нажмите мерцающую
кнопку
▶
резервирования СО
линии или кнопку Loop.
14
▶
говорите

3 Кнопки управления и Клавиша навигации
3 Кнопки управления
3 Кнопки управления расположены под дисплеем. Кнопки управления не имеют
жестко закрепленных функций, текущая функция кнопки отображается на дисплее
строго над кнопкой. Например: Если пользователь вызывает абонента, чья
телефонная линия уже занята, товтрубкеонслышитсигнал«занято» и на дисплее
отображается статус «занято». Над каждой из кнопок управления отображаются
фунциии возможные к выполнению в данный момент -“Message Wait”(Ожидающее
сообщение), “Camp-On” (Ожидающий вызов) и “Flash” (Сброс). Для активации
желаемой функции достаточно нажать на соответствующую кнопку управления.
ЗАНЯТО: ТЛФ 100
[CALLBK] CAMP(*) STEP
СООБЩ CAMP-ON ФЛЭШ
Клавиша навигации
В случаях, когда для выбора пользователя возможно более 3-хфункций, на дисплее
отображается левая (I) или правая (J) стрелка (см. рисунок). При нажатии сектора
клавиши навигации, соответствующего направлению стрелки, на дисплее
отображаются дополнительные функции. Клавиша навигации располагается под
Клавишей регулирования громкости.
ТЛФ 100 (T)
01 ФЕВ 04 17:34
ПЕРЕАДР КОНФЕР ПОВТОР→
ТЛФ 100 (T)
01 ФЕВ 04 17:34
← АБОНЕНТ
15
Основные функции
Нажав одну из 3-х кнопок управления возможно выбрать одну из функций
отображенных в нижней части дисплея. Например, если Вы хотите выбрать функцию
перехвата вызова (pickup) (см. рисунок), Нажмите левую кнопку. Если для выбора
возможны более чем 3 функции, то на дисплее отобразится стрелка. Используйте
Клавишу навигации для перехода на следующий/предыдущий экран с отображаемыми
для выбора функциями.
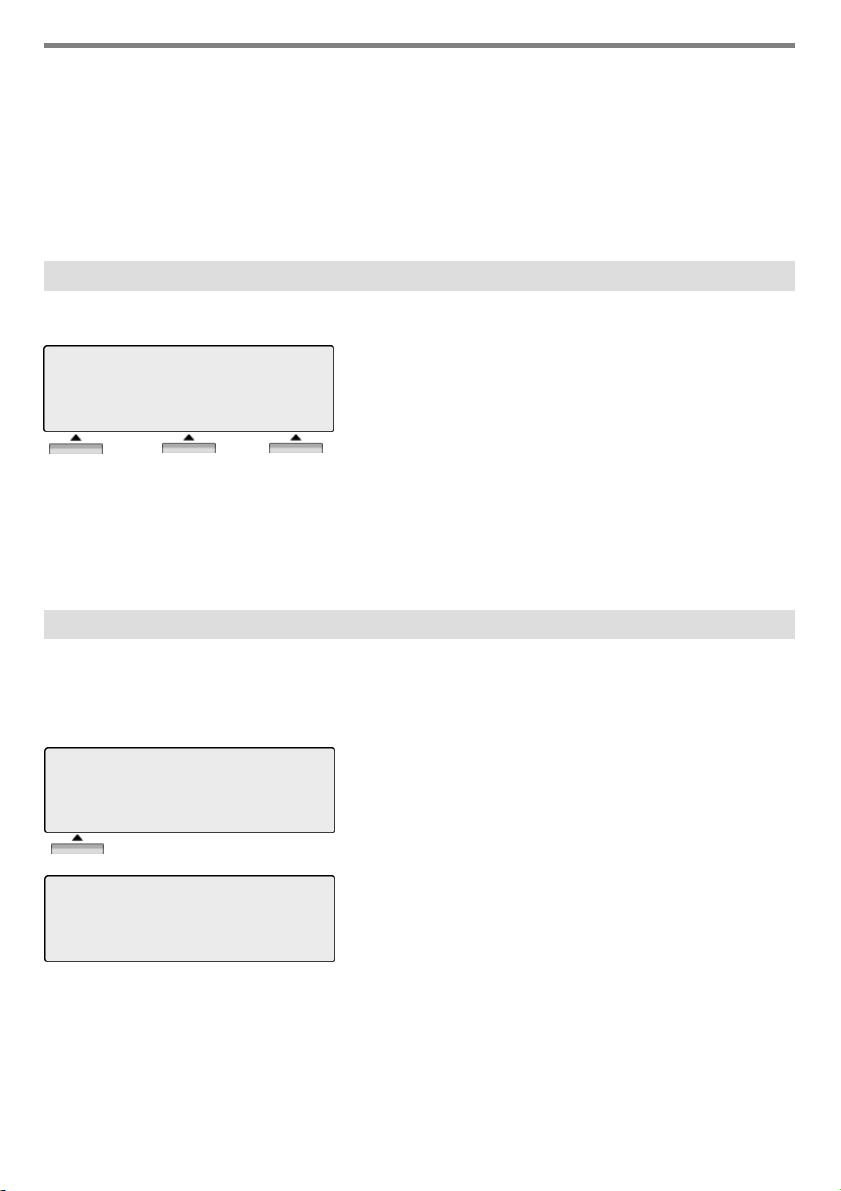
1. В исходном состоянии
3 Кнопки управления располагаются прямо под дисплеем.
ТЛФ 100 (T)
01 ФЕВ 04 17:34
ПЕРЕХВ КОНФЕР ПОВТОР
ПЕРЕХВ : нажмите [ПЕРЕХВ] для перехвата вызова в
группе перехвата.
КОНФЕР : нажмите [КОНФЕР] для перехода в режим
конференции.
ПОВТОР : нажмите [ПОВТОР] для повторного набора
номера.
1.1 Перехват вызова в группе
С ТА Вы можете перехватить вызов, пришедший на другой ТА, если оба абонента
прописаны в одной группе перехвата.
*См. также Руководство по программированию IP LDK & LDK.
ТЛФ 100 (T)
01 ФЕВ 04 17:34
ПЕРЕХВ КОНФЕР ПОВТОР
АДРЕСАТ: 104
ОТ 103 17:37
ПЕРЕВОД КОНФЕР МИК. ВЫК
Нажмите [ПОВТОР].
Говорите
16
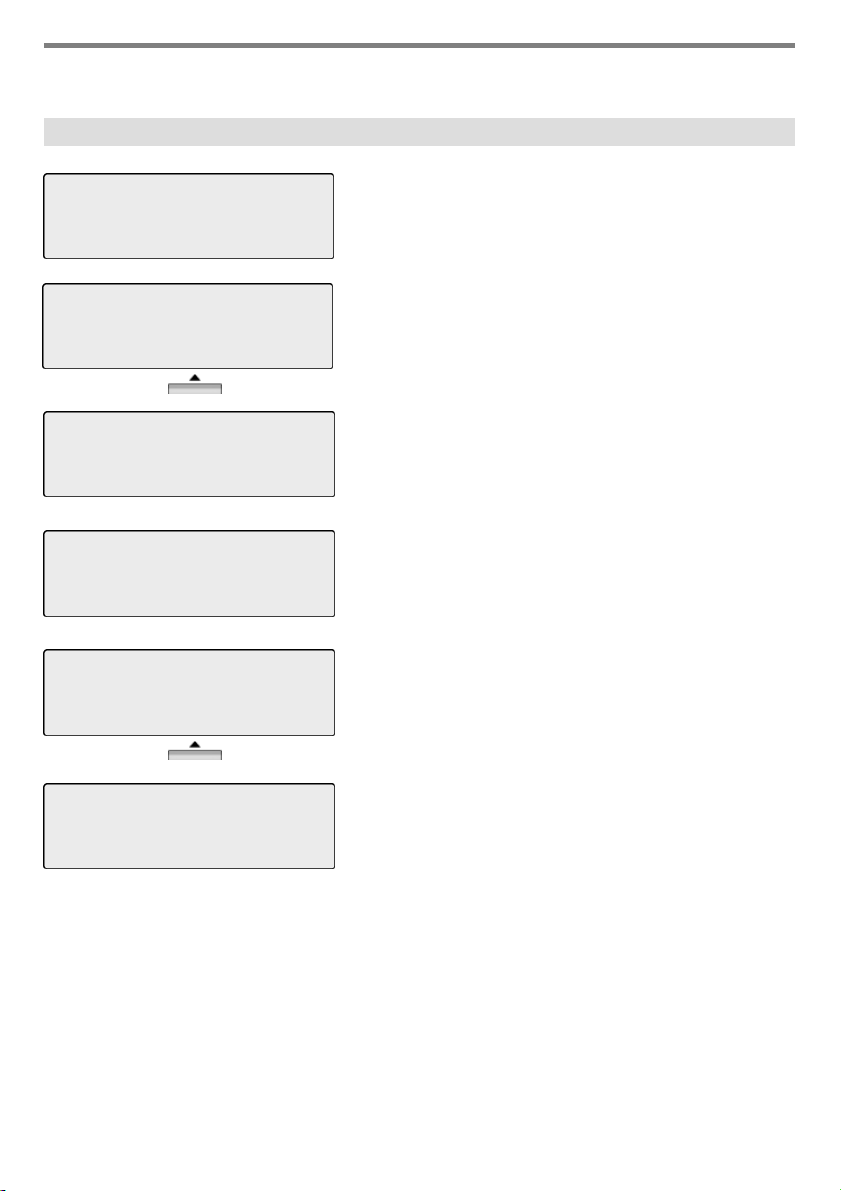
Основные функции
1.2 Конференция
ВЫЗОВ НА ТЛФ 100
01 ФЕВ 04 17:34
СООБЩ ФЛЭШ
ВЫЗОВ НА ТЛФ 100
01 ФЕВ 04 17:34
ПЕРЕВОД КОНФЕР МИК. ВЫК
КОНФЕРЕНЦИЯ
01 ФЕВ 04 17:34
ПЕРЕАДР КОНФЕР ПОВТОР→
ВЫЗОВ НА ТЛФ 104
01 ФЕВ 04 17:34
СООБЩ ФЛЭШ
ВЫЗОВ НА ТЛФ 104
01 ФЕВ 04 17:34
ПЕРЕВОД КОНФЕР МИК. ВЫК
Наберите желаемый номер внутреннего
абонента.
(например:100).
После ответа абонента 100 нажмите
[КОНФЕР].
Наберите еще один номер внутреннего
абонента, с которым необходимо провести
конференцию.(например:104)
Дождитесь когда абонент 104
примет вызов.
Нажмите дважды [КОНФЕР].
КОНФЕРЕНЦИЯ
01 ФЕВ 04 17:34
КОНФЕР МИК. ВЫК
3-х сторонняя конференция установлена
17
Loading…
Скачать
IPLDK CRS
Installation and User Guide
ISSUE 1.0A
-
Инструкции по эксплуатации
1
LG Ericsson LDP-7024D инструкция по эксплуатации
(49 страниц)
- Языки:Русский
-
Тип:
PDF -
Размер:
2.57 MB -
Описание:
Телефонный аппарат
Просмотр
На NoDevice можно скачать инструкцию по эксплуатации для LG Ericsson LDP-7024D. Руководство пользователя необходимо для ознакомления с правилами установки и эксплуатации LG Ericsson LDP-7024D. Инструкции по использованию помогут правильно настроить LG Ericsson LDP-7024D, исправить ошибки и выявить неполадки.
-
Страница 1
IPLDK CRS Installation and User Guide ISSUE 1.0A[…]
-
Страница 2
IPLDK Call Recording System Issue 1.0A — 2 — 1. INTROD UCTIO N …………………………………………… ……………………………………………… 5 1.1 OVERVIEW……………………………………………………………………………………………………. … 5 1.2 Features ………………………….[…]
-
Страница 3
IPLDK Call Recording System Issue 1.0A — 3 — Disk Information ………………………………………………………………………………………………… …………..45 Support multi-language…………………………………………………………………………………………… ……….46 MENU ………….[…]
-
Страница 4
IPLDK Call Recording System Issue 1.0A — 4 — Details for Changes Version Date Details Notes 1.0A 2004-05-19 First Created[…]
-
Страница 5
IPLDK Call Recording System Issue 1.0A — 5 — 1. INTRODUCTION 1.1 OVER VIEW — Call Recording System is the program that enables you to re co rd the messages on the phone. — You connect the USB cable to Keyset(LDP-7024 D(LD)) and deskto p computer in this System. — This System also provides various feature s that enable you to save the recorded messa[…]
-
Страница 6
IPLDK Call Recording System Issue 1.0A — 6 — — Enables you to send other peop le the file as an e-mail att ach ment. — Enables you to import address book from Outlook Express and Microsoft Excel — Enables you to export p hone book and address b ook to Microsof t Excel. 2. INSTALLATION E NVIRONME NT 2.1 Hardwar e Specification -Digital Keyset(LDP-70[…]
-
Страница 7
IPLDK Call Recording System Issue 1.0A — 7 — 3. PROGRAM SETUP 3.1APPLICA TION SETUP — You click Setup.exe after the movement to Direct ory with Appl ication install program. — Call Recording System needs DAO Versio n 3.5. — If you click the Yes(Y) bu tton, DAO files are installed.[…]
-
Страница 8
IPLDK Call Recording System Issue 1.0A — 8 — — If you click the No(N) but ton, DAO files are not installe d.[…]
-
Страница 9
IPLDK Call Recording System Issue 1.0A — 9 — — Click the Next button aft er entering your name and compan y na me. — If database is a lready existed, the messag e above is displaye d. — If you use previo us database, click th e Yes (Y) button. — Or if you use new database, click the No (N) button. — After clicking the Change butt on, select folder […]
-
Страница 10
IPLDK Call Recording System Issue 1.0A — 10 — — Click the Install button to begin the installat ion.[…]
-
Страница 11
IPLDK Call Recording System Issue 1.0A — 11 — — The window for Installat ion Complete is displayed. — Click the Finish butt on to complete the insta llation. How to check the version — Run CRS and Click ‘About’ in menu. — You can see installed CRS version and USB firmware version[…]
-
Страница 12
IPLDK Call Recording System Issue 1.0A — 12 — 3.2 DAO SETUP — Don’t cancel setup duri ng installation process. — This program will ins tall the module necessary fo r using the database.[…]
-
Страница 13
IPLDK Call Recording System Issue 1.0A — 13 — — This is the window DAO successfully installed.[…]
-
Страница 14
IPLDK Call Recording System Issue 1.0A — 14 — 3.3 USB MODULE (LDP-7 024D, LDP-7024LD) SETUP — When USB cable is connecte d to the computer, automatically the window above is displayed. — To install the driver, sele ct the Install f rom a list or spec ific location [Advanced] but ton, and then click the Next button.[…]
-
Страница 15
IPLDK Call Recording System Issue 1.0A — 15 — — Select the Search for t he best driver in these locations butt on, and then select the Inclu de the location in th e search check box. — If you click the Browse b utton, the window below is displayed. — Select WinXpUSBDrv file under Micr osoft Windows XP, and t hen click the Next button. — The appropr[…]
-
Страница 16
IPLDK Call Recording System Issue 1.0A — 16 — [USB Driver Find] — After USB Driver Setup is complet ed, — Select the Universal Se rial bus controllers in the Device Manager Control panel. — You can find the LGLDP-7024D(LD) item in th e window below.[…]
-
Страница 17
IPLDK Call Recording System Issue 1.0A — 17 — 3.4 USB MODULE (LDP-7 024D, LDP-7024LD) UPDA TE — Select the Universal Se rial bus controllers in the Device Manager control panel, and then find the LG LDP-7024D(LD) item. -After that, click Right Mouse Button, and then select the Prop erties item.[…]
-
Страница 18
IPLDK Call Recording System Issue 1.0A — 18 — — Click the Update Driver button in the LG LDP-7024D(LD) USB Properties. — The remaining feature is the same as the one described in the 3.3 USB MODULE (LDP-7024D, LDP-7024LD) SETUP part.[…]
-
Страница 19
IPLDK Call Recording System Issue 1.0A — 19 — 4. MAIN FEATURE DESCRIPTION 4.1 Main scr een Menu and Toolbar : Entir e features are available in the Menu Ba r. Also, frequently used features are available in the Toolbar. There are Backup but ton, E-Mail button, Search button, List butt on and Option button on the Toolbar. Customer Information Displa[…]
-
Страница 20
IPLDK Call Recording System Issue 1.0A — 20 — User List: There are two kinds of list. U sers in backup files a re displayed in one list. In the other list, users currently registe red are displayed. If you double c lick on the user item in the user list, the call history about the user is displayed on the right screen.. Volume Adjustment: When reco[…]
-
Страница 21
IPLDK Call Recording System Issue 1.0A — 21 — 4.2 V oice Recording and Playing Record — If the Record button is clicked , name, telephone number and recording time is displayed. — If the telephone number and name is not found in t he database or is not entered, the string «Unknown» is displayed. — The message «recording» is show[…]
-
Страница 22
IPLDK Call Recording System Issue 1.0A — 22 — Play — If you click the Play bu tton, the custom er information such as name, telephone number, and recording time is displaye d in Customer Information frame, and you can hear the recorded sou nd through speaker. — The message «playing» is showed in the status bar and h otkeys can be used. -Y[…]
-
Страница 23
IPLDK Call Recording System Issue 1.0A — 23 — Stop — The Stop button is enab led when the sound is rec orded and is played. You can stop the process as follows.[…]
-
Страница 24
IPLDK Call Recording System Issue 1.0A — 24 — — Click the Stop button, se lect the Stop menu item on the Co ntr ol Menu and use the hot key “CTRL+S” If you exit the program, you must click the Stop butto n. Pause — The Pause button is enabled whe n the sound is recorded and is played. You can pause the process as f ollows. — Select the Pause me[…]
-
Страница 25
IPLDK Call Recording System Issue 1.0A — 25 — Resume — If you click the Pause butt on, the pr ocess is paused. — The Pause button is cha nged to the Resume button. — As for the recording, the message «recording (p ause)» is showed in the status b ar. As for the playing, the message «playing (pause)» is showed in the status bar. […]
-
Страница 26
IPLDK Call Recording System Issue 1.0A — 26 — Sound Volume Up — You can adjust microphone volume more loudly, usin g the Verti cal Bar on the below part from the right part of screen. — Select the Volume menu item on the Control Menu and use th e h ot key “ALT+U”[…]
-
Страница 27
IPLDK Call Recording System Issue 1.0A — 27 — Sound Volume Down — You can adjust microphone volume more lower, using the Vertical Bar on t he below part from the right part of screen. — Select the Volume menu item on the Control Menu and use th e h ot key “ALT+D” Address Book Management — On this screen, we can manage the address book. We can a[…]
-
Страница 28
IPLDK Call Recording System Issue 1.0A — 28 — — The screen for ad ding a address is a s follows. .[…]
-
Страница 29
IPLDK Call Recording System Issue 1.0A — 29 — 4.3 OUTLOOK OUTLOOK Address Book Import — If you choose Import (A ddress Book(MS Outlook) ) from the Fil e menu, The window above is opened. After importing the sto red Outlook Address Book on your PC, — You can use the address boo k in the Call Record ing System. Send E-Mail by MS Outlook — After click[…]
-
Страница 30
IPLDK Call Recording System Issue 1.0A — 30 — Step2: mail client display. Step3 : Choose a file include in the ma il client to make .[…]
-
Страница 31
IPLDK Call Recording System Issue 1.0A — 31 — Step4 : You stick a f ile selection and put , pr ess “CTRL+V” MENU — Import Address Book from MS Outlook.[…]
-
Страница 32
IPLDK Call Recording System Issue 1.0A — 32 — 4.4 Import and Export fr om MS EXCEL Save Call List — Select the list which you will export to MS Excel. (All List, Backup Users, Current Use rs) — You can export the call list of the specific user to M S Excel . — If you choose Export (C all List) from the File menu, the window above (Save as Windo w) […]
-
Страница 33
IPLDK Call Recording System Issue 1.0A — 33 — Save Address Book — If you choose Export (Address Boo k) from the File menu, the window above (Save as Window) is opened. You can save th e Address Book informati on to MS Excel. Save Call List — If you click right mouse in a row on Call List Ta b, a popup i s displayed. Afte r selecting the Expor t (MS[…]
-
Страница 34
IPLDK Call Recording System Issue 1.0A — 34 — Import Address Book — If you create MS Excel file to create the excel file for Address Book, you must choose new (MS Excel) from the File menu, — The Excel fi le below is th e excel file created newly. — The field name is printe d on the first row. — The user inserts the dat a according to the fir st ro[…]
-
Страница 35
IPLDK Call Recording System Issue 1.0A — 35 — — After inserting the total data, you choose Import (Address Bo ok (MS Excel)) from the File menu, If the window for selecting t he file stored previously is displaye d, — Select the excel f ile made previously, and click the Ok button. — If do so, the addre ss book is imported in t he Call Recording Pr[…]
-
Страница 36
IPLDK Call Recording System Issue 1.0A — 36 — MENU — Export Menu — MENU for Exporting the Address B ook (See 4.4.4 Import Address Book (MS Excel)) 4.5 PRINT CALL LIST — In Print Call List dialog, select the list which you will print, and click the OK button. — You can print the call list of the specific user.[…]
-
Страница 37
IPLDK Call Recording System Issue 1.0A — 37 — — You can preview the call list data in the database on the screen, and print the data, zoom in and out them and view 2page on a screen. If you click the Print button , the data are printed after sele cting the printer type — Call List printing distingu ishes to an user base wh en a call list is printed[…]
-
Страница 38
IPLDK Call Recording System Issue 1.0A — 38 — Address Book — You can preview the address boo k data in the database on t he screen, and print the data, zoom in and out them and view 2 page on a screen. If you click t he Print button, the data are printed after selecting the printer type. Print from Call List frame — If you click right mouse in a ro[…]
-
Страница 39
IPLDK Call Recording System Issue 1.0A — 39 — MENU -Print Menu 4.6 SEARCH Search Call List — If you choose Search (C all List) from the View menu, the wind ow below is opened. — Search condition is as f ollows. 1) Current DB or Backup DB 2) From Start Date to End Date 3) For Users 4) For Fields[…]
-
Страница 40
IPLDK Call Recording System Issue 1.0A — 40 — — The results for search condit ion are displayed in the window. — After selecting a row in t he list, click right mouse in a row on the list and then a popup is displayed. I f you select the Edit in the popup Menu, Call list data is upda te d. — As for Backup DB, this feature is restricted. The updated[…]
-
Страница 41
IPLDK Call Recording System Issue 1.0A — 41 — — You can update the data except Da te and Length. When up dating First Name and Last Name, if updated data is not found in the dat abase, the data i s inserted in the database. — Or the data is updated in the database. If you update F irst N ame or Last Name, you must update Tel as different va lue. — […]
-
Страница 42
IPLDK Call Recording System Issue 1.0A — 42 — — In the screen for searching the address, input spe cific value in the ‘User’ field and the search results are displayed. — The ‘User’ field con sists of Last Name, First Nam e, Mobile, J ob, Title, Email, Company and Memo — After selecting a row in t he list, click right mouse in a row on the […]
-
Страница 43
IPLDK Call Recording System Issue 1.0A — 43 — — After you update the a ddress data, if you click the Update button, the data is updated in the database. Also Address Book data is updated. Th e updated inform ation is displayed on the Address frame in main screen. MENU — Tool Bar menu Click ‘Search Button’ in Toolbar menu, then ‘call list sear[…]
-
Страница 44
IPLDK Call Recording System Issue 1.0A — 44 — 4.7 VIEW Simple Mode — If you choose Simple Mode from the View menu, after the windo w collapse, we can see the window in above part of left part. When the screen is very large, you can use the fea ture.[…]
-
Страница 45
IPLDK Call Recording System Issue 1.0A — 45 — Disk Information — If you choose Disk Info from the View menu, the in formation f or disk usage is displayed as follows. (Total Size, Used Size and Free Size.) — If user’s capacity is above 90 %, the alert message is showed . — And the available space capacity for hard disk is showed. — The disk size […]
-
Страница 46
IPLDK Call Recording System Issue 1.0A — 46 — Support multi-language — You choose language (English or Local Language) from the Tool s menu. Default is in English mode. If you choose Local Language, user interface is conversed in Korean mode. If we update the data of crslang.txt file, user interface is conversed in all country mo des. MENU — LIST A[…]
-
Страница 47
IPLDK Call Recording System Issue 1.0A — 47 — 4.8 BACKUP Auto Backup — The user can automatically do the backup every same per iod. — This feature enables you to manage disk space eff iciently. — You can backup current ly used database every sam e period. — Also you can select the period every week or monthly. — As for every week, you backup auto m[…]
-
Страница 48
IPLDK Call Recording System Issue 1.0A — 48 — MENU — Backup Menu 4.9 OPTION Record Option — You choose Option from the Too ls menu. User can define variou s features as fo llows.[…]
-
Страница 49
IPLDK Call Recording System Issue 1.0A — 49 — Record Option, KEYMAP, PATH, LANGUAGE and Debug Mode. — Audio files are stored as two kind of compression type, Windows PCM and Microsoft ADPCM. — PCM type can store 450Kb per a minute and ADPCM can store 254 Kb. — By default, Record Option is displayed, an d you can change th e options licking the list[…]
-
Страница 50
IPLDK Call Recording System Issue 1.0A — 50 — KEYMAP — Setting hotkeys for functions u sed frequent ly in the program, we can work by keyboard without mouse. Change hotkey setting in the New Key Input. — On initial installation, if you click the Default button, hot keys is set by defau lt. — If you can’t use t he hotkey, click the Remove butt on.[…]
-
Страница 51
IPLDK Call Recording System Issue 1.0A — 51 — 5. UTILIZATION 5.1 Call List — There are two kinds of list, Backup List and All List. Users in Backup List ar e stored in the backup database. Users in All List consist of current user — If you click on the use r item in the user list, the ca ll history about the user list is displayed in the call list […]
-
Страница 52
IPLDK Call Recording System Issue 1.0A — 52 — 5.2 Call List and Addr ess book — There is Call list and Ad dress book. After selectin g a row in the list, click right mouse in a row on the list and then a popup is d isplayed. If yo u select the Edit in the popup Menu, address da ta is updated. — If I select the Play in the popup menu, recorded wave […]
-
Страница 53
IPLDK Call Recording System Issue 1.0A — 53 — — If you choose Export (M S Excel) from the Popup menu, the window above (Save As Window) is opened. — You can save the Address Bo ok information to MS Excel. — If you choose Delete fro m the Popup menu, selected row is deleted. — If you choose Update fr om the Popup menu, edit window is di sp layed. — […]
-
Страница 54
IPLDK Call Recording System Issue 1.0A — 54 — 5.3 Insert, Update and Delete for new customer — If you create new custo mer, click the Add button and en ter de tails for the customer. — After selecting a row in t he list, click right mouse in a row on the list and then a popup is displayed. I f you select the Edit in the popup Menu, address data is […]
-
Страница 55
IPLDK Call Recording System Issue 1.0A — 55 — — The information for user and phone number from E Z PHONE/EZ AT D is sent to Call Recording Program. This data is inserted in th e database in this System. — The data from the sele cted row is sent from EZ PHONE/EZ ATD. If the data “White Rodney” is not stored in curr ent database, insert the data […]
-
Страница 56
IPLDK Call Recording System Issue 1.0A — 56 — More System Program Hard ware Lock Key(Paralle l, USB Lock Key) Insta lled Program 7.2 USB MODULE (LDP-7024D, LDP-7024LD) is unr econized in the SYSTEM Check if USB cable is co nnected. Select the Universal Ser ial bus contro llers in the Device Manager control panel, and then Check if USB module (LDP-7[…]
-
Страница 57
IPLDK Call Recording System Issue 1.0A — 57 — By using Explorer, search System32drivers folder under the fo lder where windows is installed and then delete USB module (LDP-7024 D, LDP-7024LD) driver. How to delete the driver under Windows 98, ME Select the Universal Ser ial bus contro llers in the Device Manager control panel, and then Select USB […]
-
Страница 58
IPLDK Call Recording System Issue 1.0A — 58 — 8. ERROR MESSAGE 8.1 When you incorrectly set the w ave file Directory — Solution: You click the p ath on the Path from the Options men u. And set correct path . When you select correct path in the window below, you solve the problem.[…]
-
Страница 59
IPLDK Call Recording System Issue 1.0A — 59 — 8.2 When you incorrectly set the w ave file and backup Dir ectory — Solution: You click the p ath on the Path from the Options men u. And set correct wave path and backup path. .[…]
-
Страница 60
IPLDK Call Recording System Issue 1.0A — 60 — 8.3 Hard disk space is insufficient — Solution: Some availabl e space is necessar y for record and b a ckup. If the capacity for hard disk is above 95 %, the a lert message is showed. 8.4 USB line is disconnected — Solution: You must che ck that the computer is correct ly conne cted to the cable. 8.5 Da[…]
-
Страница 61
IPLDK Call Recording System Issue 1.0A — 61 — 8.6 MESSAGE GUIDE No Message Description 1 «Database file does not exist!» We can’t find the databa se file in the folder where running program is inst alled. Or user open database file dire ctly, and start t he program. 2 «Subject or Memo Field i s Empty. check the field» When you[…]
-
Страница 62
IPLDK Call Recording System Issue 1.0A — 62 — 9 «LDP-7024D(LD) USB Driver is not found!» The record mode set to USB, but USB cable is disconnected. 10 “The recorded file does not exist.» When the file is recorded under 1 sec or User deletes the recorde d file. 11 «The data is not found in r esult condition!» When you sear[…]