
Всем привет. Сегодня расскажу о контроллере который в процессе соблюдения заданного температурного режима, может управлять оборудованием осуществляющим нагрев или охлаждение. Ну или некие задумки к умному дому.
Коробка, выполнена в стиле Inkbird. Из вторичного сырья. Девиз компании «Smart Home. Smart life»
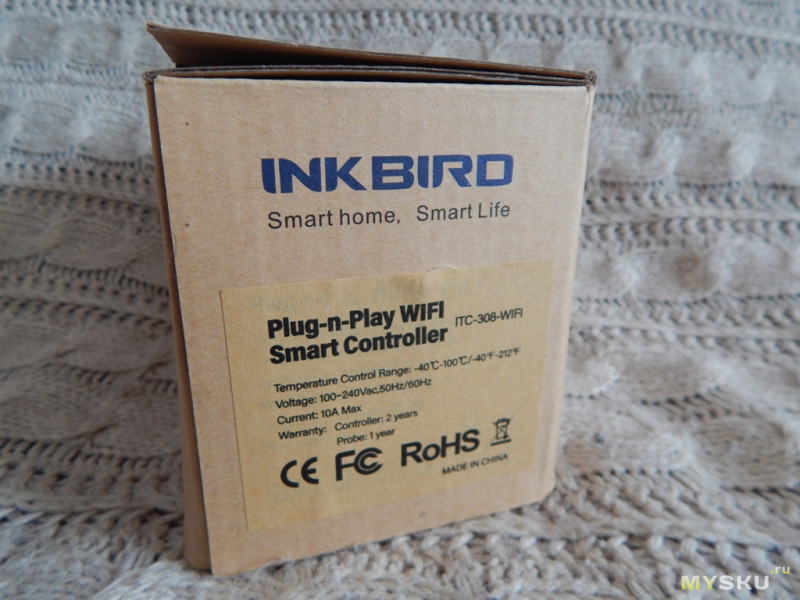
С краю коробки модель и кратко о характеристиках
С другой стороны о производителе и QR код на программное обеспечение
Внутри инструкция и гарантийный талон
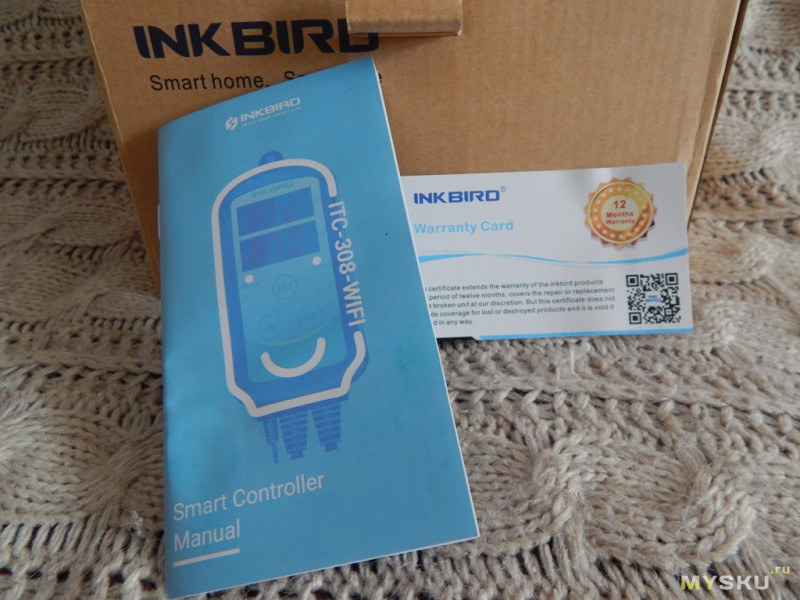
инструкция
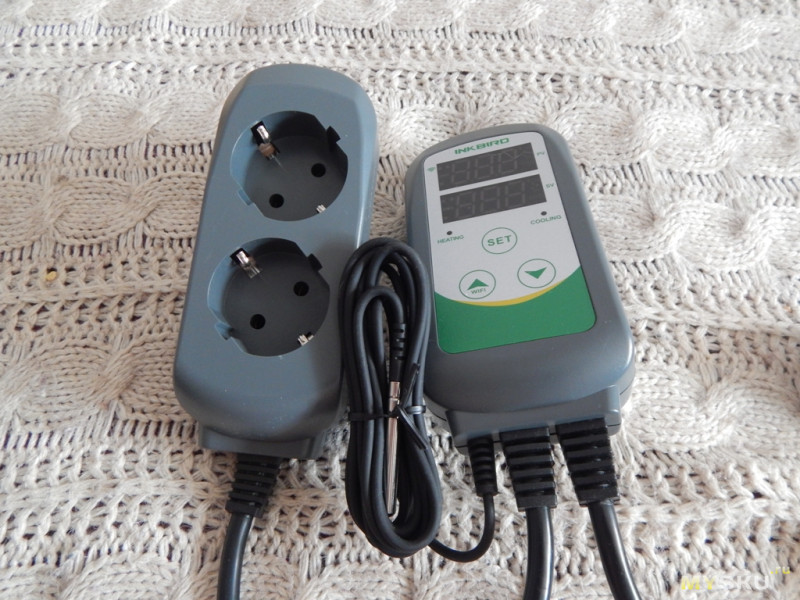
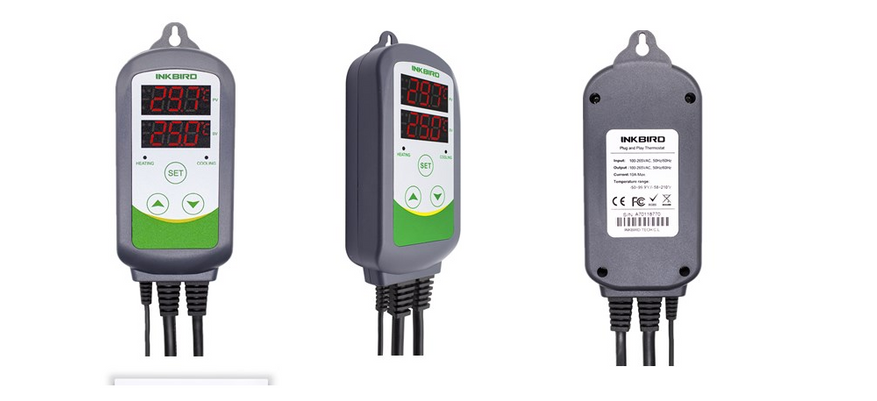
Сам контроллер. Коробка с 3 кнопками управления и 2 экранами, двойная розетка, провод с датчиком температуры и провод питания.
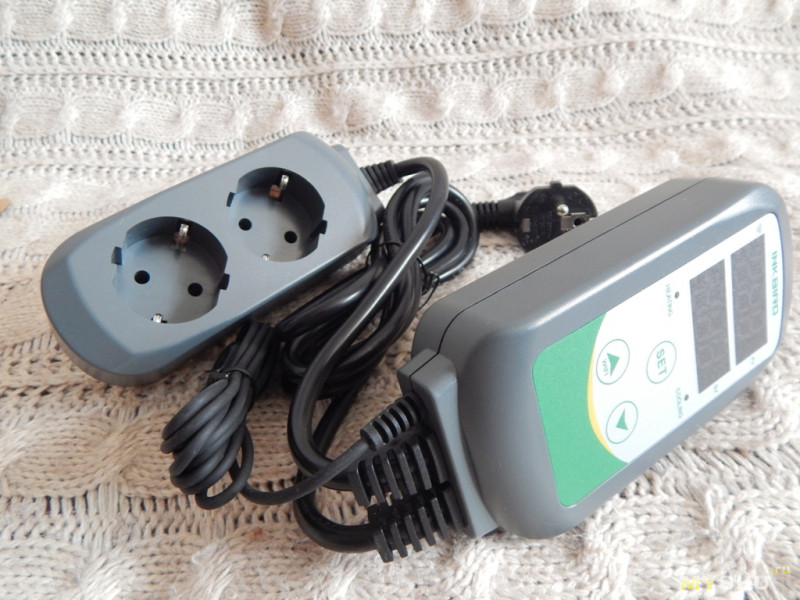
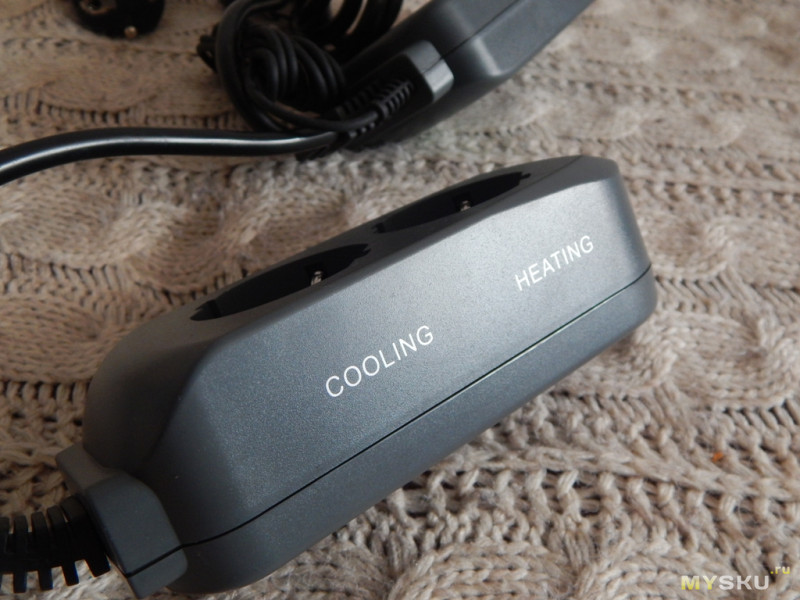
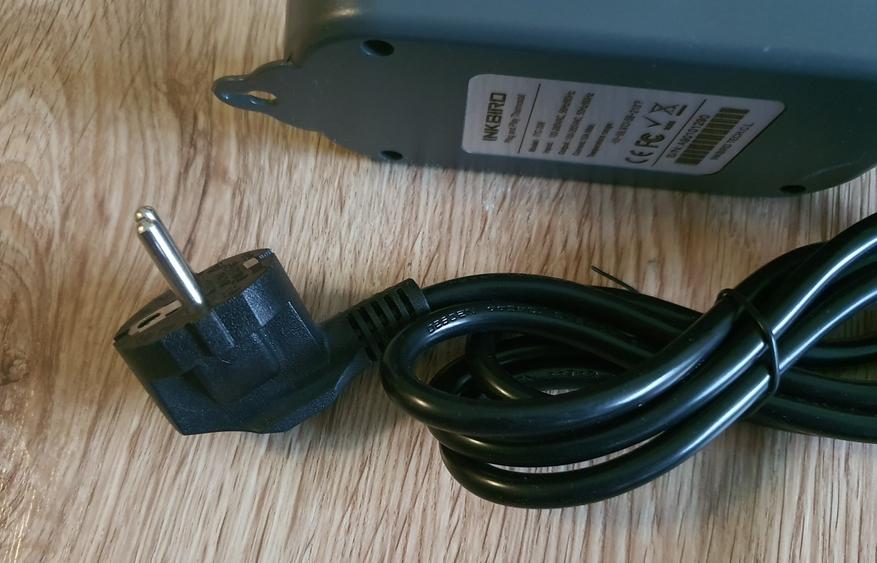
Розетка двойная с заземлением.
Отдельно подписаны куда подключать устройства для нагрева и охлаждения
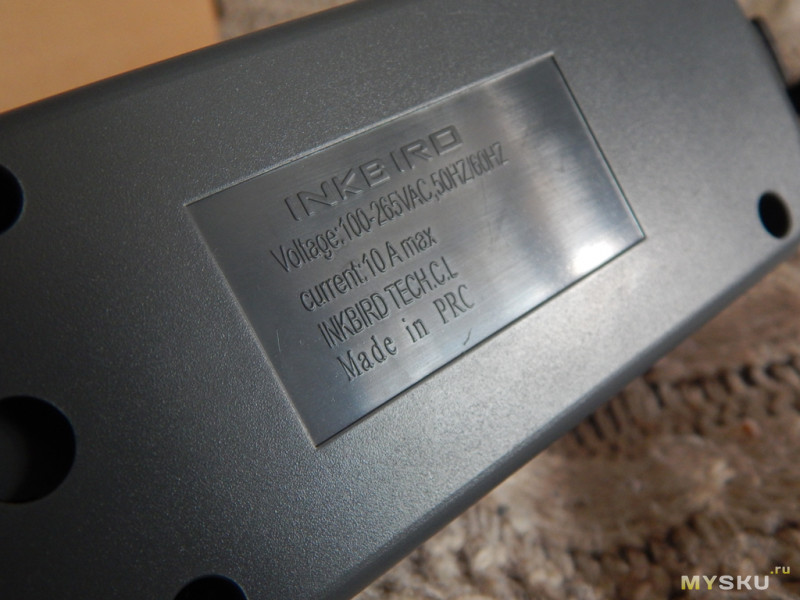
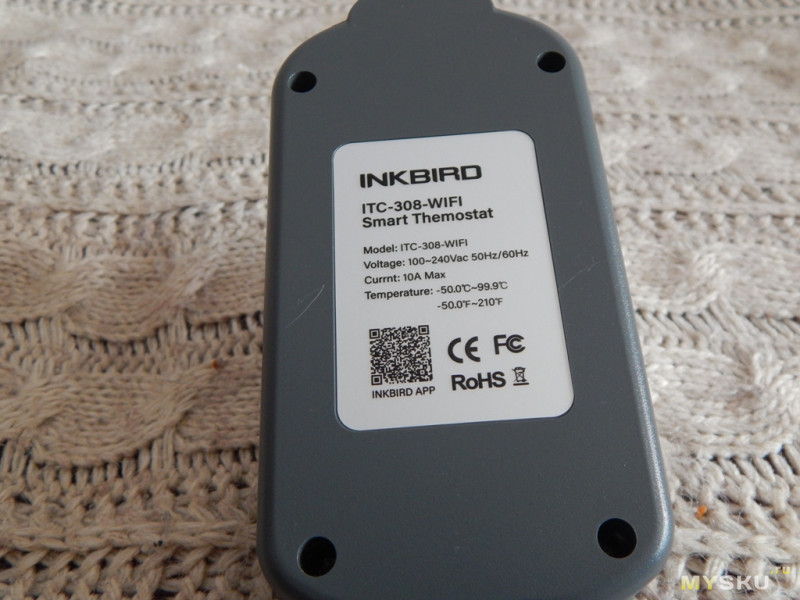
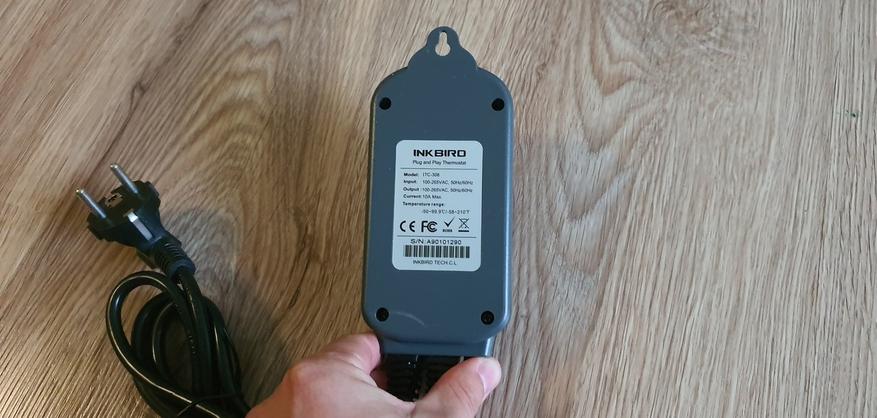
С обратной стороны характеристики
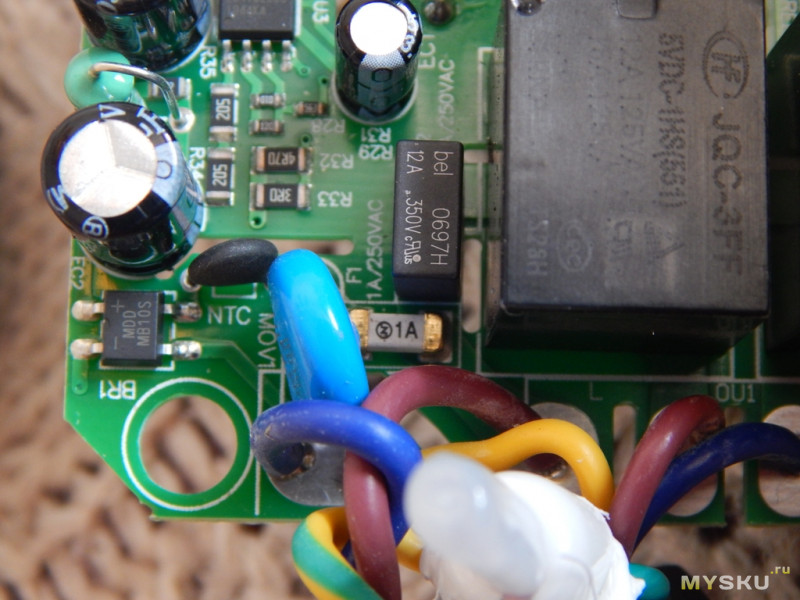
Разбираем. Внутри 4 провода. Сборка выполнена на пайке. Провод соответствует выдерживаемому току.
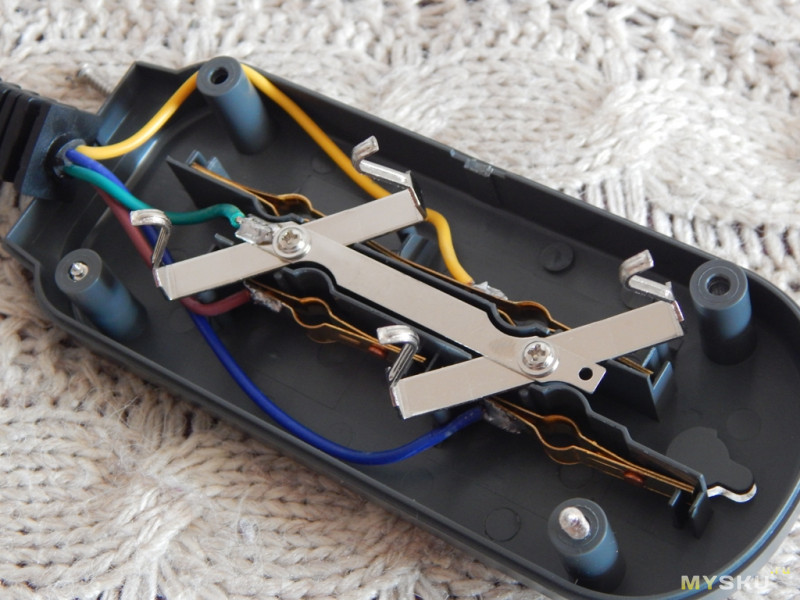
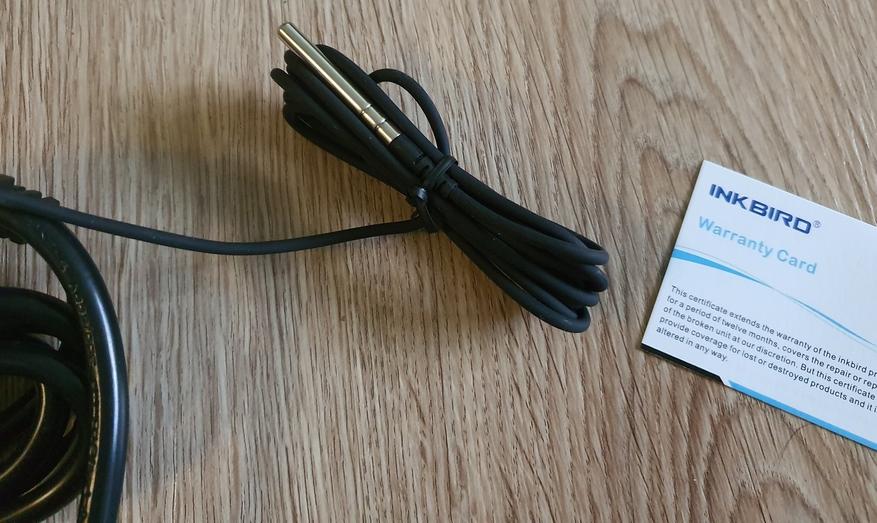
Провод с датчиком не съемный. Длина около 2 метров. Есть модели с заменяемыми датчиками.
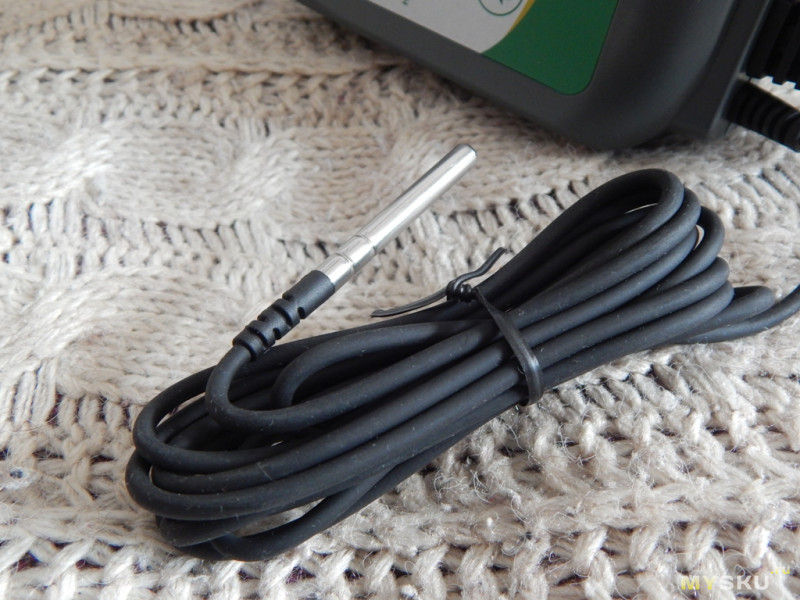
Длина датчика около 30 мм, диаметр 5 мм. Существуют запасные сменные датчики с длиной зонда 30 см.

Питающий провод толстый и грубый. Сечение 3*1.0 мм2.

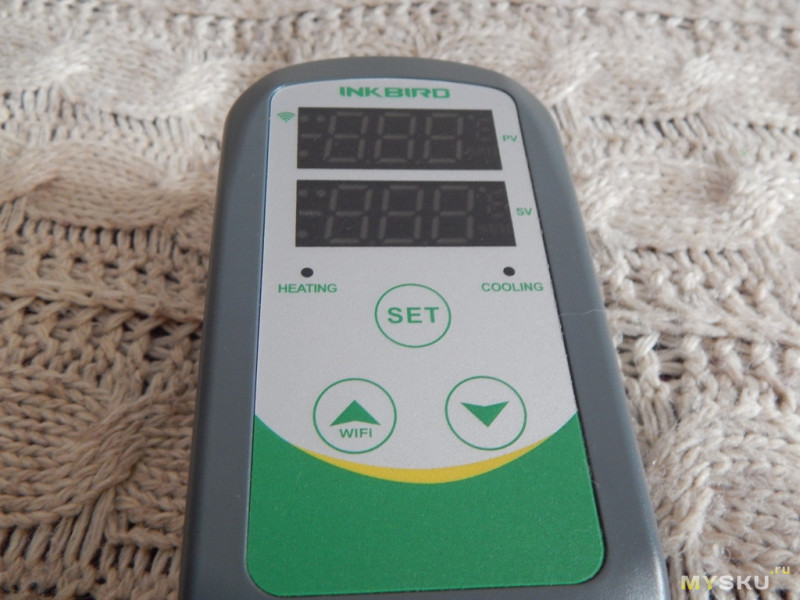
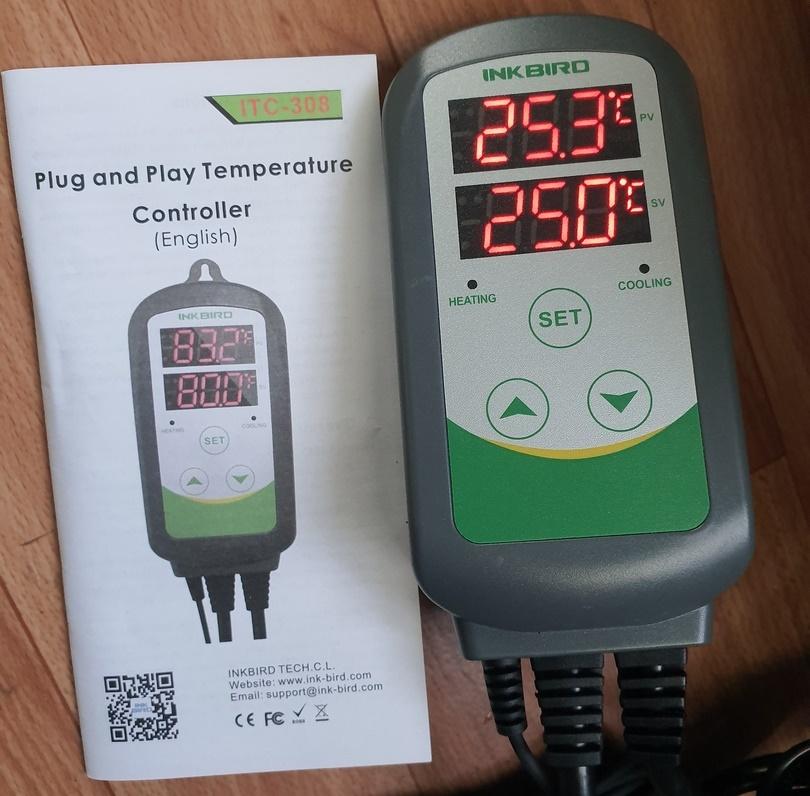
Сам контроллер в пластиковом корпусе. Из управления только 3 кнопки. Индикация на 2 цифровых экранах.
Характеристики.
Диапазон контроля температур –50…99°C / –58…210°F
Шаг измерения температуры 0,1°C/ 0,1°F
Точность измерения в диапазоне –50…70°C ± 1°C/ ± 1°F
Тип регулирования нагрева и охлаждения вкл./выкл.
Источник питания 100—240В~ 50Гц/60Гц
Релейные выходы нагрева и охлаждения 100—240В~, макс. 10А
Звуковая сигнализация выход за установленные температурные рамки
Тип датчика NTC
Длина кабеля датчика 2 м
Длина кабеля питания 1,5 м
Длина кабеля с розетками 30 см
Размеры корпус 140×68×33 мм, розетка 85×42×24 мм
Температура окружающей среды –30…75°C
Условия хранения температура –20…60°C, влажность 20—85%
Гарантия 1 год
сайт производителя www.ink-bird.com/
Коротко об управлении.
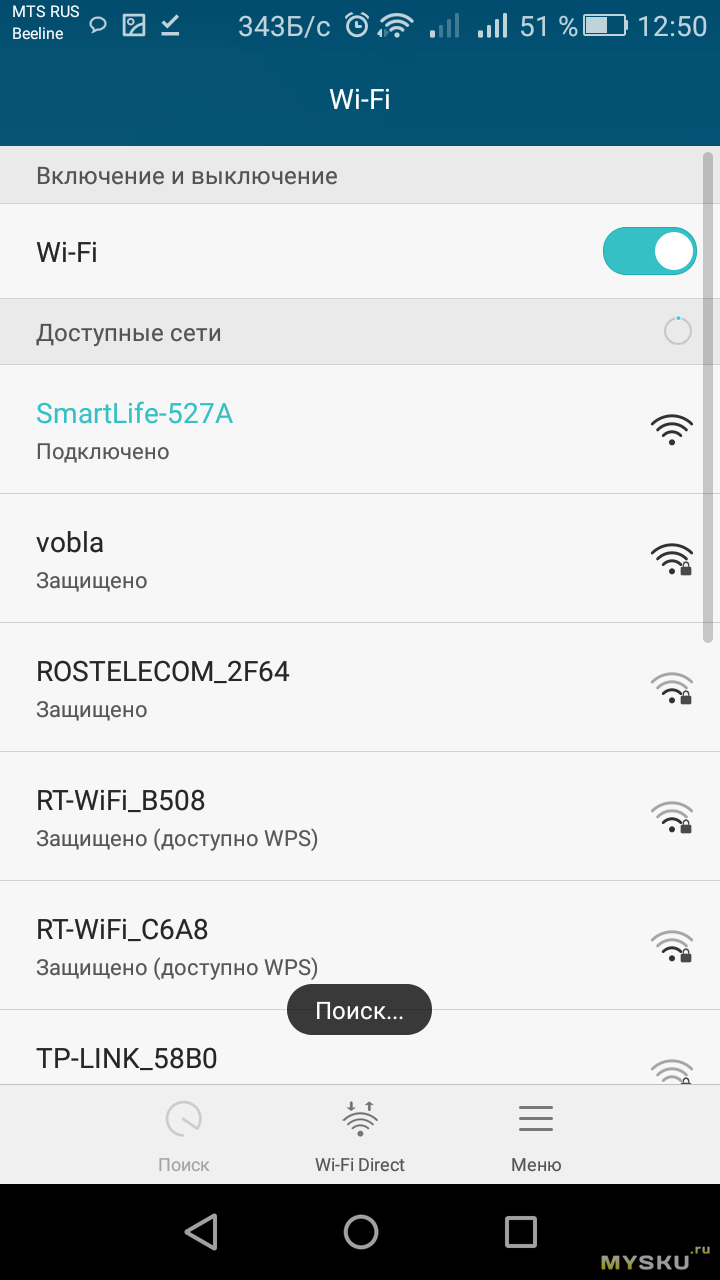
Крайняя левая кнопка отвечает за увеличения показаний при выборе данных. Длительное зажим более 5 секунд, включает модуль WiFi. При включенном и готовом к подключению модуля WiFi в верхнем левом углу верхнего экрана быстро моргает светодиод.
Средняя кнопка Set отвечает за выбор или подтверждение. А так же при длительном удержании более 2 секунд подтвердит вход или выход в меню настроек.
Правая кнопка вниз, отвечает за уменьшение показаний при выборе данных.
2 экрана отмеченные PV (показания в реальном времени) и SV (заданные значения)
2 светодиодных индикатора, включаются и выключаются в момент запуска режима: heating (красный цвет) и cooling (зеленый).
С обратной стороны крепление для подвеса и наклейка с характеристиками.
Лезем внутрь
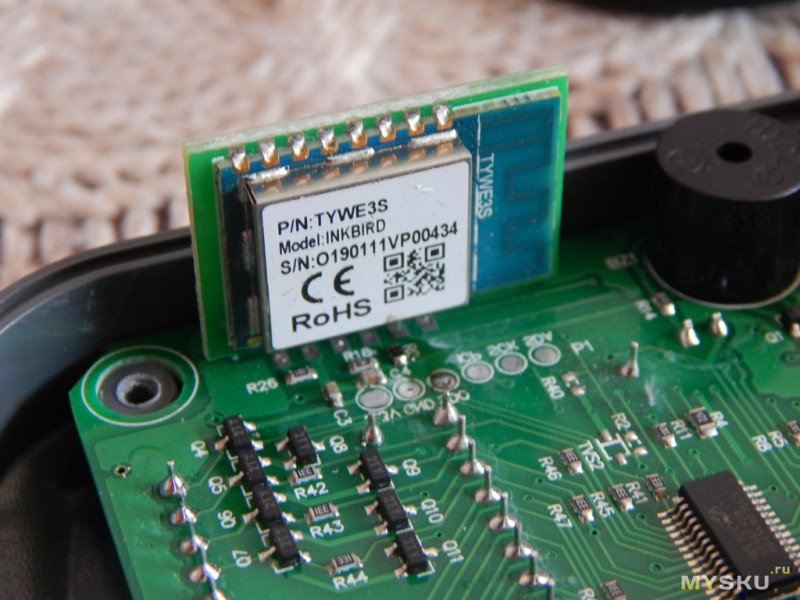
Модуль WiFi, вроде даже от производителя InkBird
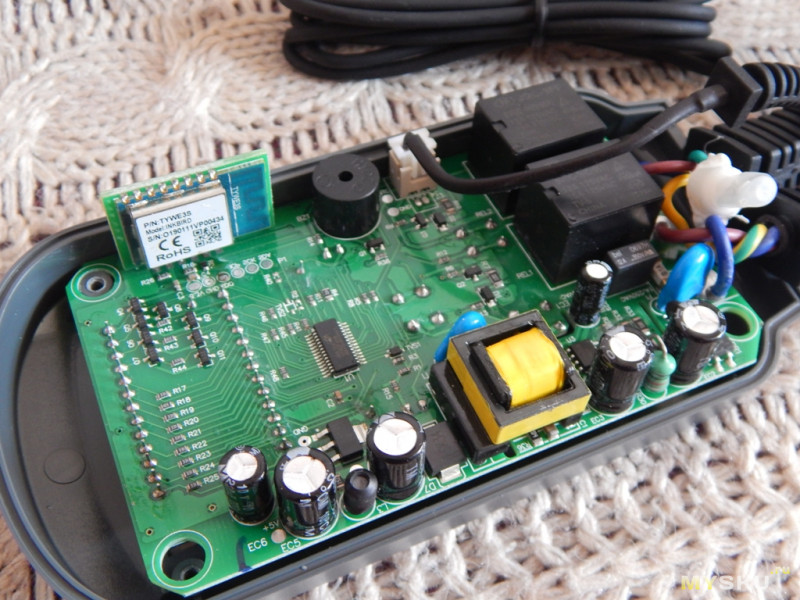
Общий вид платы
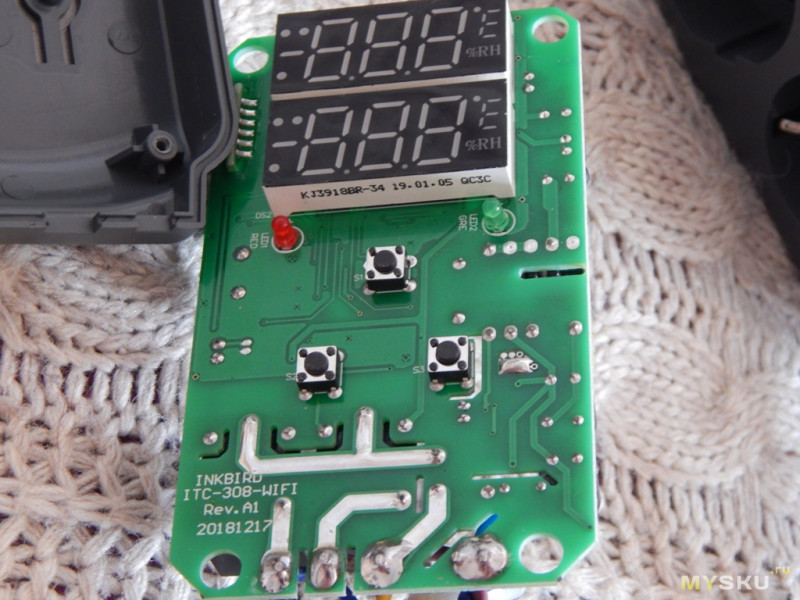
Обратная сторона
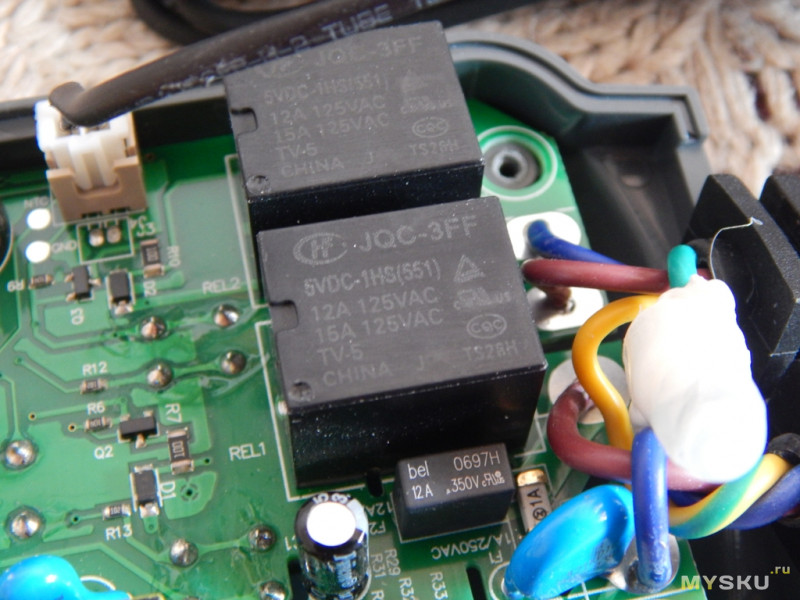
Релюшки
Построено на микроконтроллере Flash с EEPROM Holtek HT66F489
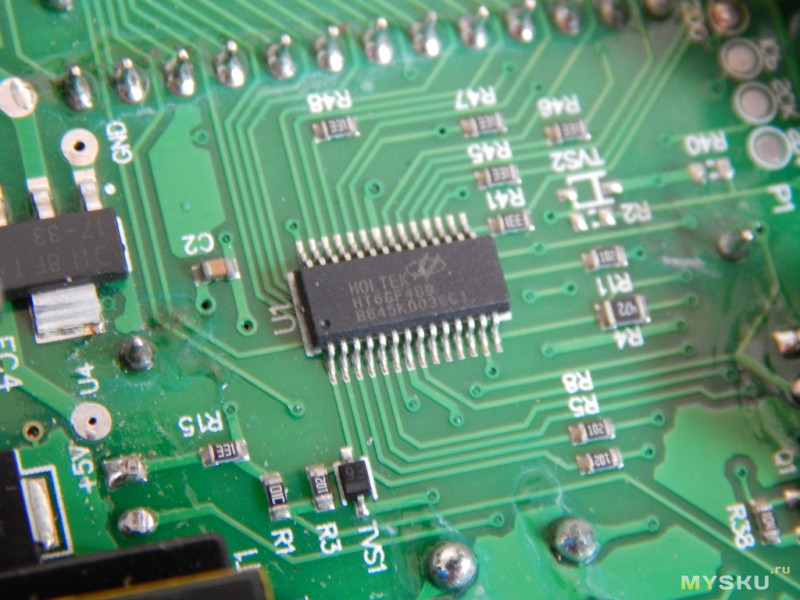
Datasheet Holtek HT66F489
Цифровые сегментные индикаторы KJ3918BR
Предохранитель на 1а
С устройством разобрались. Рассмотрим как это работает.
Контроллер температуры с управлением по WiFi с двойным релейным выходом. Терморегулятор ITC-308 представляет из себя готовое к использованию устройство. К нему легко подключаются охлаждающие и нагревающие приборы, что позволяет осуществлять идеальный контроль температуры. Прибор оснащён двойным LED-дисплеем и способен отображать температуру в градусах Цельсия и Фаренгейта.
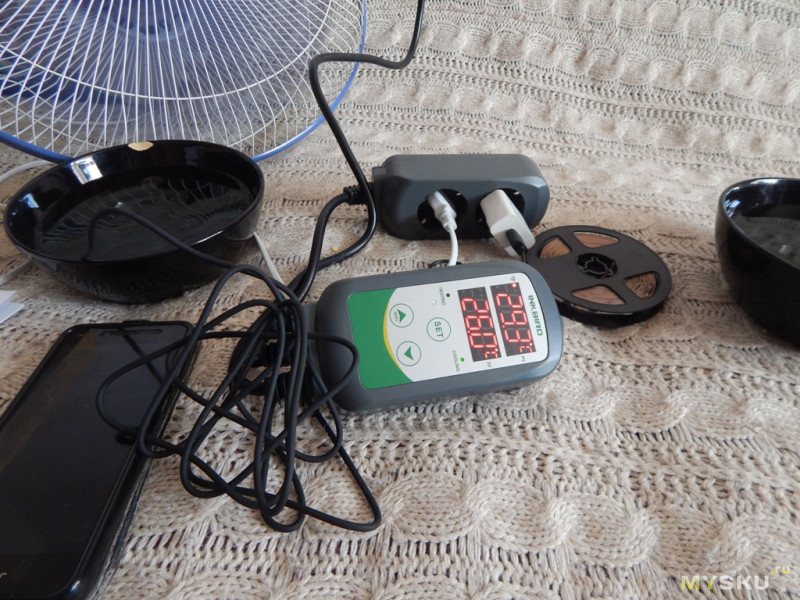
Собираю небольшой стенд. В форме охлаждения будет бытовой вентилятор, в форме нагревателя будет светодиодная лента (просто индикация работы). Чтобы показания температуры на датчике менялось, использую 2 тарелки и холодной и горячей водой. При охлаждении датчика меньше заданной температуры на 2 градуса, а эта температура тоже заданная, происходит включение розетки с надписью HEATING. Загорается светодиодная лента, символизирующая включения нагрева.

При избыточной температуре и превышении ее на 2 градуса (заданный параметр) произойдет включение вентилятора.
Время задержки на включение регулируется, так же как и температурный диапазон, на какое значение должно отличать измеренные показания от заданных. Настройки можно производить как с самого контроллера, так и с ПО на смартфоне.
Настройка самого контроллера происходит в меню.
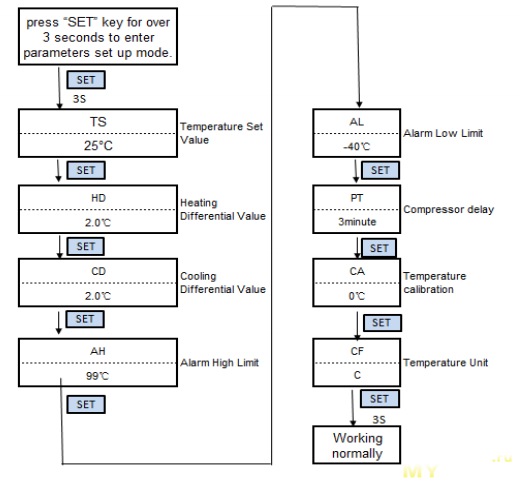
Возможные варианты диапазонов настроек
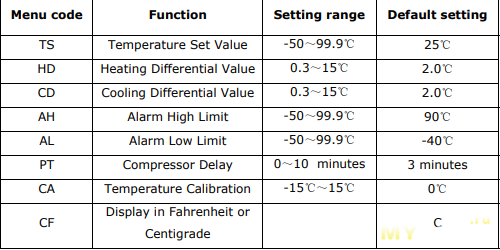
TS Temperature Set Value — заданное значение температуры, можно выставлять значения -50 +99.9℃. по умолчанию 25℃
HD Heating Differential Value — разница в температуре при нагреве, можно выставлять значения 0.3~15℃. по умолчанию 2.0℃
CD Cooling Differential Value — разница в температуре при охлаждении, можно выставлять значение 0.3~15℃. по умолчанию 2.0℃
AH Alarm High Limit — сигнализация при максимальной температуре, можно выставлять значение -50~99.9℃. по умолчанию 100℃
AL Alarm Low Limit — сигнализация при минимальной температуре, можно выставлять значение -50~99.9℃. по умолчанию -40℃
PT Compressor Delay — задержка при срабатывании, время на запуск при достижении температуры заданного значения, можно выставлять значения 0~10мин. по умолчанию 0 minutes
CA Temperature Calibration — калибровка температуры при отклонении, можно выставлять -15℃~15℃. по умолчанию значение 0℃
CF Display in Fahrenheit or Centigrade — выбор в каких значениях будет указана температура (цельсии/фаренгейт). по умолчанию С
Принцип работы
На странице с товаром можно взять купон на скидку 2$ от 15$
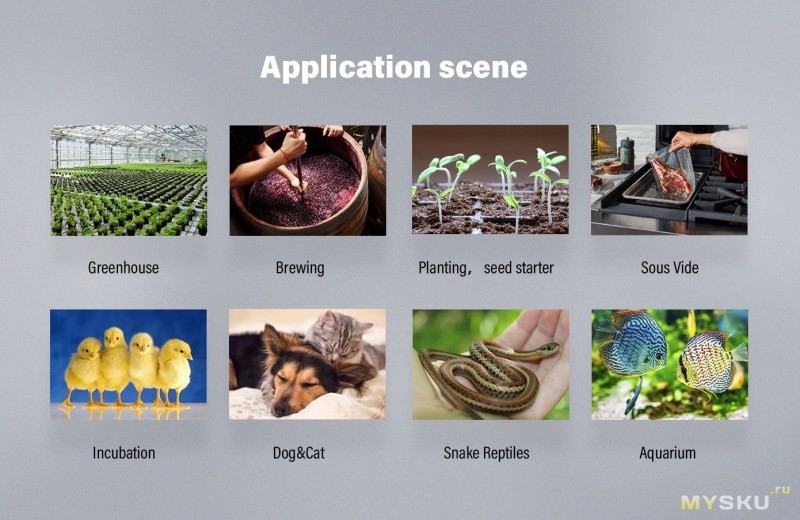
Контроллер будет полезным для любителей аквариумистикой, в домашнем животноводстве (проветривание и обогрев), домашнем производстве вина.
Время срабатывания достаточно быстрое, настройка происходит как с ПО смартфона, так и с блока управления. Возможность просмотра графиков температуры за время работы. Настройки не сбрасываются при отключении электропитания. Так же существует возможность построения сценариев срабатывания с использованием различного оборудования.
ManualsPro
INKBIRD
INKBIRD ITC-308-WIFI Digital Temperature Controller Thermostat Instruction Manual
- June 11, 2024
- INKBIRD
Table of Contents
- 01| CAUTION
- 02| Specification
- 03| Technical Parameters
- 04| Get to Know the Device
- 05| INKBIRD APP Setting
- 5.1 Download the APP
- 5.2 Pair with your phone
- 06| Control Function Instructions
- 6.1 Button Operation Instructions
- 6.1.1 Button Function in Normal Operation Mode
- 6.1.2 Button Function in Setting Mode
- 6.2 Menu Setting Flow Chart
- 6.3 Setting Menu Instruction
- 6.4 Control Function Instruction
- 6.4.1 Instructions for Setting Temperature Control (TS, HD, CD)
- 6.4.2 Alarm High / Low Temperature Limit Settings (AH,AL)
- 6.4.3 Compressor Delay Time(PT)
- 6.4.4 Temperature Calibration(CA)
- 6.4.5 Fahrenheit or Celsius Settings (CF)
- 6.1 Button Operation Instructions
- 07| Exception Handling
- 08| Technical Assistance and Warranty
- 8.1 Technical Assistance
- 8.2 Warranty
- Read User Manual Online (PDF format)
- Download This Manual (PDF format)
INKBIRD ITC-308-WIFI Digital Temperature Controller
Thermostat Instruction Manual
01| CAUTION
- KEEP CHILDREN AWAY.
- TO REDUCE THE RISK OF ELECTRIC SHOCK, USE ONLY INDOORS.
- RISK OF ELECTRIC SHOCK, DO NOT PLUG INTO ANOTHER RELOCATABLE POWER TAPS OR AN EXTENSION CORD.
- USE ONLY IN DRY LOCATION.
- USING TGE LNKBIRD CONTROLLERWITHIN 1 0A, 11 0V OR 230\/.
- NORMALLY, LIFE OF THE RELAY IS 100,000 TIMES. IF HEATING OR COOLING SWITCHES FREQUENTLY WHEN USING, SERVICE LIFE GET SHORTER PLEASE REPLACE THE OLD CONTROLLER WITH A NEW ONE ACCORDING TO SPECIFIC USING CONDITION, JUST IN CASE OF LOSS OR DAMAGE CAUSED BY THE DAMAGED RELAY.
02| Specification
- Plug-n-play, easy to use.
- Dual relay output, which can connect heating and cooling device at the same time.
- Support reading in Celsius or Fahrenheit.
- Dual screen display, can display test temperature and setting temperature simultaneously.
- Temperature calibration function.
- Delay protection for cooling.
- High and low temperature limit alarm can beset up.
- Probe abnormal alarm.
- WIFI Smart APP.
03| Technical Parameters
-
Power: Voltage: 100~240Vac 50/60Hz, Current: 1 DA, Max Wattage: 1200W(120Vac), 2200W(220Vac)
-
Type of temperature probe: R25°C =1 OK0±1 %, R0°C=26.74~27.83KO, B25/85°C=3435K±1 %
-
Temperature measurement range: -40°c~1 oo·cI-40°F~212·F
-
Temperature display accuracy: 0.1 ·c /°F(<10o·crF), 1 ·crF(>=10o·crF)
-
Temperature measurement accuracy:

-
Display unit Celsius °c or Fahrenheit °F
-
Ambient temperature: -20°C~60°C/ -4°F~140°F
-
Storage environment: temperature:
0°C~60°C/32°F~ 140°F; humidity:
20~80%RH(Unfrozen or condensastate) -
Warranty:
Contoller:2 years warranty
Temperature Probe:1 year warranty

04| Get to Know the Device

- PV: In normal mode, it displays current temperature; in settings mode, it displays menu code.
- SV: In normal mode, it displays the temperature setting value; in the setting mode, it displays the setting value.
- Red Light ON: Heating output is on.
- Green Light ON: Cooling output is on.
- Green Light Blinks: The controller is performing the function of compressor delay.
- HEATING: Heating output socket.
- COOLING: Cooling output socket.
- Setting button(SET) , Increase button(¢-), Decrease button(v): More details on Control Function Instructions.
05| INKBIRD APP Setting
5.1 Download the APP
Search the keyword “INKBIRD” in Appstore or Google Play, or scan the following
QR code to download and install the APP.https://inkbird.com/pages/app-
download
5.2 Pair with your phone
- Open the app, it will ask you to register or log in your account on the APP. Select the country and enter your Mobile number or Email to finish the registration. Then press “Add Home “button to create your home.
- Tap”+” or “add device” button in home page of the APP to add the device.
- If the controller is in the normal working state, you can long press 2 seconds to reset the WIFI. It will enter the Smartconfig configuration state by default. You can short press ~ to switch the Smartconfiger configuration state and the AP mode. If you change the WIFI state, it will take about 5 seconds to display the corresponding LED symbol and state, because of the WIFI module data processing.
Add device in quick connection:
- Plug the device in the socket and make sure that the device is in the Smartconfig.
- configuration state (the LED symbol is flashing, interval flashing 250ms). Click “Confirm indicator rapidly blink” and then select Wi-Fi network, enter Wi-Fi password, click “confirm” to enter connection process.
- The device only supports2.4GHz Wi-Fi router.

Add device in AP mode:
- Plug the device in the socket and make sure that the device is in the AP Configuration State (the LED symbol is flashing slowly, interval flashing 1500ms).
- Click”~” to enter device adding interface. click “Confirm indicator slowly blink” and then select Wi-Fi network, enter Wi-Fi password. click “confirm” to enter connection process.
- Press “Connect now” and it will go to your WLAN Setting in your smart phone, select the “Smart life-XXXX” to directly connect to the router without putting in password.
- Go back to app to enter into the automatic connection interface.

4 Click “Done” after adding device succeed fully and enter into device
controlling interface .
5 In the temperature control mode, user can set control function via APP.


06| Control Function Instructions
6.1 Button Operation Instructions
6.1.1 Button Function in Normal Operation Mode
6.1.1.1 Quickly press “v”, PV shows HD, SV shows heating difference value;
Short Press “v” again, PV shows CD, cooling difference value. And It will be
back to the normal display if there is no operation for 3 seconds or pressing
the SET button.
6.1.1.2 Quickly press the SET button to enter the quick setting temperature
setting value mode, at this time, SV displays the current control setting
value and flashes. Quickly press·~· or “v” button to increase or decrease the
setting value. Long press -Q.” or “v” button to quickly increase or decrease
the setting value, then press SET button to confirm and exit. If there is no
operation, it will automatically exit after 10 seconds and save the setting
value.
6.1.2 Button Function in Setting Mode
When the controller is working normally, press the SET button for 2 seconds to
enter the setting mode. The PV digital tube shows the first menu code “TS”, SV
shows the corresponding setting value. Press SET button to scroll down the
menu item and save the parameters of the previous menu item. Press “~”or
‘\,,”button to change the current setting value. If in the setting state,
there is no operation within 30 seconds or long press “SET” button for 2
seconds, it will exit and save the setting state and return to normal
operation mode.


6.4 Control Function Instruction
When the controller works normally, PV screen shows the measured temperature,
meantime the SV screen shows the set temperature. It recognizes and converts
from heating to cooling mode automatically. HEATING socket for heating output,
the red LED indicator showing heating status. While COOLING socket for cooling
output, the green LED indicator showing cooling status.
6.4.1 Instructions for Setting Temperature Control (TS, HD, CD)
6.4.1.1 Normal Temperature Control When the measured temperature PV s TS
(Temperature Setting Value) – HD (Heating difference value),the controller
will enter the heating state, the red led is on, HEATING output works. When
the measured temperature PV;,; TS(Temperature Settin Value), the red led is
off and the HEATING output turns off. When the measured temperature PV;,;
TS(Temperature Setting Value)+ CD(Cooling difference value), the controller
will enter the cooling state, the green led is on, COOLING output works; the
green led flashes, indicating that the cooling device is in the state of the
Compressor delay protection. When PV(measured temperature) s TS(temperature
setting value), the green led is off and the COOING output turns off. For
example, setting TS= 25.0°C, CD=2.0°C, HD=3.0°C, when the measured tempera ure
values 22°c (TS-HD), the controller will enter the state; when the measured
temperature value 25°C, the heating will stop; when t e measured temperature
value 27.0°C(TS+CD), the controller enter the cooling state; when measured
temperature value ::;25.0’C, cooling will stop.
6.4.1.2 Special Temperature Control If there is no need to judge the return
difference in heating or cooling when power on or exiting the setting state,
then it directly compare with TS. For example: When power on or exiting the
setting state, TS=25.0’C, CD=2.0°C, HD=3.0’C. If PV (measured temperature
value) >25.0’C, it
enters the cooling state. When PV(measured temperature value) ::;25.0’C, the
cooling stops. Then return to normal temperature control. When PV(measured
temperature value) <25.0 •c, it enter the heating state, when PV(measured
temperature value) ~ 25.0 ‘C, heating stops, and then return to normal
temperature control.
6.4.2 Alarm High / Low Temperature Limit Settings (AH,AL)
When measured temperature ~AH (high temperature limit alarm), then AH flashes
alternatly with the current temperature, meantime buzzer will”bi-bi-
Biii”alarm, until the temperature <AH, buzzer off and return to normal display
and control. Or press any button to turn the buzzer alarm off only . When
measured temperature :$ AL (low temperature alarm), then AL flashes
alternately with the current temperature, meantime buzzer will “bi-bi-
Biii”alarm, until the temperature >AL, buzzer off and return
to normal display and control. Or press any button to turn the buzzer alarm
off only. High and low temperature limit alarm will be pushed to mobile APP
and remind the customer that the product is in alarm state.
6.4.3 Compressor Delay Time(PT)
In the cooling mode, when the power is turned on for the first time,
PV(measured temperature value)~ TS(Temperature setting value)+ CD(Cooling
difference value), it will not start cooling immediately, but waiting for a
delay time(PT). When two adjacent of cooling starting intervals are greater
than the delay time, it will immediately
start cooling; When two adjacent of cooling starting intervals are less than
the delay time, it needs to operate the remaining delay time to start the
cooling. Delay time will start counting from the cooling output off.
6.4.4 Temperature Calibration(CA)
When the measured temperature deviates from the standard temperature, the
temperature calibration function can be used to make the measured value of the
instrument consistent with the standard value. The calibrated temperature =
the measured temperature + the calibration value.
6.4.5 Fahrenheit or Celsius Settings (CF)
User can set the display unit to Fahrenheit or Celsius according to their
habits. The default temperature is Fahrenheit. If you need to display the unit
in Celsius, then set the CF to C. Please note that when the CF changes state,
all setting values are restored to the default setting and the buzzer gives a
short beeping prompt.
07| Exception Handling
7.1 When the temperature sensor circuit is short-circuited or open-circuit
fault, the controller starts the probe fau It mode, it will close all
execution states, the buzzer sounds and the digital tube displays ER, then
press any button to eliminate the buzzer sound, after the fault is removed, it
will return to the normal working mode.
7.2 When the controller is powered off or in the state of disconnected, the
mobile APP will still show online state, and the disconnected state will be
showed after 1 to 3 minutes.
08| Technical Assistance and Warranty
8.1 Technical Assistance
If you have any problem installing or using this controller, please carefully
and thoroughly review the instruction manual.
If you require assistance, please write us to
support@inkbird.com. We will reply your emails
in 24 hours from Monday through Saturday. You can also visit our web site
www.inkbird.com to find the answers of the common
technical questions.
8.2 Warranty
INKBIRD TECH. C.L. warrant this controller for two years (temperature sensor
for one year) from the date of purchase when operated under normal condition
by the original purchaser
(not transferable), against defects caused by INKBIRD’s workmanship or
materials. This warranty is limited to the repair or replacement, at INKBIRD’s
discretion, of all or part of the controller. The original receipt is required
for warranty purposes.
FCC Requirement
changes or modifications not expressly approved by the party responsible
for compliance could void the user’s authority to operate the equipment. This
device complies with Part 15 of the FCC Rules. Operation is subject to the
following two conditions:
-
this device may not cause harmful interference, and
-
this device must accept any interference received, including interference that may cause undesired
Note : This equipment has been tested and found to comply with the limits
for a Class B digital device, pursuant to Part 15 of the FCC Rules. These
limits are designed to provide reasonable protection against harmful
interference in a residential installation. This equipment generates, uses,
and can radiate radio frequency energy, and if not installed and used in
accordance with the instructions, may cause harmful interference to radio
communications. However, there is no guarantee that interference will not
occur in a particular installation. If this equipment does cause harmful
interference to radio or television reception, which can be determined by
turning the equipment off and on, the user is encouraged to try to correct the
interference by one or more of the following measures: -
Reorient or relocate the receiving
-
Increase the separation between the equipment and
-
Connect the equipment into an outlet on a circuit different from that to which the receiver is connected.
– Consult the dealer or an experienced radio/TV technician for help.
This equipment complies with FCC radiation exposure limits set forth for an
uncontrolled environment. This equipment should be installed and operated with
a minimum distance of 20cm between the radiator & your body. This transmitter
must not be co-located or operating in conjunction with any other antenna or
transmitter.
INKBIRD TECH.C.L
support@inkbird.com
Factory address: 6th Floor, Building 713, Pengji Liantang Industrial
Area, NO.2 Pengxing Road, Luohu District, Shenzhen, China
Office address: Room 1803, Guowei Building, NO.68 Guowei Road, Xianhu
Community, Liantang, Luohu District, Shenzhen, China
Read User Manual Online (PDF format)
Read User Manual Online (PDF format) >>
Download This Manual (PDF format)
Download this manual >>
View the manual for the Inkbird ITC-308 here, for free. This user manual comes under the category not categorized and has been rated by 11 people with an average of a 8.5. This manual is available in the following languages: English. Do you have a question about the Inkbird ITC-308?
Ask your question here
Frequently asked questions
Can’t find the answer to your question in the manual? You may find the answer to your question in the FAQs about the Inkbird ITC-308 below.
Is the manual of the Inkbird ITC-308 available in English?
Yes, the manual of the Inkbird ITC-308 is available in English .
Is your question not listed? Ask your question here
Для работы проектов iXBT.com нужны файлы cookie и сервисы аналитики.
Продолжая посещать сайты проектов вы соглашаетесь с нашей
Политикой в отношении файлов cookie
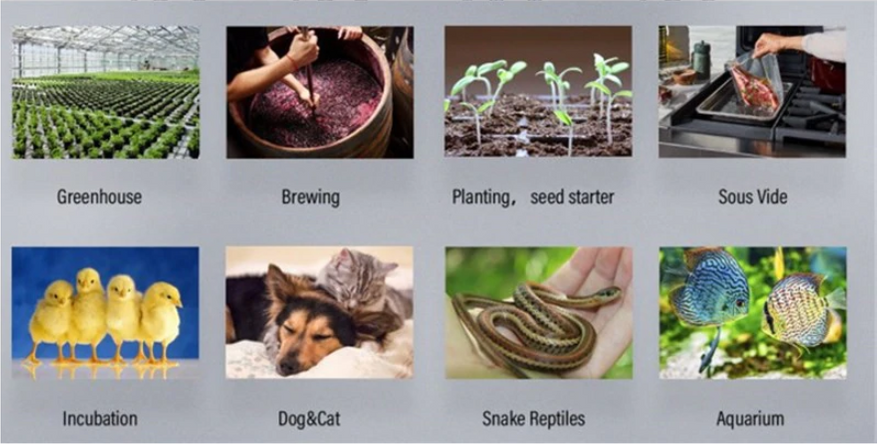
Небольшой обзор полезного устройства для домашнего применения и для использования на приусадебном участке. Это компактный и удобный регулятор температуры с широким диапазоном регулировки и контроля температуры, который можно использовать для домашней пивоварни, для инкубатора, для контроля температуры аквариума или теплицы. Устройство недорогое и простое в использовании.
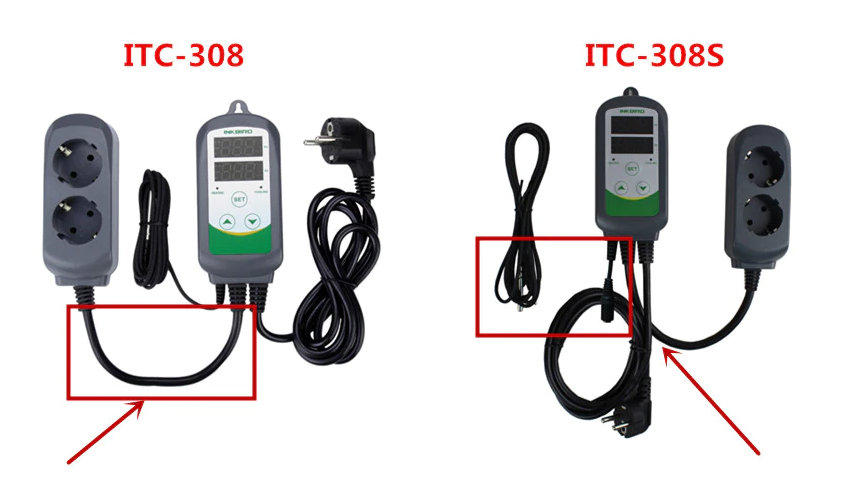
Так вот, регулятор Inkbird ITC-308 — это простой в использовании, безопасный и надежный регулятор температуры с двумя реле на выходе. Устройство предназначено для включения и выключения нагревательных устройств, компрессоров и насосов охлаждения, кулеров/чиллеров и так далее, причем не просто по сигналу датчика температуры, а именно по срабатыванию верхнего или нижнего установленного предела температуры. Подобная функция обеспечивает защиту исполнительных механизмов (например, насосов) от частого срабатывания. Порог срабатывания устанавливается исходя из конкретных целей, с расчетом на поддержание температуры. Причем работает как для нагрева (нагрузка — ТЭН), так и для охлаждения (в этом случае в качестве нагрузки выступает насос охлаждения). При выборе устройства под свои цели внимательно смотрите тип вилки (EU Plug) и тип устройства. Например, ITC-308S отличается наличием съемного датчика температуры (можно заменить/удлинить).
Характеристики:
Бренд: Inkbird
Модель: ITC-308
Диапазон регулирования температуры: -50 ~ 99 ° C / -58 ~ 210 ° F
Температурное разрешение: 0,1 ° C / 0,1 ° F
Точность температуры: ± 1 ° C (-50 ~ 70 ° C) / ± 1 ° F (-50 ~ 160 ° F)
Температура окружающей среды: -30 ~ 75 ° C / -22 ~ 167 ° F
Входная мощность: 100 ~ 240 В переменного тока, 50 Гц / 60 Гц
Выход: Макс. 10А, 100В ~ 240В переменного тока
Длина силового кабеля: 1,5 м (5 футов)
Длина выходного кабеля питания: 30 см (1 фут)
Зуммер: высокая и низкая температура
Тип датчика: датчик NTC
Длина датчика: 2 м / 6,56 фута
Тип встроенного реле: охлаждение / обогрев (10А, 100-240В переменного тока)
Максимальное количество периодов времени: ITC-308 6 периодов (ITC-310T-B 12 периодов);
Обратите внимание, в линейке Inkbird есть несколько подобных регуляторов, в том числе ITC-306 (упрощенный), ITC-310T (больше отсчетов времени), и ITC-308-WiFi. Последний имеет беспроводное подключение через Wi-Fi и специальное приложение для удаленного контроля и калибровки устройства.

Типичное применение автономных регуляторов — это контроль температуры для теплицы, для пивоварни, для инкубаторов. Отдельная тема — для аквариумов и домашних животных. Я ограничился применением для контроля температуры в теплице, в основном из-за ночных заморозков.
Заказывал пару месяцев назад, по первым акциям, прислали быстро (из наличия на складе в МСК). Упаковка приличная, полный комплект, работает «из коробки».
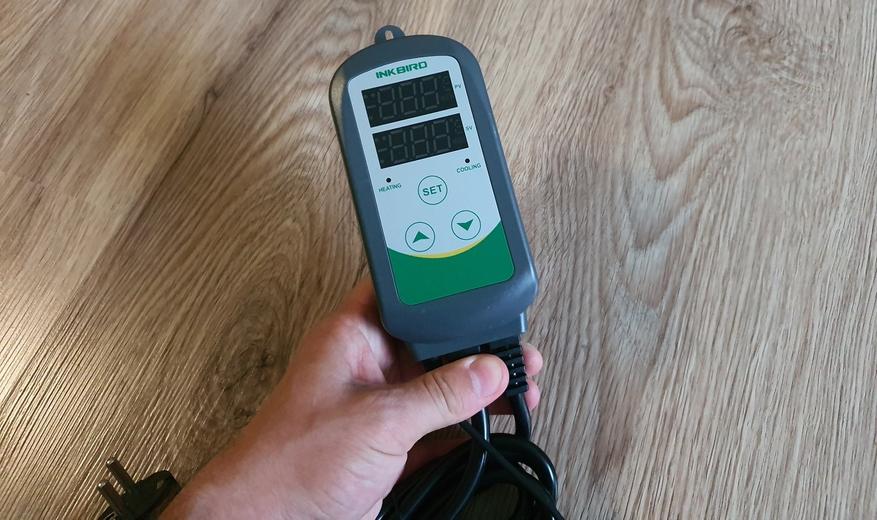
Внешний вид регулятора Inkbird ITC-308.
Обратите внимание на блок кнопок, индикацию (нагрев или охлаждение), и два ряда сегментных индикаторов.
В комплекте есть подробная инструкция.
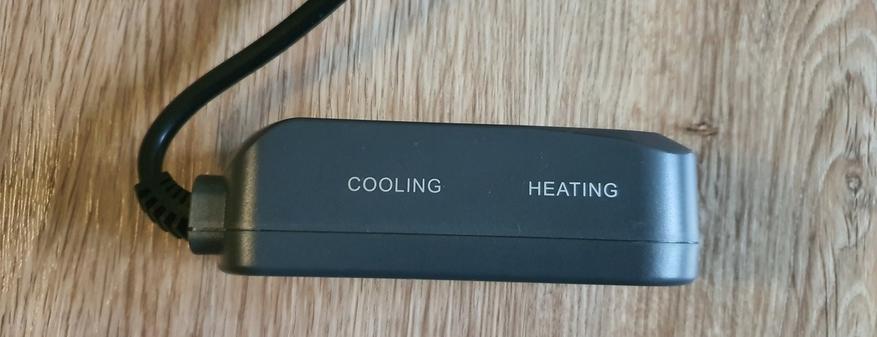
Как было сказано выше, регулятор умеет не только контролировать нагрев, но и охлаждение. Для этого предусмотрено два раздельных канала на колонке с розетками. Они соответственно подписаны: «Cooling» / «Heating».
Регулятор оборудован реле с параметрами коммутации 220В / 10 А. Максимальная мощность нагрузки — не более 2,2 кВт.
Если заказывать с Китая, то можно выбрать другой тип вилки (например, US), но в РФ в наличии устройства с EU типом вилки. Это удобнее, чем использовать адаптеры. Обращайте на это внимание.
На оборотной стороне корпуса есть наклейка с параметрами. Предусмотрено «ушко» для крепление на стену.
Замер температуры производится по NTC датчику, в моей версии датчик не съемный.
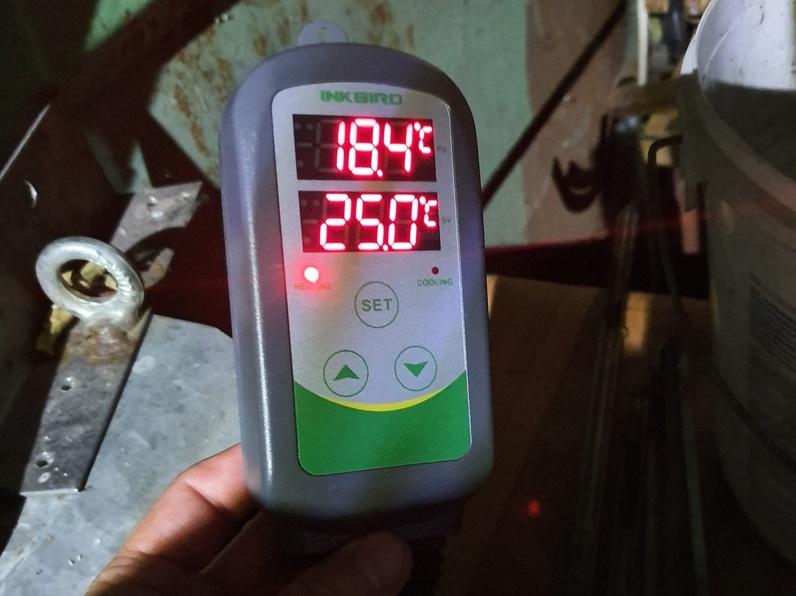
Включаем. По умолчанию установлено 25 °С.
Настраиваем по инструкции. Я старался поддерживать температуру в теплице в пределах 20….25 °С. Масляный обогреватель смысла нет ставить, так как днем на солнышке масло нагревается сильнее положенного и обогреватель может выйти из строя. А вот подключить простой обогреватель (ТЭН) через регулятор ITC-308 было правильным решением.
На фотографии пример работы обогревателя. На индикатора ITC-308 горит «лампочка» нагрева. Как только температура достигнет нужной отметки, обогреватель отключится до тех пор, пока значение температуры не упадет до установленного нижнего предела.
Собственно говоря, это и позволило пережить лютый август и получить урожай.

Плюсы: простота использования, универсальность. невысокая цена.
Минусы: версия с WiFi удобнее. Мощность всего 2.2 кВт, хотя для промприменения этого мало.
Естественно, на зиму регулятор перекочует на емкость для домашней пивоварни (бак+ТЭН от стиральной машины). Давно хотел попробовать))))
Купить термостат-регулятор INKBIRD ITC-308
Из интересного в магазине Inlbird рекомендую обратить внимание на термометр-гигрометр Inkbird IBS-TH1 Plus с функцией логгера, а также на недорогой комнатный термометр-гигрометр Inkbird ITH-20R с выносным датчиком.
Выносной датчик можно пристроить в необходимое место (например, рядом с котлом отопления), а логгер позволяет снимать графици и статистику колебаний температуры и влажности на протяжении длительного времени, а не только в момент подключения, как остальные подобные «умные» датчики.
Вся продукция есть в наличии в РФ, доставляют быстро, поддержка работает как надо.
Официальная группа Inkbird в Вконтакте
Официальный сайт Inkbird
| Огромное количество полезных статей и подборок в моем блоге: | Рекомендую ознакомиться со списками полезной электроники (предыдущие подборки): |
СПИСКИ ВЫГОДНЫХ АВТОТОВАРОВ, ТЮНИНГА, ПОДБОРКИ ЭЛЕКТРОНИКИ И ГАДЖЕТОВ, НЕОБЫЧНЫЕ ВЕЩИ И ОБЗОРЫ |
Умный дом с нуля: выбираем устройства Xiaomi MiHomeУмный дом с нуля: устройства Xiaomi MiHome для безопасности |
| Лучшие обзоры и статьи: | |
| Лучший флагман 2019 года: смартфон OnePlus 7 Pro | Небольшой FAQ по фитнес-браслету Xiaomi Mi Band 4 |
| Первые впечатления о смарт-часах Xiaomi Amazfit GTR | Новый флагман Samsung Galaxy Note 10 |
| Беспроводные наушники Tiso i5 TWS CVC BT5.0: лучший выбор | Беспроводные наушники Ausdom ANC10 с шумоподавлением |
| Тепловизор Seek Thermal Compact | Универсальный крючок в автомобиль |
| Лучший павербанк Xiaomi ZMI QB821 | Выбираем бюджетный карманный осциллограф |
| Мультитул Xiaomi HuoHou Nextool | Тестер USB AT34 с OLED (30В/4А) |
| Обзор отличного пластика для 3D-печати Creozone | Портативная колонка Tronsmart Groove IPX7 |
| Обзор 3D-принтера Geeetech E180 | Интересный Hi-Res-плеер Shanling M1 |
| Обзор набора XIAOMI Wiha 24шт | Недорогой Hi-Res-плеер Shanling M0 |