
,
If you receive the application error message «The instruction at 0x00007FF******** referenced memory at 0x00000000000000024. The memory could not be written» when Windows starts or shuts down, continue reading below to learn how to fix the problem.
The Application errors «The instruction at 0x0000***** referenced memory at 0x0000******24. The memory could not be read or written», occurs when a program cannot access a memory location to read/write information in it (Access Violation Error ).
What can cause the «The memory could not be read/written» error?
The mentioned error can appear for various reasons, but the most common ones are the following:
- Culprit Service(s)
- Faulty Memory
- Faulty Software
- Faulty Drivers
- Corrupted System files
- Malware
In this tutorial you’ll find step by step instructions to solve the «memory could not memory written» application error in Windows 10/11.
- The instruction at 0x00007FFBEE743ACA referenced memory at 0x00000000000000024 the memory could not be written. The memory could not be written. Click OK to terminate the program
- The Instruction at 0x00007FFBCEAC3ACA referenced memory at 0x0000000000000024. The memory could not be written. Click OK to terminate the program.
- The Instruction at 0x00007FFDED523FAA reference memory at 0x0000000000000024. The memory could not be written. Click OK to terminate the program.
How to fix Application error «The memory could not be read/written at 0x00000000000000024» on Windows 10/11. *
* Important: If the error occurred after installing Windows updates, proceed to uninstall the latest updates before proceeding further.
- Disable GameInput service.
- Disable Third-party Programs & Services.
- Check for Malware/Viruses.
- Increase Virtual Memory.
- Repair Windows System Files.
- Check Memory for Errors.
- Disconnect External Devices.
- Update Chipset Drivers.
- Repair Windows with in-Place Upgrade.
Method 1. Disable GameInput Service.
The «GameInput» service is a next-generation input API developed by Microsoft that allows keyboards, mice, gamepads, and other input devices to be used with it.
However, since many users have reported that the «GameInput» service is causing their systems to display the «Memory could not be written» error, go ahead and disable it and check if the problem is resolved. To do that:
1. Press the Windows + R keys to open the ‘Run‘ command box.
2. Type services.msc and press Enter to open Windows Services.

3. Locate the GameInput Service and double-click on it to open its properties.

4. Press Stop to stop the service, then set the Startup type to Disabled and click OK.

5. Finally, restart your PC and check if the problem persists.
Method 2. Disable 3rd-party Programs & Services.
The most common cause of the mentioned error is a third-party program that can’t read or write in the memory because it has bugs, corrupted files or incomplete rights.
So the first thing you should do is see if the «Memory could not be written/read» error persists after a «clean» boot of Windows, and if not identify which third-party program or service is causing the error.
Step 1. Disable Startup programs.
1. Press CTRL + SHIFT + ESC to open Task Manager.
2. In the Startup tab, disable (one by-one) all the third-party programs running at Windows Startup. Then reboot your PC.

3. After rebooting, check if the problem remains and do the following according the result:
- If the problem remains, re-enable all the disabled startup programs and proceed to Step-2.
- If the problem is fixed, reopen the Task Manager and enable one by one the disabled programs and reboot until you find the culprit. *
* Note: If you find that a third-party program is causing the error, then either keep it disabled at startup, update it, or turn off Data Execution Prevention for that program.
Step 2. Disable Third-Party Services.
1. Press the Windows + R keys to open the ‘Run‘ command box.
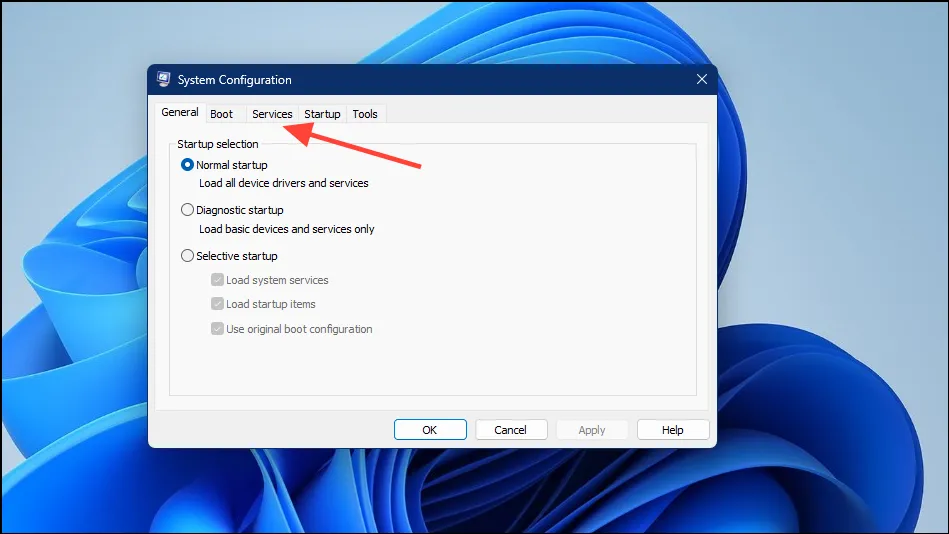
2. Type msconfig and press Enter to open the System Configuration utility.

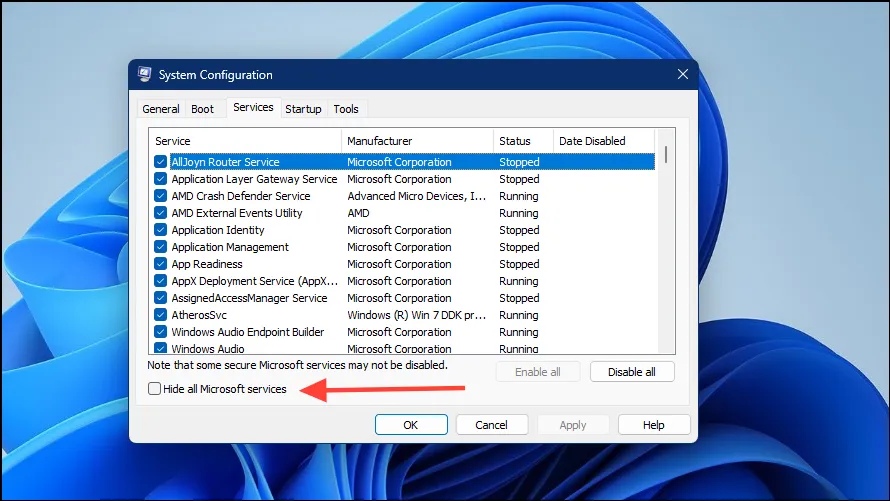
3a. At Services tab, check the Hide all Microsoft services checkbox.

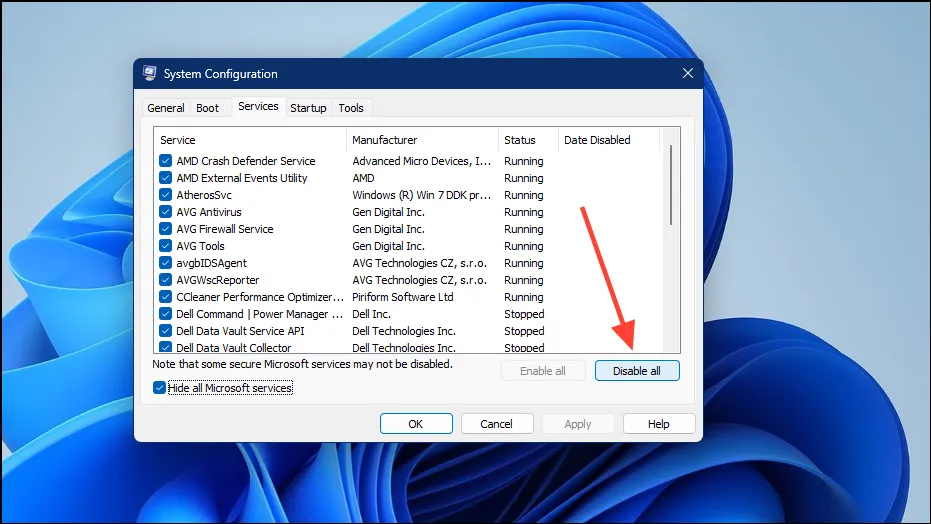
3b. Then press the Disable all button, to disable all the third-party services that start with Windows. When done, click OK and restart your PC.

4. After rebooting, check if the problem remains and do the following according the result:
- If the problem remains, reopen the System Configuration utility (msconfig.exe), select Normal Startup in General tab to re-enable all the disabled services, restart your computer and continue to next method.

- If the problem is fixed, reopen the System Configuration utility (msconfig.exe), go to Services tab and enable one by one the disabled services and reboot until you find the culprit service. *
* Note: If you find that a third-party service is causing the error, then either keep it disabled, or go to Windows services (services.msc), open the service’s Properties and change the Startup type to Manual.

Method 3. Check for Malware/Viruses.
Before proceeding further, ensure that your computer is clean from viruses and malware. To accomplish this task you can use this Malware Scan and Removal Guide to check and remove viruses or/and malicious programs that may be running on your computer.
After scanning and cleaning your computer for malware, check if the problem persists. If not, you’re done here, otherwise continue to next method.
Method 4. Fix Error ‘Memory could not be written» by increasing Virtual Memory.
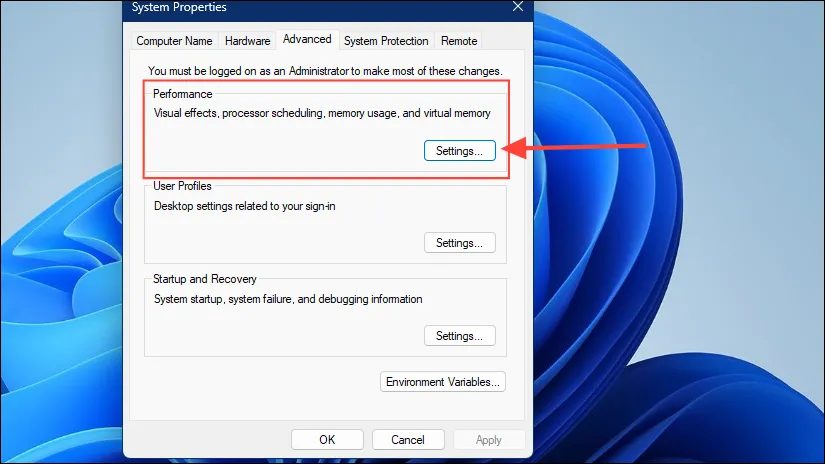
1. In File Explorer, right click on This PC and select Properties.

2. In Related settings, click Advanced system settings.

3. At Advanced tab open the Performance Settings.

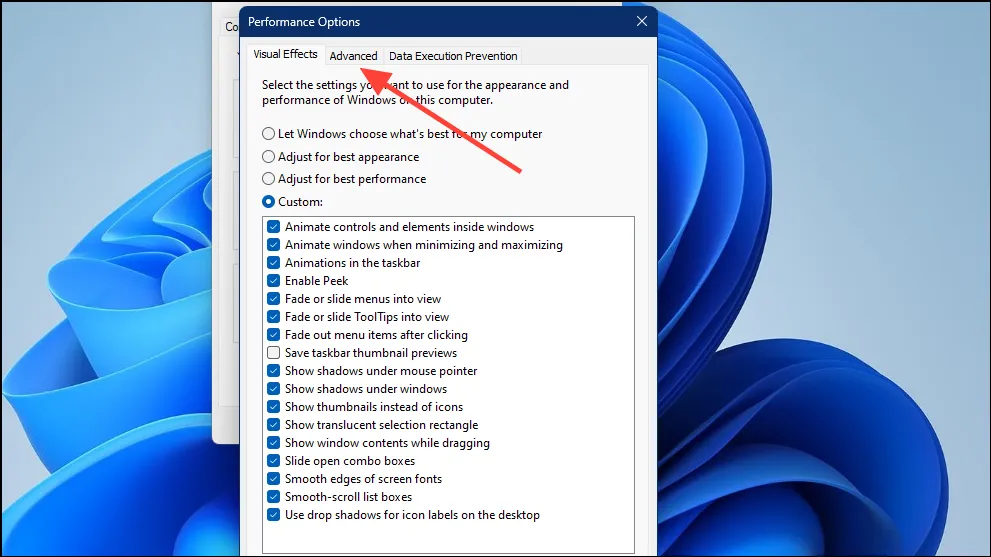
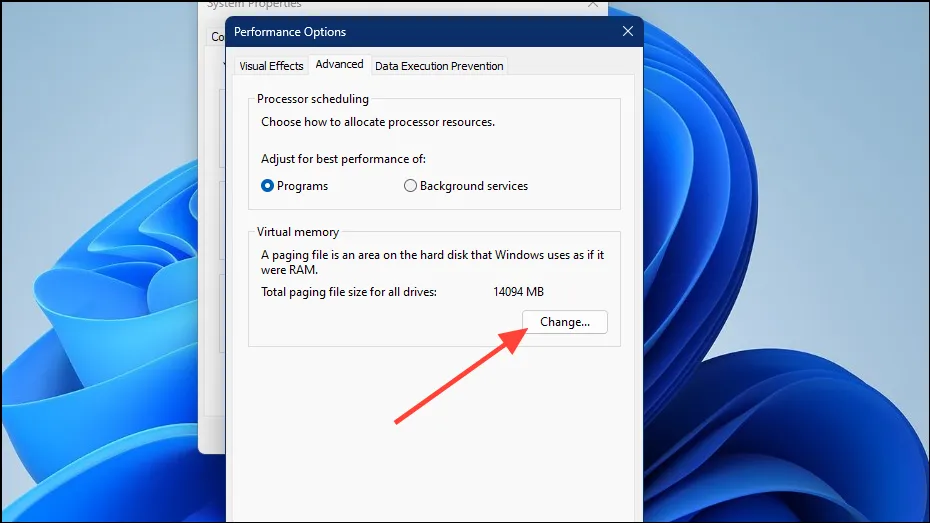
4. At Performance options, select the Advanced tab and then click Change at Virtual memory section.

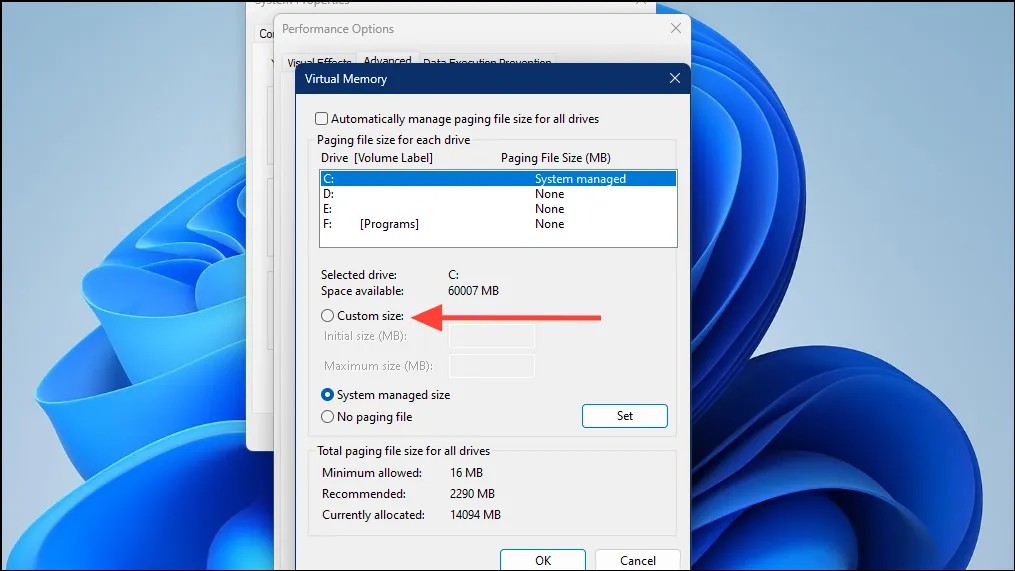
5. At Virtual Memory options:
a. Uncheck the box Automatically manage paging file size for all drives.
b. Make sure the C: drive where Windows is installed is selected.
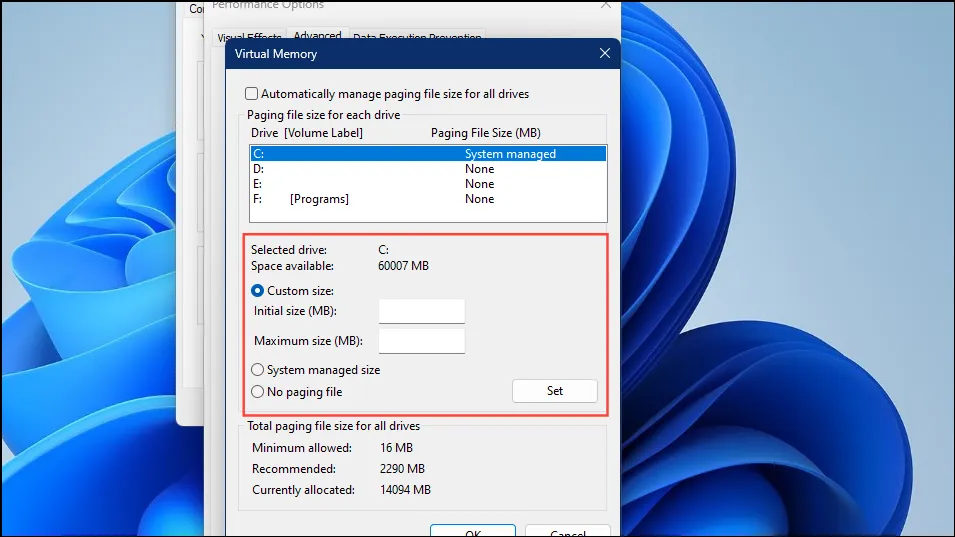
c. Select Custom size and adjust/set the initial and maximum size, depending on the size in MB* of the installed memory as instructed below:
* Note: 1GB = 1024MB.
- If you have 4 GB of RAM, multiply its total size in Megabytes (MB) x 2.5 and write the result in the initial and maximum size fields.
- If you have 8 GB of RAM, multiply its total size in Megabytes (MB) x 2 and write the result in the initial and maximum size fields.
- If you have 16 or more GB of RAM, multiply its total size in Megabytes (MB) x 1,5 and write the result in the initial and maximum size fields.
Example: If your RAM size is 4 GB (like in this example), multiply 4 x 1024 and then multiply the result «4096» x 2,5. Then write the final result «10240» in both the initial size and maximum size fields.
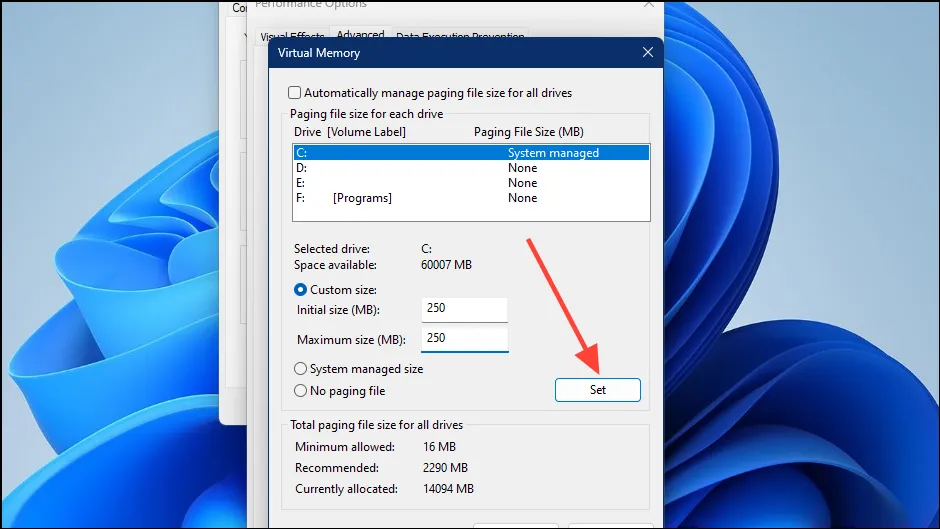
5. When done, hit Set.

6. Then click OK and OK again and reboot the computer to apply;y the change.

Method 5. Repair Windows System Files.
Repairing Windows system files is a common but important step in solving Windows 10/11 problems like the one mentioned here.
1. Open Command Prompt as Administrator. To do that, type «cmd» or «command prompt» in the Search and then click Run as administrator in Command Prompt result.

2. At the command prompt window, type the following command & press Enter:
- dism.exe /Online /Cleanup-Image /Restorehealth

3. Be patient until ‘Deployment Image Servicing and Management’ (DISM) tool repairs component store.
4. When the operation is completed, give the command below and press Enter:
- sfc /scannow

5. When SFC scan is completed, restart your computer.
6. After restarting check if the problem is fixed.
Method 6. Diagnose Memory (RAM) for problems.
1. Close all open programs.
2. Type «memory» in Search and then open the Windows Memory Diagnostic tool.

3. Click Restart now and check for problems (recommended)

4. Now let the memory diagnostics tools to check the Memory for problems and complete all the tests.

5. If the diagnostics complete and no problems are found you computer will boot in Windows. (If any problems found, replace your memory).
Method 7. Disconnect External Devices.
In some cases, the «memory could not be read» error is caused by a connected device (eg Bluetooth Game controller, USB Wi-Fi card, Printer, etc.). So, do the following:
1. Shutdown your PC.
2. Disconnect all the external devices that are not necessary for Windows to operate.
3. Then, turn on your PC and check if the problem persists. If yes, continue to next method. If not, do the following:
a. Connect one of the disconnected devices and restart the computer to see if it is causing the problem. If not, do the same process for each device you had disconnected before until you find out which one is causing the problem.
b. Once you find which device is causing the problem, connect it to another USB port, or if e.g. you’ve plugged it into a USB 3.0 port, plug it into a USB 2.0 port (or vice versa) and restart your PC again. If the problem is solved, you’re done here. If not:
- Check the device manufacturer’s support site to see if there is a better Device driver for your device.
- Update the Chipset drivers (See next method),
Method 8. Update Chipset Drivers.
Depending on the CPU manufacturer, install the Chipset drivers using the corresponding tool:
- Intel Driver & Support Assistant
- AMD Auto-detect and Install tool
Method 9. Repair Windows with an In-place Upgrade.
If, after following the methods above, you’re still having problems, your last option is to repair Windows with an in-place upgrade. To do this, use the instructions in one of these tutorials, depending on your version of Windows.
- How to Repair Windows 10 with an In-Place Upgrade.
- How to Repair Windows 11 with an In-Place Upgrade.
That’s it! Which method worked for you?
Let me know if this guide has helped you by leaving your comment about your experience. Please like and share this guide to help others.
If this article was useful for you, please consider supporting us by making a donation. Even $1 can a make a huge difference for us in our effort to continue to help others while keeping this site free:
- Author
- Recent Posts
Konstantinos is the founder and administrator of Wintips.org. Since 1995 he works and provides IT support as a computer and network expert to individuals and large companies. He is specialized in solving problems related to Windows or other Microsoft products (Windows Server, Office, Microsoft 365, etc.).
При запуске игр и программ, а в некоторых случаях при включении компьютера вы можете столкнуться с ошибкой «Инструкция по адресу обратилась к памяти по адресу. Память не может быть read» с указанием соответствующих адресов в памяти.
В этой инструкции подробно о том, чем может быть вызвана ошибка «Память не может быть read» и как исправить проблему в Windows 10, 8.1 и Windows 7.
Простые методы исправления ошибки Память не может быть read

Первое, что стоит попробовать, когда рассматриваемая ошибка возникает при запуске конкретной программы:
- Выполните запуск программы от имени администратора (для этого обычно достаточно нажать по ярлыку программы правой кнопкой мыши и выбрать соответствующий пункт контекстного меню).
- Отключить сторонний антивирус при его наличии. Если после отключения антивируса ошибка исчезла, попробуйте добавить программу в исключения антивируса.
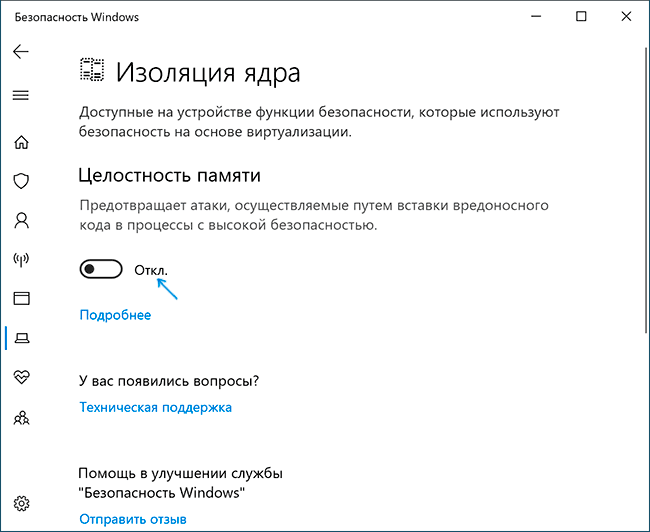
- Если у вас Windows 10 и работает Защитник Windows, попробуйте зайти в параметры безопасности (это можно сделать двойным кликом по значку защитника в области уведомлений) — Безопасность устройства — Сведения об изоляции ядра. Если изоляция ядра включена, попробуйте отключить этот пункт.

- Если вы ранее отключали файл подкачки Windows, попробуйте снова его включить и перезагрузить компьютер. Подробнее: Файл подкачки Windows 10 (актуально и для других версий ОС).
Еще один способ, который можно отнести к простым — отключение DEP в Windows. Для этого:
- Запустите командную строку от имени администратора. В командной строке введите следующую команду и нажмите Enter.
-
bcdedit.exe /set {current} nx AlwaysOff
В случае, если при выполнении команды вам сообщают, что значение защищено политикой безопасной загрузки, вы можете отключить DEP для конкретных программ, а не для системы в целом (второй способ из инструкции). Перезагрузите компьютер и проверьте, была ли решена проблема или же ошибка «Память не может быть read» всё так же возникает.
Дополнительные методы решения проблемы
Если описанные ранее способы не помогли, можно использовать следующие методы:
- Выполните проверку целостности системных файлов Windows с помощью sfc. Иногда ошибка может быть результатом повреждения библиотек DLL.
- Если ошибка возникает при загрузке системы, попробуйте выполнить чистую загрузку Windows. Если при чистой загрузке ошибка не появляется, причиной могут быть какие-то недавно добавленные в автозагрузку программы, либо службы Windows. Вспомните, какое ПО вы устанавливали в последнее время, возможно, ошибку вызывает оно.
- Если на вашем компьютере есть точки восстановления на дату, предшествующую появлению проблемы, можно просто использовать точки восстановления.
- Если проблема стала появляться после обновления каких-то драйверов (часто — видеокарты), попробуйте установить предыдущую версию.
- На всякий случай, имеет смысл проверить компьютер на наличие вредоносных программ.
Также иногда ошибка бывает вызвана проблемами самого файла программы либо его несовместимостью с текущей ОС. А в случае, если помимо рассматриваемой ошибки «Память не может быть read» у вас регулярно возникают и другие проблемы (зависания, синие экраны), теоретически ошибка может быть вызвана проблемами с оперативной памятью, здесь может пригодиться: Как проверить оперативную память RAM на ошибки.
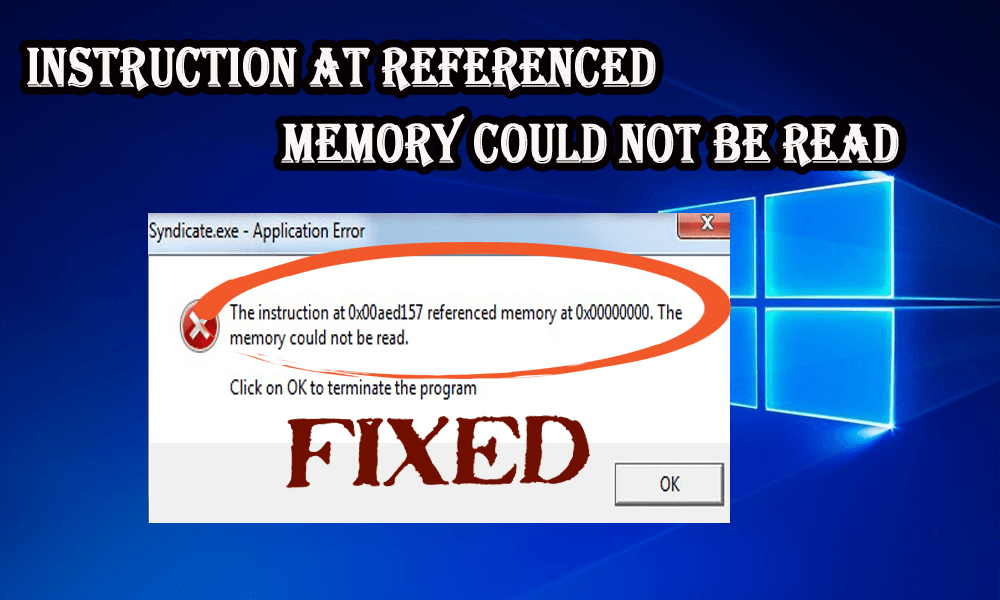
With Windows, you may get several error messages while utilizing performance logs on your Windows system and one such error is, “Instruction at 0x000 referenced memory at 0x000″. The memory could not be read.
This type of error generally occurs when you insert an alert about the use of your physical disk or when you put an end to a counter log. after investigating we found that are many different reasons responsible for the error like hardware conflicts, older drivers, bad CPU, bad memory, and many others.
So, here in this blog, you can get to know how to fix “Instruction at referenced memory could not be read” error with the help of seven updated fixes.
All these methods worked for several affected users to get past the error on different Windows versions.
To repair corrupted Windows system files, we recommend Advanced System Repair:
This software is your one stop solution to fix Windows errors, protect you from malware, clean junks and optimize your PC for maximum performance in 3 easy steps:
- Download Advanaced System Repair rated Excellent on Trustpilot.
- Click Install & Scan Now to install & scan issues causing the PC problems.
- Next, click on Click Here to Fix All Issues Now to fix, clean, protect and optimize your PC effectively.
The given solutions are very effective to resolve “Instruction at referenced memory could not be read”.
Fix 1: Increase Virtual Memory
If your virtual memory settings are enormously low then you always tend to get this type of error. To fix this,
- Right, Click on “My computer”.
- Go to the “Advanced” tab and click “Settings” under “Performance”
- After then, again click on the “Advanced” tab under “Performance Option” and click the “Change” button under “Virtual Memory”.
Now check if the instruction at 0x00007ff error is fixed or not.
Fix 2: Uninstall Buggy Software
You may encounter this error because of probable hardware problems as if you visit a website that has a buggy code or you may install buggy software. If you have installed some program that is not Google, Microsoft Edge, Adobe, or another company then uninstall it as they may have some bugs in it.
Also if you are using some software program associated with antispyware, antivirus, firewalls, or something like this, they may have referenced memory error. To fix the error, try to uninstall those programs.
If you have any type of real-time Internet traffic scanning software or any antivirus software then ensure that you had disabled it. You may also get referenced memory errors if your program is scanning web traffic.
Get Revo Uninstaller to Uninstall Programs Completely
Fix 3: Install Most Recent Patches & Update Drivers
You may be getting referenced memory error because your computer is not using the latest drivers. The main components you need to update are the chipset, network drivers, hard drive, or video. These all are generally the main reason behind this kind of error.
Also, try to update your BIOS to the current version. Make sure that you install all the recent service packs, Windows patches.
Sometimes the referenced memory error is caused by Windows so make sure to update Office, Windows, device drivers and any other program on your system with the latest updates.
Get Driver Updater to update driver automatically
Fix 4: Perform a System Restore
If you are getting this error recently then you might be capable of restoring your system to an earlier state.
Many users informed the memory could not be read is encountered by the users, if your registry gets corrupted and to repair it follow the steps given in the article – Fix Corrupt Registry.
Generally, the buggy program is the main reason behind the corruption of the registry but sometimes even after the uninstallation of that software, you may get the error because the registry is still corrupted somewhere.
Follow the steps to perform System Restore:
- In the Start menu search for Recovery
- Then click on Recovery > click Open System Restore.
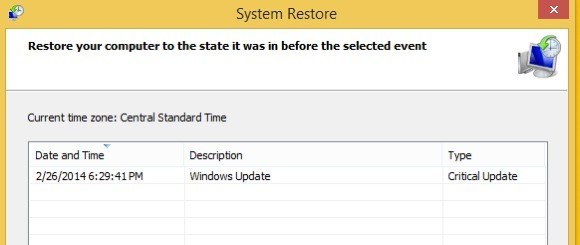
And check if the restore points were created before the error appears, so select the one and follow the onscreen instruction from Windows to complete the restoration process.
Fix 5: Run System File Checker
Another way to fix the instruction at 0x00007ff error is to run the built-in system file checker command that comes with Windows.
To run an SFC scan follow the below-mentioned steps:
- Press Windows + R key
- Type “CMD” and press Enter.
- Type sfc/scannow and press Enter.
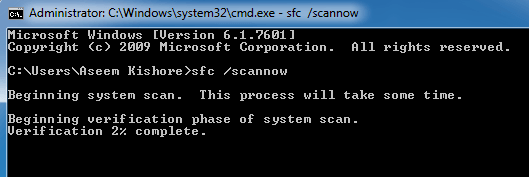
- Wait for the onscreen instructions to complete
This will repair corrupted Windows system files, and check if the instruction at referenced memory at the memory could not be read is fixed.
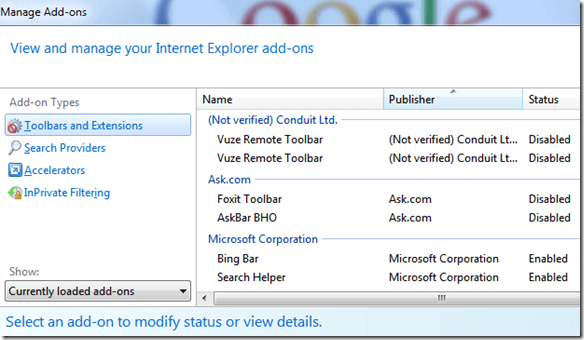
Fix 6: In the Internet Browser, Disable Add-ons
If you are getting an error message which said the memory could not be read error only in Internet Explorer then it may be caused by a faulty add-on.
To fix this issue, you have to start Internet Explorer with no add-ons or go to the “Settings” and disable all the add-ons.
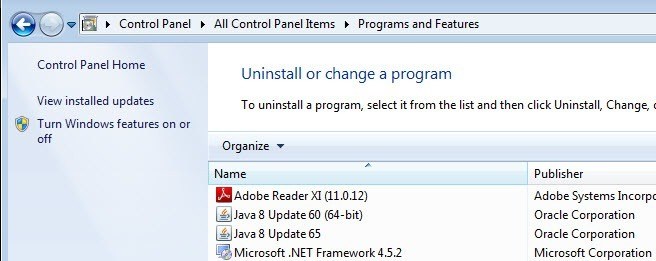
Fix 7: Uninstall Old Version of Java Runtime
Sometimes even after updating Java Runtime Environment, the older versions are left on the system and that might cause the referenced memory error.
It is estimated the error the memory could not be read is fixed but if not then go for the easy solution.
Best & Easy Solution to Fix “Instruction at referenced memory could not be read” Issue
Even after performing the manual fixes mentioned in this blog if you are getting an error “Instruction at referenced memory could not be read” then an easy solution to get rid of this error is to try running the PC Repair Tool.
This is one of the best tools in solving all kinds of PC related errors such as corrupt or damaged files, Windows update errors, DLL errors, game errors, and more. This tool will automatically scan, detect, and fix the error without the need of any professional. And also enhance the performance of your PC.
Get PC Repair Tool to Fix the Memory Could Not Be Read
Conclusion
Here I have provided ample information on the Instruction at referenced memory could not be read an issue. Now, it’s your turn to apply the above-given methods and get rid of this issue.
I hope you liked this article and it turns out to be helpful for you in resolving your issue.
If you are having any queries or questions regarding this article then feel free to share with us on our Facebook Page.
Good Luck..!
Hardeep has always been a Windows lover ever since she got her hands on her first Windows XP PC. She has always been enthusiastic about technological stuff, especially Artificial Intelligence (AI) computing. Before joining PC Error Fix, she worked as a freelancer and worked on numerous technical projects.
|
Ошибка при завершении работы Win10 — Память не может быть read |
|||||
|
|||||
|
|||||
|
|||||
|
|||||
|
|||||
|
|||||
|
|||||
|
|||||
|
|||||
|
|||||
|
|||||
|
|||||
|
|||||
|
|||||
|
В связи с введением в действие Постановления Правительства Российской Федерации от 14.11.2023 № 1905 т.н. «о запрете популяризации VPN» с 1 марта 2024 года — любое обсуждение способов обхода блокировок и VPN на портале запрещено!
С выходом Windows 11 Microsoft увеличила требования к аппаратному обеспечению, необходимые для работы ПК с новейшей ОС. Одним из основных изменений было то, что для правильной работы Windows 11 компьютер должен был иметь как минимум 8 ГБ памяти.
Однако порой даже пользователи с необходимым объемом оперативной памяти могут столкнуться с различными ошибками, связанными с памятью. Одной из наиболее распространенных ошибок является «Инструкция по адресу 0x00007FF, ссылающаяся на память 0x0000000. Воспоминания не могли быть записаны».
Эта ошибка может возникнуть при запуске приложений с интенсивным использованием графики, играх или даже запуске веб-браузеров. К счастью, исправить эту ошибку не очень сложно, и здесь мы покажем вам, как это сделать.
1. Восстановите системные файлы с помощью сканирования SFC и DISM.
Ошибка «Невозможно записать в память» иногда может возникать из-за отсутствия или повреждения системных файлов. Вы можете попытаться восстановить эти файлы с помощью утилиты проверки системных файлов Windows (SFC) и сканирования DISM.
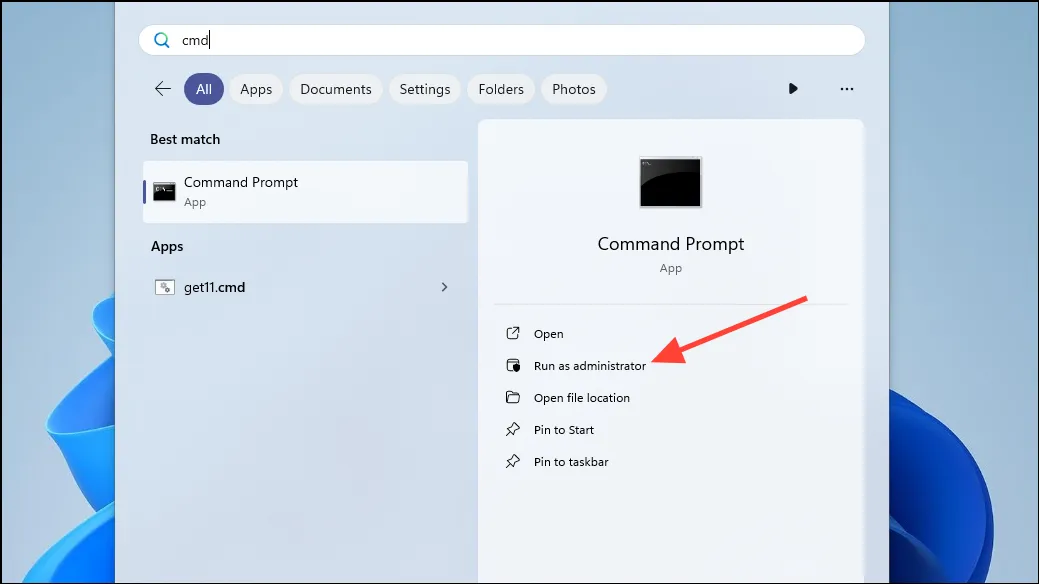
- Откройте меню «Пуск» и введите
command promptилиcmd. - Нажмите кнопку «Запуск от имени администратора», чтобы запустить командную строку.
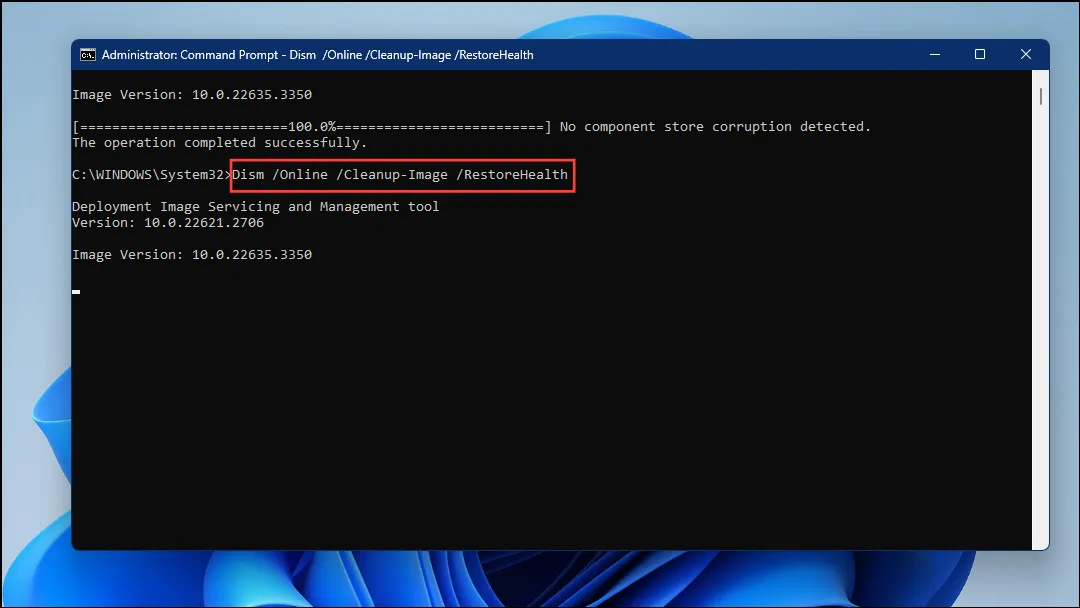
- В окне командной строки введите
sfc /scannowи нажмите клавишу «Ввод», чтобы начать сканирование системных файлов на наличие проблем.

- В зависимости от вашей системы поиск и исправление поврежденных файлов может занять некоторое время. После завершения сканирования введите,
DISM /Online /Cleanup-Image /RestoreHealthчтобы начать сканирование DISM.
- Перезагрузите компьютер после завершения сканирования, и ошибка должна исчезнуть. Если это не так, попробуйте следующий метод.
2. Обновите Microsoft.NET Framework.
Вы можете столкнуться с ошибкой «Невозможно записать память», если используете приложение, использующее Microsoft.NET Framework и требующее много памяти.
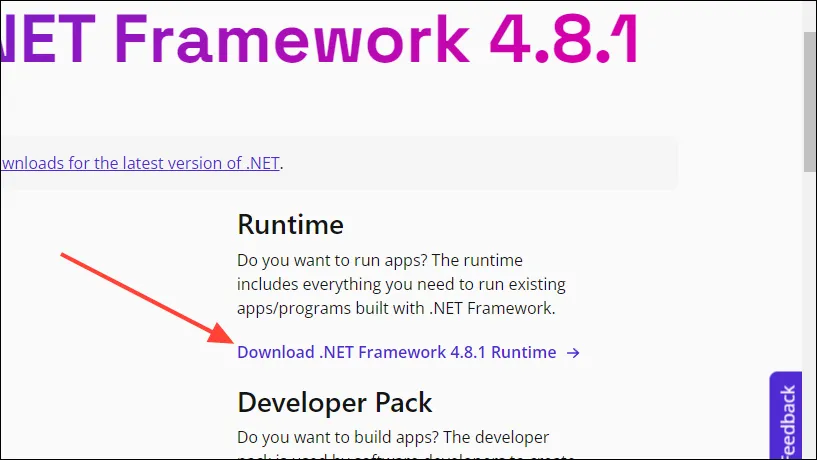
- Чтобы решить эту проблему, посетите сайт загрузки Microsoft.NET Framework.
- Нажмите на кнопку «Скачать». NET Framework Runtime» справа, чтобы загрузить установщик платформы.
- После загрузки установщика дважды щелкните его, чтобы начать процесс установки.
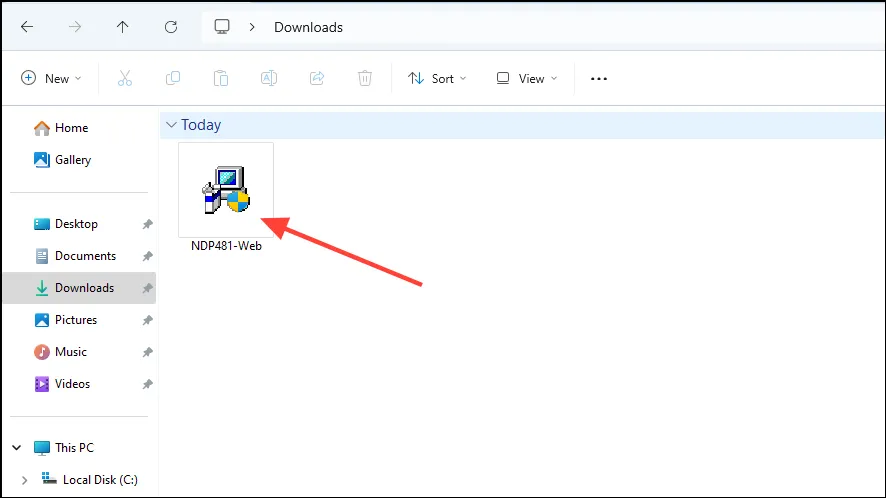
- Установка начнется, если у вас более старая версия. NET Framework, и после его завершения должна устраниться ошибка «Невозможно записать в память».
3. Отключите функцию автоматического скрытия панели задач.
Некоторые функции могут привести к тому, что на вашем компьютере с Windows 11 возникнут ошибки, связанные с памятью. «Автоматически скрывать панель задач» — одна из таких функций, и вы можете отключить ее, если у вас возникнут проблемы.
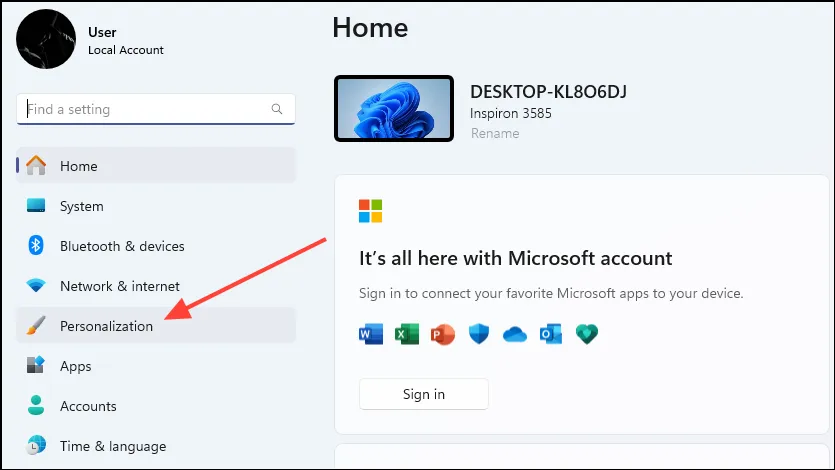
- Откройте страницу настроек и нажмите кнопку «Персонализация» слева.
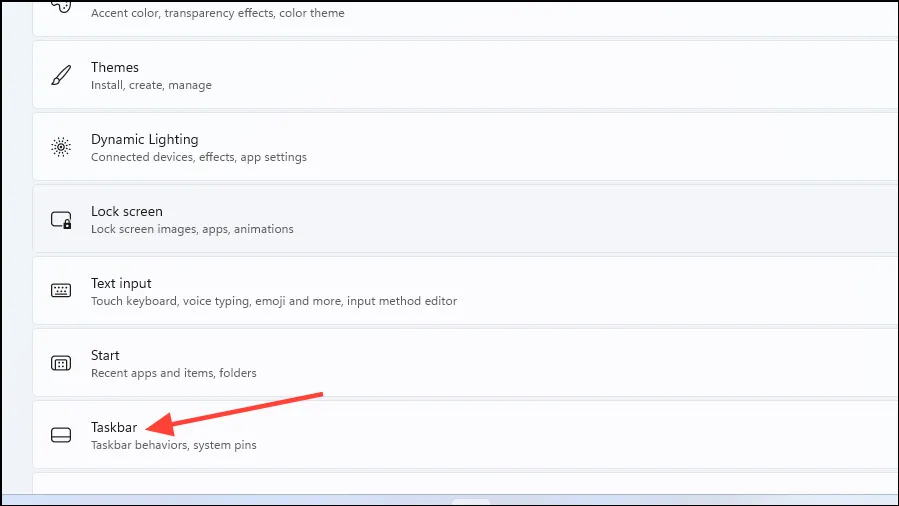
- Прокрутите вниз до параметра «Панель задач» и щелкните его, чтобы просмотреть все настройки, связанные с панелью задач.
- На этой странице щелкните, чтобы развернуть параметр «Поведение панели задач».
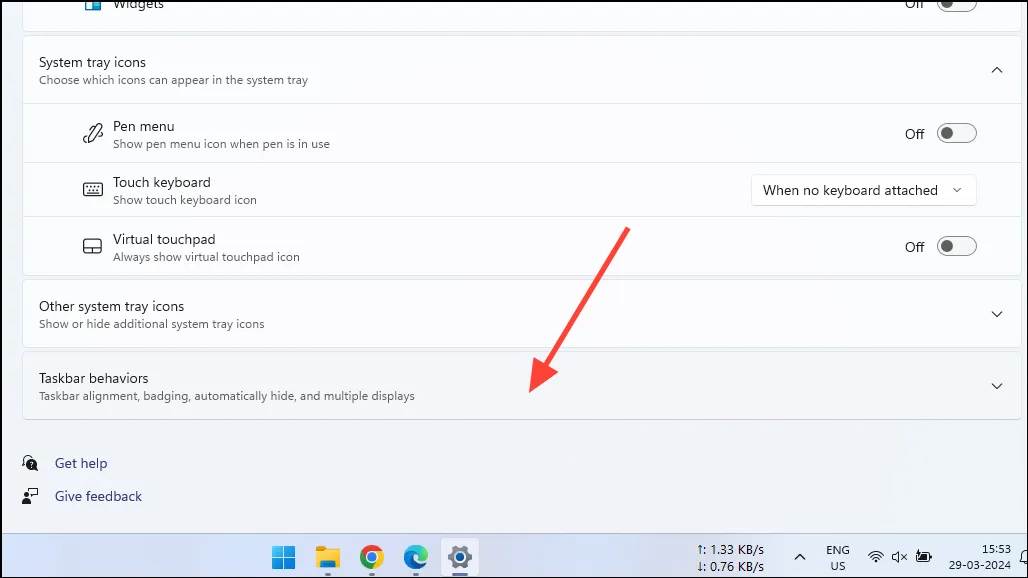
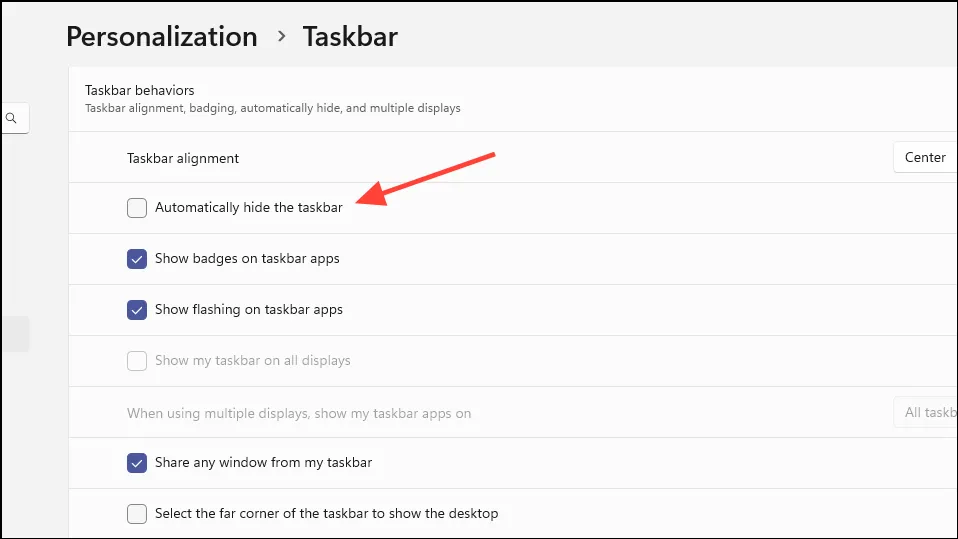
- Развернув этот раздел, вы получите доступ к опции «Автоматически скрывать панель задач». Если он включен, установите флажок, чтобы отключить его.
4. Запустите диагностическую проверку памяти.
Устаревшее или неисправное оборудование часто является причиной проблем, приводящих к таким ошибкам, как «Невозможно записать память». В этом случае проблема может быть в вашей оперативной памяти, и вы можете проверить ее состояние, выполнив диагностическую проверку памяти.
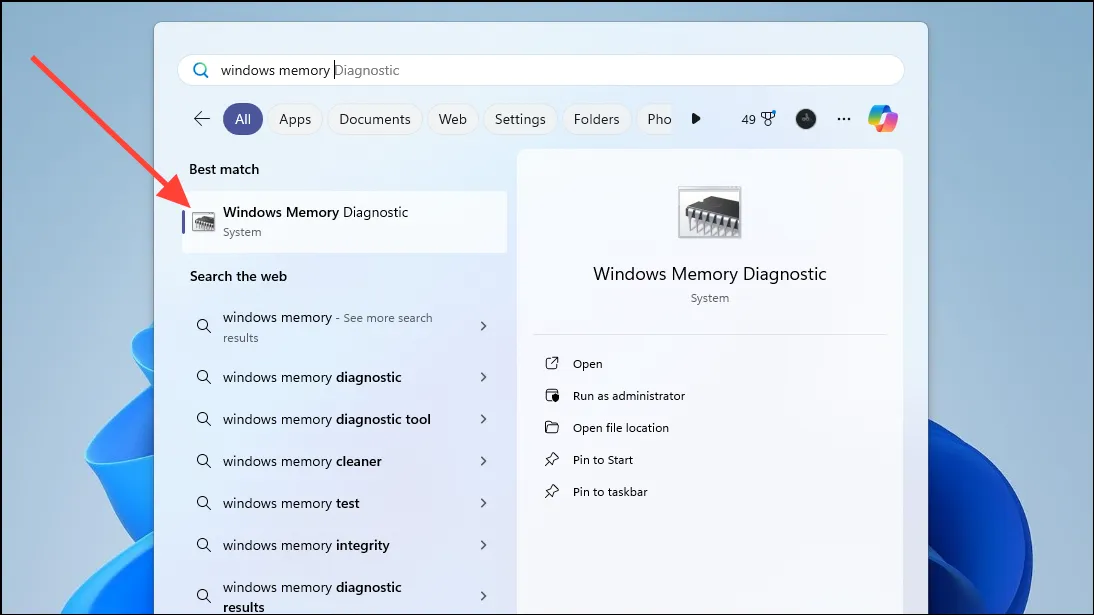
- Откройте меню «Пуск», введите
Windows Memory Diagnosticи щелкните, чтобы выбрать его, когда оно появится.
- Когда вы запустите инструмент диагностики памяти, появится окно с вопросом, хотите ли вы перезагрузить компьютер и проверить наличие проблем сейчас или позже. Нажмите «Перезагрузить сейчас и проверить наличие проблем».
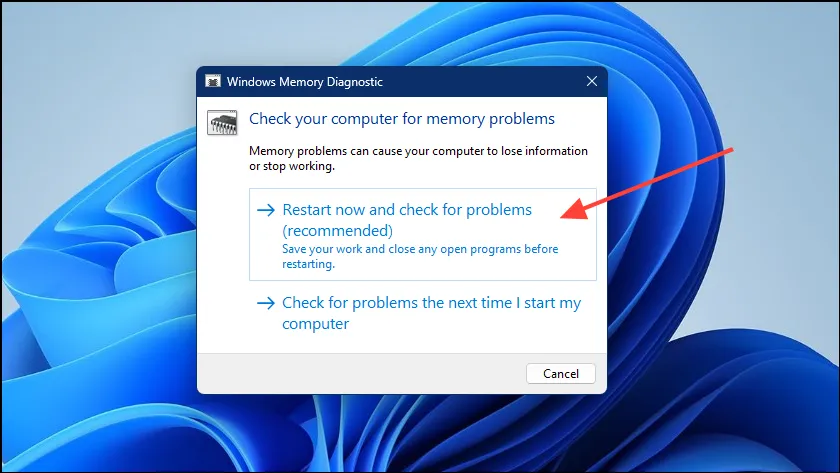
- Ваш компьютер перезагрузится и проведет диагностический тест, чтобы проверить, есть ли проблемы с вашей оперативной памятью. Если да, то это может быть причиной ошибки, и вам, возможно, придется заменить его.
5. Выполните чистую загрузку
Другим возможным решением проблемы является выполнение чистой загрузки, то есть запуск Windows только с необходимыми драйверами и службами, входящими в состав ОС. Для этого необходимо отключить все сторонние приложения, установленные в системе.
- Откройте меню «Пуск» и введите,
msconfigчтобы получить доступ к конфигурации системы. - Когда оно появится, нажмите на него, чтобы открыть.

- По умолчанию он откроется на вкладке «Общие». Нажмите на вкладку «Услуги», чтобы переключиться на нее.
- На вкладке «Службы» нажмите «Скрыть все службы Microsoft» внизу.
- Затем нажмите кнопку «Отключить все», чтобы отключить все службы сторонних производителей на вашем компьютере.
- После отключения служб нажмите на вкладку «Автозагрузка» вверху.
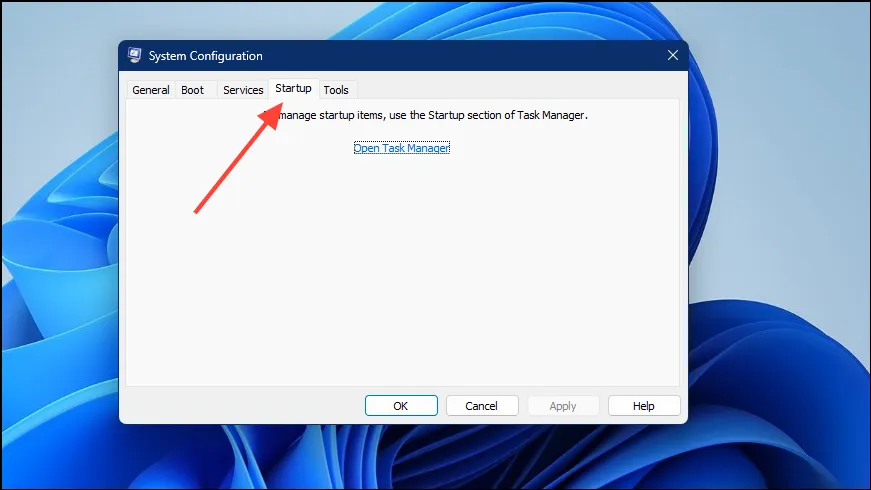
- Запустите диспетчер задач, нажав здесь опцию «Открыть диспетчер задач».

- В диспетчере задач по умолчанию будет открыта вкладка «Процессы». Нажмите вкладку «Приложения при запуске» слева, чтобы просмотреть приложения, которые запускаются при загрузке Windows.
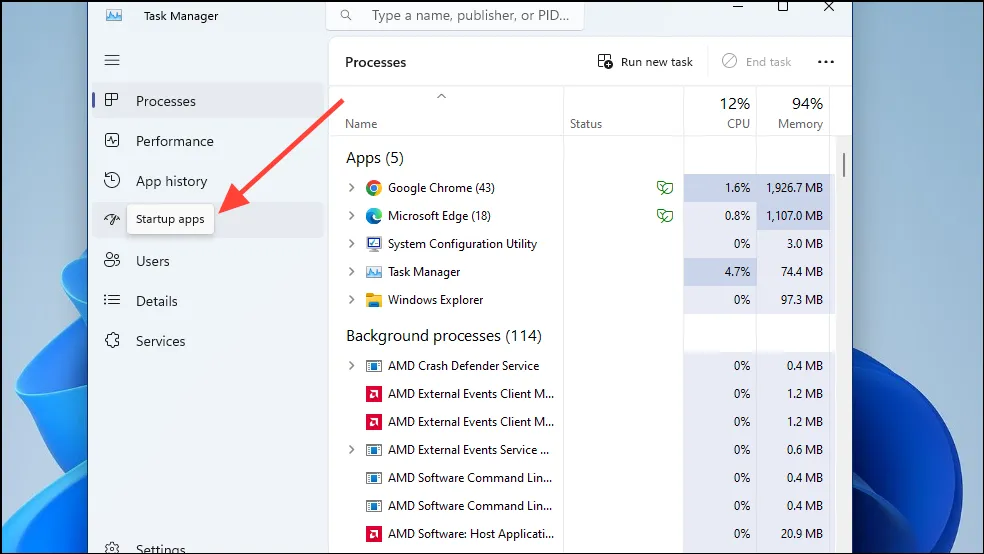
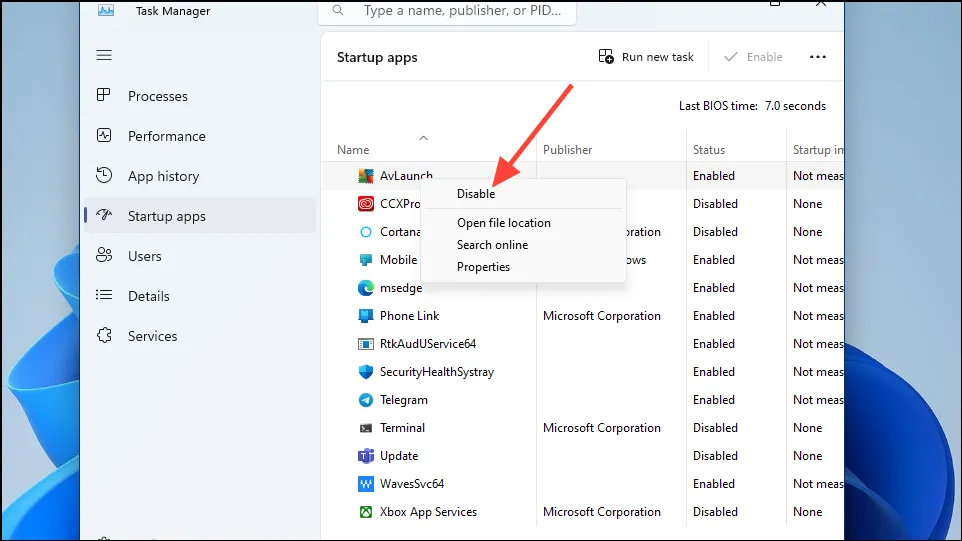
- Теперь вам нужно будет отключить каждое приложение здесь, чтобы оно не запускалось при загрузке Windows. Для этого просто щелкните правой кнопкой мыши приложение и выберите опцию «Отключить».
- Закройте диспетчер задач после отключения служб, а затем нажмите кнопку «ОК» в утилите настройки системы.

- Перезагрузите компьютер, и он загрузится в чистую загрузочную среду. Если ошибка не появляется, вы можете попробовать включить отключенные ранее службы из утилиты настройки системы таким же образом.
6. Увеличьте свою виртуальную память
Ошибка «Невозможно записать память» также может возникнуть, если в вашей системе недостаточно виртуальной памяти. Вы можете попробовать увеличить его и посмотреть, решит ли это проблему.
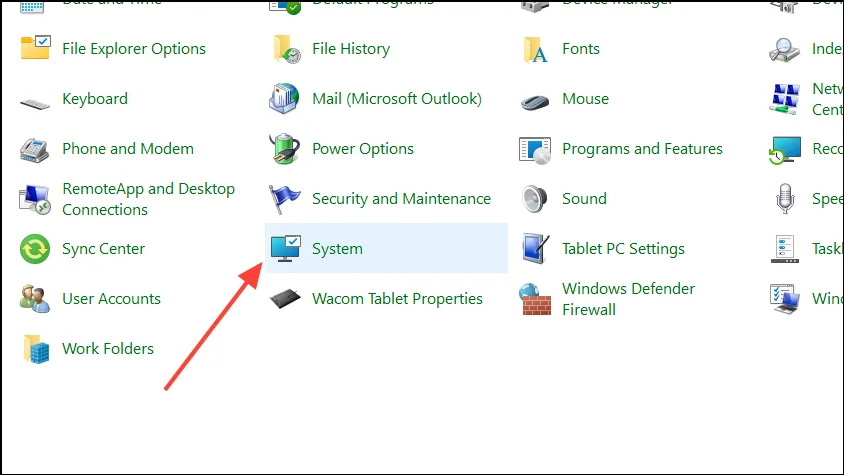
- Откройте панель управления на своем компьютере и выберите параметр «Система» или откройте «Настройки» и нажмите параметр «Система» слева.
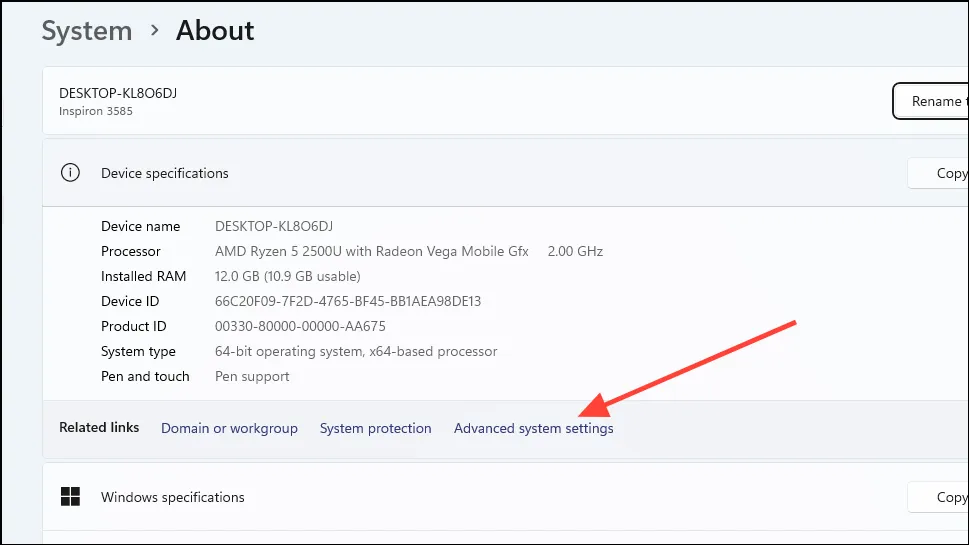
- На странице «Система» нажмите «Дополнительные параметры системы».
- Откроется всплывающее окно «Дополнительные настройки», в котором по умолчанию открыта вкладка «Дополнительно». Нажмите кнопку «Настройки» в разделе «Производительность».
- В появившемся всплывающем окне снова нажмите на вкладку «Дополнительно», откуда вы сможете увеличить виртуальную память.
- На вкладке «Дополнительно» нажмите кнопку «Изменить» в разделе «Виртуальная память».
- Чтобы иметь возможность увеличить виртуальную память, сначала необходимо снять флажок «Автоматически управлять размером файла подкачки для всех дисков» вверху. По умолчанию он включен, поэтому установите флажок, чтобы отключить его.
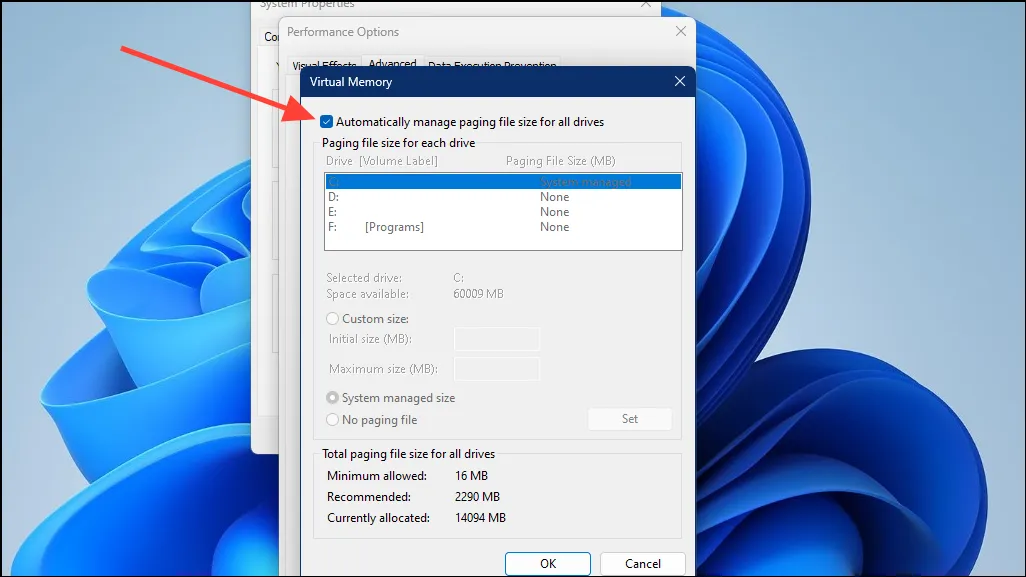
- Теперь вы можете установить виртуальную память, изменив размер файла подкачки. Выберите раздел, для которого вы хотите изменить размер файла, и нажмите кнопку «Нестандартный размер».
- Если в вашей системе только один раздел, установите «Начальный размер (МБ)» и «Максимальный размер (МБ)» в 1,5 раза больше объема ОЗУ в МБ. Сделайте то же самое, если у вас более одного раздела, но в этом случае установите значения для системного диска, обычно диска C, равными 250 МБ как для начального, так и для максимального параметров.
- Когда вы закончите, нажмите кнопку «Установить», а затем кнопку «ОК» внизу. Если проблема возникла из-за нехватки виртуальной памяти, ее следует устранить сейчас.
7. Запретите графическому процессору доступ к ответственному приложению.
Пользователи с графическим процессором Nvidia также могут попробовать изменить настройки на панели управления Nvidia, чтобы запретить графическому процессору доступ к приложению, ответственному за проблему. Вы можете сделать это с помощью параметра «Управление настройками 3D» на панели управления Nvidia, а затем выбрать встроенную графику для приложения.
8. Выполните восстановление системы.
Если вы попробовали все вышеперечисленные шаги без каких-либо положительных результатов, восстановление системы может быть единственным вариантом. Это позволит вам вернуть ваш компьютер в прежнее состояние, когда проблемы не было. Однако для этого необходимо, чтобы вы уже ранее настроили точку восстановления. Если у вас нет точки восстановления системы, перейдите к следующему исправлению.
Есть несколько способов восстановить ваш компьютер до того состояния, в котором он был раньше, но самый простой — через панель управления. Любые изменения, внесенные вами в компьютер после создания точки восстановления, например установка новых приложений, будут отменены.
- Запустите панель управления и нажмите «Восстановление».

- На следующей странице нажмите «Открыть восстановление системы».
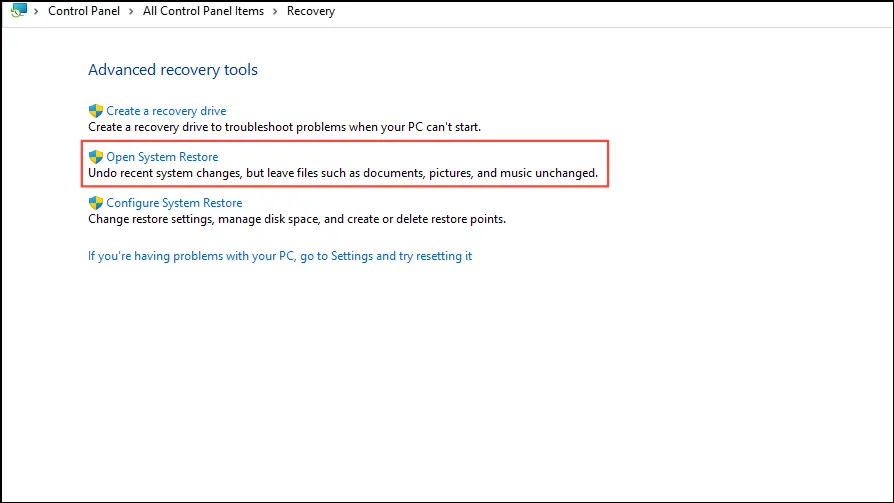
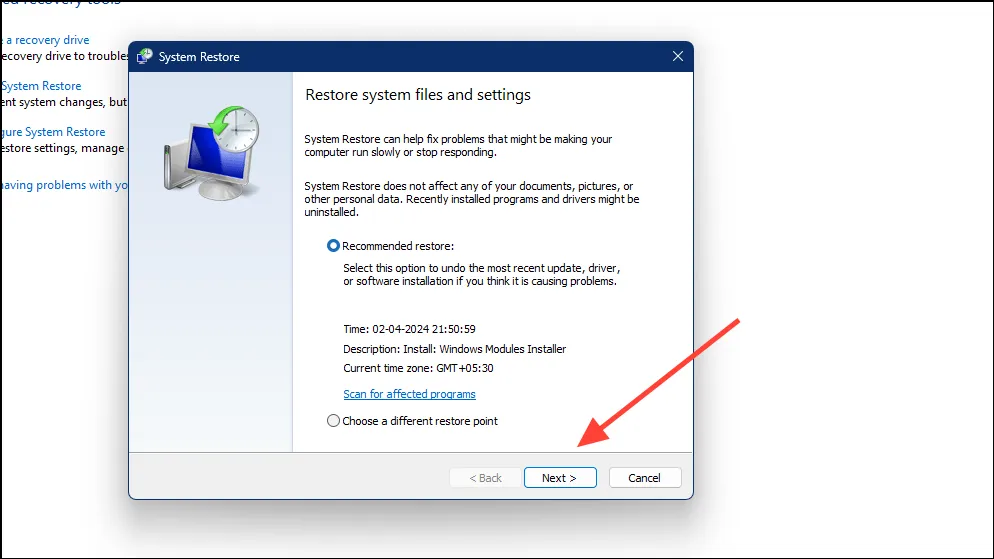
- Функция восстановления системы будет рекомендовать самую последнюю точку восстановления, созданную по умолчанию. Нажмите кнопку «Далее», чтобы продолжить. Здесь вы также можете выбрать другую точку восстановления.
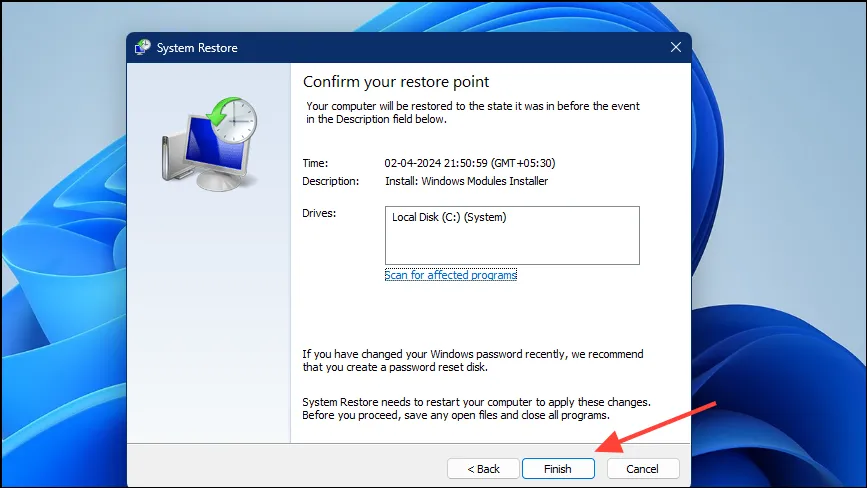
- Чтобы завершить процесс восстановления, нажмите кнопку «Готово», и ваш компьютер будет восстановлен до того момента, когда вы создали точку восстановления после перезагрузки.
9. Перезагрузите компьютер
Windows 11 позволяет перезагрузить компьютер, что означает переустановку ОС и удаление всех установленных программ и обновлений. Однако ваши личные файлы останутся нетронутыми. Если недавнее обновление или изменение системы вызвало ошибку, это может помочь вам устранить ее.
- Откройте приложение «Настройки» и нажмите вкладку «Система» слева.
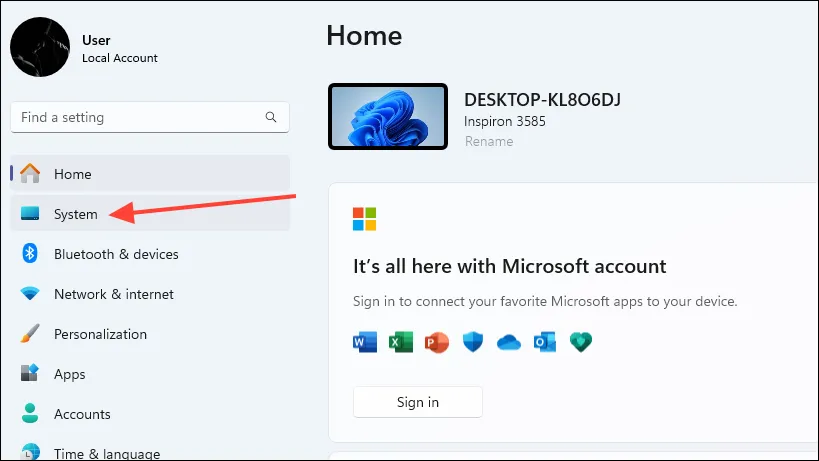
- На странице «Система» прокрутите вниз и нажмите «Восстановление».
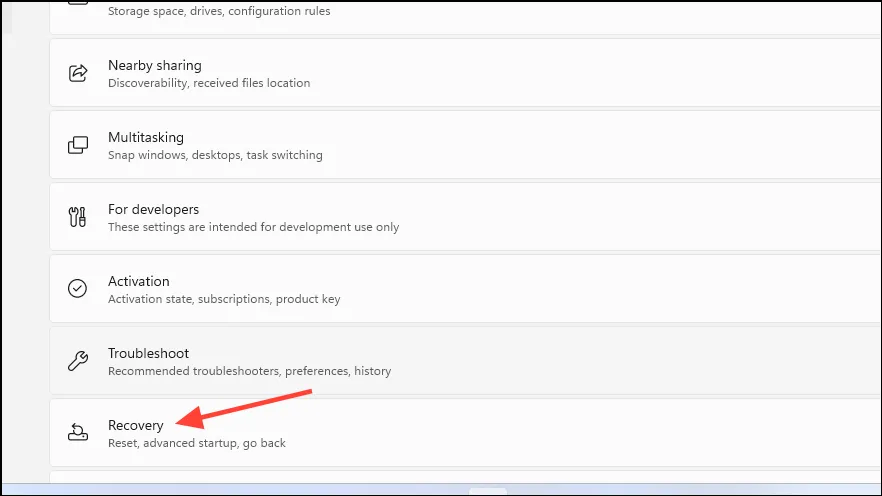
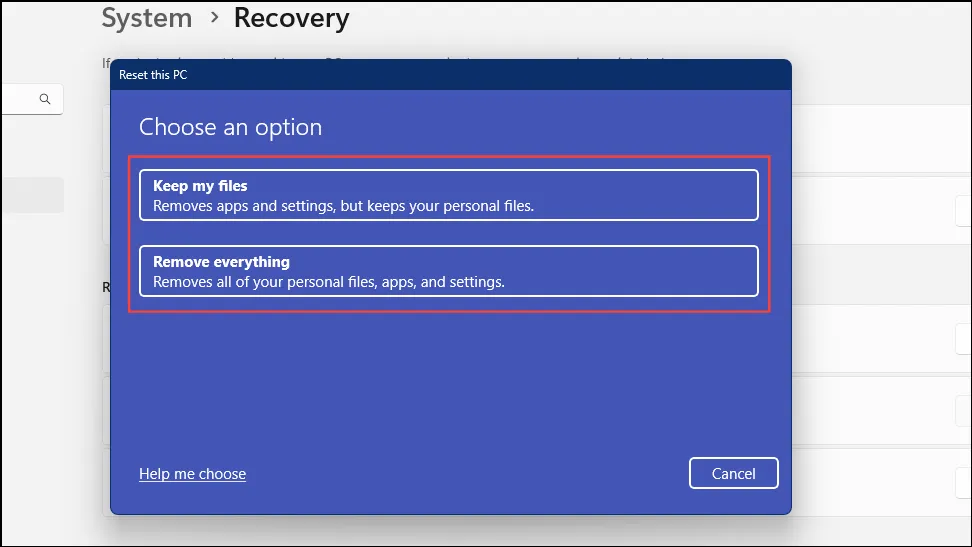
- Здесь вы найдете кнопку «Сбросить настройки этого компьютера». Нажмите на нее, и Windows спросит вас, хотите ли вы сохранить файлы или удалить все. Для достижения наилучших результатов выберите второй вариант.
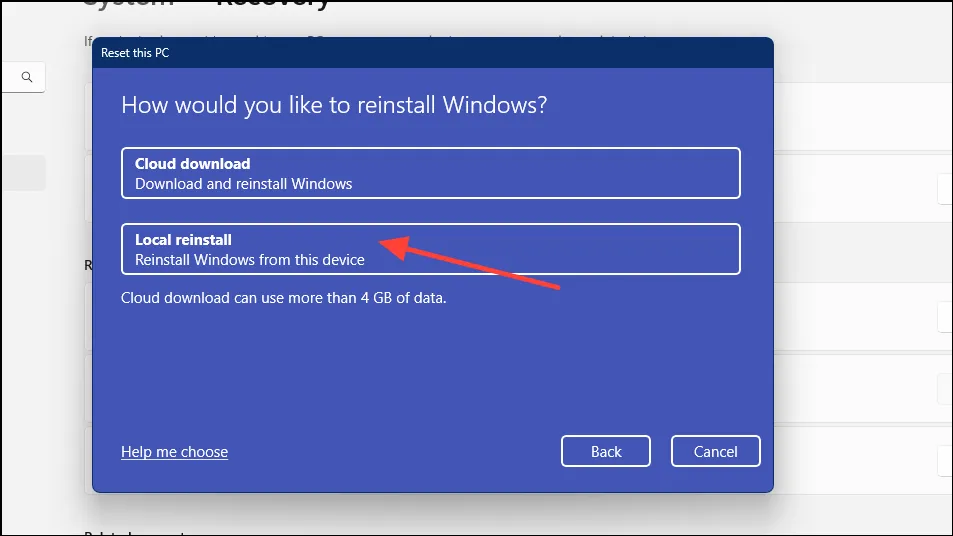
- После выбора варианта вы можете переустановить Windows из облака или локально. Нажмите на опцию «Локальная переустановка», чтобы продолжить.
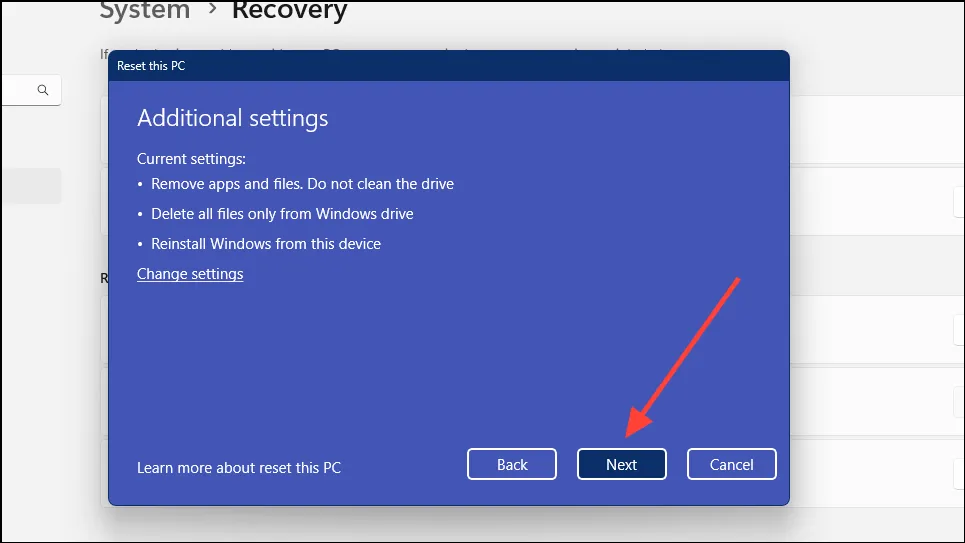
- На следующей странице вы сможете просмотреть настройки сброса. Нажмите кнопку «Далее», если вас устраивают выбранные настройки.
- Теперь Windows сообщит вам, что она готова выполнить сброс. Нажмите кнопку «Сбросить».
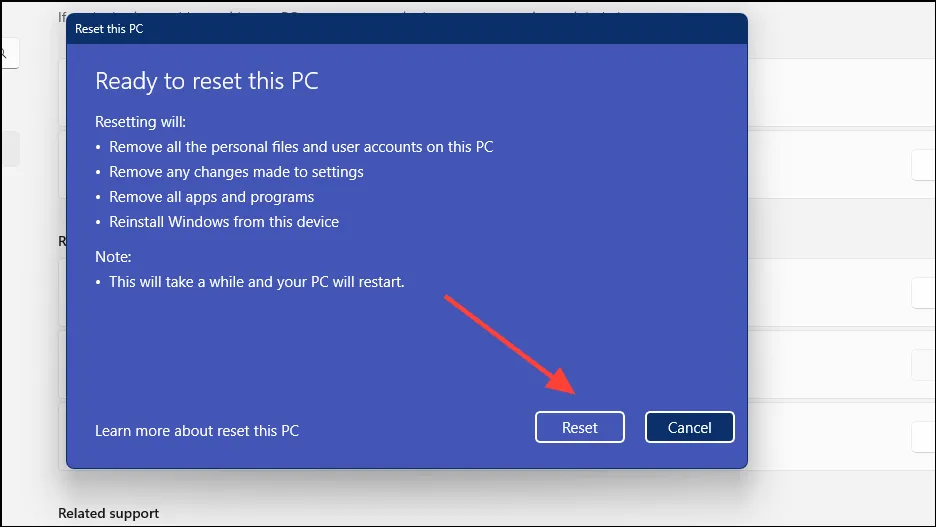
После перезагрузки вашего компьютера на нем больше не будет установлено никакого дополнительного программного обеспечения. Если ошибка была вызвана каким-либо установщиком приложения позже, она не должна появиться сейчас.
Большинству пользователей Windows 11 описанные выше методы должны помочь избавиться от ошибки «Невозможно записать в память». Попробуйте эти исправления одно за другим и перезагружайте компьютер после каждого метода, чтобы проверить, решена ли проблема. Если ничего не помогает, рассмотрите возможность восстановления или переустановки Windows, загрузив официальный ISO-образ с веб-сайта Microsoft.
Как только проблема будет решена, мы настоятельно рекомендуем следовать таким правилам, как правильное закрытие программ перед выключением системы и выполнение регулярных проверок на наличие вредоносных программ с помощью антивируса, чтобы предотвратить повторение подобных проблем.