
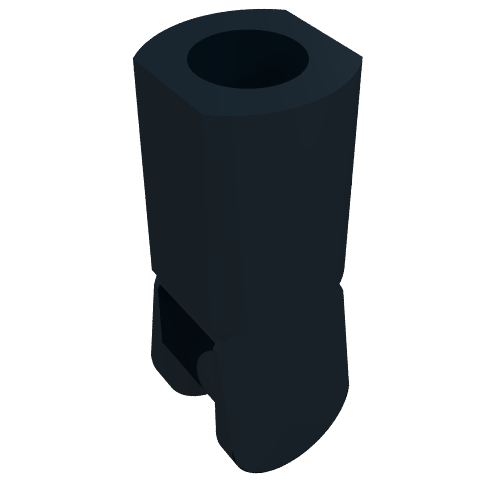
Инструкции по сборке LEGO Star Wars™ Конструктор Шлем Дарта Вейдера 75304
Воспользуйтесь поиском по артикулу
Или найдите нужную иструкцию по серии и теме
75304
По запросу 75304 найдено
Star Wars™ 75304
Конструктор Шлем Дарта Вейдера
Здесь вы найдете пошаговую инструкцию и схемы сборки, а также вы сможете скачать файл в pdf при необходимости.
В зависимости от модели, количества деталей и выбранного языка, вы без труда найдете необходимую инструкцию.
Даже если вы приобрели модель давно, и забыли, что и как использовать при сборке — у нас на сайте вы найдете необходимую информацию обо всех моделях конструктора лего.
Вбейте в строке поиска интересующий вас артикул или воспользуйтесь поиском по серии или теме.
Где мой заказ?
Введите номер заказа и номер телефона получателя, чтобы узнать где ваш заказ
Заказ № 1-123-12345
Сообщение о статусе заказа
Сообщение о статусе заказа
Способ доставки:
Доставка
Адрес доставки:
Москва, 6-я парковая, 7к3, 2
Стоимость доставки:
Бесплатно
Способ оплаты:
Наличными при получении
Отследить статус заказа можно на сайте транспортной компании.
Отследить
Если ссылка не открывается, скопируйте её в браузерную строку:
https://mir-kubikov.ru/order/delivery/
Авторизуйтесь, если часто покупаете у нас, чтобы видеть статус всех своих заказов в личном кабинете
Выберите город
Москва и область Санкт-Петербург и ЛОВладивостокВоронежЕкатеринбургИркутскКазань
КраснодарНижний НовгородНовосибирскОмскРостов-на-ДонуСамараСочи
СургутТюменьУфаЧелябинскЯрославль
- Privacy policy
- Cookies
- Legal notice
- Terms of use
- Digital wellbeing
- Accessibility
LEGO System A/S, DK-7190 Billund, Denmark. Must be 18 years or older to purchase online. LEGO, the LEGO logo, the Minifigure, DUPLO, the FRIENDS logo, the MINIFIGURES logo, DREAMZzz, NINJAGO, VIDIYO and MINDSTORMS are trademarks of the LEGO Group. ©2025 The LEGO Group. All rights reserved. Use of this site signifies your agreement to the Terms of Use.
Lego 75304 Darth Vader Helmet was released in 2021 you can find the building instructions for 75304 Darth Vader Helmet —
75304 below. Building instructions consist of 2 books and total of 164 pages.
1
2
3
4
5
6
7
8
9
10
11
12
13
14
15
16
17
18
19
20
21
22
23
24
25
26
27
28
29
30
31
32
33
34
35
36
37
38
39
40
41
42
43
44
45
46
47
48
49
50
51
52
53
54
55
56
57
58
59
60
61
62
63
64
65
66
67
68
69
70
71
72
73
74
75
76
77
78
79
80
81
82
83
84
85
86
87
88
89
90
91
92
93
94
95
96
97
98
99
100
101
102
103
104
105
106
107
108
109
110
111
112
113
114
115
116
117
118
119
120
121
122
123
124
125
126
127
128
129
130
131
132
133
134
135
136
137
138
139
140
141
142
143
144
145
146
147
148
149
150
151
152
153
154
155
156
157
158
159
160
1
2
3
4
Table of Contents
- Light My Bricks
- 75304 LIGHT KIT
- PACKAGE CONTENTS:
- LEGO PIECES:
- Before You Begin
- Before You Begin
- FINAL PRODUCT
- TROUBLESHOOTING
- CONTACT US
- Documents / Resources
- Read User Manual Online (PDF format)
- Download This Manual (PDF format)
LEGO® DARTH VADER HELMET
#75304 LIGHT KIT
INSTALLATION GUIDE
Light My Bricks
LEGO® DARTH VADER HELMET
75304 LIGHT KIT
INSTALLATION GUIDE
Hi There!
We’re here to help you get started on the LEGO®
Darth Vader Helmet (75304) Light Kit.
This PDF details the instructions for the LED light & sound kit only.
If you run into any issues, please refer to the troubleshooting section
towards the end of this guide.
Have fun and enjoy!
PACKAGE CONTENTS:
2 x Red 30cm Bit Lights
3 x Red 30cm Large Bit Lights
1 x Cool White 30cm Large Bit Light
1 x 8 Port Expansion Board
855097
LEGO PIECES:
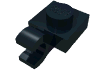
- 2 x Black Round Plate 1×1 w Open Stud
- 2 x Black Arm Skeleton, Bent w Clips (Horizontal Grip)
- 4 x Black 1×1 Modified Plate Rounded with Handle
- 2 x Black 1×6 Plate
Before You Begin
Laying cables in between and underneath bricks
Cables can fit in between and underneath LEGO® bricks, plates, and tiles
providing they are laid correctly between the LEGO® studs. Do NOT forcefully
join LEGO® together around cables; instead, ensure they are lying comfortably
in between each stud.
CAUTION: Forcing LEGO® to connect over a cable can result in damaging the
cable and light.
Connecting Cable Connectors To Expansion Boards
Take extra care when inserting connectors to ports of Expansion Boards.
Connectors can be inserted only one way. With the expansion board facing up,
look for the soldered “=” symbol on the left side of the port. The connector
side with the wires exposed should be facing toward the soldered “=” symbol as
you insert it into the port. If a plug won’t fit easily into a port connector,
do not force it.
Incorrectly inserting the connector can result in bent pins inside the port or
possible overheating of the expansion board when connected.
Before You Begin
Connecting Cable Connectors To Strip Lights
Take extra care when inserting connectors to ports on the Strip Lights.
Connectors can be inserted only one way. With the Strip Light facing up,
ensure the side of the connector with the wires exposed is facing down. If a
plug won’t fit easily into a port connector, don’t force it. Doing so will
damage the plug and the connector.
Connecting Micro Cable Connectors To Micro Expansion Board Ports
Take extra care when inserting the micro connectors to micro ports of Micro
Expansion Boards. Connecting Micro Bit Lights to Micro Expansion Boards is
similar to connecting lights and cables to Strip Lights. With the expansion
board facing up, ensure the side of the connector with the wires exposed is
facing down. If a plug won’t fit easily into a port connector, do not force
it. Use your fingernail to push the plastic part of the connector to the micro
port.
Installing Bit Lights Under Lego® Bricks And Plates
When installing Bit Lights under LEGO® pieces, ensure they are placed the
correct way up (Yellow LED component exposed).
You can either place them directly on top of LEGO® studs or in between.
INSTRUCTIONS
To ensure a smooth installation of your light kit, please read and follow each
step carefully. If you run into any issues, please refer to the online
troubleshooting guide.
If you experience any issues with the lights not working and suspect an issue
with a component, please try a different port on the expansion board to verify
where the fault lies (with the light or expansion board). To correct any
issues with expansion board ports, please view the section addressing
expansion board issues in our troubleshooting section.
FINAL PRODUCT
This finally completes the installation of the Light My Bricks Darth Vader
Helmet 75304 Light Kit.
TROUBLESHOOTING
Light My Bricks lighting kits contain individual components that are very
small and can be easily damaged if not handled correctly.
To prevent unnecessary damage to components, we highly recommend that the User
Guide section, “Important things to note” is read carefully. Follow the
handling procedures in the User Guide to help prevent faults and damages to
your Light My Bricks components.
If you are experiencing issues with your Light My Bricks set, watch our
troubleshooting video or read on for a list of common causes to help you
troubleshoot.
Firstly, ensure that the batteries have power using a battery charge gauge. If
the batteries have no power, replace the batteries. If the batteries still
have power, check to see if the batteries have been inserted correctly into
the battery pack.
Check For CR2032 Batteries Using The Flat Battery Pack
Inside the battery pack is a symbol indicating which side the (round) CR2032
battery should be inserted. Check that the “+” side of the battery pack has
the battery with the “+” symbol facing downwards.
On the opposite side, the “-” side of the battery pack should have the battery
flipped upside down, that is the “+” symbol facing upwards
Check For Cr2032 Batteries Using The Round Battery Pack
Inside the battery pack is a symbol indicating which side the (round) CR2032
battery should be inserted. In this case, for the stacked battery pack, ensure
that BOTH batteries have the “+” symbol facing upwards.
Check for AA batteries using the AA battery pack
Inside the battery pack are symbols indicating which direction the AA battery
should be inserted. The flat side of the battery should be paired with the
spring side of the battery pack.
If the batteries have been installed correctly and your kit still isn’t
operating correctly, the next step is to check the wiring.
Check Your Wires
In order for Light My Bricks components to fit in between and underneath LEGO®
bricks, the components need to be very small. Due to this nature, Light My
Bricks components can be easily damaged when not handled correctly.
Be careful when removing unpacked components out of the packaging and ensure
not to forcibly pull at the wires as this can damage the soldering that
attaches the wires to the LEDs.
If the wiring is detached from the LED itself, the light will not operate.
When connecting lights to your LEGO set, check that there are no pinched wires
underneath or in between bricks and plates. When the wires are pinched and the
exposed wires are touching each other, this can cause a crosswire and the
lights to not function correctly.
Check Your Expansion Board Ports/ Strip Light Ports /Effects Board Ports
It is important to note that connectors can only be inserted to the expansion
board, strip light, or effects board ports in one direction.
Forcibly inserting connectors in the incorrect direction will result in
damaging the pins inside each of the ports on your component board.
Not only will a light connected to the damaged port not work, but if the pins
inside the port are bent to a point they are touching each other, this can
result in all other lights in the system to stop working. This is a short
circuit.
A short circuit can also result in overheating of the board, cable or
batteries. If you suspect a short circuit, DISCONNECT POWER IMMEDIATELY
Batteries can fail, catch fire, or even explode if left connected to a short
circuit for too long.
If you suspect you have a faulty component due to a bent pin, try the
following steps:
If
you look carefully inside each of the ports, each port contains 2 small pins
that should be straight. You will be able to identify a faulty port if it has
any bent pins.
CONTACT US
If you have an inquiry regarding the online shop, our products, or a generalÁ
inquiry please refer to our Frequently Asked Questions webpage. Alternatively,
you can contact our Customer Services team by visiting our online support
portal.
support.lightmybricks.com
We thank you for purchasing this product and hope you enjoy it!
lightmybricks.com
Documents / Resources
| LEGO
75304 Darth Vader
Helmet
[pdf] Installation Guide
75304, Lego Darth Vader Helmet, 75304 Lego Darth Vader Helmet, Darth Vader
Helmet
—|—
Read User Manual Online (PDF format)
Read User Manual Online (PDF format) >>
Download This Manual (PDF format)
Download this manual >>
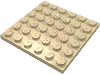
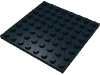
11212
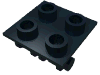
10
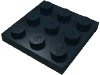
Черный
Plate 3 x 3
11212
2
Светло-оранжевый
Plate 3 x 3
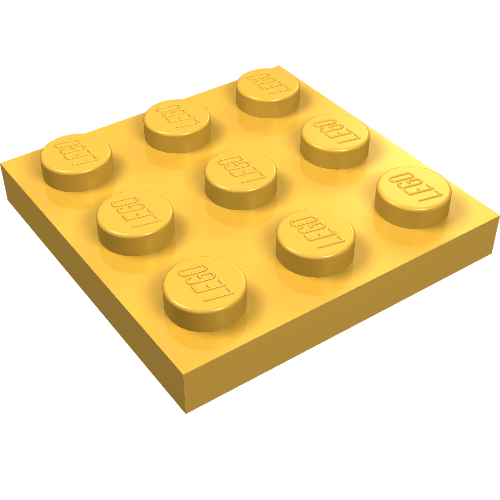
11476
1
Красно-коричневый
Plate Special 1 x 2 with Clip Horizontal on Side
11476
1
Черный
Plate Special 1 x 2 with Clip Horizontal on Side
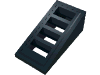
11477
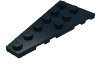
7
Черный
Slope Curved 2 x 1 No Studs [1/2 Bow]
14419
2
Темно-сине-серый
Plate Special 1 x 2 with 5.9mm Towball Socket and Towball
14718
1
Светло-серо-голубой
Panel 1 x 4 x 2 with Side Supports — Hollow Studs

15068
7
Черный
Slope Curved 2 x 2 x 2/3
15207
2
Черный
Panel 1 x 4 x 1 with Rounded Corners [Thin Wall]
15573
1
Красно-коричневый
Plate Special 1 x 2 with 1 Stud with Groove and Inside Stud Holder (Jumper)
18646
1
Черный
Plate Round Half 3 x 6 with 1 x 2 Cutout
20482
1
Светло-серо-голубой
Tile Round 1 x 1 with Hollow Bar (Запасная)
20482
4
Светло-серо-голубой
Tile Round 1 x 1 with Hollow Bar
22885
15
Светло-серо-голубой
Brick Special 1 x 2 x 1 2/3 with 4 Studs on 1 Side
23443
2
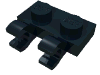
Черный
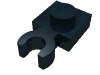
Bar Holder with Hole and Bar Handle
2357
10
Черный
Brick 2 x 2 Corner

2420
2
Желтый
Plate 2 x 2 Corner
2420
2
Зеленый
Plate 2 x 2 Corner
2420
30
Черный
Plate 2 x 2 Corner
2420
2
Бежевый
Plate 2 x 2 Corner
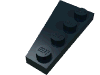
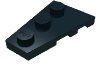
24201
6
Черный
Slope Curved 2 x 1 Inverted
24246
1
Черный
Tile Round 1 x 1 Half Circle
24246
1
Черный
Tile Round 1 x 1 Half Circle (Запасная)
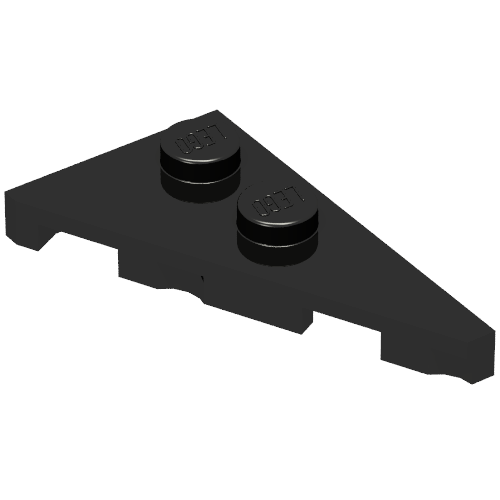
24299
2
Черный
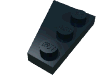
Wedge Plate 2 x 2 Left
24307
2
Черный
Wedge Plate 2 x 2 Right
24309
3
Черный
Slope Curved 3 x 2 No Studs
2431
1
Черный
Tile 1 x 4 with Groove
2456
1
Бежевый
Brick 2 x 6

25269
4
Черный
Tile Round 1 x 1 Quarter
25269
1
Синий
Tile Round 1 x 1 Quarter (Запасная)
25269
2
Синий
Tile Round 1 x 1 Quarter
25269
1
Черный
Tile Round 1 x 1 Quarter (Запасная)
26047
1
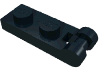
Черный
Plate Special 1 x 1 Rounded with Handle
2654
4
Черный
Plate Round 2 x 2 with Rounded Bottom [Boat Stud]
26601
4
Черный
Wedge Plate 2 x 2 Cut Corner

26603
5
Черный
Tile 2 x 3
2780
1
Черный
Technic Pin with Friction Ridges Lengthwise and Center Slots
2780
1
Черный
Technic Pin with Friction Ridges Lengthwise and Center Slots (Запасная)
27925
2
Черный
Tile 2 x 2 Curved, Macaroni
2877
6
Черный
Brick Special 1 x 2 with Grille
29119
1
Черный
Slope Curved 2 x 1 with Stud Notch Right
29120
1
Черный
Slope Curved 2 x 1 with Stud Notch Left
3001
6
Черный
Brick 2 x 4

3001
2
Белый
Brick 2 x 4
3002
1
Оранжевый
Brick 2 x 3
3003
5
Светло-серо-голубой
Brick 2 x 2

3003
1
Красный
Brick 2 x 2
3004
6
Черный
Brick 1 x 2
3005
4
Черный
Brick 1 x 1
3008
1
Бежевый
Brick 1 x 8
3010
2
Красный
Brick 1 x 4
3010
4
Черный
Brick 1 x 4
30136
14
Бежевый
Brick Special 1 x 2 Palisade [aka Log]
30136
5
Красно-коричневый
Brick Special 1 x 2 Palisade [aka Log]
30166
4
Темно-сине-серый
Minifig Shield Rectangular with 4 Studs, Handle

3020
1
Желтый
Plate 2 x 4

3020
6
Лаймово-зеленый
Plate 2 x 4
3020
15
Черный
Plate 2 x 4

3021
2
Белый
Plate 2 x 3
3021
26
Черный
Plate 2 x 3

3022
23
Черный
Plate 2 x 2
3022
3
Красный
Plate 2 x 2
3023
60
Черный
Plate 1 x 2
3023
5
Зеленый
Plate 1 x 2
3023
24
Темно-бирюзовый
Plate 1 x 2

3024
49
Черный
Plate 1 x 1
3024
2
Черный
Plate 1 x 1 (Запасная)
3030
1
Черный
Plate 4 x 10
3031
8
Черный
Plate 4 x 4
3032
3
Черный
Plate 4 x 6
3034
2
Черный
Plate 2 x 8
30357
2
Черный
Plate Round Corner 3 x 3
3036
3
Черный
Plate 6 x 8
30363
2
Черный
Slope 18° 4 x 2

30414
3
Белый
Brick Special 1 x 4 with 4 Studs on One Side
3045
4
Черный
Slope 45° 2 x 2 Double Convex
3062b
10
Оранжевый
Brick Round 1 x 1 Open Stud
3068b
1
Черный
Tile 2 x 2 with Groove
3069b
7
Черный
Tile 1 x 2 with Groove
3070b
1
Черный
Tile 1 x 1 with Groove (Запасная)
3070b
4
Черный
Tile 1 x 1 with Groove

32028
3
Белый
Plate Special 1 x 2 with Door Rail

32278
2
Белый
Technic Beam 1 x 15 Thick
32324
1
Черный
Technic Brick 4 x 4 with 2 x 2 Opening
32952
4
Зеленый
Brick Special 1 x 1 x 1 2/3 with Studs on 1 Side
32952
4
Черный
Brick Special 1 x 1 x 1 2/3 with Studs on 1 Side
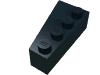
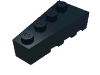
3297
5
Черный
Slope 33° 3 x 4
33909
2
Черный
Plate Special 2 x 2 with Only 2 studs
34103
4
Черный
Plate Special 1 x 3 with 2 Studs with Groove and Inside Stud Holder (Jumper)
3460
2
Светло-серо-голубой
Plate 1 x 8
3460
7
Черный
Plate 1 x 8
35480
10
Зеленый
Plate Special 1 x 2 Rounded with 2 Open Studs
35787
2
Черный
Tile 45° Cut 2 x 2 (Triangle)
3622
20
Черный
Brick 1 x 3
3623
26
Черный
Plate 1 x 3
3660
6
Черный
Slope Inverted 45° 2 x 2 [Ovoid Bottom Pin, Bar-sized Stud Holes]
3660
2
Темно-сине-серый
Slope Inverted 45° 2 x 2 [Ovoid Bottom Pin, Bar-sized Stud Holes]
3665
2
Черный
Slope Inverted 45° 2 x 1
3666
8
Бежевый
Plate 1 x 6
3666
1
Оранжевый
Plate 1 x 6

3666
5
Черный
Plate 1 x 6
3666
1
Темно-сине-серый
Plate 1 x 6
3675
4
Черный
Slope 33° 3 x 3 Double Convex
36840
4
Черный
Bracket 1 x 1 — 1 x 1 Inverted
3701
2
Бежевый
Technic Brick 1 x 4 [3 Pin Holes]
3710
36
Черный
Plate 1 x 4
3710
5
Светлая лаванда
Plate 1 x 4

3710
3
Зеленый
Plate 1 x 4
3747b
3
Черный
Slope Inverted 33° 3 x 2 [Connections between Studs]
3795
1
Светло-серо-голубой
Plate 2 x 6
3795
3
Черный
Plate 2 x 6

3795
2
Лаймово-зеленый
Plate 2 x 6

3832
2
Черный
Plate 2 x 10
3849
2
Черный
Weapon Lance
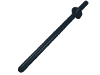
3937
3
Черный
Hinge Brick 1 x 2 Base
3958
1
Бежевый
Plate 6 x 6
4032a
2
Желтый
Plate Round 2 x 2 with Axle Hole Type 1 (+ Opening)
41539
1
Черный
Plate 8 x 8
41767
1
Черный
Wedge 4 x 2 Right
41768
1
Черный
Wedge 4 x 2 Left
41769
2
Черный
Wedge Plate 4 x 2 Right
41770
2
Черный
Wedge Plate 4 x 2 Left
4286
6
Черный
Slope 33° 3 x 1
4287c
2
Зеленый
Slope Inverted 33° 3 x 1 with Internal Stopper and No Front Stud Connection
4287c
8
Черный
Slope Inverted 33° 3 x 1 with Internal Stopper and No Front Stud Connection

43708
1
Черный
Wedge Sloped 18° 4 x 4 Corner
43722
1
Черный
Wedge Plate 3 x 2 Right
43723
1
Черный
Wedge Plate 3 x 2 Left

44728
1
Белый
Bracket 1 x 2 — 2 x 2
4477
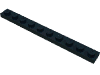
6
Черный
Plate 1 x 10
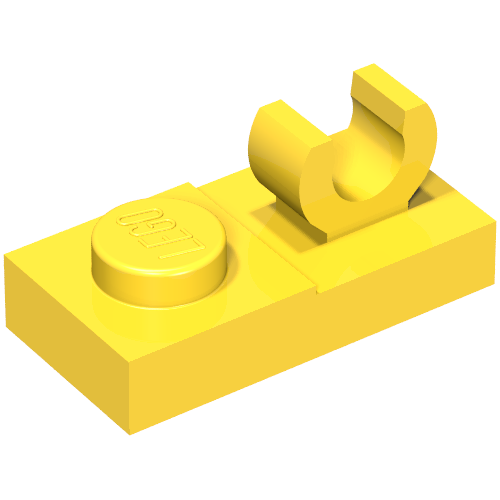
44861
4
Желтый
Plate Special 1 x 2 [Open O Top Clip]
44861
4
Светло-серо-голубой
Plate Special 1 x 2 [Open O Top Clip]

47457
2
Белый
Brick Curved 2 x 2 x 2/3 Two Studs and Curved Slope End
48336
4
Черный
Plate Special 1 x 2 [Side Handle Closed Ends]
48729b
2
Белый
Bar 1L with Clip [Cut Edges and One Side Hole] [Gap in Clip]
48729b
1
Белый
Bar 1L with Clip [Cut Edges and One Side Hole] [Gap in Clip] (Запасная)

54200
5
Черный
Slope 30° 1 x 1 x 2/3 (Cheese Slope)
54200
1
Черный
Slope 30° 1 x 1 x 2/3 (Cheese Slope) (Запасная)
54383
3
Черный
Wedge Plate 6 x 3 Right
54384
3
Черный
Wedge Plate 6 x 3 Left
60470b
4
Черный
Plate Special 1 x 2 with Clips Horizontal [Open O Clips]
60478
4
Черный
Plate Special 1 x 2 with Handle on End [Closed Ends]
60593
1
Бежевый
Window 1 x 2 x 3 Flat Front

6060
2
Черный
Brick Arch 1 x 6 x 3 1/3 Curved Top
60897
2
Черный
Plate Special 1 x 1 with Clip Vertical [Thick Open O Clip]

60897
2
Красный
Plate Special 1 x 1 with Clip Vertical [Thick Open O Clip]
61252
5
Черный
Plate Special 1 x 1 with Clip Horizontal [Thick Open O Clip]
6134
3
Черный
Hinge Brick 2 x 2 Top Plate Thin
61409
1
Черный
Slope 18° 2 x 1 x 2/3 with 4 Slots / Grate
6141
4
Черный
Plate Round 1 x 1 with Solid Stud
6141
1
Черный
Plate Round 1 x 1 with Solid Stud (Запасная)
6179
1
Черный
Plate Special 4 x 4 with Studs on One Edge [Plain]
6180pr0022
1
Черный
Plate Special 4 x 6 with Studs on 3 Edges with ‘LEGO STAR WARS DARTH VADER’ Print
63965
2
Черный
Bar 6L with Stop Ring
65426
1
Черный
Wedge Plate 2 x 4 27° Right
65429
1
Черный
Wedge Plate 2 x 4 27° Left
66906
2
Черный
Technic Pin with Friction Ridges Lengthwise and Towball — Round Pin Hole

69729
1
Черный
Tile 2 x 6
77286
1
[Без цвета/Любой цвет]
Sticker Sheet for Set 75304-1
78443
1
Черный
Wedge Plate 6 x 2 Left
78444
1
Черный
Wedge Plate 6 x 2 Right
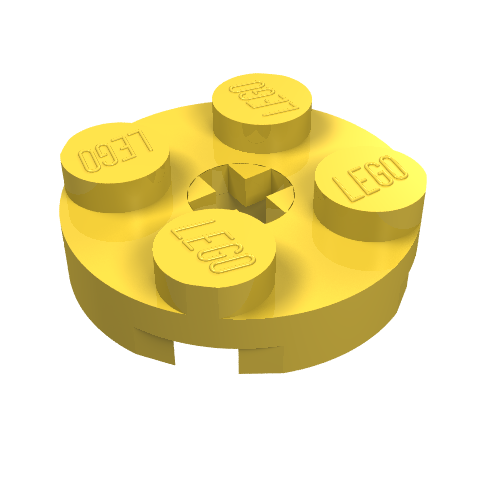
85861
1
Черный
Plate Round 1 x 1 with Open Stud (Запасная)
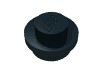
85861
10
Черный
Plate Round 1 x 1 with Open Stud
85861
1
Желтый
Plate Round 1 x 1 with Open Stud (Запасная)
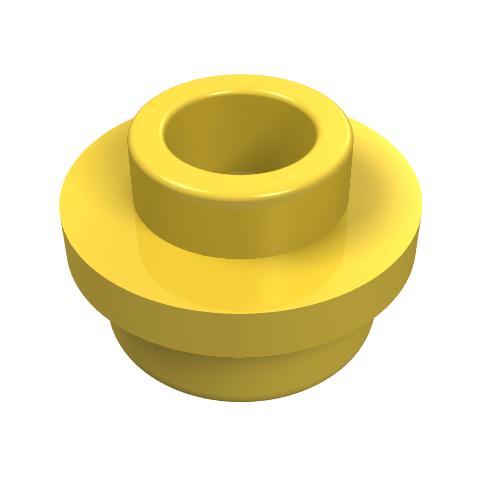
85861
16
Желтый
Plate Round 1 x 1 with Open Stud

85984
2
Черный
Slope 30° 1 x 2 x 2/3
87079
1
Черный
Tile 2 x 4 with Groove
87083
2
Темно-сине-серый
Technic Axle 4 with Stop
87087
2
Светло-серо-голубой
Brick Special 1 x 1 with Stud on 1 Side
87620
2
Черный
Wedge 2 x 2 Facet
87994
4
Светло-зеленый
Bar 3L
87994
1
Светло-зеленый
Bar 3L (Запасная)

93095
1
Белый
Panel 1 x 2 x 1 with Rounded Corners and Central Divider
93606
3
Черный
Slope Curved 4 x 2 No Studs
96874
1
Темно-бирюзовый
Brick and Axle Separator v2.0
98282
2
Черный
Wheel Arch, Mudguard 4 x 2 1/2 x 1
98560
4
Черный
Slope 75° 2 x 2 x 3 [Solid Studs]
99206
5
Черный
Plate Special 2 x 2 x 2/3 with Two Studs On Side and Two Raised

99206
2
Зеленый
Plate Special 2 x 2 x 2/3 with Two Studs On Side and Two Raised
99207
1
Красный
Bracket 1 x 2 — 2 x 2 Inverted
99563
11
Черный
Tile Special 1 x 2 with Sloped Walls AKA Money / Gold Bar [Ingot]
99780
5
Черный
Bracket 1 x 2 — 1 x 2 Inverted
99781
2
Желтый
Bracket 1 x 2 — 1 x 2