
Manual
View the manual for the Braun Cruzer 5 Beard here, for free. This manual comes under the category beard trimmers and has been rated by 4 people with an average of a 9.5.
This manual is available in the following languages: English. Do you have a question about the Braun Cruzer 5 Beard or do you need help?
Ask your question here
Braun Cruzer 5 Beard specifications
Below you will find the product specifications and the manual specifications of the Braun Cruzer 5 Beard.
The Braun Cruzer 5 beard trimmer is a grooming tool designed for maintaining facial hair. With an operating time of 40 minutes and a charging time of 1 hour, this trimmer provides convenience for those looking to keep their beard in check. The battery charge indicator ensures you won’t be caught off guard with a dead trimmer when you need it most. The trimmer has a minimum hair length of 1 millimeter and a maximum hair length of 11 millimeters, giving users the ability to achieve their desired beard length with precision. The trimmer’s sleek design and ergonomic grip make it easy to handle while grooming. Whether you’re looking to trim down stubble or maintain a longer beard, the Braun Cruzer 5 beard trimmer offers versatility and ease of use for all your grooming needs.
General
| Brand | Braun |
| Model | Cruzer 5 Beard | CRUZER 5 BEARD |
| Product | beard trimmer |
| EAN | 4210201045540, 4210201048145 |
| Language | English |
| Filetype | User manual (PDF) |
Power
| Operating time | 40 min |
| Battery charge indicator | Yes |
| Charging time | 1 h |
| Battery type | Built-in battery |
| AC input voltage | 110 — 240 V |
Design
Performance
| Number of length steps | — |
| Cutter width | — mm |
| Minimum hair length | 1 mm |
| Maximum hair length | 11 mm |
| Wet & Dry | — |
show more
Frequently Asked Questions
Can’t find the answer to your question in the manual? You may find the answer to your question in the FAQs about the Braun Cruzer 5 Beard below.
Does the Braun Cruzer 5 Beard have a battery charge indicator?
Yes, the Braun Cruzer 5 Beard has a battery charge indicator, which is convenient for users to know when it needs to be recharged. This feature puts it on par with other similar beard trimmers.
How long is the operating time of the Braun Cruzer 5 Beard?
The operating time of the Braun Cruzer 5 Beard is 40 minutes, which is relatively average compared to other beard trimmers in the market.
How long does it take to fully charge the Braun Cruzer 5 Beard?
The Braun Cruzer 5 Beard takes 1 hour to fully charge, which is quite fast and convenient for users who need to use it on a regular basis. This charging time is competitive with other beard trimmers available.
How do I properly place and use the trimming attachments for different beard styles?
To properly place and use the trimming attachments for different beard styles with the Braun Cruzer 5 Beard trimmer, follow these steps:
1. For a stubble look, use the 3-day beard comb & protective cap attachment. Place it onto the foil and push up the twistable trimmer. Turn on the shaver and trim as illustrated for the best angle.
2. For maintaining a constant beard length, use the adjustable comb attachment. Place it onto the foil, set the desired length, and push up the twistable trimmer. Trim against hair growth by guiding the comb over the skin.
3. To shape sideburns, moustaches, and short beards, use the wide trimmer. Press the blue stripes to push up the twistable trimmer and trim large areas evenly with safety rips and a gliding strip.
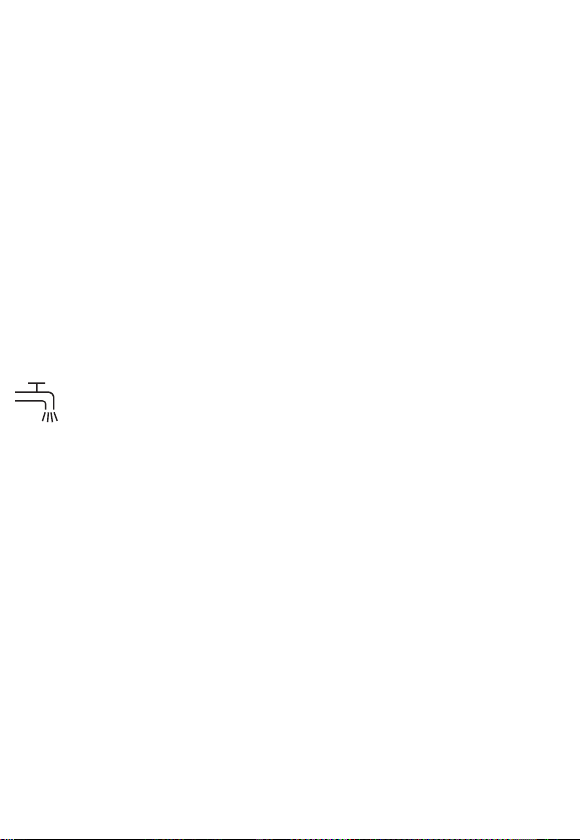
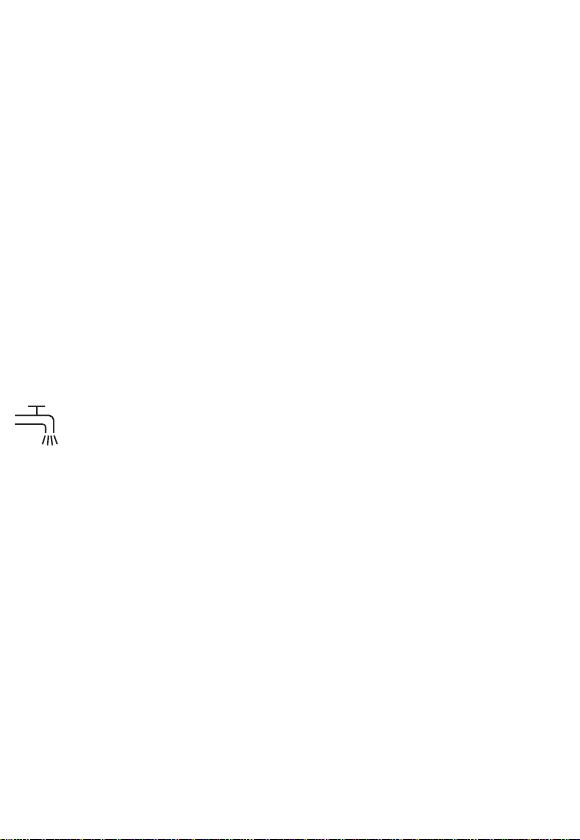
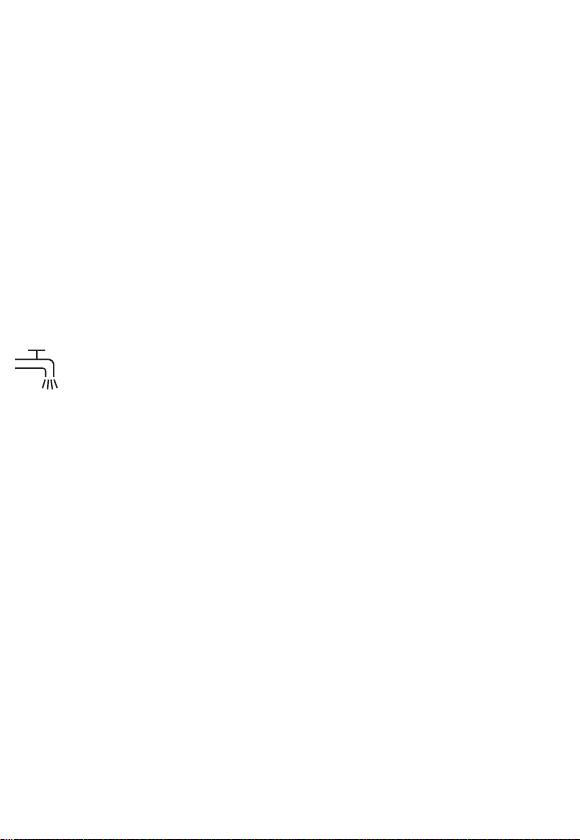
Remember to clean the shaver head under running water for better performance.
How can I effectively clean the shaver head under running tap water for better shaving performance?
To effectively clean the shaver head of the Braun Cruzer 5 Beard under running tap water for better shaving performance, follow these steps:
1. Switch off the shaver and detach the shaver foil and the cutter block.
2. Leave the disassembled shaving parts to dry.
3. Apply a drop of light machine oil onto the trimmers and shaver foil once a week if you regularly clean the shaver under water.
4. Alternatively, clean the shaver using the provided brush by following these steps:
— Switch off the shaver and remove the shaver foil.
— Use the brush to clean the cutter block and the inner area of the shaver head, avoiding cleaning the shaver foil with the brush to prevent damage.
5. Rinse the shaving head under hot running water while the shaver is switched on (cordless).
6. You may use liquid soap without abrasive substances, rinse off all foam, and let the shaver run for a few more seconds.
Is the manual of the Braun Cruzer 5 Beard available in English?
Yes, the manual of the Braun Cruzer 5 Beard is available in English .
Is your question not listed? Ask your question here
cruZer
Stapled booklet, 105 x 148 mm, 80 p (incl. 8 pages cover), 2/2c = cyan + black
n
a
e
l
c
5
r
e
Z
u
r
c
+
–
Type 5415
cruZer
www.braun.com
5
clean shave
Braun Infolines
English 6
Français 10
Polski 15
âesk˘ 21
Slovensk˘ 26
Magyar 31
Hrvatski 36
Slovenski 41
Türkçe 46
Română (RO/MD) 51
Български 56
кЫТТНЛИ 61
ì͇ªÌҸ͇ 68
81
Braun GmbH
Frankfurter Straße 145
61476 Kronberg/Germany
www.braun.com
www.service.braun.com
UK 0800 783 7010
IE 1 800 509 448
FR 0 800 944 802
BE 0 800 14 592
PL 801 127 286
801 1 BRAUN
CZ 221 804 335
SK 02/5710 1135
HU (06-1) 451-1256
HR 091 66 01 777
SI 080 2822
TR 0 800 261 63 65
RO 021.224.30.35
RU 8 800 200 20 20
UA 0 800 505 000
HK 2926 2300
(Jebsen Consumer Service
Centre)
RSA 0860 112 188
(Sharecall charged at local
rates)
97144062/IX-14
GB/F/PL/CZ/SK/H/HR/SLO/TR/RO/MD/
BG/RUS/UA/Arab
1
2
n
a
e
l
c
5
r
e
Z
u
r
c
3
4
5
+
–
6
7
8
4
9
+
90°
f
ul
l
f
u
ll
click!
5

English
Our products are designed to meet the highest standards of quality,
functionality and design. We hope you enjoy your new Braun Shaver.
Read these instructions completely, they contain safety information.
Keep them for future reference.
Warning
Your shaving system is provided with a special cord set,
which has an integrated Safety Extra Low Voltage power
supply. Do not exchange or tamper with any part of it,
otherwise there is risk of an electric shock. Only use the
special cord set provided with the appliance.
The shaver head is suitable for cleaning under running
tap water. Detach the shaver from the power supply
before cleaning the shaver head in water.
Do not shave with a damaged foil or cord.
This appliance can be used by children aged from 8 years
and above and persons with reduced physical, sensory or
mental capabilities or lack of experience and knowledge if
they have been given supervision or instruction concerning
the safe use of the appliance and understand the hazards
involved. Children shall not play with the appliance.
Cleaning and user maintenance shall not be made by
children unless they are older than 8 years and supervised.
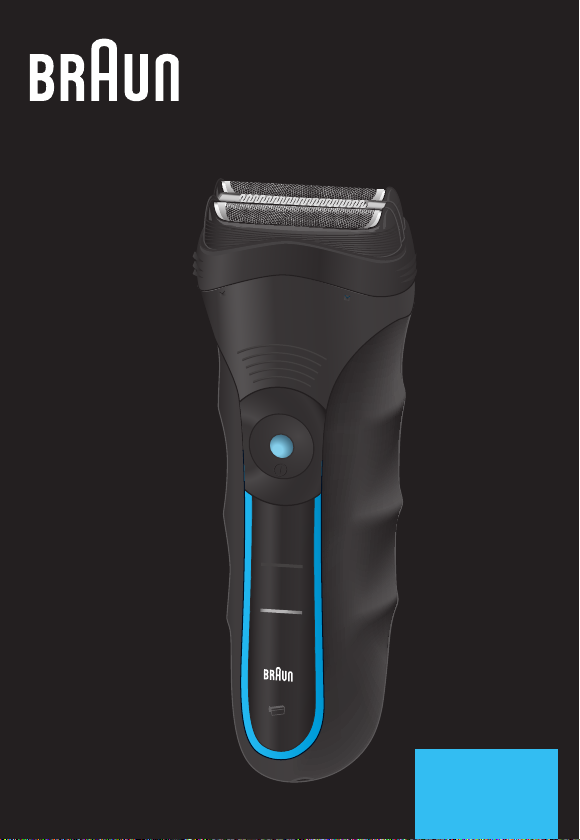
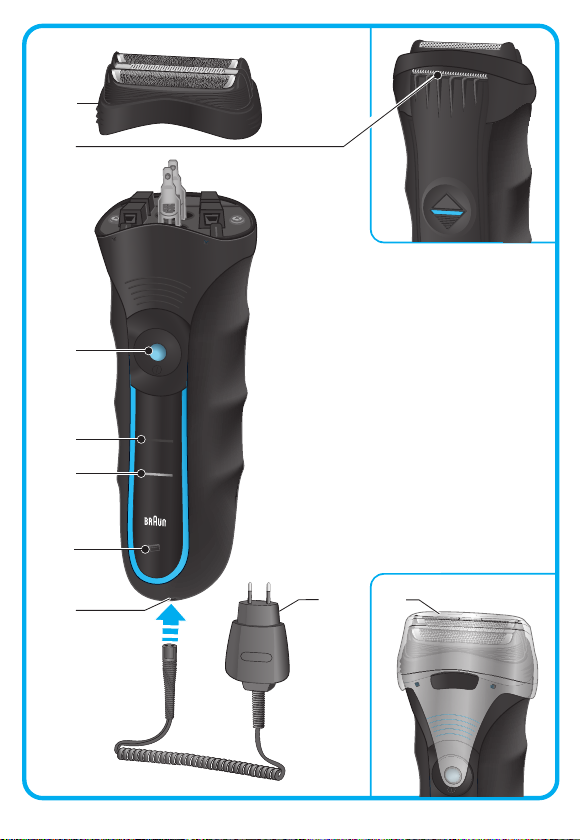
Description
1 Foil & Cutter cassette
2 Long hair trimmer
3 On/off switch
4 Charging light (green)
5 Low-charge light (red)
6 Replacement light for shaving parts
7 Shaver power socket
6

8 Special cord set
9 Protection cap
Charging
Recommended ambient temperature for charging is 5 °C to 35 °C.
The battery may not charge properly or at all under extreme low or high
temperatures. Recommended ambient temperature for shaving is 15 °C
to 35 °C. Do not expose the shaver to temperatures higher than 50 °C for
extended periods of time.
• Using the special cord set (8), connect the shaver to an electrical outlet with
the motor switched off.
• When charging for the first time
months
• Once the shaver is completely charged, discharge the shaver through
• A full charge provides up to 45 minutes of cordless shaving time depending
• If the rechargeable batteries are discharged, you may also shave by con-
• 5-minute quick charge is sufficient for a shave.
Charging light (4)
The green charging light shows the status of the batteries. The green
charging light blinks when the shaver is being charged or switched on.
When the battery is fully charged, the green charging light shines
permanently, provided the shaver is connected to an electrical outlet.
Low-charge light (5)
The red low-charge light flashes when the battery is running low.
You should be able to finish your shave.
, leave the shaver to charge continuously for 4 hours.
normal use. Then recharge to full capacity. Subsequent charges will take
about 1 hour.
on your beard growth. However, the maximum battery capacity will only be
reached after several charging/discharging cycles.
necting the shaver to an electrical outlet via the special cord set.
or when the shaver is not used for a few
Shaving
Press the on/off switch (3) to operate the shaver (picture).
The flexible shaving foils automatically adjust to every contour of your face
(picture).
Long hair trimmer (2)
To trim sideburns, moustache or beard, slide the long hair trimmer upwards.
7

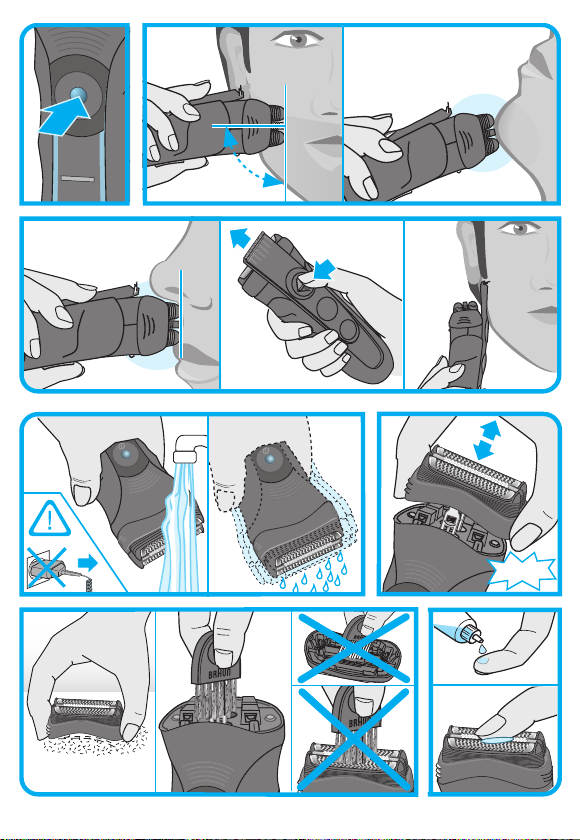
Tips for the perfect dry shave
For best results, Braun recommends you follow 3 simple steps:
1. Always shave before washing your face.
2. At all times, hold the shaver at right angles (90°) to your skin.
3. Stretch your skin and shave against the direction of your beard growth.
For pre-shaving after a few days of not having shaved, use the long hair
trimmer (2) to pre-cut long hairs. For a close, smooth shave, finish with the foil.
Cleaning
Regular cleaning ensures better shaving performance. Rinsing the shaver
head under running water after each shave is an easy and fast way to keep
it clean:
• Switch on the shaver (cordless) and rinse the shaver head under hot running
water until all residues have been removed. You may use liquid soap
without abrasive substances. Rinse off all foam and let the shaver run for a
few more seconds.
• Next, switch off the shaver, remove the Foil & Cutter cassette (1) and let it
dry.
• If you regularly clean the shaver under water, then once a week apply a
drop of light machine oil onto the long hair trimmer (2) and Foil & Cutter
cassette (1) (picture).
Alternatively, you may clean the shaver using a brush:
• Switch off the shaver. Remove the Foil & Cutter cassette and tap it out on
a flat surface (picture).
• Using a brush, clean the inner area of the shaver head. However, do not
clean the Foil & Cutter cassette with a brush as this may damage it
(picture).
Keeping your shaver in top shape
Replacement light for shaving parts / Reset
To maintain 100% shaving performance, replace the Foil & Cutter cassette
(1), when the replacement light for shaving parts (6) comes on (after about
18 months) or when worn.
Foil & Cutter cassette: 32S/32B
The replacement light will remind you during the next 7 shaves to replace the
Foil & Cutter cassette. Then the shaver will automatically reset the display.
8

After you have replaced the Foil & Cutter cassette (1), press the on/off switch
(3) for at least 5 seconds to reset the counter.
While doing so, the replacement light blinks and goes off when the reset is
complete. The manual reset can be done at any time.
Preserving the batteries
In order to maintain the optimum capacity of the rechargeable batteries, the
shaver has to be fully discharged (by shaving) every six months approximately. Then recharge the shaver to full capacity.
Environmental notice
Product contains batteries and/or recyclable electric waste. For
environment protection do not dispose of in household waste, but
for recycling take to electric waste collection points provided in your
country.
Subject to change without notice.
For electric specifications, see printing on the special cord set.
Guarantee
We grant a 2 year guarantee on the product commencing on the date of
purchase. Within the guarantee period we will eliminate any defects in the
appliance resulting from faults in materials or workmanship, free of charge
either by repairing or replacing the complete appliance at our discretion.
This guarantee extends to every country where this appliance is supplied by
Braun or its appointed distributor.
This guarantee does not cover: damage due to improper use, normal wear or
use as well as defects that have a negligible effect on the value or operation
of the appliance.
The guarantee becomes void if repairs are undertaken by unauthorised
persons and if original Braun parts are not used.
To obtain service within the guarantee period, hand in or send the complete
appliance with your sales receipt to an authorised Braun Customer Service
Centre (address information available online at www.service.braun.com).
For UK only
This guarantee in no way affects your rights under statutory law.
9
Français
Nos produits sont conçus pour répondre aux normes les plus élevées en
matière de qualité, fonctionnalité et design. Nous espérons que vous
apprécierez votre nouveau rasoir Braun.
Merci de lire attentivement et intégralement la notice d’utilisation avant
d’utiliser le produit. Veuillez la conserver pour vous y référer ultérieurement.
Attention
Votre rasoir est livré avec un cordon d’alimentation basse
tension. Vous ne devez pas remplacer ou modifier ses
composants, afin d’éviter tout risque d’accident. Utilisez
uniquement le cordon d’alimentation livré avec votre
appareil.
La tête du rasoir peut être lavée sous l’eau chaude
courante. Débranchez toujours le rasoir de la prise
électrique secteur avant de nettoyer la tête sous l’eau.
Ne vous rasez pas avec une grille ou un cordon
endommagés.
Cet appareil peut être utilisé par des enfants de 8 ans et
plus et par des personnes dont les capacités physiques,
sensorielles ou mentales sont réduites, ou des personnes
dénuées d’expérience ou de connaissance, si elles ont pu
bénéficier, par l’intermédiaire d’une personne responsable de
leur sécurité, d’une surveillance ou d’instructions préalables
concernant l’utilisation de l’appareil en toute sécurité et les
dangers encourus. Les enfants ne doivent pas jouer avec
l’appareil. Le nettoyage et l’entretien ne doivent pas être faits
par des enfants, à moins qu’ils ne soient âgés de plus de
8 ans et qu’ils ne soient sous surveillance.
10

Description
1 Cassette de rasage (grille et bloc-couteaux)
2 Tondeuse rétractable pour poils longs
3 Bouton marche/arrêt
4 Témoin lumineux de charge (vert)
5 Témoin lumineux de décharge (rouge)
6 Indicateur lumineux de remplacement de la cassette de rasage
7 Prise d’alimentation du rasoir
8 Cordon d’alimentation
9 Capot de protection
Mise en charge du rasoir
La température ambiante recommandée pour charger le rasoir est comprise
entre 5 °C et 35 °C. La batterie peut ne pas se charger correctement ou pas
du tout à des températures extrêmement basses ou élevées. La température
ambiante recommandée pour se raser est comprise entre 15° C et 35 °C.
N’exposez pas votre rasoir à des températures supérieures à 50 °C pendant
une période prolongée.
• Si vous utilisez le cordon d’alimentation (8), branchez le rasoir à une prise
électrique avec le moteur éteint.
• Lors de la première charge, ou si le rasoir n’a pas été utilisé pendant
plusieurs mois, laissez le rasoir se charger pendant 4 d’heures.
• Lorsque le rasoir est complètement chargé, utilisez le normalement
jusqu’à complète décharge de la batterie. Rechargez le ensuite jusqu’à
pleine capacité. Les charges suivantes prendront environ une heure.
• Une pleine charge procure jusqu’à 45 minutes d’autonomie de rasage en
fonction de l’épaisseur et de la dureté de votre barbe. Cependant, la
capacité maximale de la batterie ne sera atteinte qu’après plusieurs cycles
de charge/décharge.
• Si les batteries sont déchargées, vous pouvez aussi vous raser en
branchant le rasoir à une prise électrique via le cordon d’alimentation.
• Une charge rapide de 5 minutes est suffisante pour un rasage.
Témoin lumineux de charge (4)
Le voyant vert de charge indique l’état de la batterie. Le voyant vert de
charge clignote lorsque le rasoir est en train de charger ou qu’il est allumé.
Lorsque la batterie est entièrement chargée, le voyant vert de charge
s’allume en permanence, à condition que le rasoir soit branché à une prise
électrique.
11

Témoin lumineux de décharge (5)
Le voyant lumineux rouge de faible charge clignote lorsque la batterie doit
être rechargée. La charge restante est normalement suffisante pour que vous
puissiez terminer votre rasage.
Rasage
Appuyez sur le bouton marche/arrêt (3) pour mettre en marche le rasoir
(cf. schéma). Les grilles de rasage souples s’adaptent automatiquement aux
contours de votre visage (cf. schéma).
Tondeuse rétractable pour poils longs (2)
Pour tailler les pattes, la moustache ou la barbe, faites glisser la tondeuse
rétractable vers le haut.
Conseils pour un rasage parfait
Pour un résultat de rasage optimal, Braun vous recommande de suivre
3 étapes simples :
1. Rasez-vous toujours avant de vous laver le visage.
2. Tenez toujours le rasoir à angle droit (90°) par rapport à la peau.
3. Tendez votre peau et rasez-vous dans le sens opposé à la pousse du
poil.
Pour un pré-rasage après quelques jours sans rasage, nous vousconseillons
d’utiliser la tondeuse poils longs (2) pour pré-couper les poils les plus longs.
Pour un rasage de plus près et plus en douceur, terminez avec la grille.
Nettoyage
Un nettoyage régulier assure une meilleure performance de rasage. Nettoyer
la tête du rasoir sous l’eau après chaque rasage permet de garder le rasoir
propre simplement et rapidement :
• Allumez le rasoir (sans le cordon) et rincez la tête du rasoir sous l’eau
chaude jusqu’à retirer tous les résidus. Vous pouvez utiliser du savon
liquide ne contenant pas de substances abrasives. Rincez toute la mousse
et laissez le rasoir en marche pendant quelques secondes supplémentaires.
• Ensuite, arrêtez le rasoir, retirez la cassette de rasage (1) et laissez la
sécher.
12

• Si vous nettoyez régulièrement votre rasoir sous l’eau, appliquez une fois
par semaine une goutte d’huile de machine à coudre sur la tondeuse
rétractable (2) et sur la cassette de rasage (1) (cf. schéma).
Vous pouvez également nettoyer le rasoir en utilisant une brossette :
• Arrêtez le rasoir. Enlevez la cassette de rasage et tapotez-la légèrement
sur une surface plane.
• A l’aide de la brossette, nettoyez l’intérieur de la tête du rasoir. Cependant,
ne nettoyez pas la cassette de rasage avec la brossette car cela risquerait
de l’endommager (cf. schéma).
Entretien du rasoir
Témoin lumineux de remplacement de la cassette de rasage /
réinitialisation
Pour conserver 100% de la performance de votre rasoir, remplacez la cassette
de rasage (1) quand le témoin lumineux de remplacement des pièces de
rasage (6) s’allume (après environ 18 mois) ou quand elle est usée.
Cassette de rasage « Foil & Cutter » : 32S/32B
Le témoin lumineux de remplacement vous rappellera lors des 7 rasages
suivants qu’il faut remplacer la cassette de rasage. Ensuite, le rasoir
réinitialisera automatiquement l’affichage.
Après avoir remplacé la cassette de rasage (1), appuyez sur le bouton
marche/arrêt (3) pendant au moins 5 secondes afin de remettre manuellement le compteur à zéro.
Pendant ce temps là, le témoin lumineux de remplacement clignote et
s’éteint quand la réinitalisation est faite. La réinitialisation manuelle peut être
faite à n’importe quel moment.
Conservation des batteries
Pour maintenir la capacité optimale des batteries rechargeables, tous les
6 mois environ déchargez complètement, le rasoir en l’utilisant sans le
remettre en charge entre chaque rasage ; ensuite recharger le rasoir au
maximum.
13

Respect de l’environnement
Ce produit contient des batteries rechargeables et/ou des déchets
électriques recyclables. Afin de protéger l’environnement, ne jetez
jamais l’appareil dans les ordures ménagères a la fin de sa durée de
vie. Remettez-le à votre centre service agréé Braun ou déposez-le
dans des sites de récupération appropriés conformément aux réglementations locales ou nationales en vigueur.
Sujet à toute modification sans préavis.
Voir les spécifications électriques mentionnées sur l’adaptateur basse tension.
Garantie
Nous accordons une garantie de 2 ans sur ce produit, à partir de la date
d’achat.
Pendant la durée de la garantie, Braun prendra gratuitement à sa charge la
réparation des vices de fabrication ou de matière en se réservant le droit de
décider si certaines pièces doivent être réparées ou si l’appareil lui-même
doit être échangé.
Cette garantie s’étend à tous les pays où cet appareil est commercialisé par
Braun ou son distributeur exclusif.
Cette garantie ne couvre pas : les dommages occasionnés par une utilisation
inadéquate, l’usure normale (par exemple, grille et bloc-couteaux) ainsi que
les défauts d’usuresqui ont un effet négligeable sur la valeur ou l’utilisation
de l’appareil. Cette garantie devient caduque si des réparations ont été
effectuées par des personnes non agréées par Braun et si des pièces de
rechange ne provenant pas de Braun ont été utilisées.
Pour toute réclamation intervenant pendant la période de garantie, retournez
ou rapportez l’appareil ainsi que l’attestation de garantie à votre revendeur
ou à un Centre Service Agréé Braun.
Veuillez vous référer à www.service.braun.com ou appeler le 0 800 944 802
(service consommateurs — appel gratuit depuis un poste fixe) pour connaître
le Centre Service Agrée Braun le plus proche de chez vous.
Clause spéciale pour la France
Outre la garantie contractuelle exposée ci-dessus, nos clients bénéficient de
la garantie légale des vices cachés prévue aux articles 1641 et suivants du
Code civil.
14
Polski
Nasze produkty spełniają najwyższe standardy jakości, funkcjonalności i
designu. Mamy nadzieję, ze będziesz usatysfakcjonowany naszą nową
golarką Braun.
Prosimy o przeczytanie poniższej instrukcji w całości, zawiera ona
informacje dotyczące bezpieczeństwa. Należy ją zachować do użytku
w przyszłości.
Ostrzeżenie
Twój system golący wyposażony jest w specjalną stację
ładującą. Nie należy samodzielnie wymieniać lub
wymontowywać jakiejkolwiek jej części, gdyż grozi to
porażeniem prądem. Niniejsze urządzenie należy używać
wyłącznie przy użyciu specjalnego dołączonego zestawu
przewodów.
Głowica golarki jest przystosowana do mycia pod
bieżącą wodą. Należy odłączyć golarkę od źródła
prądu, zanim użytkownik zacznie czyścić głowicę po
bieżącą wodą.
Urządzenia nie należy używać z uszkodzoną folią golącą lub
kablem sieciowym.
To urządzenie może być używane przez dzieci w wieku od
8 lat i powyżej oraz przez osoby o ograniczonej zdolności
fizycznej, czuciowej lub psychicznej lub nieposiadające
doświadczenia i wiedzy, jeśli znajdują się pod nadzorem
lub zapoznały się z instrukcją bezpiecznego użytkowania
urządzenia i zrozumiały istniejące zagrożenia. Dzieci nie
mogą bawić się urządzeniem. Czyszczenie i konserwacja
urządzenia nie może być wykonana przez dzieci chyba że
są one starsze niż 8 lat i nadzorowane.
15

Opis
1 Kaseta z systemem noży i folii golących
2 Trymer do długich włosów
3 Przycisk włącznik/wyłącznik
4 Kontrolka ładowania (zielona)
5 Wskaźnik rozładowania baterii (czerwony)
6 Wskaźnik wymiany elementów golących
7 Stacja ładowania golarki
8 Przewód zasilający
9 Nasadka zabezpieczająca
Ładowanie
Zalecana temperatura otoczenia podczas ładowania wynosi 5–35 °C.
Akumulator może nie naładować się prawidłowo lub wcale się nie
naładować w skrajnie niskich lub wysokich temperaturach. Zalecana
temperatura podczas golenia wynosi 15–35 °C.
czas wystawiać urządzenia na działanie temperatur wyższych niż 50 °C.
• Za pomocą dołączonego w zestawie przewodu zasilającego (8), należy
podłączyć wyłączoną golarkę do gniazda elektrycznego.
• W przypadku pierwszego ładowania golarki lub nie używania jej przez kilka
miesięcy, należy podłączyć ją do ciągłego zasilania na 4 godziny.
• Po maksymalnym naładowaniu golarki, należy ją w czasie normalnego
użytkowania rozładować, a następnie ponownie maksymalnie naładować.
Pełne naładowanie zajmuje około 1 godziny.
• Pełne naładowanie akumulatora zapewnia 45 minut bezprzewodowego
golenia. Pełna gotowość baterii zostanie osiągnięta dopiero po kilku jej
rozładowaniach i ponownych naładowaniach.
• Jeżeli bateria golarki jest rozładowana, istnieje możliwość golenia z podłą-
czeniem za pomocą przewodu zasilającego bezpośrednio do gniazdka
elektrycznego.
• Szybkie, 5-minutowe ładowanie zapewnia czas pracy golarki wystarczający
na jedno ogolenie.
Nie wolno przez dłuższy
Kontrolka ładowania (4)
Zielona kontrolka informuje o stanie naładowania akumulatora. Zielona
kontrolka miga kiedy golarka jest ładowana lub włączona. Gdy akumulator
jest w pełni nałdowany, zielona kontrolka świeci na stałe, pod warunkiem,
że golarka jest podłączona do gniazdka sieciowego.
16

Wskaźnik rozładowania baterii (5)
W przypadku, gdy bateria jest na wyczerpaniu zapala się czerwona kontrolka.
Powinno jednak wystarczyć energii na dokończenie golenia.
Golenie
Należy włączyć golarkę za pomocą przycisku włącznik/wyłącznik (3).
Sprężyste folie golące dopasują się do kształtu każdej twarzy (rysunek).
Trymer do długich włosów (2)
Służy do przycinania baczków, wąsów i dłuższej brody.
Wskazówki dotyczące idealnego golenia na sucho
Dla najlepszych efektów golenia Braun poleca 3 proste zasady:
1. Należy się golić przed umyciem twarzy.
2. Golarka w czasie golenia zawsze powinna być prowadzona pod kątem
prostym w stosunku do golonej powierzchni.
3. Należy naciągnąć skórę i golić «pod włos», odwrotnie do kierunku
porostu włosów.
Do wstępnego golenia po kilku dniach przerwy w goleniu, użyj trymer do
długich włosów (2) aby skrócić długie włosy zarostu. Nasadka z folią
zapewni dokładne i gładkie wykończenie golenia.
Czyszczenie
Regularne czyszczenie zapewnia lepsze golenie. Opłukanie głowicy pod
bieżącą wodą po każdym goleniu, to najszybsza i najłatwiejsza droga do
utrzymania golarki w czystości i higienie.
• Włączyć golarkę (bezprzewodowo) i płukać głowicę pod bieżącą ciepłą
wodą aż wszystkie pozostałości zostaną usunięte.
płynie, jeżeli nie posiada żadnych grudkowatych składników np. ziarenek
do peelingu. Następnie należy dokładnie opłukać głowicę z mydła i
zostawić działającą golarkę na kilka dodatkowych sekund.
• Kolejnym krokiem jest wyłączenie golarki oraz wyjęcie kasety z folią golącą
i nożykami (1). Należy pozostawić wyjęte elementy do wyschnięcia.
• Jeżeli golarka jest regularnie czyszczona pod bieżącą wodą, to wystarczy
raz na tydzień nanieść kroplę lekkiego oleju maszynowego na trymer (2)
oraz na kasetę z folią i nożykami (1). W ten sposób zostaną nasmarowane
elementy golące, które wymagają takiej ochrony.
Można użyć mydła w
17

Golarka mo˝e byç tak˝e czyszczona przy pomocy szczoteczki:
• Należy wyłączyć golarkę a następnie wyjąć kasetę z folią golącą i nożykami.
Delikatnie stukając kasetą o płaską powierzchnię, trzeba wysypać wszelkie
zanieczyszczenia.
• Używając szczoteczki należy oczyścić głowicę golarki oraz jej okolice.
Absolutnie nie należy używać szczoteczki do czyszczenia kasety z folią i
nożykami, gdyż można ją uszkodzić.
Jak utrzymać golarkę w najlepszym stanie
Wskaźnik wymiany elementów golących / reset
Aby golarka zawsze działała na 100% swoich możliwości, należy co 18 miesięcy wymieniać kasetę z foliami i nożami (1). Przypomina o tym specjalny
wskaźnik wymiany elementów golących (6). Jeżeli elementy golące zużyją
się wcześniej, wskaźnik także o tym poinformuje.
Kasety z foliami golącymi oraz nożykami: 32S/32B
W ciągu następnych 7 goleń specjalna dioda będzie przypominać o
konieczności wymiany. Po tym czasie czyli po 7 goleniach, specjalny panel
zostanie automatycznie zresetowany a czas do następnej wymiany będzie
naliczany na nowo.
Po wymianie kasety z folią golącą i blokiem ostrzy (1), należy wcisnąć przycis (3) i przytrzymać przynajmniej przez 5 sekund, aby zresetować licznik.
W czasie wykonywania tej czynności wskaźnik będzie pulsować i wyłączy
się, kiedy reset golarki zostanie zakończony. Ręczne zresetowanie może być
przeprowadzone o każdej porze i w każdym momencie.
Konserwacja baterii
Aby zachować optymalną pojemność akumulatora golarki, należy go formatować raz na 6 miesięcy, czyli rozładować w czasie golenia a następnie naładować do pełna.
Uwaga dotycząca środowiska
Ten symbol oznacza, że zużytego sprzętu nie można wyrzucać
łącznie z odpadami socjalnymi. Produkt zawiera akumulatory i/ lub
recyklowalne odpady elektryczne. W celu ochronyśrodowiska, zużyty
produkt należy zostawić w jednym z punktów zbiórki zużytego sprzętu
elektrycznego i elektronicznego.
Powy˝sze informacje mogà ulec zmianie bez uprzedniego powiadomienia.
18

Specyfikacje elektryczne zosta∏y wydrukowane na specjalnym kablu
sieciowym.
Warunki gwarancji
1. Procter & Gamble International Operations SA z siedzibą w Route de
St-Georges 47, 1213 Petit Lancy 1 w Szwajcarii, gwarantuje sprawne
działanie sprzętu w okresie 24 miesięcy od daty jego wydania
Kupującemu. Ujawnione w tym okresie wady będą usuwane bezpłatnie,
przez autoryzowany punkt serwisowy, w terminie 14 dni od daty
dostarczenia sprzętu do autoryzowanego punktu serwisowego.
2. Kupujący może wysłać sprzęt do naprawy do najbliżej znajdującego się
autoryzowanego punktu serwisowego lub skorzystać z pośrednictwa
sklepu, w którym dokonał zakupu sprzętu. W takim wypadku termin
naprawy ulegnie wydłużeniu o czas niezbędny do dostarczenia i odbioru
sprzętu.
3. Kupujący powinien dostarczyć sprzęt w opakowaniu należycie
zabezpieczonym przed uszkodzeniem. Uszkodzenia spowodowane
niedostatecznym zabezpieczeniem sprzętu nie podlegają naprawom
gwarancyjnym. Naprawom gwarancyjnym nie podlegają także inne
uszkodzenia powstałe w następstwie okoliczności, za które Gwarant nie
ponosi odpowiedzialności, w szczególności zawinione przez Pocztę
Polską lub firmy kurierskie.
4. Niniejsza gwarancja jest ważna jedynie z dokumentem zakupu i
obowiązuje wyłącznie na terytorium Rzeczypospolitej Polskiej.
5. Okres gwarancji przedłuża się o czas od zgłoszenia wady lub
uszkodzenia do naprawy sprzętu i zwrotnego postawienia go do
dyspozycji Kupującego.
6. Naprawa gwarancyjna nie obejmuje czynności przewidzianych w
instrukcji, do wykonania, których Kupujący zobowiązany jest we
własnym zakresie i na własny koszt.
7. Ewentualne oczyszczenie sprzętu dokonywane jest na koszt Kupującego
według cennika danego autoryzowanego punktu serwisowego i nie
będzie traktowane jako naprawa gwarancyjna, chyba, że oczyszczenie
jest niezbędne do usunięcia wady w ramach świadczeń objętych
niniejszą gwarancją i nie stanowi czynności, o których mowa w p. 6.
8. Gwarancją nie są objęte:
a) mechaniczne uszkodzenia sprzętu spowodowane w czasie jego
użytkowania lub w czasie dostarczania sprzętu do naprawy;
19

b) uszkodzenia i wady wynikłe na skutek:
– używania sprzętu do celów innych niż osobisty użytek;
– niewłaściwego lub niezgodnego z instrukcją użytkowania,
konserwacji, przechowywania lub instalacji;
– używania niewłaściwych materiałów eksploatacyjnych;
– napraw dokonywanych przez nieuprawnione osoby; stwierdzenie
faktu takiej naprawy lub samowolnego otwarcia plomb lub innych
zabezpieczeń sprzętu powoduje utratę gwarancji;
– przeróbek, zmian konstrukcyjnych lub używania do napraw
nieoryginalnych części zamiennych;
c) części szklane, żarówki, oświetlenia;
d) ostrza i folie do golarek oraz materiały eksploatacyjne.
9. Bez nazwy, modelu sprzętu i daty jego zakupu potwierdzonej pieczątką i
podpisem sprzedawcy albo paragonu lub faktury zakupu z nazwą i
modelem sprzętu, karta gwarancyjna jest nieważna.
10. Niniejsza gwarancja na sprzedany towar konsumpcyjny nie wyłącza, nie
ogranicza ani nie zawiesza uprawnień Kupującego wynikających z
niezgodności towaru z umową.
20
Český
Naše výrobky jsou vyrobeny tak, aby splňovaly nejvyšší nároky na kvalitu,
funkčnost a design. Doufáme, že budete se svým novým holicím strojkem
Braun spokojeni.
Tyto pokyny si důkladně prostudujte, jelikož obsahují bezpečnostní
informace. Ponechejte si je pro potřebu do budoucna.
Výstraha
Tento holicí strojek je vybaven speciálním síťovým přívodem
s integrovaným bezpeč-nostním síťovým adaptérem.
Nevyměňujte ani nerozebírejte žádnou z jeho částí, jinak by
mohlo dojít k úrazu elektrickým proudem. Používejte pouze
speciální napájecí kabel dodávaný s přístrojem.
Tento přístroj je možné čistit pod tekoucí vodou.
Před čištěním holicí hlavy vodou odpojte holicí strojek
ze sítě.
Přístroj nepoužívejte, je-li poškozena planžeta nebo vadný
síťový přívod.
Tento přístroj mohou používat děti ve věku od 8 let a osoby
se sníženými fyzickými, smyslovými nebo duševními
schopnostmi nebo bez patřičných zkušeností a znalostí,
pokud jim byl zajištěn dohled nebo pokud jim byly poskytnuty pokyny týkající se bezpečného používání spotřebiče
a pokud chápou související rizika. Děti by si s přístrojem
neměly hrát. Děti by neměly provádět čištění a uživatelskou
údržbu, pokud nejsou starší 8 let a pokud nemají zajištěn
dohled.
Popis
1 Kazeta s planžetou a břitovým blokem
2 Zastřihovač dlouhých vousů
21

3 Spínač zapnutý/vypnutý
4 Kontrolka nabíjení (zelená)
5 Kontrolka nízkého nabití (červená)
6 Kontrolka výměny holicích dílů
7 Síťová zásuvka holicího strojku
8 Speciální síťový přívod
9 Ochranný nástavec
Nabíjení
Doporučená okolní teplota pro nabíjení je 5 °C až 35 °C. Za extrémně nízkých
nebo vysokých teplot se baterie nemusí nabíjet správně nebo vůbec.
Doporučená okolní teplota pro holení je 15 °C až 35 °C.
Nevystavujte přístroj po delší dobu teplotám vyšším než 50 °C.
• Pomocí speciálního síťového přívodu (8) připojte holicí strojek k zásuvce
elektrické sítě, přičemž holicí strojek je vypnutý.
• Pokud holicí strojek nabíjíte poprvé nebo jste ho několik měsíců nepoužíval,
nechte holicí strojek nabíjet nepřetržitě 4 hodiny.
• Jakmile je holicí strojek plně nabitý, vybijte jej normálním používáním,
a pak znovu nabijte na plnou kapacitu. Další dobíjení budou trvat zhruba
1 hodinu.
• Plné nabití umožňuje až 45 minut holení bez síťového přívodu, v závislosti
na vzrůstu vašich vousů. Maximální kapacity baterie se však dosáhne až
po několika cyklech nabíjení/vybíjení.
• Pokud je akumulátorová baterie vybita, můžete se také holit holicím stroj-
kem, připojeným k síti pomocí speciálního síťového přívodu.
• Pětiminutové rychlonabíjení postačí na jedno oholení bez síťového
přívodu.
Kontrolka nabíjení (4)
Zelená kontrolka nabíjení indikuje stav baterií. Zelená kontrolka bliká, pokud
se holicí strojek nabíjí nebo je zapnutý.
Je-li baterie zcela nabitá, zelená kontrolka nabíjení trvale svítí, pokud je
holicí strojek připojený v elektrické zásuvce.
Kontrolka nízkého nabití (5)
Při poklesu kapacity baterie začne blikat červený dílek, indikující slabé nabití
baterie. Zbývající kapacita pak postačí na dokončení holení.
22

Holení
Pro zahájení provozu holicího strojku stiskněte spínač (3) – viz obrázek.
Výkyvný holicí systém se automaticky přizpůsobuje všem konturám vašeho
obličeje (viz obrázek).
Zastřihovač dlouhých vousů (2)
Při zastřihování kotlet, knírku nebo bradky vysuňte zastřihovač dlouhých
vousů směrem nahoru.
Tipy pro dokonalé suché oholení
Pro dosažení nejlepších výsledků vám Braun doporučuje 3 jednoduché kroky:
1. Holte se vždy před mytím obličeje.
2. Holicí strojek držte vždy v pravém úhlu (90°) k pokožce.
3. Napněte pokožku a holte se proti směru růstu vousů.
Pokud jste se několik dní neholil, použijte před holením nejprve zastřihovač
vousů (2) pro zkrácení delších vousů. Důkladné a hladké oholení dokončete
pomocí holicí planžety.
Čištění
Pravidelným čištěním zlepšíte holicí výkon vašeho holicího strojku.
Propláchnutí holicí hlavy pod tekoucí vodou po každém holení představuje
rychlý a snadný způsob jak udržovat holicí strojek čistý:
• Zapněte holicí strojek (bez připojeného kabelu) a proplachujte jeho hlavu
horkou tekoucí vodou, dokud z ní neodstraníte všechny nečistoty.
použít tekuté mýdlo bez abrazivních složek. Opláchněte všechnu pěnu a
nechte holicí strojek ještě několik sekund běžet.
• Poté holicí strojek vypněte a sejměte kazetu s holicí planžetou a břitovým
blokem (1). Demontované holicí díly nechte oschnout.
• Pokud čistíte holicí strojek pod tekoucí vodou pravidelně, promažte každý
týden zastřihovač dlouhých vousů (2) a na povrch kazety s planžetou a
břitovým blokem (1) naneste kapku jemného oleje na šicí stroje.
Můžete
Holicí strojek můžete alternativně čistit pomocí kartáčku:
• Vypněte holicí strojek, sejměte kazetu s planžetou a břitovým blokem a
jemně ji vyklepejte na ploché podložce.
• Pomocí kartáčku vyčistěte vnitřní část holicí hlavy. Kartáček však nepou-
žívejte na čištění kazety holicí planžety a břitového bloku – tyto díly byste
tak mohli poškodit.
23

Udržování holicího strojku ve špičkové formě
Kontrolka výměny holicích dílů / Resetování
Aby byl udržen 100% holicí výkon, vyměňte kazetu s holicí planžetou a
břitovým blokem (1) vždy, když se rozsvítí kontrolka výměny holicích dílů (6)
(po cca 18 měsících), nebo když jsou holicí díly opotřebovány.
Kazeta s planžetou a břitovým blokem: 32S/32B
Kontrolka výměny vám bude v průběhu následujících 7 holení připomínat
nutnost výměny kazety holicí planžety a břitového bloku. Pak holicí strojek
automaticky resetuje displej.
Po výměně holicí planžety a břitového bloku (1) stiskněte na minimálně
5 sekund tlačítko zapnutý/vypnutý (3), čímž resetujete čítač.
V průběhu resetování bude blikat kontrolka výměny, která po dokončení
resetování zhasne. Manuální resetování se může provést kdykoli.
Ochrana akumulátorových baterií
Pro udržení optimální kapacity akumulátorových baterií by měl být holicí
strojek (normálním holením) plně vybit každých cca 6 měsíců. Poté holicí
strojek nabijte na plnou kapacitu.
Poznámka k ochraně životního prostředí
Produkt obsahuje baterie a/nebo recyklovatelné elektrické prvky.
Chraňte životní prostředí! Přístroj nevyhazujte do komunálního
odpadu, ale odevzdejte jej v místním sběrném středisku elektrického
odpadu.
Deklarovaná hodnota emise hluku tohoto spotfiebiãe je 63 dB(A), coÏ
pfiedstavuje hladinu A akustického v˘konu vzhledem na referenãní
akustick˘ v˘kon 1 pW.
Změny jsou vyhrazeny.
Elektrikáfiské specifikace najdete v návodu na speciální sadû ‰ÀÛr.
24

Záruka
Poskytujeme dvojletou záruku na výrobek s platností od data jeho
zakoupení. V záruční lhůtě bezplatně odstraníme všechny vady přístroje
zapříčiněné chybou materiálu nebo výroby, a to buď formou opravy, nebo
výměnou celého přístroje (podle našeho vlastního uvážení). Uvedená záruka
je platná v každé zemi, ve které tento přístroj dodává společnost Braun
nebo její pověřený distributor.
Záruka se netýká následujících případů: poškození zapříčiněné nesprávným
použitím, běžné opotřebování (například plátků holicího strojku nebo
pouzdra zastřihávače), jakož i vady, které mají zanedbatelný dosah na
hodnotu nebo funkci přístroje. Pokud opravu uskuteční neautorizovaná
osoba a nebudou-li použity původní náhradní díly společnosti Braun,
platnost záruky bude ukončena.
Pokud v záruční lhůtě požadujete provedení servisní opravy, odevzdejte
celý přístroj s potvrzením o nákupu v autorizovaném servisním středisku
společnosti Braun nebo jej do střediska zašlete.
25
Loading…
Скачать
www.braun.com
cruZer
cruZer
6
beard&head
cruZer
5
beard
Type 5418
Type 5417
99748834_beard-head_CEE_S1.indd 1
99748834_beard-head_CEE_S1.indd 1
21.03.11 13:55
21.03.11 13:55
Stapled booklet, 105×148 mm, 68 p (incl. 8 p cover), 2/2c = black + cyan
A good user manual
The rules should oblige the seller to give the purchaser an operating instrucion of Braun Cruzer 5 Beard, along with an item. The lack of an instruction or false information given to customer shall constitute grounds to apply for a complaint because of nonconformity of goods with the contract. In accordance with the law, a customer can receive an instruction in non-paper form; lately graphic and electronic forms of the manuals, as well as instructional videos have been majorly used. A necessary precondition for this is the unmistakable, legible character of an instruction.
What is an instruction?
The term originates from the Latin word „instructio”, which means organizing. Therefore, in an instruction of Braun Cruzer 5 Beard one could find a process description. An instruction’s purpose is to teach, to ease the start-up and an item’s use or performance of certain activities. An instruction is a compilation of information about an item/a service, it is a clue.
Unfortunately, only a few customers devote their time to read an instruction of Braun Cruzer 5 Beard. A good user manual introduces us to a number of additional functionalities of the purchased item, and also helps us to avoid the formation of most of the defects.
What should a perfect user manual contain?
First and foremost, an user manual of Braun Cruzer 5 Beard should contain:
— informations concerning technical data of Braun Cruzer 5 Beard
— name of the manufacturer and a year of construction of the Braun Cruzer 5 Beard item
— rules of operation, control and maintenance of the Braun Cruzer 5 Beard item
— safety signs and mark certificates which confirm compatibility with appropriate standards
Why don’t we read the manuals?
Usually it results from the lack of time and certainty about functionalities of purchased items. Unfortunately, networking and start-up of Braun Cruzer 5 Beard alone are not enough. An instruction contains a number of clues concerning respective functionalities, safety rules, maintenance methods (what means should be used), eventual defects of Braun Cruzer 5 Beard, and methods of problem resolution. Eventually, when one still can’t find the answer to his problems, he will be directed to the Braun service. Lately animated manuals and instructional videos are quite popular among customers. These kinds of user manuals are effective; they assure that a customer will familiarize himself with the whole material, and won’t skip complicated, technical information of Braun Cruzer 5 Beard.
Why one should read the manuals?
It is mostly in the manuals where we will find the details concerning construction and possibility of the Braun Cruzer 5 Beard item, and its use of respective accessory, as well as information concerning all the functions and facilities.
After a successful purchase of an item one should find a moment and get to know with every part of an instruction. Currently the manuals are carefully prearranged and translated, so they could be fully understood by its users. The manuals will serve as an informational aid.