
Умный дом
Умный дом
Hi Oazo HO-WT-1 (11,6 МБ).pdf
HiOazo HO-WT-1S (2,5 МБ).pdf
INKBIRD HO-WT-1 (11,6 МБ).pdf
INKBIRD IBS-M1 (1,7 МБ).pdf
INKBIRD IBS-M2 (3,2 МБ).pdf
INKBIRD IBS-M2S+ITH-20R3 (2,8 МБ).pdf
INKBIRD IBS-TH1 (844,1 КБ).pdf
INKBIRD IBS-TH1 MINI (2,2 МБ).pdf
INKBIRD IBS-TH1 PLUS (2,3 МБ).pdf
INKBIRD IBS-TH2 (2,6 МБ).pdf
INKBIRD IBS-TH2 Plus (2,3 МБ).pdf
INKBIRD IBS-TH2H (2,8 МБ).pdf
INKBIRD IBS-TH3-WIFI (1,7 МБ).pdf
INKBIRD IBS-TH3PLUS (2 МБ).pdf
INKBIRD IBS-TH5 (783,2 КБ).pdf
INKBIRD IRC_RW1 (2,9 МБ).pdf
INKBIRD ITH-10 (890,4 КБ).pdf
INKBIRD ITH-12S (1,3 МБ).pdf
INKBIRD ITH-20 (776,7 КБ).pdf
INKBIRD ITH-20R (954,2 КБ).pdf
INKBIRD Weather Station (1,7 МБ).pdf
Для работы проектов iXBT.com нужны файлы cookie и сервисы аналитики.
Продолжая посещать сайты проектов вы соглашаетесь с нашей
Политикой в отношении файлов cookie
Сегодня расскажу об универсальном термометре\гигрометре INKBIRD ITH-20R, к которому можно подключать внешние датчики, соединяемые с головным устройством на радио частоте 433 Mhz. Всего может быть подключено до 3 датчиков, к каждому из которых можно дополнительно присоединить выносной щуп. Благодаря этим возможностям устройство можно использовать, как в помещении, так и на открытом воздухе (внешние датчики имеют защиту от дождя). И даже в жидкостях (благодаря щупу), например в бассейне или аквариуме. При этом все показания выводятся на экран и переключаются нажатием одной кнопки.
Видео версия обзора
Технические характеристики и возможности INKBIRD ITH-20R
Измерение температуры:
- Внутренний блок (с экраном): от -20°C до +60°C
- Внешние датчики: от -40°C до +70°C
- Измерение щупом: от-50°C до+125°C
- Шаг измерения температуры 0.1°C
- Точность измерений температуры +- 1°C
Измерение влажности:
- от 10% до 95% (и внутренний и внешний датчик)
- Шаг измерения влажности 1%
- Точность измерений +-5%
Все измерения можно проводить одновременно. Частота измерений — каждые 10 секунд.
Передатчик:
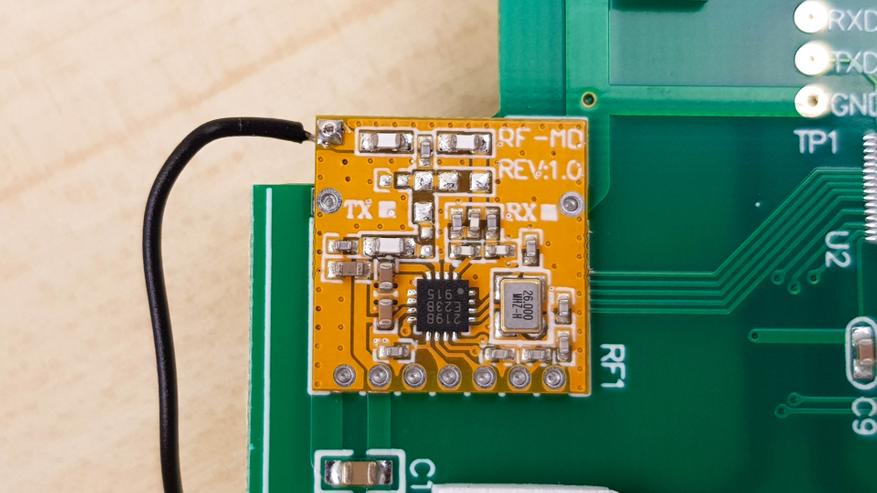
- Частота передатчика: 433MHz
- Максимально допустимое расстояние до базы: около 90 метров
- Количество одновременно подключенных передатчиков: от 1 до 3
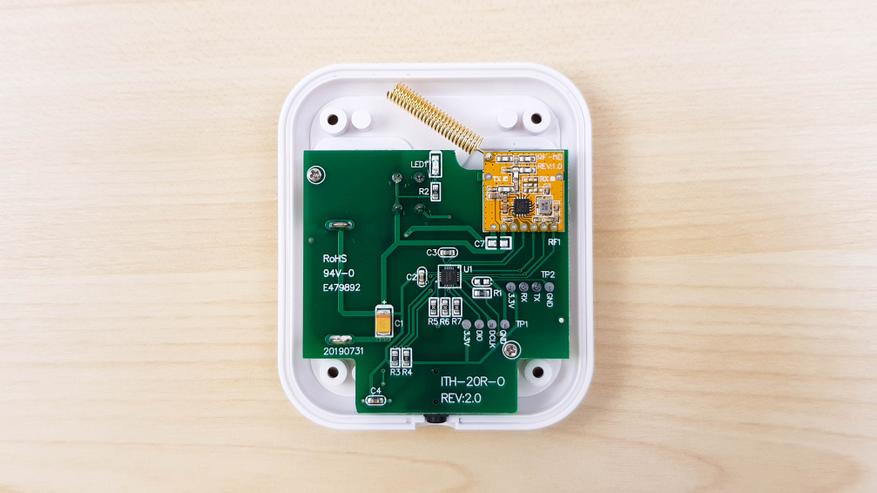
Размеры приемника (он же база) и передатчика (он же внешний датчик) идентичны: 75mm*64mm*21mm.
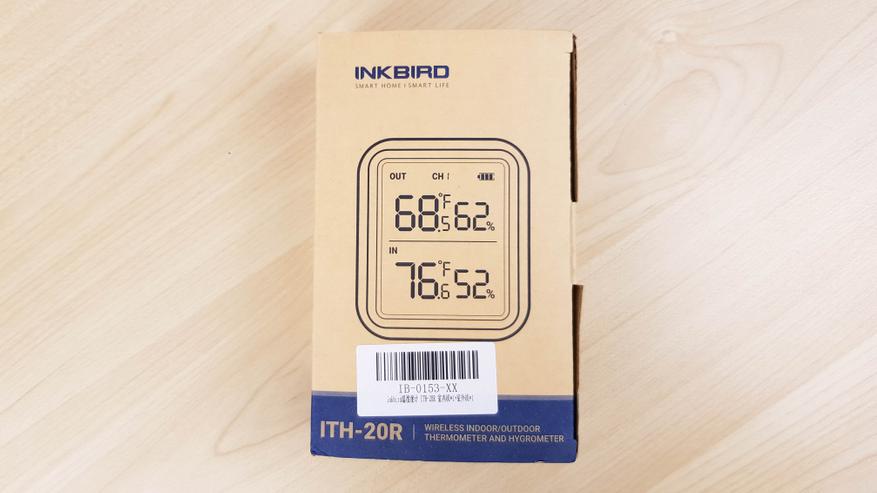
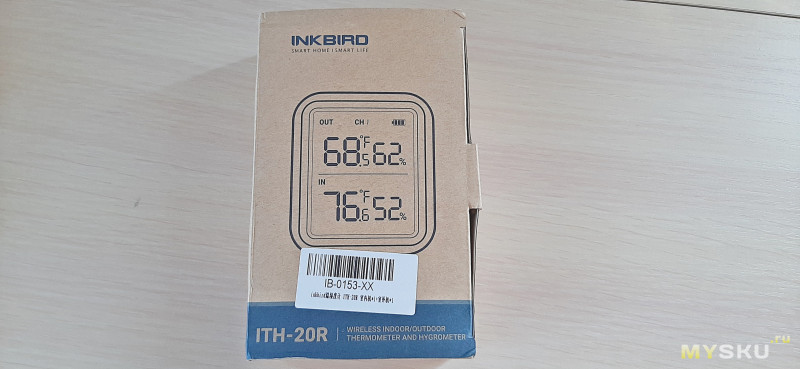
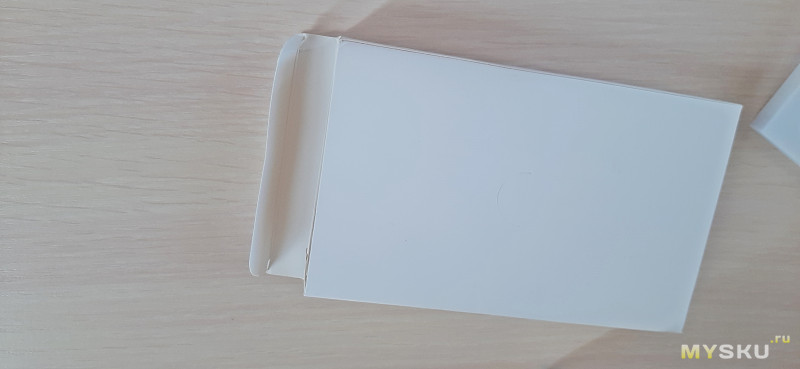
Давайте рассмотрим все в подробностях. Миниатюрная упаковка с изображением прибора и наименованием модели.
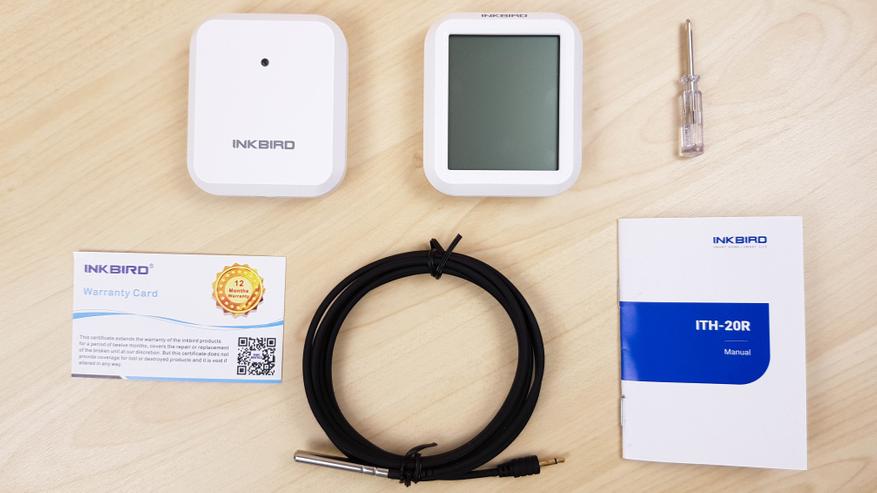
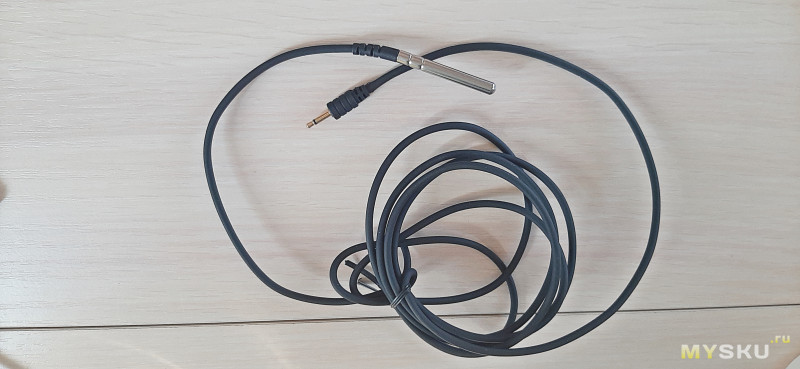
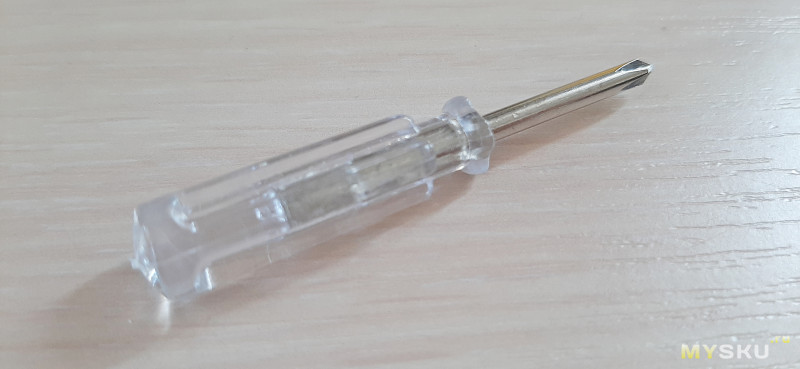
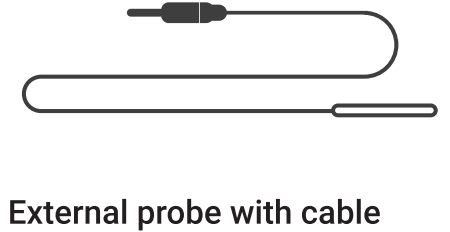
Я выбрал вариант с одним дополнительным внешним датчиком. Кроме головного устройства и передатчика, в комплекте есть съемный щуп (длина 2 метра), документация и крохотная отвертка.
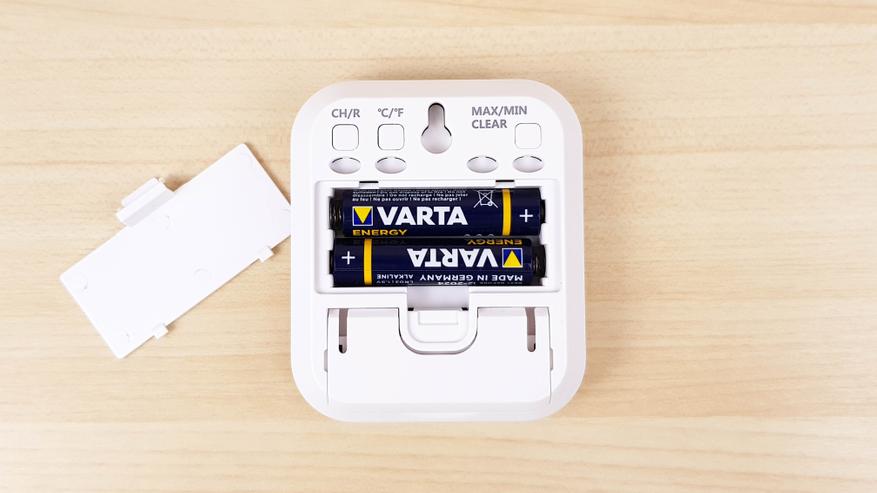
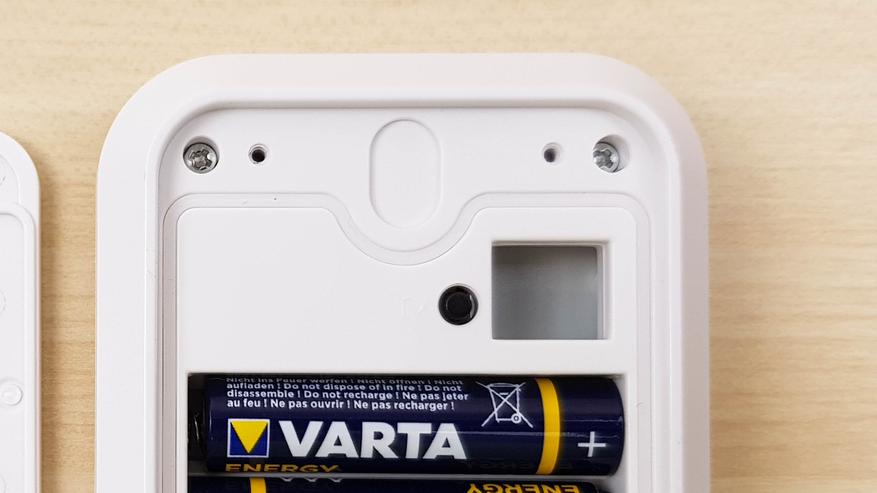
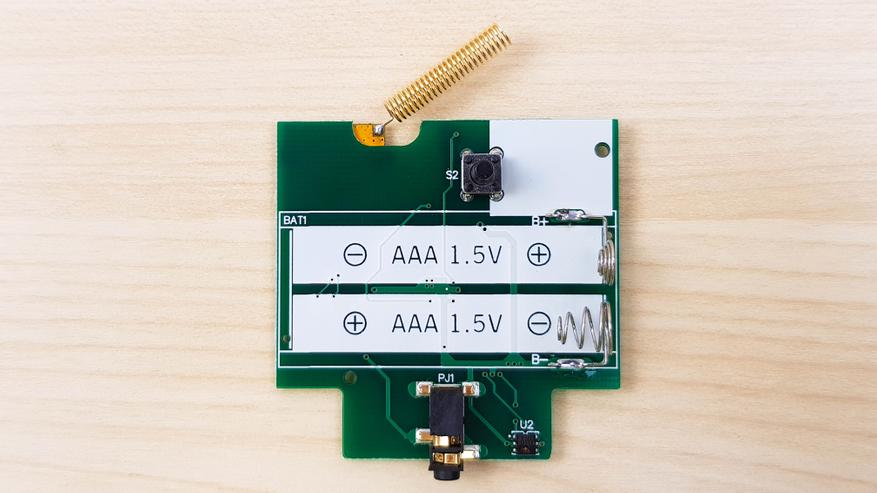
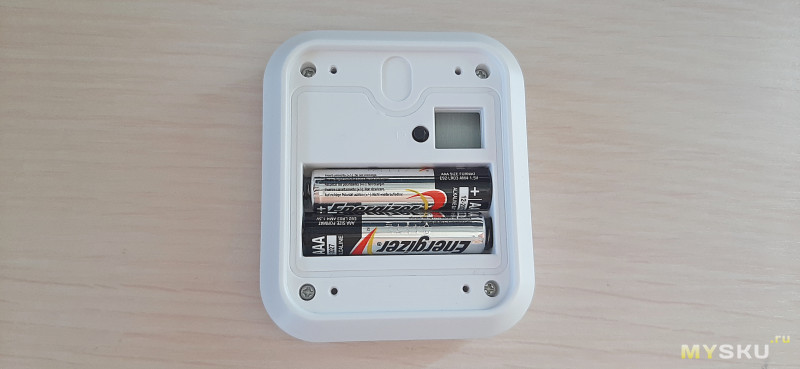
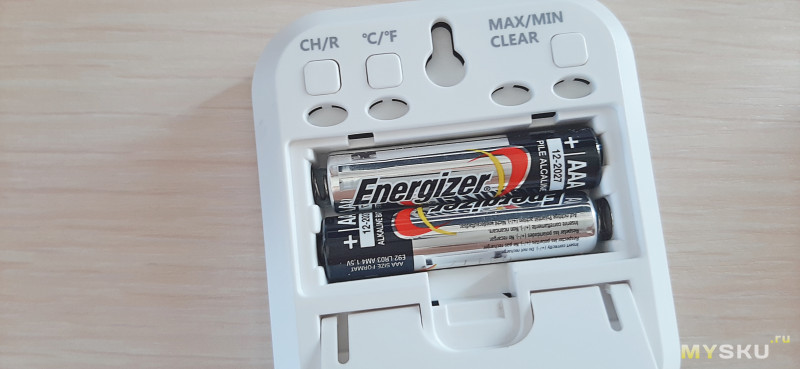
Питается устройство от 2 AAA батареек. В комплекте не идут, нужно покупать отдельно.
Тоже самое во внешних датчиках. Только там, чтобы добраться до батареек, нужно раскрутить 4 винта и снять крышку, которая обеспечивает защиту от дождя. Для достижения водозащиты между крышкой и корпусом также использовали силиконовую вставку.

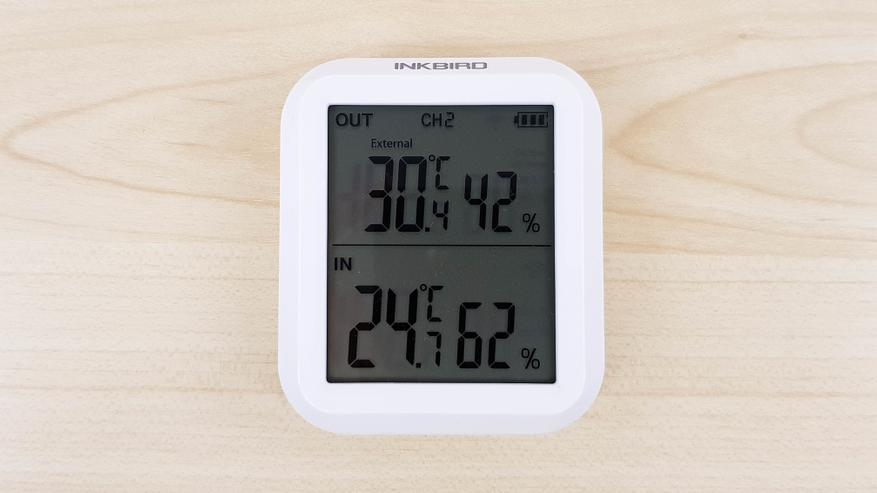
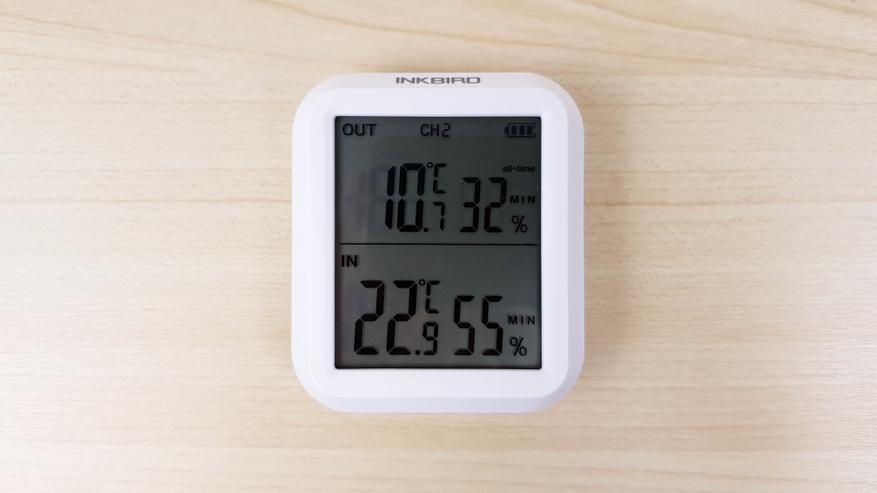
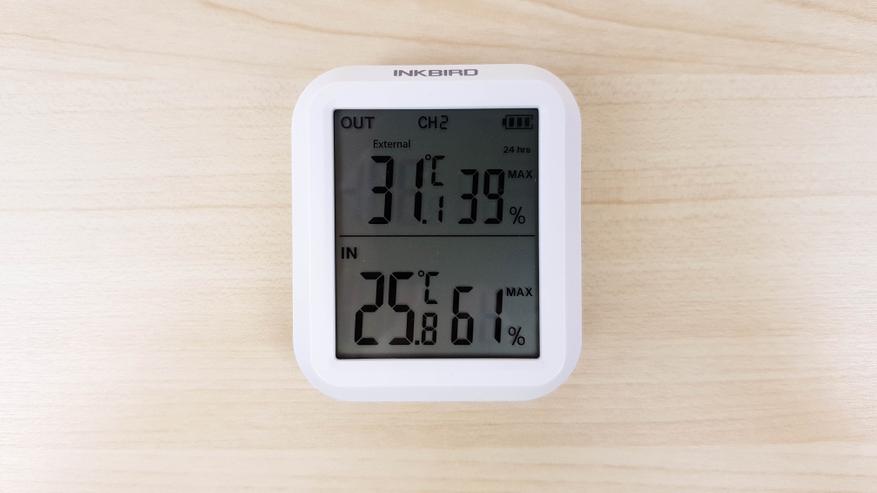
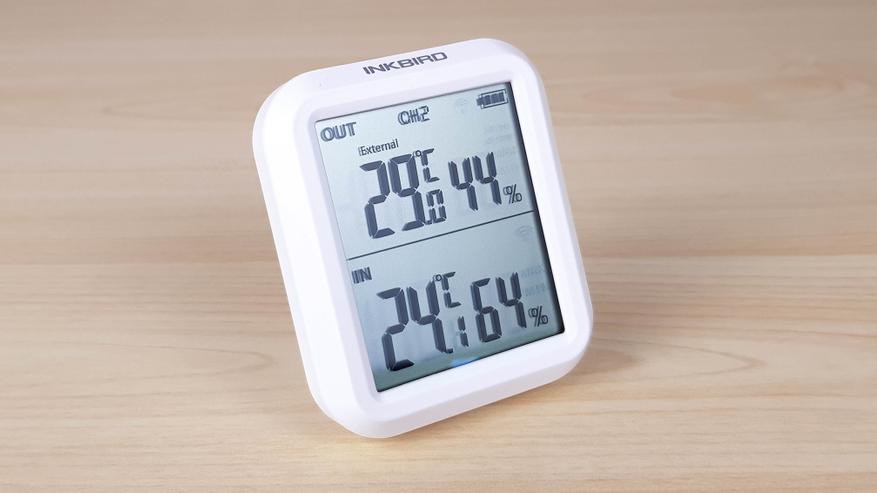
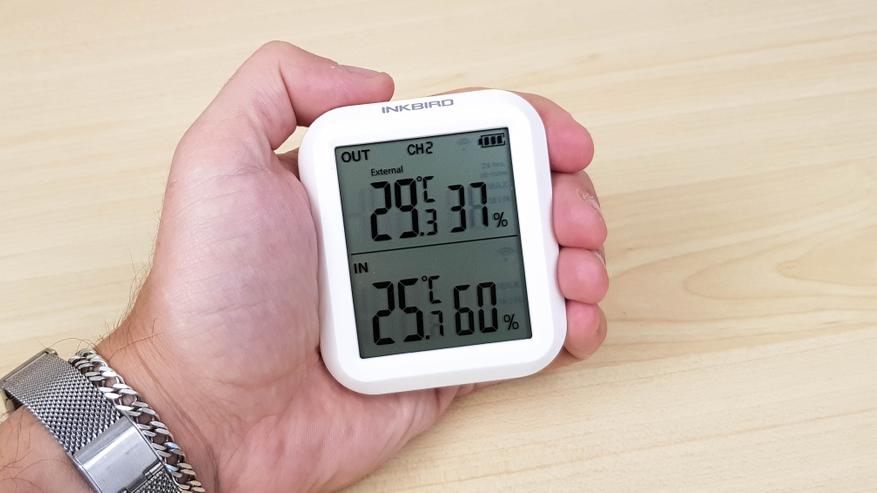
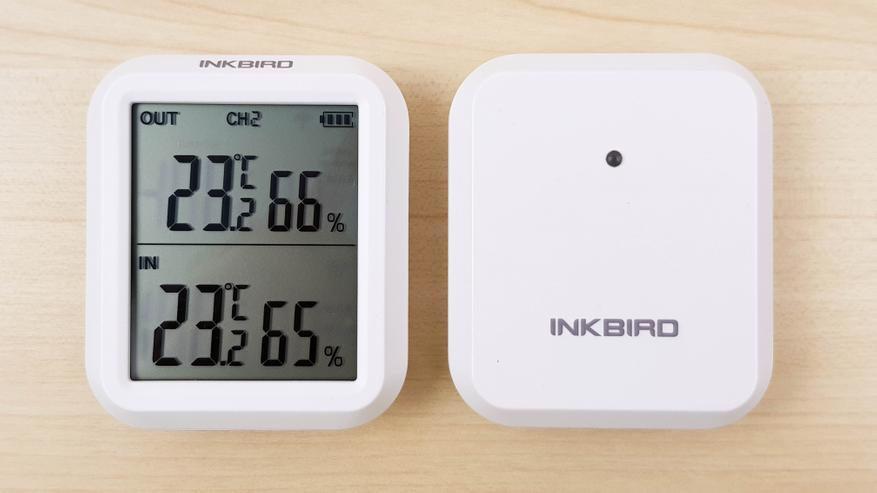
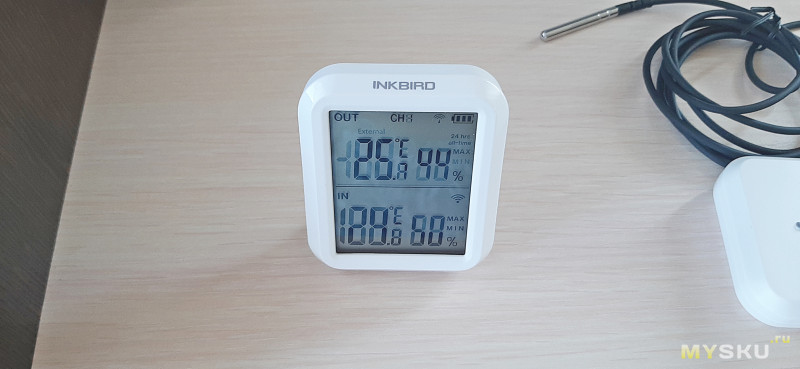
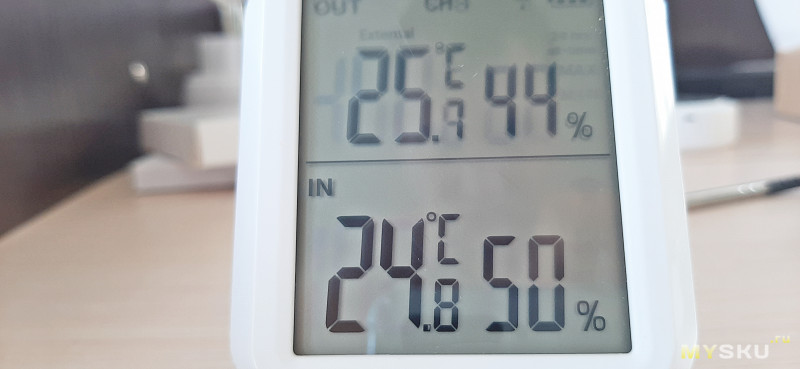
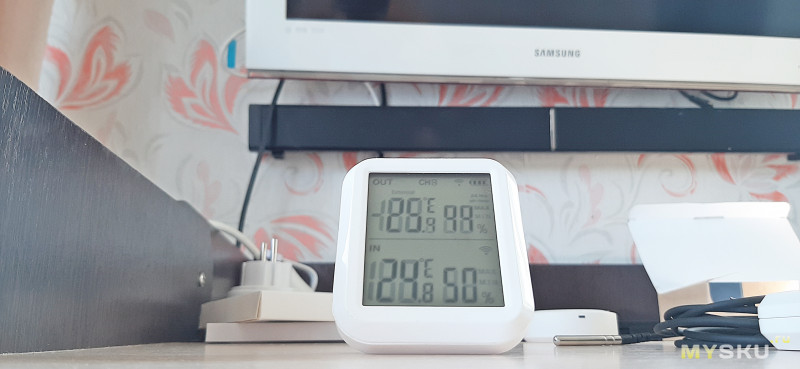
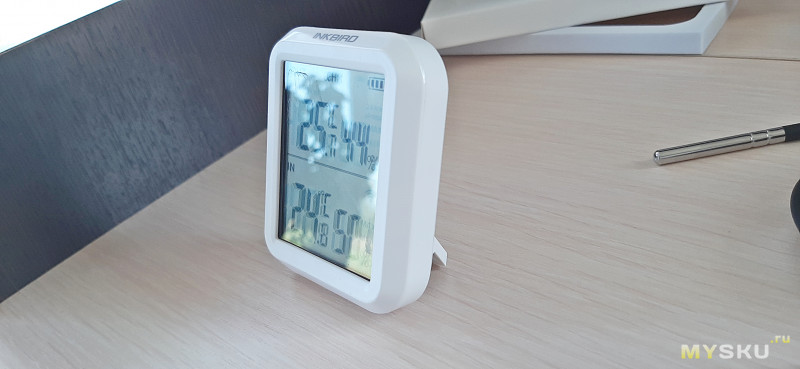
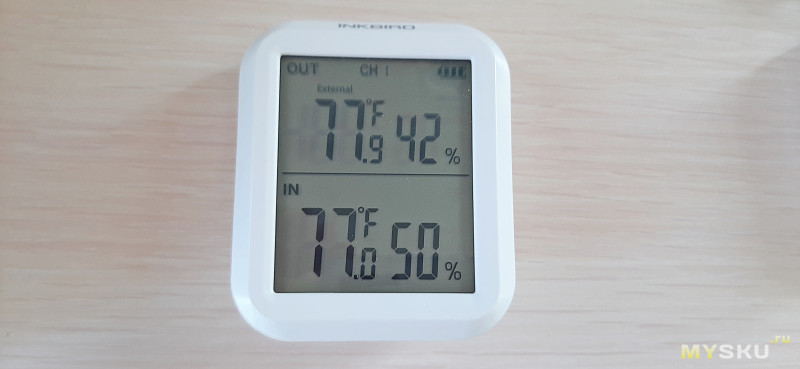
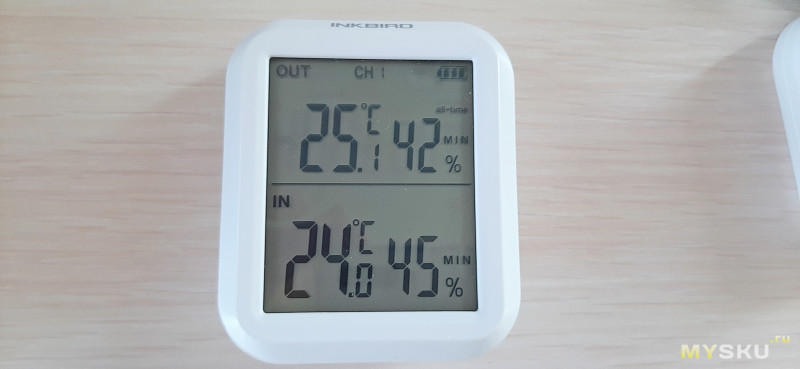
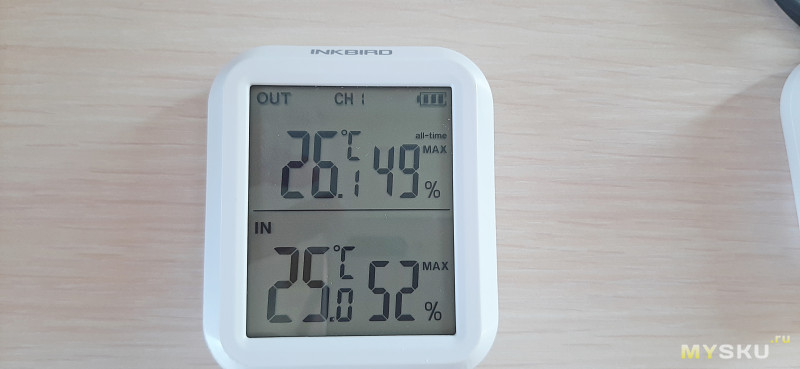
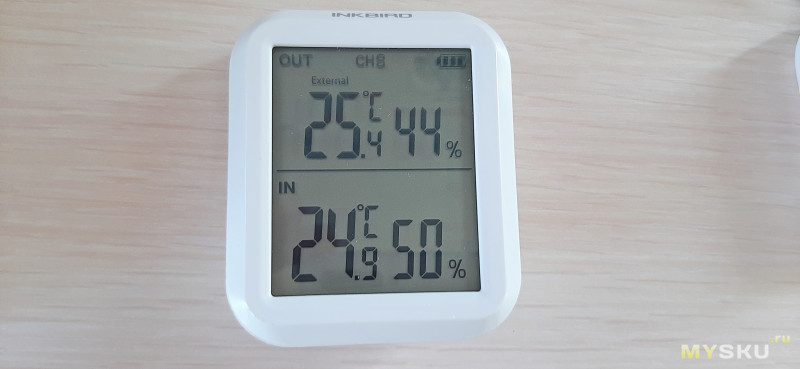
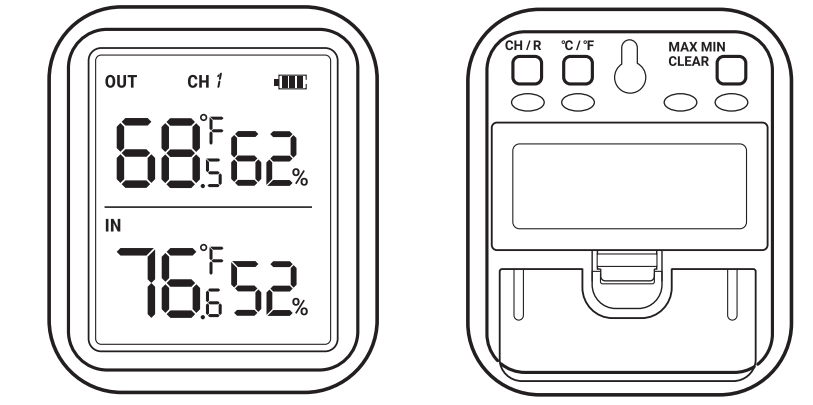
Экран разделен на 2 части. В нижней — показания внутреннего датчика, т.е температура и влажность в комнате где стоит головное устройство. Верхняя часть для внешних датчиков. Если будет подключен щуп, то показания будут каждые несколько секунд переключаться с внешнего датчика на щуп. Показания с щупа помечаются надписью External. Если у вас несколько датчиков, то переключаете каналы при помощи кнопки на задней части.
Можно также посмотреть максимальные и минимальные показатели за все время или за 24 часа.
Экран читается хорошо, активной подсветки нет. Как и у любого другого жидкокристаллического экрана, чем ярче внешнее освещение, тем лучше видно его содержимое. Углы обзора конечно слабые, сбоку все неплохо.
А вот сверху или снизу уже ничего не разобрать.
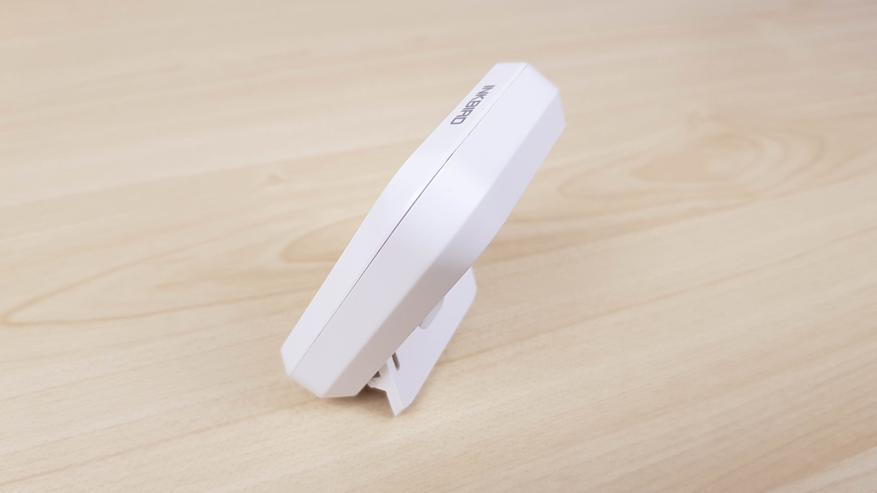
Размеры компактные, внешний вид аккуратный.
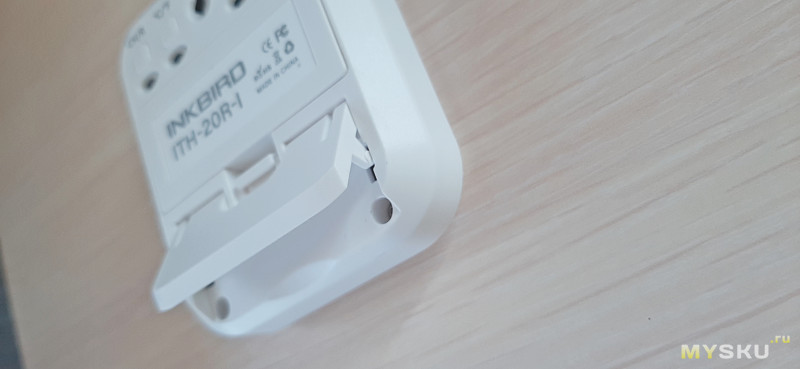
Можно повесить на стену, для этого предусмотрено специальное отверстие.
Можно также поставить на полочку, предусмотрена откидная ножка.
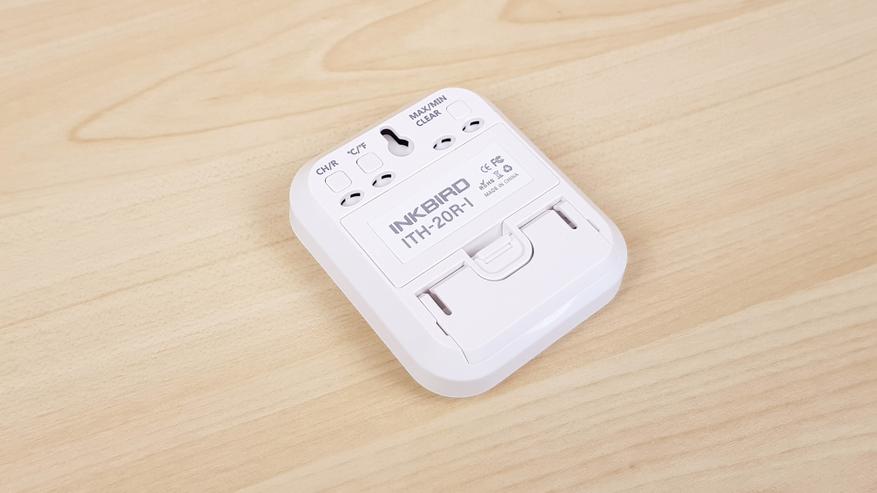
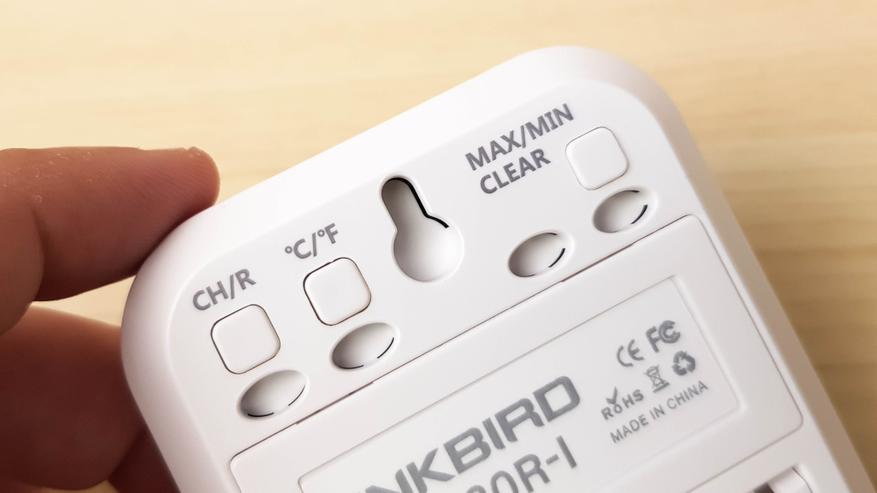
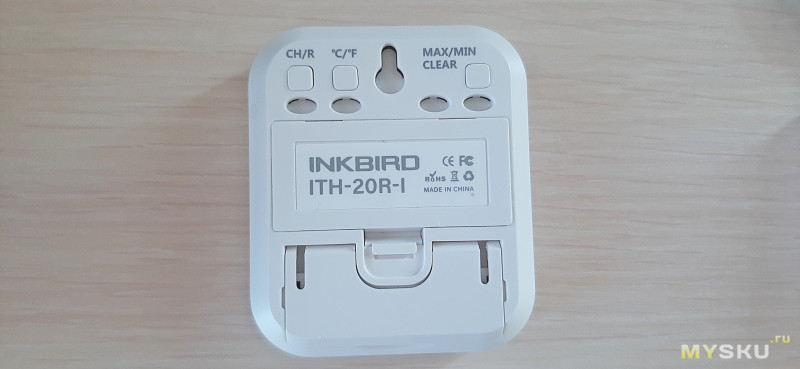
На задней части разместили 3 кнопки. Первая переключает каналы, чтобы посмотреть показания на разных датчиках. Вторая переключает единицы измерения температуры с градусов Цельсия на Фаренгейта. Третья позволяет посмотреть максимальные/минимальные значения, которые были зафиксированы за все время или за сутки. Длительное нажатие обнуляет показания.
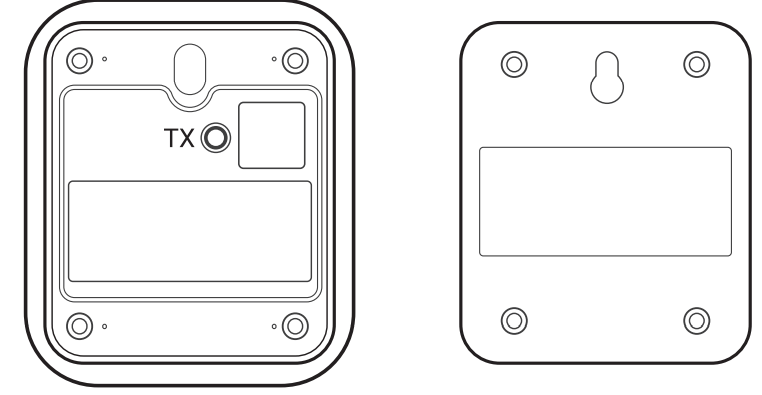
Внешний датчик имеет абсолютно идентичные размеры, но у него отсутствует экран. Все показания он передает на головное устройство. По центру разместили небольшой светодиод, который мигает при синхронизации.
С обратной стороны все чисто. Есть отверстие для того, чтобы повесить датчик на стену.
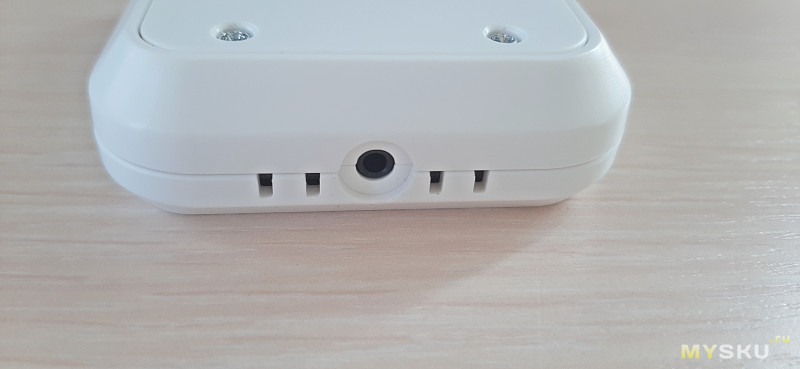
В нижней части отверстия для доступа воздуха к датчику влажности и разъем для подключения дополнительного щупа.
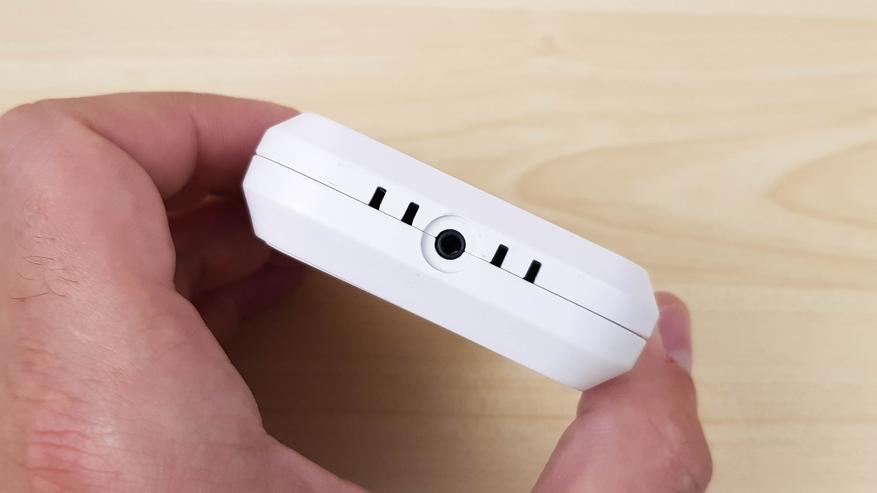
Кнопка TX спрятана под крышкой, она нужна для синхронизации (кратковременное нажатие) и отмены сопряжения (удерживать 5 секунд).
Далее небольшие тесты. Первым делом после синхронизации я проверил показатели температуры и влажности, оставив их в одной комнате на небольшое время. Градусы совпали полностью, по влажности расхождение в 1%. Очень хорошие показатели.
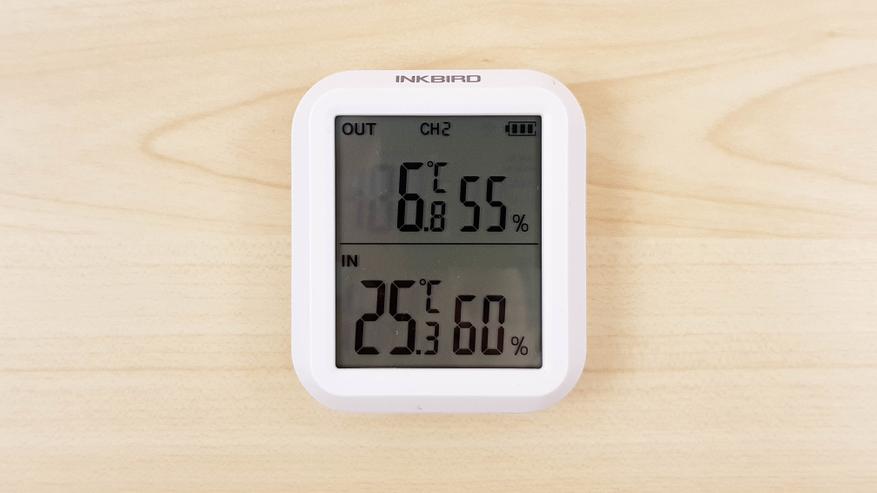
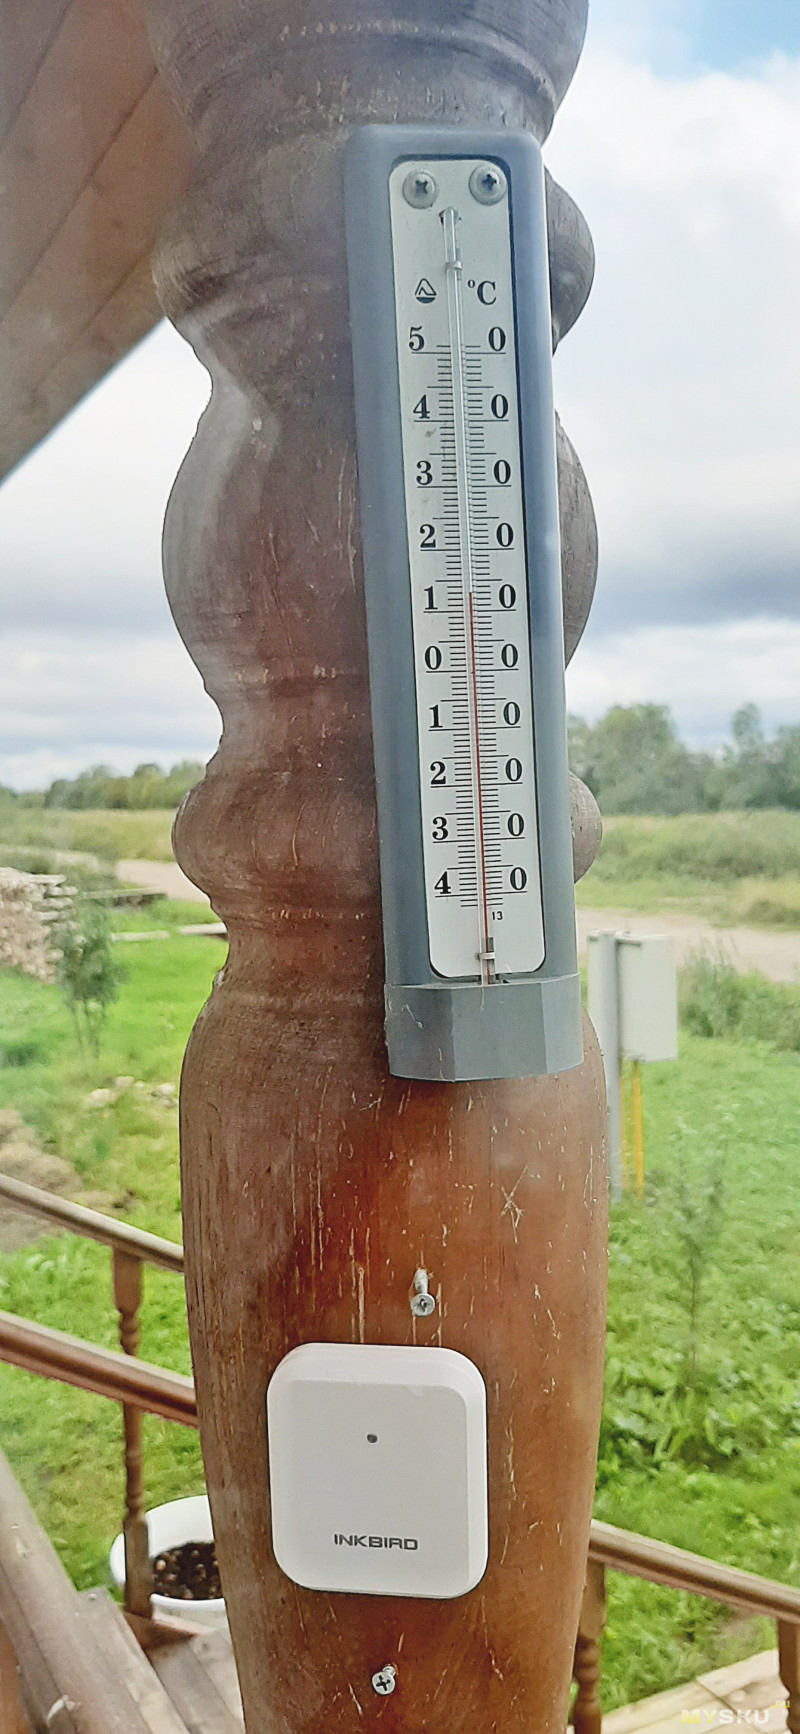
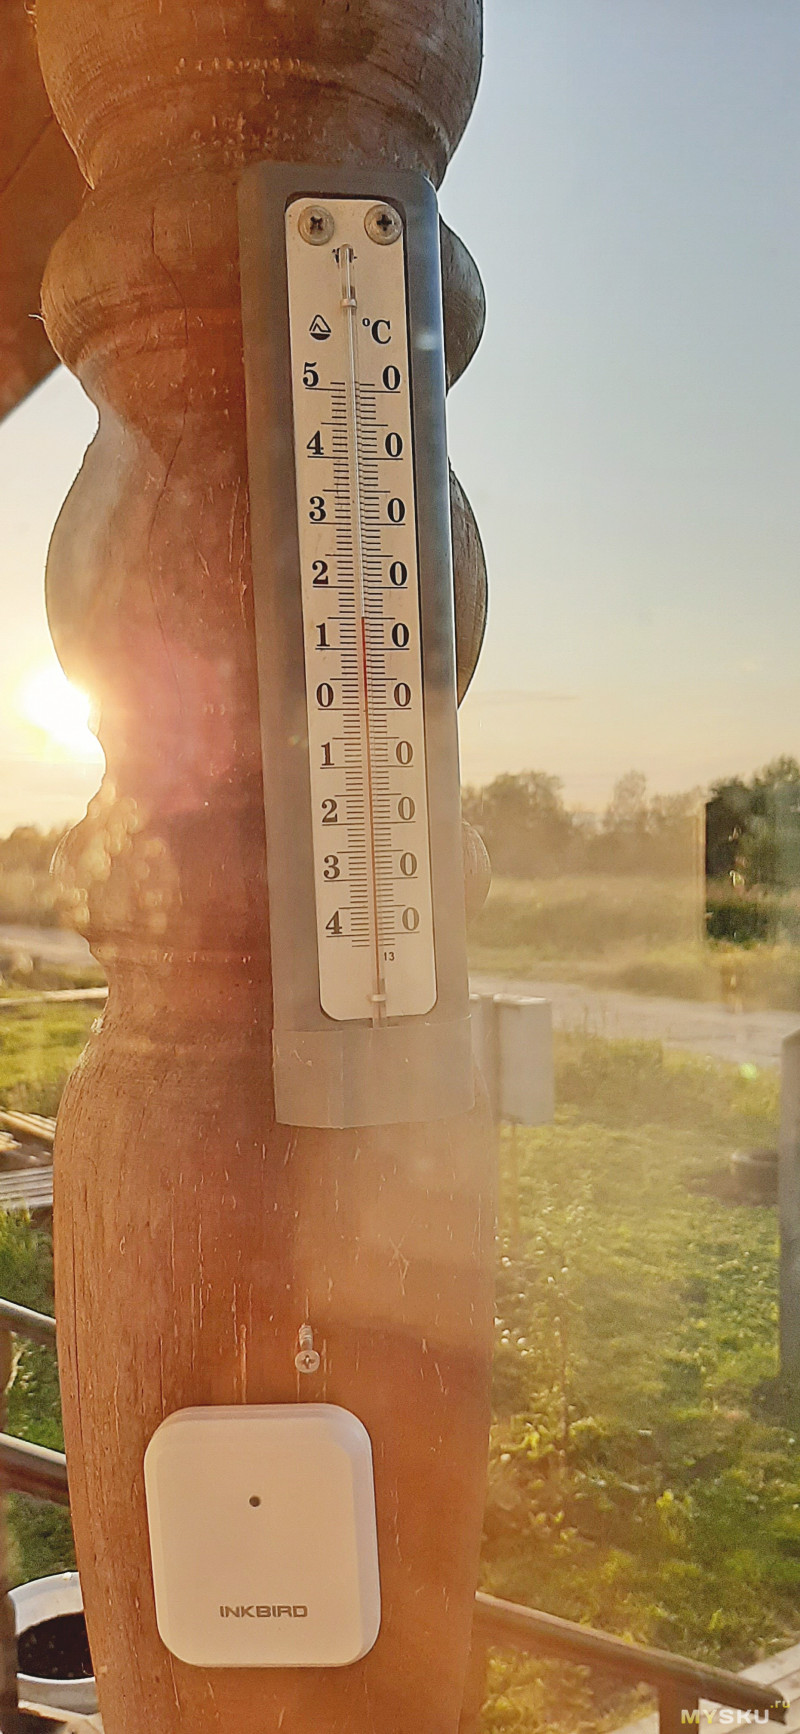
Далее поэкспериментировал с сигналом. На открытом пространстве сигнал передавался на расстоянии более 100 метров, что даже больше заявленного. Но если есть стены, то расстояние существенно уменьшается. Как бы там нибыло, разместив внешний датчик за окном балкона, а внутренний на кухне — сигнал не обрывался. У меня от балкона до кухни еще 3 стены: 2 гипсовых и одна толстенная бетонная несущая. Сигнал не прерывался, даже когда я засунул передатчик в морозилку  Точнее в морозилку я засунул щуп, а внешний датчик оставил в холодильнике в общем отделе. В морозилке показало -19,3 °C.

А в холодильнике в общем отделении +6,8°C.
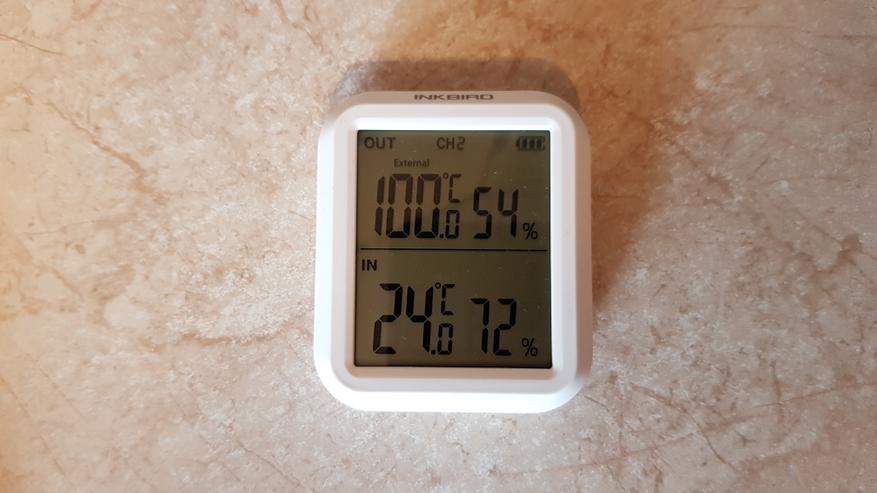
После этого измерил температуру кипятка.

Известно, что при атмосферном давлении 760 мм ртутного столба температура кипения составляет 100 градусов. Градусник показал ровно 100 градусов. Сказать, что был удивлен — не сказать ничего.
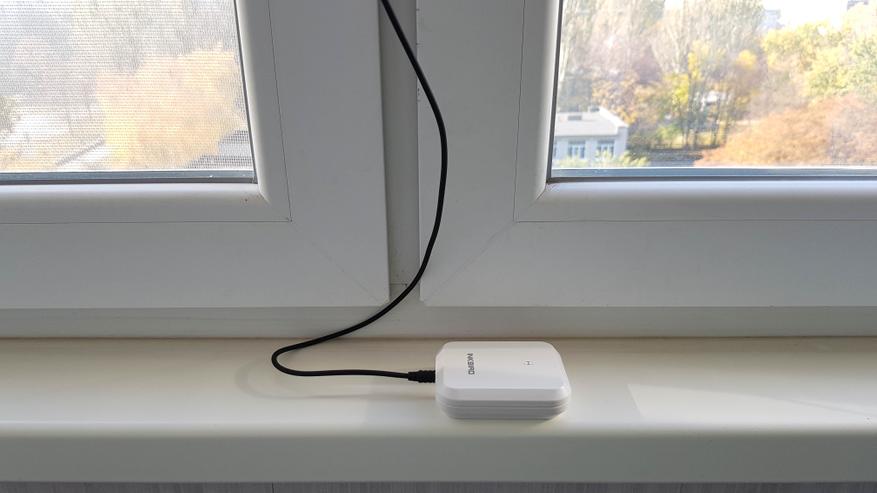
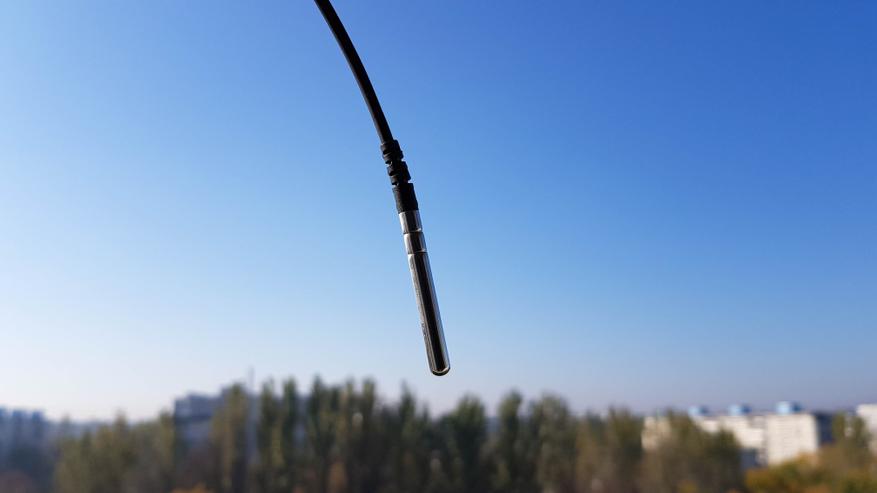
Теперь немного о сценариях использования. Лично я планирую разместить головное устройство в своей комнате, дополнительный датчик в детской комнате, а щуп пропущу через окно на улицу. Таким образом я буду всегда видеть температуру и влажность в комнатах, а также температуру на улице. Кабель гибкий и прочный, можно смело закрыть пластиковым окном, не переживая что его перебьет. Таким образом один датчик одновременно мониторит температуру и внутри и снаружи.
Единственное, нужно спрятать щуп от солнца, например под козырек, т.к на солнце он нагревается и показывает гораздо больше.
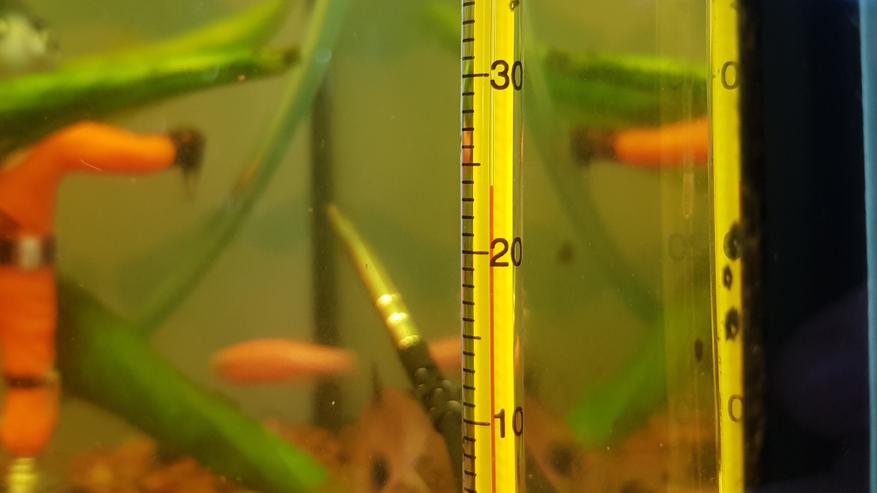
Еще один из сценариев позволяет использовать датчик в бассейне или например в аквариуме. Рыбкам нужно поддерживать определенную температуру. Летом нельзя допускать перегрева, охлаждая по необходимости льдом. Зимой нужно воду подогревать, если она опустится ниже нормы. Электронный датчик показал 24,1°C. Термометр в аквариуме показывает примерно столько же.
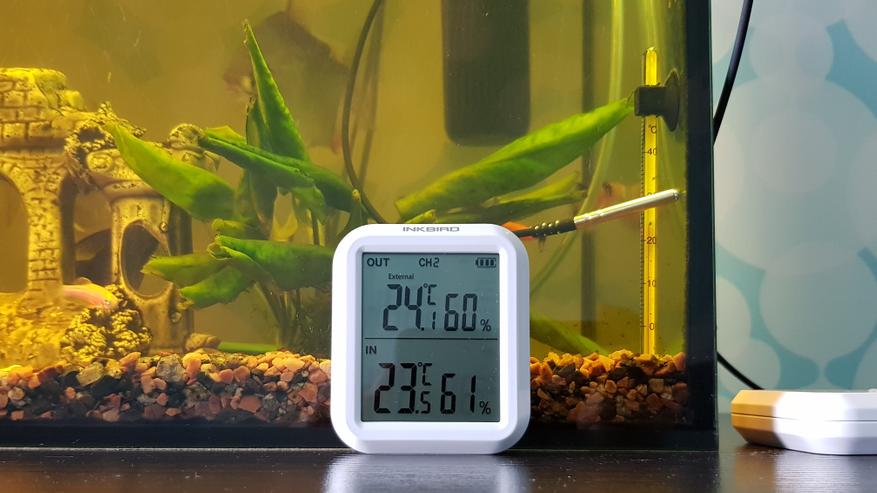
На глаз 23,9°C — 24°C. Показания совпадают.
В общем на мой взгляд отличный прибор, позволяющий довольно точно измерять температуру в помещении, на улице и в различных жидкостях. Простой, как 5 копеек. Компактный. Недорогой. Что еще нужно?
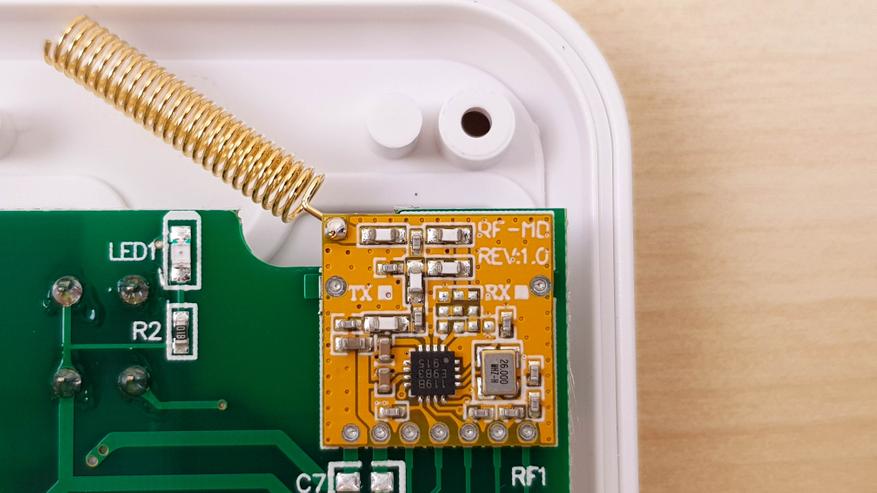
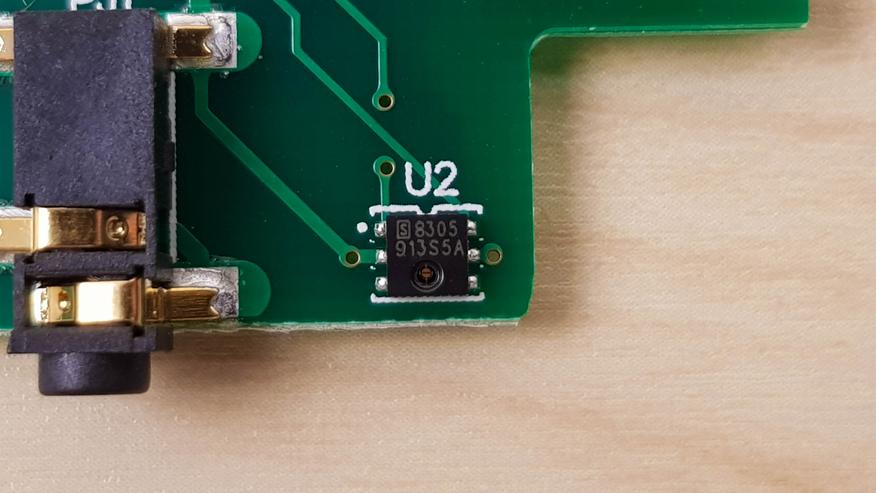
В качестве бонуса — разборка (фото увеличиваются при нажатии). Сначала приемник.
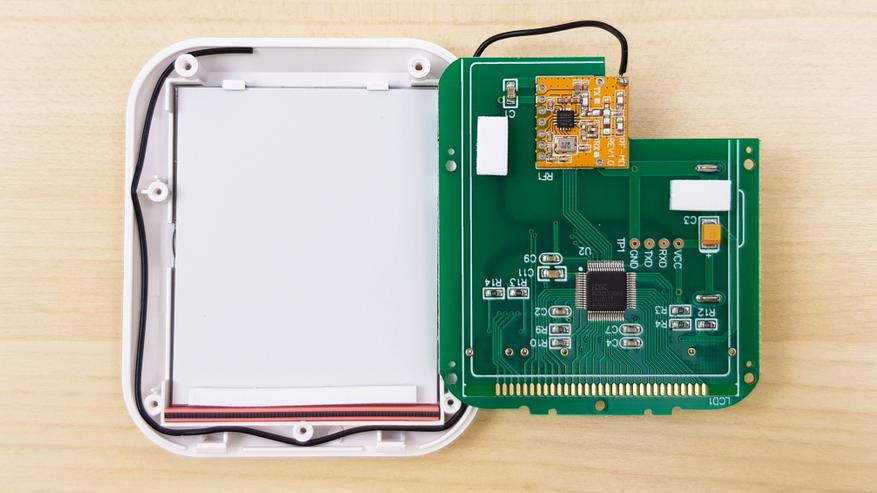

И передатчик.
По поводу цены. Завтра главная распродажа года, поэтому цены наиболее низкие за весь год. Ну и соответственно цена зависит от комплектации. Если вам не нужны дополнительные датчики, то можно взять модель попроще — ITH 20, она может показывать только температуру там, где собственно стоит устройство. Но и стоит такой девайс всего $7.39. Для большинства людей будет достаточно набора как у меня: приемник + передатчик. Такой комплект стоит $15.66. Самый дорогой комплект будет полезен владельцам больших домов, он включает в себя 1 приемник и 3 передатчика и стоит $22.93.
Узнать актуальную стоимость на разные комплекты в фирменном магазине inkbird store на aliexpress
Официальный сайт Inkbird
Inkbird в Вконтакте
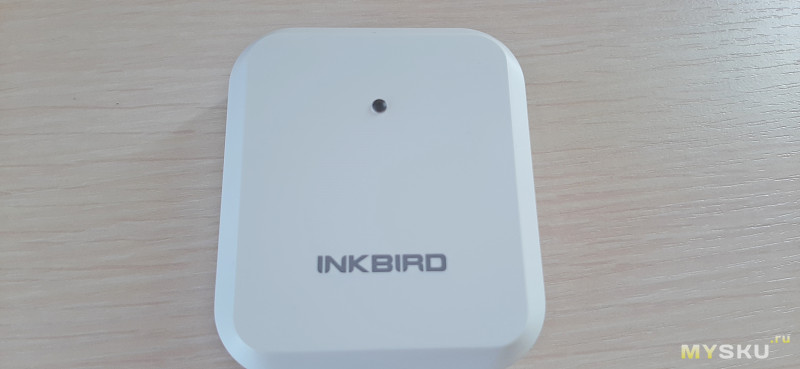
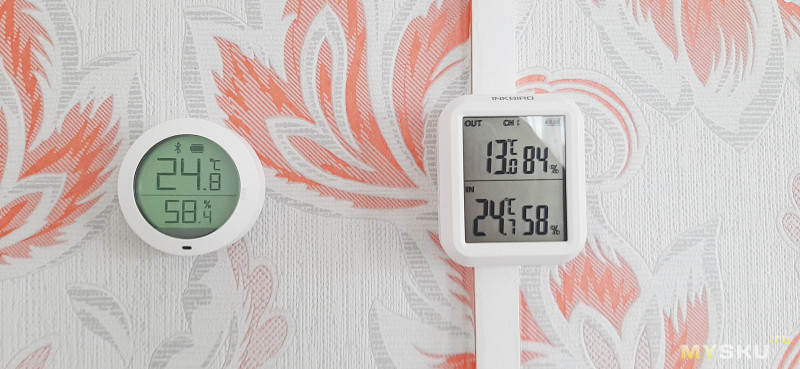
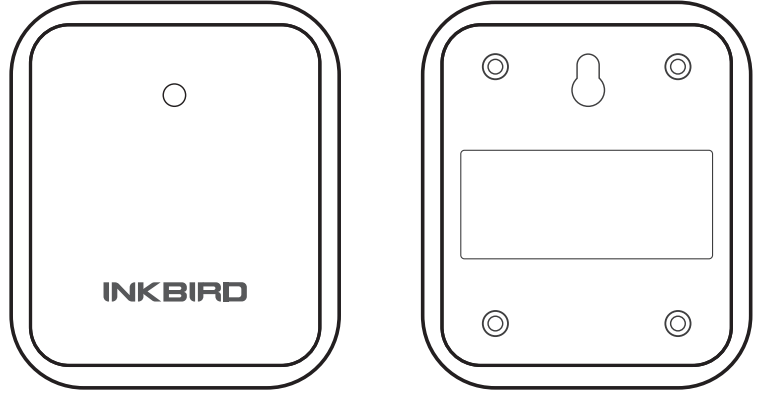
Всем привет! Сегодня пришла очередь рассказать о термометре-гигрометре от известного производителя InkBird. Подкупил его компактный размер основного блока. Он не стоит огромной штуковиной на столе, а просто незаметно висит рядышком с термометром с дисплеем от Сяоми. Размером кстати он не намного больше, и имеет такой же хорошо видимый дисплей.
Есть версия только с основным блоком, есть с одним выносным датчиком есть с тремя выносными датчиками. В обзоре будет версия с одним датчиком.
Основные параметры:
Бренд: INKBIRD
Модель: ITH-20R
Частота передачи: 433 МГц
Расстояние передачи: и asymp; 300 футов
Максимально Доступные передатчики: 3
Питание: 2 батарейки типа ААА
Размер приемника: 75*64*21 мм
Размер передатчика: 75*64*21 мм
Диапазон измерения температуры приемника:-20 ~ 60 °C (-4 ~ 140 °F)
Диапазон измерения влажности приемника: 10 ~ 95%
Диапазон измерения температуры передатчика:-40 ~ 70 ℃ (-40 ~ 158 °F)
Диапазон измерения влажности передатчика: 10 ~ 95%
Диапазон измерения температуры передатчика:-50 ~ 125℃ (-58 ~ 257 °F)
Точность измерения температуры: ±1℃
Точность измерения влажности: ± 5%
Время выборки: 10 секунд
Внешний вид дисплея: «HH. L» или «LL. L»
Гарантия: 12 месяцев
Временами буду называть термометр-гигрометр метеостанцией по забывчивости
Приходит товар в обычном почтовом пакете в двойном слое пупырки, чтобы сохранить внешний вид.
Внутри пакета расположилась невзрачная на вид коробочка.

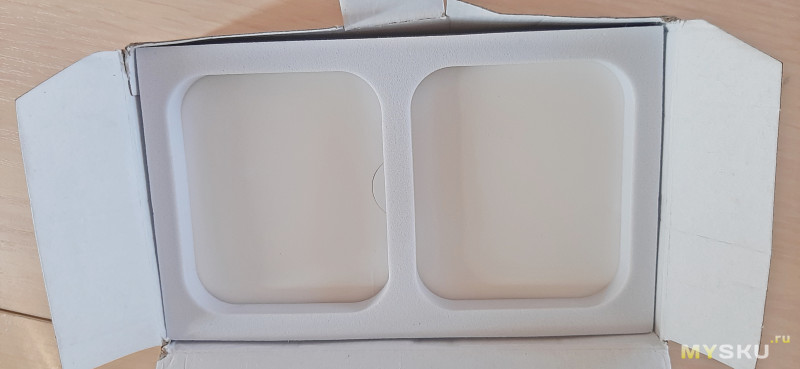
Метеостанция упакована в прочный уплотнитель
В комплекте инструкция, кабель для внешнего датчика и отвертка
Рассмотрим сам внешний вид
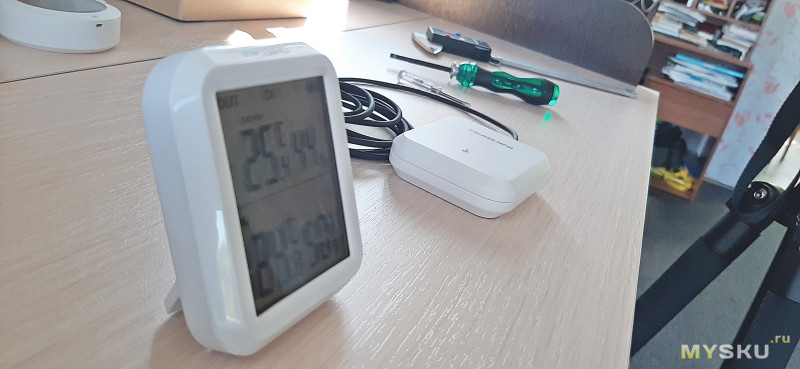
Метеостанция представляет собой 2 девайса. Один это основной блок с жидкокристаллическим дисплеем и выносной датчик.
Оба предмета выполнены из белого глянцевого пластика.

И примерно идентичны по размерам.
Сразу с размеров и начну. Вот эти размеры под спойлером
Дополнительная информация
Внешний датчик имеет надпись InkBird на лицевой стороне и глазок приемника, или что это
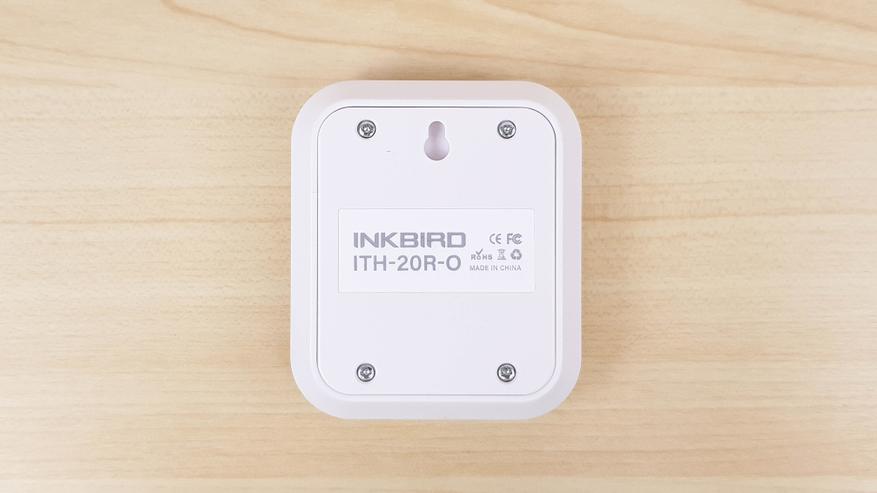
Сзади отверстие под гвоздик и название модели на наклейке.
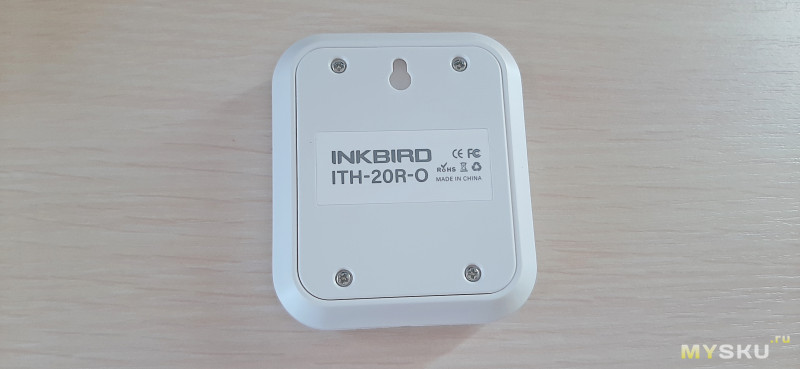
Корпус закрыт на 4 винта
Интересным решением является наличие во внешнем датчике разъема для подключения проводного датчика, если нужно замерять температуру в каком-то определенном месте
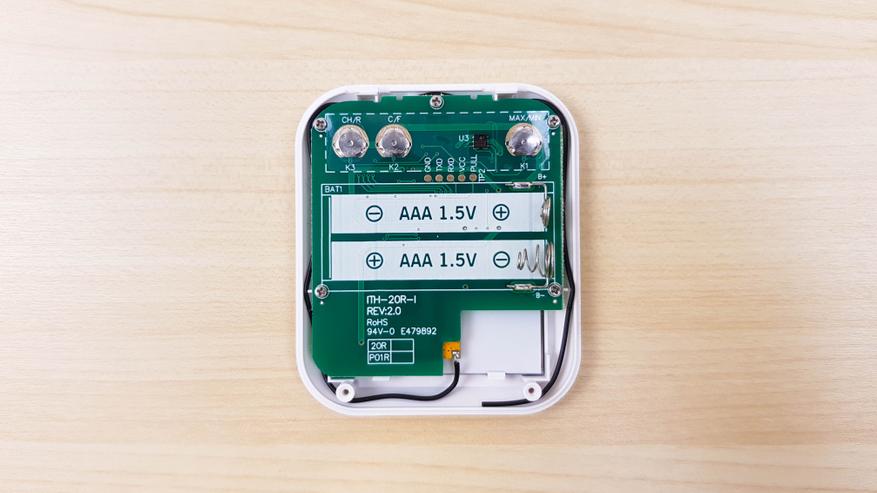
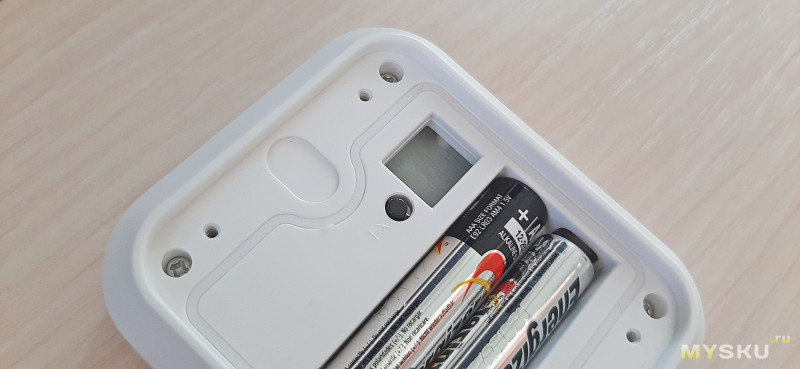
Открутим 4 винта, внутри имеется отсек под 2 батарейки ААА
Тут же кнопка синхронизации с основным блоком
Разберём датчик, для этого открутим еще 4 винта. Фотографии под спойлером
Дополнительная информация
Основной блок тоже имеет надпись название производителя, но она расположилась над дисплеем.
Сзади выдвигаемая пластиковая ножка для настольного расположения, отсек под батарейки, отверстие под гвоздик и три кнопки.
Вот ножка
Питается основной блок от 2-х батареек ААА
Видимость у дисплея стандартная для такого типа дисплеев
Для изменения некоторых настроек нажимаем кнопки сзади основного блока, а именно
Выбираем единицы измерения C/F
Можно посмотреть максимальные и минимальные показания за все время
Также можно выбрать канал для отображения в соответствии с выбранными внешними датчиками, повторю, основной блок умеет связываться с 3-мя внешними датчиками
Когда вставляем во внешний датчик проводной щуп, тога добавляется надпись EXTERNAL
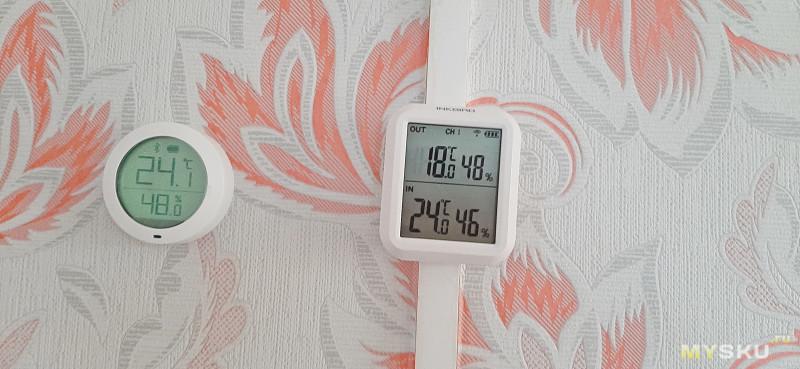
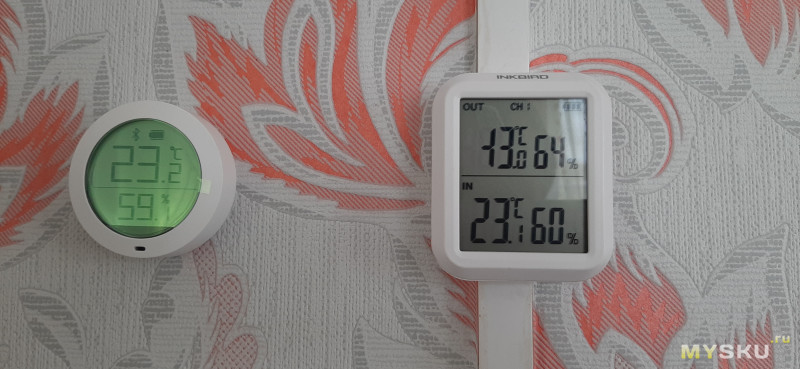
Показания внешнего блок будем сравнивать с проверенным временем уличным термометром
А внутренние показания с датчиком от Сяоми
Днем
Ночью
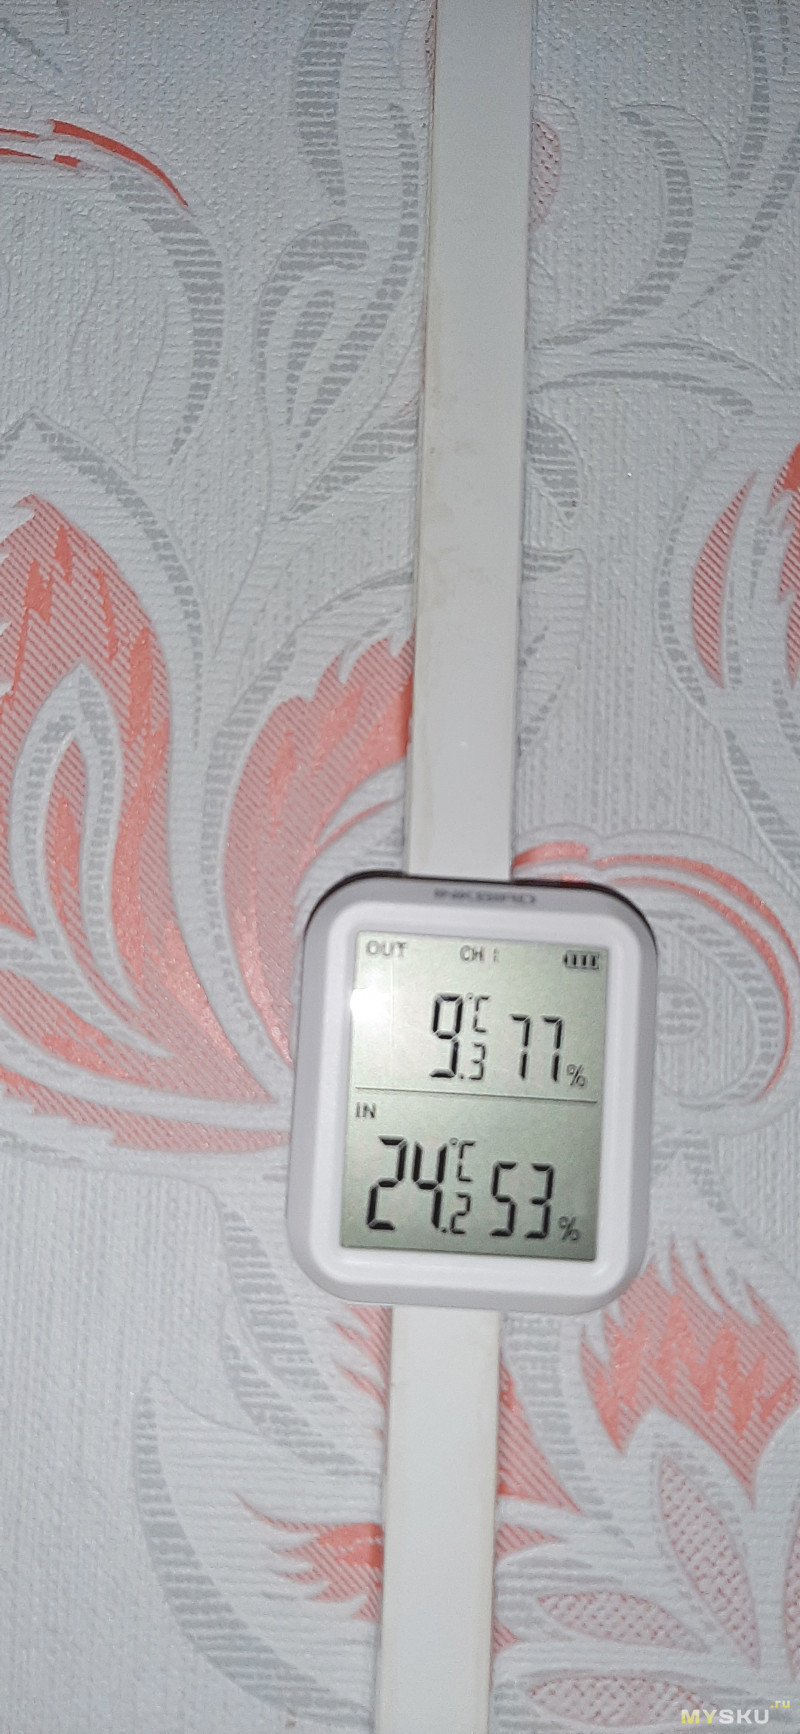
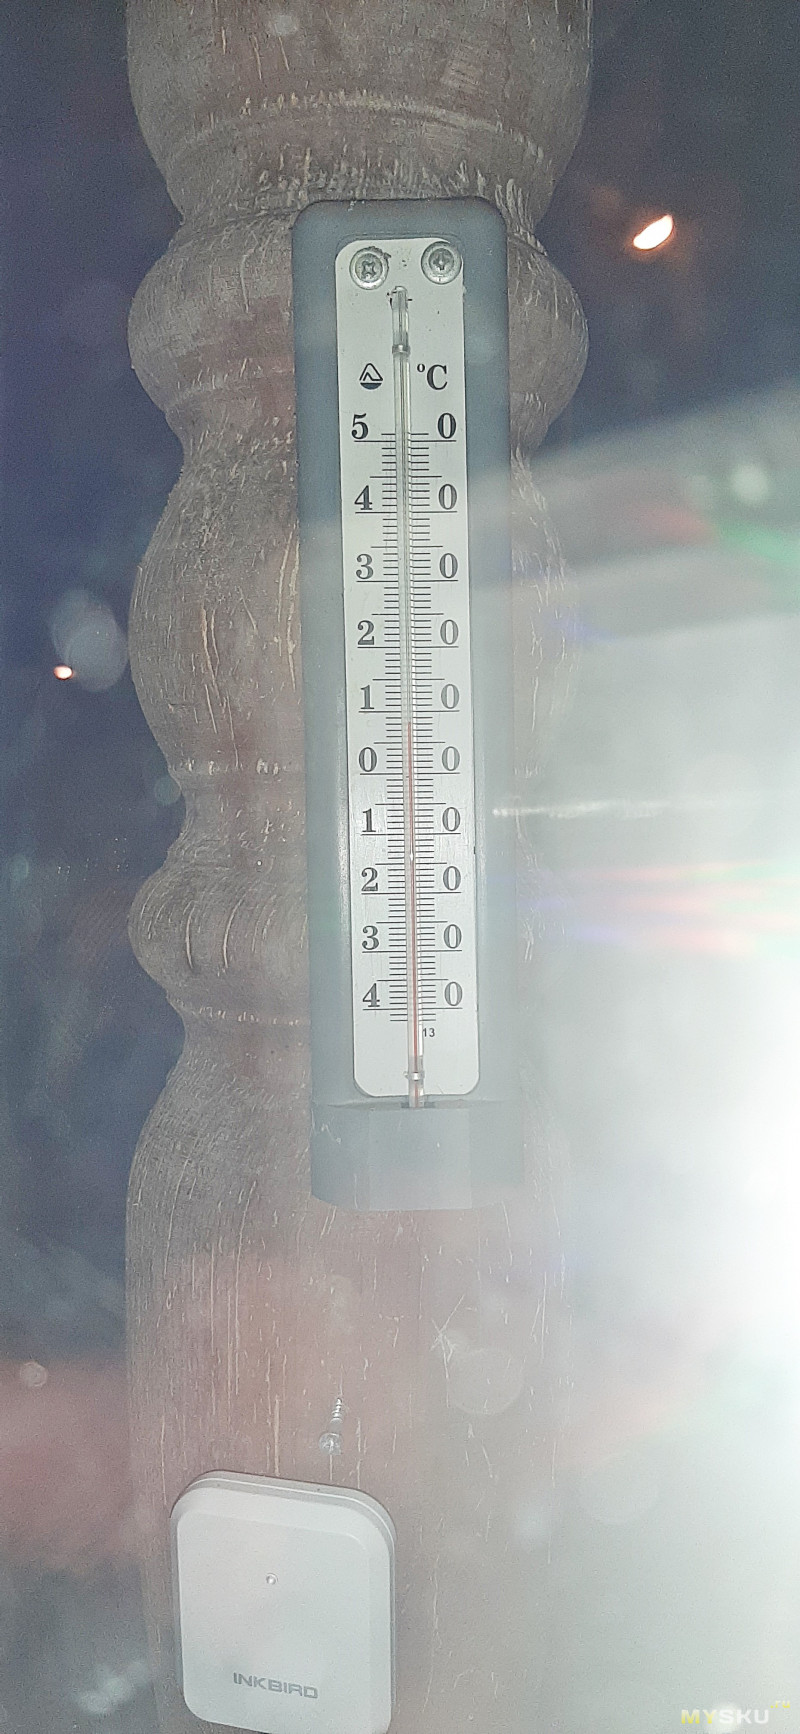
На закате
Также для проверки отрицательных измерений поместим внешний датчик в морозильник
Так странно нарисован минус, интересно как оно будет выглядеть когда температура будет холоднее -20
Расстояние между основным блоком и датчиком 6 м + одна деревянная стена. Работает без нареканий.
Висят уже 2-й месяц, про батарейку не пикают. Так что не скажу пока.
В итоге получаем неплохой термометр-гигрометр с возможностью измерения температуры и влажности. Пределы измерений вполне приемлемы для любого климата. Есть возможность дополнить выносной датчик еще и проводным вариантом. За эту цену вполне себе отличный вариант. Разбирал внешний датчик после проливных дождей, на плате никаких капель нет, но там и защищено резиновой прокладкой, а на пластике под первыми 4-мя болтами пару капель я нашел. Но это не страшно, там страдать нечему.
Обзор приурочил к распродаже. сейчас ее можно купить максимально выгодно
UPD отошел на 80 метров, датчик спокойно обновляется, дальше идти мне было уже лень.
Частота обновления 1 раз в минуту
Introducing the Inkbird Digital Hygrometer ITH-20R
The Inkbird Digital Hygrometer ITH-20R is a cutting-edge device that is engineered to deliver precise and dependable humidity readings in a variety of settings. This hygrometer is an essential tool for individuals who wish to maintain optimal humidity levels in their residences, greenhouses, musical instruments, and other applications. It is anticipated to be released in August 2022 at a price point of $15 to $25.
Detailed Specifications
The Inkbird Digital Hygrometer ITH-20R boasts an array of features that make it a standout product in its category:
- High-precision sensor that provides accurate humidity readings from 10% to 99% RH.
- Measures temperature ranging from -50°C to 70°C (-58°F to 158°F) with an accuracy of ±1°C.
- Large LCD screen with adjustable backlight for easy reading.
- Data hold function that allows you to save and review readings at any time.
- Low battery indicator and auto-shutdown feature to conserve battery life.
- Compact and portable design with a mounting hole and a magnetic back for easy installation.
Get to know the product
-
Temperature and Humidity Monitor (Receiver)

-
Wireless Remote Sensor (Transmitter)

-
External Probe for wireless remote sensor

Function Parameter
- Battery: 2XAAA 1.5V (Temperature and Humidity Monitor/wireless remote sensor)
- Transmission Frequency: 433Mhz
- Transmission Distance: Up to 300ft/90m in open space; if there is interference, the transmission distance will be limited
- Wireless Remote Sensor:
- Supports up to three channels and is rain-proof (The unit can be used outdoors when raining but cannot be submerged in water)
- Temperature and Humidity Monitor Temperature Measurement Range: -20°C ~ 60°C (-4°F ~ 140°F)
- Wireless Remote Sensor Temperature Measurement Range: -40°C — 70°C (-40°F — 158°F)
- Wireless Remote Sensor External Probe Temperature Measurement Range: -50°C — 125°C (-58°F — 257°F)
- Wireless Remote Sensor: Supports external probe and built-in temperature probe using simultaneously
- Temperature Display Accuracy: 0.1°C (0.1°F)
- Temperature Measurement Accuracy: ±1.0°C (±1.8°F)
- Humidity Measurement Range: 10% — 95%
- Humidity Measurement Accuracy: ±5%
- Humidity Display Accuracy: 1%
- Temperature and Humidity Sampling Period: 10 seconds
- Temperature and Humidity Maximum and Minimum Recording Interval: Can support ALL-TIME or 24 hours; the start recording time of ALL-TIME or 24-hour is from the power-on time or the last clear maximum/minimum time
- Out of Range Display: «HH.H» or «LL.L»
- Warranty: 1 year
Description
The Inkbird Digital Hygrometer ITH-20R is a temperature and humidity monitoring device that is both precise and adaptable, making it ideal for a wide range of applications, such as:
- Monitoring the humidity and temperature levels in conservatories and gardening areas.
- Controlling the temperature and humidity of musical instruments, reptile habitats, and cigar humidors.
- Maintaining optimal humidity and temperature levels in storage areas, warehouses, and residences.
- Monitoring humidity levels and weather patterns for individuals who are interested in the subject.
Button Icon Description
CH/R
- Quickly press
- When there are multiple wireless remote sensor, press to switch the current channel (CH1, CH2 or CH3) of the wireless remote sensor, and the wireless remote sensor can be fixed in the current channel.
- When switching to «CHS», after 5s, the temperature and humidity of wireless remote
sensor will be displayed in turn, each will show 5 seconds.- (Note: Up to 3 wireless remote sensors can be connected, CH1 = wireless remote sensor 1, CH2 = wireless remote sensor 2, and CH3 = wireless remote sensor 3)
- Long press (Ss)
It can reset the synchronization between the Temperature and Humidity Monitor and all wireless remote sensor. After resetting, the wireless remote sensor needs to be re-powered (Re-install the battery) before it synchronize with the Temperature and Humidity Monitor.
The Temperature and Humidity Monitor and the wireless remote sensor can be synchronized within 2 minutes after the wireless remote sensor is re-powered on), when synchronizing, try to make the wireless remote sensor close to the Temperature and Humidity Monitor and please do not press any button.
C/°F
- Quickly press
When in normal working mode, press to switch temperature unit to C/°F.
When the display is showing the maximum minimum temperature and humidity (press MAX/MIN/CLEAR button to display the maximum minimum temperature and humidity), press to switch the maximum and minimum recording time interval of temperature and humidity to ALL-TIME or24 hours.
MAX/MIN/CLEAR
- Quickly press
Press to display the maximum minimum temperature and humidity
When there is no button operation, the current temperature and humidity display will be restored after 30s. -
Long press (5s)
Long press to clear the maximum minimum temperature and humidity record value, then re-record.
Wireless remote sensor (Transmitter)
TX
- Quickly press
Press to send temperature and humidity data to the Temperature and Humidity Monitor, when the transmission is successful, the red light of wireless remote sensor will flash once. - Long press (5s)
Reset the synchronization between the wireless remote sensor unit and the Temperature and Humidity Monitor. After resetting, the wireless remote sensor needs to be powered on again to synchronize with the Temperature and Humidity Monitor, when synchronizing, try to make the wireless remote sensor close to the Temperature and Humidity Monitor.
The Temperature and Humidity Monitor and the wireless remote sensor can be synchronized within 2 minutes after the wireless remote sensor is re-powered on (Re-install the battery).
Setup Guide
The Inkbird Digital Hygrometer ITH-20R requires no effort to set up. Putting in the batteries, powering on the device, and customizing the settings is as easy as pie. The device’s magnetic back allows you to connect it to any metal surface, while the mounting hole allows you to put it on walls or other vertical surfaces. The user manual is available for download from Inkbird’s website; following its instructions will calibrate the device.
Synchronization
Reset of Temperature and Humidity Monitor and wireless remote sensor
- The first step is to correctly install the battery of the Temperature and Humidity Monitor to power on.
- After Temperature and Humidity Monitor is powered on, then please install battery correctly for wireless remote sensor power on, and try to close the wireless remote sensor to the Temperature and Humidity Monitor.
(Note: When the wireless remote sensor is synchronized with the Temperature and Humidity Monitor, it has to be powered on again (Re-install the battery). Please synchronized within 2 minutes after power-on. After 2 minutes of power-on, it is normal working time, then it cannot be synchronized with the Temperature and Humidity Monitor.) - If the battery installation is successful, the Temperature and Humidity Monitor and wireless remote sensor will be powered on normally, and the Temperature and Humidity Monitor and the wireless remote sensor will complete synchronization within 2 minutes. If fail to synchronization, the wireless remote sensor can be re-powered to complete synchronization.
- Once the Temperature and Humidity Monitor and the wireless remote sensor are synchronized, the wireless remote sensor is successfully registered, the Temperature and Humidity Monitor will display the corresponding wireless remote sensor synchronization channel, and the registration information of the wireless remote sensor is recorded sensor (After the Temperature and Humidity Monitor is powered off and restarted, it is not necessary to re-synchronize with the wireless remote sensor).
When the red light of the wireless remote sensor flashes once, it indicates that the data is successfully transmitted once, and when the RF signal icon of the corresponding channel of the wireless remote sensor is light (lighting for Ss), it means the Temperature and Humidity Monitor successfully receives the data once and updates the current temperature and humidity in real time.
Reset synchronization
- Press and hold the TX button (5s) of wireless remote sensor to reset the synchronization between the wireless remote sensor and the Temperature and Humidity Monitor. If you need to re-synchronize, follow the above steps A-D to synchronize.
- Press and hold the CH/R button (5s) of Temperature and Humidity Monitor to reset the synchronization between the Temperature and Humidity Monitor and all the wireless remote sensors. If you need to re-synchronize, follow the above steps A~D to synchronize.
- After the Temperature and Humidity Monitor and the wireless remote sensor are synchronized, if the Temperature and Humidity Monitor does not receive the data update from the wireless remote sensor of the corresponding channel for a long time (about 10 minutes or more), ‘’—,-» will be displayed.
Troubleshooting
Some typical issues with the Inkbird Digital Hygrometer ITH-20R and how to fix them are as follows:
- Make sure the batteries are in the right way if the device still won’t switch on. Just put in fresh batteries whenever they run out.
- Check that the equipment has been calibrated correctly in accordance with the user handbook if the readings are inaccurate. Get in touch with Inkbird’s support staff if you’re still having trouble with the readings.
- Verify that the batteries are properly inserted if the LCD screen remains blank. It may be worth trying resetting the device or modifying the backlight settings if the batteries are functioning properly.
- Keep the device away from water and other damp environments; doing so could harm the sensor and lead to erroneous results. The warranty could be voided if you open the item with sharp objects or force.
Customer Reviews about Inkbird Digital Hygrometer ITH-20R
Customers who have used the Inkbird ITH-20R have praised its accuracy, ease of use, and versatility. Some have used it for cigar humidors, greenhouses, and musical instruments, while others have used it for weather monitoring and home automation. Overall, customers have given the device a rating of 4.5 out of 5 stars, with many commending its affordable price and high-quality build.
However, some customers have reported issues with the device’s accuracy and calibration, especially when used in extreme temperatures. Some have also noted that the device’s magnetic back is not strong enough to hold it securely to metal surfaces. Despite these minor issues, the Inkbird remains a popular choice for those who need an affordable and reliable humidity monitoring device.
What is the Inkbird Digital Hygrometer ITH-20R used for?
Inkbird Digital Hygrometer ITH-20Ris used for measuring and monitoring temperature and humidity levels in various environments such as homes, greenhouses, and incubators.
How do I calibrate the Hygrometer ITH-20R?
You can calibrate the Inkbird Digital Hygrometer ITH-20R using a calibration kit or a saturated salt solution, following the instructions in the user manual.
What is the battery life of the Inkbird Hygrometer ITH-20R?
The Inkbird Digital Hygrometer ITH-20R uses two AAA batteries, which can last up to 12 months with regular use.
What is included in the Inkbird Digital Hygrometer ITH-20R?
The package includes the Inkbird ITH-20R main unit, an external sensor, a user manual, and batteries.
What is the warranty policy of the Inkbird Digital Hygrometer ITH-20R?
The Inkbird Digital Hygrometer ITH-20R comes with a 12-month warranty, which covers defects in materials and workmanship. Contact Inkbird’s customer support for assistance.
What is the measurement range of the ITH-20R for temperature and humidity?
The Inkbird Digital Hygrometer ITH-20R temperature measurement range is -40°F to 158°F (-40°C to 70°C) and the humidity measurement range is 1% to 99% RH.
How do I reset the Inkbird Digital Hygrometer ITH-20R?
You can reset the device by pressing and holding the reset button on the back for 5 seconds.
How do I switch between Celsius and Fahrenheit?
There is a button on the back of the Inkbird Digital Hygrometer ITH-20R that allows you to switch between Celsius and Fahrenheit.
What is the purpose of Inkbird Digital Hygrometer ITH-20R external sensor?
The external sensor allows you to measure temperature and humidity in a different location from where Inkbird Digital Hygrometer ITH-20R main unit is placed, providing more flexibility and accuracy in monitoring different areas.
How do I read Inkbird Digital Hygrometer ITH-20R maximum and minimum recorded values?
The ITH-20R has a Max/Min button which, when pressed, will display the highest and lowest recorded temperature and humidity values.
Bluetooth Speaker BT2200B
ManualsPro
INKBIRD
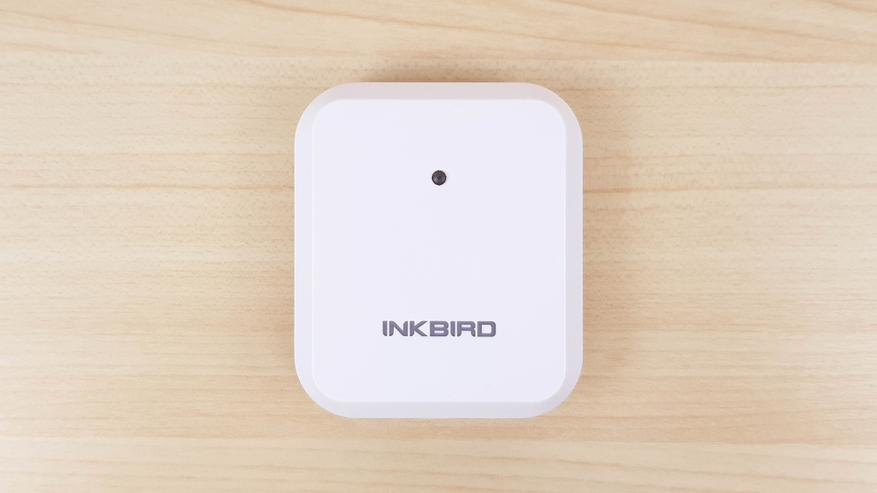
INKBIRD ITH-20R-O Wireless Temperature and Humidity Sensor User Manual
- June 14, 2024
- INKBIRD
Table of Contents
- ITH-20R-O Wireless Temperature and Humidity Sensor
- Overview
- Technical Specifications
- Product Diagram
- Key Definitions
- APP Installation & Connection
- Important Notes/Warnings
- Troubleshooting Guide
- FCC Requirement
- Customer Service
- Read User Manual Online (PDF format)
- Download This Manual (PDF format)
Wireless Temperature Humidity Sensor with WiFi Gateway
USER MANUAL
ITH-20R-O Wireless Temperature and Humidity Sensor

Scan to download
https://inkbird.com/pages/download
Scan To View the Setup Video
Escanear para descargar el manual
Scansione per scaricare il manuale
Scannen, um das Handbuch herunterzuladen
Please keep this manual properly for reference. You can also scan the QR code
below to visit our official website for product instructions. For any usage
issues, please feel free to contact us at
support@inkbird.com.
Overview
This combination of ITH-20R-0 Wireless Temperature-Humidity Sensor and IBS-M2S
WiFi Gateway allows you to remotely monitor the sensor temperature and
humidity through gateway networking, check historical data and receive timely
alarm notifications.
Technical Specifications
1BS-M2S WiFi Gateway (receiver) :
- Input Voltage: AC 100~240V 50/60Hz
- Maximum Wireless Connection Distance: up to 300 feet without interferences (Interferences will limit transmission)
- Number of ITH-20R-0 Sensors Supported: up to 10 sensors at the same time
IBS-TH2R-0 Wireless Sensor (transmitter):
- Battery: 2% AAA 1.5V
- Transmission Distance: up to 300 feet without interferences (Interferences will limit transmission)
- Temperature Measurement Range: -40°C ~70°C (-40°F~158°F)
- Temperature Display Accuracy: 0.1°C (0.1°F)
- Temperature Measurement Accuracy: +1.0°C (+1.8°F)
- Humidity Measurement Range: 0% ~100%
- Humidity Measurement Accuracy: 3%
- Humidity Display Accuracy: 1%
- Temperature-Humidity Sampling Period: 10 sec
- Warranty: 1 year
Product Diagram

Key Definitions
IBS-M2S WiFi Gateway Reset Button:
Press and hold the Reset button for more than 5 seconds to reset the
registration of all sensors. The user should take out the battery of the
sensor and reinstall it, then bring the sensor close to the 1BS-M2S WiFi
Gateway to re-establish the connection and complete the registration.
WiFi Button:
Press and hold the WiFi button for more than 5 seconds to reset WiFi and pair
it with the network again.
ITH-20R-O Wireless Sensor TX Button:
Short press the TX button to send temperature and humidity data to the indoor
receiver. After sending successfully, the red light on the transmitter will
flash once.
APP Installation & Connection
5.1 INKBIRD APP
https://inkbird.com/pages/app-download
Search the INKBIRD App from Google Play or App Store to get it for free, or
you can scan the QR code left to download it directly.
NOTES:
- Your i0S devices must be running i0S 12.0 or above to download the app smoothly.
- Your android devices must be running android 7.1 or above to download the app smoothly.
- The device supports a 2.4GHz Wi-i router only.
- APP Location Permission Requirement: We need to obtain your location information to discover and add nearby devices. INKBIRD promises to keep your location information strictly confidential. And your location information will only be used for the location function of the App and will not be collected, used, or disclosed to any third party. Your privacy is very important to us. We will abide by relevant laws and regulations and take reasonable security measures to protect your information security.
5.2 Registration
Step1: Registering an account is necessary before using the INKBIRD app
for the first time.
Step2: Open the app, select your Country/Region, and a verification code
will be sent to you.
Step3: Enter the verification code to confirm your identity, and the
registration is complete.
5.3 How to Connect
Open the INKBIRD app and Click “+” on the top right corner to add a device.
Then, follow the app instructions to complete the WiFi connection. Note that
the device should be as close as possible to the smartphone and router during
the connection process.
5.3.1 Open the app, click “+”, and choose the IBS-M2S to start the connection.

5.3.2 Plug in the
gateway, power it on, and click Next Step.

5.3.3 Select a WiFi network to connect, enter the password,
and click Next Step. 5.3.4 Press and hold the button until the Wii indicator
light flashes and enters the pairing state, then click Next Step. 5.3.5 The
smartphone will automati- cally scan for the device. Once the device is found,
click Next Step. 5.3.6 Automatically
pairing. 5.3.7 The pairing is
successful. Note: If the pairing fails, unplug the device, restart it
again, and repeat the above steps to complete the connection.
5.4 Add ITH-20R-0 Wireless sensors
a) Firstly, plug in the IBS-M2S WiFi Gateway and start it up correctly. Then
follow the above steps to establish the App connection. If the app connection
has already been completed, skip this step.
b) Secondly, install the battery of the ITH-20R Wireless sensor , start it up
correctly, and put it as close as possible to the IBS-M2S WiFi Gateway. ¢) Add
sub-devices through the phone APP, as shown in the figures below. Select the
relevant device and click confirm to add it. The sub-device will automatically
establish a connection. After adding successfully, the ITH-20R-0 Wireless
Sensor channel number will be displayed.
Note that if adding the device fails, take out the battery of the ITH-
20R-O Wireless sensor and repeat steps a~c to complete the addition.


Important Notes/Warnings
a) Pay attention to the safe use of electronic products and keep children
away.
b)Please do not disassemble the product if you are not a professional.
c) Be sure that the sensor is not covered with dust as dust may lead to
inaccurate measurements.
d) Do not use alcohol to clean the sensor,
Troubleshooting Guide
| Issues | Possible Solutions |
|---|
The gateway cannot connecttothe
network| a. Make sure the 2.4GHz WiFi signal is stable, and place the WiFi
gateway as close to the router as possible.
b. Make sure there are as few barriers as possible between the WiFi gateway
and the router.
c. Enable Bluetooth and positioning functions, allow the App to obtain
location information, and allow the local network (10S System).
Unabletoadd sub-devices| Reset the WiFi gateway and the registration of ITH-
20R Wireless gonsors Remove and reinstall the battery of the ITH-20R-0
Wireless sensor, and then try again to add sub-devices.
Incorrect temperature/hu- midity detection| Leave the sensor in a ventilated
place for one day, and be careful not to block the sensing area.
FCC Requirement
Changes or modifications not expressly approved by the party responsible for
compliance could void the user’s authority to operate the equipment. This
device complies with Part 15 of the FCC Rules. Operation is subject to the
following two conditions:
- this device may not cause harmful interference, and
- this device must accept any interference received, including interference that may cause undesired operation.
Note: This equipment has been tested and found to comply with the limits
for a
Class B digital device, pursuant to Part 15 of the FCC Rules. These limits are
designed to provide reasonable protection against harmful interference in a
residential installation. This equipment generates, uses, and can radiate
radio frequency energy, and if not installed and used in accordance with the
instruc- tions, may cause harmful interference to radio communications.
However, there is no guarantee that interference will not occur in a
particular installation. If this equipment does cause harmful interference to
radio or television reception, which can be determined by turning the
equipment off and on, the user is encouraged to try to correct the
interference by one or more of the following measures:
— Reorient or relocate the receiving antenna
— Increase the separation between the equipment and receiver.
— Connect the equipment into an outlet on a circuit different from that to
which the receiver is connected.
— Consult the dealer or an experienced radio/TV technician for help.
This equipment complies with FCC radiation exposure limits set forth for an
uncontrolled environment. This equipment should be installed and operated with
aminimum distance of 20cm between the radiator & your body. This transmitter
must not be co-located or operating in conjunction with any other antenna or
transmitter.
Customer Service
This item carries a 1-year warranty against defects in either components or
workmanship. During this period, products that prove to be defective will, at
the discretion of INKBIRD, be either repaired or replaced without charge. For
any problems in use, please feel free to contact us at
support@inkbird.com. We will do our best to help
you.
INKBIRD TECH.C.L.
support@inkbird.com
Factory address: 6th Floor, Building 713, Pengji Liantang
Industrial Area, NO.2 Pengxing Road, Luohu District,
Shenzhen, China
Office address: Room 1803, Guowei Building, NO.68
Guowei Road, Xianhu Community, Liantang, Luohu District,
Shenzhen, China
Read User Manual Online (PDF format)
Read User Manual Online (PDF format) >>
Download This Manual (PDF format)
Download this manual >>