
Информация о продукте
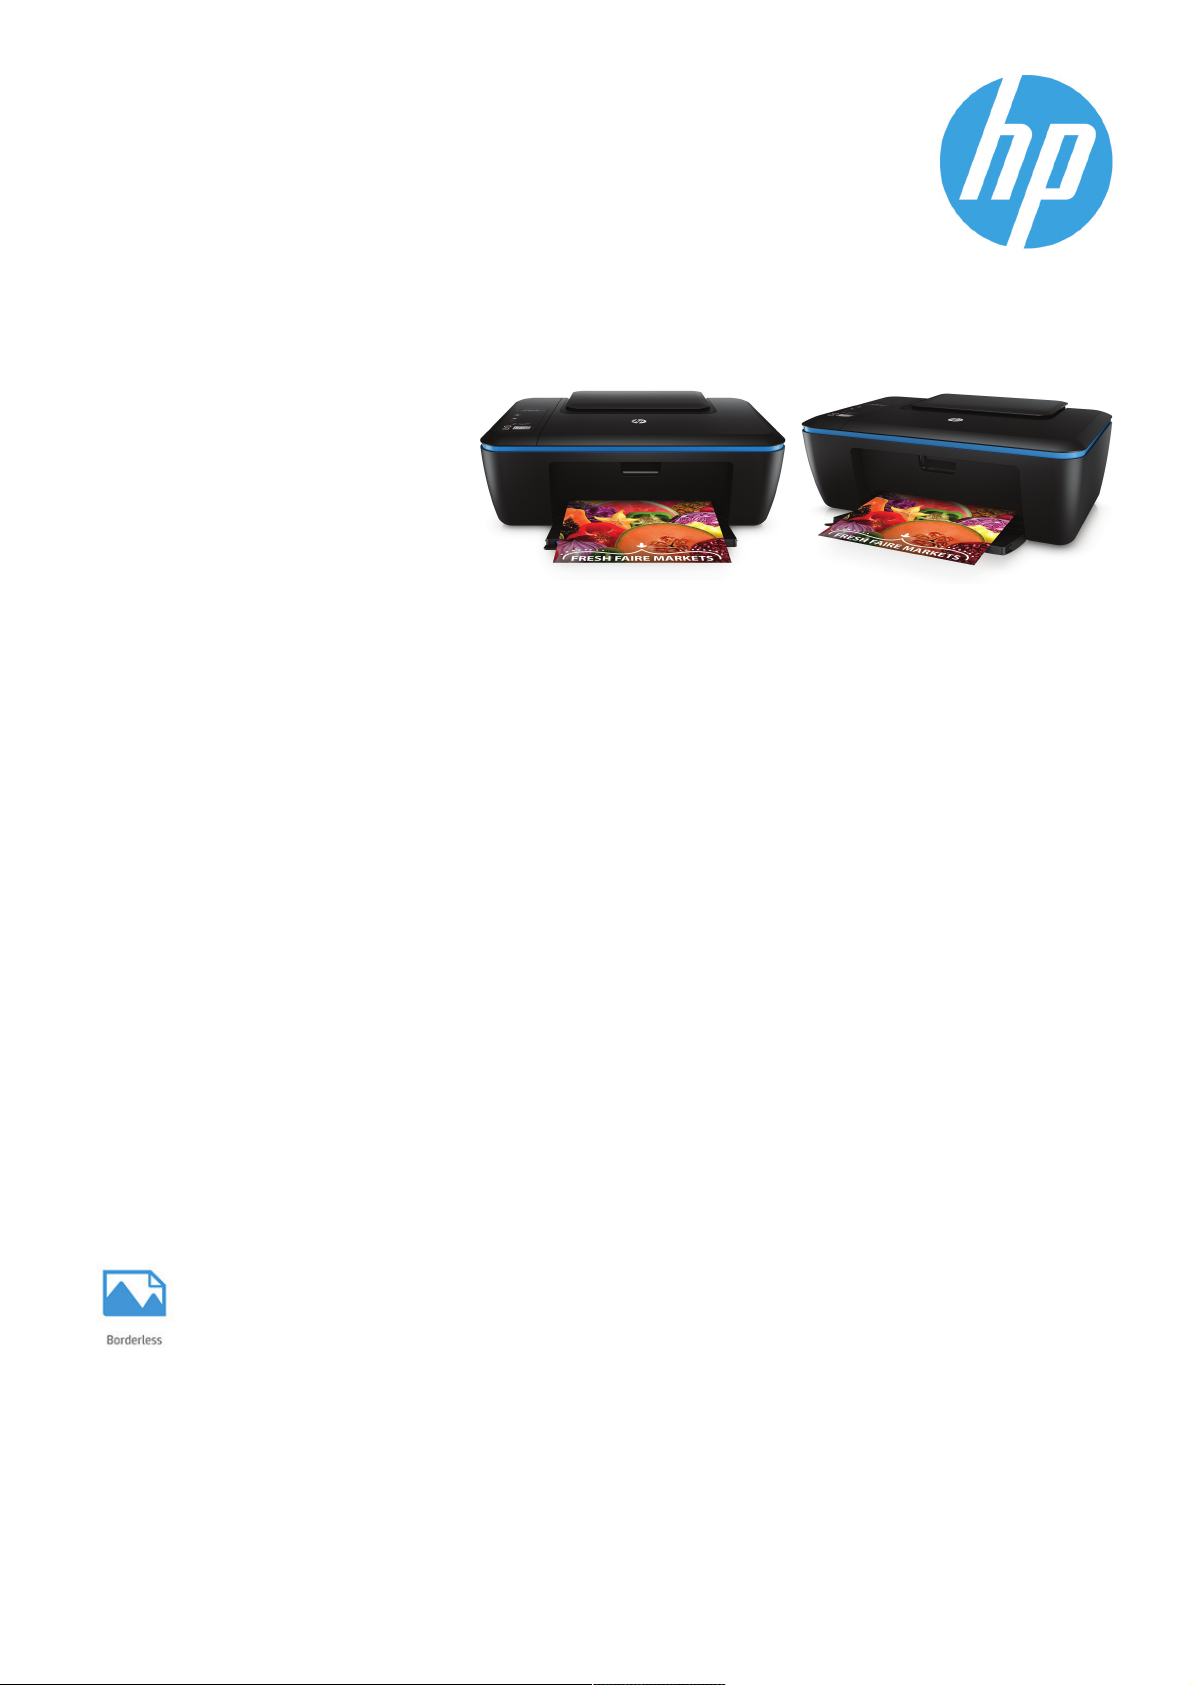
МФУ HP DeskJet Ink
Advantage Ultra 2529
До 3000 страниц по доступной цене
Устройство обладает всем
необходимым для работы.
Создавайте тысячи документов
высочайшего качества с
помощью стильного МФУ HP и
долговечных картриджей
увеличенной емкости. Удобство
печати и удивительно низкая
стоимость страницы.
Особо отмечено
Скорость печати: до 7 стр./мин. в
●
черно-белом режиме, ISO (формат A4); до
4 стр./мин. в цветном режиме, ISO (формат
A4)
Максимальная скорость печати: до 19
●
стр./мин. в черно-белом режиме (А4), до
15 стр./мин. в цветном режиме (A4)
Простая настройка
●
1
Больше отпечатков при неизменном качестве HP
●
Сократите расходы на печать благодаря двум черным картриджам общим
ресурсом 3000 страниц, которые входят в комплект поставки1.
●
Сократите время на замену картриджей. Используйте оригинальные струйные
картриджи HP увеличенной емкости, чтобы создавать больше долговечных
отпечатков.
●
Печать превосходного качества. Оцените надежность системы и удобство ее
обслуживания. Экономьте время, деньги и расходные материалы.
Стабильно высокое качество печати
●
Используйте бумагу ColorLok®, чтобы получить отпечатки высокой четкости,
сделать их более контрастными и избежать смазывания изображения2.
●
Оригинальные чернила HP помогают создавать долговечные цветные фотографии,
устойчивые к смазыванию и воздействию влаги и не выцветающие на протяжении
десятилетий3.
●
Это МФУ отличается надежностью и неизменно высоким качеством печати.
1
Решение любых задач
●
Гибкие возможности установки. Экономия места на столе или полке благодаря
компактности МФУ, которое легко можно разместить даже в небольшом
пространстве.
●
Создание фотографий профессионального качества без полей и печать
документов на уровне лазерных устройств, дома и в офисе.
Рассчитано на работу в сети
●
Это экономичное МФУ позволяет сократить потребление энергии без ущерба для
производительности.
●
Вместо того, чтобы отправлять использованные оригинальные картриджи HP на
свалку или перепродажу, мы утилизируем их в рамках бесплатной программы HP
Planet Partners4.
МФУ HP DeskJet Ink Advantage Ultra 2529
Технические характеристики
Функции
Скорость печати
Разрешение припечати
Технология печати
Область печати
Языки управленияпринтером
Функции печати
Количество картриджей
Мобильная печать
Ежемесячная нагрузка
Датчик дляавтоматического
определения типабумаги
Дисплей
Поддержка многозадачности
Беспроводной
Подсоединяемость
Память
Совместимость картпамяти
Настройки копира
Скорость копирования
Технические характеристикисканера
Формат файловсканирования
Сканируемая область
Глубина цвета/ градации серого
Типы печатныхносителей
Размеры печатныхносителей
Использование носителей
Плотность бумаги
Печать, копирование, сканирование
До 7 стр./мин.ISO, ч/б (A4); До4 стр./мин. ISO, цв.(A4)
время выхода первойстраницы:За 18 секунд ч/б (A4,режим готовности)
;За 25 сцв. (A4, режим готовности)
До 600 точекна дюйм Черный; Оптимизация разрешениядо 4800 x 1200
точек на дюймпри печати с компьютера нафотобумаге HP с разрешением
на входе 1200точек на дюйм
Термальная струйная печатьHP
Поля печати: Сверху:3,2 мм; Снизу: 3,2 мм;Слева: 3,2 мм; Справа: 3,2мм;
Максимально допустимая областьпечати: 209 x 349 мм
HP PCL 3GUI
Печать без полей:Да, до 210 x 297мм (A4)
2 (1 черныйи 1 трехцветный)
Нет
До 1000 страниц(A4); Рекомендуемый месячный объём печати(стр.):
200–400
Нет
Символьный ЖК-дисплей диагональю3 см (1,2″)
Нет
Нет
Стандартная 1 высокоскоростнойпорт USB 2.0
Стандартная Встроенный; МаксимумВстроенный
Нет
Автомасштабирование; Разрешение прикопировании: До 600 х 300т/д;
Разрешение при копировании,цветной текст и графика: До600 х 300 т/д;
Масштабирование при копировании:Автомасштабирование
До 5 копий/минЧ/б ISO (A4), До 5копий/мин цветная ISO (A4)
Тип сканера: Планшетный;Технология сканирования: Контактный датчик
изображений (CIS); Режимыввода при сканировании: Сканированиеи
передача на ПКили по электронной почте спомощью передней панели
принтера или ПОHP Solution Center; ВерсияTWAIN-интерфейса: Версия 2.1;
Максимальный размер областисканирования (планшет, ADF): 216 x297
мм; оптическое разрешениесканирования: До 1200 т/д
JPEG, TIFF, PDF,BMP, PNG
максимальный размер носителя:216 x 297 мм
24 бит/ 256
Обычная бумага, фотобумага,конверты и другие типы бумагидля
струйной печати
поддерживается A4; A5;B5; A6; конверт DL
Емкость подачи: До60 листов; До 15 листовПрозрачные плёнки; До 20
открыток Открытки; До20 листов фотобумага
Выходная емкость: До25 листов, До 5 конвертов
Максимум: До 25листов
Двусторонняя печать: Драйверпечати поддерживает двустороннюю
печать с ручнойподачей
Поддерживается: от 60до 300 г/м²; Рекомендуемый: A4:от 60 до 90 г/м²;
конверты HP: от75 до 90 г/м²; открыткиHP: до 200 г/м²; фотобумагаHP
формата 10 x15 см: до 300 г/м²
Комплектация
Расходные материалы
Совместимые операционныесистемы
Минимальные системныетребования
Прилагаемое программноеобеспечение
Размеры принтера(Ш x Г xВ)
Размеры упаковки(Ш x Г xВ)
Вес принтера
Масса упаковки
Требования кокружающей среде
Хранение информации
Уровень шума
Питание
Сертификаты
Страна-изготовитель
Гарантия
Сервис иподдержка
K7W99A: МФУ HPDeskJet Ink Advantage Ultra 2529; HP46, Струйный
картридж, Черный (2шт., каждый ~1500 стр.); HP46, Струйный картридж,
Трехцветный (~750 стр.);компакт-диск с программным обеспечением;
справочное руководство; блокпитания; шнур питания
CZ637AE Оригинальный струйныйкартридж HP 46 Advantage,черный 1500
страниц
CZ638AE Оригинальный струйныйкартридж HP 46 Advantage,трехцветный
750 страниц
F6T40AE Упаковка из3 оригинальных струйных картриджей HP46, черный
(2)/трехцветный (1) 1500страниц 750 страниц
Windows 10, Windows8.1, Windows 8, Windows7, Windows Vista; Mac OSX
10.6, OS X10.7 Lion, OS X 10.8Mountain Lion, OS X10.9 Mavericks, OS X
10.10 Yosemite
Windows: Windows 10,8.1, 8, 7: 32- или64-разрядный процессор, 2 Гбайт
свободного места нажестком диске, привод CD-ROM/DVD или
подключение к Интернету,разъем USB, Internet Explorer;Windows Vista:
только 32-разрядный процессор,2 Гбайт свободного места нажестком
диске, привод CD-ROM/DVDили подключение к Интернету, разъемUSB,
Internet Explorer8
Mac: Mac OSX v10.6, OS X v10.7Lion, OS X v10.8Mountain Lion, OS X v10.9
Mavericks, OSX v10.10 Yosemite, 1Гбайт свободного пространства на
жестком диске, подключениек Интернету
HP PhotoCreations
Минимум: 431,4 x302,3 x 157,9 мм; Максимум:431,4 x 557,5 x 251,6мм
475 x 194x 353 мм
3,9 кг
4.96 кг
Температура: От 5до 40 ºC, Влажность: Влажность20–80%
Температура: от -40до 60ºC, Влажность: 5–90 %отн. влажности при
отсутствии конденсации
Акустическая мощность шумовойэмиссии: 6,1 Б (А) (припечати со
скоростью 4 стр./мин);Акустическое давление: 49 дБ (A)(при печати со
скоростью 4 стр./мин)
требования: Входное напряжение:100–240 В переменного тока (+/-10%),
50/60 Гц (+/-3Гц)
расход: 10 Вт(максимум), 10 Вт (в рабочемрежиме), 0,3 Вт
(автоматическое выключение, ручноевыключение), 1,3 Вт (в спящем
режиме), 2,3 Вт(в режиме ожидания)
тип источника питания:Внешний
Соответствие стандарту ENERGY STAR:Да
Сделано в Китае
Гарантия на аппаратнуючасть сроком на один год;ограниченная
круглосуточная поддержка поИнтернету
UG062E: обслуживание HPCare Pack принтеров втечение 3 лет с заменой
на следующий день
UG187E: обслуживание HPCare Pack принтеров втечение 3 лет со
стандартной заменой
(UG062E: только Австрия,Бельгия, Дания, Финляндия, Франция, Германия,
Ирландия, Италия, Нидерланды,Норвегия, Португалия, Испания, Швеция,
Швейцария, Великобритания, Чехия,Греция, Венгрия, Польша, Словакия,
UG187E: все страныЕвропы, Ближнего Востока и Африки)
Примечания
1
Сравнение стоимости печати однойстраницы основано на показателях ресурса струйных картриджей HP46 и стандартных струйных картриджей HP по рекомендуемойрозничной цене, измеренного по методике ISO/IEC
24711 при непрерывной печати.Фактический ресурс может отличаться в зависимости от печатаемыхматериалов и других факторов. Дополнительные сведения см. навеб-сайте http://www.hp.com/go/learnaboutsupplies.;2На
основе внутреннего тестирования HPс использованием оригинальных черных пигментных чернил HP ибумаги ColorLok® в сравнении с обычной бумагой.;3Устойчивость к влаге определенана основе внутреннего
тестирования HP, проведенного всоответствии со стандартами ISO 18935 с использованием оригинальныхчернил HP и фотобумаги HP. Оценка стойкости изображенияпроведена с использованием оригинальных чернил HP и
фотобумаги HP. Дополнительную информациюсм. на веб-сайте http://www.hp.com/go/printpermanence.;4Программа доступна не вовсех странах. Дополнительную информацию см. на веб-сайте http://www.hp.com/recycle.
http://www.hp.com/ru
Продукт может отличаться от представленного на рисунках. © Copyright 2016 HP Development Company, L.P. Информация в настоящем документе может быть изменена без предварительного уведомления.
Все гарантии в отношении продуктов и услуг компании HP выражены исключительно в явном виде в гарантийных обязательствах, прилагаемых к этим продуктам и услугам. Никакие сведения в данном
документе не могут рассматриваться как дополнительные гарантийные обязательства. HP не несет ответственности за технические, редакторские и иные ошибки в данном документе.
4AA6-2809RUE, Январь 2016
Manuals.eu
- Manuals.eu
- HP
- Computers & Peripherals
- Printers
- Deskjet Printers
- DeskJet Ultra Ink Advantage 2529
- Инструкции для пользователя
×
1
2
3
4
5
6
7
8
9
10
11
12
13
14
15
16
17
18
19
20
21
22
23
24
25
26
27
28
29
30
31
32
33
34
35
36
37
38
39
40
41
42
43
44
45
46
47
48
49
50
51
52
53
54
⟨
⟩
Copyright © Manuals.eu
Agreement
Privacy Policy
Contact us
-
Драйверы
4
-
Инструкции по эксплуатации
20
Языки:
HP DeskJet Ink Advantage Ultra 2529 инструкция по эксплуатации
(2 страницы)
- Языки:Русский
-
Тип:
PDF -
Размер:
1.44 MB -
Описание:
Струйное мфу
Просмотр
HP DeskJet Ink Advantage Ultra 2529 инструкция по эксплуатации
(53 страницы)
- Языки:Русский
-
Тип:
PDF -
Размер:
1.61 MB
Просмотр
HP DeskJet Ink Advantage Ultra 2529 инструкция по эксплуатации
(51 страница)
- Языки:Английский
-
Тип:
PDF -
Размер:
1.4 MB
Просмотр
HP DeskJet Ink Advantage Ultra 2529 инструкция по эксплуатации
(53 страницы)
- Языки:Эстонский
-
Тип:
PDF -
Размер:
1.44 MB
Просмотр
HP DeskJet Ink Advantage Ultra 2529 инструкция по эксплуатации
(53 страницы)
- Языки:Испанский
-
Тип:
PDF -
Размер:
1.45 MB
Просмотр
HP DeskJet Ink Advantage Ultra 2529 инструкция по эксплуатации
(59 страниц)
- Языки:Тайский
-
Тип:
PDF -
Размер:
1.6 MB
Просмотр
HP DeskJet Ink Advantage Ultra 2529 инструкция по эксплуатации
(52 страницы)
- Языки:Китайский
-
Тип:
PDF -
Размер:
1.84 MB
Просмотр
HP DeskJet Ink Advantage Ultra 2529 инструкция по эксплуатации
(53 страницы)
- Языки:Индонезийский
-
Тип:
PDF -
Размер:
1.38 MB
Просмотр
HP DeskJet Ink Advantage Ultra 2529 инструкция по эксплуатации
(53 страницы)
- Языки:Португальский
-
Тип:
PDF -
Размер:
1.45 MB
Просмотр
HP DeskJet Ink Advantage Ultra 2529 инструкция по эксплуатации
(49 страниц)
- Языки:Арабский
-
Тип:
PDF -
Размер:
1.62 MB
Просмотр
HP DeskJet Ink Advantage Ultra 2529 инструкция по эксплуатации
(53 страницы)
- Языки:Французский
-
Тип:
PDF -
Размер:
1.46 MB
Просмотр
HP DeskJet Ink Advantage Ultra 2529 инструкция по эксплуатации
(53 страницы)
- Языки:Немецкий
-
Тип:
PDF -
Размер:
1.45 MB
Просмотр
HP DeskJet Ink Advantage Ultra 2529 инструкция по эксплуатации
(53 страницы)
- Языки:Болгарский
-
Тип:
PDF -
Размер:
1.64 MB
Просмотр
HP DeskJet Ink Advantage Ultra 2529 инструкция по эксплуатации
(58 страниц)
- Языки:Японский
-
Тип:
PDF -
Размер:
1.54 MB
Просмотр
HP DeskJet Ink Advantage Ultra 2529 инструкция по эксплуатации
(51 страница)
- Языки:Чешский
-
Тип:
PDF -
Размер:
1.5 MB
Просмотр
HP DeskJet Ink Advantage Ultra 2529 инструкция по эксплуатации
(53 страницы)
- Языки:Итальянский
-
Тип:
PDF -
Размер:
1.45 MB
Просмотр
HP DeskJet Ink Advantage Ultra 2529 инструкция по эксплуатации
(49 страниц)
- Языки:Иврит
-
Тип:
PDF -
Размер:
1.59 MB
Просмотр
HP DeskJet Ink Advantage Ultra 2529 инструкция по эксплуатации
(53 страницы)
- Языки:Финский
-
Тип:
PDF -
Размер:
1.44 MB
Просмотр
HP DeskJet Ink Advantage Ultra 2529 инструкция по эксплуатации
(51 страница)
- Языки:Польский
-
Тип:
PDF -
Размер:
1.51 MB
Просмотр
HP DeskJet Ink Advantage Ultra 2529 инструкция по эксплуатации
(51 страница)
- Языки:Корейский
-
Тип:
PDF -
Размер:
1.53 MB
Просмотр
На NoDevice можно скачать инструкцию по эксплуатации для HP DeskJet Ink Advantage Ultra 2529. Руководство пользователя необходимо для ознакомления с правилами установки и эксплуатации HP DeskJet Ink Advantage Ultra 2529. Инструкции по использованию помогут правильно настроить HP DeskJet Ink Advantage Ultra 2529, исправить ошибки и выявить неполадки.
HP Deskjet Ink Advantage 2520hc All-In-One series
Contents
1 How Do I?…………………………………………………………………………………………………………………………………………………….3
2 Get to know the HP Deskjet 2520 series Printer parts……………………………………………………………………………………………………………………………………………………..5 Control panel features……………………………………………………………………………………………………………………………………….6 Status lights……………………………………………………………………………………………………………………………………………………..6
3 Print Print documents………………………………………………………………………………………………………………………………………………..9 Print photos……………………………………………………………………………………………………………………………………………………10 Print envelopes……………………………………………………………………………………………………………………………………………….10 Tips for print success……………………………………………………………………………………………………………………………………….11
5 Copy and scan Copy documents or photos………………………………………………………………………………………………………………………………21 Scan to a computer…………………………………………………………………………………………………………………………………………22 Tips for copy success………………………………………………………………………………………………………………………………………23 Tips for scan success………………………………………………………………………………………………………………………………………24
6 Work with cartridges Check the estimated ink levels………………………………………………………………………………………………………………………….25 Order ink supplies…………………………………………………………………………………………………………………………………………..25 Replace the cartridges…………………………………………………………………………………………………………………………………….26 Use single-cartridge mode……………………………………………………………………………………………………………………………….28 Cartridge warranty information………………………………………………………………………………………………………………………….28
7 Connectivity USB Connection (non-network connection)………………………………………………………………………………………………………..29 Connect a new printer……………………………………………………………………………………………………………………………………..29
8 Solve a problem Improve print quality………………………………………………………………………………………………………………………………………..31 Clear a paper jam……………………………………………………………………………………………………………………………………………32 Unable to print………………………………………………………………………………………………………………………………………………..34 HP support……………………………………………………………………………………………………………………………………………………..37
9 Technical information Notice……………………………………………………………………………………………………………………………………………………………39 Specifications…………………………………………………………………………………………………………………………………………………39 Environmental product stewardship program………………………………………………………………………………………………………41 Regulatory notices…………………………………………………………………………………………………………………………………………..45
Index………………………………………………………………………………………………………………………………………………………………….49
1
C on
te nt
s
1 How Do I? Learn how to use your HP Deskjet 2520 series
Printer parts Copy documents or photos Load media Replace the cartridges Clear a paper jam
How Do I? 3
H ow
D o
I?
Chapter 1
4 How Do I?
H ow
D o I?
2 Get to know the HP Deskjet 2520 series Printer parts Control panel features Status lights
Printer parts
1 Input tray
2 Input tray guard
3 Paper-width guide for the input tray
4 Control panel
5 Cartridge door
6 Output tray
7 Output tray extender (also referred to as the tray extender)
8 Cartridges
Get to know the HP Deskjet 2520 series 5
G et
to k
no w
th e
H P
D es
kj et
2 52
0 se
rie s
Control panel features
1 Power: Turns the product on or off. When the product is off, a minimal amount of power is still used. To completely remove power, turn off the product, then unplug the power cord. See Status lights for more information.
2 Scan: Initiates a front panel scan job after connection to computer has been established.
3 Cancel: Stops the current operation.
4 Fit to page: Enlarges or reduces the original placed on the glass.
5 Fit to page light: Indicates whether the enlarge or reduce function has been selected.
6 Start Copy Black: Starts a black-and-white copy job. Increase the number of copies by pressing the button multiple times. Acts as a resume button after resolving print problems.
7 Start Copy Color: Starts a color copy job. Increase the number of copies by pressing the button multiple times. Acts as a resume button after resolving print problems.
8 Attention light: Indicates that there is a paper jam, the printer is out of paper, or some event that requires your attention.
9 Control panel display: Indicates the number of copies, media error, ink level, and ink error.
Auto Power-Off is automatically enabled by default when you turn on the printer. When Auto Power-Off is enabled, the printer will automatically turn off after two hours of inactivity to help reduce energy use. See Auto Power-Off for more information.
Status lights When the product is turned on, the power button light will be lit. When the product is processing a job, the power light will be blinking. Additional blinking lights signal errors that you can resolve. See below to learn about blinking lights and what to do.
Behavior Cause and solution
Power light is blinking and attention light is on. Output tray closed when printing is attempted. Open output tray.
Chapter 2
6 Get to know the HP Deskjet 2520 series
G et to know
the H
P D eskjet 2520 series
Behavior Cause and solution
Power light, ink levels, and attention light are blinking. Ink access door is open. See Prepare the trays.
Both ink level icons are blinking. Both cartridges are missing, or do not have the tape removed, or may be defective. Install cartridges, or remove the pink tape from the cartridges, or replace the defective cartridges. See Replace the cartridges for more information.
One ink level icon is blinking. Blinking icon indicates corresponding cartridge is missing, or does not have the tape removed, or may be defective. The printer will print in single- cartridge mode with one cartridge. Install missing black or color cartridge, or remove the pink tape from the cartridge, or replace the defective cartridge.
Letter «P», media icon, and attention light are blinking. There is no paper, or paper is not feeding. Load paper, then press any button, except Cancel, to resume printing. See Load media.
Letter «J», media icon, and attention light are blinking. There is a paper jam. See Clear a paper jam. Load paper, then press any button, except Cancel, to resume printing.
Letter «C», ink level icons, and attention light are blinking. Cartridge carriage inside printer has stalled. Open cartridge door and make sure carriage is not obstructed. Move carriage to the right, close door, and then press any button, except Cancel, to resume.
Power light, media icon, and attention light are blinking. Scanner is not working. Press Power button to turn printer off, and then on again. If problem persists, contact HP. Printer will still print even if scanner is not working.
(continued)
Status lights 7
G et
to k
no w
th e
H P
D es
kj et
2 52
0 se
rie s
Behavior Cause and solution
Power light, letter «E», media icon, ink level icons, ink drop icon, and attention light are blinking.
Printer is in an error state. Reset printer. 1. Turn printer off. 2. Unplug power cord. 3. Wait a minute, plug power cord back in. 4. Turn on printer. If problem persists, contact HP.
One ink level icon and ink drop icon are blinking, and the attention light is on.
Blinking ink level icon indicates that corresponding cartridge has a problem. Cartridge may be improperly installed, incompatible, counterfeit or very low on ink.
If you see a message on your computer screen, refer to the message for more information about the problem.
If there is no message on your computer screen, try removing and reinserting the cartridge.
Confirm that you are using the correct HP cartridge for your printer.
Determine if the cartridge is defective. See Identify a defective cartridge.
If print quality is poor, consider replacing the cartridge. See Replace the cartridges.
Both ink level icons and ink drop icon are blinking, and the attention light is on.
Both cartridges have a problem. Cartridges may be improperly installed, incompatible, defective, counterfeit or very low on ink.
If you see a message on your computer screen, refer to the message for more information about the problem.
If there is no message on your computer screen, try removing and reinserting the cartridges.
Confirm that you are using the correct HP cartridges for your printer.
Determine if a cartridge is defective. See Identify a defective cartridge.
If print quality is poor, consider replacing the cartridges. See Replace the cartridges.
Chapter 2 (continued)
8 Get to know the HP Deskjet 2520 series
G et to know
the H
P D eskjet 2520 series
3 Print Choose a print job to continue.
Print documents
Print photos
Print envelopes
Print documents To print from a software application 1. Make sure the output tray is open. 2. Make sure you have paper loaded in the input tray.
See Load media for more information. 3. From your software application, click the Print button. 4. Make sure the product is the selected printer. 5. Click the button that opens the Properties dialog box.
Depending on your software application, this button might be called Properties, Options, Printer Setup, Printer, or Preferences.
6. Select the appropriate options. On Layout tab select Portrait or Landscape orientation. On Paper/Quality tab select the appropriate paper type and print quality from the Media drop-down
list. Click Advanced to select the appropriate paper size from the Paper/Output list.
7. Click OK to close the Properties dialog box. 8. Click Print or OK to begin printing.
Print 9
Pr in
t
NOTE: You can print your document on both sides of the paper, instead of just one side. Click on the Advanced button on the Paper/Quality or Layout tab. From the Pages to Print drop-down menu select Print Even Pages Only. Click OK to print. After the even numbered pages of the document have been printed, remove the document from the output tray. Reload the paper in the input tray with the blank side up, and top of page down. Return to the Pages to Print drop-down menu and then select Print Odd Pages Only. Click OK to print.
Print photos To print a photo on photo paper 1. Make sure the output tray is open. 2. Remove all paper from the input tray, and then load the photo paper print side up.
NOTE: If the photo paper you are using has perforated tabs, load photo paper so that tabs are on top.
See Load media for more information. 3. On the File menu in your software application, click Print. 4. Make sure the product is the selected printer. 5. Click the button that opens the Properties dialog box.
Depending on your software application, this button might be called Properties, Options, Printer Setup, Printer, or Preferences.
6. Click the Paper/Quality tab. 7. Select the appropriate options.
On Layout tab select Portrait or Landscape orientation. On Paper/Quality tab select the appropriate paper type and print quality from the Media drop-down
list. Click Advanced to select the appropriate paper size from the Paper/Output list.
NOTE: For maximum dpi resolution, go to the Paper/Quality tab and select Photo Paper, Best Quality from the Media drop-down list. Make sure you are printing in color. Then click the Advanced button and select Yes from the Print in Max DPI drop-down list. For more information, see Print using the maximum dpi.
8. Click OK to return to the Properties dialog box. 9. Click OK, and then click Print or OK in the Print dialog box.
NOTE: Do not leave unused photo paper in the input tray. The paper might start to curl, which could reduce the quality of your printout. Photo paper should be flat before printing.
Print envelopes You can load one or more envelopes into the input tray of the HP Deskjet 2520 series. Do not use shiny or embossed envelopes or envelopes that have clasps or windows.
Chapter 3
10 Print
NOTE: For specific details on how to format text for printing on envelopes, consult the help files in your word processing software. For best results, consider using a label for the return address on envelopes.
To print envelopes 1. Make sure the output tray is open. 2. Slide the paper guide all the way to the left. 3. Place the envelopes in the right side of the tray. The side to be printed on should face up. The flap should
be on the left side. 4. Push the envelopes into the printer until they stop. 5. Slide the paper guide firmly against the edge of the envelopes.
See Load media for more information. 6. Click the button that opens the Properties dialog box.
Depending on your software application, this button might be called Properties, Options, Printer Setup, Printer, or Preferences.
7. Select the appropriate options. On Paper/Quality tab select the appropriate type from the Media drop-down menu. Click the Advanced button, and select the appropriate envelope size from the Paper Size drop-down
menu. 8. Click OK, and then click Print or OK in the Print dialog box.
Tips for print success To successfully print, the HP cartridges should be functioning properly with sufficient ink, the paper should be loaded correctly, and the product should have the appropriate settings.
Cartridge tips Use genuine HP ink cartridges. Install both the black and tri-color cartridges correctly.
For more information, see Replace the cartridges. Check the estimated ink levels in the cartridges to make sure there is sufficient ink.
For more information, see Check the estimated ink levels. For more information, see Improve print quality.
Paper loading tips Load a stack of paper (not just one page). All of the paper in the stack should be the same size and type to
avoid causing a paper jam. Load paper with the side to be printed on facing up. Ensure that paper loaded in the input tray lies flat and the edges are not bent or torn. Adjust the paper-width guide in the input tray to fit snugly against all paper. Make sure the paper-width
guide does not bend the paper in the input tray. For more information, see Load media.
Tips for print success 11
Pr in
t
Printer settings tips On the Paper/Quality tab of the print driver, select the appropriate paper type and quality from the Media
drop down menu. Click the Advanced button, and select the appropriate paper size from the Paper Size drop-down menu. Click the HP Deskjet 2520 series desktop icon to open the Printer Software.
NOTE: You can also access the Printer Software by clicking Start > Programs > HP > HP Deskjet 2520 series > HP Deskjet 2520 series
Notes Genuine HP ink cartridges are designed and tested with HP printers and papers to help you easily produce
great results, time after time.
NOTE: HP cannot guarantee the quality or reliability of non-HP supplies. Product service or repairs required as a result of using a non-HP supply will not be covered under warranty.
If you believe you purchased genuine HP ink cartridges, go to:
www.hp.com/go/anticounterfeit
Ink level warnings and indicators provide estimates for planning purposes only.
NOTE: When you receive a low-ink warning message, consider having a replacement cartridge available to avoid possible printing delays. You do not need to replace the cartridges until print quality becomes unacceptable.
Software settings selected in the print driver only apply to printing, they do not apply to copying or scanning. You can print your document on both sides of the paper, instead of just one side.
NOTE: Click the Advanced button on the Paper/Quality or Layout tab. From the Pages to Print drop-down menu select Print Odd Pages Only. Click OK to print. After the odd numbered pages of the document have been printed, remove the document from the output tray. Reload the paper in the input tray with the blank side facing up. Return to the Pages to Print drop-down menu and then select Print Even Pages Only. Click OK to print.
Print using black ink only
NOTE: If you want to print a black and white document using black ink only, click the Advanced button. From the Print in Grayscale drop-down menu select Black Ink Only, then click the OK button. If you see Black and White as an option on the Paper/Quality tab or the Layout tab, select it.
Print using the maximum dpi Use maximum dots per inch (dpi) mode to print high-quality, sharp images on photo paper.
See technical specifications for the print resolution of the maximum dpi mode.
Printing in maximum dpi takes longer than printing with other settings and requires a large amount of disk space.
To print in Maximum dpi mode 1. Make sure you have photo paper loaded in the input tray. 2. On the File menu in your software application, click Print. 3. Make sure the product is the selected printer. 4. Click the button that opens the Properties dialog box.
Depending on your software application, this button might be called Properties, Options, Printer Setup, Printer, or Preferences.
5. Click the Paper/Quality tab.
Chapter 3
12 Print
6. In the Media drop-down list, click Photo Paper, Best Quality.
NOTE: Photo Paper, Best Quality must be selected from the Media drop-down list on the Paper/ Quality tab to enable printing in maximum DPI.
7. Click the Advanced button. 8. In the Printer Features area, select Yes from the Print in Max DPI drop-down list. 9. Select Paper Size from Paper/Output drop-down menu. 10. Click OK to close the advanced options. 11. Confirm Orientation on Layout tab, then click OK to print.
Print using the maximum dpi 13
Pr in
t
4 Paper basics You can load many different types and sizes of paper in the HP Deskjet 2520 series, including letter or A4 paper, photo paper, transparencies, and envelopes.
This section contains the following topics:
Recommended papers for printing Load media
Recommended papers for printing If you want the best print quality, HP recommends using HP papers that are specifically designed for the type of project you are printing.
Depending on your country/region, some of these papers might not be available.
ColorLok HP recommends plain papers with the ColorLok logo for printing and copying of everyday documents. All
papers with the ColorLok logo are independently tested to meet high standards of reliability and print quality, and produce documents with crisp, vivid color, bolder blacks, and dry faster than ordinary plain papers. Look for papers with the ColorLok logo in a variety of weights and sizes from major paper manufacturers.
HP Advanced Photo Paper This thick photo paper features an instant-dry finish for easy handling without smudging. It resists water,
smears, fingerprints, and humidity. Your prints have a look and feel comparable to a store-processed photo. It is available in several sizes, including A4, 8.5 x 11 inch, 10 x 15 cm (4 x 6 inch) (with or without tabs), 13 x 18 cm (5 x 7 inch), and two finishes — glossy or soft gloss (satin matte). It is acid-free for longer lasting documents.
HP Everyday Photo Paper Print colorful, everyday snapshots at a low cost, using paper designed for casual photo printing. This
affordable, photo paper dries quickly for easy handling. Get sharp, crisp images when you use this paper with any inkjet printer. It is available in semi-gloss finish in several sizes, including A4, 8.5 x 11 inch, and 10 x 15 cm (4 x 6 inch) (with or without tabs). For longer-lasting photos, it is acid-free.
HP Brochure Paper or HP Superior Inkjet Paper These papers are glossy-coated or matte-coated on both sides for two-sided use. They are the perfect
choice for near-photographic reproductions and business graphics for report covers, special presentations, brochures, mailers, and calendars.
HP Premium Presentation Paper or HP Professional Paper These papers are heavy two-sided matte papers perfect for presentation, proposals, reports, and
newsletters. They are heavyweight for an impressive look and feel.
Paper basics 15
Pa pe
r b as
ic s
HP Bright White Inkjet Paper HP Bright White Inkjet Paper delivers high-contrast colors and sharp text. It is opaque enough for two-sided
color usage with no show-through, which makes it ideal for newsletters, reports, and flyers. It features ColorLok Technology for less smearing, bolder blacks, and vivid colors.
HP Printing Paper HP Printing Paper is a high-quality multifunction paper. It produces documents that look and feel more
substantial than documents printed on standard multipurpose or copy paper. It features ColorLok Technology for less smearing, bolder blacks, and vivid colors. It is acid-free for longer lasting documents.
HP Office Paper HP Office Paper is a high-quality multifunction paper. It is suitable for copies, drafts, memos, and other
everyday documents. It features ColorLok Technology for less smearing, bolder blacks, and vivid colors. It is acid-free for longer lasting documents.
HP Iron-On Transfers HP Iron-on Transfers (for color fabrics or for light or white fabrics) are the ideal solution for creating custom
T-shirts from your digital photos.
HP Premium Inkjet Transparency Film HP Premium Inkjet Transparency Film make your color presentations vivid and even more impressive. This
film is easy to use and handle and dries quickly without smudging.
HP Photo Value Pack HP Photo Value Packs conveniently package original HP cartridges and HP Advanced Photo Paper to save
you time and take the guesswork out of printing affordable professional photos with your HP Deskjet 2520 series. Original HP inks and HP Advanced Photo Paper have been designed to work together so your photos are long lasting and vivid, print after print. Great for printing out an entire vacations worth of photos or multiple prints to share.
NOTE: At this time, some portions of the HP Web site are available in English only.
To order HP papers and other supplies, go to www.hp.com/buy/supplies. If prompted, choose your country/ region, follow the prompts to select your product, and then click one of the shopping links on the page.
Load media Select a paper size to continue.
Load full-size paper a. Raise the input tray
Raise the input tray.
b. Lower the output tray Lower the output tray and pull out the tray extender.
Chapter 4
16 Paper basics
Paper basics
c. Slide paper-width guide to the left Slide paper-width guide to the left.
d. Load paper. Insert stack of paper into input tray with short edge forward and print side up.
Slide stack of paper down until it stops. Slide paper-width guide to the right until it stops at edge of paper.
Load small-size paper a. Raise the input tray
Raise the input tray.
Load media 17
Pa pe
r b as
ic s
b. Lower the output tray Lower the output tray and pull out the tray extender.
c. Slide paper-width guide to the left. Slide paper-width guide to the left.
d. Load paper. Insert stack of photo paper with short edge down and print side up. Slide stack of paper forward until it stops.
NOTE: If the photo paper you are using has perforated tabs, load photo paper so that tabs are on top.
Slide paper-width guide to the right until it stops at edge of paper.
Chapter 4
18 Paper basics
Paper basics
Load envelopes a. Raise the input tray
Raise the input tray.
b. Lower the output tray Lower the output tray and pull out the tray extender.
c. Slide paper-width guide to the left. Slide paper-width guide to the left.
Remove all paper from the main input tray. d. Load envelopes.
Insert one or more envelopes into far-right side of the input tray. The side to be printed on should face up. The flap should be on the left side and facing down.
Slide stack of envelopes down until it stops. Slide paper-width guide to the right against stack of envelopes until it stops.
Load media 19
Pa pe
r b as
ic s
Chapter 4
20 Paper basics
Paper basics
5 Copy and scan Copy documents or photos Scan to a computer Tips for copy success Tips for scan success
Copy documents or photos NOTE: All documents are copied in normal quality print mode. You cannot change the print mode quality when copying.
Do one of the following:
1-sided original to 1-sided copy a. Load paper.
Load either small photo paper or full-size paper in the input tray.
b. Load original. Lift lid on product.
Load original print side down on right front corner of glass.
Copy and scan 21
C op
y an
d sc
an
Close lid. c. Start copy.
Press Fit to Page to enlarge or reduce the original. Press either Start Copy Black or Start Copy Color. Increase the number of copies by pressing
the button multiple times.
Scan to a computer NOTE: To scan to a computer, the HP Deskjet 2520 series and computer must be connected and turned on.
To scan to a computer:
Single page scan a. Load original.
Lift lid on product.
Load original print side down on right front corner of glass.
Chapter 5
22 Copy and scan
C opy and scan
Close lid.
b. Start scan. Start the scan job by either pressing Scan on the control panel or using the Printer Software.
Click the HP Deskjet 2520 series desktop icon to open the Printer Software.
NOTE: You can also access the Printer Software by clicking Start > Programs > HP > HP Deskjet 2520 series > HP Deskjet 2520 series
Select Scan a Document or Photo. You will see scan options that you can select onscreen.
Tips for copy success Load your original print side down on the right front corner of the glass.
Tips for copy success 23
C op
y an
d sc
an
Press Fit to Page to enlarge or reduce the original image to fit the paper size on which you are printing.
Click here to go online for more information.
Tips for scan success Load your original print side down on the right front corner of the glass.
Clean the scanner glass and make sure that there are no foreign materials adhering to it.
Click here to go online for more information.
Chapter 5
24 Copy and scan
C opy and scan
6 Work with cartridges Check the estimated ink levels Order ink supplies Replace the cartridges Use single-cartridge mode Cartridge warranty information
Check the estimated ink levels You can easily check the ink supply level to determine how soon you might need to replace a cartridge. The ink supply level shows an estimate of the amount of ink remaining in the cartridges.
The printer’s control panel display shows the estimated ink level directly. Refer to the below instructions for checking the detailed information about estimated ink level.
To check the ink levels from the Printer Software 1. Click the HP Deskjet 2520 series desktop icon to open the Printer Software.
NOTE: You can also access the Printer Software by clicking Start > Programs > HP > HP Deskjet 2520 series > HP Deskjet 2520 series
2. In the Printer Software, click Estimated Ink Levels.
NOTE: 1 If you have installed a refilled or remanufactured cartridge, or a cartridge that has been used in another printer, the ink level indicator might be inaccurate or unavailable.
NOTE: 2 Ink level warnings and indicators provide estimates for planning purposes only. When you receive a low-ink warning message, consider having a replacement cartridge available to avoid possible printing delays. You do not have to replace the cartridges until the print quality is unacceptable.
NOTE: 3 Ink from the cartridges is used in the printing process in a number of different ways, including in the initialization process, which prepares the product and cartridges for printing, and in printhead servicing, which keeps print nozzles clear and ink flowing smoothly. In addition, some residual ink is left in the cartridge after it is used. For more information, see www.hp.com/go/inkusage.
Order ink supplies Before ordering cartridges, locate the correct cartridge number.
Locate the cartridge number on the printer The cartridge number is located inside the cartridge door.
Work with cartridges 25
W or
k w
ith c
ar tr
id ge
s
Locate the cartridge number in the Printer Software 1. Click the HP Deskjet 2520 series desktop icon to open the Printer Software.
NOTE: You can also access the Printer Software by clicking Start > Programs > HP > HP Deskjet 2520 series > HP Deskjet 2520 series
2. In the Printer Software, click Shop and then click Shop For Supplies Online. The correct cartridge number will be automatically displayed when you use this link.
To order genuine HP supplies for the HP Deskjet 2520 series, go to www.hp.com/buy/supplies. If prompted, choose your country/region, follow the prompts to select your product, and then click one of the shopping links on the page.
NOTE: Ordering cartridges online is not supported in all countries/regions. If it is not available in your country/region, you may still view supplies information and print a list for reference when shopping at a local HP reseller.
Related topics Choose the right cartridges
Choose the right cartridges HP recommends that you use original HP cartridges. Original HP cartridges are designed and tested with HP printers to help you easily produce great results, time after time.
Related topics Order ink supplies
Replace the cartridges To replace the cartridges 1. Check power. 2. Load paper. 3. Remove cartridge.
a. Open cartridge door.
Wait for print carriage to move to center of the product. b. Press down to release cartridge, then remove it from slot.
Chapter 6
26 Work with cartridges
W ork w
ith cartridges
4. Insert new cartridge. a. Remove cartridge from packaging.
b. Remove plastic tape using pink pull tab.
c. Slide cartridge into slot until it clicks into place.
d. Close cartridge door.
5. Align cartridges.
Replace the cartridges 27
W or
k w
ith c
ar tr
id ge
s
Use single-cartridge mode Use the single-cartridge mode to operate the HP Deskjet 2520 series with only one print cartridge. The single- cartridge mode is initiated when a print cartridge is removed from the print cartridge carriage. During single- cartridge mode, the product can copy documents, copy photos, and print jobs from the computer.
NOTE: When the HP Deskjet 2520 series operates in single-cartridge mode, a message is displayed on screen. If the message is displayed and two print cartridges are installed in the product, verify that the protective piece of plastic tape has been removed from each print cartridge. When plastic tape covers the print cartridge contacts, the product cannot detect that the print cartridge is installed.
Exit single-cartridge mode Install two print cartridges in the HP Deskjet 2520 series to exit single-cartridge mode.
Related topics Replace the cartridges
Cartridge warranty information The HP cartridge warranty is applicable when the product is used in its designated HP printing device. This warranty does not cover HP ink products that have been refilled, remanufactured, refurbished, misused, or tampered with.
During the warranty period the product is covered as long as the HP ink is not depleted and the end of warranty date has not been reached. The end of warranty date, in YYYY/MM format, may be found on the product as indicated:
For a copy of the HP Limited Warranty Statement for the printer, see the printed documentation that came with the product.
Chapter 6
28 Work with cartridges
W ork w
ith cartridges
7 Connectivity USB Connection (non-network connection) Connect a new printer
USB Connection (non-network connection) The HP Deskjet 2520 series supports a rear USB 2.0 High Speed port for connection to a computer.
To connect the product with the USB cable Refer to the setup instructions that came with your product for information on connecting to a computer with
a USB cable.
NOTE: Do not connect the USB cable to the product until you are prompted to do so.
If the printer software has been installed, the printer will operate as a plug and play device. If the software has not been installed, insert the CD that came with the device and follow the onscreen instructions.
Connect a new printer If you have already installed the printer software on your computer, but have not yet connected your printer, do the following:
Connect a new printer 1. From the computers start menu select All Programs or Programs, and then select HP. 2. Select HP Deskjet 2520 series. 3. Select Printer Setup & Software. 4. Select Connect a new printer. Follow the onscreen instructions.
Connectivity 29
C on
ne ct
iv ity
Chapter 7
30 Connectivity
C onnectivity
8 Solve a problem This section contains the following topics:
Improve print quality Clear a paper jam Unable to print HP support
Improve print quality 1. Make sure you are using genuine HP cartridges. 2. Check the Printer Software settings to make sure you have selected the appropriate paper type and print
quality from the Media drop-down list. 3. Check the estimated ink levels to determine if the cartridges are low on ink. For more information, see
Check the estimated ink levels. If the print cartridges are low on ink consider replacing them. 4. Align the printer cartridges.
To align the cartridges from the Printer Software
NOTE: Aligning the cartridges ensures high-quality output. The HP All-in-One prompts you to align the cartridges every time you install a new cartridge. If you remove and reinstall the same print cartridge, the HP All-in-One will not prompt you to align the print cartridges. The HP All-in-One remembers the alignment values for that print cartridge, so you do not need to realign the print cartridges.
a. Load letter or A4 unused plain white paper into the input tray. b. In the Printer Software, click Print & Scan and then click Maintain Your Printer to access the HP
Deskjet 2520 series Toolbox. c. The HP Deskjet 2520 series Toolbox appears. d. Click the Device Services tab. e. Click Align Ink Cartridges tab. The product prints an alignment sheet. f. Load the cartridge alignment sheet print side down on the right front corner of the glass. g. Press the Start Copy Black button. The product aligns the cartridges. Recycle or discard the cartridge
alignment sheet. 5. Print a diagnostics page if the cartridges are not low on ink.
To print a diagnostics page a. Load letter or A4 unused plain white paper into the input tray. b. In the Printer Software, click Print & Scan and then click Maintain Your Printer to access the HP
Deskjet 2520 series Toolbox. c. Click the Device Reports tab. d. Click Print Diagnostic Information to print a diagnostics page. Review the blue, magenta, yellow,
and black boxes on the diagnostics page. If you are seeing streaks in the color and black boxes, or no ink in portions of the boxes, then automatically clean the cartridges
Solve a problem 31
So lv
e a
pr ob
le m
6. Clean the print cartridges automatically, if the diagnostic page shows steaks or missing portions of the color and black boxes.
To clean the cartridges automatically a. Load letter or A4 unused plain white paper into the input tray. b. In the Printer Software, click Print & Scan and then click Maintain Your Printer to access the HP
Deskjet 2520 series Toolbox. c. Click the Device Services tab. d. Click Clean Ink Cartridges. Follow the onscreen instructions.
If the above solutions do not resolve the problem, click here for more online troubleshooting.
Clear a paper jam Clear a paper jam.
To clear a paper jam 1. Locate the paper jam
Input tray If the paper jam is located near the back input tray, pull the paper gently out of the input tray.
Chapter 8
32 Solve a problem
Solve a problem
Output tray If the paper jam is located near the front output tray, pull the paper gently out of the output tray.
You may need to open the carriage door and slide the print carriage to the right to access the paper jam.
Inside of printer If the paper jam is located inside the printer, open the cleanout door located on the bottom of the
printer. Press tabs on both sides of the cleanout door.
Remove jammed paper.
Close the cleanout door. Gently push the door towards the prin