

4-170-536-82(1)
HDR-CX550E/CX550VE/
XR550E/XR550VE
Cameră video digitală HD
Manual „Handycam”
Cuprins
Pregătirea
Înregistrare/Redare
Folosirea corectă a camerei
video
Salvarea imaginilor cu un
dispozitiv extern
Particularizarea camerei
video
Informaţii suplimentare
Consultare rapidă
9
12
21
45
58
67
93
122
2010 Sony Corporation

Citiţi mai întâi
următoarele informaţii
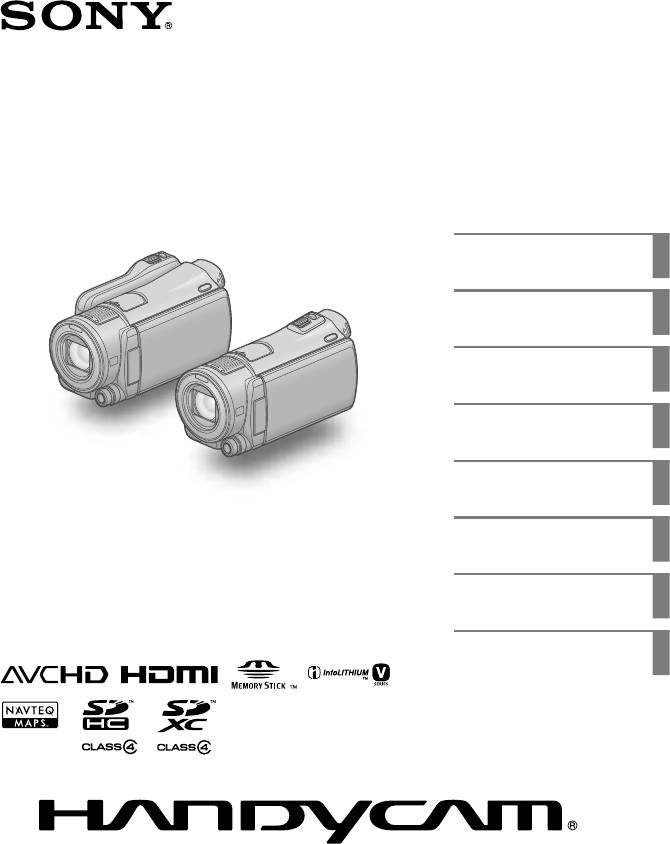
Elemente furnizate
Cifrele din ( ) reprezintă numărul de
articole furnizate.
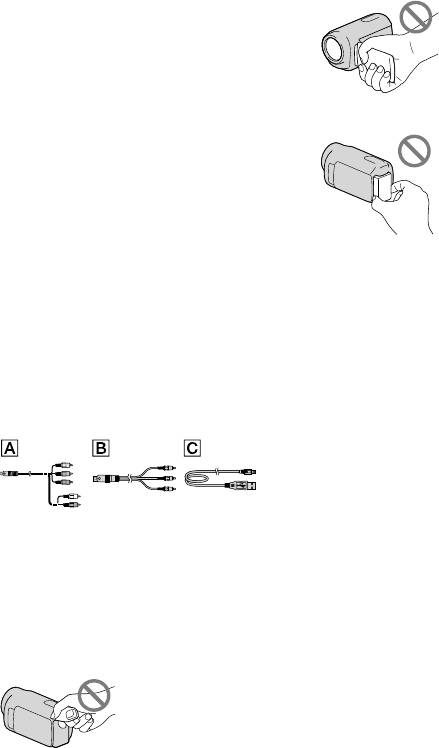
Adaptor de c.a.. (1)
Cablu de alimentare (1)
Cablu A/V de semnal pe componente
(1)
Cablu de conectare A/V (1)
Cablu USB (1)
Telecomandă fără fir (1)
O baterie cu litiu de tip buton este deja instalată.
Înlăturaţi folia de izolare înainte de a utiliza
telecomanda fără fir.
Acumulator reîncărcabil NP-FV50 (1)
CD-ROM „Handycam” Application
Software (1)
„PMB” (software, inclusiv „PMB Help”)
Manual „Handycam” (PDF)
„Ghid de acţionare” (1)
Consultaţi pagina 19 cu privire la cartela de
memorie pe care o puteţi folosi împreună cu
această cameră video.
Utilizarea camerei video
Nu ţineţi camera video de următoarele
componente şi de capacele mufelor.
Vizor
Acumulator
Camera video nu este rezistentă la praf, la stropi
sau la apă. Consultaţi „Despre manevrarea
merei video” (pag. 116).
ca
Chiar dacă este oprită camera video,
funcţia GPS funcţionează atâta timp cât
comutatorul GPS este setat pe ON. Asiguraţivă că aţi setat comutatorul GPS pe OFF în
timpul decolării sau aterizării unui avion
(HDR-CX550VE/XR550VE).
Elementele de meniu, ecranul LCD,
vizorul şi obiectivul
Elementele de meniu marcate cu gri nu sunt
disponibile în condiţiile curente de înregistrare
sau redare.
Ecranul LCD şi vizorul sunt produse cu ajutorul
unei tehnologii extrem de precise, astfel că
peste 99,99% dintre pixeli sunt funcţionali. Cu
toate acestea, este posibil ca pe ecranul LCD
să apară în mod constant nişte puncte mici
negre şi/sau luminoase (de culoare albă, roşie,
albastră sau verde). Aceste puncte reprezintă
rezultatul normal al procesului de fabricaţie şi
nu afectează în niciun fel înregistrarea.
RO
2
Ecran LCD
Puncte negre
Puncte albe, roşii, albastre sau verzi
Expunerea îndelungată la soare a ecranului
LCD, a vizorului sau a lentilelor poate provoca
disfuncţionalităţi.

Nu îndreptaţi camera spre soare.
Procedând astfel, aceasta ar putea funcţiona
necorespunzător. Înregistraţi imagini ale
soarelui numai în condiţii de luminozitate
scăzută, cum ar fi în amurg.
Despre setarea limbii
Afişajele de pe ecran în diverse limbi sunt
utilizate pentru ilustrarea procedurilor de
funcţionare. Dacă este necesar, înainte de
utilizarea camerei video, schimbaţi limba afişată
e e
cran (pag. 17).
p
Despre înregistrare
Pentru o funcţionare stabilă a cartelei de
memorie, se recomandă să iniţializaţi cartela
de memorie cu camera video, înainte de prima
t
ilizare (pag. 87). La iniţializarea cartelei vor fi
u
şterse toate datele stocate pe cartelă, iar datele
vor fi irecuperabile. Salvaţi datele importante pe
calculator, etc.
Înainte de a începe înregistrarea, verificaţi
funcţia de înregistrare pentru a vă asigura
că imaginile şi sunetul sunt înregistrate fără
probleme.
Nu se acordă despăgubiri pentru conţinutul
înregistrărilor, chiar dacă înregistrarea sau
redarea nu este posibilă din cauza unei
defecţiuni a camerei video, a suportului de
stocare etc.
Sistemele TV color sunt diferite în funcţie de
ţară/regiune. Pentru a vedea înregistrările pe
televizor, aveţi nevoie de un televizor în sistem
PAL.
Programele de televiziune, filmele, casetele
video şi alte materiale pot fi protejate de
drepturile de autor. Înregistrarea neautorizată
a unor astfel de materiale poate să contravină
legilor drepturilor de autor.
Note despre redare
Camera dvs. video este compatibilă cu formatul
MPEG-4 AVC/H.264 High Profile pentru o
înregistrare cu o calitate a imaginii de înaltă
definiţie (HD). Prin urmare, nu puteţi reda
imaginile înregistrate cu o calitate a imaginii de
înaltă definiţie (HD) de camera dvs. video pe
următoarele dispozitive;
Alte dispozitive compatibile cu formatul
AVCHD, dar incompatibile cu High Profile
Dispozitive incompatibile cu formatul
AVCHD
Este posibil să nu puteţi reda în mod normal
imagini înregistrate cu camera video pe alte
dispozitive. Este posibil să nu puteţi reda
în mod normal imagini înregistrate cu alte
dispozitive pe camera video.
Filmele cu calitatea imaginii (STD) standard
înregistrate pe cardurile de memorie SD nu
pot fi redate pe echipamentul AV al altor
producători.
Discurile înregistrate cu o calitate a
imaginii HD (înaltă definiţie)
Această cameră video înregistrează imagini de
înaltă definiţie în format AVCHD. Suporturile
DVD ce conţin înregistrări AVCHD nu trebuie
utilizate împreună cu dispozitive DVD de
redare sau de înregistrare deoarece este posibil
ca dispozitivul de redare/înregistrare DVD
să nu elimine discul şi să şteargă conţinutul
fără avertisment. Suportul DVD ce conţine
înregistrări AVCHD poate fi redat pe un
dispozitiv de redare/înregistrare cu discuri Blu-
sau pe alte dispozitive compatibile.
ray Disc
Salvarea tuturor datelor de imagine
înregistrate
Pentru a evita pierderea datelor de imagine,
salvaţi periodic toate imaginile înregistrate pe
un suport extern. Se recomandă salvarea datelor
de imagine pe un disc, cum ar fi un DVD-R,
cu ajutorul computerului. De asemenea, puteţi
salva datele de imagine utilizând un aparat
video sau un dispozitiv de înregistrare DVD/
D (p
ag. 60).
HD
RO
3
Nu puteţi realiza un disc AVCHD cu datele de
imagine înregistrate cu
[Afişaţi altele]
categoria
FX]. Salvaţi-le pe un disc Blu-ray Disc sau
losiţi un suport extern (pag. 58).
fo
[SETĂRI FOTO.]) setat la [HD
(MENU)
[ MOD ÎNREG.] (din
Note cu privire la acumulator/adaptor
de c.a.
După oprirea camerei video, aveţi grijă să
scoateţi acumulatorul sau adaptorul de c.a.
Deconectaţi adaptorul de c.a. de la camera
video ţinând în mână atât camera video, cât şi
conectorul de c.c.
Notă privind temperatura camerei
video/acumulatorului
Atunci când temperatura camerei video sau a
acumulatorului devine deosebit de ridicată sau
deosebit de scăzută, este posibil să nu puteţi
înregistra sau reda pe camera video; aceasta se
datorează funcţiilor de protecţie ale camerei
video care se activează în astfel de situaţii. În
acest caz, pe ecranul LCD şi pe vizor apare un
dic
ator (pag. 101).
in
Când camera video este conectată la
un computer sau accesorii
Nu încercaţi să formataţi suportul de
înregistrare al camerei video cu ajutorul
computerului. Procedând astfel, camera video
poate să nu funcţioneze corect.
Atunci când conectaţi camera video la un
alt dispozitiv cu ajutorul unor cabluri de
legătură, aveţi grijă să introduceţi corect mufa
de conectare. Dacă introduceţi forţat mufa în
terminal, veţi deteriora terminalul şi pot apărea
defecţiuni ale camerei video.
RO
4
Dacă nu puteţi înregistra/reda imagini,
efectuaţi procedura [FORMAT.MEDIU]
Dacă înregistraţi/ştergeţi imagini în mod
repetat pe o perioadă lungă de timp, se
produce o fragmentare a datelor pe suportul
de înregistrare. Imaginile nu pot fi salvate
sau înregistrate. În acest caz, salvaţi mai întâi
imaginile pe un suport extern şi apoi efectuaţi
[FORMAT.MEDIU] atingând
(MENU)
[Afişaţi altele] [FORMAT.MEDIU]
(din categoria
suportul dorit
[GEST.MED.STOC.])
[DA] [DA] .
Observaţii despre accesoriile opţionale
Recomandăm folosirea unor accesorii Sony
originale.
Este posibil ca în anumite ţări/regiuni să nu fie
disponibile accesoriile originale Sony.
Despre acest manual, ilustraţii şi afişaje
de pe ecran
Imaginile folosite ca exemplu în acest manual
în scopul ilustrării sunt realizate cu o cameră
foto digitală, de aceea pot fi diferite de imaginile
şi indicatorii de ecran care apar pe camera
dvs. video. Iar ilustraţiile camerei video şi a
indicaţiilor de pe ecran sunt exagerate sau
simplificate pentru o înţelegere mai clară.
În acest manual, memoria internă (HDRCX550E/CX550VE), hard disk-ul (HDRXR550E/XR550VE) al camerei video şi cartela
de memorie sunt denumite „suporturi de
înregistrare”.
În acest manual, discul DVD înregistrat cu o
calitate a imaginii de înaltă definiţie (HD) este
numit disc AVCHD.
Designul şi specificaţiile camerei video şi ale
accesoriilor pot fi modificate fără preaviz.
Verificaţi numele modelului camerei
dvs. video
Numele modelului este prezentat în acest
manual când există diferenţe de specificaţii
între modele. Verificaţi numele modelului de pe
partea inferioară a camerei dvs. video.

Principalele diferenţe de specificaţii ale acestei
serii sunt următoarele.
HDRCX550E/
HDRCX550VE
HDRXR550E/
HDRXR550VE
*
*
Suport de
înregistrare
Memorie
internă +
cartelă de
memorie
Hard disk
intern +
cartelă de
memorie
Capacitatea
suportului
intern de
înregistrare
64 GB Intrare/
240 GB
Mufă
USB
ieşire
Modelul cu simbolul * este dotat cu GPS.
Observaţii despre folosire
Nu efectuaţi niciuna dintre următoarele acţiuni.
În caz contrar, suportul de înregistrare poate fi
deteriorat, imaginile înregistrate pot fi imposibil
de redat, se pot pierde sau pot apărea alte
defecţiuni.
scoaterea cartelei de memorie când ledul de
g. 20) este aprins sau clipeşte
a
acces (p
scoaterea acumulatorului sau a adaptorului de
c.a. din camera video sau supunerea camerei
la şocuri mecanice sau vibraţii când ledurile
(Film)/ (Foto) (pag. 21) sau ledul de
acces (pag. 20) sunt aprinse sau clipesc
Când folosiţi o curea de umăr (se vinde
separat), nu izbiţi camera video de obiecte.
Nu folosiţi camera video în ambiente foarte
zgomotoase (HDR-XR550E/XR550VE).
Despre senzorul de cădere (HDRXR550E/XR550VE)
Pentru a proteja hard disk-ul intern de şocuri
în urma căderii, camera video are o funcţie a
rului de cădere (pag. 92). În timpul căderii
senzo
sau în stare de imponderabilitate, poate fi
înregistrat şi zgomotul când este activată această
funcţie de către camera video. Dacă senzorul de
cădere percepe căderi în mod repetat, se poate
opri înregistrarea/redarea.
Observaţii despre folosirea camerei
video la mari altitudini (HDR-XR550E/
XR550VE)
Nu porniţi camera video într-o zonă cu
presiunea scăzută, la o altitudine de peste 5.000
de metri. În caz contrar, puteţi deteriora hard
disk-ul intern al camerei video.
RO
5

Operaţiuni
Pregătirea (pag. 12)
Pregătiţi sursa de alimentare şi cartela de memorie.
Înregistrarea filmelor şi a fotografiilor (pag. 21)
Înregistrarea filmelor pag. 22
Schimbarea modului de înregistrare (pag. 28)
Durata de înregistrare estimată (INFO.MEDIU, pag. 87)
Realizarea fotografiilor pag. 24
Redarea filmelor şi a fotografiilor
Redarea cu camera video pag. 33
Redarea imaginilor pe un televizor pag. 41
Salvarea imaginilor
Salvarea filmelor şi a fotografiilor cu ajutorul unui computer
Salvarea filmelor şi a fotografiilor pe un suport extern
g. 58
pa
Salvarea imaginilor cu un DVD writer/recorder p
ag. 60
Ştergerea filmelor şi a fotografiilor (pag. 45)
Dacă ştergeţi datele de imagine pe care le-aţi salvat pe un
computer sau pe un disc, puteţi înregistra imagini noi pe spaţiul
liber.
RO
6

Sfaturi pentru o înregistrare reuşită
Pentru a obţine rezultate bune de înregistrare
Stabilizarea camerei video
Atunci când ţineţi camera video, menţineţi o poziţie dreaptă şi
ţineţi braţele aproape de corp.
Deşi funcţia SteadyShot este eficientă pentru împiedicarea
mişcărilor camerei, este esenţial să nu mişcaţi camera video.
Efectuarea lină a operaţiunilor de zoom (mărire/
micşorare a imaginilor)
Măriţi şi micşoraţi încet şi cu mişcări line. De asemenea, utilizaţi
zoom-ul cu moderaţie. Zoom-ul utilizat în exces creează filme
care pot provoca o stare de oboseală celui ce le urmăreşte.
Crearea senzaţiei de spaţialitate
Utilizaţi tehnica de panoramare. Stabilizaţi-vă şi deplasaţi
camera video pe orizontală în timp ce vă răsuciţi încet corpul.
Rămâneţi nemişcat la sfârşitul panoramării pentru ca scena să
pară stabilă.
Accentuarea filmelor cu ajutorul narării
Gândiţi-vă la sunetele ce vor fi înregistrate împreună cu filmele.
Naraţi pe tema subiectului sau vorbiţi cu subiectul în timpul
filmării.
Încercaţi să creaţi un volum echilibrat al vocilor, întrucât
persoana care înregistrează se află mai aproape de microfon
decât persoana înregistrată.
Utilizarea accesoriilor
Utilizaţi în mod eficient accesoriile camerei video.
De exemplu, cu ajutorul unui trepied, puteţi face înregistrări
secvenţiale sau puteţi înregistra subiecţii în condiţii de iluminare
slabă, cum ar fi scene cu artificii sau vederi nocturne. Dacă
aveţi întotdeauna cu dvs. un acumulator de schimb, puteţi
continua înregistrarea fără să vă îngrijoraţi că se va descărca
acumulatorul.
RO
7

Tehnici utile de înregistrare
Surprinderea unor imagini frumoase
fără reglări complicate
AUTO.INTELIGENT(26)
Realizarea fotografiilor în timpul
înregistrării unui film
Dual Rec(30)
Declanşare Zâmbet (29)
Filmarea unor artificii sau a unui apus
de soare în toată splendoarea sa
ARTIFICII(72)
RĂSĂRIT ŞI APUS(72)
Focalizarea pe un copil din partea
stângă a ecranului
Setarea prioritară a unui subiect (29)
FOCALIZ.PCT.(74)
Înregistrarea într-o cameră slab
iluminată
NightShot(31)
LOW LUX(79)
Verificarea poziţiei de avânt la golf
CAPTURARE GOLF(76)
ÎNREG.CRSV.LENT.(77)
RO
8

Cuprins
Citiţi mai întâi următoarele informaţii .. .. . .. .. . .. .. .. . .. .. . .. .. . .. .. . .. .. . .. .. .. . .. .. . .. .. . .. .. . 2
Observaţii despre folosire . .
Operaţiuni .. .. .. .. . .. .. . .. .. . .. .. . .. .. .. . .. .. . .. .. . .. .. . .. .. . .. .. .. . .. .. . .. .. . .. .. . .. .. . .. .. .. . .. .. . .. 6
turi pentru o înregistrare reuşită ..
Sfa
Pregătirea
Pasul 1: Încărcarea acumulatorului .. .. . .. .. .. . .. .. . .. .. . .. .. . .. .. . .. .. .. . .. .. . .. .. . .. .. . .. .. . . 12
Pasul 2: Pornirea camerei şi setarea datei şi a orei ..
Schimbarea setării pentru limbă . .
Pasul 3: Pregătirea suportului de înregistrare ..
Selectarea suportului de înregistrare pentru filme . .
Selectarea suportului de înregistrare pentru fotografii ..
Introducerea unei cartele de memorie . .
Înregistrare/Redare
Înregistrare .. .. .. .. .. .. . .. .. . .. .. . .. .. . .. .. . .. .. .. . .. .. . .. .. . .. .. . .. .. . .. .. . .. .. .. . .. .. . .. .. . .. .. . .. 21
Înregistrarea filmelor . .
Realizarea fotografiilor ..
Funcţii utile pentru înregistrarea filmelor şi a fotografiilor . .
Utilizarea zoom-ului . .
Înregistrarea automată a unor imagini mai bune (AUTO.INTELIGENT) . .
Selectarea unei calităţi a imaginii de înaltă definiţie (HD)
sau a unei calităţi standard (STD) . .
Selectarea modului de înregistrare . .
Setarea unui subiect ca prioritar . .
Surprinderea automată a zâmbetelor (Declanşare zâmbet) ..
Înregistrarea sunetului cu mai multă prezenţă (înregistrare a sunetului
surround pe 5,1 canale) . .
Realizarea fotografiilor de înaltă calitate în timpul înregistrării filmelor
(Dual Rec) . .. .. . .. .. . .. .. . .. .. . .. .. .. . .. .. . .. .. . .. .. . .. .. . .. .. .. . .. .. . .. .. . .. .. . .. .. . .. .. .. . 30
nregistrarea în locuri întunecate (NightShot) . .
Î
Înregistrarea în modul Oglindă . .
Controlul manual al setărilor pentru imagini cu ajutorul butonului
rotativ MANUAL . .
Redarea cu camera video . .
Funcţii utile pentru redarea filmelor şi a fotografiilor . .
Căutarea după dată a imaginilor dorite (Index după dată) . .
Căutarea cu precizie a scenei dorite (Indexul rolei de film) . .
Căutarea scenei dorite după faţă (Index pentru feţe) . .
Redarea unui rezumat al filmelor (Redare evidenţiere) ..
. .. . .. .. . .. .. .. . .. .. . .. .. . .. .. . .. .. . .. .. .. . .. .. . .. .. . .. .. . .. .. . .. .. .. . .. . 31
. .. . .. .. . .. .. .. . .. .. . .. .. . .. .. . .. .. . .. .. .. . .. .. . .. .. . .. .. . .. .. . 5
. .. . .. .. . .. .. .. . .. .. . .. .. . .. .. . .. .. . .. .. .. . .. .. . .. .. . .. .. . . 7
. .. . .. .. . .. .. .. . .. .. . .. .. . .. .. . .. .. . .. .. 15
. .. . .. .. . .. .. .. . .. .. . .. .. . .. .. . .. .. . .. .. .. . .. .. . .. .. . 17
. .. . .. .. . .. .. .. . .. .. . .. .. . .. .. . .. .. . .. .. .. . .. 18
. .. . .. .. . .. .. .. . .. .. . .. .. . .. .. 18
. .. . .. .. . .. .. .. . .. .. . .. .. 18
. .. . .. .. . .. .. .. . .. .. . .. .. . .. .. . .. .. . .. .. .. . .. 19
. .. . .. .. . .. .. .. . .. .. . .. .. . .. .. . .. .. . .. .. .. . .. .. . .. .. . .. .. . .. .. . .. .. 22
. .. . .. .. . .. .. .. . .. .. . .. .. . .. .. . .. .. . .. .. .. . .. .. . .. .. . .. .. . .. .. . .. 24
. .. . .. .. . .. .. .. . .. .. . .. .. . .. . 26
. .. . .. .. . .. .. .. . .. .. . .. .. . .. .. . .. .. . .. .. .. . .. .. . .. .. . .. .. . .. .. . .. .. . 26
. .. . .. .. . .. .. .. . .. .. . .. .. . .. .. . .. .. . .. .. .. . .. .. . .. .. 27
. .. . .. .. . .. .. .. . .. .. . .. .. . .. .. . .. .. . .. .. .. . .. .. . . 28
. .. . .. .. . .. .. .. . .. .. . .. .. . .. .. . .. .. . .. .. .. . .. .. . .. .. . 29
. .. . .. .. . .. .. .. . .. . 29
. .. . .. .. . .. .. .. . .. .. . .. .. . .. .. . .. .. . .. .. .. . .. .. . .. .. . .. .. . .. .. . 30
. .. . .. .. . .. .. .. . .. .. . .. .. . .. .. . .. .. . 31
. .. . .. .. . .. .. .. . .. .. . .. .. . .. .. . .. .. . .. .. .. . .. .. . .. .. . . 31
. .. . .. .. . .. .. .. . .. .. . .. .. . .. .. . .. .. . .. .. .. . .. .. . .. .. . .. .. . .. .. . .. .. .. . 33
. .. . .. .. . .. .. .. . .. .. . .. .. . .. .. . .. .. . 36
. .. . .. .. . .. .. .. . .. .. . 36
. .. . .. .. . .. .. .. . .. .. 36
. .. . .. .. . .. .. .. . .. .. . .. .. . . 37
. .. . .. .. . .. .. .. . .. .. . .. .. 37
Cuprins
. .. . .. . 26
RO
9

Utilizarea zoom-ului la redare cu fotografii . . .. .. .. .. .. . .. .. . .. .. .. . .. .. . .. .. . .. .. . .. 40
Redarea unei serii de fotografii (Succesiune foto) ..
Redarea imaginilor pe un televizor . .
Conectarea la un televizor utilizând funcţia [Ghid CONECT.TV] . .
Utilizarea tehnologiei „BRAVIA” Sync ..
. .. . .. .. . .. .. .. . .. .. . .. .. . .. .. . .. .. . .. .. .. . .. .. . .. .. . .. .. . 41
. .. . .. .. . .. .. .. . .. .. . .. .. . .. .. . .. .. . .. .. .. . .. .. . 44
. .. . .. .. . .. .. .. . .. .. . .. .. . .. .. . . 40
. .. . .. .. . .. .. .. 41
Folosirea corectă a camerei video
Ştergerea filmelor şi a fotografiilor . .. . .. .. . .. .. . .. .. .. . .. .. . .. .. . .. .. . .. .. . .. .. .. . .. .. . .. .. . .. 45
Protejarea filmelor şi a fotografiilor înregistrate (Protejare) . .
Divizarea unui film ..
Capturarea unei fotografii dintr-un film . .
Duplicarea/copierea filmelor şi a fotografiilor de pe memoria internă pe o
cartelă de memorie . .
Duplicarea filmelor ..
Copierea fotografiilor ..
Utilizarea Listei de redare a filmelor . .
Crearea Listei de redare . .
Redarea Listei de redare . .
Utilizarea funcţiei GPS (HDR-CX550VE/XR550VE). .. .. . .. .. . .. .. . .. .. .. . .. .. . .. .. . .. .. . .. .. . 54
Setarea funcţiei GPS .
Obţinerea informaţiilor despre locaţia actuală . .
Căutarea unei scene dorite după locaţia înregistrării (Index hartă) . .
Afişarea informaţiilor despre coordonate (COORDONATE) . .
Reglarea automată a orei şi a zonei (AUTOAJUST.ORĂ/AUTOSTAB.ZONĂ) ..
. .. . .. .. . .. .. .. . .. .. . .. .. . .. .. . .. .. . .. .. .. . .. .. . .. .. . .. .. . .. .. . .. .. .. . .. .. . .. . 47
. .. . .. .. . .. .. .. . .. .. . .. .. . .. .. . .. .. . .. .. .. . .. .. . .. .. 48
. .. . .. .. . .. .. .. . .. .. . .. .. . .. .. . .. .. . .. .. .. . .. .. . .. .. . .. .. . .. .. . .. .. .. . .. .. . . 49
. .. . .. .. . .. .. .. . .. .. . .. .. . .. .. . .. .. . .. .. .. . .. .. . .. .. . .. .. . .. .. . .. .. .. 49
. .. . .. .. . .. .. .. . .. .. . .. .. . .. .. . .. .. . .. .. .. . .. .. . .. .. . .. .. . .. .. . .. . 50
. .. . .. .. . .. .. .. . .. .. . .. .. . .. .. . .. .. . .. .. .. . .. .. . .. .. . .. .. 52
. .. . .. .. . .. .. .. . .. .. . .. .. . .. .. . .. .. . .. .. .. . .. .. . .. .. . .. .. . .. .. . 52
. .. . .. .. . .. .. .. . .. .. . .. .. . .. .. . .. .. . .. .. .. . .. .. . .. .. . .. .. . .. .. . 53
.
. .. . .. .. . .. .. .. . .. .. . .. .. . .. .. . .. .. . .. .. .. . .. .. . .. .. . .. .. . .. .. . .. .. . 54
. .. . .. .. . .. .. .. . .. .. . .. .. . .. 46
. .. . .. .. . .. .. .. . .. .. . .. .. . .. .. . .. .. 55
. .. . .. .. . . 56
. .. . .. .. . .. .. .. . .. .. . 57
Salvarea imaginilor cu un dispozitiv extern
Salvarea imaginilor pe un suport extern (COPIE DIRECTĂ) . .. . .. .. . .. .. .. . .. .. . .. .. . .. .. . . 58
Crearea unui disc cu un DVD writer, recorder . .
Selectarea metodei de creare a unui disc . .
Crearea unui disc cu ajutorul dispozitivului DVD writer dedicat,
DVDirect Express . .
Crearea unui disc cu o calitate a imaginii de înaltă definiţie (HD) cu un
DVD writer etc., diferit de DVDirect Express . .
Crearea unui disc cu o calitate a imaginii de definiţie standard (STD) cu
ajutorul unui recorder etc. ..
. .. . .. .. . .. .. .. . .. .. . .. .. . .. .. . .. .. . .. .. .. . .. .. . .. .. . .. .. . .. .. . .. .. .. . .. 61
. .. . .. .. . .. .. .. . .. .. . .. .. . .. .. . .. .. . .. .. .. . .. .. . .. .. . .. .. . .. 65
. .. . .. .. . .. .. .. . .. .. . .. .. . .. .. . .. .. . .. .. .. . .. 60
. .. . .. .. . .. .. .. . .. .. . .. .. . .. .. . .. .. . .. .. .. 60
. .. . .. .. . .. .. .. . .. .. . .. .. . .. .. . .. .. . .. . 64
. . 57

Particularizarea camerei video
Utilizarea meniurilor . .. .. .. .. .. .. . .. .. . .. .. . .. .. . .. .. .. . .. .. . .. .. . .. .. . .. .. . .. .. . .. .. .. . .. .. . .. .. . 67
Utilizarea meniurilor . .
Utilizarea funcţiei MENIUL MEU. .. .. . .. .. . .. .. . .. .. . .. .. . .. .. .. . .. .. . .. .. . .. .. . .. .. . .. . 68
Utilizarea funcţiei
Liste de meniuri . .
SETĂRI MANUALE (Elemente de ajustat pentru starea scenei) . . .. .. .. . .. .. . .. .. . .. .. . .. .. . .. .. . 72
SETĂRI FOTO. (Elemente pentru fotografiere particularizată) . . .. .. .. .. .. .. . .. .. . .. .. . .. .. . .. .. . . 78
REGLAJE FOTO. (Elemente pentru înregistrarea fotografiilor) .. . .. .. . .. .. .. . .. .. . .. .. . .. .. . .. .. . .. 82
REDARE (Elemente pentru redare) . .. .. . .. .. .. . .. .. . .. .. . .. .. . .. .. . .. .. .. . .. .. . .. .. . .. .. . .. .. . .. .. 84
EDITARE (Elemente pentru editare) . . . .. .. .. .. .. . .. .. . .. .. . .. .. .. . .. .. . .. .. . .. .. . .. .. . .. .. .. . .. .. . 86
ALTELE (Elemente pentru alte setări) .. .. .. . .. .. .. . .. .. . .. .. . .. .. . .. .. . .. .. . .. .. .. . .. .. . .. .. . .. .. . .. 86
GEST.MED.STOC. (Elemente pentru suportul de înregistrare) . . .. . .. . .. .. . .. .. .. . .. .. . .. .. . .. .. . .. 87
REGLAJ GENERAL (Alte elemente de configurare) . .. .. .. .. .. . .. .. . .. .. . .. .. . .. .. . .. .. .. . .. .. . .. . 88
. .. . .. .. . .. .. .. . .. .. . .. .. . .. .. . .. .. . .. .. .. . .. .. . .. .. . .. .. . .. .. . .. .. .. . .. .. . .. .. . . 70
. .. . .. .. . .. .. .. . .. .. . .. .. . .. .. . .. .. . .. .. .. . .. .. . .. .. . .. .. . .. .. . .. .. 67
OPTION MENU . .. . .. .. . .. .. .. . .. .. . .. .. . .. .. . .. .. . .. .. .. . .. .. . . 69
Informaţii suplimentare
Depanare . .. .. . .. .. . .. .. . .. .. . .. .. .. . .. .. . .. .. . .. .. . .. .. . .. .. .. . .. .. . .. .. . .. .. . .. .. . .. .. .. . .. .. . 93
Afişaj de auto-diagnosticare/Indicatori de avertizare ..
Durata de înregistrare a filmelor/numărul de fotografii ce pot fi înregistrate . .
Durata estimată de înregistrare şi redare cu fiecare acumulator . .
Durata estimată de înregistrare a filmelor . .
Numărul estimat de fotografii ce pot fi înregistrate ..
Utilizarea camerei video în străinătate . .
Întreţinerea şi măsurile de precauţie . .
Despre formatul AVCHD . .
Despre GPS (HDR-CX550VE/XR550VE) . .
Despre cartela de memorie . .
Despre acumulatorul „InfoLITHIUM” . .
Despre x.v.Color . .
Despre manevrarea camerei video . .
. .. . .. .. . .. .. .. . .. .. . .. .. . .. .. . .. .. . .. .. .. . .. .. . .. .. . .. .. . .. .. . .. .. .. . .. 116
. .. . .. .. . .. .. .. . .. .. . .. .. . .. .. . .. .. . .. .. .. . .. .. . .. .. . 109
. .. . .. .. . .. .. .. . .. .. . .. .. . .. .. . .. .. . .. .. .. . .. .. . .. .. . .. 111
. .. . .. .. . .. .. .. . .. .. . .. .. . .. .. . .. .. . .. .. .. . .. .. . .. .. . .. .. . .. .. 111
. .. . .. .. . .. .. .. . .. .. . .. .. . .. .. . .. .. . .. .. .. . .. .. . .. .. . .. .. . 114
. .. . .. .. . .. .. .. . .. .. . .. .. . .. .. . .. .. . .. .. 106
. .. . .. .. . .. .. .. . .. .. . .. .. . .. .. . .. .. . .. .. .. . . 111
. .. . .. .. . .. .. .. . .. .. . .. .. . .. .. . .. .. . .. .. .. . .. .. 115
. .. . .. .. . .. .. .. . .. .. . .. .. . .. .. . .. .. . .. .. .. . .. .. . . 116
. .. . .. .. . .. .. .. . .. .. . .. .. . 101
. .. . .. .. . .. .. 105
. .. . .. .. . .. .. .. . .. .. . .. .. . .. 107
Cuprins
. .. . .. 105
Consultare rapidă
Indicatori de ecran . .. . .. . .. .. . .. .. .. . .. .. . .. .. . .. .. . .. .. . .. .. .. . .. .. . .. .. . .. .. . .. .. . .. .. .. . .. .. . . 122
Componente şi butoane . .
Index . .. .. .. .. . .. .. . .. .. .. . .. .. . .. .. . .. .. . .. .. . .. .. .. . .. .. . .. .. . .. .. . .. .. . .. .. . .. .. .. . .. .. . .. .. . .. .. . 128
. .. . .. .. . .. .. .. . .. .. . .. .. . .. .. . .. .. . .. .. .. . .. .. . .. .. . .. .. . .. .. . .. .. .. . 123
RO
11

Pregătirea
Pasul 1: Încărcarea acumulatorului
HDR-CX550E/CX550VE
Acumulator
Mufă DC IN
Adaptor de
c.a.
HDR-XR550E/XR550VE
Conector de c.c.
Cablu de alimentare
La sursa de c.a.
Led
/CHG (bliţ/
încărcare)
Acumulator
Adaptor de
RO
12
c.a.
Mufă DC IN
Conector de c.c.
Cablu de alimentare
Led
încărcare)
La sursa de c.a.
/CHG (bliţ/

Puteţi încărca acumulatorul „InfoLITHIUM” (seria V) după ce l-aţi montat în camera video.
Note
Nu puteţi monta un alt acumulator „InfoLITHIUM” în camera video decât unul din seria V.
Opriţi camera video prin închiderea ecranului LCD după repoziţionarea
1
vizorului.
Montaţi acumulatorul glisându-l în direcţia indicată de săgeată până când
2
acesta face clic.
Conectaţi adaptorul de c.a. şi cablul de alimentare la camera video şi la
3
sursa de c.a.
Aliniaţi semnul de pe conectorul de c.c. cu cel de pe mufa DC IN.
Ledul /CHG (bliţ/încărcare) se aprinde şi începe încărcarea. Ledul /CHG (bliţ/
încărcare) se stinge atunci când acumulatorul este complet încărcat.
Atunci când bateria este încărcată, deconectaţi adaptorul de c.a. de la
4
mufa DC IN a camerei video.
Sugestii
Consultaţi pagina 105 pentru a afla durata de înregistrare şi de redare.
Atunci când camera video este pornită, puteţi verifica autonomia aproximativă a acumulatorului cu
ajutorul indicatorului din colţul stânga sus al ecranului LCD.
Pregătirea
Durata de încărcare
Durata aproximativă (min.) necesară atunci când încărcaţi complet un acumulator complet
descărcat.
Acumulator Durată de încărcare
NP-FV50 (furnizat) 155
NP-FV70 195
NP-FV100 390
Timpi înregistraţi cu camera video la 25 C.
Se recomandă între 10
C şi 30 C.
RO
13

Pentru a scoate acumulatorul
Închideţi ecranul LCD. Glisaţi pârghia de decuplare BATT (acumulator) () şi scoateţi
acumulatorul ().
Pentru a utiliza o sursă de c.a. ca sursă de alimentare
Conectaţi în acelaşi mod ca şi la „Pasul 1: Încărcarea acumulatorului”. Chiar dacă
acumulatorul este montat, acesta nu este descărcat.
Încărcarea acumulatorului în străinătate
Puteţi încărca acumulatorul în orice ţară/regiune utilizând adaptorul de c.a. furnizat împreună cu
camera video, la o tensiune între 100 V — 240 V, 50 Hz/60 Hz de c.a.
Note
Nu folosiţi un transformator electric de tensiune.
Note despre acumulator
Atunci când scoateţi acumulatorul sau decuplaţi adaptorul de c.a., repoziţionaţi vizorul, închideţi ecranul
LCD şi asiguraţi-vă că ledurile
/CHG (bliţ/încărcare) clipeşte în timpul încărcării în următoarele condiţii:
Ledul
Acumulatorul nu este montat corect.
Acumulatorul este deteriorat.
Temperatura acumulatorului este scăzută.
(Film)/ (Foto) (pag. 21) şi ledul de acces (pag. 20) sunt stinse.
Scoateţi acumulatorul din camera video şi puneţi-l într-un loc uscat şi răcoros.
Temperatura acumulatorului este ridicată.
Scoateţi acumulatorul din camera video şi puneţi-l într-un loc răcoros.
Atunci când ataşaţi o lumină video (se vinde separat), se recomandă să utilizaţi un acumulator NP-FV70
sau NP-FV100.
Nu vă recomandăm să utilizaţi modelul NP-FV30 împreună cu camera video, deoarece acesta permite
durate reduse de înregistrare şi de redare.
Cu setările din fabrică, alimentarea se opreşte automat dacă nu utilizaţi camera video timp de aproximativ
te; acest lucru se întâmplă pentru a economisi energia bateriei ([OPRIRE AUTO.], pag. 91).
u
5 min
Note despre adaptorul de c.a.
Utilizaţi o sursă de c.a. apropiată atunci când utilizaţi adaptorul de c.a. Deconectaţi imediat adaptorul de
c.a. de la sursa de c.a. dacă apare o defecţiune în timpul utilizării camerei video.
Nu utilizaţi adaptorul de c.a. într-un spaţiu îngust, cum ar fi între un perete şi un obiect de mobilier.
Nu scurtcircuitaţi conectorul de c.c. al adaptorului de c.a. sau borna acumulatorului cu obiecte metalice.
Acest lucru poate cauza defecţiuni.
14
RO

Pasul 2: Pornirea camerei şi setarea datei şi a orei
Deschideţi ecranul LCD al camerei dvs. video.
1
Capacul obiectivului este deschis şi camera dvs. video este pornită.
Pentru a porni camera video atunci când ecranul LCD este deschis, apăsaţi pe POWER.
Led MODE
Buton POWER
Selectaţi zona geografică dorită cu
2
Atingeţi butonul de pe
ecranul LCD
Pentru a seta din nou data şi ora, atingeţi (MENU) [Afişaţi altele] [CEAS/ LIMBĂ]
(din categoria
ecran, atingeţi
Setaţi [ORA DE VARĂ], data şi ora, apoi atingeţi
3
Ceasul porneşte.
Dacă setaţi [ORA DE VARĂ] la [PORNIT], ceasul este dat cu 1 oră înainte.
[REGLAJ GENERAL]) [POTRIVIRE CEAS]. Dacă un element nu este pe
/ până ce acesta apare.
/ , apoi atingeţi [URMĂTORUL].
.
Pregătirea
RO
15

Note
Data şi ora nu apar în timpul înregistrării, dar sunt înregistrate automat pe suportul de înregistrare şi
pot fi afişate în timpul redării. Pentru a afişa data şi ora, atingeţi
[SETĂRI REDARE] (din categoria
.
Puteţi opri sunetele bip de funcţionare atingând
AFIŞ.] (din categoria
.
Dacă butonul pe care l-aţi atins nu răspunde corect, calibraţi panoul tactil (pag. 118).
Odată setat ceasul, ora este ajustată automat cu [AUTOAJUST.ORĂ] şi [AUTOSTAB.ZONĂ] setat
e [PO
RNIT] (pag. 57). Este posibil ca ceasul să nu fie ajustat la ora corectă automat, în funcţie de
p
ţara/regiunea selectată pentru camera dvs. video. În acest caz, setaţi [AUTOAJUST.ORĂ] şi [AUTOSTAB.
ZONĂ] la [OPRIT] (HDR-CX550VE/XR550VE).
[REGLAJ GENERAL]) [Semnal sonor] [OPRIT]
[REDARE]) [COD DE DATE] [DATĂ/ORĂ]
(MENU) [Afişaţi altele] [REGL.SUNET/
(MENU) [Afişaţi altele]
Pentru a opri alimentarea
Închideţi ecranul LCD. Ledul (Film) clipeşte pentru câteva secunde, iar alimentarea este
oprită.
Sugestii
De asemenea, puteţi opri camera video apăsând pe POWER.
Dacă vizorul este scos, retractaţi-l ca în imaginea de mai jos.
Despre pornirea sau oprirea camerei video cu ajutorul ecranului LCD sau a vizorului
Alimentarea camerei este pornită sau oprită în funcţie de starea ecranului LCD sau a
vizorului.
Stare Alimentarea
Ecran LCD Vizor
camerei video
Deschis Retractat Pornit
Scos Pornit
Închis Retractat Oprit
Scos Pornit
Note
Chiar dacă ecranul LCD este închis, în cazul în care vizorul este scos, camera video nu este oprită. Când
opriţi alimentarea camerei video, asiguraţi-vă că vizorul este retractat în poziţia originală.
16
RO

Schimbarea setării pentru limbă
Puteţi schimba afişajele de pe ecran pentru a vizualiza mesajele într-o anumită limbă.
Atingeţi
GENERAL]) [
(MENU) [Afişaţi altele] [CEAS/ LIMBĂ] (din categoria [REGLAJ
STABILIRE LIMBĂ] o limbă dorită .
Pregătirea
RO
17

Pasul 3: Pregătirea suportului de înregistrare
Suportul de înregistrare ce poate fi folosit diferă în funcţie de modelul camerei video.
Următoarele simboluri sunt afişate pe ecranul camerei dvs. video.
HDR-CX550E/CX550VE
HDR-XR550E/XR550VE
* În setarea implicită, atât filmele, cât şi fotografiile sunt înregistrate pe acest suport de înregistrare. Puteţi
efectua operaţii de înregistrare, redare şi editare pe suportul selectat.
Sugestii
Consultaţi pagina 106 pentru a afla durata de înregistrare a filmelor.
Consultaţi pagina 107 pentru a afla numărul de fotografii ce pot fi înregistrate.
Selectarea suportului de înregistrare pentru filme
Atingeţi (MENU) [Afişaţi altele] [SETĂRI SUPORT] (din categoria
[GEST.MED.STOC.]) [ALEG.MEDIU FILME].
Apare ecranul [ALEG.MEDIU FILME].
Atingeţi suportul de înregistrare dorit.
Atingeţi [DA]
Suportul de înregistrare este schimbat.
.
*
Memorie
internă
*
Hard disk
intern
Cartelă de
memorie
Cartelă de
memorie
Selectarea suportului de înregistrare pentru fotografii
Atingeţi (MENU) [Afişaţi altele] [SETĂRI SUPORT] (din categoria
[GEST.MED.STOC.]) [ALEG.MEDIU FOTO].
Apare ecranul [ALEG.MEDIU FOTO].
Atingeţi suportul de înregistrare dorit.
RO
18

Atingeţi [DA] .
Suportul de înregistrare este schimbat.
Pentru a verifica setările suportului de înregistrare
Atât în modul de înregistrare a filmelor, cât şi în modul de înregistrare a fotografiilor,
simbolul suportului de înregistrare selectat este afişat în colţul din dreapta sus a ecranului.
Simbolul suportului de
înregistrare
Simbolul afişat poate diferi în funcţie de model.
Introducerea unei cartele de memorie
Note
Setaţi suportul de înregistrare pe [CARTELĂ MEMORIE] pentru a înregistra filme şi/sau fotografii pe o
cartelă de memorie.
Tipuri de cartele de memorie ce pot fi folosite cu camera dvs. video
Puteţi folosi următoarele cartele de memorie pentru această cameră video: „Memory Stick PRO Duo”
(Mark2), „Memory Stick PRO-HG Duo”, cartele de memorie SD, cartele de memorie SDHC, cartele de
memorie SDXC (Este necesară o Clasă de viteză 4 sau mai rapidă pentru fiecare cartelă SD). Nu este
garantată funcţionarea cu toate cartelele de memorie.
Cartelele „Memory Stick PRO Duo” de până la 32 GB şi cartelele SD de până la 64 GB au fost verificate şi
funcţionează cu camera dvs. video.
În acest manual, „Memory Stick PRO Duo” (Mark2) şi „Memory Stick PRO-HG Duo” sunt numite
„Memory Stick PRO Duo”. Cartela de memorie SD, cartela de memorie SDHC şi cartela de memorie
SDXC sunt numite cartele de memorie SD.
Note
Cartelele MultiMediaCard nu pot fi utilizate împreună cu camera video.
Filmele înregistrate pe cartele de memorie SDXC nu pot fi importate sau redate pe calculatoare sau
dispozitive A/V ce nu acceptă un sistem de fişiere exFAT
echipamente cu cablul USB. Verificaţi în prealabil dacă echipamentul conectat acceptă sistemul exFAT.
Dacă conectaţi un echipament ce nu acceptă sistemul exFAT şi apare ecranul de formatare, nu efectuaţi
formatarea. Se vor pierde toate datele înregistrate.
* Sistemul exFAT este un sistem de fişiere folosit pentru cartelele de memorie SDXC.
Dimensiunea cartelei de memorie ce poate fi folosită cu camera dvs. video
* prin conectarea camerei video la aceste
Pregătirea
RO
19

Pot fi folosite „Memory Stick PRO Duo”, jumătate din dimensiunea unui „Memory Stick”, sau cartele SD
standard în această cameră video.
Nu lipiţi etichete sau alte obiecte adezive pe cartela de memorie sau pe adaptorul cartelei de memorie.
Acest lucru poate cauza defecţiuni.
Deschideţi capacul şi introduceţi cartela de memorie cu colţul tăiat în direcţia
ilustrată, până auziţi un clic.
Închideţi capacul după ce aţi introdus cartela de memorie.
Observaţi direcţia colţului tăiat.
Led de acces
Poate apărea ecranul [Creaţi un nou Fişier de bază de date de imagini.] dacă introduceţi o
cartelă de memorie nouă. În acest caz, atingeţi [DA]. Dacă înregistraţi doar fotografii pe
cartela de memorie, atingeţi [NU].
Verificaţi sensul cartelei de memorie. Dacă introduceţi forţat cartela de memorie în sensul greşit,
cartela de memorie, fanta pentru cartela de memorie sau imaginile înregistrate pot fi deteriorate.
Note
Dacă este afişat mesajul [Crearea unui nou Fişier de bază de date de imagini a eşuat. Este posibil să nu fie
suficient spaţiu liber.] formataţi cartela de memorie atingând
[FORMAT.MEDIU] (din categoria [GEST.MED.STOC.]) [CARTELĂ MEMORIE] [DA]
.
[DA]
(MENU) [Afişaţi altele]
Pentru a scoate cartela de memorie
Deschideţi capacul şi împingeţi uşor cartela de memorie înăuntru o dată.
Nu deschideţi capacul în timpul înregistrării.
Atunci când introduceţi sau scoateţi cartela de memorie, aveţi grijă ca aceasta să nu sară şi să cadă.
RO
20

Înregistrare/Redare
Înregistrare
În setarea implicită, filmele sunt înregistrate cu o calitate a imaginii de înaltă definiţie (HD) pe
următoarele suporturi.
HDR-CX550E/CX550VE: Memorie internă
HDR-XR550E/XR550VE: Hard disk intern
Sugestii
Pentru a schimba suportul de înregistrare, consultaţi pagina 18.
Fixaţi cureaua de susţinere.
1
Deschideţi ecranul LCD al camerei dvs. video.
2
Capacul obiectivului este deschis şi camera dvs. video este pornită.
Pentru a porni camera video atunci când ecranul LCD este deja deschis, apăsaţi pe POWER
(pag. 15).
Puteţi comuta de la un mod de înregistrare la altul apăsând MODE. Apăsaţi MODE pentru a
aprinde ledul corespunzător modului de înregistrare dorit.
Buton MODE
Înregistrare/Redare
(Film): În timpul înregistrării unui film
(Foto): În timpul înregistrării unei
fotografii
RO
21

Înregistrarea filmelor
Apăsaţi pe START/STOP pentru a începe înregistrarea.
De asemenea, puteţi începe să înregistraţi atingând din partea stângă jos a ecranului LCD.
Buton START/STOP
[STBY] [ÎNREG.]
Pentru a opri înregistrarea, apăsaţi pe START/STOP din nou.
De asemenea, puteţi opri înregistrarea atingând din partea stângă jos a ecranului LCD.
Simbolurile şi indicatorii de pe panoul LCD vor fi afişate pentru aproximativ 3 secunde, apoi vor dispărea
după pornirea camerei video sau comutarea modurilor de înregistrare (film/foto)/redare. Pentru a afişa
din nou simbolurile şi indicatorii, atingeţi ecranul în orice loc, cu excepţia butoanelor de înregistrare & de
zoom de pe LCD.
Butoane de înregistrare & de zoom de pe LCD
după
aproximativ
3 secunde
Note
Dacă închideţi ecranul LCD în timpul înregistrării filmelor, camera video opreşte înregistrarea.
Durata maximă continuă de înregistrare a filmelor este de aproximativ 13 ore.
Atunci când dimensiunea unui fişier de film depăşeşte 2 GB, următorul fişier de film este creat automat.

După pornirea camerei video, veţi putea începe înregistrarea în câteva secunde. În acest timp, nu puteţi
efectua operaţiuni pe camera video.
Dacă datele sunt în curs de scriere pe suport după terminarea înregistrării, vor fi indicate următoarele
stări. În acest timp, nu aplicaţi şocuri sau vibraţii camerei video şi nu scoateţi acumulatorul sau adaptorul
de c.a..
dul de acces (pag. 20) este aprins sau clipeşte
e
L
Simbolul suportului din colţul din dreapta sus al ecranului LCD clipeşte
Sugestii
Consultaţi pagina 106 pentru a afla durata de înregistrare a filmelor.
eţi realiza fotografii în timpul înregistrării filmelor apăsând complet pe PHOTO (Dual Rec, pag. 30).
Put
Atunci când este detectată o faţă, va apărea un cadru alb, iar calitatea imaginii din jurul feţei va fi
p
timizată automat ([DETECŢIA FEŢEI], pag. 79).
o
eţi specifica faţa prioritară atingând-o (pag. 29).
Put
În setarea implicită, o fotografie este înregistrată automat atunci când camera video detectează zâmbetul
ei p
ersoane în timpul înregistrării unui film (Declanşare Zâmbet, pag. 29).
un
eţi captura fotografii din filmele înregistrate (pag. 48).
Put
Puteţi verifica durata de înregistrare şi capacitatea rămasă estimată etc., atingând
[Afişaţi altele] [INFO.MEDIU] (din categoria
Ecranul LCD al camerei video poate afişa imagini înregistrate pe întregul ecran (afişare la dimensiune
[GEST.MED.STOC.]).
(MENU)
completă). Cu toate acestea, poate apărea o uşoară tăiere a marginilor de sus, de jos, din dreapta şi
din stânga ale imaginilor atunci când se redau pe un televizor care nu este compatibil cu afişarea la
en
siune completă. În acest caz, setaţi [CHENAR GHIDARE] la [PORNIT] (pag. 78) şi înregistraţi
dim
imagini utilizând cadrul exterior afişat pe ecran pentru ghidare.
Pentru a ajusta unghiul panoului LCD, deschideţi mai întâi panoul LCD la 90 de grade faţă de camera
video (), apoi ajustaţi unghiul ().
la 90 de grade (max.)
Înregistrare/Redare
la 180 de grade (max.)
Când doriţi să înregistraţi doar cu vizorul, scoateţi vizorul şi închideţi panoul LCD. Dacă indicatorul de
la 90 de grade faţă
de camera video
pe vizor este înceţoşat, reglaţi cursorul vizorului localizat în lateral.
[ STEADYSHOT] este setat la [ACTIV] în setarea implicită.
RO
23

Codul de date în timpul înregistrării
Data, ora şi condiţiile înregistrării, precum şi coordonatele (HDR-CX550VE/XR550VE) sunt
înregistrate automat pe suportul de înregistrare. Acestea nu sunt afişate în timpul înregistrării.
Cu toate acestea, le puteţi verifica sub formă de [COD DE DATE] în timpul redării. Pentru a
le afişa, atingeţi
[REDARE]) [COD DE DATE] o setare dorită
(MENU) [Afişaţi altele] [SETĂRI REDARE] (din categoria
.
Realizarea fotografiilor
În setarea implicită, fotografiile sunt înregistrate pe următoarele suporturi de înregistrare.
HDR-CX550E/CX550VE: Memorie internă
HDR-XR550E/XR550VE: Hard disk intern
Sugestii
Pentru a schimba suportul de înregistrare, consultaţi pagina 18.
Apăsaţi pe MODE pentru a aprinde ledul (Foto).
Afişajul ecranului LCD comută la modul de înregistrare a fotografiilor, iar formatul de
imagine devine 4:3.
Apăsaţi uşor pe PHOTO pentru a ajusta focalizarea, apoi apăsaţi complet.
De asemenea, puteţi înregistra fotografii atingând pe ecranul LCD.
Clipeşte Se aprinde
Când dispare, fotografia este înregistrată.

Sugestii
Consultaţi pagina 107 pentru a afla numărul de fotografii ce pot fi înregistrate.
Pentru a schimba dimensiunea imaginii, atingeţi
IMAG.] (din categoria
Nu puteţi înregistra fotografii atâta timp cât este afişat
Camera dvs. video declanşează automat bliţul atunci când nu există suficientă lumină în mediul
înconjurător. Bliţul nu funcţionează în modul de înregistrare a filmelor. Puteţi schimba felul în care
camera dvs. utilizează bliţul cu ajutorul opţiunii
categoria
Dacă înregistraţi fotografii utilizând un bliţ cu o lentilă de conversie (se vinde separat), este posibil să se
reflecte umbra.
[REGLAJE FOTO.]) o setare dorită .
[REGLAJE FOTO.]) o setare dorită .
(MENU) [Afişaţi altele] [ DIMENS.
.
(MENU) [Afişaţi altele] [MOD BLIŢ] (din
Dacă pe fotografii apar puncte circulare albe
Acestea sunt cauzate de particule (praf, polen etc.) ce plutesc în apropierea obiectivului.
Atunci când sunt accentuate de bliţul camerei video, acestea apar sub formă de pete albe
circulare.
Pentru a reduce petele albe circulare, luminaţi încăperea şi fotografiaţi subiectul fără bliţ.
Înregistrare/Redare
Particule (praf,
polen etc.) din
aer
Subiect
RO
25

Funcţii utile pentru
înregistrarea filmelor şi
a fotografiilor
Utilizarea zoom-ului
Puteţi mări imaginile de până la 14 ori
faţă de dimensiunea originală cu ajutorul
cursorului de zoom. De asemenea, puteţi
mări imaginile cu ajutorul
ecranul LCD.
/ de pe
Note
Asiguraţi-vă că ţineţi degetul pe cursorul
de zoom. Dacă luaţi degetul de pe cursorul
de zoom, se poate înregistra sunetul emis la
activarea zoom-ului.
Nu puteţi modifica viteza zoom-ului cu ajutorul
butonului
Distanţa minimă posibilă dintre camera video
şi subiect în timpul menţinerii unei focalizări
clare este de aproximativ 1 cm pentru unghi
panoramic şi aproximativ 80 cm pentru telefoto.
Puteţi mări imaginile de maximum 10 ori
folosind zoom-ul optic, dacă
[
Sugestii
Puteţi seta [
doriţi să măriţi şi mai mult.
/ de pe ecranul LCD.
STEADYSHOT] nu este setat la [ACTIV].
ZOOM DIGITAL] (pag. 81) dacă
*
**
Unghi panoramic de
vizualizare
(Unghi panoramic)
* HDR-CX550E/CX550VE
** HDR-XR550E/XR550VE
Vizualizare de
aproape
(Telefoto)
Deplasaţi uşor cursorul de zoom pentru
utilizarea lentă a zoom-ului. Deplasaţi-l mai
mult pentru un zoom mai rapid.
Înregistrarea automată a unor
imagini mai bune (AUTO.
INTELIGENT)
Dacă apăsaţi , puteţi înregistra imagini
cu ajutorul funcţiei AUTO.INTELIGENT.
Când orientaţi camera video spre subiect,
camera înregistrează folosind combinaţia
optimă a celor trei moduri de detectare:
Detectarea feţelor, Detectarea mediului
ambiant şi Detectarea vibraţiilor camerei.
Când camera video detectează subiectul,
sunt afişate simbolurile ce corespund
situaţiei detectate.
Sugestii
În setarea implicită, AUTO.INTELIGENT este
setat la ON.

Detectare faţă
(Portret), (Bebeluş)
Camera video detectează feţele şi ajustează
focalizarea, culoarea şi expunerea.
Detectare mediu ambiant
(Retroiluminare),
(Amurg),
slabă),
(Lumină puternică), (Lumină
(Macro)
(Peisaj),
Camera video selectează automat cea
mai eficientă setare, în funcţie de mediul
ambiant.
Detectarea vibraţiilor camerei
(Mers), (Trepied)
Camera video detectează vibraţiile,
realizând o compensare optimă.
Note
Camera video poate să nu detecteze mediul
ambiant sau subiectul, în funcţie de condiţiile
de înregistrare.
Nu puteţi utiliza bliţul în funcţie de mediul
ambiant detectat.
Pentru anulare AUTO.INTELIGENT
Apăsaţi pe .
Simbolul
sau cele ale modului de
detectare dispar şi puteţi înregistra cu
setările preferate.
De asemenea, setarea AUTO.INTELIGENT
este anulată dacă schimbaţi următoarele
setări:
NightShot
[IRIS]
[VITEZ.OBTURATOR]
[EXP.ADIACENTE]
[WB ADIACENT]
[CAPTURARE GOLF]
[ÎNREG.CRSV.LENT.]
[SELECŢIE SCENĂ]
[ECHILIBRU DE ALB]
[EXP./FOCALIZ.PCT]
[EXP.PUNCTUALĂ]
[FOCALIZ.PCT.]
[EXPUNERE]
[FOCALIZARE]
[MACRO PRIM PLAN]
STEADYSHOT]
[
STEADYSHOT]
[
[ILUM.SPATE AUTO.]
[LOW LUX]
[DETECŢIA FEŢEI]
[PRIORITATE ZÂMB.]
Note
Setările de mai sunt sunt resetate la setările
implicite când AUTO.INTELIGENT este setat
la ON.
Selectarea unei calităţi a imaginii
de înaltă definiţie (HD) sau a unei
calităţi standard (STD)
Puteţi selecta calitatea dorită a imaginii
cum ar fi o calitate a imaginii de înaltă
definiţie (HD), ce vă permite să înregistraţi
imagini frumoase, sau o calitate standard a
imaginii (STD) care este compatibilă cu mai
multe echipamente de redare. Schimbaţi
calitatea imaginii în funcţie de condiţiile de
înregistrare sau de echipamentul de redare.
Atingeţi
(MENU)
[Afişaţi altele] [ALEGERE /
] (din categoria [SETĂRI
FOTO.]).
Înregistrare/Redare
RO
27

Atingeţi [
CALITATE HD]
pentru a înregistra imagini cu o
calitate de înaltă definiţie (HD),
sau atingeţi [ CALITATE STD]
pentru a înregistra imagini cu o
calitate standard (STD).
Atingeţi [DA]
Calitatea de înregistrare a imaginii s-a
schimbat.
Sugestii
Puteţi înregistra, reda sau monta filme numai la
calitatea imaginii selectate. Pentru a înregistra,
reda sau monta filme cu o altă calitate a
imaginii, schimbaţi această setare.
.
Selectarea modului de înregistrare
Puteţi selecta unul dintre cele 4 moduri de
înregistrare disponibile pentru a înregistra
filme cu o calitate a imaginii de înaltă
definiţie (HD). Durata de înregistrare a
suportului variază în funcţie de modul de
înregistrare.
Înregistrare
îndelungată
Înregistrare cu o calitate
înaltă a imaginii
Atingeţi
(MENU) [Afişaţi
altele] [ MOD ÎNREG.] (din
categoria [SETĂRI FOTO.]).
Atingeţi o setare dorită.
Dacă doriţi să înregistraţi imagini
cu o calitate de înaltă definiţie (HD),
selectaţi modul FX sau FH. Dacă doriţi
să înregistraţi filme mai lungi, selectaţi
modul LP.
Atingeţi
Note
Nu puteţi crea un disc AVCHD cu filme
înregistrate cu modul [HD FX] din [
ÎNREG.]. Salvaţi filmele înregistrate cu modul
[HD FX] pe discuri Blu-ray sau pe suporturi
er
ne de stocare (pag. 58).
ext
Sugestii
Filmele sunt înregistrate cu formatul AVCHD
1920 1080/50i când este selectat modul FX
sau FH pentru o calitate a imaginii de înaltă
definiţie (HD). Iar când este selectat modul
HQ sau LP pentru o calitate a imaginii de
înaltă definiţie (HD), filmele sunt înregistrate
în formatul AVCHD 1440 1080/50i. Filmele
sunt înregistrate în format MPEG-2 atunci când
selectaţi o calitate standard a imaginii (STD).
Puteţi selecta următorul mod de înregistrare
pentru o calitate a imaginii de înaltă definiţie
(HD). „24M” pentru [HD FX] este rata maximă
de transfer de biţi, iar valorile diferite de [HD
FX], cum ar fi „17M”, reprezintă o rată medie de
transfer de biţi.
[HD FX] (AVC HD 24M (FX))
[HD FH] (AVC HD 17M (FH))
[HD HQ] (AVC HD 9M (HQ)) (setarea
implicită)
[HD LP] (AVC HD 5M (LP))
Modul de înregistrare al calităţii standard
a imaginii (STD) este limitat la următoarea
valoare. „9M” este o rată medie de transfer de
biţi.
[STD HQ] (STD 9M (HQ))
„M”, ca în „24M”, înseamnă „Mbps”.
.
MOD

Setarea unui subiect ca prioritar
Atunci când opţiunea [DETECŢIA FEŢEI]
(pag. 79) este setată la [PORNIT] (setarea
implicită) şi sunt detectate mai multe feţe,
atingeţi faţa pe care doriţi să o înregistraţi
ca prioritate. Focalizarea/culoarea/
expunerea sunt ajustate automat pentru faţa
selectată. Întrucât faţa atinsă are prioritate
şi cu funcţia Declanşare Zâmbet, camera
video înregistrează automat o fotografie
când detectează faţa zâmbitoare.
Atingeţi faţa pe care doriţi s-o
înregistraţi cu prioritate.
Este afişat chenarul cu linie dublă.
Atingeţi din nou faţa cu cadrul cu linie
dublă pentru anulare.
Note
În funcţie de luminozitatea mediului
înconjurător sau de coafura subiectului, este
posibil ca faţa atinsă să nu fie detectată. În
acest caz, atingeţi din nou faţa atunci când
înregistraţi.
Sugestii
Chenarul cu linie dublă din jurul feţei care
a fost aleasă pentru o posibilă detectare a
zâmbetului va deveni portocaliu.
Dacă faţa atinsă dispare de pe ecranul LCD,
subiectul selectat în [SET.PRIORITATE]
g. 79) are prioritate. Dacă faţa atinsă revine
(pa
pe ecran, aceasta are prioritate.
Surprinderea automată a
zâmbetelor (Declanşare zâmbet)
În setarea implicită, o fotografie este
înregistrată automat atunci când camera
video detectează zâmbetul unei persoane
în timpul înregistrării unui film. Un cadru
portocaliu apare în jurul feţei care a fost
aleasă pentru o posibilă fotografie cu
detectare a zâmbetului.
Note
Este posibil ca unele zâmbete să nu poată fi
detectate în funcţie de condiţiile de înregistrare,
de starea subiecţilor şi de setările camerei video.
MOD ÎNREG.] este setat la [HD FX],
Când [
nu puteţi folosi funcţia Declanșare zâmbet.
Sugestii
Puteţi selecta subiectul ce are prioritate la
detectarea feţei şi la detectarea zâmbetului cu
utorul [SET.PRIORITATE] (pag. 79). Atunci
aj
când indicaţi subiectul prioritar atingând cadrul
de detectare de pe ecranul LCD, faţa din cadrul
cu linie dublă are prioritate.
Dacă un zâmbet nu a fost detectat, setaţi
IB.ZÂMBETE] (pag. 80).
ENS
[S
Înregistrare/Redare
RO
29

Înregistrarea sunetului cu mai
multă prezenţă (înregistrare a
sunetului surround pe 5,1 canale)
Puteţi înregistra sunetul surround
Dolby Digital pe 5,1 canale cu ajutorul
microfonului încorporat. Vă puteţi bucura
de sunet real atunci când redaţi un film pe
dispozitive care acceptă sunetul surround
pe 5,1 canale.
Microfon încorporat
Note
Dacă redaţi sunet pe 5,1 canale cu camera
video, sunetul pe 5,1 canale este transformat şi
transferat automat pe 2 canale.
Pentru a vă bucura de sunetul surround pe
5,1 canale al filmelor înregistrate cu o calitate
a imaginii de înaltă definiţie (HD) în modul
de sunet pe 5,1 canale, aveţi nevoie de un
dispozitiv cu format AVCHD compatibil cu
sunetul surround pe 5,1 canale.
Atunci când conectaţi camera video printr-un
cablu HDMI (se vinde separat), sunetul filmelor
cu o calitate a imaginii de înaltă definiţie (HD)
înregistrate în modul de sunet pe 5,1 canale este
transferat automat în modul de sunet pe 5,1
canale. Sunetul filmelor cu o calitate standard
a imaginii (STD) este transformat în sunet pe
2 canale.
Sugestii
Puteţi selecta sunetul de înregistrare din
[SURROUND 5.1ch] (
[STEREO 2ch] (
pag. 80).
Cu ajutorul software-ului furnizat „PMB”, puteţi
crea pe computer un disc care conţine filmele
înregistrate pe camera video. Dacă redaţi discul
pe un sistem surround pe 5,1 canale, vă puteţi
bucura de sunet realist.
) sau din
) ([MOD AUDIO],
Realizarea fotografiilor de înaltă
calitate în timpul înregistrării
filmelor (Dual Rec)
Puteţi realiza fotografii în timpul
înregistrării filmelor apăsând pe PHOTO.
Note
Nu puteţi utiliza bliţul în timpul Dual Rec.
Poate apărea simbolul
capacitatea suportului de înregistrare nu este
suficientă sau când înregistraţi poze continuu.
Nu puteţi înregistra fotografii atâta timp cât este
.
afişat
MOD ÎNREG.] este setat la [HD FX],
Când [
nu puteţi folosi Dual Rec.
Sugestii
Atunci când ledul MODE este setat la
(Film), dimensiunea fotografiilor devine [
8,3 M] (16:9 panoramic) sau [6,2M] (4:3).
Puteţi înregistra fotografii în timpul modului de
aşteptare a înregistrării la fel ca şi atunci când
(Foto) este aprins.
ledul
atunci când
Loading…
4-170-536-92(1)
Содержание
10
Подготовка к работе
13
23
Запись/Воспроизведение
Оптимальное использование
49
видеокамеры
Сохранение изображений
64
на внешнем устройстве
HDR-CX550E/CX550VE/
Индивидуальная
74
XR550E/XR550VE
настройка видеокамеры
Дополнительная
103
Цифровая видеокамера HD
информация
Руководство по “Handycam”
Краткое справочное
136
руководство
2010 Sony Corporation
Прочитайте это в
первую очередь
Экран ЖКД
Прилагаемые принадлежности
Числа в круглых скобках ( ) обозначают
количество принадлежностей.
Адаптер переменного тока (1)
Шнур питания (1)
Компонентный кабель A/V (1)
Аккумуляторная батарея
Соединительный кабель A/V (1)
USB-кабель (1)
Беспроводной пульт дистанционного
управления (1)
Литиевая батарея пуговичного типа
уже установлена. Перед эксплуатацией
беспроводного пульта дистанционного
Видеокамера не имеет защиты от попадания
управления удалите изоляционное полотно.
пыли, капель или воды. См. “Об обращении
Аккумуляторный батарейный блок
с ва
шей видеокамерой” (стр. 130).
NP-FV50 (1)
Даже если видеокамера выключена, функция
GPS работает все время, пока переключатель
CD-ROM “Handycam” Application
GPS установлен в положение ON. Убедитесь,
Software (1)
что переключатель GPS установлен в
“PMB” (программное обеспечение,
положение OFF во время взлета и посадки
включая “Справка PMB”)
самолета (HDR-CX550VE/XR550VE).
Руководство по “Handycam” (PDF)
“Руководство по эксплуатации” (1)
Элементы меню, панель ЖКД,
видоискатель и объектив
Затененные серым элементы меню
недоступны при текущих настройках записи
или воспроизведения.
См. стр. 21 для информации о картах
Экран ЖКД и видоискатель изготовлены с
памяти, которые можно использовать с этой
применением высокоточной технологии, что
видеокамерой.
обеспечивает эффективное использование
более 99,99% точек. Тем не менее, на экране
Использование видеокамеры
ЖКД могут постоянно отображаться мелкие
Не держите видеокамеру за указанные ниже
черные и/или яркие точки (белого, красного,
детали, а также за крышки разъемов.
синего или зеленого цвета). Появление этих
точек является нормальным следствием
Видоискатель
производственного процесса и никак не
влияет на качество записи.
RU
2
Системы цветного телевидения различаются
в зависимости от страны/региона. Для
просмотра своих записей на телевизоре
необходимо использовать телевизор,
поддерживающий систему PAL.
Телевизионные программы, кинофильмы,
видеокассеты и другие материалы могут
Черные точки
быть защищены авторским правом.
Белые, красные, синие или зеленые точки
Несанкционированная запись таких
материалов может противоречить законам
Воздействие прямого солнечного света на
об авторском праве.
экран ЖКД, видоискатель или объектив
в течение длительного времени может
Примечания о воспроизведении
привести к их неисправности.
Видеокамера совместима с MPEG-4
Не наводите видеокамеру на солнце. Это
AVC/H.264 High Profile для записи с
может привести к неполадкам в работе
качеством изображения высокой четкости
видеокамеры. Выполняйте съемку солнца
(HD). Поэтому вы не сможете выполнить
только в условиях низкой освещенности,
воспроизведение записей, записанных на
например на закате.
видеокамере с качеством изображения
высокой четкости (HD), на следующих
О настройке языка
устройствах;
Для пояснения процедур использования
Другие устройства, совместимые с
видеокамеры используются экраны на
форматом AVCHD, но не совместимые с
различных языках. При необходимости
форматом High Profile
перед использованием видеокамеры
Устройства, не совместимые с форматом
из
м
ените язык экрана (стр. 19).
AVCHD
Вы возможно не сможете нормально
О записи
воспроизвести на других устройствах
Для обеспечения устойчивой работы карты
изображения, записанные на вашей
памяти рекомендуется инициализировать
видеокамере. Вы также возможно
карту памяти с видеокамерой перед первым
не сможете воспроизвести на вашей
и
сп
ользованием (стр. 96). Инициализация
видеокамере изображения, записанные на
карты памяти приведет к удалению всех
других устройствах.
данных, сохраненных на ней, и эти данные
Фильмы стандартной четкости (STD),
будет невозможно восстановить. Сохраните
записанные на карте памяти SD, не
ваши важные данные на компьютере и т. п.
удастся воспроизвести на аудио-/
Перед началом записи проверьте работу
видеооборудовании других производителей.
функции записи, чтобы убедиться в том,
что изображение и звук записываются
нормально.
Компенсация за содержание записей не
выплачивается, даже если запись или
воспроизведение невозможны по причине
неисправности видеокамеры, носителя
записи и т. п.
RU
3
Диски, записанные с качеством
Примечание относительно
изображения HD (высокая четкость)
температуры видеокамеры/
Видеокамера записывает изображение
аккумуляторной батареи
высокой четкости в формате AVCHD. Не
Когда температура видеокамеры или
следует использовать носитель записи
аккумуляторной батареи чрезмерно
DVD, содержащий отснятый материал
повышается или понижается, возможно,
в формате AVCHD на проигрывателях
не удастся выполнить запись или
или устройствах записи DVD, так как
воспроизведение на видеокамере, поскольку
плейер/рекордер DVD может не вытолкнуть
в таких условиях активизируются функции
носитель и может удалить его содержание
защиты видеокамеры. В этом случае
без предупреждения. Носитель записи
индикатор появляется на экране ЖКД и в
DVD, содержащий отснятый материал в
ви
д
оискателе (стр. 112).
формате AVCHD может воспроизводиться
на плейере/рекордере, совместимом с
Если видеокамера подключена
Blu-ray Disc
или на другом совместимом
к компьютеру или другому
устройстве.
дополнительному оборудованию
Не пытайтесь форматировать носитель
Сохраните данные всех записанных
записи видеокамеры с помощью
изображений
компьютера. Это может привести
Во избежание потери данных изображений
к нарушению нормальной работы
регулярно сохраняйте все записанные
видеокамеры.
изображения на внешнем носителе.
При подключении видеокамеры к другому
Рекомендуется сохранять данные
устройству с помощью соединительных
изображений на диске, например таком
кабелей убедитесь в правильном
как DVD-R и т. п., используя компьютер.
подключении соединительного разъема.
Вы также можете сохранить данные
Установка штекера в разъем с большим
изображений с помощью видеомагнитофона
усилием может привести к повреждению
и
ли рекордера DVD/HDD (стр. 67).
разъема и неполадкам в работе
Вы не можете создать диск AVCHD из
видеокамеры.
данных изображений, записанных с
параметром
(MENU) [Показать
др.]
[ РЕЖ.ЗАПИСИ] (в категории
[НАСТР.СЪЕМКИ]), установленным на
[HD FX]. Сохраните их на Blu-ray Disc или
на вн
ешнем носителе (стр. 64).
Примечания относительно
аккумуляторной батареи/адаптера
переменного тока
Извлекайте батарею или отключайте
адаптер переменного тока после
выключения видеокамеры.
Отсоединяйте адаптер переменного тока
от видеокамеры, одновременно удерживая
видеокамеру и штекер постоянного тока.
RU
4

Если не удается выполнить запись/
В данном руководстве диск DVD,
записанный с качеством изображения
воспроизведение изображений,
высокой четкости (HD) называется как диск
выполните команду [ФОРМАТ.
AVCHD.
НОСИТ.]
Конструкция и технические характеристики
Если в течение длительного времени
видеокамеры и принадлежностей могут
повторно выполнять запись/удаление
быть изменены без предварительного
изображений, на носителе записи
уведомления.
происходит фрагментация данных. Это
исключает возможность сохранения или
Проверьте название модели вашей
записи изображений. В таком случае,
видеокамеры
сначала сохраните ваши изображения на
Название модели указывается в этом
каком-либо внешнем носителе записи и
руководстве там, где имеются отличия
затем выполните [ФОРМАТ.НОСИТ.],
в характеристиках моделей. Проверьте
коснувшись
(MENU) [Показать
название модели на нижней стороне вашей
др.]
[ФОРМАТ.НОСИТ.] (в категории
видеокамеры.
[УПРАВЛ.НОСИТ.]) требуемый
Основными отличиями в характеристиках
носитель записи
[ДА] [ДА]
этой серии являются следующие.
.
Носитель
Емкость
Гнездо
записи
внутреннего
USB
Примечания по дополнительным
носителя
записи
принадлежностям
Мы рекомендуем использовать
HDR—
Внутренняя
64 ГБ Вход/
CX550E/
память
выход
оригинальные принадлежности Sony.
HDR—
+ карта
В некоторых странах/регионах
CX550VE
*
памяти
оригинальные принадлежности компании
HDR—
Внутренний
240 ГБ
Sony могут быть недоступны.
XR550E/
жесткий
HDR—
диск + карта
О данном руководстве,
XR550VE
*
памяти
иллюстрациях и экранах дисплея
Модели, отмеченные *, оборудованы
Примеры изображений, используемые
GPS.
в этом руководстве только в качестве
иллюстраций, сняты с использованием
цифровой фотокамеры, поэтому они могут
отличаться от изображений и индикаторов
экрана, которые могут в реальности
появляться на вашей видеокамере.
Иллюстрации вашей видеокамеры и
индикация на экране также преувеличены
или упрощены для большей наглядности.
В этом руководстве внутренняя память
(HDR-CX550E/CX550VE) и жесткий диск
(HDR-XR550E/XR550VE) видеокамеры,
а также карта памяти называются
“носителями записи”.
RU
5
Примечания по использованию
Не делайте следующего. Это может
привести к повреждению носителя
записи, невозможности воспроизведения
записанных изображений или их утрате, а
также к другим неисправностям.
выталкивание карты памяти, когда
ин
дика
тор доступа (стр. 22) светится или
мигает
извлечение аккумуляторной батареи
или отключение адаптера переменного
тока от видеокамеры, или механические
удары или вибрация видеокамеры, когда
индикаторы
(Фильм)/ (Фото)
(стр. 23) или индикатор доступа (стр. 22)
св
етятся или мигают
При использовании ремня для переноски
на плече (продается отдельно) не раздавите
камеру, прижимая ее к другому предмету.
Не используйте вашу видеокамеру в очень
шумных местах (HDR-XR550E/XR550VE).
О датчике падения (HDR-XR550E/
XR550VE)
Для защиты внутреннего жесткого диска
от удара при падении видеокамера имеет
функцию да
тчика падения (стр. 101). В
случае падения или в условиях отсутствия
силы тяжести, помехи, возникающие при
включении данной функции видеокамерой,
также могут записываться. В случае,
если датчик падения будет фиксировать
падение несколько раз подряд, запись/
воспроизведение может быть остановлена.
Примечание по использованию
камеры на высоте (HDR-XR550E/
XR550VE)
Не включайте видеокамеру в местах с
низким атмосферным давлением при высоте
над уровнем моря более 5000 метров.
Это может привести к повреждению
встроенного жесткого диска видеокамеры.
RU
6
-
Page 1: Sony HDR-XR550E
4-170-534- 11 (1) Digital HD Video Camera Recor der “Handycam ” Handbook 2010 Sony Corporation HDR-CX550/CX550V/ XR550/XR550V T able of contents 9 Getting started 12 Recording/Playback 21 Making good use of your camcorder 44 Saving images with an external device 57 Customizing your camcorder 66 Additional information 91 Quick referenc e 119[…]
-
Page 2: Sony HDR-XR550E
2 US Read this first Supplied items The num bers in ( ) are the sup plied quan tity . AC A daptor (1) P ower co rd (Ma ins lead) (1) Componen t A/V cable (1) A/V connecting cable (1) USB cable (1) W ireless Remo te Commander (1) A butt on-type lithium bat tery is already installed. Remove the insula tion sheet be[…]
-
Page 3: Sony HDR-XR550E
3 US Do not aim a t the sun. Doing so might cause your camco rder to malfunction. T ake imag es of the sun only in lo w light condi tions, such as at dus k. About language setting The on-screen displa ys in each local language are used for illu strating the opera ting procedur es. Change the screen languag e before u sing the camcor der if necessar[…]
-
Page 4: Sony HDR-XR550E
4 US pro tection featur es of the camcor der being activated in such si tuation s. In this case, an indicato r appears o n the LCD screen and the v iewfinder (p. 98). When the camcoder is connected to a computer or accessories Do not try to format the reco rding media of the camcorder u sing a comp uter . If you do so , your camcorder m ay not o pe[…]
-
Page 5: Sony HDR-XR550E
5 US Notes on use Do not do an y of the follo wing. Other wise, the recordin g media may be damaged, r ecorded images ma y be impossible to pla y back or may be lost, or other malfunctions could occur . ejecting the memory card when the access l amp (p . 20) is lit or flashing removin g the battery pack or A C Ada ptor from the camcor der , or appl[…]
-
Page 6: Sony HDR-XR550E
6 US Operation flow Getting star ted (p. 12) Prepar e the power source a nd memory card. Recording movies and photos (p . 21) Recording mo vies p . 22 Changing the reco rding mode (p . 28) E xpected recording time (MEDI A INFO, p . 85) Shooting pho tos p . 24 Playing movies and phot os Playback on the camco rder p . 33 Playing i[…]
-
Page 7: Sony HDR-XR550E
7 US Advic e for succ essful rec ording T o get good results in recording Stabilizing your camcorder When yo u hold the camcor der , keep your upper body uprigh t, and hold yo ur arms close to yo ur body . The SteadySh ot function is effective against ca mera-shake, however , it is essential that you no t move the cam corder . Zooming smoothly […]
-
Page 8: Sony HDR-XR550E
8 US Useful recor ding techniques Capturing images beautifully without troublesome setting INTELLIGENT A UTO(26) Focusing on the child on the left side of the screen Prioritizing the sub ject(28) SPOT FOCUS(73) Capturing photos during movie recording Dual Rec(30) Smile Shu tter (29) Recording in a dimly-lit room Nigh tShot(30) LOW L UX(77) Capt[…]
-
Page 9: Sony HDR-XR550E
9 T able of contents US T able of cont ents Read this first …………………………………………………………………………….. 2 Notes on use . …………………………………………………………………….. 5 Operation flow . ………………………………………………………………………..[…]
-
Page 10: Sony HDR-XR550E
10 US Playing images on a T V ……………………………………………………………….. 41 Connecting a T V using [ T V CONNECT Guide] . ……………………………….. 41 Using “BRAVIA ” Sync . …………………………………………………………… 43 Mak ing good use of your camcor der Deleting movies an[…]
-
Page 11: Sony HDR-XR550E
11 T able of contents US Menu lists ………………………………………………………………………………. 69 MANU AL SET TINGS (Items to adjust for scene condition) ………………………………. 71 SHOOTING SET (Items for customized shooting) ……………………………………….. 76 PHOT O SE T TINGS (Items f[…]
-
Page 12: Sony HDR-XR550E
12 US Getting star ted Step 1: Charg ing the battery pack HDR -CX550/CX550V HDR -XR550/XR550V Battery pack AC Adaptor DC IN jack /CHG (flash/charge) lamp DC plug Pow er cord (Mains lead) T o the wall outlet (wall socket) Battery pack AC Adaptor /CHG (flash/charge) lamp T o the wall outlet (wall socket) Pow er cord (Mains lead) DC IN jack DC plug[…]
-
Page 13: Sony HDR-XR550E
13 Getting started US Y ou can charge the “ InfoLITHIU M” ba ttery pack (V series) after attaching it t o your camcor der . Notes Y ou cannot a ttach an y “Inf oLITHIUM” ba ttery pack other than the V series to your camco rder . 1 T urn off your camcorder by closing the L CD screen after replacing the viewfinder . 2 Attach the battery pack […]
-
Page 14: Sony HDR-XR550E
14 US T o remove the ba ttery pack Close the LCD screen. Slide the BA T T (battery) release lever ( ) and remo ve the batt ery pack ( ). T o use a wall outlet (wall socket) as a power sour ce Make the same co nnections as “ Step 1: Char ging the battery pack. ” Even if the bat tery pack is attach ed, the battery pack is not dischar ged.[…]
-
Page 15: Sony HDR-XR550E
15 Getting started US Step 2: T urning the power on, and setting the date and time 1 Open the L CD screen of your camcorder . Y our camcorder is turned o n and the lens co ver is opened. T o turn on your camcor der when the LCD screen is open, press PO WER . 2 Select the desired geographical area with / , then touch [NEXT ]. T o s et the date and t[…]
-
Page 16: Sony HDR-XR550E
16 US Notes The date an d time does not appear d uring recordin g, but they are a uto matically recor ded on the recordin g media, and can be display ed during playback. T o display the dat e and time, touc h (MENU) [Show o thers] [PLA YBA CK SET] (under [PLA YBA CK] catego ry) [DA T A CODE] [D A TE/TIME] . Y ou can turn[…]
-
Page 17: Sony HDR-XR550E
17 Getting started US Changing the language setting Y ou can change the on-scr een displays to s how messag es in a specified language. T ouch (MENU) [Show others] [CL OCK/ LANG] (under [GENERAL SET] catego ry) [ LANGU AGE SE T] a desired language .[…]
-
Page 18: Sony HDR-XR550E
18 US Step 3: P reparing the recording media The recor ding media that can be used differs depending on y our camco rder . The following icons ar e displa yed on the screen of y our camcor der . HDR -CX550/CX550V * In ternal memory Memo ry card HDR -XR550/XR550V * In ternal hard disk M emory card * In the defaul t setting, both movies and pho tos a[…]
-
Page 19: Sony HDR-XR550E
19 Getting started US T ouch [ YES] . The recor ding medium is cha nged. T o check the recording media settings In either mo v ie recor ding mode or pho to recor ding mode, the media icon of the selected recor ding media is displa yed at the to p right corner of the screen. The icon displa yed may va ry dep ending on yo ur model. Inser ting[…]
-
Page 20: Sony HDR-XR550E
20 US Open the cover , and inser t the memor y card with the nothched edge in the direction as illustrated until it clicks. Close the cover after inserting the memory card. The [Creat e a new Image Da tabase File.] screen ma y appear if yo u insert a new memory card. I n that case, to uch [YES]. If yo u recor d only pho tos on the memo r y card, t […]
-
Page 21: Sony HDR-XR550E
Recording/Playback 21 US Recording/Playback Recording In the defa ult setting, movies a re recor ded with high definition image quali ty (HD) on the followin g media. HDR -CX550/CX550V : Internal memory HDR -XR550/XR550V : Internal hard di sk Tips T o change the recordin g media, see page 18. 1 F asten the grip belt. 2 Open the L CD screen of your […]
-
Page 22: Sony HDR-XR550E
22 US Recording movies Press ST ART/STOP to start recording . Y ou can start recor ding also by touc hing in the bottom left o f LCD screen. T o stop recor ding, pr ess ST ART/STOP a gain. Y ou can stop r ecording also b y touching in the bot tom left of LCD screen. The icons an d indicator s on the LCD panel will be display ed for abou t 3[…]
-
Page 23: Sony HDR-XR550E
23 Recording/Playback US The followin g states will be indicated if data is still being writt en onto the r ecording media after r ecording has finished. During this time, do not a pply shock o r vibratio n to the camcorder , or remove the bat tery or AC A d apt or . A ccess la mp (p . 20) is lit or flashing The media icon in the upper right o f th[…]
-
Page 24: Sony HDR-XR550E
24 US Data code during recor ding The recor ding date , time and condi tion , and coor dinates (HD R -CX550V/XR550V ) are recor ded auto matically on the r ecording m edia. They are not disp layed during r ecordin g. Ho wever , you can ch eck them as [D A T A CODE] during pla yback. T o display them, touch (MENU) [Show o thers] [PLA YBA CK […]
-
Page 25: Sony HDR-XR550E
25 Recording/Playback US Tips See page 105 on the recorda ble number of p hotos. T o change the image size, to uch (MENU) [Show others] [ IMAGE SIZE] (under [PHOTO S ETTINGS] category) a desired setting . Y ou cannot r ecord pho tos while is di splayed. Y our camcor der flashes auto matically when there is insufficient a mbien t[…]
-
Page 26: Sony HDR-XR550E
26 US Useful functions for recor ding movies and photos Zooming Y ou can magnify images up to 14 times the original size with the power zoom lever . Y ou can magnify images also with the / on the LCD screen. * HDR -CX550/CX550V ** HD R -XR550/XR550V Mo ve the power zoom lever s lightly for a slower zoom. M ove it further for a fast er zoom. Notes B[…]
-
Page 27: Sony HDR-XR550E
27 Recording/Playback US Scene detection (Backlight), (L andscape), (T wilight), (Spotlight), (Low light), (Macro) The camcor der selects the most effective setting au toma tically , depending on the scene. Camera-shak e detection (W alk), (T r ipod) The camcor der detects whether camera- shake occurs or not, a nd makes the optim um compensa ti[…]
-
Page 28: Sony HDR-XR550E
28 US Tips Y ou can recor d, play , or edit movies in the selected image quality only . T o record, pla y , or edit movies in an other image quality , change this setting. Selecting the recording mode Y ou can select a recording mode to reco rd the high definition image quality (HD) movies fro m 4 levels. The recor ding time of the media is chan ge[…]
-
Page 29: Sony HDR-XR550E
29 Recording/Playback US T ouch the face with the double-lined frame again to cance l. Notes The face you to uched may no t be detected, depending on the surro unding brightness o r hairstyle of the sub ject. In this case, touch the face again when you r ecord. Tips The double-lined frame a round a face targ eted for possible smile detection sho t […]
-
Page 30: Sony HDR-XR550E
30 US T o enjoy the 5.1ch surround soun d of the movies reco rded with high definition image quality (HD) in 5.1ch sound, y ou need an A VCHD forma t device compatib le with 5.1ch surround. When you co nnect your camco rder with an HDMI cable (sold separa tely), the sound o f high definition image quali ty (HD) movies recor ded in 5.1ch sound is au[…]
-
Page 31: Sony HDR-XR550E
31 Recording/Playback US Recording in mirror mode Open the LCD panel 90 degrees to the camcor der ( ), then rota te it 180 degrees to the lens side ( ). Tips A mirror -image of the su bject appears on the LCD screen, but the ima ge will be normal when recorded. Controlling the image settings manually with the MANU AL dial Y ou can assign 1 […]
-
Page 32: Sony HDR-XR550E
32 US Notes Man ual settings will be retained even if you change the as signed item of the MANU AL dia l. Ho wever , if you set [EXPOSURE] after setting [AE SHIFT] man ually , [EXPOSURE] will override [AE SHIFT]. If you set ei ther one of [EXPOS URE], [IRIS], or [SHUTTER SPEED], the settings of o ther 2 items ar e canceled. If you select [RESET] in[…]
-
Page 33: Sony HDR-XR550E
33 Recording/Playback US Pla yback on the camcorder In the defa ult setting, movies a nd photos tha t are r ecorded on the f ollowing r ecording m edia are pla yed. HDR -CX550/CX550V : Internal memory HDR -XR550/XR550V : Internal hard di sk Tips T o change the recordin g media, see page 18. 1 Open the L CD screen of your camcorder . Y our camcorder[…]
-
Page 34: Sony HDR-XR550E
34 US / : Displays m ovies recor ded on the pr evious/next date . * / : Displays the p revious/next mo vie. Returns to the reco rding screen. * is display ed when is touched. appears when the stan dard definition imag e quality (STD) mo vie is selected with [ / SET] (p . 27). Y ou can scroll the displa y by to uching and draggin[…]
-
Page 35: Sony HDR-XR550E
35 Recording/Playback US T o adjust the sound volume of movies While playin g back movies, to uch adjust with / . Y ou can also adjust the sound v olume b y using / in the OPTI ON MENU . Viewing photos Y our camcorder displa ys t he selected photo . Tips When viewing phot os recorded o n the memory card, (playback folder) appears o n the sc[…]
-
Page 36: Sony HDR-XR550E
36 US Useful functions for playing movies and photos Searching for desir ed images by date (Date Index) Y ou can search for desir ed images by da te efficiently . Notes Y ou cannot use the Dat e Index function for photos o n the memory card. Press ( VIE W IMAGES). The VISU AL INDEX screen appears. T ouch [DA TE INDEX]. T ouch / to s[…]
-
Page 37: Sony HDR-XR550E
37 Recording/Playback US Tips Y ou can also display the F ilm Roll Index by touching (MENU) [Sho w others] [VIEW IMA GES] (under [PLA YBACK] catego ry) [ FILM ROLL]. Searching for desir ed scene by face (F ace Index) The face images detected or t ouched during movie reco rding ar e displa yed on the INDEX screen. Y ou can play back the […]
-
Page 38: Sony HDR-XR550E
38 US T o stop Highlight Playback T o pause, touch . T o stop , touch or . T o change the settings for Highlight Playback After touchin g [ HIGHLIGHT], t ouch [HIGHLIGHT S ET] before the H ighlight Playback starts. Y ou can set following it ems. [PLA YBA CK RANGE] Set the range of mo vies to be played by selecting the from and to da te, then touc h[…]
-
Page 39: Sony HDR-XR550E
39 Recording/Playback US catego ry) [ERASE] and select a scenario you wan t to erase w ith / , t hen touch [YES] . T o eras e all scenarios, touch (MENU) [Show o thers] [ SCEN ARIO ERASE] (under [EDIT] categ ory) [ERASE ALL] [YES] [YES] . Y ou can erase also by touchin g (OPTION) d uring Highlight Scenari[…]
-
Page 40: Sony HDR-XR550E
40 US Adjust the magnification with W ( Wide angle)/T ( T elephoto). T o cancel, touch . Playing back a series of photos (Slide show) T ouch on the photo playback screen. The slide sho w begins from the selected photo . T o stop the slide show T ouch . T o restart the slide show T ouch again. Notes Y ou cannot o perate playback zoom d uring sli[…]
-
Page 41: Sony HDR-XR550E
41 Recording/Playback US Playing images on a T V Connection methods and the image quality (high definition (HD) or sta ndard definition (STD)) viewed on the TV screen differ depending on what type of TV is connected, and the co nnectors used. Connecting a T V using [ T V CONNECT Guide] Y ou can connect your camco rder to the TV easily following the[…]
-
Page 42: Sony HDR-XR550E
42 US T ypes of connection cables between your camcorder and T V Connecting to a high definition T V Componen t A/V Cable (supp lied) HDMI Cable (sold separat ely) Connecting to a non-high-definition 16:9 (wide) or 4:3 TV Componen t A/V Cable (supp lied) A/V connecting cable with S VIDEO (sold separately) A/V connecting cable (su pplied) When conne[…]
-
Page 43: Sony HDR-XR550E
43 Recording/Playback US When you connect with A/V connecting cable with S VIDEO When the S VIDEO pl ug (S VIDEO channel) is connected, audio signals a re not ou tpu t. T o outp ut audio signals, co nnect the white and red plugs to the a udio inpu t jack of your TV . This connection pr oduces higher resolutio n images com pared with the A/V connect[…]
-
Page 44: Sony HDR-XR550E
44 US Making good use of your camcorder Deleting movies and photos Y ou can free media space by deleting movies and p hotos fro m recor ding media. Notes Y ou cannot r estore ima ges once they are deleted. Sav e important mo vies and pho tos in advance. Do not remo ve the batt ery p ack or the A C Ada ptor fro m your camco rder while deleting the i[…]
-
Page 45: Sony HDR-XR550E
45 Making good use of your camcorder US T ouch / to select the recording date o f the desired movies/pho tos, then touch . T ouch the image on the LCD screen to confirm the image. T ouch to return to the previous scr een. T ouch [YES] . Pr otec ting recor ded movies and photos (Pr otec t) Pro tect movies and ph otos to a void de[…]
-
Page 46: Sony HDR-XR550E
46 US T o protect all the movies and photos recorded on the same da y at one time Notes Y ou cannot select [ PRT . by dat e] for still images reco rded on the memory card. In step 2, to uch [ PROTECT] [ PR T . by date]/[ P RT . by date]. T o protect all photos on the same da y at one time, to uch [ PROTECT] [ PR T . by date]. T ouch[…]
-
Page 47: Sony HDR-XR550E
47 Making good use of your camcorder US Do not remo ve the batt ery p ack or the A C Ada ptor fro m your camco rder while dividing the movie. I t may damage the recor ding media. Also, do no t eject the memory c ard while dividing movies o n the memory card. A slight difference ma y o ccur from the point where you to uch and the actual dividing poi[…]
-
Page 48: Sony HDR-XR550E
48 US 5 T ouch . Notes The image size is fixed depending on the ima ge quality of the mo vie: [ 2.1M] with high definition image quality (HD) [ 0.2M] in 16:9 (wide) with standard definition image quali ty (STD) [V GA(0.3M)] in 4:3 with standard definitio n image quality (S TD) The recor ding medium where yo u want to sa ve photos sh ould have e[…]
-
Page 49: Sony HDR-XR550E
49 Making good use of your camcorder US T ouch the type of dubbing. [DUB by select]: T o select movies and dub [DUB by da te]: T o dub all movies o f a specified date [ DUB ALL]: T o dub the high definition image q uality (HD) Playlist [ DUB ALL]: T o dub the standar d definition image q uality (STD) Playlist When yo u select the Playlist as th[…]
-
Page 50: Sony HDR-XR550E
50 US Select the photo to be copied. [COPY by select]: T ouch the photo t o be copied, and ma rk with . Y ou can select multiple ph otos. Press a nd hold the image do wn on the screen to confirm the image. T ouch to return to the p revious screen. [COPY by da te]: Select the recording date o f the photo to be co pied, then touch . Y ou cannot s[…]
-
Page 51: Sony HDR-XR550E
51 Making good use of your camcorder US T o add all the movies recor ded on the same day at one time In step 2, to uch [ ADD b y date]/ [ ADD by da te]. The recording da tes of movies are display ed on the screen. T ouch / to select the recording date o f the desired movie, then to uch . T ouch the image on the LCD screen to confirm the ima[…]
-
Page 52: Sony HDR-XR550E
52 US T ouch [YES] . Tips Even if y ou erase a movie from a P laylist, the original movie is not de leted. T o change the order within the Playlist T ouch (MENU) [Show others] [PLA YLIST EDIT] (under [EDIT] categ ory). T ouch [ MOVE]/[ M OVE]. S elect t he movie to be mo ved. The selected movie is marked with . T[…]
-
Page 53: Sony HDR-XR550E
53 Making good use of your camcorder US Setting the GPS function Set the GPS switch to ON ( ap pears on the LCD screen). Y our camcorder starts tr ying to triangulat e. When yo ur camcor der triangulates successfully , it will record the location info rmation a t the time movies and pho tos were r ecorded. Notes U s e the GPS function in outdoors. […]
-
Page 54: Sony HDR-XR550E
54 US Acquiring the current loca tion information Y ou can display the curren t location on a map . S et the GPS switch to ON so tha t your camcor der can acquire the curren t location informa tion. T ouch ( Y OUR L OC A TION) on the recording scr een. The current locatio n is displa yed and marked a t the center o f the LCD screen. If you to uch a[…]
-
Page 55: Sony HDR-XR550E
55 Making good use of your camcorder US the thumbn ail of the movie o r photo witho ut location informa tion. T ouch the image marker where you recor ded the movies and photos to be play ed back. The image ma rker turns r ed. The movies or p hotos r ecorded at tha t location ar e display ed on the left of the screen. T ouch the desired movi[…]
-
Page 56: Sony HDR-XR550E
56 US Adjusting the clock and the area automatically (A UTO CL OCK ADJ/ A UTO AREA ADJ) Y our camcorder can ma intain accurat e time and com pensate f or time difference aut oma tically , by acquiring time and location info rmation fro m GPS. T ouch (MENU) [Show others] [CL OCK/ LANG] (under [GENERAL SET ] category) [AUT O CLOCK ADJ[…]
-
Page 57: Sony HDR-XR550E
Saving images with an external device 57 US Saving images with an external device Saving images in external media (DIREC T COP Y ) Y ou can save mo vies and pho tos on external media (USB stora ge device), such as an external hard disk driv e. Y ou can also play back images on the ca mcorder o r another playback device. Notes For this o peration, y[…]
-
Page 58: Sony HDR-XR550E
58 US 6 After the operation is completed , touch on the camcorder screen. Notes The number o f scenes you can save o n the external media are as follo ws. Ho wever , even if the external media has free space, you canno t save scenes exceeding the fo llowing num ber . High definition image q uality (HD) movies: Max. 3,999 Standar d definition image […]
-
Page 59: Sony HDR-XR550E
59 Saving images with an external device US T o play back images in the external media on the camcorder T ouch [Play witho ut cop ying.] in step 5 above. The VISU AL INDEX screen of the external media is display ed. P lay back the image (p . 33). Y ou can also view images on a TV connected to your ca mcorder (p . 41). Y ou can play back the[…]
-
Page 60: Sony HDR-XR550E
60 US Ordinary DVD device Player DVD pla yer Compu ter that can pla y DVDs, etc. Creating devic e DVD writer , DVDirect Expr ess (p. 60) DVD writer , other than DVDir ect Express (p . 63) Di sc recorder , etc. (p . 64) Disc type Standar d definition image quali ty (STD) disc Notes Always main t ain your Pla yStatio n 3 t[…]
-
Page 61: Sony HDR-XR550E
61 Saving images with an external device US Inser t an unused disc into the DVD writer , and close the disc tray . The [DISC BURN] scr een appears o n the camcor der screen. Press (DISC BURN) on the DVD writer . Mo vies recor ded on the internal recor ding media that ha ve not been saved on a ny discs will be recorded ont o the disc. When t[…]
-
Page 62: Sony HDR-XR550E
62 US T ouch [YES] on the camcor der screen. T o create another disc of the same cont ents, insert a new disc and touch [CREA TE SAME DISC]. A fter the operation is co mplet ed, touch [EXIT] [END] on the camco rder screen. Di sconnect the USB cable from y our camcor der . Notes Do not do an y of the follo wing when creating a di[…]
-
Page 63: Sony HDR-XR550E
63 Saving images with an external device US T o play back a disc on the ordinary DVD player Select the standard image q uality (STD) on the screen to select the image quality of the disc to be created in step 2 o f “T o customize a disc with DISC BURN O PTION. ” Tips If you ca nnot pla y back created standa rd definition (STD) image q uality di[…]
-
Page 64: Sony HDR-XR550E
64 US After the operation is completed , touch [END] [ YES] on the camcorder screen. Disconnect the USB cable. Creating a standar d definition image quality (STD) disc with a recorder , etc. Y ou can dub images pla yed back on yo ur camcor der on a disc or video cassette, by conn ecting your camcor der to a disc recor der , a Sony DVD w[…]
-
Page 65: Sony HDR-XR550E
65 Saving images with an external device US cable (supplied) or an A/V connecting cable with S VIDEO (sold separately). Connect your camcor der to the inpu t jacks of the recor ding device. Start playback on your camcorder , and record it on the recording devic e. Refer to the instruction man uals supplied with your reco rding device fo[…]
-
Page 66: Sony HDR-XR550E
66 US Customizing y our camcorder Using menus U sing the menus, you ca n perform useful funct ions an d chang e various settings. I f you make good use of menu opera tions, yo u can enjo y using your ca mcorder . The camcor der has various men u items under each of eight men u categories. MANU AL SETTINGS (I tems to adjust for scene c ondition) […]
-
Page 67: Sony HDR-XR550E
67 Customizing your camc order US Notes Y ou may no t be able to set some menu i tems, depending on the r ecording o r playback condi tions. Grayed o ut menu i tems or settings a re not a vailable. Tips Depending on the menu i tems being chan ged, your camco rder switc hes between playback mode and recordin g mode (movie/phot o). Using MY MENU Y ou[…]
-
Page 68: Sony HDR-XR550E
68 US Using the OPTION MENU The OPTIO N MENU appears j ust like the pop-up windo w that a ppears when you righ t-click the mouse on a co mpu ter . When is display ed at bott om-right of the screen, y ou can use the OPTION MENU . Y ou touc h , and the menu it ems you ca n change in the co ntext appear . T ouch (OPTION). T ouch the desired ta[…]
-
Page 69: Sony HDR-XR550E
69 Customizing your camc order US Menu lists (MANU AL SET TINGS) category SCENE SELECTION 71 F ADER 71 WHITE BAL. 72 SPO T MTR/FCS 73 SPO T METER 73 SPO T FOCUS 73 EXPOSURE 73 FOCUS 74 TELE M ACRO 74 AE SHIFT 74 WB SHIFT 75 GOLF SHO T 75 SM TH SL W REC 75 (SHOOTING SET ) categor y / SET 27 REC MODE 28 GUIDEFRAME 76 STEADY SHOT 77 CONVERSION LENS 77[…]
-
Page 70: Sony HDR-XR550E
70 US PHOT O COPY COPY b y select 49 C OPY b y date 49 PLA YLIST EDIT ADD/ ADD 50 ADD by date/ ADD by date 51 ERASE/ ERASE 51 ERASE ALL/ ERASE ALL 51 MOVE/ MOVE 52 (O THERS) category Y OUR LOCA TION * 1 54 USB CONNECT USB CONNECT* 2 63 USB CONNECT* 3 63 USB CONNECT 63 DISC BURN Operating Guide T V CONNECT Guide 41 MUSIC TOOL EMPT Y MUSIC 39 DOWNL O[…]
-
Page 71: Sony HDR-XR550E
71 Customizing your camc order US MANU AL SET TINGS (Items to adjust for scene condition) See “U sing men us ” (p. 66) on the operatio n. The default set tings are ma rked with . SCENE SELEC TION Y ou can record imag es effectively in various situa tions. AUT O Records imag es in average im age quality without the [SCENE S ELECTION] fun[…]
-
Page 72: Sony HDR-XR550E
72 US WHITE F ADER Fades in/ou t with the white effect. Out In BLACK F ADER Fades in/ou t with the black effect. Out In T o cancel the fader before starting the operation, t ouch [OFF]. Tips When you p ress ST ART/STO P , the setting is cleared. A movie reco rded using [BLA CK F ADER] may be difficu lt to see in the VIS U AL INDEX screen. WHITE BAL[…]
-
Page 73: Sony HDR-XR550E
73 Customizing your camc order US from inside the ho use, or vice versa, you need to redo the [ONE PUSH] p rocedure to r eadjust the white balance. SPOT M TR/FCS (Spot meter/ focus) Y ou can adjust the brigh tness and focus for the selected subject simul taneously . This function enables yo u to use [SPOT ME TER] (p . 73) and [SPOT FOCUS] (p . 73) […]
-
Page 74: Sony HDR-XR550E
74 US FOCUS Y ou can adjust the focus man ually . Y ou can select this funct ion also when you wan t to focus on a certain subject inten t ionally . T ouch (nearby sub ject)/ (distant subject) to adju st the focus. T o adjust the focus au toma tically , touch [A UTO]. Notes When you set [FOCUS] to [MANU AL], appears. The minimum possible dis ta[…]
-
Page 75: Sony HDR-XR550E
75 Customizing your camc order US Y ou can also adjust ma nually by usin g the MANU AL dial (p. 31). WB SHIFT ( White Balance Shift) Y ou can adjust the white balance ma nually . OFF Ad justs the white balance a utoma t ically . ON ( and the adjustment value) Ad justs the white balance man u ally . Tips When the white balance is set to a lo wer[…]
-
Page 76: Sony HDR-XR550E
76 US T o change the setting T ouch (OPTION), then select the setting you wa nt to cha nge. [ TIMING] Select the recording start poin t after ST ART/STOP i s pressed. The defa ult setting is [3sec AFTER]. Notes Y ou cannot r ecord sound. Image q uality is not as good as that o f normal recordin g. SHOO TING SE T (Items for customized sh[…]
-
Page 77: Sony HDR-XR550E
77 Customizing your camc order US STEAD YSHO T Y ou can compensat e for camera s hake. Set [ STEADY SHO T] to [OFF] ( ) when using a tripod (sold separately), then the image becomes na tural. ACTIVE Pro vides a more pow erful SteadyShot effect. ST ANDARD Pro vides the SteadySh ot effect under rela tively stable recor ding condi tions. OFF ( ) T[…]
-
Page 78: Sony HDR-XR550E
78 US is a limit to the n umber of faces that can be recorded in F ace Index. T o play back from the Face I ndex, see page 37. PRIORIT Y SET TING Selects the priority subject for the face detection or the smile shu tter . Ad justs focus/colo r/exposure au toma tically for the selected faces. AUT O Detects faces auto matically . CHILD PRIORITY D[…]
-
Page 79: Sony HDR-XR550E
79 Customizing your camc order US L OW ( ) Records am bient sound fa ithfully . Selec t [LOW] when yo u want to r ecord an ex citing and powerful sound in a concert hall, etc. (This setting is not sui table for r ecording conv ersations.) AUDIO MODE Y ou can change the r ecording sound forma t. 5.1ch SURROUND ( ) Records sound in 5.1ch s ur[…]
-
Page 80: Sony HDR-XR550E
80 US ON ( ) Records in x.v .Color . Notes Set [ X.V .COLOR] to [ON] when the recorded mo vie will be played back on an x.v .Color-com pliant TV . If the movie r ecorded with this function [ON] is played back o n a non-x.v .Color-co mplian t TV , the color ma y not be repr oduced correctly . [ X.V .C OLOR] cann ot be set to [ON]: When reco rding st[…]
-
Page 81: Sony HDR-XR550E
81 Customizing your camc order US STEAD YSHO T Y ou can compensat e for camera s hake. Set [ STEADY SH OT] to [OFF] ( ) when using a tripod (sold separately), then the image becomes na tural. ON The SteadySho t function is used. OFF ( ) The SteadySho t function is not used. FLASH MODE Y ou can select t he flash setting when you recor d photos u[…]
-
Page 82: Sony HDR-XR550E
82 US FILE NO . (F ile number) Y ou can select t he way to as sign file number of pho tos. SERIES Assigns file num bers of photos in sequence . The file number becomes larger each time you reco rd a phot o. Even if the memo ry card is replaced with another on e, the file number is assigned in sequence. RESET Assigns file num bers in sequence, f[…]
-
Page 83: Sony HDR-XR550E
83 Customizing your camc order US OFF Data code is not displa yed. DA TE/TIME Displays the da te and time. CAMERA DA T A Displays ca mera setting data. COORDINA TES * Displays coor dinates. * HDR -CX550V/XR550V DA TE/TIME Date Time CAMERA DA T A SteadySho t off Brightness White balance Gain Shu tter speed A pertu[…]
-
Page 84: Sony HDR-XR550E
84 US EDIT (Items for editing) See “U sing men us ” (p. 66) on the operatio n. DELETE See page 44. SCENARIO ERASE See page 38. PROTECT See page 45. DIVIDE See page 46. PHOT O CAPTURE See page 47. MOVIE DUB See page 48. PHOT O COPY See page 49. PLA YLIST EDIT See page 50. O THERS (Items for other settings) See “U sing men us ” (p. 66) on the[…]
-
Page 85: Sony HDR-XR550E
85 Customizing your camc order US MANA GE MEDIA (Items for recor ding media) See “U sing men us ” (p. 66) on the operatio n. MEDIA SET TINGS See page 18. MEDIA INFO Y ou can check the remaining r ecordab le time for each r ecording mode of the recor ding media for mo vies and the app ro ximate free a nd used media space of the recordin g media.[…]
-
Page 86: Sony HDR-XR550E
86 US REP AIR IMG.DB F . See page 96, 101. GENERAL SE T (Other setup items) See “U sing men us ” (p. 66) on the operatio n. The default set tings are ma rked with . SOUND/DISP SET VOL UME Y ou can adjust the vol ume of pla yback sound by to uching / . BEEP ON A melody sounds when you s tart/stop recordin g, or operate the t ouch[…]
-
Page 87: Sony HDR-XR550E
87 Customizing your camc order US to the camcor der body , the s etting becomes [NORMAL] au toma tically . Tips This adjustmen t does not affect the recor ded images in an y way . L CD COL OR Y ou can adjust the colo r of the LCD screen by to uching / . Tips This adjustmen t does not affect the recor ded images in an y way . DISPLA Y SE T Y[…]
-
Page 88: Sony HDR-XR550E
88 US COMPONENT Select [COMPONENT] when connecting your camco rder to a TV with the compo nent in put jack. 480i Select this when connecting your camcorder t o a TV with the component inpu t jack. 1080i/480i Select this when connecting your camcorder t o a TV that has the componen t inpu t jack and is capa ble of displa ying the 1080i signa[…]
-
Page 89: Sony HDR-XR550E
89 Customizing your camc order US AUT O AREA ADJ (Auto area adjustment) (HDR-CX550V/XR550V ) See page 56. DST SET/SUMMERTIME Y ou can change this setting wi thout stop ping the clock. Set to [ON] to mo ve the time forward 1 hour . OFF Does not set the DST SET . ON Sets the DST SET . LANGUA GE SET Y ou can select t he language t o be[…]
-
Page 90: Sony HDR-XR550E
90 US DROP SENSOR (HDR-XR550/XR550V ) Y our camcorder detects that i t is drop ping, and pr otects the internal ha rd disk. ON Activa tes the drop sensor . When it i s detected that the camco rder is drop ping, yo u may not be able to r ecord or p lay back images correctly , to pro tect the internal hard disk. When dro pping is det ected, a[…]
-
Page 91: Sony HDR-XR550E
Additional information 91 US Additional inf ormation T roubleshooting If yo u run into an y problems using y our camcor der , follow the steps belo w . Check the list (p. 91 to 102), and inspect your camcorder . Disconnect the power source, attach the power sourc e again after about 1 minute, and turn the camcorder on. Press RESET (p. 1[…]
-
Page 92: Sony HDR-XR550E
92 US The menu settings have changed automatically . The followin g menu it ems return to the default settings in m ore than 12 ho urs after you close the LCD screen. [SCENE SELECTION] [WHITE BAL.] [SPOT MTR/FCS] [SPOT METER] [SPOT FOCUS] [EXPOSURE] [FOCUS] [LOW L UX] [BL T -IN ZOOM MIC] [MICREF LEVEL] [A UTO BACK LI GHT] [IRIS] [SHUTTER SPEED] [DR[…]
-
Page 93: Sony HDR-XR550E
93 Additional information US The remaining battery time indicator does not indicate the correct time. The amb ient tem perature is t oo high or too low . This is not a malfunction. The battery pack has not been char ged enough. Fully cha rge the bat tery again. If the prob lem persists, replace the bat tery pack with a n ew one (p . 113). The indic[…]
-
Page 94: Sony HDR-XR550E
94 US cannot make new r ecording d uring this period. The recor ding media is full. Delete unn ecessary images (p. 44). T otal number of movie scenes or p hotos exceeds the recorda ble capacity o f your c amcor der (p. 104, 105). Delete unnecessa ry im ages (p . 44). W hile [DROP S ENSOR] is activat ed (p. 90), you ma y not recor d images. (HDR -XR[…]
-
Page 95: Sony HDR-XR550E
95 Additional information US The horizontal to vertical ratio of the movie (16:9 (wide)/4:3) cannot be changed. The horizon tal to vertical ratio of high definition image q uality (HD) movies is 16:9 (wide). The auto focus does not function. Set [FOCUS] to [AUT O] (p. 74). The recor ding conditio ns are no t suitable f or a ut o focus. Adj ust the […]
-
Page 96: Sony HDR-XR550E
96 US Photos cannot be played back. Photos cann ot be played back if yo u have modified fi les or folder s, or hav e edited the data on a com puter . (The fi le name flashes in that case.) This is no t a malfunction. is indicated on an image on the VISU AL INDEX screen. This may a ppear on an ima ge recor ded on other devices, edited on a com put e[…]
-
Page 97: Sony HDR-XR550E
97 Additional information US Playlist. Erase unnecessary movies from the Playlist (p . 51). Y ou cannot add p hotos in the Playlis t. A movie cannot be divided. A movie that i s too short cannot be divided. A pro tected movie cannot be divided. A photo cannot be captured from a movie. The recor ding media where you wa nt to sav e photos is full. Pl[…]
-
Page 98: Sony HDR-XR550E
98 US Connecting to a Computer “PMB” cannot be installed. Check the comp uter en vironmen t or installation pr ocedure requir ed to install “PMB ” . “PMB” does not work correctly. Quit “PMB ” and restart your com puter . The camcorder is not r ecognized by the computer . Disconnect devices from the USB jack of the comp uter other th[…]
-
Page 99: Sony HDR-XR550E
99 Additional information US C:(or E:) : (Self-diagnosis display) C:04: The battery pack is not an “ InfoLITHIU M” battery pack (V series). U se an “Inf oLITHIUM” ba ttery pack (V series) (p . 112). Connect the DC plug of the AC A d apt or to the D C IN jack of your ca mcorder securely (p . 12). C:06: The battery[…]
-
Page 100: Sony HDR-XR550E
100 US ( Warning indicator pertaining to incompatible memory card) Incom p atible memo ry card is inserted (p. 19). ( Warning indicator pertaining to the write-protect of the memor y card) Access t o the memory card was restricted on another device. ( Warning indicator pertaining to the flash) F ast flashing There is something wr ong with the f[…]
-
Page 101: Sony HDR-XR550E
101 Additional information US The Image Database File is damaged . Do you want to cr eate a new file? HD movie management information is damaged. Creat e new information? The managem ent file is damaged. W hen you to uch [YES], a new managemen t file is creat ed. The old recor ded images on the media cannot be play ed back (Image files are not dama[…]
-
Page 102: Sony HDR-XR550E
102 US This memory card may not be able to record or pla y images correctly . U s e a memory card recommen ded for your camcor der (p. 19). Do not eject the memor y card during writing. Data may be damaged . Reinsert the memory card, and follo w the instructions on the LCD screen. Other No further selec tion is possible. Y ou can select only 100 im[…]
-
Page 103: Sony HDR-XR550E
103 Additional information US Recording time of movies/number of recor dable photos “HD ” stands for high definition image quality , and “STD ” stands for standa rd image quality . Expected time of recording and playback with each battery pack Recording time A ppr oxima te time ava ilable when you use a fully charged ba ttery pack. HDR -CX5[…]
-
Page 104: Sony HDR-XR550E
104 US Expected recording time of movies Internal memory HDR -CX550/CX550V High definition image quality (HD) in h (hour) and m (minute) Recording mode Recording time HDR-CX550 HDR-CX550V [HD FX] 6 h 5 m 6 h [HD FH] 7 h 45 m 7 h 40 m [HD HQ] 15 h 50 m 15 h 35 m [HD LP] (5.1ch) * 25 h 35 m 25 h 15 m [HD LP] (2ch) * 26 h 55 m 26 h 35 m Standard defin[…]
-
Page 105: Sony HDR-XR550E
105 Additional information US Memor y card High definition image quality (HD) (unit: minu te) A VC HD 24M (FX) A VC HD 17M (FH) A VC HD 9M (HQ) A VC HD 5M (LP) 5.1ch * A VC HD 5M (LP) 2ch * 1GB 5 (5) 6 (6) 10 (9) 20 (15) 20 (15) 2GB 10 (10) 10 (10) 25 (15) 45 (35) 45 (35) 4GB 20 (20) 25 (25) 55 (40) 90 (70) 95 (75) 8GB 40 (40) 55 (55) 115 (80) 185 […]
-
Page 106: Sony HDR-XR550E
106 US LP: A ppr ox. 5Mbps (a verage) 1,440 1,080 pixels/16:9 Standar d definition image quali ty (STD): HQ: A pprox. 9Mbps (a verage) 720 480 pixels/16:9, 4:3 The photo r ecording p ixels and the aspect ratio . Photo r ecording mode: 4,000 3,000 dots/4:3 4,000 2,250 dots/16:9 2,880 2,160 dots/4:3 1,600 1,200 dots/4:3 640 ?[…]
-
Page 107: Sony HDR-XR550E
107 Additional information US Using your camc order abroad Po wer supply Y ou can use your camcor der in any countries/r egions using the A C Adapto r supp lied with your camco rder within the AC 100 V t o 240 V , 50 Hz/60 Hz rang e. Viewing high definition image quality (HD) movies In coun t ries/regions where 1080/60i i s supported, y ou can view[…]
-
Page 108: Sony HDR-XR550E
108 US Setting to the local time Y ou can easily set the clock to the loca l time by setting a time differen ce when using your camcor der abr oad. T ouch (MENU) [Show others] [CL OCK/ LANG] (under [GENERAL SET] cat egory) [AREA SET] and [DST S ET]/[SU MMER TIME] (p. 88). HDR-CX550V/XR550V When [A UTO CLOCK ADJ] and [A UTO AREA ADJ] are[…]
-
Page 109: Sony HDR-XR550E
109 Additional information US Maintenance and precautions About the A VCHD format What is the A VCHD format? The A VCHD f ormat is a high definition digital video camera forma t used to recor d a high definition (HD) signal of either the 1080i specification * 1 or the 720p specification * 2 using efficient data comp ressio n coding technology . The[…]
-
Page 110: Sony HDR-XR550E
110 US Y ou may no t be able to recor d location informa tion at location s or in situa tions where radio signals from the GPS satelli tes do not reach the camcor der as follows. In tunnel s, indoors or under the shade o f buildings. Between tal l buildings or a t narro w streets surrounded b y buildings. In undergr ound locations, loca tions surro[…]
-
Page 111: Sony HDR-XR550E
111 Additional information US Croatia, Esto nia, Latvia, Lithuania, P oland and Slovenia © EuroGeogra phics France source: Géoro ute® IGN F rance & BD Carto® IGN Fra nce Germany Die Grundlagendaten wur den mit Genehmigung der zustaendigen Behoerden entnommen. Great B ritain Based upon Crown Copyrigh t material. Greece © EuroGeogra phics; C[…]
-
Page 112: Sony HDR-XR550E
112 US media near magnets or magnetic fields I t is recommended tha t you make a back-u p of important da ta on the har d disk of a com puter . Do not at tach a label or the like on “ Memo ry Stick PRO Duo ” medi a or “ Memo ry Stick Duo ” media adapto r . Do not touch, o r allow metallic objects to come into co ntact with the terminals. Do[…]
-
Page 113: Sony HDR-XR550E
113 Additional information US The “Inf oLITHIUM ” battery pack calculates the power cons umption acco rding to the o perating condition s of your ca mcorder , and displa ys the remaining ba ttery time in minutes. The battery pack NP -FV50 is compatible with “ ActiFORCE. ” “ ActiFORCE” is a new genera t ion power system. Batt ery c apaci[…]
-
Page 114: Sony HDR-XR550E
114 US About x.v .Color x.v .Color is a more familiar t erm for the xvY C C standard p roposed by Son y , and is a trademark of Sony . xvY CC is an interna tional standar d for colo r space in video. This stan dard can expr ess a wider color rang e than the currently used broadcast stan dard. About handling of your camcor der On use and care Do not[…]
-
Page 115: Sony HDR-XR550E
115 Additional information US Y ou bring yo ur camcorder fro m an air condition ed car or room in to a hot place outside. Y ou use your camco rder after a squall or a shower . Y ou use your camco rder in a hot an d humid place. Ho w to preven t moist ure conden sation When you b ring your cam corder from a co ld place into a wa rm place, put yo ur […]
-
Page 116: Sony HDR-XR550E
116 US On charging the pre-installed rechargeable battery Y our camcor der has a pre-in stalled rechargeable battery to retain the da te, time, and o ther settings even when the LCD screen is closed. The pre- installed rechargea ble battery is always cha rged while your camcor der is connected to the wall outlet (wall socket) via the AC A dap tor o[…]
-
Page 117: Sony HDR-XR550E
117 Additional information US SDHC log o is a trademark. Mul tiMediaCard is a trademar k of Mul tiMediaCard A ssociation. All other product nam es mentioned her ein may be the trademarks or register ed trademarks of their respective com panies. Furthermore, and are n ot mentio ned in each case in this Han dbook. Notes on the License[…]
-
Page 118: Sony HDR-XR550E
118 US On GNU GPL/L GPL applied software The software tha t is eligible for the f ollowing GNU General Public License (hereinafter r eferred to as “ GPL ”) or GNU Lesser G eneral Public License (hereinafter r eferred to as “L GPL ”) are included in the camco rder . This informs yo u that yo u have a right t o have access to , modify , and r[…]
-
Page 119: Sony HDR-XR550E
Quick referenc e 119 US Quick refer ence Screen indicators Upper left Indicator Meaning MENU butt on (66) AUD IO MOD E (79) Self-timer recording (80) GPS tracking statu s (53) Flash (81)/ REDEYE REDUC (81) MICREF LEVEL lo w (78) WIDE SELECT (80) BL T -IN ZOOM MIC (78) 60 min Remaining bat tery Recording f older Return but ton (66) Center Indicator […]
-
Page 120: Sony HDR-XR550E
120 US Indicator Meaning IRIS (31) C ONVERSIO N LENS (77) INTELLIGENT A UTO (26) OPTION b utto n (68) VIEW IMA GES but ton (33) Slide show b utto n (40) Y OUR LOCA TION butt on (54) 101-0005 Data file name (35) Prot ected image (45) Index bu tton (35) Indica tors and their positio ns are a ppr oxima te and may differ fr om what yo u actuall[…]
-
Page 121: Sony HDR-XR550E
121 Quick referenc e US the operating instructions su pplied with yo ur accessory for details. The Active I nterface Sh oe has a safety device for fixing the installed accessory securely . T o connect an accessory , press down and p ush it to the end, an d then tighten the screw . T o remov e an accessory , loos en the screw , and then press do wn […]
-
Page 122: Sony HDR-XR550E
122 US (INTELLIGENT AUT O) button (26) POWER button (15) RESET button Press RES ET using a point ed object. Press RES ET to initialize all the settings including the clock settin g. GPS switch (HDR-CX550V/XR550V ) (53) Speaker MODE button (21) (Movie)/ (Photo) lamps (21) (USB) jack (60, 63) HDMI OUT jack (41)[…]
-
Page 123: Sony HDR-XR550E
123 Quick referenc e US Wir eless Remote Commander DA T A CODE button (82) Displays the da te and time, cam era setting data, or coor dinates (HDR -CX550V/XR550V) of the recor ded images when you p ress this butt on during pla yback. PHOT O button (24) The on-screen image when y ou pres s this butt on will be recorded as a still image. […]
-
Page 124: Sony HDR-XR550E
124 US T o change the battery of the W ireless Remote Commander While pressing o n the tab, in set your fingernail into the sli t to pull out the ba ttery case. Place a new battery with the + side facing up. Insert the battery case back into the W ireless Remote Commander un til it clicks. W ARNING Battery may explode if mistrea ted. Do[…]
-
Page 125: Sony HDR-XR550E
125 Quick referenc e US Index Creating a disc ………………………. 59 CTRL FOR HDMI …………………. 90 D DA T A CODE …………………………16 DA TE/TIME………………………….. 16 Date In dex …………………………….. 36 DELETE ………………………………… 44 DEMO MOD E ………………………[…]
-
Page 126: Sony HDR-XR550E
126 US Men us ……………………………….66, 69 MICREF LEVEL …………………….78 Mirror mode ………………………….31 Mo isture con densation ………… 114 MOVIE DUB ………………………… 48 MOVIE MEDI A SET …………….. 18 Mo vies ………………………………22, 34 MPEG-4 A VC/H.264 ………….[…]
-
Page 127: Sony HDR-XR550E
Addi tional informa tion on this p roduct and answers t o frequently a sked question s can be found a t our Cus tomer Su pport W ebsite. http://www.son y .net/[…]
Photography > Camcorder
When we buy new device such as Sony HDR-XR550E we often through away most of the documentation but the warranty.
Very often issues with Sony HDR-XR550E begin only after the warranty period ends and you may want to find how to repair it or just do some service work.
Even oftener it is hard to remember what does each function in Camcorder Sony HDR-XR550E is responsible for and what options to choose for expected result.
Fortunately you can find all manuals for Camcorder on our side using links below.
Sony HDR-XR550E Manual
127 pages2.94 Mb
Also you can find more Sony manuals or manuals for other Photography.
-
Страница 1
4-170-534- 11 (1) Digital HD Video Camera Recor der “Handycam ” Handbook 2010 Sony Corporation HDR-CX550/CX550V/ XR550/XR550V T able of contents 9 Getting started 12 Recording/Playback 21 Making good use of your camcorder 44 Saving images with an external device 57 Customizing your camcorder 66 Additional information 91 Quick referenc e 119[…]
-
Страница 2
2 US Read this first Supplied items The num bers in ( ) are the sup plied quan tity . AC A daptor (1) P ower co rd (Ma ins lead) (1) Componen t A/V cable (1) A/V connecting cable (1) USB cable (1) W ireless Remo te Commander (1) A butt on-type lithium bat tery is already installed. Remove the insula tion sheet be[…]
-
Страница 3
3 US Do not aim a t the sun. Doing so might cause your camco rder to malfunction. T ake imag es of the sun only in lo w light condi tions, such as at dus k. About language setting The on-screen displa ys in each local language are used for illu strating the opera ting procedur es. Change the screen languag e before u sing the camcor der if necessar[…]
-
Страница 4
4 US pro tection featur es of the camcor der being activated in such si tuation s. In this case, an indicato r appears o n the LCD screen and the v iewfinder (p. 98). When the camcoder is connected to a computer or accessories Do not try to format the reco rding media of the camcorder u sing a comp uter . If you do so , your camcorder m ay not o pe[…]
-
Страница 5
5 US Notes on use Do not do an y of the follo wing. Other wise, the recordin g media may be damaged, r ecorded images ma y be impossible to pla y back or may be lost, or other malfunctions could occur . ejecting the memory card when the access l amp (p . 20) is lit or flashing removin g the battery pack or A C Ada ptor from the camcor der , or appl[…]
-
Страница 6
6 US Operation flow Getting star ted (p. 12) Prepar e the power source a nd memory card. Recording movies and photos (p . 21) Recording mo vies p . 22 Changing the reco rding mode (p . 28) E xpected recording time (MEDI A INFO, p . 85) Shooting pho tos p . 24 Playing movies and phot os Playback on the camco rder p . 33 Playing i[…]
-
Страница 7
7 US Advic e for succ essful rec ording T o get good results in recording Stabilizing your camcorder When yo u hold the camcor der , keep your upper body uprigh t, and hold yo ur arms close to yo ur body . The SteadySh ot function is effective against ca mera-shake, however , it is essential that you no t move the cam corder . Zooming smoothly […]
-
Страница 8
8 US Useful recor ding techniques Capturing images beautifully without troublesome setting INTELLIGENT A UTO(26) Focusing on the child on the left side of the screen Prioritizing the sub ject(28) SPOT FOCUS(73) Capturing photos during movie recording Dual Rec(30) Smile Shu tter (29) Recording in a dimly-lit room Nigh tShot(30) LOW L UX(77) Capt[…]
-
Страница 9
9 T able of contents US T able of cont ents Read this first …………………………………………………………………………….. 2 Notes on use . …………………………………………………………………….. 5 Operation flow . ………………………………………………………………………..[…]
-
Страница 10
10 US Playing images on a T V ……………………………………………………………….. 41 Connecting a T V using [ T V CONNECT Guide] . ……………………………….. 41 Using “BRAVIA ” Sync . …………………………………………………………… 43 Mak ing good use of your camcor der Deleting movies an[…]
-
Страница 11
11 T able of contents US Menu lists ………………………………………………………………………………. 69 MANU AL SET TINGS (Items to adjust for scene condition) ………………………………. 71 SHOOTING SET (Items for customized shooting) ……………………………………….. 76 PHOT O SE T TINGS (Items f[…]
-
Страница 12
12 US Getting star ted Step 1: Charg ing the battery pack HDR -CX550/CX550V HDR -XR550/XR550V Battery pack AC Adaptor DC IN jack /CHG (flash/charge) lamp DC plug Pow er cord (Mains lead) T o the wall outlet (wall socket) Battery pack AC Adaptor /CHG (flash/charge) lamp T o the wall outlet (wall socket) Pow er cord (Mains lead) DC IN jack DC plug[…]
-
Страница 13
13 Getting started US Y ou can charge the “ InfoLITHIU M” ba ttery pack (V series) after attaching it t o your camcor der . Notes Y ou cannot a ttach an y “Inf oLITHIUM” ba ttery pack other than the V series to your camco rder . 1 T urn off your camcorder by closing the L CD screen after replacing the viewfinder . 2 Attach the battery pack […]
-
Страница 14
14 US T o remove the ba ttery pack Close the LCD screen. Slide the BA T T (battery) release lever ( ) and remo ve the batt ery pack ( ). T o use a wall outlet (wall socket) as a power sour ce Make the same co nnections as “ Step 1: Char ging the battery pack. ” Even if the bat tery pack is attach ed, the battery pack is not dischar ged.[…]
-
Страница 15
15 Getting started US Step 2: T urning the power on, and setting the date and time 1 Open the L CD screen of your camcorder . Y our camcorder is turned o n and the lens co ver is opened. T o turn on your camcor der when the LCD screen is open, press PO WER . 2 Select the desired geographical area with / , then touch [NEXT ]. T o s et the date and t[…]
-
Страница 16
16 US Notes The date an d time does not appear d uring recordin g, but they are a uto matically recor ded on the recordin g media, and can be display ed during playback. T o display the dat e and time, touc h (MENU) [Show o thers] [PLA YBA CK SET] (under [PLA YBA CK] catego ry) [DA T A CODE] [D A TE/TIME] . Y ou can turn[…]
-
Страница 17
17 Getting started US Changing the language setting Y ou can change the on-scr een displays to s how messag es in a specified language. T ouch (MENU) [Show others] [CL OCK/ LANG] (under [GENERAL SET] catego ry) [ LANGU AGE SE T] a desired language .[…]
-
Страница 18
18 US Step 3: P reparing the recording media The recor ding media that can be used differs depending on y our camco rder . The following icons ar e displa yed on the screen of y our camcor der . HDR -CX550/CX550V * In ternal memory Memo ry card HDR -XR550/XR550V * In ternal hard disk M emory card * In the defaul t setting, both movies and pho tos a[…]
-
Страница 19
19 Getting started US T ouch [ YES] . The recor ding medium is cha nged. T o check the recording media settings In either mo v ie recor ding mode or pho to recor ding mode, the media icon of the selected recor ding media is displa yed at the to p right corner of the screen. The icon displa yed may va ry dep ending on yo ur model. Inser ting[…]
-
Страница 20
20 US Open the cover , and inser t the memor y card with the nothched edge in the direction as illustrated until it clicks. Close the cover after inserting the memory card. The [Creat e a new Image Da tabase File.] screen ma y appear if yo u insert a new memory card. I n that case, to uch [YES]. If yo u recor d only pho tos on the memo r y card, t […]
-
Страница 21
Recording/Playback 21 US Recording/Playback Recording In the defa ult setting, movies a re recor ded with high definition image quali ty (HD) on the followin g media. HDR -CX550/CX550V : Internal memory HDR -XR550/XR550V : Internal hard di sk Tips T o change the recordin g media, see page 18. 1 F asten the grip belt. 2 Open the L CD screen of your […]
-
Страница 22
22 US Recording movies Press ST ART/STOP to start recording . Y ou can start recor ding also by touc hing in the bottom left o f LCD screen. T o stop recor ding, pr ess ST ART/STOP a gain. Y ou can stop r ecording also b y touching in the bot tom left of LCD screen. The icons an d indicator s on the LCD panel will be display ed for abou t 3[…]
-
Страница 23
23 Recording/Playback US The followin g states will be indicated if data is still being writt en onto the r ecording media after r ecording has finished. During this time, do not a pply shock o r vibratio n to the camcorder , or remove the bat tery or AC A d apt or . A ccess la mp (p . 20) is lit or flashing The media icon in the upper right o f th[…]
-
Страница 24
24 US Data code during recor ding The recor ding date , time and condi tion , and coor dinates (HD R -CX550V/XR550V ) are recor ded auto matically on the r ecording m edia. They are not disp layed during r ecordin g. Ho wever , you can ch eck them as [D A T A CODE] during pla yback. T o display them, touch (MENU) [Show o thers] [PLA YBA CK […]
-
Страница 25
25 Recording/Playback US Tips See page 105 on the recorda ble number of p hotos. T o change the image size, to uch (MENU) [Show others] [ IMAGE SIZE] (under [PHOTO S ETTINGS] category) a desired setting . Y ou cannot r ecord pho tos while is di splayed. Y our camcor der flashes auto matically when there is insufficient a mbien t[…]
-
Страница 26
26 US Useful functions for recor ding movies and photos Zooming Y ou can magnify images up to 14 times the original size with the power zoom lever . Y ou can magnify images also with the / on the LCD screen. * HDR -CX550/CX550V ** HD R -XR550/XR550V Mo ve the power zoom lever s lightly for a slower zoom. M ove it further for a fast er zoom. Notes B[…]
-
Страница 27
27 Recording/Playback US Scene detection (Backlight), (L andscape), (T wilight), (Spotlight), (Low light), (Macro) The camcor der selects the most effective setting au toma tically , depending on the scene. Camera-shak e detection (W alk), (T r ipod) The camcor der detects whether camera- shake occurs or not, a nd makes the optim um compensa ti[…]
-
Страница 28
28 US Tips Y ou can recor d, play , or edit movies in the selected image quality only . T o record, pla y , or edit movies in an other image quality , change this setting. Selecting the recording mode Y ou can select a recording mode to reco rd the high definition image quality (HD) movies fro m 4 levels. The recor ding time of the media is chan ge[…]
-
Страница 29
29 Recording/Playback US T ouch the face with the double-lined frame again to cance l. Notes The face you to uched may no t be detected, depending on the surro unding brightness o r hairstyle of the sub ject. In this case, touch the face again when you r ecord. Tips The double-lined frame a round a face targ eted for possible smile detection sho t […]
-
Страница 30
30 US T o enjoy the 5.1ch surround soun d of the movies reco rded with high definition image quality (HD) in 5.1ch sound, y ou need an A VCHD forma t device compatib le with 5.1ch surround. When you co nnect your camco rder with an HDMI cable (sold separa tely), the sound o f high definition image quali ty (HD) movies recor ded in 5.1ch sound is au[…]
-
Страница 31
31 Recording/Playback US Recording in mirror mode Open the LCD panel 90 degrees to the camcor der ( ), then rota te it 180 degrees to the lens side ( ). Tips A mirror -image of the su bject appears on the LCD screen, but the ima ge will be normal when recorded. Controlling the image settings manually with the MANU AL dial Y ou can assign 1 […]
-
Страница 32
32 US Notes Man ual settings will be retained even if you change the as signed item of the MANU AL dia l. Ho wever , if you set [EXPOSURE] after setting [AE SHIFT] man ually , [EXPOSURE] will override [AE SHIFT]. If you set ei ther one of [EXPOS URE], [IRIS], or [SHUTTER SPEED], the settings of o ther 2 items ar e canceled. If you select [RESET] in[…]
-
Страница 33
33 Recording/Playback US Pla yback on the camcorder In the defa ult setting, movies a nd photos tha t are r ecorded on the f ollowing r ecording m edia are pla yed. HDR -CX550/CX550V : Internal memory HDR -XR550/XR550V : Internal hard di sk Tips T o change the recordin g media, see page 18. 1 Open the L CD screen of your camcorder . Y our camcorder[…]
-
Страница 34
34 US / : Displays m ovies recor ded on the pr evious/next date . * / : Displays the p revious/next mo vie. Returns to the reco rding screen. * is display ed when is touched. appears when the stan dard definition imag e quality (STD) mo vie is selected with [ / SET] (p . 27). Y ou can scroll the displa y by to uching and draggin[…]
-
Страница 35
35 Recording/Playback US T o adjust the sound volume of movies While playin g back movies, to uch adjust with / . Y ou can also adjust the sound v olume b y using / in the OPTI ON MENU . Viewing photos Y our camcorder displa ys t he selected photo . Tips When viewing phot os recorded o n the memory card, (playback folder) appears o n the sc[…]
-
Страница 36
36 US Useful functions for playing movies and photos Searching for desir ed images by date (Date Index) Y ou can search for desir ed images by da te efficiently . Notes Y ou cannot use the Dat e Index function for photos o n the memory card. Press ( VIE W IMAGES). The VISU AL INDEX screen appears. T ouch [DA TE INDEX]. T ouch / to s[…]
-
Страница 37
37 Recording/Playback US Tips Y ou can also display the F ilm Roll Index by touching (MENU) [Sho w others] [VIEW IMA GES] (under [PLA YBACK] catego ry) [ FILM ROLL]. Searching for desir ed scene by face (F ace Index) The face images detected or t ouched during movie reco rding ar e displa yed on the INDEX screen. Y ou can play back the […]
-
Страница 38
38 US T o stop Highlight Playback T o pause, touch . T o stop , touch or . T o change the settings for Highlight Playback After touchin g [ HIGHLIGHT], t ouch [HIGHLIGHT S ET] before the H ighlight Playback starts. Y ou can set following it ems. [PLA YBA CK RANGE] Set the range of mo vies to be played by selecting the from and to da te, then touc h[…]
-
Страница 39
39 Recording/Playback US catego ry) [ERASE] and select a scenario you wan t to erase w ith / , t hen touch [YES] . T o eras e all scenarios, touch (MENU) [Show o thers] [ SCEN ARIO ERASE] (under [EDIT] categ ory) [ERASE ALL] [YES] [YES] . Y ou can erase also by touchin g (OPTION) d uring Highlight Scenari[…]
-
Страница 40
40 US Adjust the magnification with W ( Wide angle)/T ( T elephoto). T o cancel, touch . Playing back a series of photos (Slide show) T ouch on the photo playback screen. The slide sho w begins from the selected photo . T o stop the slide show T ouch . T o restart the slide show T ouch again. Notes Y ou cannot o perate playback zoom d uring sli[…]
-
Страница 41
41 Recording/Playback US Playing images on a T V Connection methods and the image quality (high definition (HD) or sta ndard definition (STD)) viewed on the TV screen differ depending on what type of TV is connected, and the co nnectors used. Connecting a T V using [ T V CONNECT Guide] Y ou can connect your camco rder to the TV easily following the[…]
-
Страница 42
42 US T ypes of connection cables between your camcorder and T V Connecting to a high definition T V Componen t A/V Cable (supp lied) HDMI Cable (sold separat ely) Connecting to a non-high-definition 16:9 (wide) or 4:3 TV Componen t A/V Cable (supp lied) A/V connecting cable with S VIDEO (sold separately) A/V connecting cable (su pplied) When conne[…]
-
Страница 43
43 Recording/Playback US When you connect with A/V connecting cable with S VIDEO When the S VIDEO pl ug (S VIDEO channel) is connected, audio signals a re not ou tpu t. T o outp ut audio signals, co nnect the white and red plugs to the a udio inpu t jack of your TV . This connection pr oduces higher resolutio n images com pared with the A/V connect[…]
-
Страница 44
44 US Making good use of your camcorder Deleting movies and photos Y ou can free media space by deleting movies and p hotos fro m recor ding media. Notes Y ou cannot r estore ima ges once they are deleted. Sav e important mo vies and pho tos in advance. Do not remo ve the batt ery p ack or the A C Ada ptor fro m your camco rder while deleting the i[…]
-
Страница 45
45 Making good use of your camcorder US T ouch / to select the recording date o f the desired movies/pho tos, then touch . T ouch the image on the LCD screen to confirm the image. T ouch to return to the previous scr een. T ouch [YES] . Pr otec ting recor ded movies and photos (Pr otec t) Pro tect movies and ph otos to a void de[…]
-
Страница 46
46 US T o protect all the movies and photos recorded on the same da y at one time Notes Y ou cannot select [ PRT . by dat e] for still images reco rded on the memory card. In step 2, to uch [ PROTECT] [ PR T . by date]/[ P RT . by date]. T o protect all photos on the same da y at one time, to uch [ PROTECT] [ PR T . by date]. T ouch[…]
-
Страница 47
47 Making good use of your camcorder US Do not remo ve the batt ery p ack or the A C Ada ptor fro m your camco rder while dividing the movie. I t may damage the recor ding media. Also, do no t eject the memory c ard while dividing movies o n the memory card. A slight difference ma y o ccur from the point where you to uch and the actual dividing poi[…]
-
Страница 48
48 US 5 T ouch . Notes The image size is fixed depending on the ima ge quality of the mo vie: [ 2.1M] with high definition image quality (HD) [ 0.2M] in 16:9 (wide) with standard definition image quali ty (STD) [V GA(0.3M)] in 4:3 with standard definitio n image quality (S TD) The recor ding medium where yo u want to sa ve photos sh ould have e[…]
-
Страница 49
49 Making good use of your camcorder US T ouch the type of dubbing. [DUB by select]: T o select movies and dub [DUB by da te]: T o dub all movies o f a specified date [ DUB ALL]: T o dub the high definition image q uality (HD) Playlist [ DUB ALL]: T o dub the standar d definition image q uality (STD) Playlist When yo u select the Playlist as th[…]
-
Страница 50
50 US Select the photo to be copied. [COPY by select]: T ouch the photo t o be copied, and ma rk with . Y ou can select multiple ph otos. Press a nd hold the image do wn on the screen to confirm the image. T ouch to return to the p revious screen. [COPY by da te]: Select the recording date o f the photo to be co pied, then touch . Y ou cannot s[…]
-
Страница 51
51 Making good use of your camcorder US T o add all the movies recor ded on the same day at one time In step 2, to uch [ ADD b y date]/ [ ADD by da te]. The recording da tes of movies are display ed on the screen. T ouch / to select the recording date o f the desired movie, then to uch . T ouch the image on the LCD screen to confirm the ima[…]
-
Страница 52
52 US T ouch [YES] . Tips Even if y ou erase a movie from a P laylist, the original movie is not de leted. T o change the order within the Playlist T ouch (MENU) [Show others] [PLA YLIST EDIT] (under [EDIT] categ ory). T ouch [ MOVE]/[ M OVE]. S elect t he movie to be mo ved. The selected movie is marked with . T[…]
-
Страница 53
53 Making good use of your camcorder US Setting the GPS function Set the GPS switch to ON ( ap pears on the LCD screen). Y our camcorder starts tr ying to triangulat e. When yo ur camcor der triangulates successfully , it will record the location info rmation a t the time movies and pho tos were r ecorded. Notes U s e the GPS function in outdoors. […]
-
Страница 54
54 US Acquiring the current loca tion information Y ou can display the curren t location on a map . S et the GPS switch to ON so tha t your camcor der can acquire the curren t location informa tion. T ouch ( Y OUR L OC A TION) on the recording scr een. The current locatio n is displa yed and marked a t the center o f the LCD screen. If you to uch a[…]
-
Страница 55
55 Making good use of your camcorder US the thumbn ail of the movie o r photo witho ut location informa tion. T ouch the image marker where you recor ded the movies and photos to be play ed back. The image ma rker turns r ed. The movies or p hotos r ecorded at tha t location ar e display ed on the left of the screen. T ouch the desired movi[…]
-
Страница 56
56 US Adjusting the clock and the area automatically (A UTO CL OCK ADJ/ A UTO AREA ADJ) Y our camcorder can ma intain accurat e time and com pensate f or time difference aut oma tically , by acquiring time and location info rmation fro m GPS. T ouch (MENU) [Show others] [CL OCK/ LANG] (under [GENERAL SET ] category) [AUT O CLOCK ADJ[…]
-
Страница 57
Saving images with an external device 57 US Saving images with an external device Saving images in external media (DIREC T COP Y ) Y ou can save mo vies and pho tos on external media (USB stora ge device), such as an external hard disk driv e. Y ou can also play back images on the ca mcorder o r another playback device. Notes For this o peration, y[…]
-
Страница 58
58 US 6 After the operation is completed , touch on the camcorder screen. Notes The number o f scenes you can save o n the external media are as follo ws. Ho wever , even if the external media has free space, you canno t save scenes exceeding the fo llowing num ber . High definition image q uality (HD) movies: Max. 3,999 Standar d definition image […]
-
Страница 59
59 Saving images with an external device US T o play back images in the external media on the camcorder T ouch [Play witho ut cop ying.] in step 5 above. The VISU AL INDEX screen of the external media is display ed. P lay back the image (p . 33). Y ou can also view images on a TV connected to your ca mcorder (p . 41). Y ou can play back the[…]
-
Страница 60
60 US Ordinary DVD device Player DVD pla yer Compu ter that can pla y DVDs, etc. Creating devic e DVD writer , DVDirect Expr ess (p. 60) DVD writer , other than DVDir ect Express (p . 63) Di sc recorder , etc. (p . 64) Disc type Standar d definition image quali ty (STD) disc Notes Always main t ain your Pla yStatio n 3 t[…]
-
Страница 61
61 Saving images with an external device US Inser t an unused disc into the DVD writer , and close the disc tray . The [DISC BURN] scr een appears o n the camcor der screen. Press (DISC BURN) on the DVD writer . Mo vies recor ded on the internal recor ding media that ha ve not been saved on a ny discs will be recorded ont o the disc. When t[…]
-
Страница 62
62 US T ouch [YES] on the camcor der screen. T o create another disc of the same cont ents, insert a new disc and touch [CREA TE SAME DISC]. A fter the operation is co mplet ed, touch [EXIT] [END] on the camco rder screen. Di sconnect the USB cable from y our camcor der . Notes Do not do an y of the follo wing when creating a di[…]
-
Страница 63
63 Saving images with an external device US T o play back a disc on the ordinary DVD player Select the standard image q uality (STD) on the screen to select the image quality of the disc to be created in step 2 o f “T o customize a disc with DISC BURN O PTION. ” Tips If you ca nnot pla y back created standa rd definition (STD) image q uality di[…]
-
Страница 64
64 US After the operation is completed , touch [END] [ YES] on the camcorder screen. Disconnect the USB cable. Creating a standar d definition image quality (STD) disc with a recorder , etc. Y ou can dub images pla yed back on yo ur camcor der on a disc or video cassette, by conn ecting your camcor der to a disc recor der , a Sony DVD w[…]
-
Страница 65
65 Saving images with an external device US cable (supplied) or an A/V connecting cable with S VIDEO (sold separately). Connect your camcor der to the inpu t jacks of the recor ding device. Start playback on your camcorder , and record it on the recording devic e. Refer to the instruction man uals supplied with your reco rding device fo[…]
-
Страница 66
66 US Customizing y our camcorder Using menus U sing the menus, you ca n perform useful funct ions an d chang e various settings. I f you make good use of menu opera tions, yo u can enjo y using your ca mcorder . The camcor der has various men u items under each of eight men u categories. MANU AL SETTINGS (I tems to adjust for scene c ondition) […]
-
Страница 67
67 Customizing your camc order US Notes Y ou may no t be able to set some menu i tems, depending on the r ecording o r playback condi tions. Grayed o ut menu i tems or settings a re not a vailable. Tips Depending on the menu i tems being chan ged, your camco rder switc hes between playback mode and recordin g mode (movie/phot o). Using MY MENU Y ou[…]
-
Страница 68
68 US Using the OPTION MENU The OPTIO N MENU appears j ust like the pop-up windo w that a ppears when you righ t-click the mouse on a co mpu ter . When is display ed at bott om-right of the screen, y ou can use the OPTION MENU . Y ou touc h , and the menu it ems you ca n change in the co ntext appear . T ouch (OPTION). T ouch the desired ta[…]
-
Страница 69
69 Customizing your camc order US Menu lists (MANU AL SET TINGS) category SCENE SELECTION 71 F ADER 71 WHITE BAL. 72 SPO T MTR/FCS 73 SPO T METER 73 SPO T FOCUS 73 EXPOSURE 73 FOCUS 74 TELE M ACRO 74 AE SHIFT 74 WB SHIFT 75 GOLF SHO T 75 SM TH SL W REC 75 (SHOOTING SET ) categor y / SET 27 REC MODE 28 GUIDEFRAME 76 STEADY SHOT 77 CONVERSION LENS 77[…]
-
Страница 70
70 US PHOT O COPY COPY b y select 49 C OPY b y date 49 PLA YLIST EDIT ADD/ ADD 50 ADD by date/ ADD by date 51 ERASE/ ERASE 51 ERASE ALL/ ERASE ALL 51 MOVE/ MOVE 52 (O THERS) category Y OUR LOCA TION * 1 54 USB CONNECT USB CONNECT* 2 63 USB CONNECT* 3 63 USB CONNECT 63 DISC BURN Operating Guide T V CONNECT Guide 41 MUSIC TOOL EMPT Y MUSIC 39 DOWNL O[…]
-
Страница 71
71 Customizing your camc order US MANU AL SET TINGS (Items to adjust for scene condition) See “U sing men us ” (p. 66) on the operatio n. The default set tings are ma rked with . SCENE SELEC TION Y ou can record imag es effectively in various situa tions. AUT O Records imag es in average im age quality without the [SCENE S ELECTION] fun[…]
-
Страница 72
72 US WHITE F ADER Fades in/ou t with the white effect. Out In BLACK F ADER Fades in/ou t with the black effect. Out In T o cancel the fader before starting the operation, t ouch [OFF]. Tips When you p ress ST ART/STO P , the setting is cleared. A movie reco rded using [BLA CK F ADER] may be difficu lt to see in the VIS U AL INDEX screen. WHITE BAL[…]
-
Страница 73
73 Customizing your camc order US from inside the ho use, or vice versa, you need to redo the [ONE PUSH] p rocedure to r eadjust the white balance. SPOT M TR/FCS (Spot meter/ focus) Y ou can adjust the brigh tness and focus for the selected subject simul taneously . This function enables yo u to use [SPOT ME TER] (p . 73) and [SPOT FOCUS] (p . 73) […]
-
Страница 74
74 US FOCUS Y ou can adjust the focus man ually . Y ou can select this funct ion also when you wan t to focus on a certain subject inten t ionally . T ouch (nearby sub ject)/ (distant subject) to adju st the focus. T o adjust the focus au toma tically , touch [A UTO]. Notes When you set [FOCUS] to [MANU AL], appears. The minimum possible dis ta[…]
-
Страница 75
75 Customizing your camc order US Y ou can also adjust ma nually by usin g the MANU AL dial (p. 31). WB SHIFT ( White Balance Shift) Y ou can adjust the white balance ma nually . OFF Ad justs the white balance a utoma t ically . ON ( and the adjustment value) Ad justs the white balance man u ally . Tips When the white balance is set to a lo wer[…]
-
Страница 76
76 US T o change the setting T ouch (OPTION), then select the setting you wa nt to cha nge. [ TIMING] Select the recording start poin t after ST ART/STOP i s pressed. The defa ult setting is [3sec AFTER]. Notes Y ou cannot r ecord sound. Image q uality is not as good as that o f normal recordin g. SHOO TING SE T (Items for customized sh[…]
-
Страница 77
77 Customizing your camc order US STEAD YSHO T Y ou can compensat e for camera s hake. Set [ STEADY SHO T] to [OFF] ( ) when using a tripod (sold separately), then the image becomes na tural. ACTIVE Pro vides a more pow erful SteadyShot effect. ST ANDARD Pro vides the SteadySh ot effect under rela tively stable recor ding condi tions. OFF ( ) T[…]
-
Страница 78
78 US is a limit to the n umber of faces that can be recorded in F ace Index. T o play back from the Face I ndex, see page 37. PRIORIT Y SET TING Selects the priority subject for the face detection or the smile shu tter . Ad justs focus/colo r/exposure au toma tically for the selected faces. AUT O Detects faces auto matically . CHILD PRIORITY D[…]
-
Страница 79
79 Customizing your camc order US L OW ( ) Records am bient sound fa ithfully . Selec t [LOW] when yo u want to r ecord an ex citing and powerful sound in a concert hall, etc. (This setting is not sui table for r ecording conv ersations.) AUDIO MODE Y ou can change the r ecording sound forma t. 5.1ch SURROUND ( ) Records sound in 5.1ch s ur[…]
-
Страница 80
80 US ON ( ) Records in x.v .Color . Notes Set [ X.V .COLOR] to [ON] when the recorded mo vie will be played back on an x.v .Color-com pliant TV . If the movie r ecorded with this function [ON] is played back o n a non-x.v .Color-co mplian t TV , the color ma y not be repr oduced correctly . [ X.V .C OLOR] cann ot be set to [ON]: When reco rding st[…]
-
Страница 81
81 Customizing your camc order US STEAD YSHO T Y ou can compensat e for camera s hake. Set [ STEADY SH OT] to [OFF] ( ) when using a tripod (sold separately), then the image becomes na tural. ON The SteadySho t function is used. OFF ( ) The SteadySho t function is not used. FLASH MODE Y ou can select t he flash setting when you recor d photos u[…]
-
Страница 82
82 US FILE NO . (F ile number) Y ou can select t he way to as sign file number of pho tos. SERIES Assigns file num bers of photos in sequence . The file number becomes larger each time you reco rd a phot o. Even if the memo ry card is replaced with another on e, the file number is assigned in sequence. RESET Assigns file num bers in sequence, f[…]
-
Страница 83
83 Customizing your camc order US OFF Data code is not displa yed. DA TE/TIME Displays the da te and time. CAMERA DA T A Displays ca mera setting data. COORDINA TES * Displays coor dinates. * HDR -CX550V/XR550V DA TE/TIME Date Time CAMERA DA T A SteadySho t off Brightness White balance Gain Shu tter speed A pertu[…]
-
Страница 84
84 US EDIT (Items for editing) See “U sing men us ” (p. 66) on the operatio n. DELETE See page 44. SCENARIO ERASE See page 38. PROTECT See page 45. DIVIDE See page 46. PHOT O CAPTURE See page 47. MOVIE DUB See page 48. PHOT O COPY See page 49. PLA YLIST EDIT See page 50. O THERS (Items for other settings) See “U sing men us ” (p. 66) on the[…]
-
Страница 85
85 Customizing your camc order US MANA GE MEDIA (Items for recor ding media) See “U sing men us ” (p. 66) on the operatio n. MEDIA SET TINGS See page 18. MEDIA INFO Y ou can check the remaining r ecordab le time for each r ecording mode of the recor ding media for mo vies and the app ro ximate free a nd used media space of the recordin g media.[…]
-
Страница 86
86 US REP AIR IMG.DB F . See page 96, 101. GENERAL SE T (Other setup items) See “U sing men us ” (p. 66) on the operatio n. The default set tings are ma rked with . SOUND/DISP SET VOL UME Y ou can adjust the vol ume of pla yback sound by to uching / . BEEP ON A melody sounds when you s tart/stop recordin g, or operate the t ouch[…]
-
Страница 87
87 Customizing your camc order US to the camcor der body , the s etting becomes [NORMAL] au toma tically . Tips This adjustmen t does not affect the recor ded images in an y way . L CD COL OR Y ou can adjust the colo r of the LCD screen by to uching / . Tips This adjustmen t does not affect the recor ded images in an y way . DISPLA Y SE T Y[…]
-
Страница 88
88 US COMPONENT Select [COMPONENT] when connecting your camco rder to a TV with the compo nent in put jack. 480i Select this when connecting your camcorder t o a TV with the component inpu t jack. 1080i/480i Select this when connecting your camcorder t o a TV that has the componen t inpu t jack and is capa ble of displa ying the 1080i signa[…]
-
Страница 89
89 Customizing your camc order US AUT O AREA ADJ (Auto area adjustment) (HDR-CX550V/XR550V ) See page 56. DST SET/SUMMERTIME Y ou can change this setting wi thout stop ping the clock. Set to [ON] to mo ve the time forward 1 hour . OFF Does not set the DST SET . ON Sets the DST SET . LANGUA GE SET Y ou can select t he language t o be[…]
-
Страница 90
90 US DROP SENSOR (HDR-XR550/XR550V ) Y our camcorder detects that i t is drop ping, and pr otects the internal ha rd disk. ON Activa tes the drop sensor . When it i s detected that the camco rder is drop ping, yo u may not be able to r ecord or p lay back images correctly , to pro tect the internal hard disk. When dro pping is det ected, a[…]
-
Страница 91
Additional information 91 US Additional inf ormation T roubleshooting If yo u run into an y problems using y our camcor der , follow the steps belo w . Check the list (p. 91 to 102), and inspect your camcorder . Disconnect the power source, attach the power sourc e again after about 1 minute, and turn the camcorder on. Press RESET (p. 1[…]
-
Страница 92
92 US The menu settings have changed automatically . The followin g menu it ems return to the default settings in m ore than 12 ho urs after you close the LCD screen. [SCENE SELECTION] [WHITE BAL.] [SPOT MTR/FCS] [SPOT METER] [SPOT FOCUS] [EXPOSURE] [FOCUS] [LOW L UX] [BL T -IN ZOOM MIC] [MICREF LEVEL] [A UTO BACK LI GHT] [IRIS] [SHUTTER SPEED] [DR[…]
-
Страница 93
93 Additional information US The remaining battery time indicator does not indicate the correct time. The amb ient tem perature is t oo high or too low . This is not a malfunction. The battery pack has not been char ged enough. Fully cha rge the bat tery again. If the prob lem persists, replace the bat tery pack with a n ew one (p . 113). The indic[…]
-
Страница 94
94 US cannot make new r ecording d uring this period. The recor ding media is full. Delete unn ecessary images (p. 44). T otal number of movie scenes or p hotos exceeds the recorda ble capacity o f your c amcor der (p. 104, 105). Delete unnecessa ry im ages (p . 44). W hile [DROP S ENSOR] is activat ed (p. 90), you ma y not recor d images. (HDR -XR[…]
-
Страница 95
95 Additional information US The horizontal to vertical ratio of the movie (16:9 (wide)/4:3) cannot be changed. The horizon tal to vertical ratio of high definition image q uality (HD) movies is 16:9 (wide). The auto focus does not function. Set [FOCUS] to [AUT O] (p. 74). The recor ding conditio ns are no t suitable f or a ut o focus. Adj ust the […]
-
Страница 96
96 US Photos cannot be played back. Photos cann ot be played back if yo u have modified fi les or folder s, or hav e edited the data on a com puter . (The fi le name flashes in that case.) This is no t a malfunction. is indicated on an image on the VISU AL INDEX screen. This may a ppear on an ima ge recor ded on other devices, edited on a com put e[…]
-
Страница 97
97 Additional information US Playlist. Erase unnecessary movies from the Playlist (p . 51). Y ou cannot add p hotos in the Playlis t. A movie cannot be divided. A movie that i s too short cannot be divided. A pro tected movie cannot be divided. A photo cannot be captured from a movie. The recor ding media where you wa nt to sav e photos is full. Pl[…]
-
Страница 98
98 US Connecting to a Computer “PMB” cannot be installed. Check the comp uter en vironmen t or installation pr ocedure requir ed to install “PMB ” . “PMB” does not work correctly. Quit “PMB ” and restart your com puter . The camcorder is not r ecognized by the computer . Disconnect devices from the USB jack of the comp uter other th[…]
-
Страница 99
99 Additional information US C:(or E:) : (Self-diagnosis display) C:04: The battery pack is not an “ InfoLITHIU M” battery pack (V series). U se an “Inf oLITHIUM” ba ttery pack (V series) (p . 112). Connect the DC plug of the AC A d apt or to the D C IN jack of your ca mcorder securely (p . 12). C:06: The battery[…]
-
Страница 100
100 US ( Warning indicator pertaining to incompatible memory card) Incom p atible memo ry card is inserted (p. 19). ( Warning indicator pertaining to the write-protect of the memor y card) Access t o the memory card was restricted on another device. ( Warning indicator pertaining to the flash) F ast flashing There is something wr ong with the f[…]
-
Страница 101
101 Additional information US The Image Database File is damaged . Do you want to cr eate a new file? HD movie management information is damaged. Creat e new information? The managem ent file is damaged. W hen you to uch [YES], a new managemen t file is creat ed. The old recor ded images on the media cannot be play ed back (Image files are not dama[…]
-
Страница 102
102 US This memory card may not be able to record or pla y images correctly . U s e a memory card recommen ded for your camcor der (p. 19). Do not eject the memor y card during writing. Data may be damaged . Reinsert the memory card, and follo w the instructions on the LCD screen. Other No further selec tion is possible. Y ou can select only 100 im[…]
-
Страница 103
103 Additional information US Recording time of movies/number of recor dable photos “HD ” stands for high definition image quality , and “STD ” stands for standa rd image quality . Expected time of recording and playback with each battery pack Recording time A ppr oxima te time ava ilable when you use a fully charged ba ttery pack. HDR -CX5[…]
-
Страница 104
104 US Expected recording time of movies Internal memory HDR -CX550/CX550V High definition image quality (HD) in h (hour) and m (minute) Recording mode Recording time HDR-CX550 HDR-CX550V [HD FX] 6 h 5 m 6 h [HD FH] 7 h 45 m 7 h 40 m [HD HQ] 15 h 50 m 15 h 35 m [HD LP] (5.1ch) * 25 h 35 m 25 h 15 m [HD LP] (2ch) * 26 h 55 m 26 h 35 m Standard defin[…]
-
Страница 105
105 Additional information US Memor y card High definition image quality (HD) (unit: minu te) A VC HD 24M (FX) A VC HD 17M (FH) A VC HD 9M (HQ) A VC HD 5M (LP) 5.1ch * A VC HD 5M (LP) 2ch * 1GB 5 (5) 6 (6) 10 (9) 20 (15) 20 (15) 2GB 10 (10) 10 (10) 25 (15) 45 (35) 45 (35) 4GB 20 (20) 25 (25) 55 (40) 90 (70) 95 (75) 8GB 40 (40) 55 (55) 115 (80) 185 […]
-
Страница 106
106 US LP: A ppr ox. 5Mbps (a verage) 1,440 1,080 pixels/16:9 Standar d definition image quali ty (STD): HQ: A pprox. 9Mbps (a verage) 720 480 pixels/16:9, 4:3 The photo r ecording p ixels and the aspect ratio . Photo r ecording mode: 4,000 3,000 dots/4:3 4,000 2,250 dots/16:9 2,880 2,160 dots/4:3 1,600 1,200 dots/4:3 640 ?[…]
-
Страница 107
107 Additional information US Using your camc order abroad Po wer supply Y ou can use your camcor der in any countries/r egions using the A C Adapto r supp lied with your camco rder within the AC 100 V t o 240 V , 50 Hz/60 Hz rang e. Viewing high definition image quality (HD) movies In coun t ries/regions where 1080/60i i s supported, y ou can view[…]
-
Страница 108
108 US Setting to the local time Y ou can easily set the clock to the loca l time by setting a time differen ce when using your camcor der abr oad. T ouch (MENU) [Show others] [CL OCK/ LANG] (under [GENERAL SET] cat egory) [AREA SET] and [DST S ET]/[SU MMER TIME] (p. 88). HDR-CX550V/XR550V When [A UTO CLOCK ADJ] and [A UTO AREA ADJ] are[…]
-
Страница 109
109 Additional information US Maintenance and precautions About the A VCHD format What is the A VCHD format? The A VCHD f ormat is a high definition digital video camera forma t used to recor d a high definition (HD) signal of either the 1080i specification * 1 or the 720p specification * 2 using efficient data comp ressio n coding technology . The[…]
-
Страница 110
110 US Y ou may no t be able to recor d location informa tion at location s or in situa tions where radio signals from the GPS satelli tes do not reach the camcor der as follows. In tunnel s, indoors or under the shade o f buildings. Between tal l buildings or a t narro w streets surrounded b y buildings. In undergr ound locations, loca tions surro[…]
-
Страница 111
111 Additional information US Croatia, Esto nia, Latvia, Lithuania, P oland and Slovenia © EuroGeogra phics France source: Géoro ute® IGN F rance & BD Carto® IGN Fra nce Germany Die Grundlagendaten wur den mit Genehmigung der zustaendigen Behoerden entnommen. Great B ritain Based upon Crown Copyrigh t material. Greece © EuroGeogra phics; C[…]
-
Страница 112
112 US media near magnets or magnetic fields I t is recommended tha t you make a back-u p of important da ta on the har d disk of a com puter . Do not at tach a label or the like on “ Memo ry Stick PRO Duo ” medi a or “ Memo ry Stick Duo ” media adapto r . Do not touch, o r allow metallic objects to come into co ntact with the terminals. Do[…]
-
Страница 113
113 Additional information US The “Inf oLITHIUM ” battery pack calculates the power cons umption acco rding to the o perating condition s of your ca mcorder , and displa ys the remaining ba ttery time in minutes. The battery pack NP -FV50 is compatible with “ ActiFORCE. ” “ ActiFORCE” is a new genera t ion power system. Batt ery c apaci[…]
-
Страница 114
114 US About x.v .Color x.v .Color is a more familiar t erm for the xvY C C standard p roposed by Son y , and is a trademark of Sony . xvY CC is an interna tional standar d for colo r space in video. This stan dard can expr ess a wider color rang e than the currently used broadcast stan dard. About handling of your camcor der On use and care Do not[…]
-
Страница 115
115 Additional information US Y ou bring yo ur camcorder fro m an air condition ed car or room in to a hot place outside. Y ou use your camco rder after a squall or a shower . Y ou use your camco rder in a hot an d humid place. Ho w to preven t moist ure conden sation When you b ring your cam corder from a co ld place into a wa rm place, put yo ur […]
-
Страница 116
116 US On charging the pre-installed rechargeable battery Y our camcor der has a pre-in stalled rechargeable battery to retain the da te, time, and o ther settings even when the LCD screen is closed. The pre- installed rechargea ble battery is always cha rged while your camcor der is connected to the wall outlet (wall socket) via the AC A dap tor o[…]
-
Страница 117
117 Additional information US SDHC log o is a trademark. Mul tiMediaCard is a trademar k of Mul tiMediaCard A ssociation. All other product nam es mentioned her ein may be the trademarks or register ed trademarks of their respective com panies. Furthermore, and are n ot mentio ned in each case in this Han dbook. Notes on the License[…]
-
Страница 118
118 US On GNU GPL/L GPL applied software The software tha t is eligible for the f ollowing GNU General Public License (hereinafter r eferred to as “ GPL ”) or GNU Lesser G eneral Public License (hereinafter r eferred to as “L GPL ”) are included in the camco rder . This informs yo u that yo u have a right t o have access to , modify , and r[…]
-
Страница 119
Quick referenc e 119 US Quick refer ence Screen indicators Upper left Indicator Meaning MENU butt on (66) AUD IO MOD E (79) Self-timer recording (80) GPS tracking statu s (53) Flash (81)/ REDEYE REDUC (81) MICREF LEVEL lo w (78) WIDE SELECT (80) BL T -IN ZOOM MIC (78) 60 min Remaining bat tery Recording f older Return but ton (66) Center Indicator […]
-
Страница 120
120 US Indicator Meaning IRIS (31) C ONVERSIO N LENS (77) INTELLIGENT A UTO (26) OPTION b utto n (68) VIEW IMA GES but ton (33) Slide show b utto n (40) Y OUR LOCA TION butt on (54) 101-0005 Data file name (35) Prot ected image (45) Index bu tton (35) Indica tors and their positio ns are a ppr oxima te and may differ fr om what yo u actuall[…]
-
Страница 121
121 Quick referenc e US the operating instructions su pplied with yo ur accessory for details. The Active I nterface Sh oe has a safety device for fixing the installed accessory securely . T o connect an accessory , press down and p ush it to the end, an d then tighten the screw . T o remov e an accessory , loos en the screw , and then press do wn […]
-
Страница 122
122 US (INTELLIGENT AUT O) button (26) POWER button (15) RESET button Press RES ET using a point ed object. Press RES ET to initialize all the settings including the clock settin g. GPS switch (HDR-CX550V/XR550V ) (53) Speaker MODE button (21) (Movie)/ (Photo) lamps (21) (USB) jack (60, 63) HDMI OUT jack (41)[…]
-
Страница 123
123 Quick referenc e US Wir eless Remote Commander DA T A CODE button (82) Displays the da te and time, cam era setting data, or coor dinates (HDR -CX550V/XR550V) of the recor ded images when you p ress this butt on during pla yback. PHOT O button (24) The on-screen image when y ou pres s this butt on will be recorded as a still image. […]
-
Страница 124
124 US T o change the battery of the W ireless Remote Commander While pressing o n the tab, in set your fingernail into the sli t to pull out the ba ttery case. Place a new battery with the + side facing up. Insert the battery case back into the W ireless Remote Commander un til it clicks. W ARNING Battery may explode if mistrea ted. Do[…]
-
Страница 125
125 Quick referenc e US Index Creating a disc ………………………. 59 CTRL FOR HDMI …………………. 90 D DA T A CODE …………………………16 DA TE/TIME………………………….. 16 Date In dex …………………………….. 36 DELETE ………………………………… 44 DEMO MOD E ………………………[…]
-
Страница 126
126 US Men us ……………………………….66, 69 MICREF LEVEL …………………….78 Mirror mode ………………………….31 Mo isture con densation ………… 114 MOVIE DUB ………………………… 48 MOVIE MEDI A SET …………….. 18 Mo vies ………………………………22, 34 MPEG-4 A VC/H.264 ………….[…]
-
Страница 127
Addi tional informa tion on this p roduct and answers t o frequently a sked question s can be found a t our Cus tomer Su pport W ebsite. http://www.son y .net/[…]