
INSTALLATION
TECHNICAL SPECIFICATION: FLUX-135PRO
SELECT SUITABLE LOCATION
This machine can operate in harsh environments However, simple preventative measures must be followed to ensure long life and reliable operation:
- Do not use this machine for pipe thawing
- This machine must be located where clean air is free circulation without restrictions for air movement to
and from the air vents. Do not cover the machine with paper, cloth, or rags when switched on - Dirt and dust that can be drawn into the machine should be kept to a minimum
- This machine has a protection rating Of IP21S Keep it dry when possible and do not place it on wet ground or in puddles
- Locate the machine away from radio-controlled machinery Normal operation may adversely affect the operation of nearby radio-controlled machinery, which may result in injury or equipment damage. Read the section on electromagnetic compatibility in this manual.
- Do not operate in areas with an ambient temperature above 40 degrees C.
STACKING
The inverter FLUX-135PRO cannot be stacked.
TILTING
Place the machine directly on a secure, level surface. Do not place or operate this machine on a surface with an incline greater than 150 from horizontal. The machine may topple over if this procedure is not followed.
INSTALLATION
INSTALLING 4-INCH SPOOL (SEE FIGURE FOR PART IDENTIFICATION)
- Open the access panel.
- Remove the nut (A), nut washer (C), spring (E), and spool spacer (D)
- Remove the outer wrapping from the spool of wire and then find the leading end of the wire (it goes through a hole in the outer edge of the spool and is bent over the spool edge to prevent the wire from unspooling) but do not unhook it yet.
- Place the spool On the WIRE SPOOL SPINDLE so that the wire unspools from the bottom, and the spool will rotate counterclockwise
- Place the spool spacer, spring, nut washer, and nut back.
- proceed to the “FEEDING WIRE THROUGH THE MIG TORCH” instructions below
INSTALLATION
FEEDING WIRE THROUGH THE MIG TORCH
- Unhook the wire and hold the wire end and the spool in one hand. Use the other hand to tighten the nut (A) to some extent so that when the spool is released, it does not spin freely and uncoils the wire. Tightening the nut too much may cause inconsistent wire feeding. Leaving it too loose will allow the wire to straighten freely from the spool, leaving a mess of wire in the cabinet.
- While holding the wire in place, use a wire cutter to cut the bent end of the wire so that only a straight end remains
- Hold the wire end in one hand and release the drive roller pressure arm (l) by pulling the pressure arm adjustment knob (G) toward you. Hold the drive roller pressure arm up off of the drive roller and insert the leading end of the wire into the inlet guide tube (H) Push the wire across the drive roller (J) and into the torch assembly approximately six inches
- Align the wire up in the inner groove Of the drive roller and allow the drive pressure arm to drop onto the drive roller. Pull the pressure arm adjustment knob back over the pressure arm and tighten (turn clockwise) the pressure adjusting knob until the pressure roller applies enough force on the wire to prevent it from slipping out of the drive assembly.
- Let go of the wire
- Remove the nozzle (K) and contact tip (L) from the end of the torch assembly (M).
- Plug the welder’s INPUT POWER CABLE into the AC power source Adjust the settings at the front panel per the setup chart on the welding machine’s inside door according to the wire and workpiece size
- Pull the trigger on the MIG torch to feed the wire through the torch assembly Check if the drive roller is slipping on the wire and increase pressure on the pressure arm adjustment knob if necessary.
- When at least an inch of wire sticks out past the end of the torch, release the trigger.
- Slide the contact tip (L) over the wire protruding from the end of the torch Screw the contact tip into the end of the torch and hand tighten securely
- Install the nozzle (K) on the torch assembly
- Cut off the excess wire that extends past the end of the nozzle.
- Fine-tune the wire drive pressure with the pressure arm adjustment knob (G)
- Turn the pressure adjustment knob clockwise to increase the driving pressure until the wire seems to feed smoothly without slipping.
- When the driving pressure is set correctly, there should be no slippage between the wire and the drive roller. But if an obstruction occurs along the wire feed path, the wire should slip on the drive roller. You can check it by squeezing the wire between two fingers with moderate force as it comes out Of the torch. If this stops the wire from feeding, increase the pressure until the wire feeds through your fingers without issue
- Double-check your spool tension: When wire feeding stops, the wire comes Off the spool with some curvatures while it should not relax so much that the wire loosens on the spool. e of the curvature the coiled wire naturally reverts to. It should also not relax so much that the wire begins to loosen on the spool.
FLUX-CORE WELDING
Select a suitable filler wire according to the process being used (W-type drive roll for gasless flux-cored welding). The wire diameter must be matched to the drive roll, the liner, and the contact tip Open the side panel of the wire feeder and mount the wire spool post The end Of the wire must be at the bottom Of the Wlre spool, opposite wire feeder inlet guide tube
The spool post is fitted with a brake, and the wing nut in the center of the spool post adjusts the brake tension. Pull the wire from the reel by hand and adjust the tension to provide some drag clockwise will increase the braking and anticlockwise reduce it Release the wire tensioning device on the drive rolls, insert the filler wire, and into the inlet guide tube of the wire feeder, align wire with the drive roll groove and feed a short length into the torch connector so that it protrudes out of the front panel, then replace the tensioner over the wire.
(The filler wire can be fed through the torch cable once the input power is switched on pressing the trigger Of MIG torch.) (SEE FIGURE A 1 And FIGURE A.2)
Install the torch control switch on the control switch socket. Connect the MIG torch cable to the e) terminal of the machine and the work clamp to the (+) terminal. Insert the connector with the key lining up with the replay and turn clockwise. Do not over-tighten. ) (SEE FIGURE A.3)
STICK WELDING
First, determine the proper electrode polarity for the electrode to be used. Consult the electrode data for this information Then connect the Output cables to the Output terminals of the machine for the selected polarity Shown here is the connection method for DC (+) welding (SEE FIGURE A 4)
Connect the electrode cable to the (+) terminal and the work clamp to the (-) terminal Insert the connector with the key lining up with the keyway turn clockwise. Do not over-tighten For DC (-) welding, switch the cable connections at the machine so that the electrode cable is connected to (-) and the work clamp is connected to (+).
TIG WELDING
This machine does not have a built-in gas solenoid, so a one-piece gas valve TIG Torch is required. Most TIG welding is done with DC (-) polarity shown here (SEE FIGURE A 5) Connect the torch cable to the (-) terminal Of the machine and the work clamp to the (+) terminal. Insert the connector with the key lining up with the keyway and turn clockwise. Do not over-tighten.
PRODUCT DESCRIPTION (PRODUCT CAPABILITIES)
This small portable wire feed welder is capable Of flux-cored (FCAW) welding on steel, mild steel, and stainless steel. The wire feed welder is also capable Of STICK welding (SMAW) and DC lift TIG welding (GTAW) Self Shielding Flux-cored Welding does not require a separate shielding gas to protect the weld since the welding wire has special additives known as flux to protect the weld until it cools.
Flux-cored welding is ideal for medium to thicker material and if welding on painted or rusty steel. Flux-cored welding is also ideal in outdoor applications Flux-cored welding produces a good-looking weld but does not produce an excellent weld appearance as MIG welding does
This machine does not have a built-in Gas Solenoid so a piece gas valve TIG Torch is required, The gas valve must be opened manually before welding and closed manually when welding is completed. The arc is activated using a lift arc technique.
OPERATION
CONTROLS AND OPERATIONAL FEATURES
- Welding Mode Button
- Diameter Button
- Feed Wire Button
- Parameter Button
- Digital Display
- Value Knob
- MIG Torch Socket
- Control Switch Socket
- Positive Output Terminal
- Negative Output Terminal
- Input Power Cable
- Power Switch
- Ground Screw
- Rating Plate
- Fan
FRONT PANEL CONTROLS
Model: FLUX-135PRO Flux-core welder
- Mode Switch
For switching welding mode: Stick welding, Lift TIG welding, Flux core welding - Wire Diameter Switch
For switching the diameter Ofwelding wire: 030’/ 035 - Feed Wire Button
For manual wire feeding, the longer you press the button, the faster the speed is - Parameter Switch
Stick mode: For switching amperage/arc force/hot start preset Lift TIG: For amperage preset
Flux core: For switching the wire feeding speed preset/voltage trimming - Value Knob
For adjusting the value Of wire feeding speed/voltage/amperage/arc force level/hot start level - Digital Display
- When switching the welding mode, the corresponding indicator will light up
- When switching the wire diameter, the corresponding indicator will light up
- When pressing the feed wire button, the indicator will flash
- When switching the parameter, the corresponding indicator will light up. (On Stick mode, only the indicator of amperage, arc force, and hot start can light up; On Lift TIG mode, only the indicator Of amperage can light up; On Flux core mode, Only the indicator Of wire feeding speed and voltage can light up.)
- When adjusting amperage/wire feed speed, the degree indicator near synergic the knob will gradually light up/off to indicate an increase or decrease in degree.
- The protection indicator will turn on when the machine is overheated or over-current/low voltage When the indicator turns Off, the machine will work normally again.
WORKPIECE CLEANING BEFORE WELDING
Please keep the workpiece clean, and remove existing rust, greasy dirt, water and paint, etc.
Stick Welding Steps
Lift TIG Welding steps (Optional TIG Torch Required)
- The TIG welding torch should be connected to the negative (-) output terminal, and the work clamp leads to the positive (+) output terminal
- Turn on the power switch, and the fan will work.
- Turn on the gas regulator on the gas cylinder, the gas pressure is shown on the gauge
- Set the welding mode button on “LIFT TIG”
- Set the welding amperage (15-135A) with the knob
TROUBLESHOOTING
HOW TO USE TROUBLESHOOTING GUIDE
This Troubleshooting Guide is provided to help you locate and repair possible machine malfunctions. Simply follow the three-step procedure listed below.
step 1. LOCATE PROBLEM (SYMPTOM)
Look under the column labeled “PROBLEM (SYMPTOM)” This column describes possible symptoms that the machine may exhibit. Find the listing that best describes the symptom that the machine is exhibiting
step 2. POSSIBLE CAUSE.
The second column labeled “POSSIBLE CAUSE” lists the obvious external possibilities that may contribute to the machine’s symptoms
step 3. RECOMMENDED COURSE OF ACTION
The third column labeled “POSSIBLE SOLUTION” provides a course of action for the Possible Cause If you do not understand or are unable to perform the recommended Course of Action safely, Contact YESWELDER, at support@yeswelder.com.
For more manuals by YesWelder visit, ManualsLibraryy
YesWelder Flux-135PRO MIG Flux Core Welder-FAQs
What is flux core MIG welding used for?
Flux-cored arc welding is ideal for welding carbon steel, low-alloy steels, high-nickel alloys, cast iron, and stainless steel. It works best on materials no thinner than 20 gauge and is effective for thick weld joints.
How effective is flux core welding?
Flux core welding is a versatile and efficient process, suitable for all-position welding with the right filler material and flux composition. It delivers high deposition rates and produces strong, clean welds.
What is flux welding best for?
Flux core welding is excellent for welding dirty, rusted, or contaminated metals. It is particularly useful for outdoor welding since the flux provides shielding, making it resistant to wind interference.
What is the best setting for MIG welding?
For optimal results, maintain a wire feed speed between 240-290 inches per minute (ipm) and a travel speed of 14-19 ipm. Keep the wire stickout at 5/8 inch or shorter for better amperage control and heat input.
How much gas flow is needed for MIG welding?
Gas flow rates vary based on the material:
1. Mild Steel: 15-25 cubic feet per hour (CFH)
2. Stainless Steel: 20-30 CFH
3. Aluminum: 25-35 CFH
What are the current and voltage settings for MIG welding?
For a 1.2mm diameter wire, current typically ranges from 100A (17V) to 200A (22V). Power sources usually support currents up to 350A. Circuit inductance helps control current surges, reducing spatter.
What are the disadvantages of flux core welding?
Some drawbacks of Flux-Cored Arc Welding (FCAW) include:
1. Higher smoke and fume production
2. More heat input into the weld
3. Higher cost of flux-cored wire compared to solid wire
4. Additional cost for dual-shielded equipment when using both gas and flux
What polarity is used for flux core welding?
Flux-cored welding typically requires DC electrode negative (DCEN), also known as straight polarity. Polarity settings are usually found inside the welder near the drive rolls.
What is the best flux core wire?
The E71T series flux-cored wire is widely recommended for general-purpose welding due to its excellent weld quality and smooth performance.
What gas should be used for flux core welding?
Gas-shielded flux-cored wires require an external shielding gas, typically 100% CO2 or a 75-80% argon/CO2 mix. The type of gas used affects weldability, including spatter levels and arc stability.
+7 (495) 215-16-67
8 (800) 333-16-67
с 9:00-19:00 — ежедневно (МСК)
Заказать звонок
×
Обратный звонок
Представьтесь
Номер вашего телефона
Ваш вопрос
я даю согласие Shopozz на обработку персональных данных
в соответствии с Федеральным законом от 27.07.2006 года №152-ФЗ «О персональных данных», на условиях и для целей, определенных Политикой конфиденциальности.
×
Доставка товаров с аукциона eBay и интернет-магазинов США в
Россию (Москва, Санкт-Петербург, Новосибирск, Екатеринбург,
Казань, Нижний Новгород, Челябинск, Красноярск, Самара, Уфа,
Ростов-на-Дону, Омск, Краснодар, Воронеж, Волгоград, Пермь и
другие города).
© Shopozz — сервис покупок за рубежом

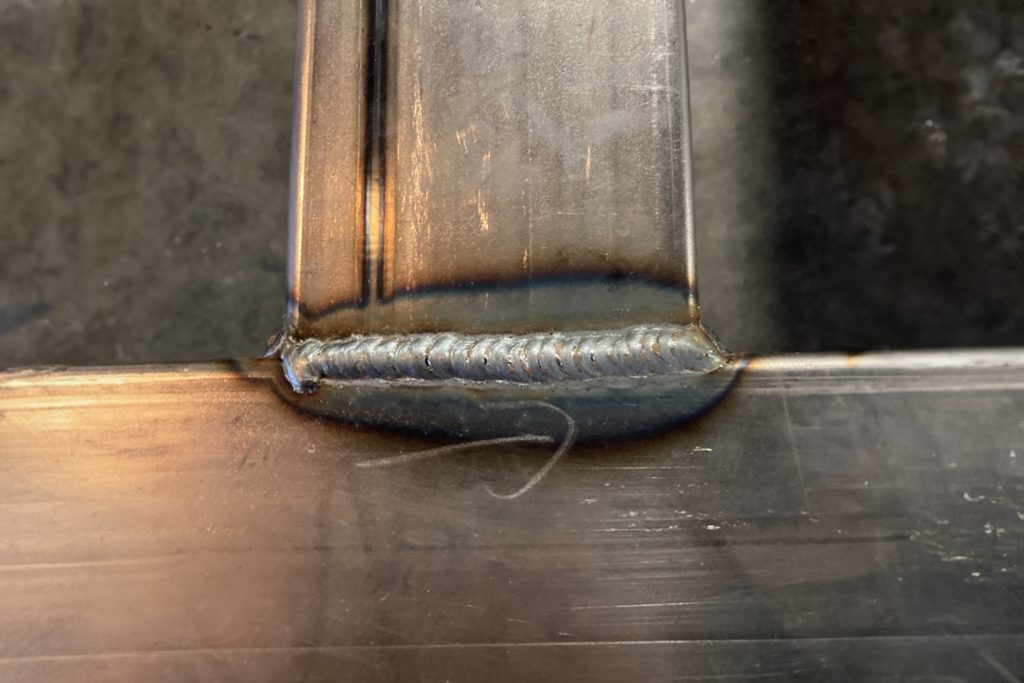
What We Thought (full review below!)
For new fabricators or hobbyists, the Flux 135 is an excellent starting point. It offers enough flexibility to experiment and learn various welding techniques without overwhelming beginners with overly complex features.
The welder’s simplicity and effectiveness make it a great tool for home projects and small-scale fabrications.
However, for those looking to undertake heavier projects, it’s important to recognize the limitations of the Flux 135. While it can handle materials up to 3/8 inch, the results might not be ideal for high-stress applications.
In such cases, a more powerful welder might be necessary to ensure the strength and durability of your welds.
Our Trusted Vendors

Overview
Dimensions
18.35 x 13.5 x 11.81”
Positives
- Versatility: Offers multiple welding modes including flux core, MMA, and lift TIG, making it suitable for a variety of projects.
- User-Friendly: Designed with simplicity in mind, it’s ideal for beginners and those new to welding.
- Portable: Its compact size and compatibility with generators make it convenient for on-site work and outdoor projects.
- Cost-Effective: Provides good value for money, especially for hobbyists and DIY enthusiasts.
- Suitable for Thin to Medium Materials: Performs well on steel plates up to 1/4 inch, making it a practical choice for most home projects and light fabrications.
- Good for Learning: The welder’s straightforward design and functionality make it a great tool for educational purposes and for those looking to improve their welding skills.
Negatives
- Limited Power for Heavy-Duty Projects: Not ideal for materials thicker than 3/8 inch or for high-stress applications where stronger welds are necessary.
- Power Setting Ambiguity: The welder uses a non-standard scale for power settings, which can be confusing for those used to traditional amperage or voltage measurements.
- Potential for Overheating: When pushed to its limits on thicker materials, there’s a risk of overheating, which could affect weld quality and durability.
- Lacks Gas Shielding Capability: As a flux core and stick welder, it doesn’t offer gas shielding, which may limit its use for certain types of precise or clean welding jobs.
- Spatter Management: Flux core welding can be messy due to spatter, and this welder is no exception, requiring careful cleanup and potentially anti-spatter measures.
The Flux 135, made by YesWelder, looks to be a promising welder for both novices and seasoned welders.
Our aim is to rigorously test its capabilities across different thicknesses of steel plates – specifically, 3/16, 1/4, and 3/8 inch.
This exercise is a demonstration and an informative review to help you understand the nuances of working with this particular welder to see if it’s the one for you!
So, who are YesWelder?
They’ve rapidly gained recognition in the welding community for producing affordable yet reliable welding equipment.
YesWelder caters to a diverse audience, ranging from DIY enthusiasts to professional fabricators. What sets them apart is their commitment to balancing cost-effectiveness with performance.
Their products, including the Flux 135 welder, are designed considering welders’ practical needs. This welder, in particular, is known for its versatility and user-friendliness, making it an appealing option for those who are just starting their journey in welding or looking for a reliable tool for home projects.
Today, as we test the Flux 135, we’ll assess its functionality, ease of use, and performance on various steel plates. This will not only give us a comprehensive understanding of this welder’s capabilities but also provide you with tangible insights to help decide if it’s the right tool for your welding needs.
Whether you’re a beginner eager to learn or an experienced welder keen on expanding your toolset, this article is for you.

Equipment and Setup
When it comes to welding, the right power source is crucial.
For our tests with the Flux 135 welder, we’ve chosen a 6500 watt generator.
Why a generator, you might ask?
Well, it’s all about versatility and mobility. A generator allows you to weld in locations where you might not have ready access to a power outlet, opening up a world of possibilities for fieldwork and outdoor projects.
However, the choice of a 6500 watt generator might raise some eyebrows.
Is it overkill? Perhaps.
The Flux 135 is a 110-volt welder, and in theory, you could comfortably run it on a 3500 watt generator. But we’re going for the extra power to ensure we don’t encounter any hiccups during our testing. It’s also a valuable insight for those of you wondering about the necessary generator size for smooth operation.
In the future, we’ll experiment with smaller generators to provide you with a more comprehensive guide.
What Do You Get?
When you purchase a YesWelder Flux 135, you can expect to find the following items in the box, along with a description of what each piece of equipment does:
| Item | Description |
|---|---|
| Flux 135 Welder Unit | The main welding machine which is capable of flux core, MMA, and lift TIG welding. |
| Ground Clamp | Used to complete the electrical circuit and ensure a stable arc by grounding the workpiece. |
| MIG Gun | A torch used for flux core welding, through which the welding wire is fed. |
| Electrode Holder | Used in MMA (stick) welding to hold the electrode (welding rod). |
| Power Adapter | Allows the welder to be connected to various power sources, enhancing its versatility. |
| Wire Brush/Chipping Hammer | Tool for cleaning the weld area and removing slag after welding. |
| User Manual | Provides instructions on setup, operation, and maintenance of the welder. |
These components together make the Flux 135 a versatile and user-friendly welding machine, suitable for a range of welding tasks and skill levels.
Material Preparation: Selection of Steel Plates
Selecting the right material is just as important as choosing the right tools. For this test, we’re using three different thicknesses of steel plates: 3/16, 1/4, and 3/8 inch.
This range will allow us to thoroughly evaluate the Flux 135’s performance across various scenarios. Each thickness presents its own challenges and learning opportunities, making our test both comprehensive and informative.
Preparation Tips Using a Cutoff Wheel
Before we start welding, proper preparation of these steel plates is essential.
Here’s where a good cutoff wheel comes into play.
I’m using an eighth-inch thick cutoff wheel, which is slightly thicker than the standard options. This choice is deliberate – thicker cutoff wheels are less prone to breaking, especially when you’re grinding rather than cutting.
But remember, safety is paramount. Always use face protection, preferably a full face shield, when working with cutoff wheels.
Even though thicker wheels are safer, they can still pose risks. They also tend to dig into the material effectively, so be cautious if you’re working on a project where the finish is crucial.
Avoid using these wheels on surfaces where grind marks would be undesirable.
Additional Equipment Recommendations
Having the right tools can make a significant difference in the quality and efficiency of your work.
This brings me to a piece of equipment that I highly recommend for any fabricator’s arsenal: the Anvil Portable and Stationary Bandsaw.
Why Choose the Anvil Bandsaw?
- Versatility: The Anvil bandsaw serves a dual purpose. It’s not just a portable tool that you can carry to different job sites; it also functions effectively as a stationary bandsaw. This versatility means you’re getting two tools for the price of one.
- Performance: When it comes to cutting materials, precision and reliability are key. The Anvil bandsaw delivers on both fronts. It runs smoothly, ensuring clean and accurate cuts, which is essential whether you’re prepping materials for welding or working on intricate fabrication projects.
- Cost-Effectiveness: One of the standout features of the Anvil bandsaw is its affordability, especially when compared to its competitors like Milwaukee and DeWalt. You get a high-quality tool without the hefty price tag, making it accessible for both professionals and hobbyists.
- Ease of Use: Whether you’re a seasoned fabricator or just starting out, you’ll find the Anvil bandsaw easy to operate. This ease of use, combined with its efficiency, makes it an excellent choice for a wide range of projects.
Applications in Welding and Fabrication
The Anvil bandsaw is ideal for prepping materials before welding, especially when dealing with intricate designs or when precision is non-negotiable.
Its ability to switch between a portable and stationary setup allows you to adapt to various working conditions, providing flexibility in your workflow.
Welder Setup and Wire Selection
The Flux 135 welder by YesWelder is designed with versatility and ease of use in mind, making it a suitable choice for a wide range of welding applications.
Let’s dive into the four key settings of this welder and how they can be utilized for different welding needs.
- Flex Core Wire Options (0.30 and 0.35): The Flux 135 offers settings for two sizes of flux core wire: 0.30 and 0.35 inches. These options cater to different thicknesses and types of materials. The 0.30 setting is typically used for thinner metals and provides a smoother weld with less spatter, while the 0.35 setting is better for thicker materials, offering deeper penetration.
- MMA (Manual Metal Arc) Welding: This setting transforms the Flux 135 into a stick welder, broadening its utility. MMA welding is ideal for outdoor conditions or for materials that are rusty or dirty. It’s a valuable feature for welders who need versatility in different working environments.
- Lift TIG Welding: This setting allows for TIG welding, where the welder has to touch the tungsten electrode to the material to initiate the arc. While this method requires more skill, it provides greater control and precision, especially for thinner metals and fine work.
Each setting on the Flux 135 is designed to optimize performance for specific welding styles and materials. Understanding these settings will help you leverage the full potential of this versatile welder.
Wire Choice and Amperage/Voltage Considerations
Selecting the right wire and adjusting the amperage and voltage is critical for achieving the best weld quality. Here are some tips:
- Choosing the Right Wire: The choice between 0.30 and 0.35 flux core wires depends on your material’s thickness and the type of job. For general use and thinner materials, the 0.30 wire is often sufficient. If you’re working with thicker materials, consider the 0.35 wire for better penetration.
- Adjusting Amperage and Voltage Based on Tack Welds: Before starting your main welding project, it’s wise to do some tack welds on scrap material. This will allow you to adjust the welder’s settings based on the material’s response. Look for a stable arc and good penetration without excessive spatter or burning through the material.
- Understanding the Flux 135’s Settings: The Flux 135 doesn’t specify its power settings in traditional amperage or voltage terms. Instead, it uses a scale from negative 5.0 to positive 5.0. As a general guideline, the higher the number, the higher the power output. Start with a mid-range setting and adjust based on your tack weld results.
- Experimentation is Key: Don’t be afraid to experiment with different settings on scrap pieces. Welding is as much an art as it is a science, and finding the perfect settings often requires a bit of trial and error.
Welding Process and Techniques
Tacking and Adjusting Settings
Tacking is an essential step in welding, serving as a preliminary bond that holds your workpieces in place.
Here’s how to effectively tack weld with the Flux 135 and adjust the machine settings for optimal results:
- Initial Tacking: Position your steel plates in the desired configuration, typically in a T-joint for this exercise. Use the Flux 135 to make small tack welds at key points to secure the plates together.
- Adjusting Settings After Tacking: After your initial tacks, assess the weld quality. Look for a stable arc and good metal fusion. If the tack is too weak or too strong, adjust the welder’s power settings. A good starting point is a mid-range setting, tweaking as necessary based on your observations.
- Finding the Right Balance: The key is to find a balance between enough heat to ensure good penetration and not so much that it warps the metal or burns through. This balance will vary based on the thickness of your material.
Welding Different Thickness Plates
Welding plates of varying thicknesses requires different techniques and settings:
- 3/16 Inch Plate: Start with a lower setting and increase the power as needed. This thickness is relatively easy to weld and a good starting point for warming up with the Flux 135.
- 1/4 Inch Plate: This thickness requires a bit more heat for proper penetration. Turn up the power setting slightly from where you had it for the 3/16 inch plate. Monitor the weld puddle closely to ensure it’s not too hot or too cold.
- 3/8 Inch Plate: This is where things get more challenging. You’ll need to increase the power setting significantly. The key here is heat management – ensuring enough heat for penetration without overheating and weakening the metal.
Reading the Weld Puddle
Understanding and reacting to the weld puddle is crucial for successful welding:
- Observation: Watch the puddle closely. It should be consistent and fluid, indicating that the metal is melting properly.
- Adjusting Technique Based on Puddle Behavior: If the puddle is too small or solidifies too quickly, you may need more heat. If it’s too runny or moves too quickly, reduce the heat.
- Puddle Shape and Size: The ideal puddle size is about the width of the metal you’re welding. Its shape should be controlled and consistent as you move along the weld.
Welding Patterns and Learning
Experimentation and learning from failures are key to mastering welding:
- Experiment with Welding Patterns: Instead of sticking to textbook patterns, experiment with different movements and speeds. Every welder develops a unique style that works best for them.
- Learning from Failures: Don’t be discouraged by unsuccessful welds. Each mistake is a learning opportunity. Adjust your technique, settings, and approach based on what the metal tells you.
- Practice: The most important aspect of welding is practice. Try different angles, speeds, and movements. Weld on scrap metal in various positions to gain confidence and skill.
Performance Evaluation
Testing on Various Thicknesses
Evaluating the performance of the Flux 135 welder involves rigorous testing across different thicknesses of steel plates.
Here’s a breakdown of how the welder fared with 3/16, 1/4, and 3/8 inch plates:
- 3/16 Inch Plate: The Flux 135 handled this thickness with ease. The welds were consistent, showing good penetration and a stable arc. This indicates that for general home projects and light fabrications, the Flux 135 is more than capable.
- 1/4 Inch Plate: As the material thickness increased, the welder was pushed a bit more. However, it still performed admirably. The key was adjusting the power settings to ensure proper heat input for adequate penetration. The results were promising, with strong, clean welds.
- 3/8 Inch Plate: This was the real test of the welder’s limits. The Flux 135 could weld this thickness, but it required maxing out the power settings. While the welds were decent, they may not be as structurally sound as those made with a more powerful welder. This thickness is on the upper limit of what the Flux 135 can handle effectively.
Strength and Limitations
After testing the Flux 135 on various thicknesses, it’s clear that the welder has its strengths and limitations:
- Strengths: For light to medium fabrication work, the Flux 135 is a solid performer. It offers clean, strong welds on materials up to 1/4 inch thick, making it a great option for many DIY projects and smaller professional jobs.
- Limitations: When it comes to heavier materials, like the 3/8 inch plate, the Flux 135 reaches its limits. While it can perform the job, the welds might not be suitable for high-stress applications or where structural integrity is critical. This limitation should be kept in mind for projects involving heavier materials.
- Overall Assessment: The Flux 135 is a versatile and capable welder within its operating range. It’s an excellent tool for beginners and experienced welders working on light to medium-thickness materials. However, for heavy-duty, industrial-grade work or thick materials, a more powerful welder would be necessary to ensure the strength and reliability of the welds.
The Flux 135 welder offers impressive performance for its size and price range. It’s well-suited for a variety of projects, particularly those involving thinner materials.
While it has its limitations with heavier materials, its strengths make it a valuable tool for many welders, especially for those starting out or needing a reliable welder for home and light industrial applications.
Final Thoughts and Recommendations
After thoroughly testing the Flux 135 welder, my overall impression is overwhelmingly positive.
This welder stands out for its user-friendliness, versatility, and adequate performance for a range of thicknesses up to 1/4 inch.
Its ability to handle different welding modes, including flux core, MMA, and lift TIG, adds to its appeal for a broad spectrum of users.
Thank you for joining us in this review of the Flux 135 welder.
I hope this deep dive has provided valuable insights into its capabilities and limitations, helping you make an informed decision about whether it’s the right tool for your welding needs!
Our Trusted Vendors
Выпрямитель сварочный полуавтомат MIG-MAG-FLUX, однофазный 220 В, напряжение холостого хода 30 В, сварочный ток MIG/MAG 50-120 А, ПВ при max токе 15 процентов, потребляемая мощность 3,6 кВт, диаметр проволоки сталь/алюминий/флюс 0,6-0,8/0,8/0,8-0,9 мм, размер/вес катушки 200 мм / 5 кг, класс защиты/изоляции IP21/H, габариты ДхШхВ 420х240х370 мм, вес 17,3 кг, набор для MIG/MAG сварки.
Полуавтомат MIG-MAG сварочный BLUEWELD Combi 4.135 Turbo — это сварочный аппарат, который используется для проведения сварочных работ методом Mig-Mag. Полуавтомат лучше всего подходит для проведения работ средней интенсивности, однофазный сварочный полуавтомат с воздушным охлаждением для сварки электродной проволокой в среде защитного газа методом MIG-MAG или самозащитной порошковой проволокой (без газа).
- С термозащитой и ступенчатой регулировкой сварочного тока.
- Прочный металлический корпус.
- Класс нагревостойкости изоляции — H, т.е. до 180 градусов С.
- Класс защиты IP21. Защита от проникновения внутрь корпуса пальцев или предметов длиной более 80 мм и от проникновения твердых тел диаметром более 12 мм. Капли воды, вертикально падающие на оболочку, не должны оказывать вредного воздействия на изделие.
- Поставляются с принадлежностями для сварки самозащитной порошковой проволокой.
Произведено
-
Россия – родина бренда
-
Италия – страна производства
Бренд
Искатель_63T
Новичок
Регистрация: 05.06.2021
Саратов
Сообщений: 4
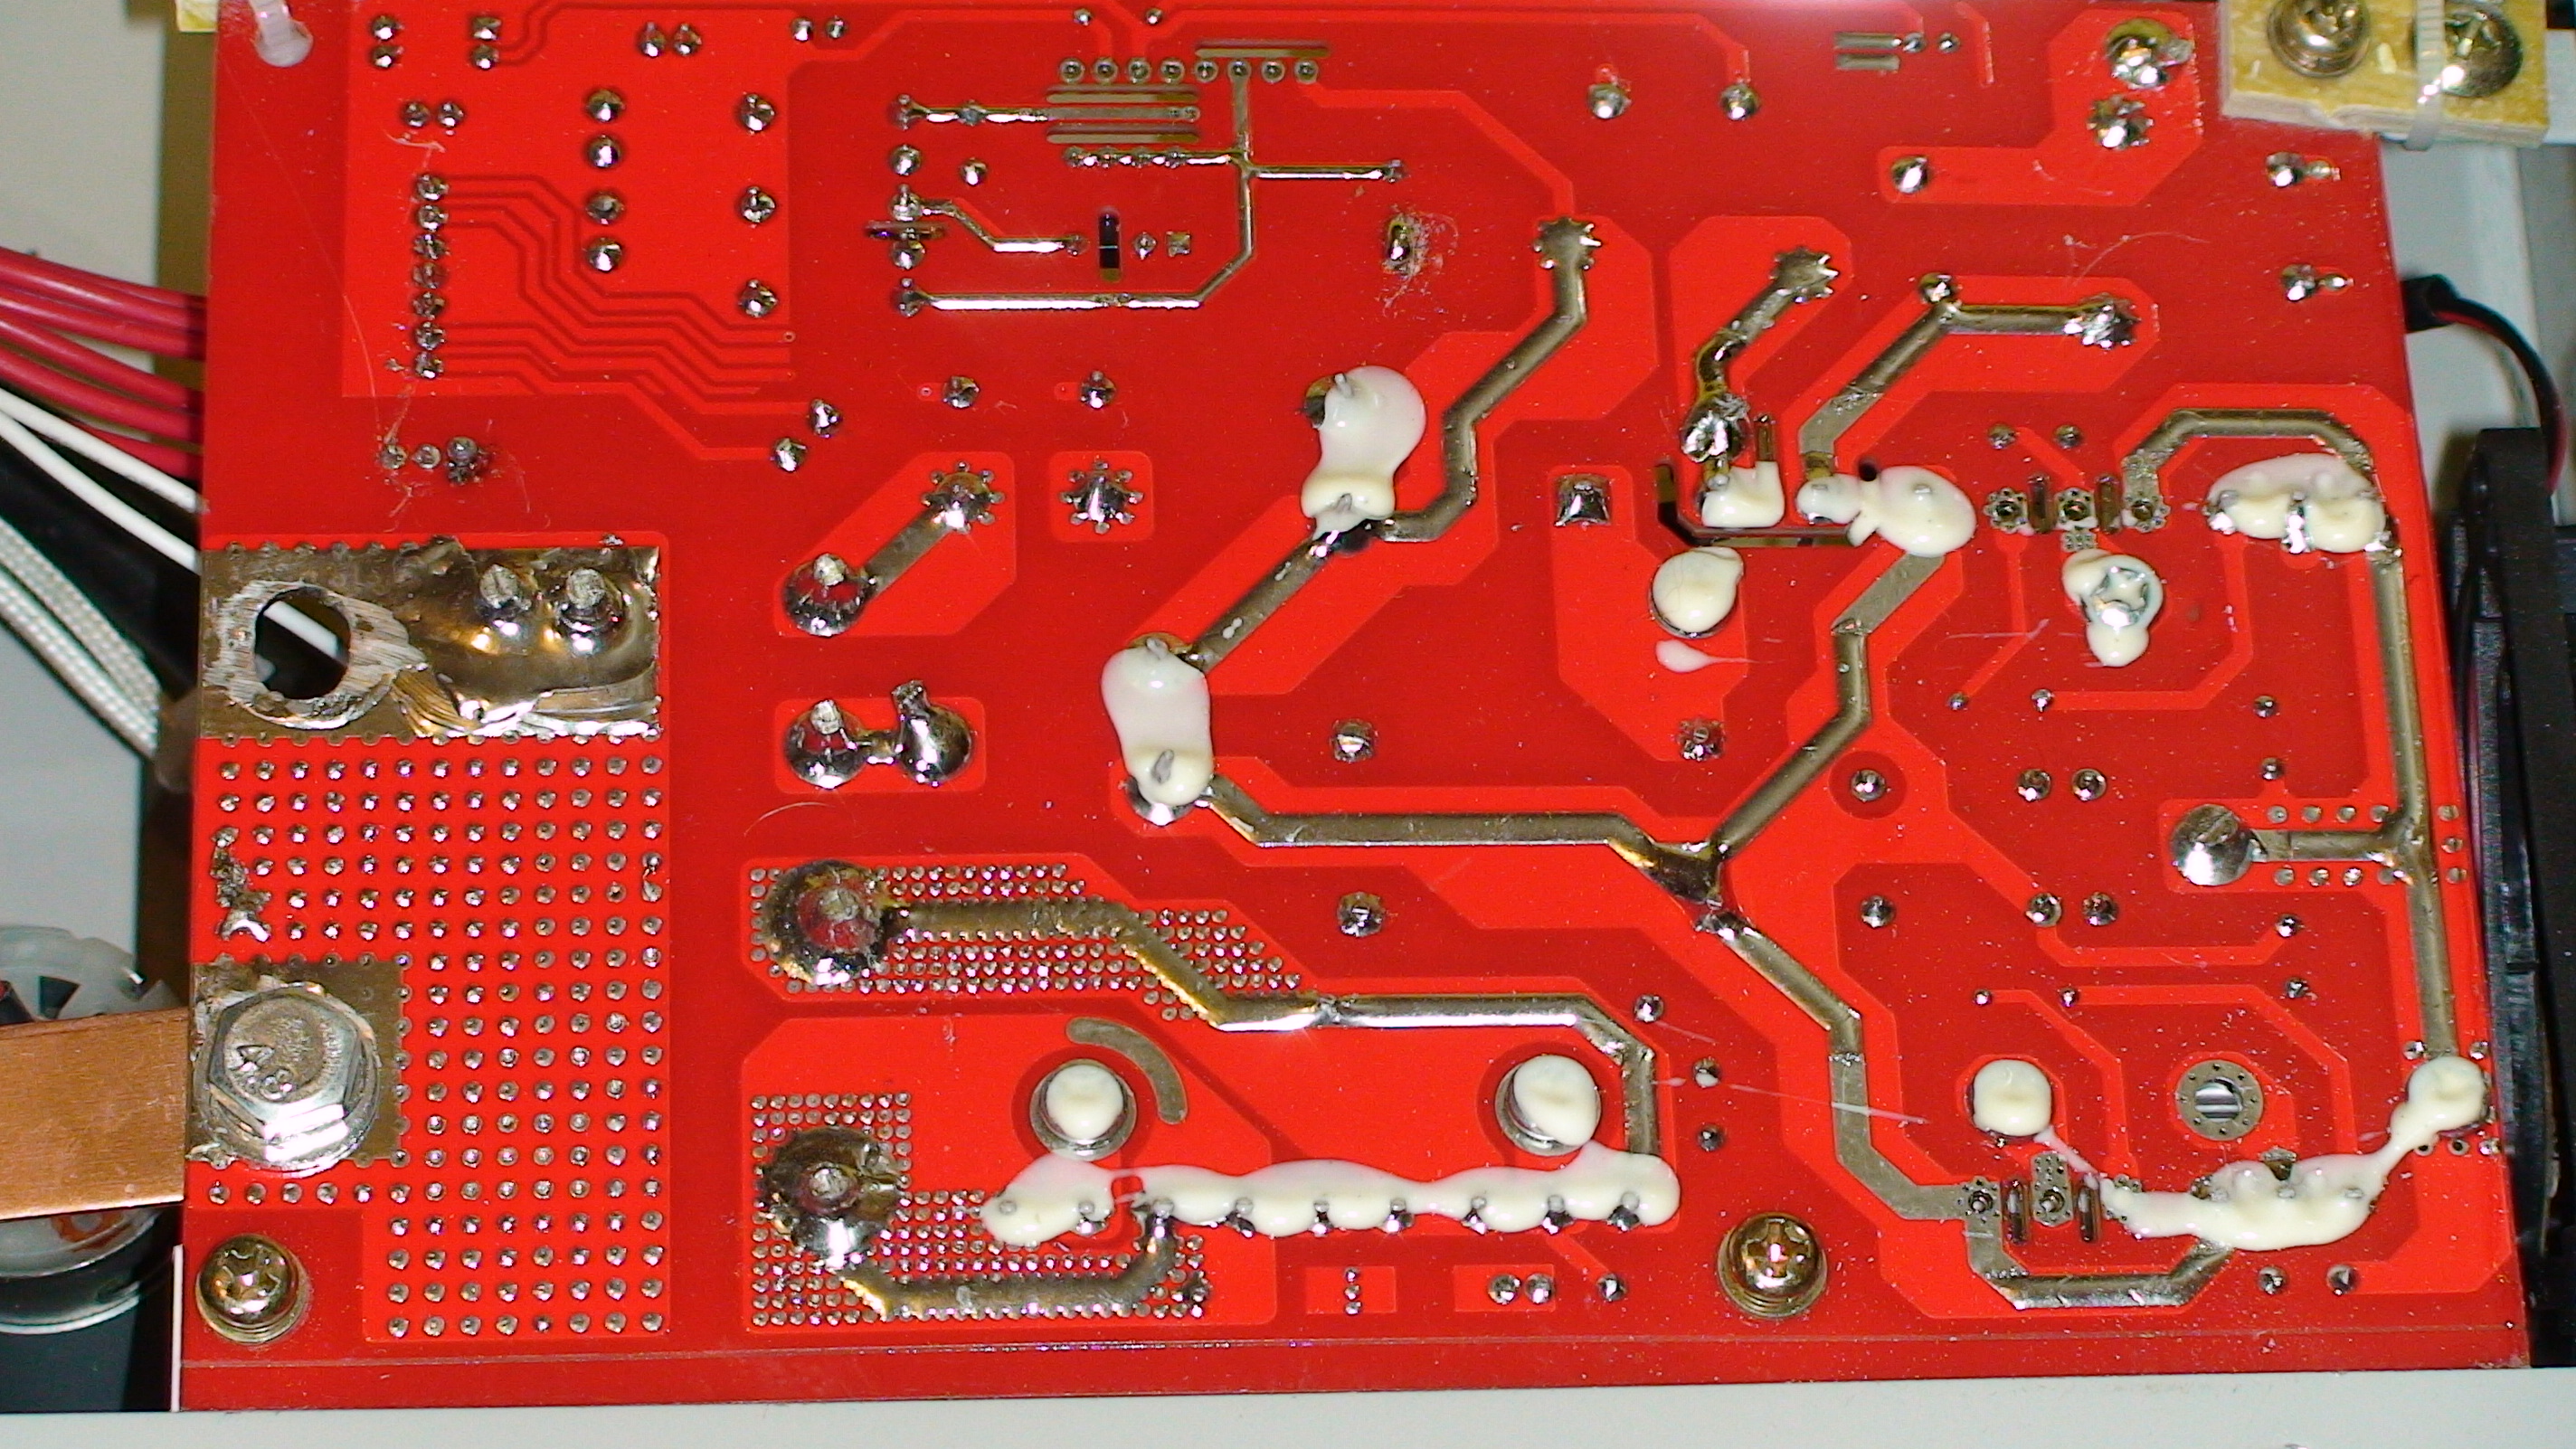
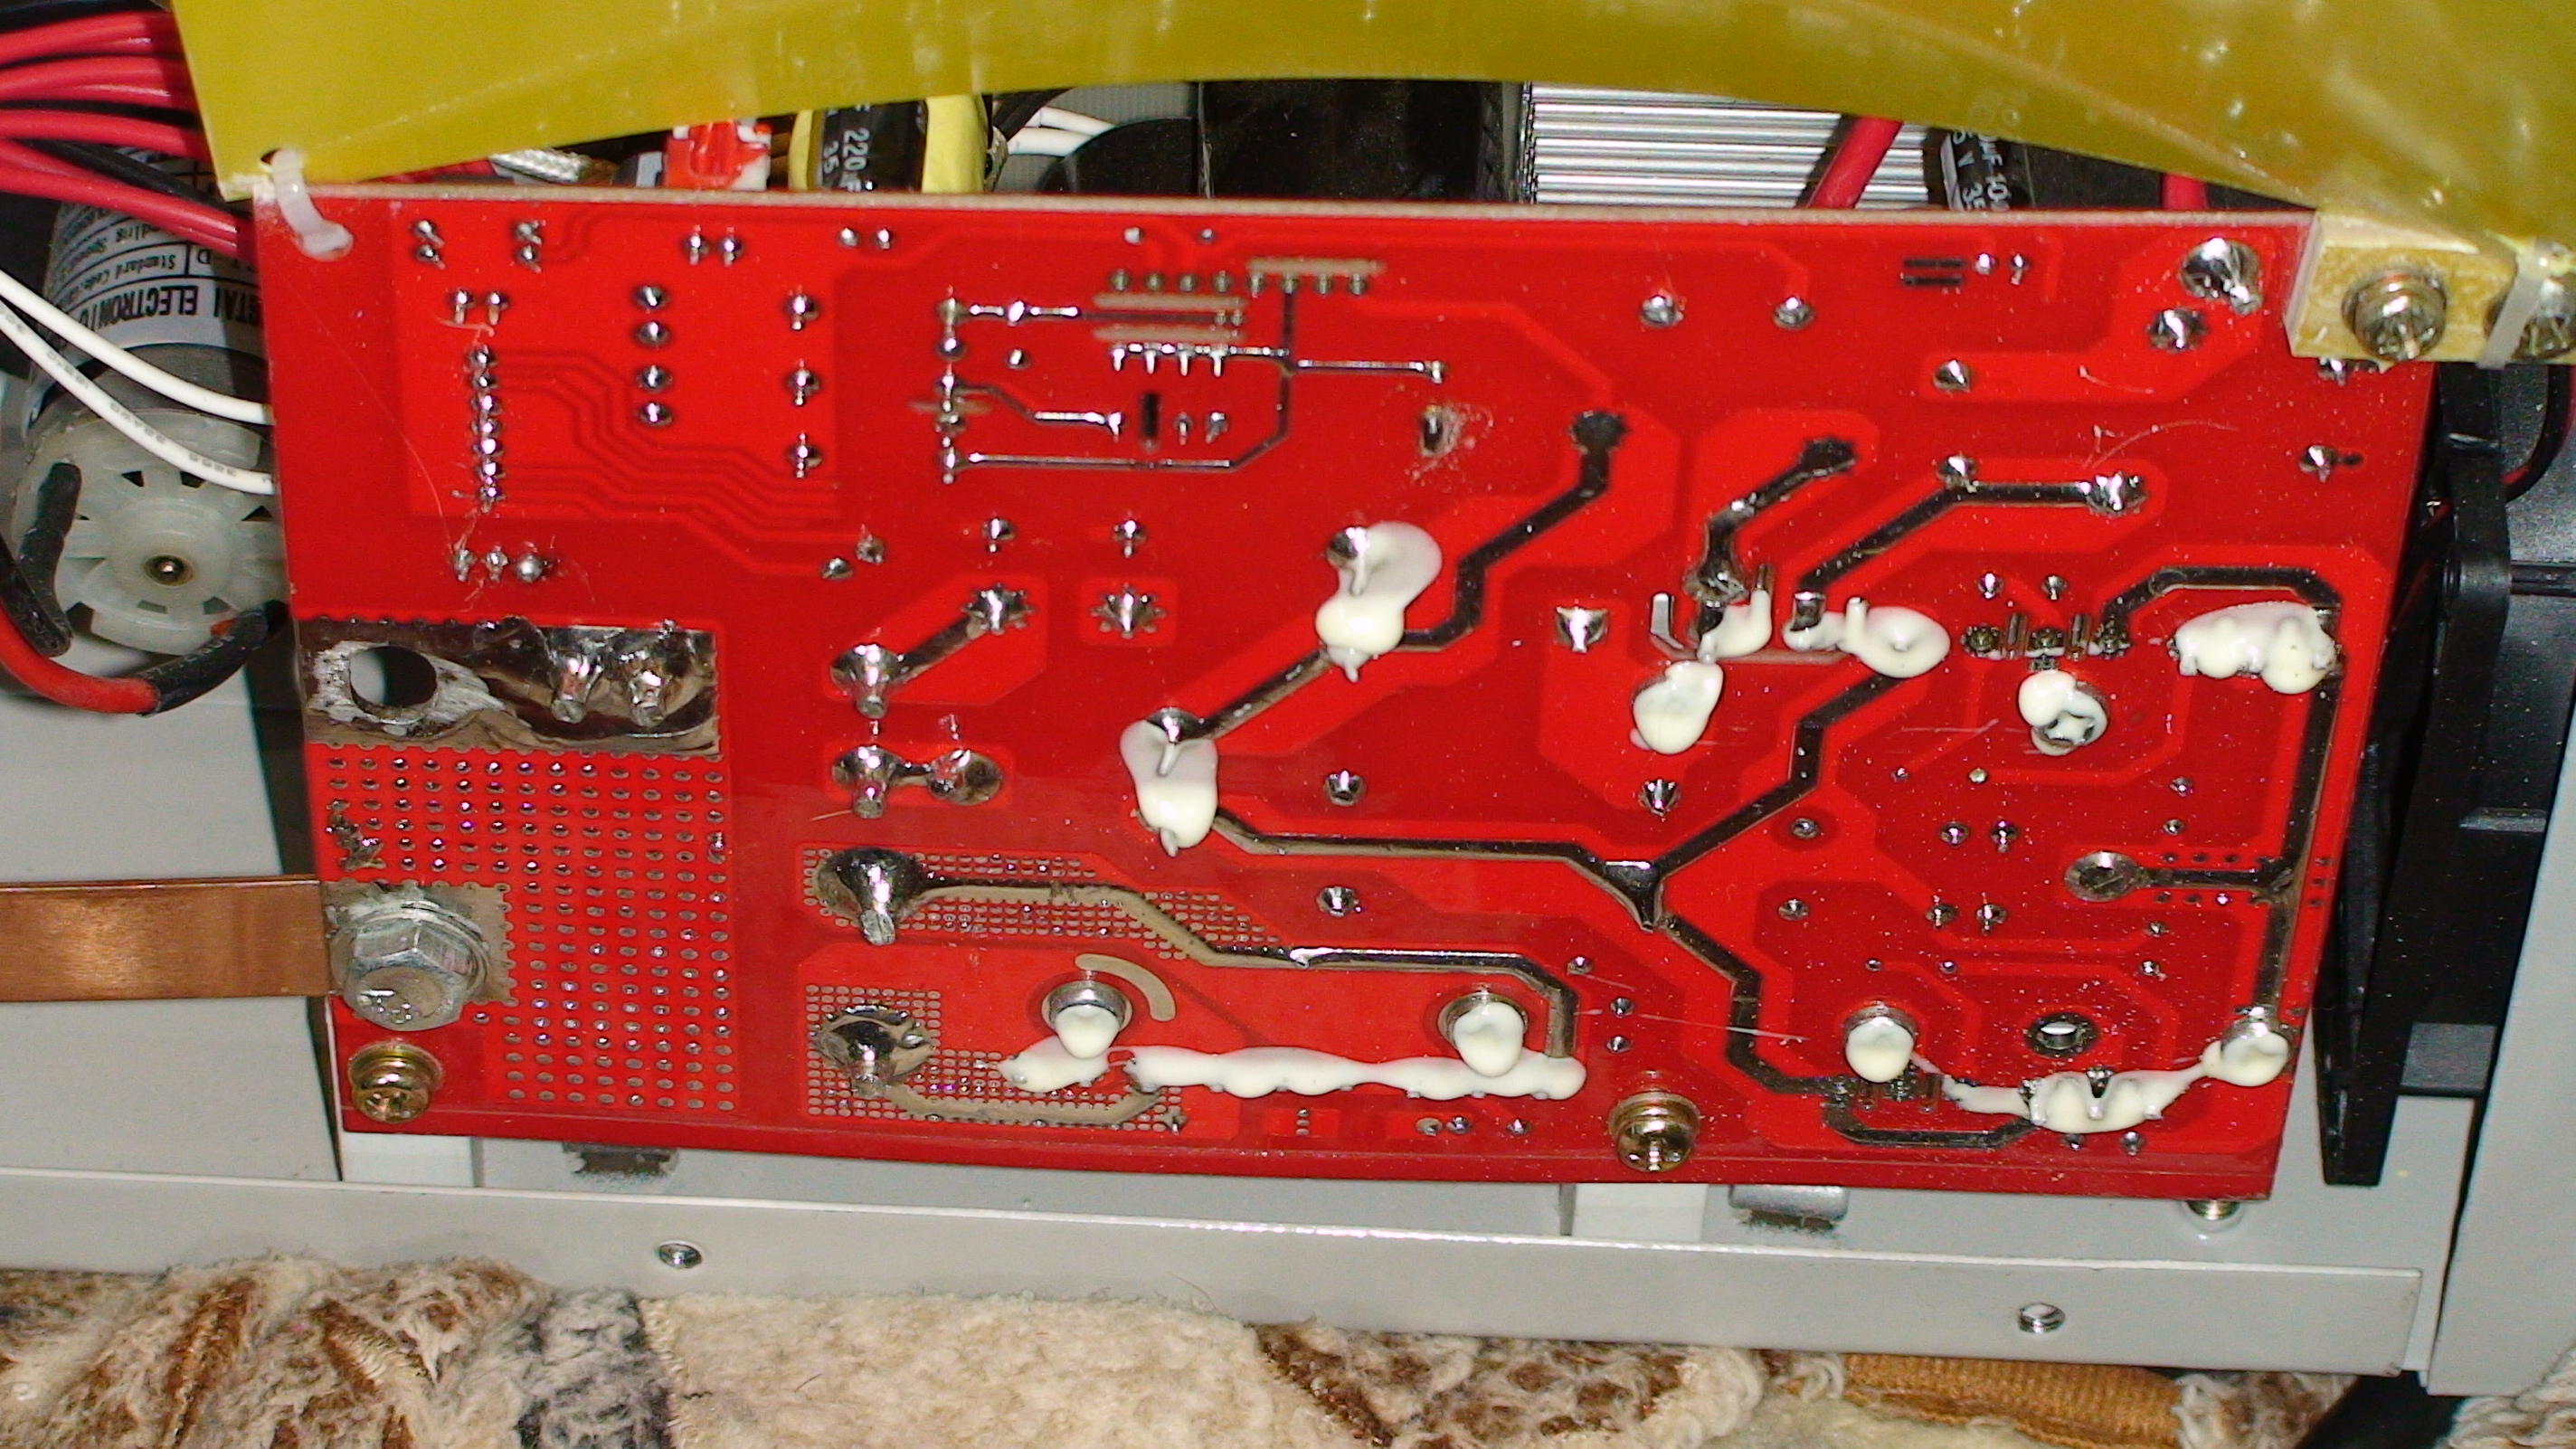
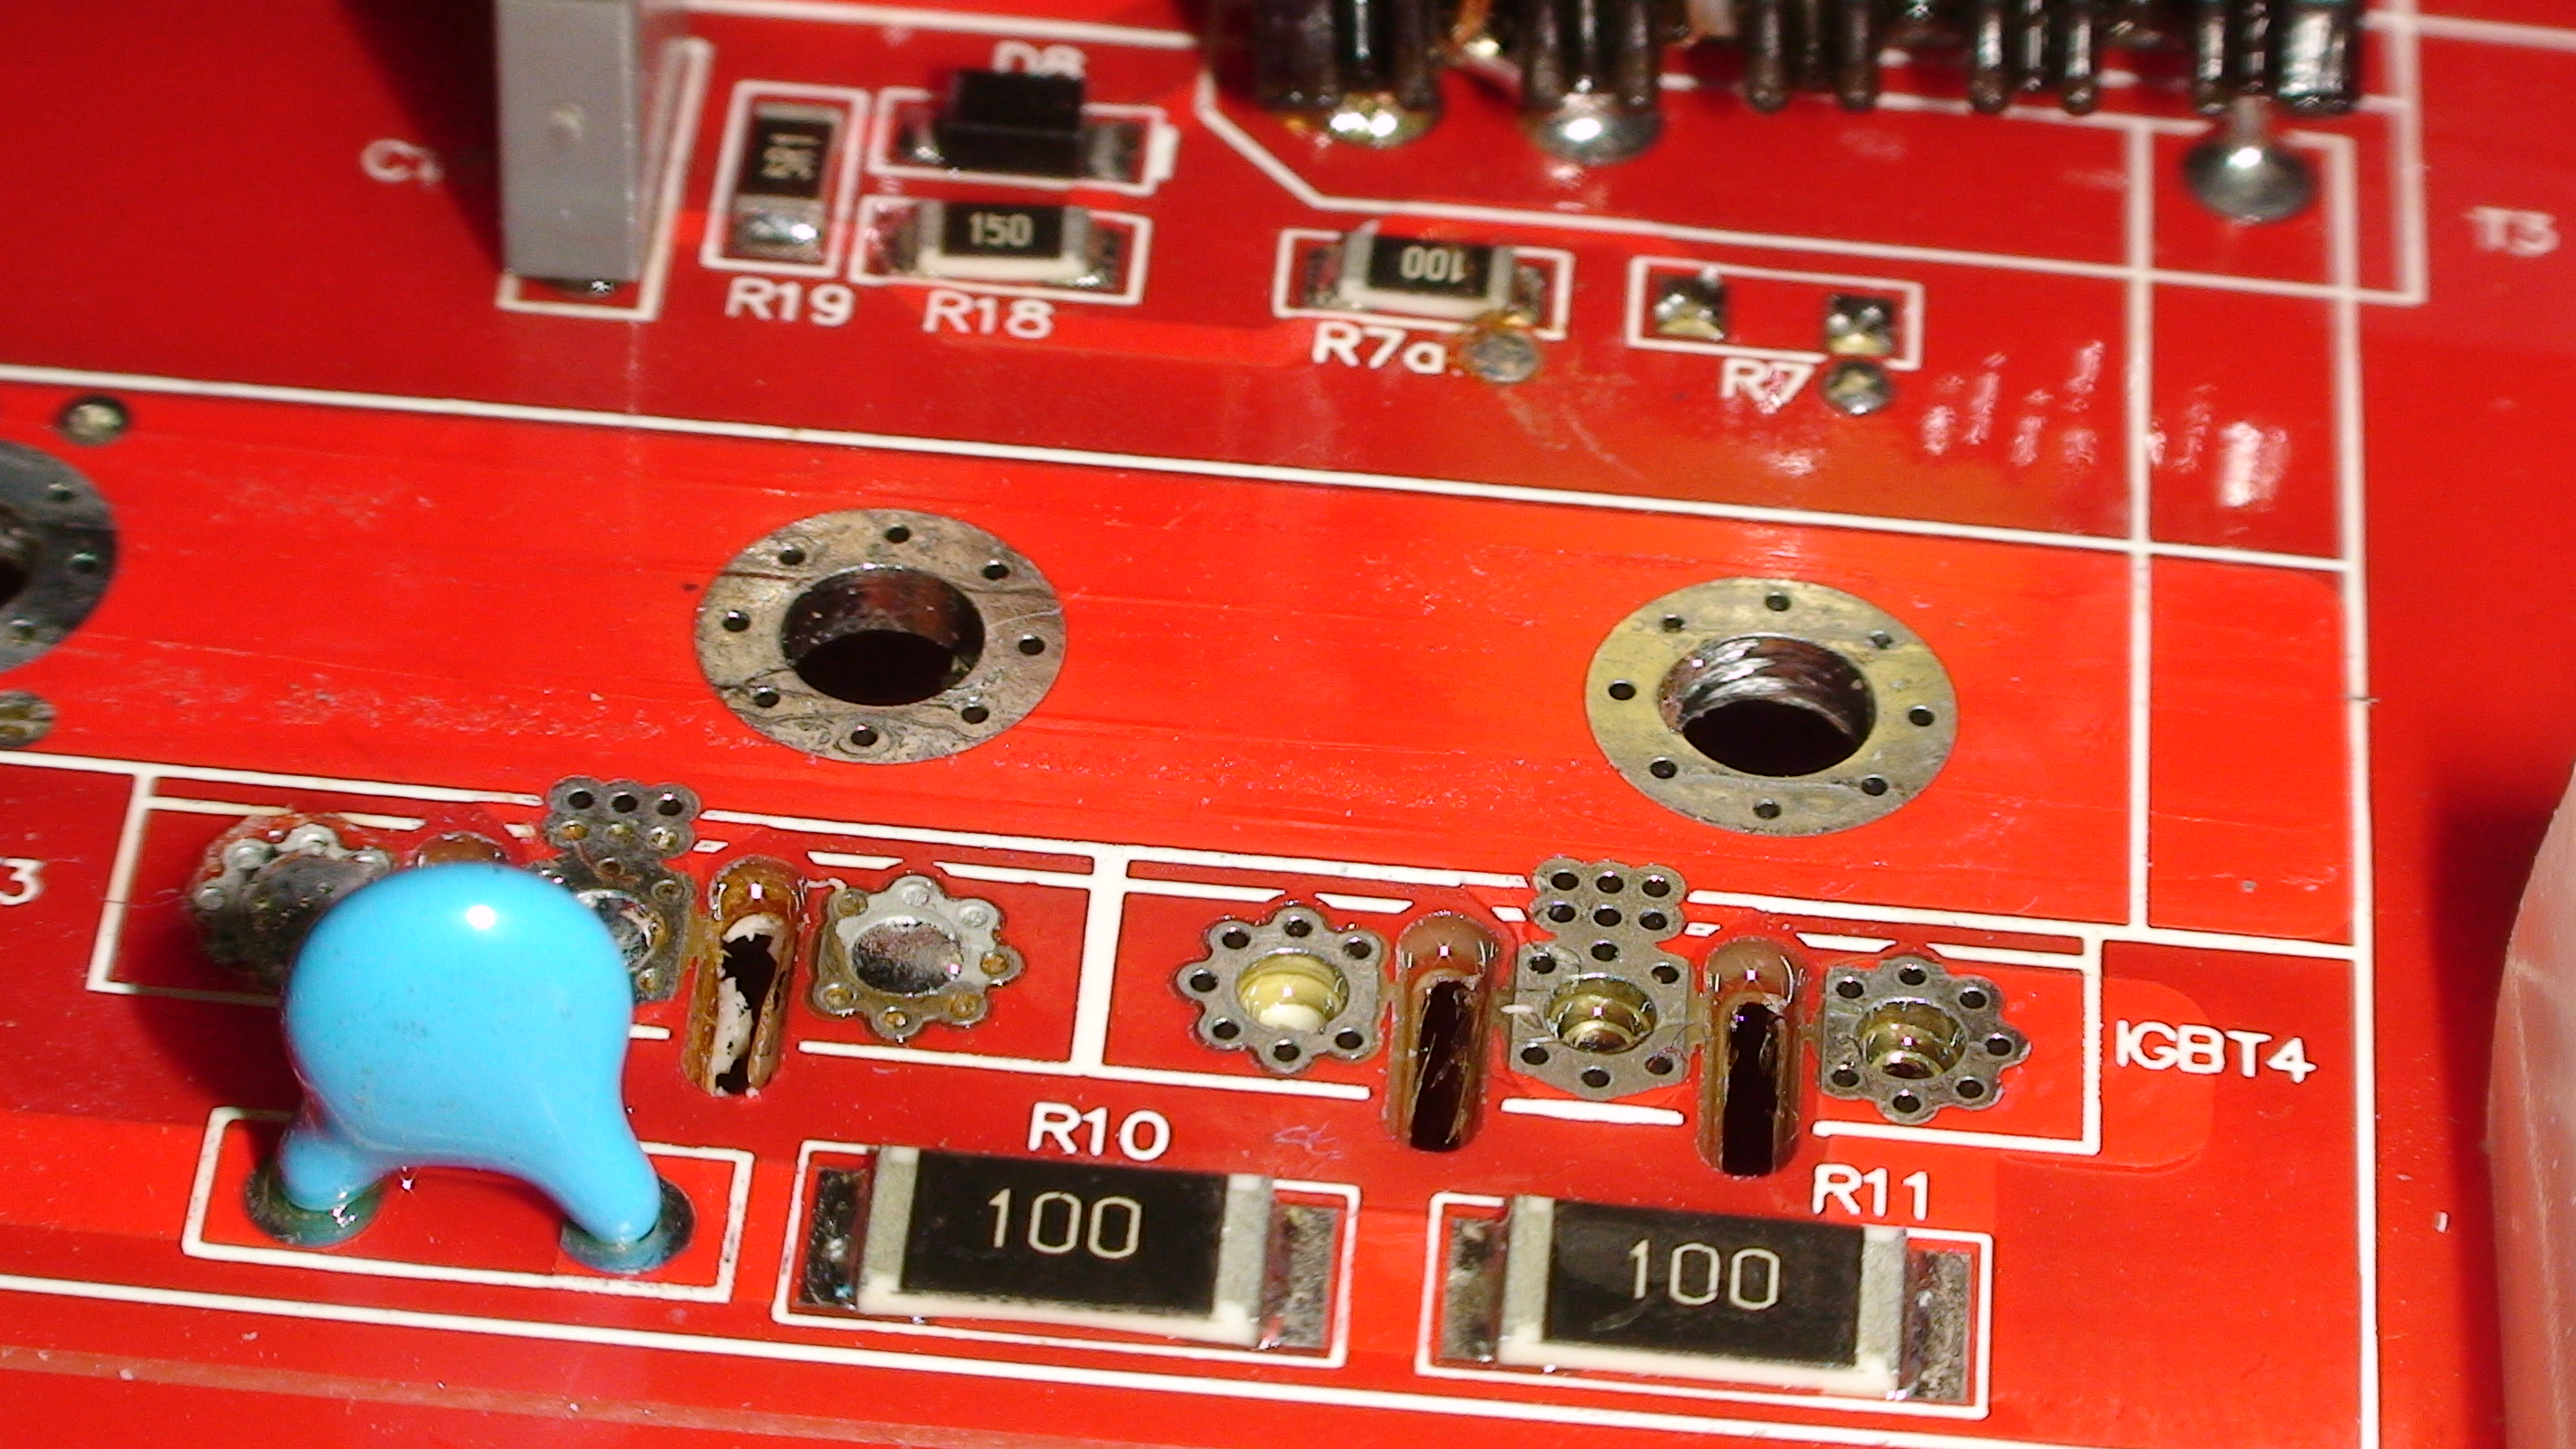
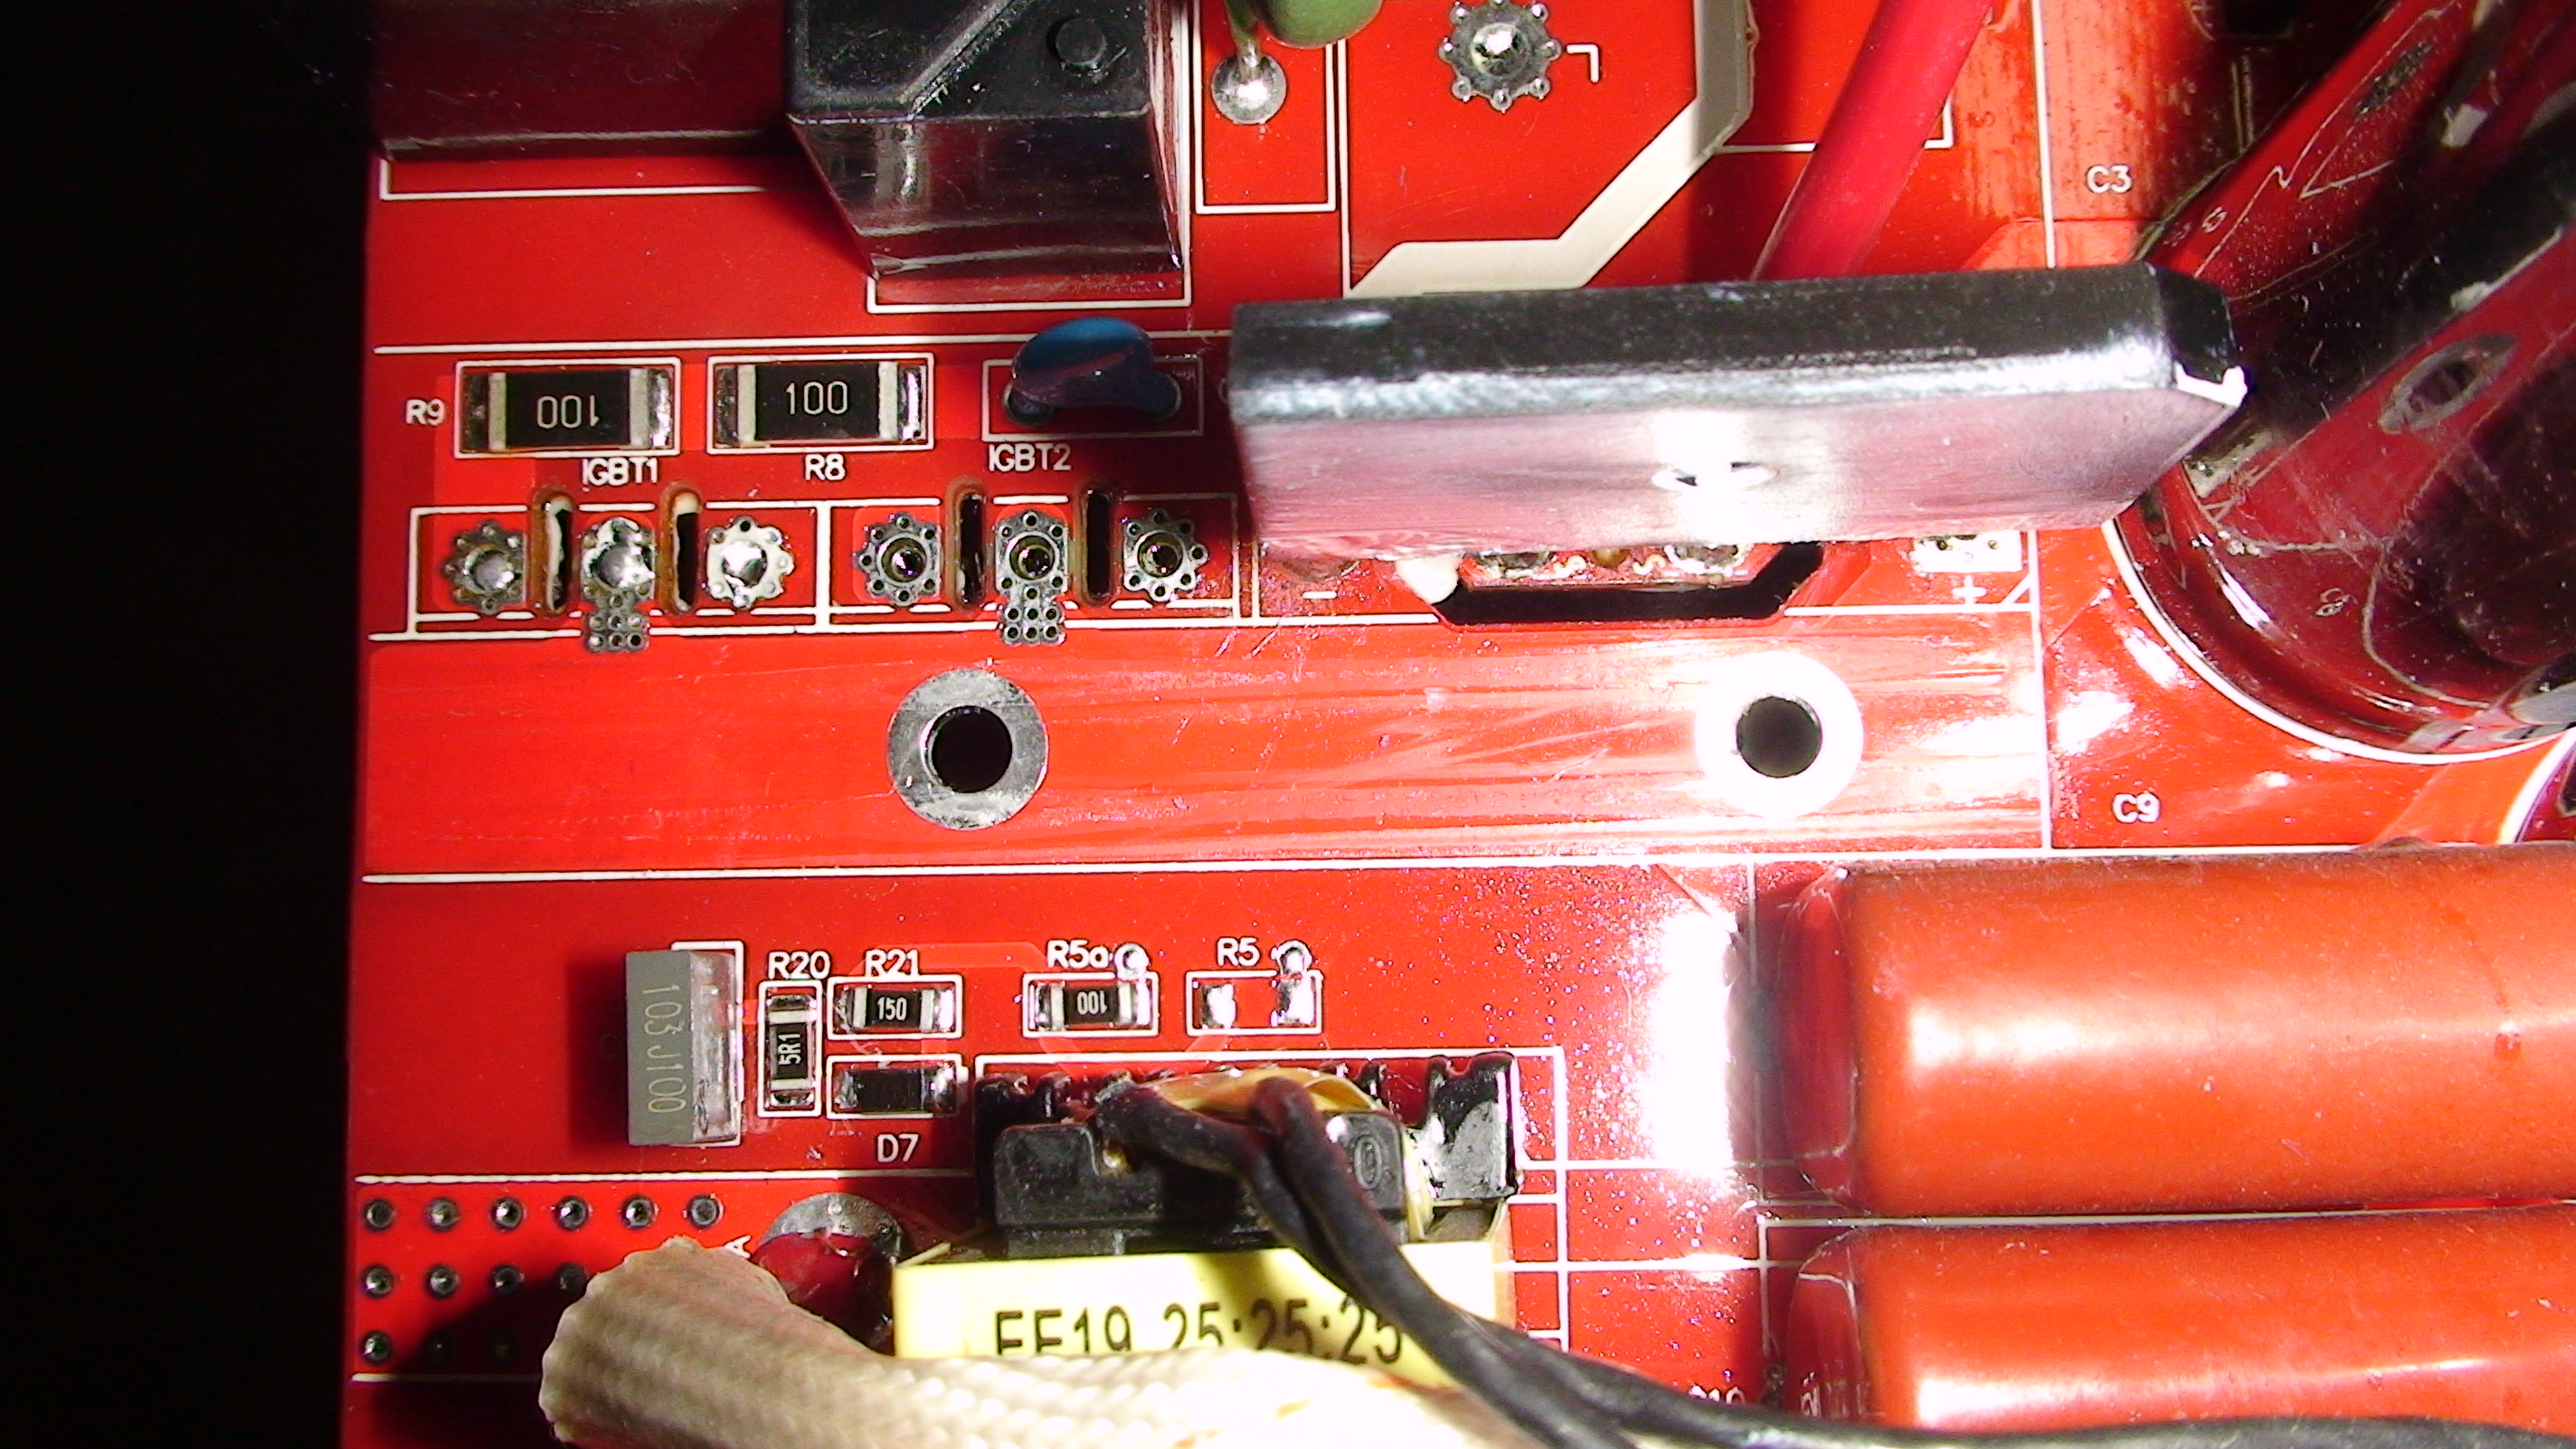
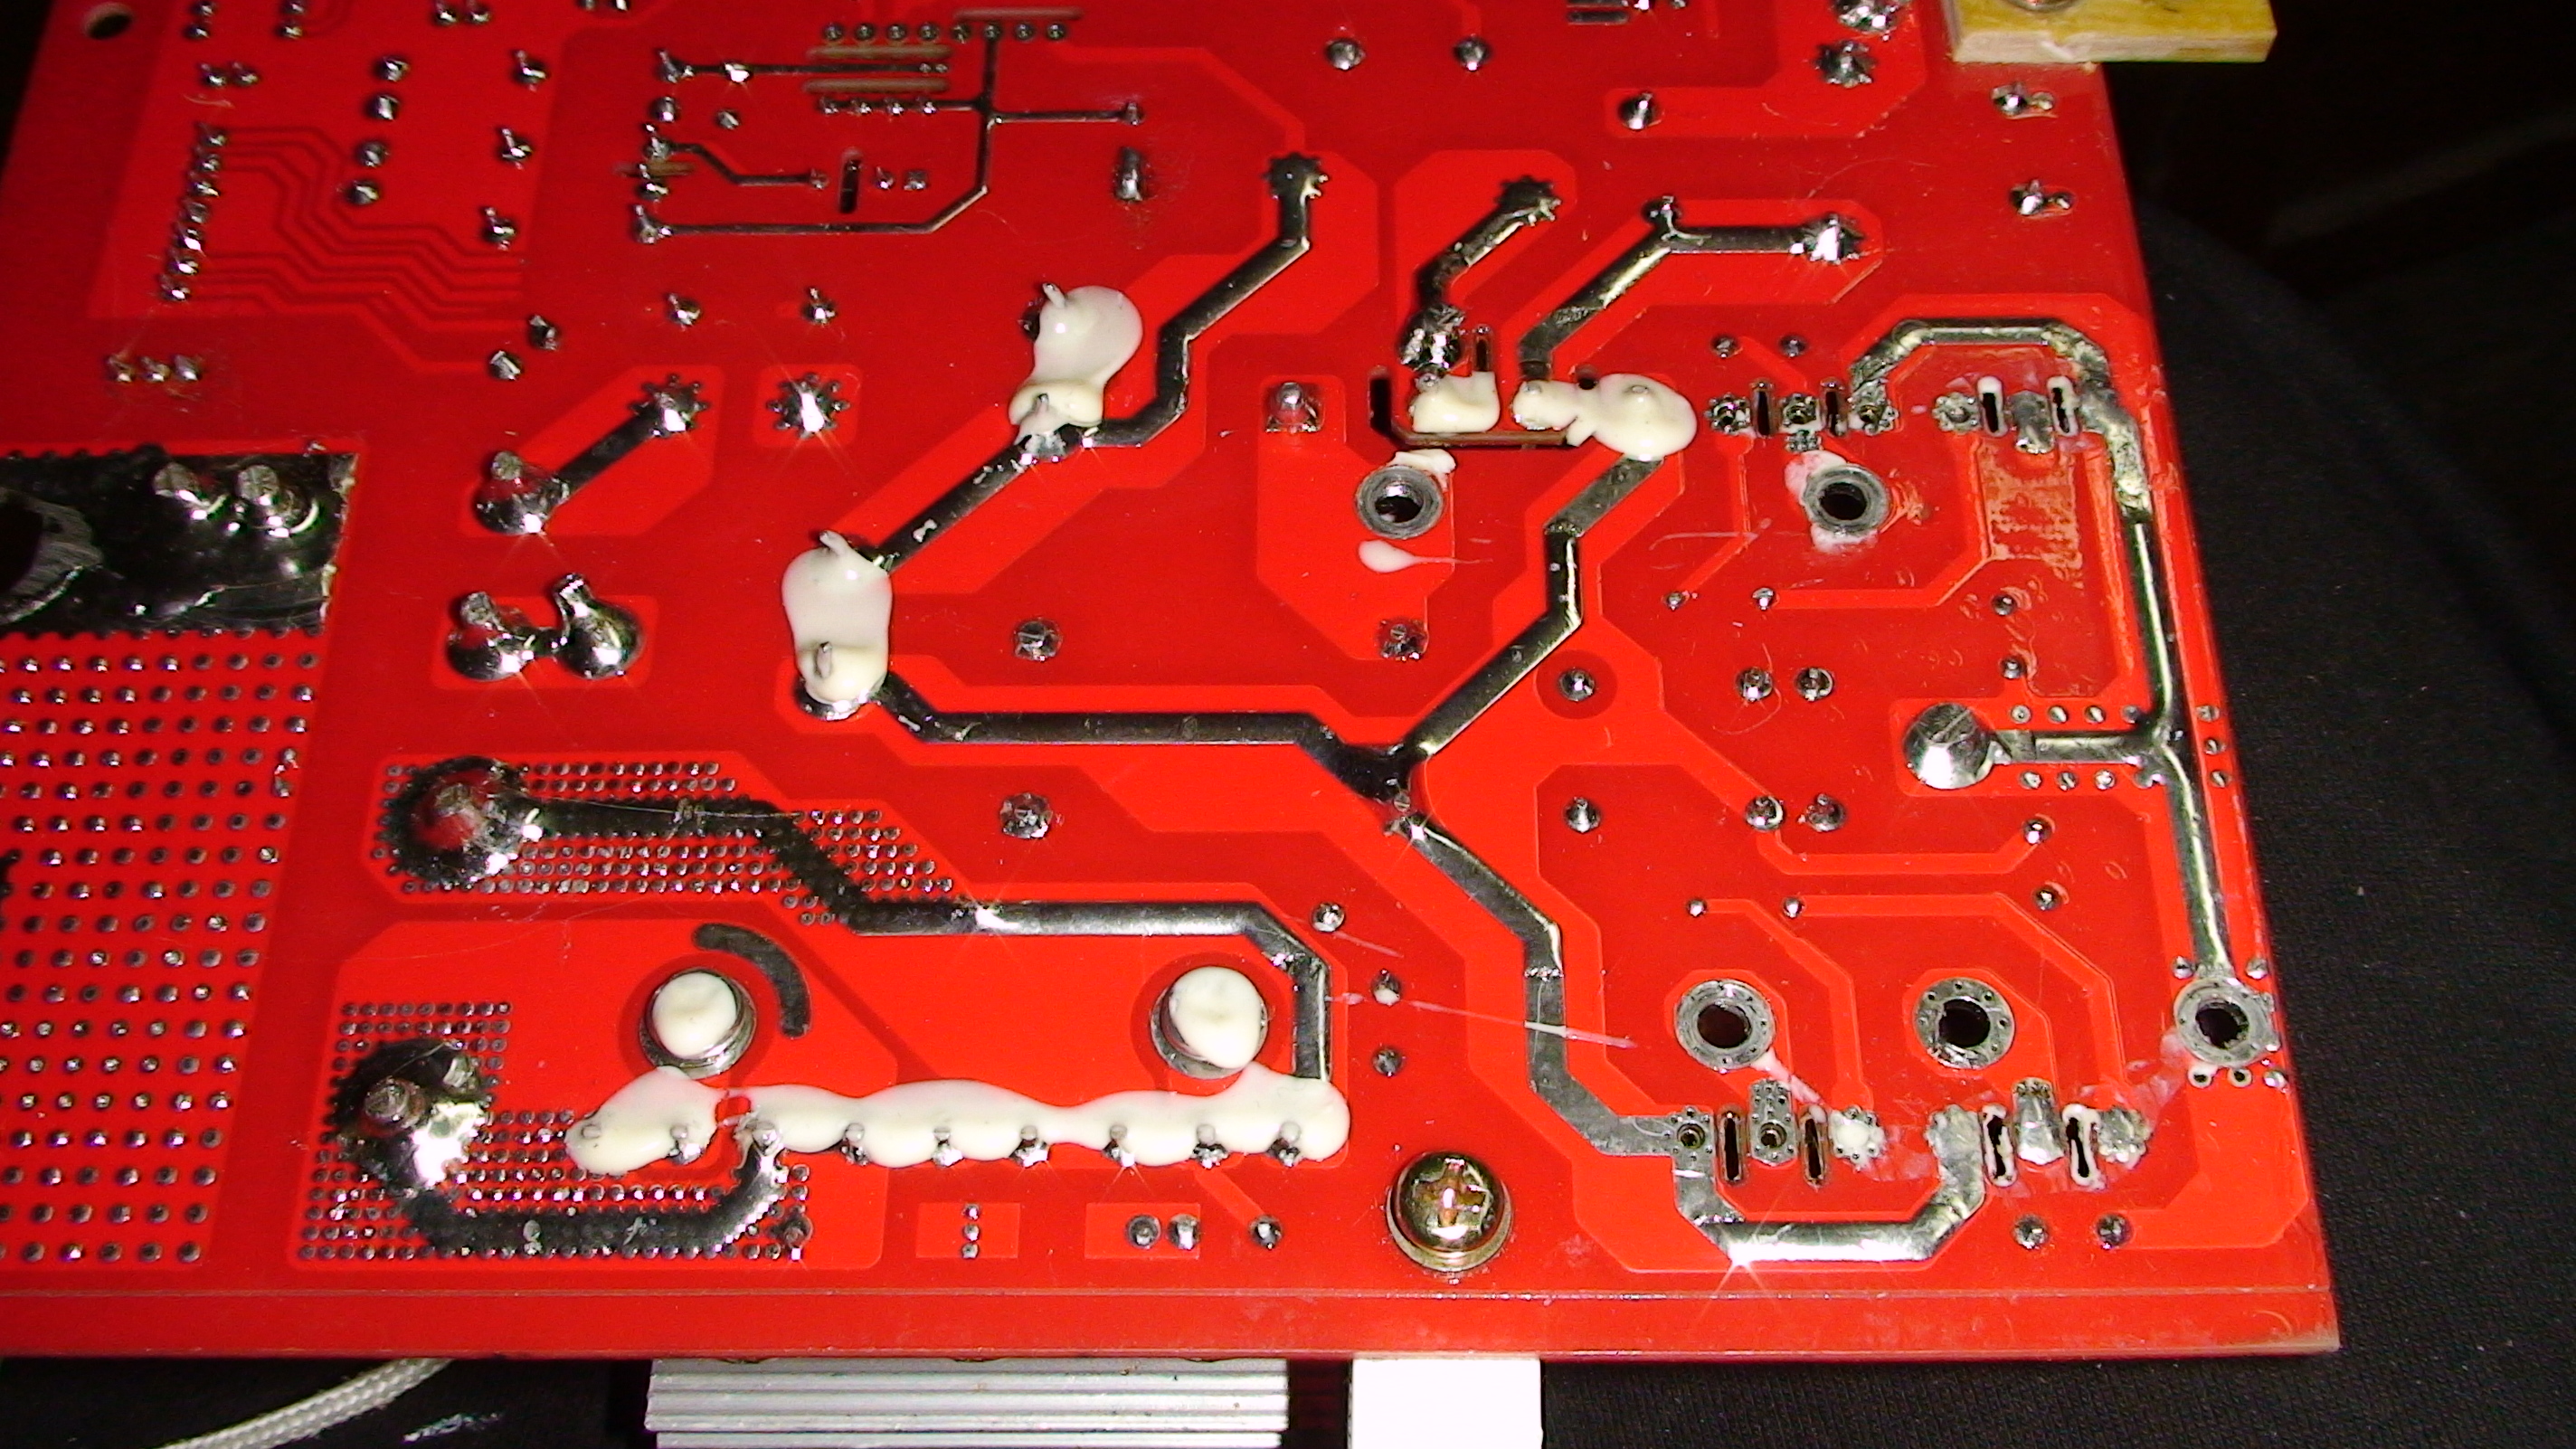
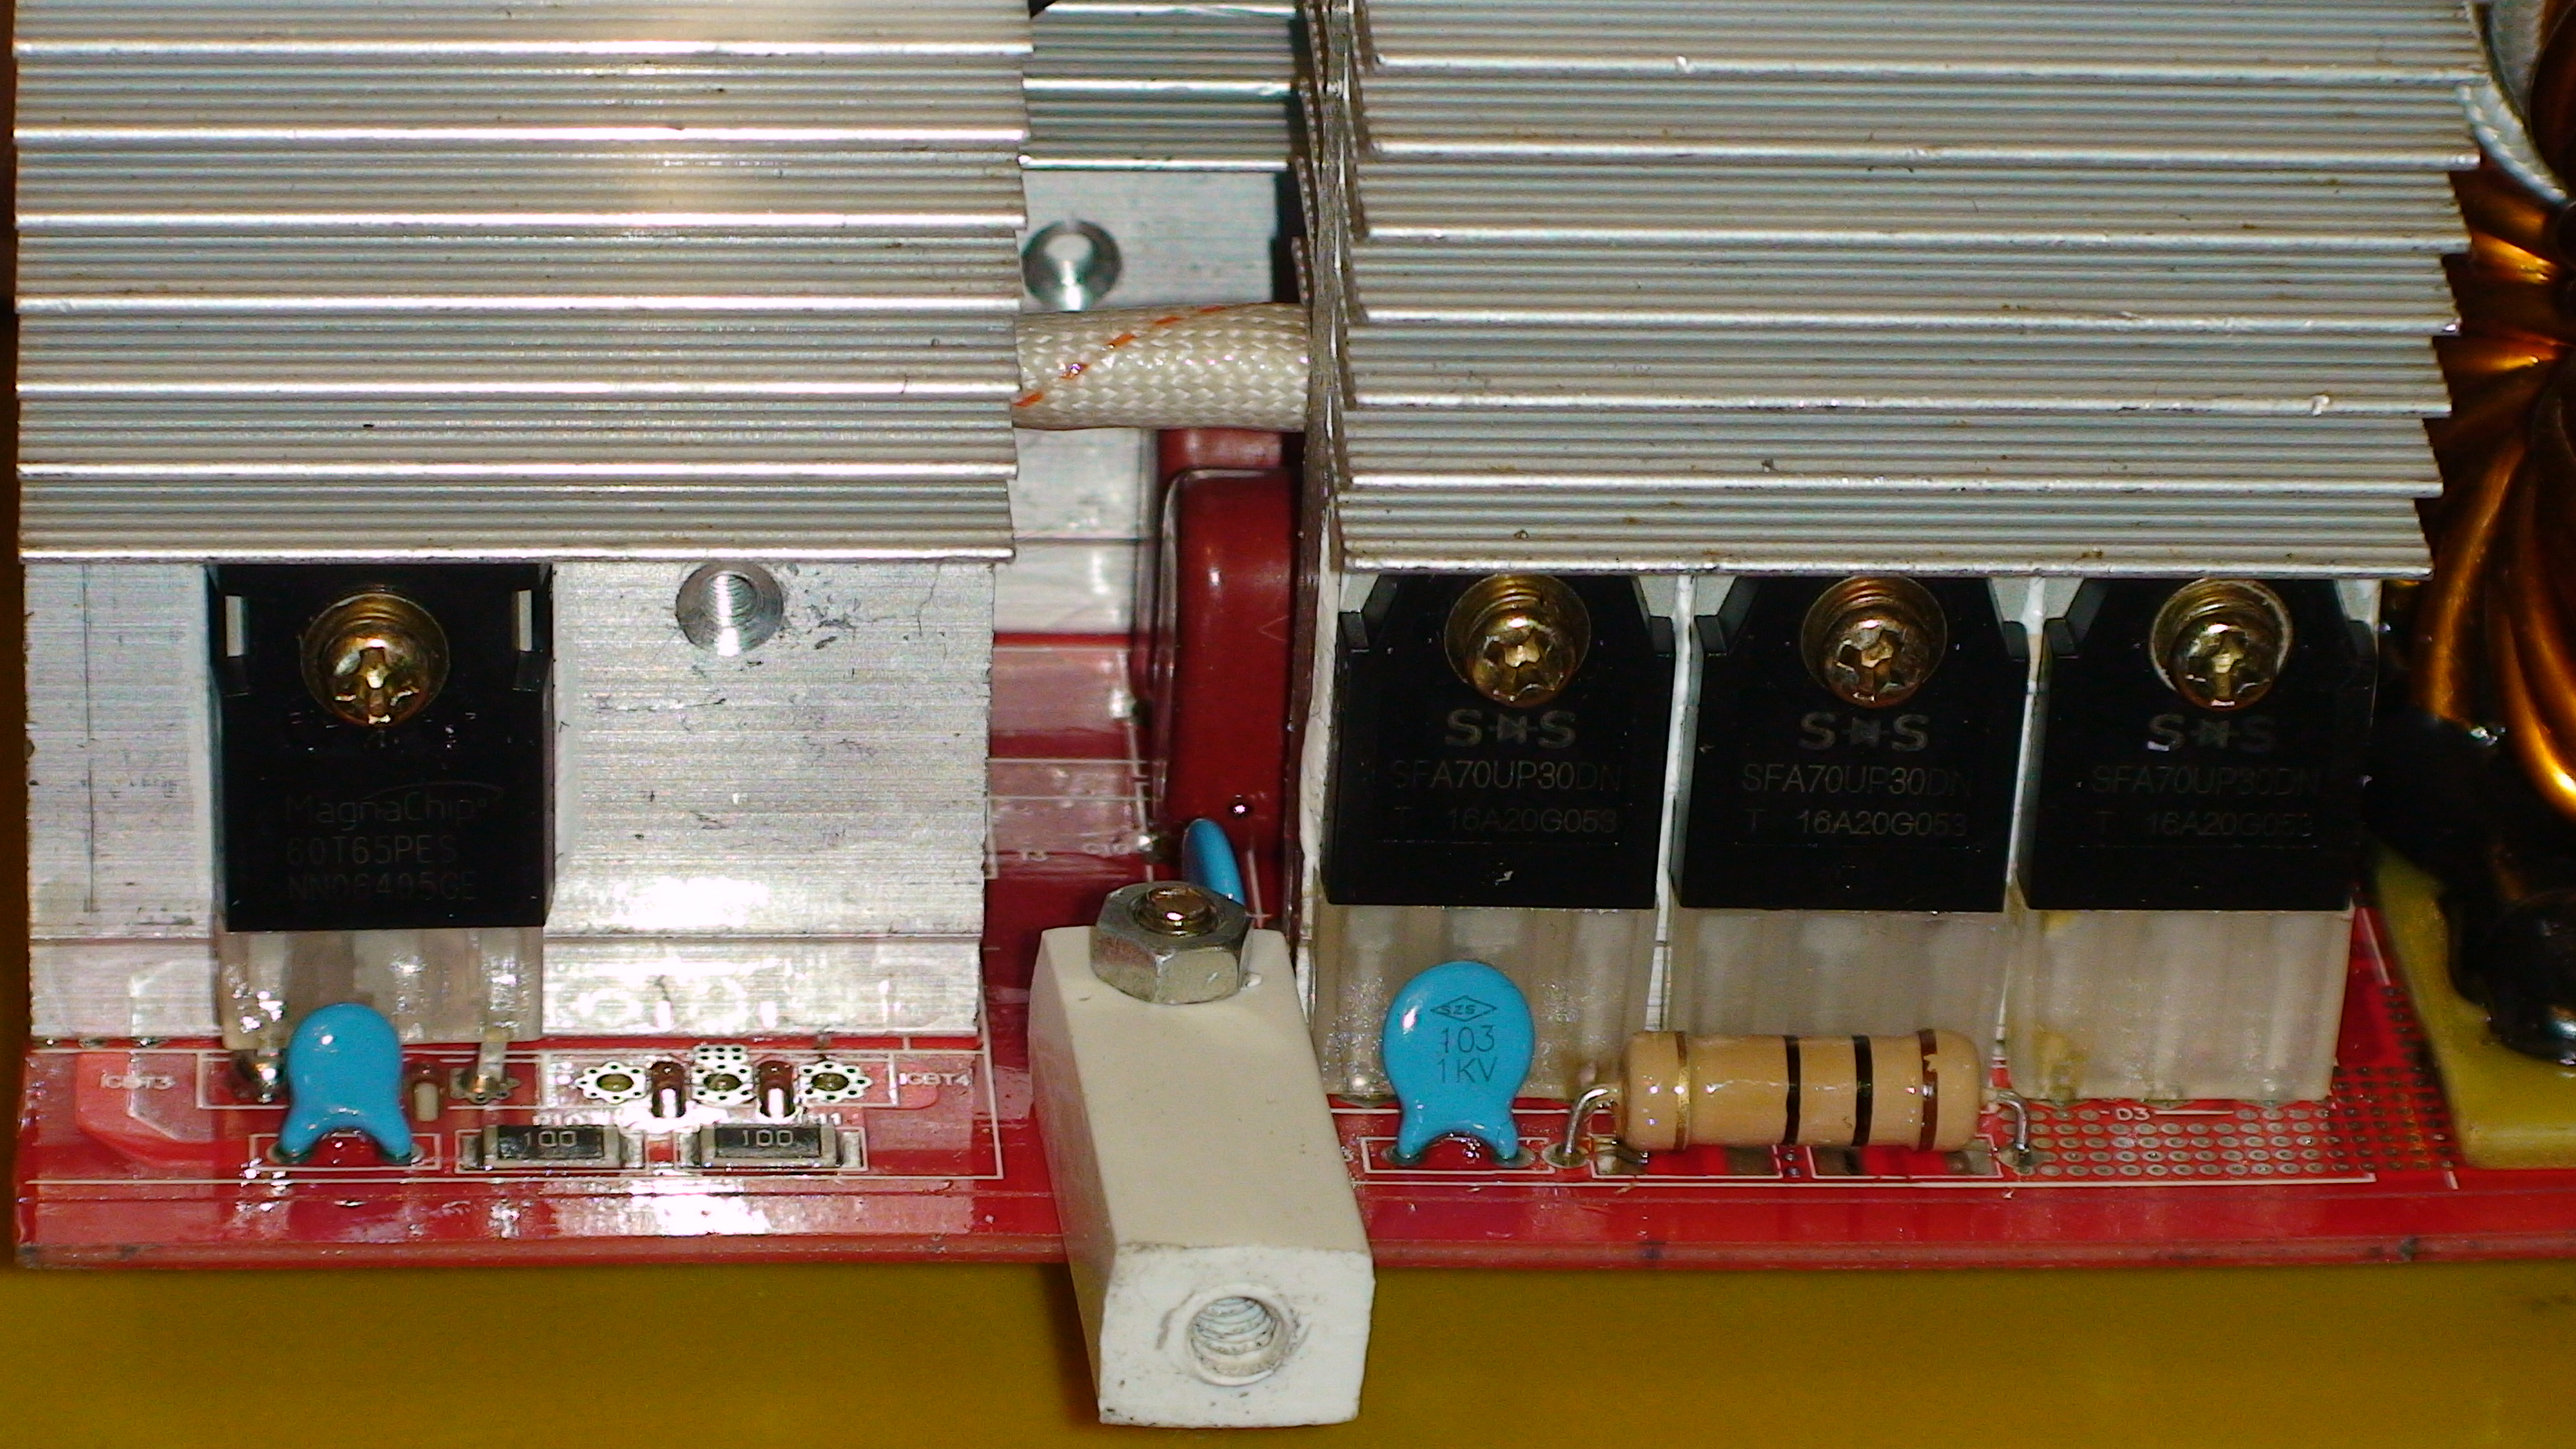
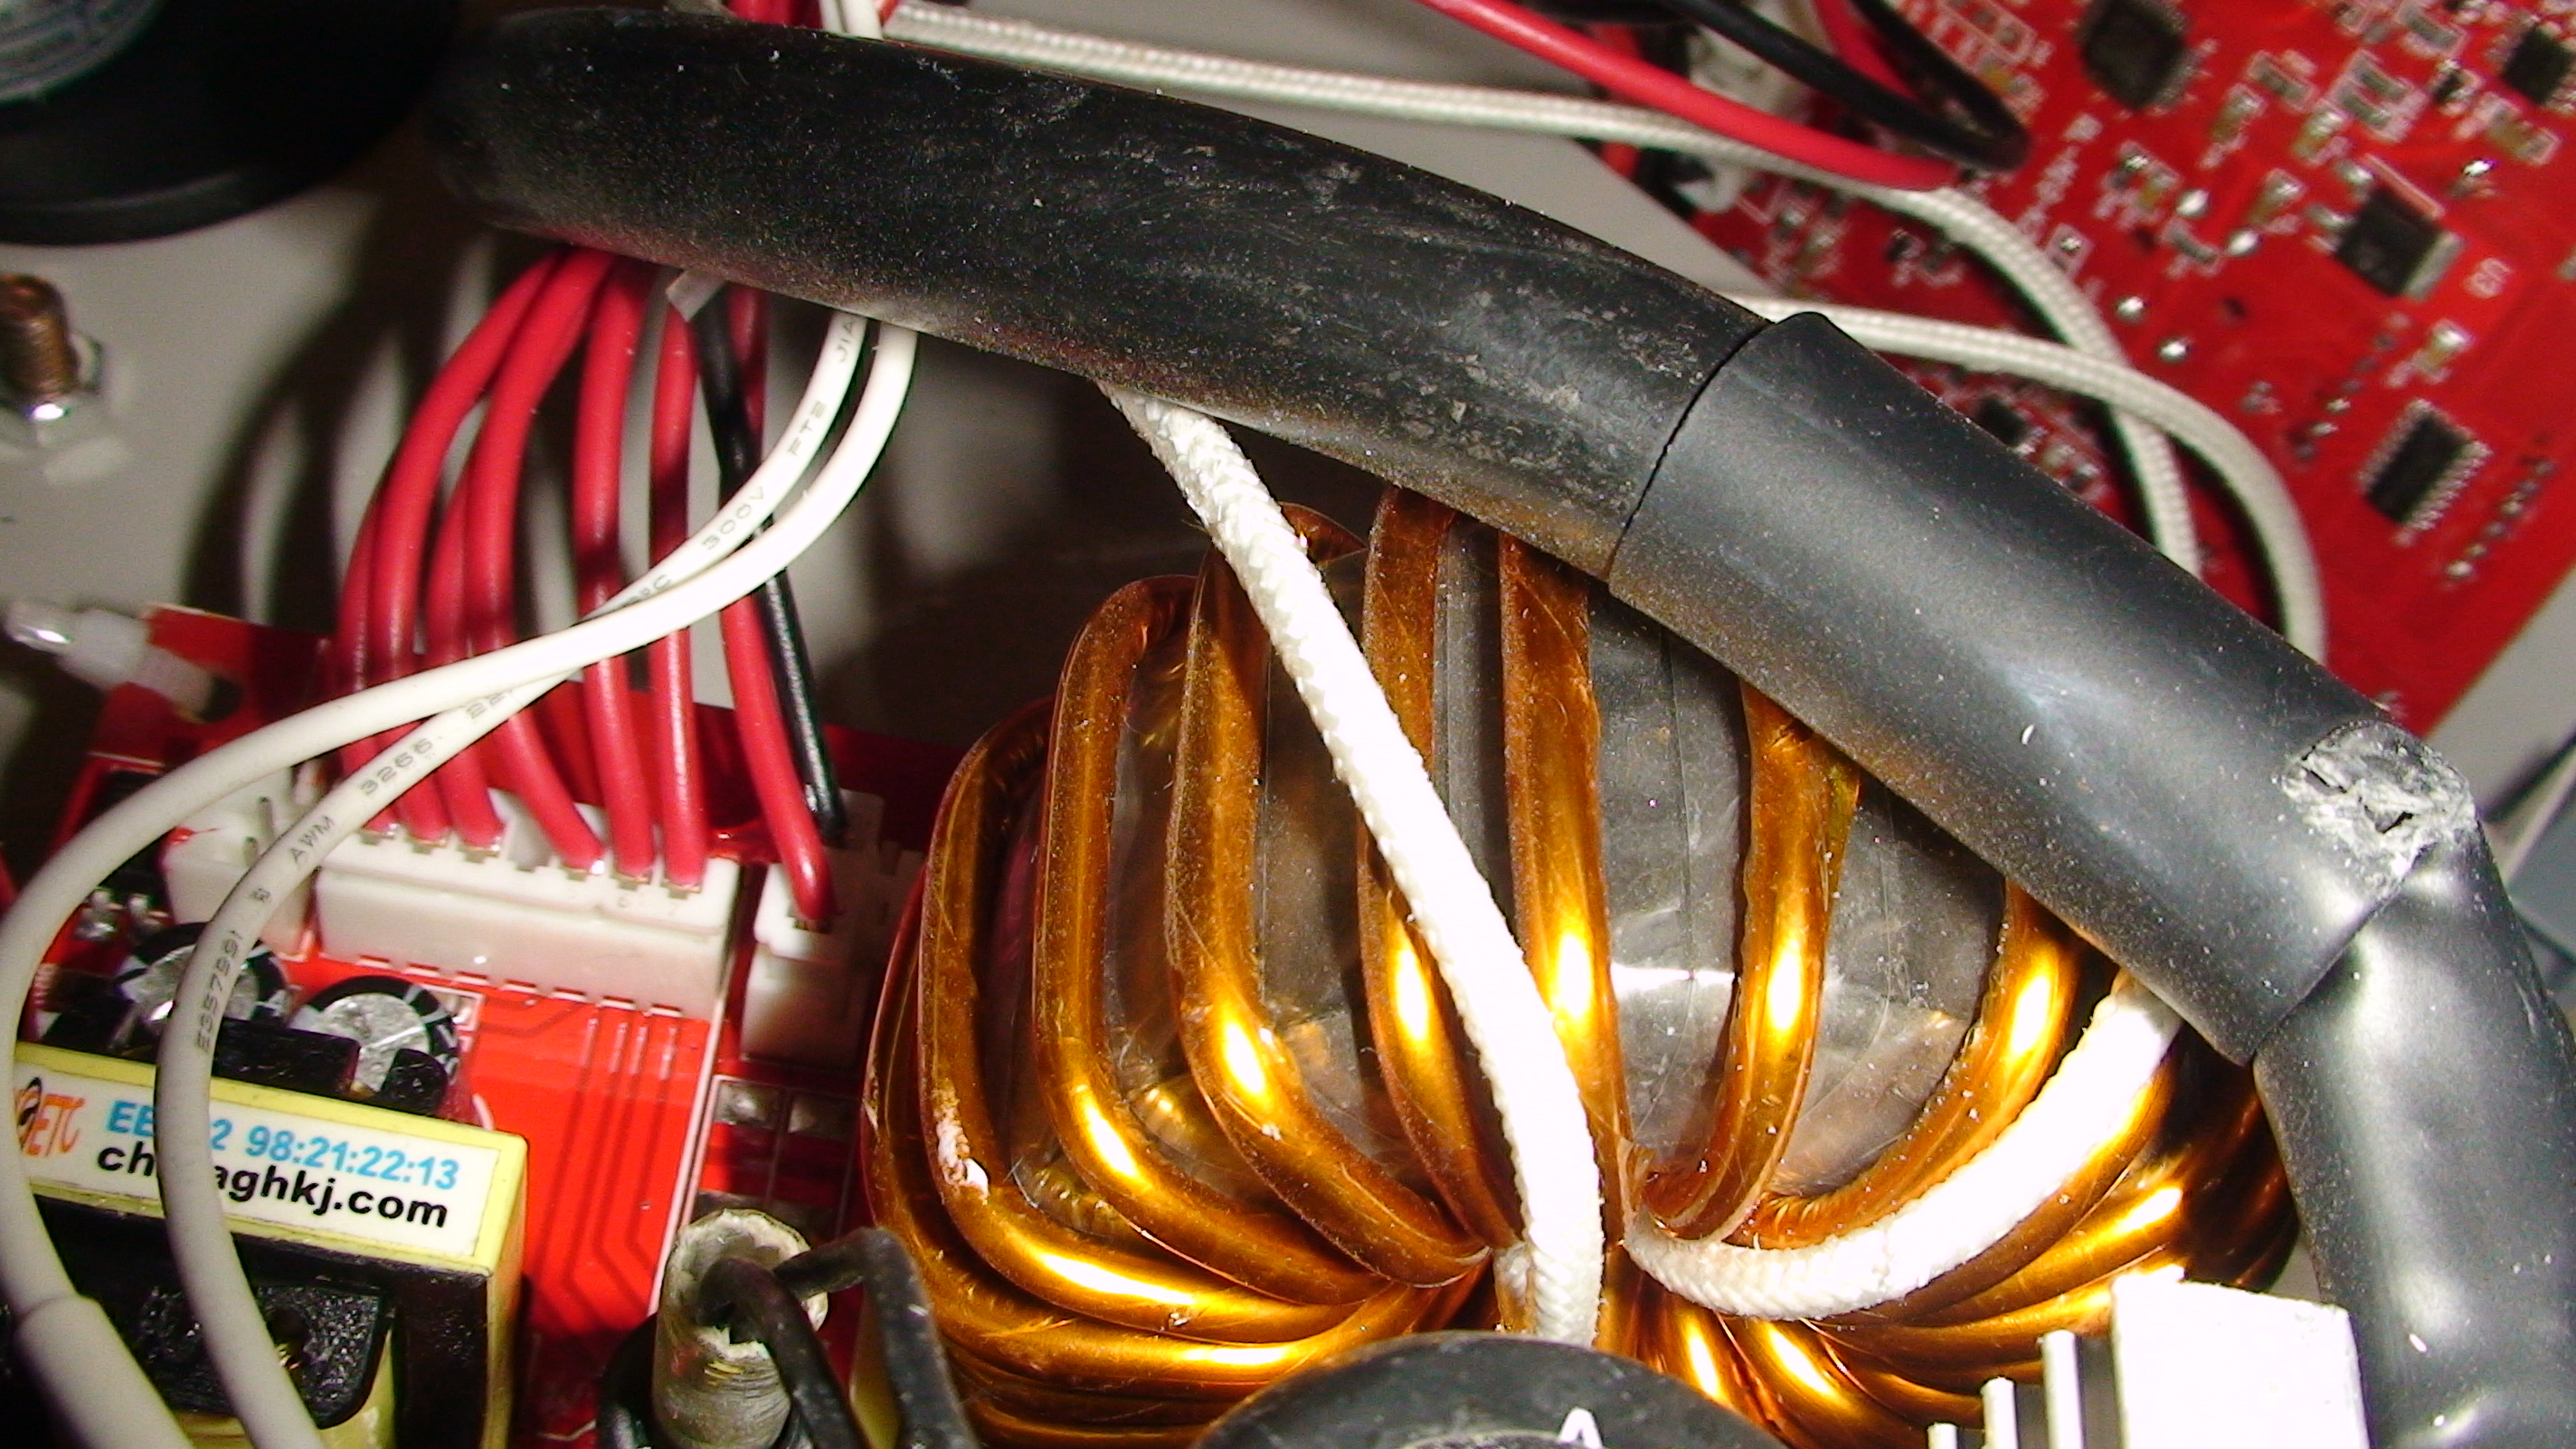
Здравствуйте,помогите пожалуйста разобраться с транзисторами IGBT в китайском полуавтомате FLUX-135.В полуавтомате установлена плата MIG-140A рассчитанная на питающее напряжение 110 и 220 вольт.Плата рассчитана на установку 4-х транзисторов IGBT.Но были установлены на китайском заводе только 2 транзистора по одному 60T65PES в плечо,и заявлен выходной ток в 135 ампер при ПВ 60% и 104 ампера при ПВ 100% . Может аппарат ли аппарат выдавать на двух транзисторах выдавать при ПВ 100 % выдавать 104 ампера.И возможно ли установить все 4 транзистора на которые рассчитана плата полуавтомата ? На на первых двух транзисторах на плате перед затвором установлены резисторы чип по 100 ом. На месте установки под вторую пару транзисторов этих резисторов нет.Если установить резисторы на 100 ом и вторую пару транзисторов в параллель,катастрофы не произойдет ? На плате отсутствуют резисторы R5 и R7,через которые подается сигнал на затворы второй пары транзисторов.Разводка на плате сделана так,что эмиттеры и коллекторы сделаны в параллель,т.е. соединены вместе,а затворы через резистор.Может возможна установка четырех транзисторов с меньшим током коллектора,например 40N60 или 30N60 ? Чтобы сварочный ток был 130-135 ампер при ПВ 60%.Кто-то что-то может подсказать ?
joha
Резидент
Регистрация: 13.08.2011
Ярославль
Сообщений: 5743
Если установить 2 пары 40Н60, то и 200А можно снять, Вопрос только в ёмкости силовых конденсаторов, в токе и количестве выходных диодов и силовом трансформаторе, возможно он (трансформатор) установлен (намотан) на заявленные 135А
tehsvar
Резидент
Регистрация: 06.02.2011
Нижний Новгород
Сообщений: 1228
Только это не 100 Ом, а 10.
Я бы не советовал Вам с такими знаниями что либо химичить.
Затворные ёмкости транзисторов неплохо затягивают нарастание и спад сигнала. А двойное увеличение не лучшим образом отразится на долговечности компонентов.
Нужно ещё смотреть и сам драйвер. Вытянет ли он их ?
Искатель_63T
Новичок
Регистрация: 05.06.2021
Саратов
Сообщений: 4
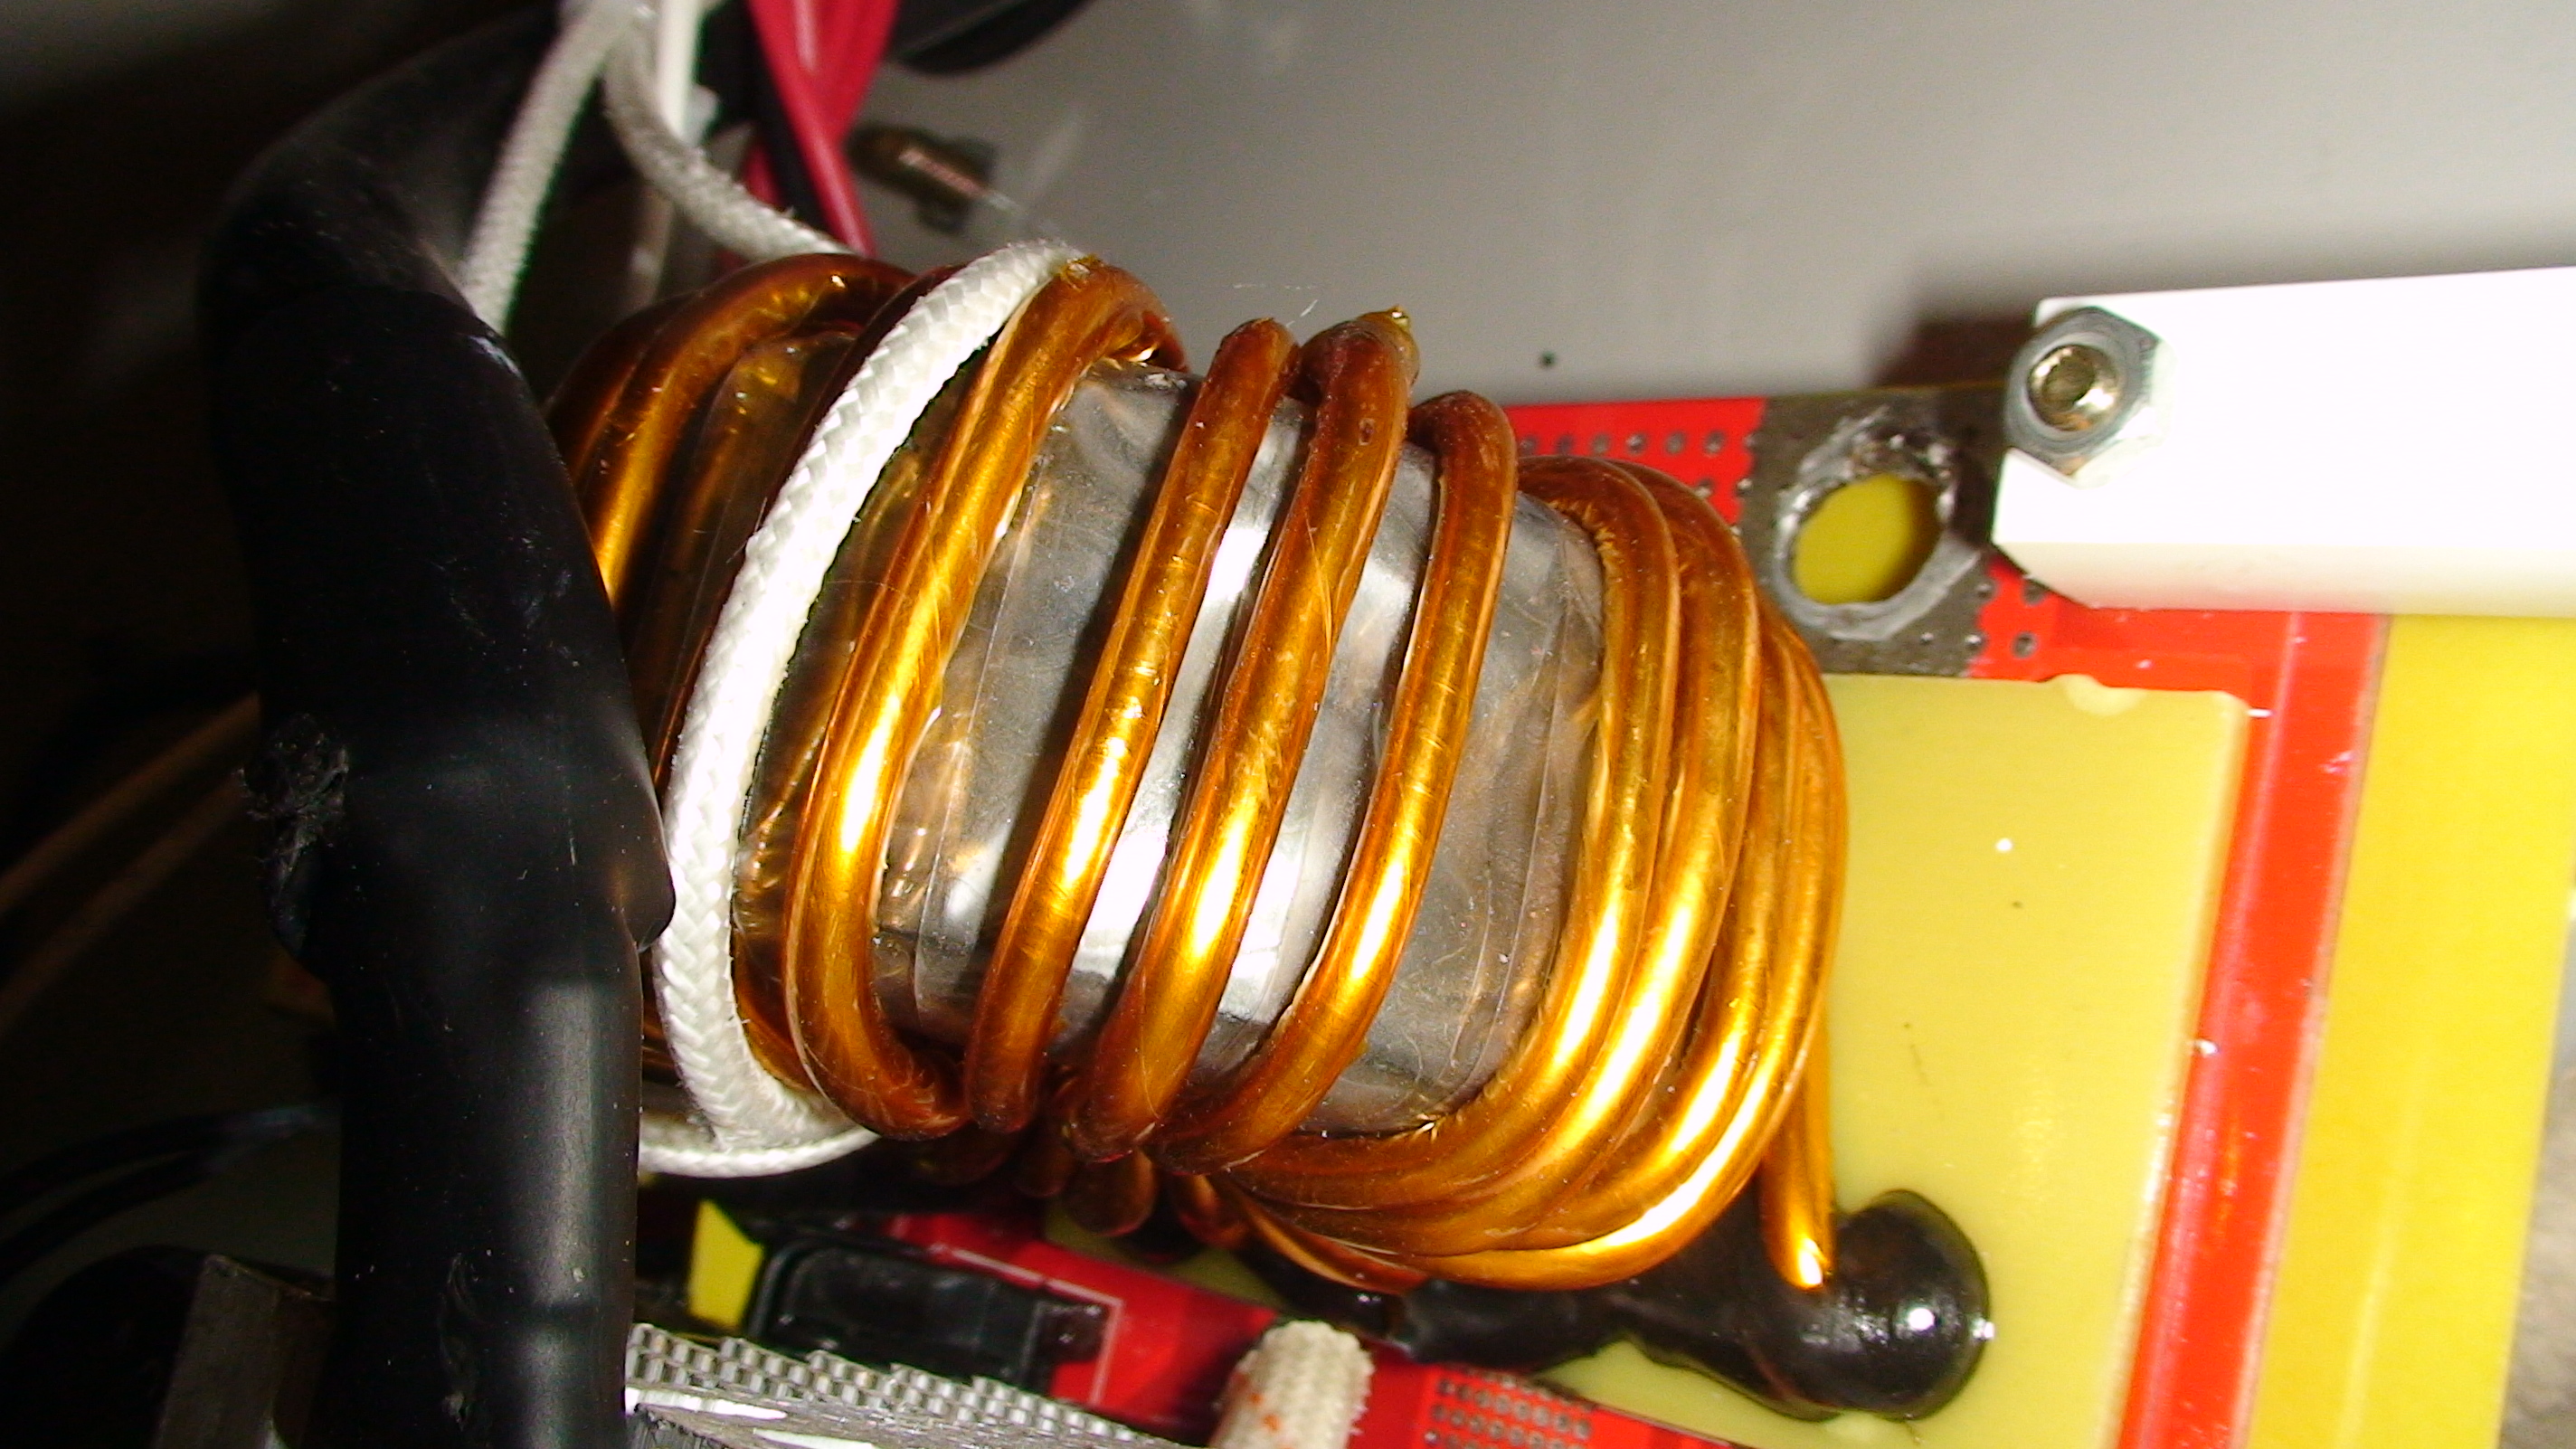
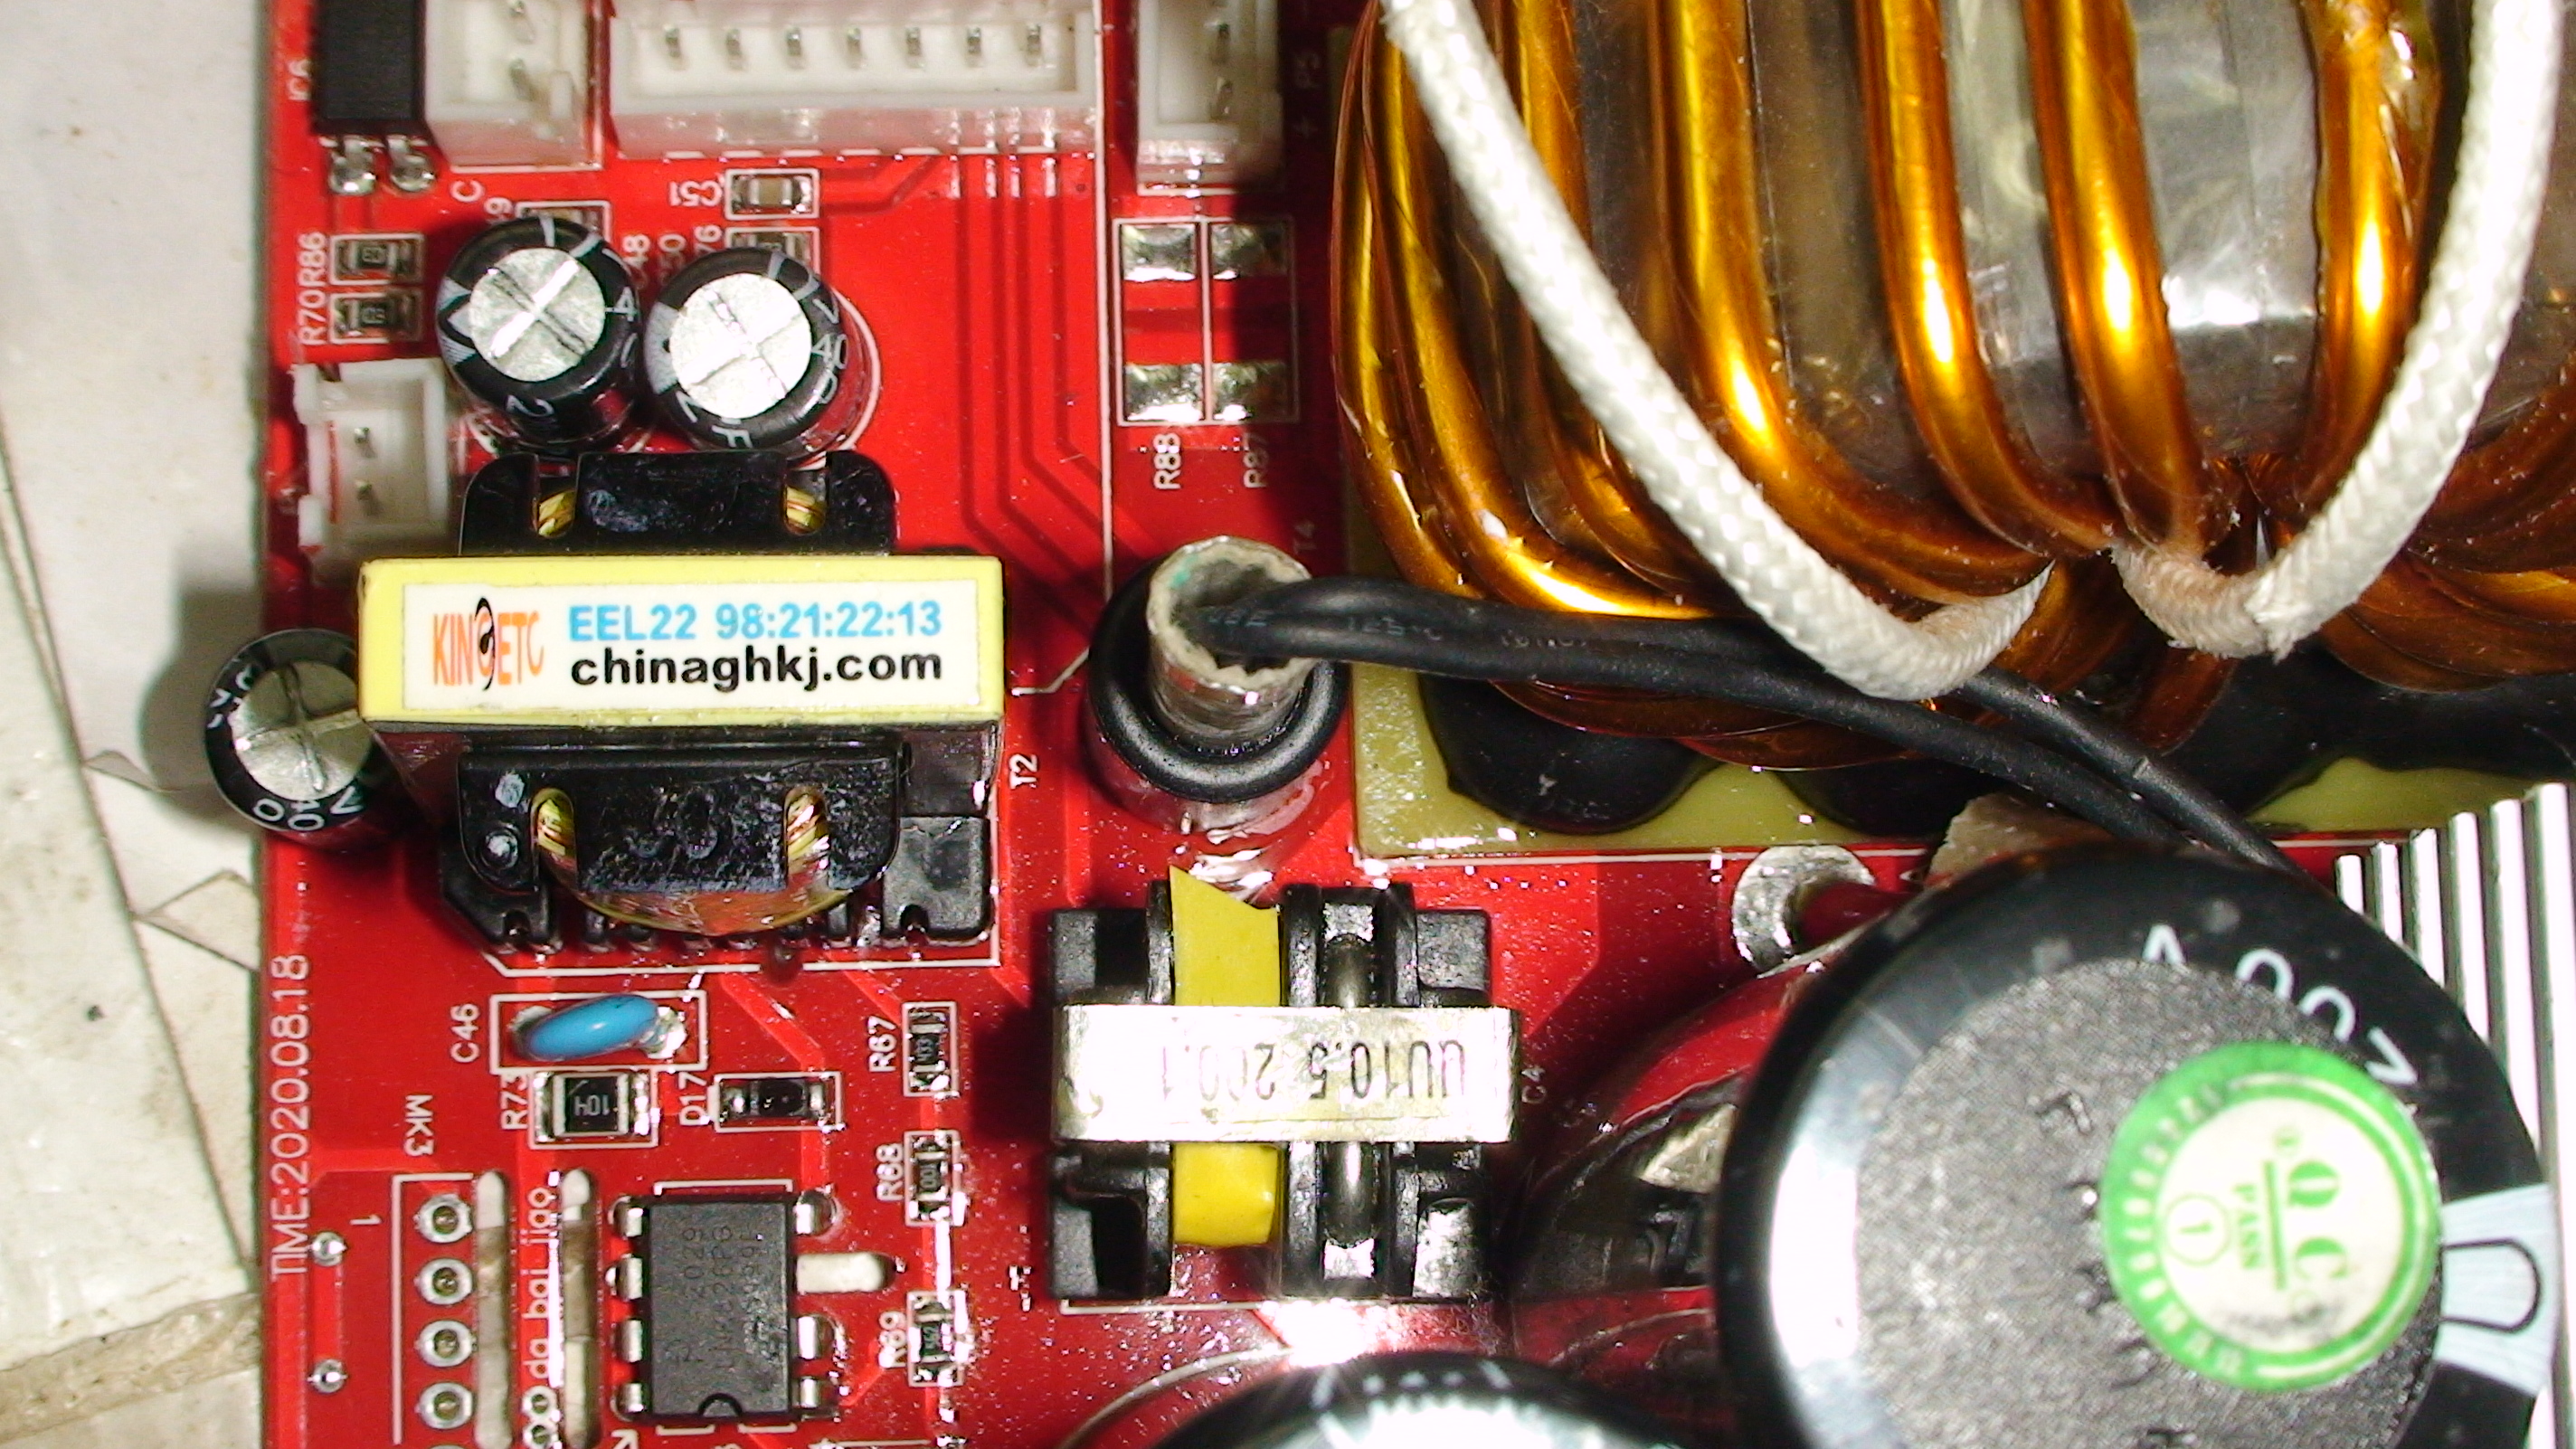
Да спасибо,это 10 ом,подзабыл маркировку.Драйвер простейший,даже нет стабилитронов в обвязке.Емкости 1500 мкф на 200 вольт.Диоды 3 на 70 ампер 300 вольт.Если потянут 135 ампер два транзистора 60T65, то лучше наверное оставить как есть.Трансформатор только похоже намотан алюминием.
Искатель_63T
Новичок
Регистрация: 05.06.2021
Саратов
Сообщений: 4
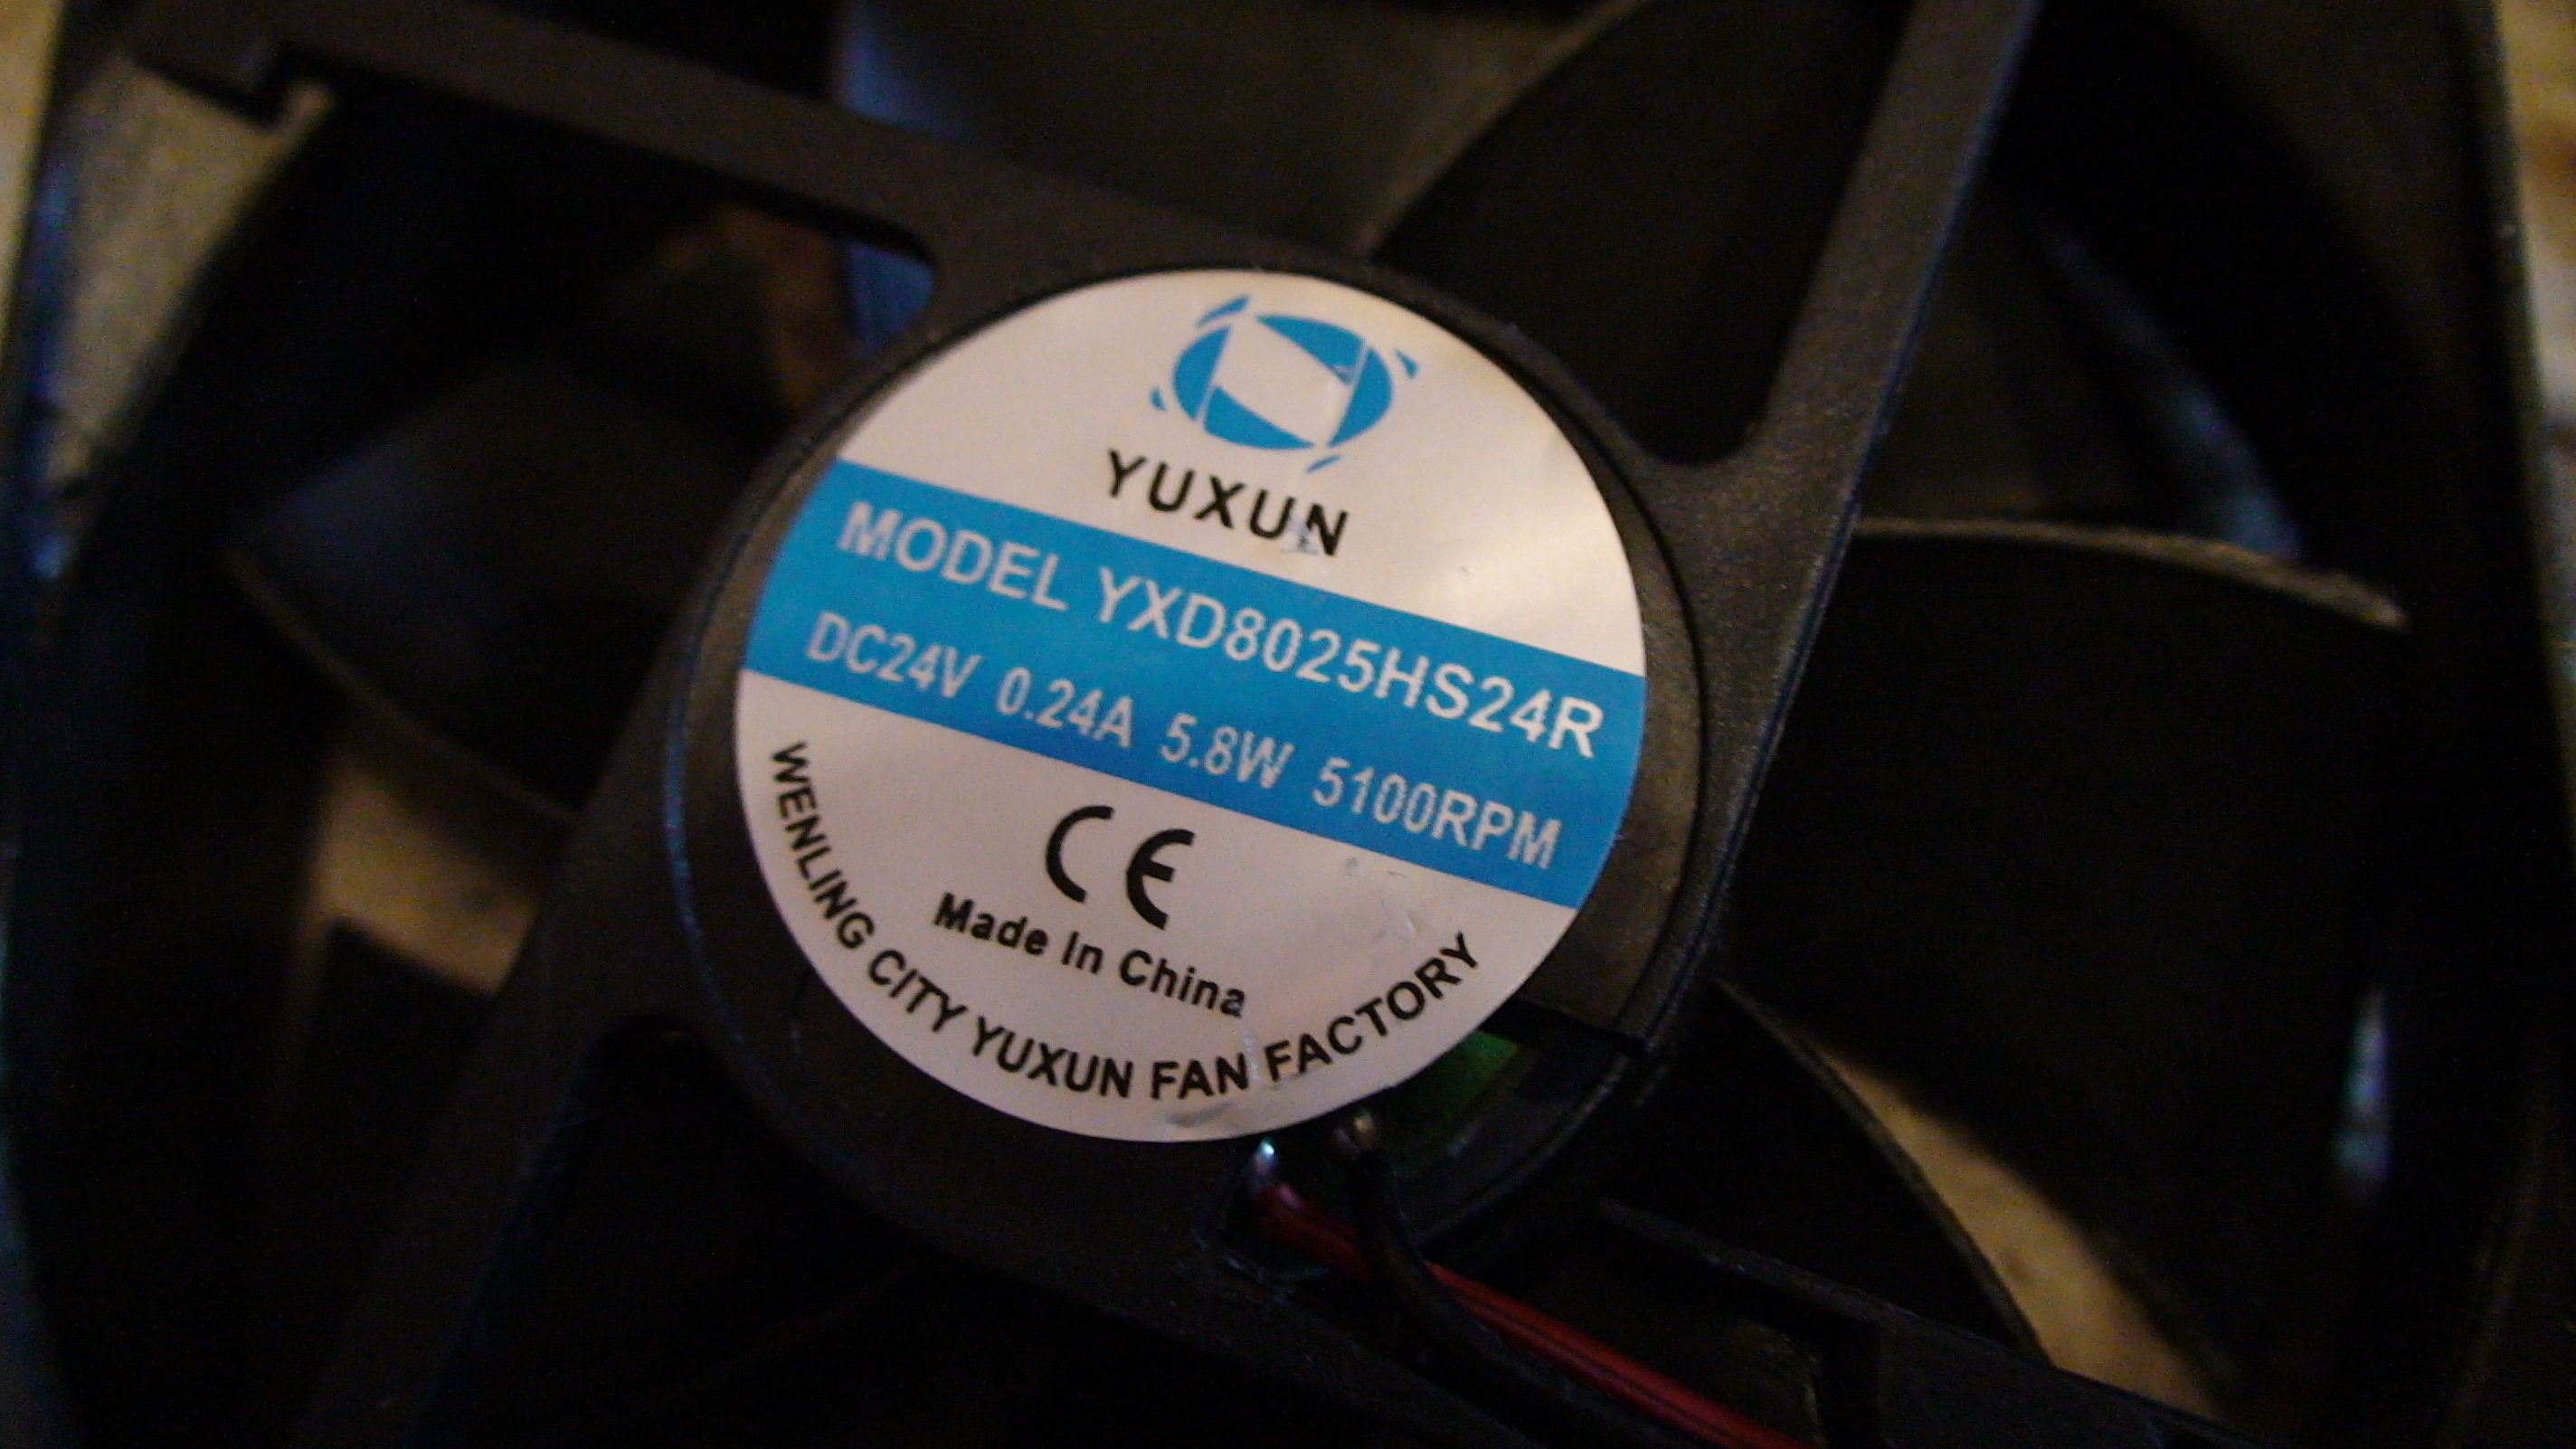
Поставил два транзистора 60T65PES вроде оригинал.Аппарат работает,но предназначен похоже только для флюсовой проволоки 0,8-1,0 мм. Электродами варить нужно только 2-2,5 мм не более,и то аккуратно.Еще сгорел вентилятор,хотя напряжение 25 вольт на него подается,наверное брак .И вентиляторов таких в продаже нет 24 вольт 0,24 а 5100 об/мин.В магазинах все слабые и низко оборотистые,в основном на 3000 об. Придется наверное заказывать с Китая.
Искатель_63T
Новичок
Регистрация: 05.06.2021
Саратов
Сообщений: 4
Напряжение без нагрузки в режиме MMA и MIG 61 вольт,в режиме TIG 19 вольт. Под нагрузкой пока не испытывали.Нужно менять вентилятор,пока поставил на 3000 оборотов и 0,08а ток,но дует слабо.Испытывать будем после замены вентилятора.