
Техническая документация:
- Паспорт. Анализатор спектра ARINST SSA-TG R3
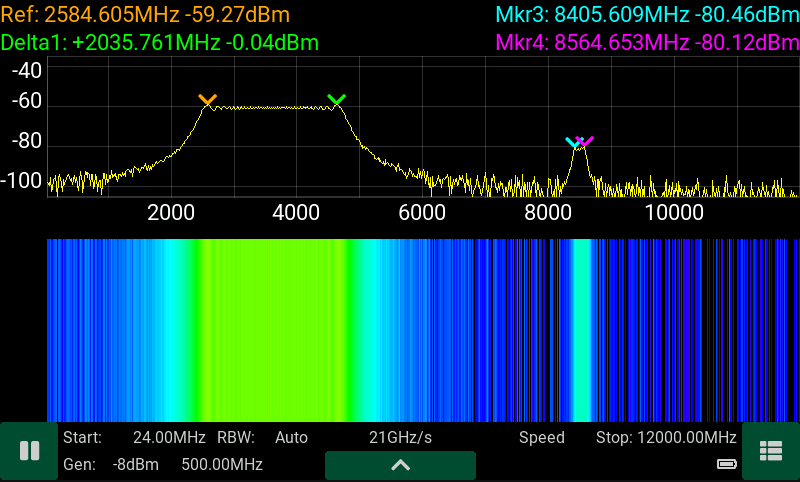
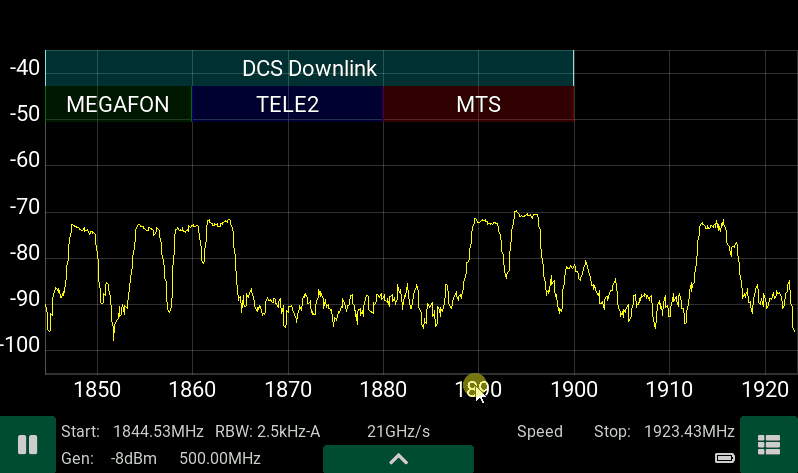
Arinst SSA-TG R3 – это портативный панорамный анализатор спектра со встроенным трекинг-генератором и демодулятором, предназначен для отображения спектральных составляющих сигналов в диапазоне частот от 24 МГц до 12 ГГц. Высокая скорость сканирования дает возможность обнаруживать импульсные сигналы цифровых стандартов связи: Wi-Fi, 2G, 3G, 4G, LTE, CDMA, DCS, GSM, GPRS, ГЛОНАСС и т.д. Встроенный следящий генератор позволяет проводить измерения АЧХ пассивных или активных устройств, например, фильтров, усилителей. Программный демодулятор ШЧМ/ЧМ/АМ сигналов предназначен для прослушивания эфира и настройки аналоговых радиопередатчиков. Установка региональных частот покрытия сотовых операторов позволяет сопоставлять отображаемый сигнал с соответствующим оператором.
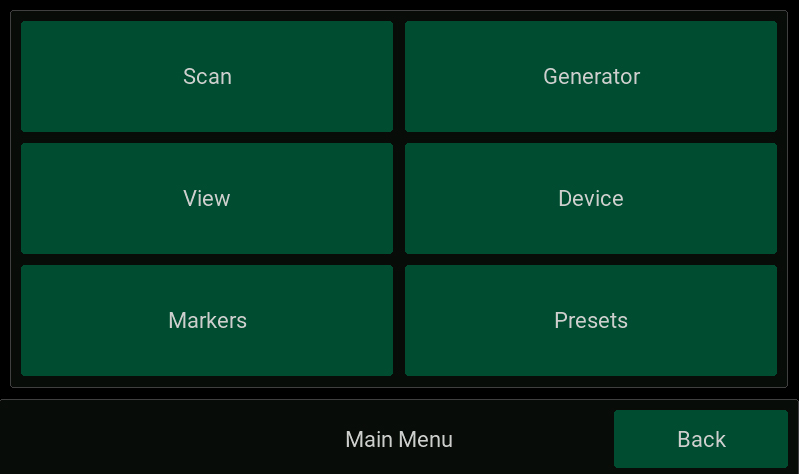
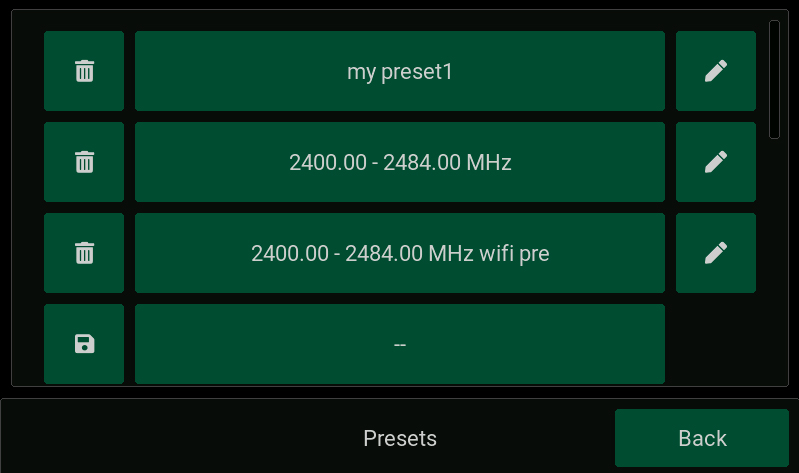
Для удобства работы встроенное ПО прибора позволяет подписывать и выделять цветом на экране частотные диапазоны. Например, подписать названия радиостанций, каналы WiFi или диапазоны частот мобильных операторов.

Для кого?
Анализатор спектра ARINST SSA-TG R3 предназначен в первую очередь для полевых работ, он имеет малые вес, размеры и отличается невысоким энергопотреблением. С его помощью сервисные центры и ремонтные бригады могут на месте провести ВЧ-анализ для проведения пуско-наладочных или ремонтных работ. Кроме этого, анализатор спектра идеально подходит для ремонтных мастерских и радиолюбителей.
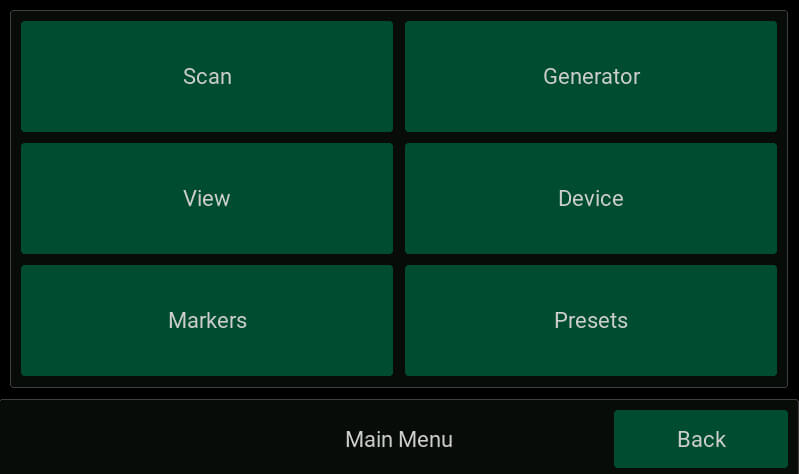
С помощью прибора можно выполнить следующие работы:
- навести внешнюю антенну на базовую станцию
- провести экспресс-анализ радиочастотной обстановки
- проверить правильность работы репитера сотовой связи
- провести ремонт и настройку репитера, генератора, фильтра
- настроить радиопередатчик с аналоговой модуляцией
Как работает?
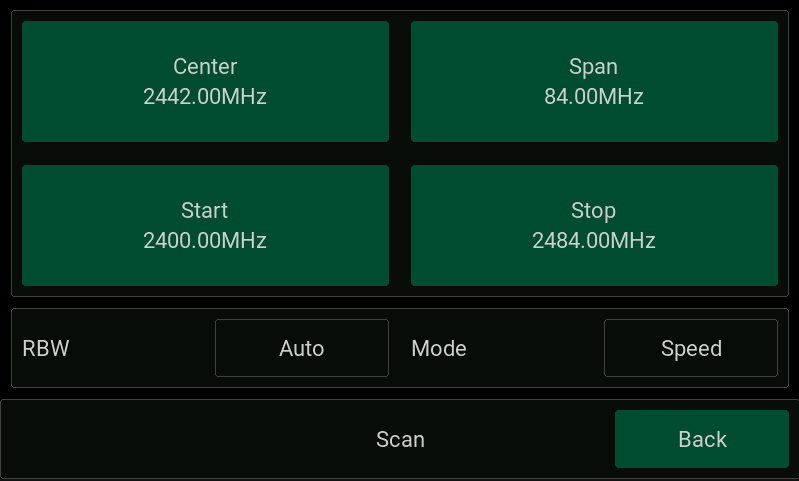
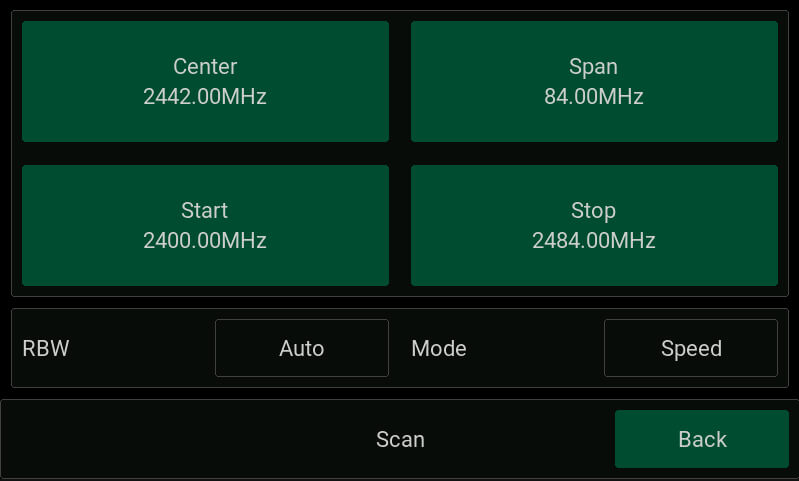
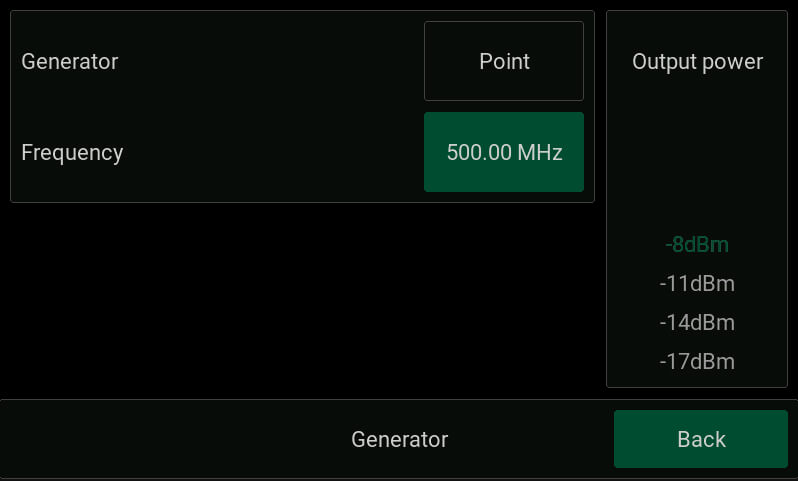
Прибор построен на основе супергетеродинного переноса спектра на нулевую промежуточную частоту, содержит высокопроизводительный микропроцессор, осуществляющий цифровую обработку сигналов. С его помощью удалось достичь высокой скорости сканирования до 20 ГГц/с и разрешения по частоте до 2,5 кГц, а так же реализовать программную демодуляцию аналоговых сигналов. Для расширения динамического диапазона входных сигналов в анализаторе установлены малошумящий усилитель и аттенюатор с фиксированным значением. Встроенный трекинг (следящий) генератор с регулировкой выходной мощности позволяет производить измерения кабелей, фильтров и т.д.
Преимущества анализатора спектра ARINST SSA-TG R3:
- наличие цветного сенсорного IPS дисплея с диагональю 4 дюйма
- широкий диапазон частот: от 24 МГц до 12 ГГЦ
- высокая скорость сканирования: до 20 ГГц/с
- встроенный трекинг-генератор (следящий генератор)
- программный демодулятор ШЧМ/ЧМ/АМ
- встроенный динамик
- разъем аудио 3,5мм для подключения наушников
- полный динамический диапазон с учетом МШУ и аттенюатора 125 дБ
- отображение региональных распределений частот
- настраиваемые темы отображения
- зарядка от mini-USB или от внешнего блока питания с напряжением 7- 24 В
- малый вес и размеры: вес 400 г, размеры 145х81х27 мм
- автономная работа до 4 часов
Ограничения
Анализатор спектра Arinst SSA-TG R3 не является измерительным прибором, так как не имеет утвержденного типа средства измерений. Утверждение типа средства измерений негативно повлияло бы на доступность и цену прибора. Поэтому анализатор спектра с официальной точки зрения является индикатором поля. Однако, несмотря на это, прибор полностью соответствует всем заявленным техническим характеристикам. Анализатор не является полноценным классическим анализатором спектра, поскольку не использует классическую схему преобразования частот для 100% подавления зеркального канала. Мы используем математическое подавление зеркального канала, что в отдельных редких случаях может приводить к появлению в составе отображаемых сигналов «фантомных» сигналов.
| ТЕХНИЧЕСКИЕ ХАРАКТЕРИСТИКИ ARINST SSA-TG R3: | |
|---|---|
| Частотный диапазон | |
| Отображаемый диапазон частот1 | 24 МГц — 12 ГГц |
| Измеряемый диапазон частот | 24 МГц — 9 ГГц |
| Максимальная полоса обзора | ~12 ГГц |
| Опорный генератор TXCO GPS | 26 МГц |
| Разрешение по частоте | 25, 10, 5, 2.5 кГц |
| Полка шума2 | |
| в полосе 24 МГц — 6.2 ГГц | -110 дБм |
| в полосе 6.2 ГГц — 9 ГГц | -100…-70 дБм |
| в полосе 9 ГГц – 12 ГГц | -70 дБм |
| Параметры сканирования3 | |
| Максимальная скорость сканирования | 20 ГГц/с |
| Минимальное время обзора полной полосы частот 12 ГГц | 0.6 с |
| РЧ вход | |
| Усиление при включенном аттенюаторе | -15 дБ |
| Усиление при включенном малошумящем усилителе | +15 дБ |
| Волновое сопротивление | 50 Ом |
| КСВ в рабочем диапазоне частот | < 2.0 |
| Максимальная входная мощность при выключенном аттенюаторе и МШУ | 0 дБм |
| Максимальная входная мощность при включенном аттенюаторе | +15 дБм |
| Максимальная входная мощность при включенном МШУ | -15 дБм |
| Максимальное постоянное напряжение на входе | 25 В |
| Трекинг генератор | |
| Режимы измерений | фиксированная, S21 |
| Нормированный уровень выходной мощности в полосе 24-6200 МГц | -8 дБм : — 29 дБм |
| Нормированный уровень выходной мощности в полосе 6200-9000 МГц | -14 дБм |
| Глубина регулировки мощности в полосе 24-6200 МГц | 21 дБ |
| Шаг регулировки мощности в полосе 24-6200 МГц | 3 дБ |
| Демодулятор | |
| Типы демодуляции | ШЧМ, ЧМ, АМ |
| Функции | АРУ, S-метр, пороговый шумоподавитель |
| Полосы для ШЧМ | 400, 300, 200, 100 кГц |
| Полосы для ЧМ, АМ | 20, 10, 8, 6, 4 кГц |
| Аудио выход | Динамик 2 Вт, наушники |
| Отображение | |
| Тип экрана | сенсорный резистивный, IPS |
| Разрешение экрана | 800×480 |
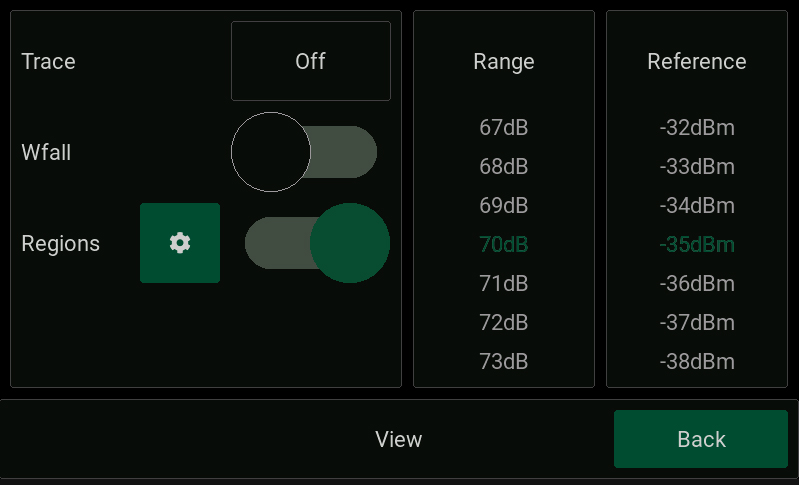
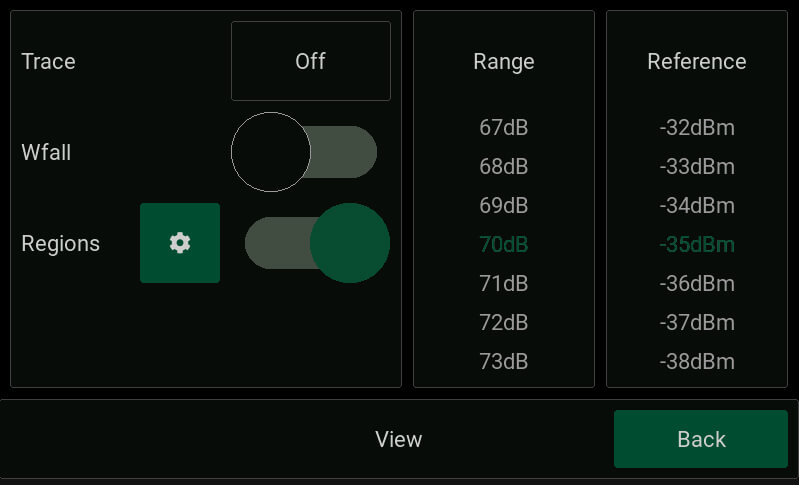
| Графики | спектр, водопад, S21 |
| Питание | |
| Ёмкость встроенного аккумулятора | 5000 мАч |
| Время непрерывной работы от аккумулятора | ~ 4 ч |
| Время заряда аккумулятора4 | ~ 3.5 ч |
| Интерфейс подключения к ПК | USB |
| Внешний блок питания | 7-24 В, 2 А |
| Рабочий диапазон температур | 0 … +40°С |
| Габаритные размеры (Д×Ш×В) | 145x81x27 мм |
| Масса | 0,4 кг |
- В диапазоне отображения не гарантируются точностные параметры сигналов.
- Уровень шумовой полки измеряется при включенном МШУ и спектральном разрешении 2.5 кГц.
- Измерения проводятся при режиме работы «Скорость» и спектральном разрешении 25 кГц.
-
Источник должен обеспечивать мощность не менее 7 Вт.


07-07-2022
|
Габариты (длина , ширина , высота ), мм |
250 x 250 x 100 |
Антенны- характеристики :
|
Рабочий диапазон частот, МГц |
1700-2700 |
|
Усиление антенны, дБ |
12-15 |
|
КСВ в рабочем диапазоне частот, не более |
1.7 |
|
Входное сопротивление, Ом |
50 |
|
Максимальная подводимая мощность, Вт |
10 |
|
Допустимая ветровая нагрузка, м/с |
30 |
|
Диапазон рабочих температур, оС |
-40 … +50 |
|
Максимально допустимая влажность воздуха, % |
100 |
|
Кроссполяризационная развязка не менее, дБ |
30 |
|
Стандарт связи |
4G(LTE2600), YOTA |
|
Тип исполнения |
направленная |
Графики КСВ, диаграммы направленности:
Комплектация:
Хомут для крепления к трубе
04-07-2018
Arinst SSA-TG R3 – это портативный панорамный анализатор спектра со встроенным трекинг-генератором и демодулятором, предназначен для отображения спектральных составляющих сигналов в диапазоне частот от 24 МГц до 12 ГГц. Высокая скорость сканирования дает возможность обнаруживать импульсные сигналы цифровых стандартов связи: Wi-Fi, 2G, 3G, 4G, LTE, CDMA, DCS, GSM, GPRS, ГЛОНАСС и т.д. Встроенный следящий генератор позволяет проводить измерения АЧХ пассивных или активных устройств, например, фильтров, усилителей. Программный демодулятор ШЧМ/ЧМ/АМ сигналов предназначен для прослушивания эфира и настройки аналоговых радиопередатчиков. Установка региональных частот покрытия сотовых операторов позволяет сопоставлять отображаемый сигнал с соответствующим оператором.
Для удобства работы встроенное ПО прибора позволяет подписывать и выделять цветом на экране частотные диапазоны. Например, подписать названия радиостанций, каналы WiFi или диапазоны частот мобильных операторов.
Для кого?
Анализатор спектра ARINST SSA-TG R3 предназначен в первую очередь для полевых работ, он имеет малые вес, размеры и отличается невысоким энергопотреблением. С его помощью сервисные центры и ремонтные бригады могут на месте провести ВЧ-анализ для проведения пуско-наладочных или ремонтных работ. Кроме этого, анализатор спектра идеально подходит для ремонтных мастерских и радиолюбителей.
С помощью прибора можно выполнить следующие работы:
- навести внешнюю антенну на базовую станцию
- провести экспресс-анализ радиочастотной обстановки
- проверить правильность работы репитера сотовой связи
- провести ремонт и настройку репитера, генератора, фильтра
- настроить радиопередатчик с аналоговой модуляцией
Как работает?
Прибор построен на основе супергетеродинного переноса спектра на нулевую промежуточную частоту, содержит высокопроизводительный микропроцессор, осуществляющий цифровую обработку сигналов. С его помощью удалось достичь высокой скорости сканирования до 20 ГГц/с и разрешения по частоте до 2,5 кГц, а так же реализовать программную демодуляцию аналоговых сигналов. Для расширения динамического диапазона входных сигналов в анализаторе установлены малошумящий усилитель и аттенюатор с фиксированным значением. Встроенный трекинг (следящий) генератор с регулировкой выходной мощности позволяет производить измерения кабелей, фильтров и т.д.
Преимущества анализатора спектра ARINST SSA-TG R3:
- наличие цветного сенсорного IPS дисплея с диагональю 4 дюйма
- широкий диапазон частот: от 24 МГц до 12 ГГЦ
- высокая скорость сканирования: до 20 ГГц/с
- встроенный трекинг-генератор (следящий генератор)
- программный демодулятор ШЧМ/ЧМ/АМ
- встроенный динамик
- разъем аудио 3,5мм для подключения наушников
- полный динамический диапазон с учетом МШУ и аттенюатора 125 дБ
- отображение региональных распределений частот
- настраиваемые темы отображения
- зарядка от mini-USB или от внешнего блока питания с напряжением 7- 24 В
- малый вес и размеры: вес 400 г, размеры 145х81х27 мм
- автономная работа до 4 часов
Ограничения
Анализатор спектра Arinst SSA-TG R3 не является измерительным прибором, так как не имеет утвержденного типа средства измерений. Утверждение типа средства измерений негативно повлияло бы на доступность и цену прибора. Поэтому анализатор спектра с официальной точки зрения является индикатором поля. Однако, несмотря на это, прибор полностью соответствует всем заявленным техническим характеристикам. Анализатор не является полноценным классическим анализатором спектра, поскольку не использует классическую схему преобразования частот для 100% подавления зеркального канала. Мы используем математическое подавление зеркального канала, что в отдельных редких случаях может приводить к появлению в составе отображаемых сигналов «фантомных» сигналов.
- В диапазоне отображения не гарантируются точностные параметры сигналов.
- Уровень шумовой полки измеряется при включенном МШУ и спектральном разрешении 2.5 кГц.
- Измерения проводятся при режиме работы «Скорость» и спектральном разрешении 25 кГц.
- Источник должен обеспечивать мощность не менее 7 Вт.

Паспорт — Анализатор спектра ARINST SSA-TG R3 [PDF, ~2.2Mb]
| Характеристики | |
| Отображаемый диапазон частот1 | 24 МГц — 12 ГГц |
| Измеряемый диапазон частот | 24 МГц — 9 ГГц |
| Максимальная полоса обзора | ~12 ГГц |
| Опорный генератор TXCO GPS | 26 МГц |
| Разрешение по частоте | 25, 10, 5, 2.5 кГц |
| в полосе 24 МГц — 6.2 ГГц | -110 дБм |
| в полосе 6.2 ГГц — 9 ГГц | -100…-70 дБм |
| в полосе 9 ГГц – 12 ГГц | -70 дБм |
| Максимальная скорость сканирования | 20 ГГц/с |
| Минимальное время обзора полной полосы частот 12 ГГц | 0.6 с |
| Усиление при включенном аттенюаторе | -15 дБ |
| Усиление при включенном малошумящем усилителе | +15 дБ |
| Волновое сопротивление | 50 Ом |
| КСВ в рабочем диапазоне частот | < 2.0 |
| Максимальная входная мощность при выключенном аттенюаторе и МШУ | 0 дБм |
| Максимальная входная мощность при включенном аттенюаторе | +15 дБм |
| Максимальная входная мощность при включенном МШУ | -15 дБм |
| Максимальное постоянное напряжение на входе | 25 В |
| Режимы измерений | фиксированная, S21 |
| Нормированный уровень выходной мощности в полосе 24-6200 МГц | -8 дБм : — 29 дБм |
| Нормированный уровень выходной мощности в полосе 6200-9000 МГц | -14 дБм |
| Глубина регулировки мощности в полосе 24-6200 МГц | 21 дБ |
| Шаг регулировки мощности в полосе 24-6200 МГц | 3 дБ |
| Типы демодуляции | ШЧМ, ЧМ, АМ |
| Функции | АРУ, S-метр, пороговый шумоподавитель |
| Полосы для ШЧМ | 400, 300, 200, 100 кГц |
| Полосы для ЧМ, АМ | 20, 10, 8, 6, 4 кГц |
| Аудио выход | Динамик 2 Вт, наушники |
| Тип экрана | сенсорный резистивный, IPS |
| Разрешение экрана | 800×480 |
| Графики | спектр, водопад, S21 |
| Ёмкость встроенного аккумулятора | 5000 мАч |
| Время непрерывной работы от аккумулятора | ~ 4 ч |
| Время заряда аккумулятора4 | ~ 3.5 ч |
| Интерфейс подключения к ПК | USB |
| Внешний блок питания | 7-24 В, 2 А |
| Рабочий диапазон температур | 0 … +40°С |
| Габаритные размеры (Д×Ш×В) | 145x81x27 мм |
| Вес | 0,4 кг |
| Комплектация | Анализатор спектра ARINST SSA-TG R3, аккумулятор (установлен в приборе), ВЧ переходник для защиты разъемов от износа (2 шт.), кабель mini-USB – USB 2.0, паспорт, упаковка |
Нет отзывов об этом товаре.
Написать отзыв об этом товаре
Ваше имя:*
Оценка:*
Ужасно
Отлично
Текст отзыва:*
Добавьте фото (до 5 штук):
Введите код, указанный на картинке:*

Dishwasher
SR…
User manual
en
Register your product on My Siemens and discover
exclusive services and offers.
siemens-home.bsh-group.com/welcome
The future moving in.
Siemens Home Appliances

en
Table of contents
Safety………………………………………..4
General information……………………..4
Intended use……………………………….4
Restriction on user group……………..4
Safe installation …………………………..5
Safe use …………………………………….6
Damaged appliance …………………….8
Risk to children …………………………..9
Safety systems ………………………….10
Preventing material damage ……..11
Safe installation …………………………11
Safe use …………………………………..11
Childproof lock1……………………….12
Electric childproof lock……………….12
Environmental protection and
saving energy…………………………..12
Disposing of packaging ……………..12
Saving energy……………………………12
AquaSensor1……………………………..13
Installation and connection……….13
Scope of supply ………………………..13
Installing and connecting the ap-
pliance ……………………………………..13
Drainage connection ………………….14
Drinking water connection ………….14
Electrical connection ………………….14
Familiarising yourself with
your appliance………………………….15
Appliance …………………………………15
Controls ……………………………………16
Programmes …………………………….18
Information for test institutes ……….20
Additional functions …………………20
Features…………………………………..21
Top basket ……………………………….22
Bottom basket …………………………..23
Cutlery basket …………………………..24
Cutlery drawer …………………………..24
Etagere …………………………………….25
Folding prongs ………………………….25
Small items holder …………………….26
Knife shelf…………………………………26
Baking sheet spray head ……………26
Basket heights…………………………..27
Before using for the first time ……28
Performing initial start-up ……………28
Water softening system…………….28
Overview of water hardness set-
tings…………………………………………28
Setting water softening system ……29
Special salt ……………………………….29
Switching off water softening
system ……………………………………..30
Regeneration of the water
softening system ……………………….30
Rinse aid system………………………31
Rinse aid ………………………………….31
Setting the amount of rinse aid……31
Switching rinse aid system off …….32
Detergent …………………………………32
Suitable detergents ……………………32
Unsuitable detergents ………………..33
Information on detergents …………..33
Adding detergent ………………………34
Tableware ………………………………..35
Damage to glass and tableware ….35
Arrange tableware ……………………..36
Removing tableware…………………..37
1
Depending on the appliance specifications
2

en
Basic operation ………………………..37
Opening appliance door …………….37
Switching on the appliance …………37
Setting a programme …………………37
Setting additional functions …………37
Setting timer programming …………37
Starting the programme ……………..38
Interrupting programme ……………..38
Terminate programme………………..38
Switching off appliance ………………38
Basic settings…………………………..39
Overview of basic settings ………….39
Changing basic settings……………..41
Cleaning and servicing……………..41
Cleaning the tub ………………………..41
Self-cleaning interior1………………….41
Cleaning products ……………………..42
Tips on appliance care……………….42
Machine Care 1………………………42
Filter system ……………………………..43
Cleaning spray arms ………………….44
Troubleshooting……………………….45
Appliance safety………………………..45
Error code / Fault display / Sig-
nal……………………………………………47
Washing results…………………………49
Information on display panel……….55
Malfunctions ……………………………..56
Mechanical damage…………………..57
Noise ……………………………………….57
Clean wastewater pump……………..58
Customer Service……………………..59
Product number (E-Nr.) and pro-
duction number (FD) ………………….60
AQUA-STOP guarantee1……………..60
Technical specifications……………60
Transportation, storage and
disposal …………………………………..58
Removing the appliance …………….58
Protect appliance from frost………..59
Transporting the appliance …………59
Disposing of old appliance …………59
1
Depending on the appliance specifications
3

en Safety
Safety
Please read the safety information to ensure that you use the appliance safely.
General information
¡ Read this instruction manual carefully. Only this will ensure you
use the appliance safely and efficiently.
¡ Keep the instruction manual and the product information safe
for future reference or for the next owner.
¡ Check the appliance after unpacking it. Do not connect the ap-
pliance if it has been damaged in transit.
Intended use
Read the information on intended use to ensure that you use the
appliance correctly and safely.
Only use this appliance:
¡ For cleaning household tableware.
¡ In private households and in enclosed spaces in a domestic en-
vironment.
¡ Up to an altitude of max. 4000m above sea level.
Restriction on user group
Avoid risks to children and vulnerable persons.
This appliance may be used by children aged 8 or over and by
people who have reduced physical, sensory or mental abilities or
inadequate experience and/or knowledge, provided that they are
supervised or have been instructed on how to use the appliance
safely and have understood the resulting dangers.
Children must not play with the appliance.
Cleaning and user maintenance must not be performed by children unless they are being supervised.
Keep children under the age of 8 years away from the appliance
and power cable.
4

Safety en
Safe installation
Follow these safety instructions when installing the appliance.
WARNING‒Risk of injury!
Improper installation may cause injury.
▶
When installing and connecting the appliance, follow the instructions in the manual and installation instructions.
WARNING‒Risk of electric shock!
¡ Improper installation is dangerous.
▶
Connect and operate the appliance only in accordance with
the specifications on the rating plate.
▶
Connect the appliance to a power supply with alternating
current only via a properly installed socket with earthing.
▶
The protective conductor system of the domestic electrical
installation must be properly installed.
▶
Never equip the appliance with an external switching
device, e.g. a timer or remote control.
▶
When the appliance is installed, the mains plug of the
power cord must be freely accessible. If free access is not
possible, an all-pole isolating switch must be installed in the
permanent electrical installation according to the installation
regulations.
▶
When installing the appliance, check that the power cable is
not trapped or damaged.
¡ Cutting through the supply hose or immersing the Aqua-Stop
valve in water is dangerous.
▶
Never immerse the plastic housing in water. The plastic
housing on the supply hose contains an electric valve.
▶
Never cut through the supply hose. The supply hose contains electric power cables.
WARNING‒Risk of fire!
It is dangerous to use an extended power cord and non-approved adapters.
▶
Do not use extension cables or multiple socket strips.
▶
If the power cord is too short, contact Customer Service.
5

en Safety
▶
Only use adapters approved by the manufacturer.
WARNING‒Risk of injury!
Hinges move when opening and closing the appliance door
and can cause injury.
▶
If built-under or integrable appliances are not in a cavity so
that one side is accessible, the hinge area must be covered
at the side. Covers are available from Customer Service or
specialist outlets.
WARNING‒Risk of tipping!
Improper installation may cause the appliance to tip up.
▶
Only install built-under or integrable appliances under a
continuous worktop that is securely connected to adjacent
cabinets.
WARNING‒Risk of burns!
If the appliance is not installed properly, this may result in
burns.
▶
With free-standing appliances, ensure that they are installed
with the back panel against a wall.
Safe use
WARNING‒Risk of serious harm to health!
Failure to comply with safety instructions and directions for
use on packagings of detergent and rinse aid products may
cause serious harm to health.
▶
Follow the safety instructions and directions for use on the
packagings of detergent and rinse aid products.
WARNING‒Risk of explosion!
¡ Adding solvents to the interior of the appliance may cause ex-
plosions.
▶
Never add solvents to the interior of the appliance.
6

Safety en
¡ Highly caustic alkaline or highly acidic cleaning agents in con-
junction with aluminium parts in the interior of the appliance
may cause explosions.
▶
Never use highly caustic alkaline or highly acidic cleaning
agents, in particular commercial or industrial products, in
conjunction with aluminium parts (e.g. grease filters of extractor hoods or aluminium pans), e.g. for the Machine Care
programme.
WARNING‒Risk of injury!
¡ Leaving the appliance door open may result in injury.
▶
Only open the appliance door to load or unload tableware
in order to prevent accidents, e.g. through tripping.
▶
Do not sit or stand on the appliance door when open.
¡ Knives and utensils with sharp points can cause injuries.
▶
Arrange knives and utensils with sharp points in the cutlery
basket with the points downwards, on the knife shelf or in
the cutlery drawer.
WARNING‒Risk of scalding!
If you open the appliance door while the programme is running, hot water may splash out of the appliance.
▶
Open the appliance door carefully if the programme is still
running.
WARNING‒Risk of tipping!
Overfilling the Baskets may cause the appliance to tip up.
▶
Never overfill the Baskets with free-standing appliances.
WARNING‒Risk of electric shock!
¡ An ingress of moisture can cause an electric shock.
▶
Only use the appliance in enclosed spaces.
▶
Never expose the appliance to intense heat or humidity.
▶
Do not use steam- or high-pressure cleaners to clean the
appliance.
7

en Safety
¡ If the insulation of the power cord is damaged, this is danger-
ous.
▶
Never let the power cord come into contact with hot appliance parts or heat sources.
▶
Never let the power cord come into contact with sharp
points or edges.
▶
Never kink, crush or modify the power cord.
Damaged appliance
Follow the safety instructions if the appliance is damaged.
WARNING‒Risk of electric shock!
¡ If the appliance or the power cord is damaged, this is danger-
ous.
▶
Never operate a damaged appliance.
▶
Never operate an appliance with a cracked or fractured surface.
▶
Never pull on the power cord to unplug the appliance. Always unplug the appliance at the mains.
▶
If the appliance or the power cord is damaged, immediately
unplug the power cord or switch off the fuse in the fuse box
and turn off the water tap.
▶
«Call Customer Service.» →Page59
▶
Repairs to the appliance should only be carried out by
trained specialist staff.
¡ Incorrect repairs are dangerous.
▶
Repairs to the appliance should only be carried out by
trained specialist staff.
▶
Only use genuine spare parts when repairing the appliance.
▶
If the power cord of this appliance is damaged, it must be
replaced with a special connection cable, which is available
from the manufacturer or his Customer Service.
8

Safety en
Risk to children
Follow the safety instructions if there are children in your home.
WARNING‒Risk of suffocation!
¡ Children may put packaging material over their heads or wrap
themselves up in it and suffocate.
▶
Keep packaging material away from children.
▶
Do not let children play with packaging material.
¡ Children may breathe in or swallow small parts, causing them
to suffocate.
▶
Keep small parts away from children.
▶
Do not let children play with small parts.
WARNING‒Risk of harm to health!
Children can lock themselves in the appliance, thereby putting
their lives at risk.
▶
With redundant appliances, unplug the power cord. Then
cut through the cord and damage the lock on the appliance
door beyond repair so that the appliance door will no longer
close.
WARNING‒Risk of crushing!
With higher-level appliances, children can become crushed
between the appliance door and cabinet doors underneath.
▶
Keep an eye on children when opening and closing the appliance door.
WARNING‒Risk of chemical burns!
Rinse aid and detergent may cause chemical burns to the
mouth, throat and eyes.
▶
Keep children away from detergent and rinse aid products.
▶
Keep children away from the appliance when open. The water in the interior of the dishwasher is not drinking water. It
may contain residues of detergents and rinse aid.
9

en Safety
WARNING‒Risk of injury!
Children may get their fingers caught in the slots of the tablet
collecting tray and injure themselves.
▶
Keep children away from the appliance when open.
WARNING‒Risk of suffocation!
Children may become trapped in the appliance and suffocate.
▶
Use the childproof lock if fitted.
▶
Never let children play with or operate the appliance.
Safety systems
Protect children from possible hazards resulting from the appliance.
Depending on the features of the model, the appliance comes
with a
→«Childproof lock», Page12.
10

Preventing material damage en
Preventing material damage
Preventing material damage
Preventing material damage
Safe installation
Follow the instructions when installing
the appliance.
ATTENTION!
¡ Improper installation of the appli-
ance may cause damage.
▶
If the dishwasher is installed
above or below other domestic
appliances, follow the information on installation in combination with a dishwasher in the installation instructions for the individual appliances.
▶
If there is no information or if the
installation instructions do not include the relevant information,
contact the manufacturer of
these appliances to check that
the dishwasher can be installed
above or below these appliances.
▶
If no information is available
from the manufacturer, the dishwasher should not be installed
above or below such appliances.
▶
To ensure the safe operation of
all domestic appliances, continue following the installation instructions for the dishwasher.
▶
Do not install the dishwasher under a hob.
▶
Do not install the dishwasher
near heat sources, e.g. radiators, heat storage tanks, ovens
or other appliances that generate heat.
¡ Modified or damaged water hoses
may result in material damage and
damage to the appliance.
▶
Never kink, crush, modify or cut
through water hoses.
▶
Only use the water hoses supplied with the appliance or genuine spare hoses.
▶
Never re-use water hoses that
have been used before.
¡ If the water pressure is too high or
too low, this may impair functioning of the appliance.
▶
Make sure that the water pressure in the water supply system
is min. 50kPa (0,5bar) and
max. 1000kPa (10bar).
▶
If the water pressure exceeds
the maximum value specified, a
pressure-reducing valve must be
installed between the drinking
water connection and the hose
set of the appliance.
Safe use
Follow the instructions when using
the appliance.
ATTENTION!
¡ Escaping water vapour can dam-
age fitted units.
▶
When the programme ends,
leave the appliance to cool
down for a while before opening
the door.
¡ Special salt can damage the tub
due to corrosion.
▶
To make sure that any special
salt that escapes is washed out
of the tub, add the special salt
to the dispenser for special salt
immediately before the programme starts.
¡ Detergent may damage the water
softening system.
▶
Only fill the dispenser of the water softening system with special
dishwasher salt.
¡ Unsuitable cleaning agents may
damage the appliance.
▶
Do not use a steam cleaner.
11

en Childproof lock
▶
So as not to scratch the finish
on the appliance, do not use
sponges with a rough surface or
abrasive cleaning agents.
▶
To prevent corrosion, do not use
sponge cloths on dishwashers
with a stainless steel front or
rinse such cloths thoroughly
several times before using them
for the first time.
Childproof lock
Childproof lock
Childproof lock
The childproof lock lets you protect
1
children from possible hazards resulting from the appliance.
Depending on the features of the appliance model, the appliance comes
with an electric childproof lock.
Electric childproof lock
The electric childproof lock makes it
more difficult to open the appliance
door.
You can activate or deactivate the
electric childproof lock in the «Basic
settings» →Page39.
WARNING
Risk of suffocation!
Children may become trapped in the
appliance and thus suffocate.
▶
Activate the electric childproof lock
and close the appliance door.
→«Opening appliance door»,
Page37
Environmental protection and saving energy
Environmental protection
and saving energy
Environmental protection and saving energy
Help protect the environment by using your appliance in a way that conserves resources and by disposing of
reusable materials properly.
Disposing of packaging
The packaging materials are environmentally compatible and can be recycled.
▶
Sort the individual components by
type and dispose of them separately.
Information about current disposal
methods are available from your
specialist dealer or local authority.
Saving energy
If you follow these instructions, your
appliance will use less electricity and
less water.
Use the Eco 50° programme.
The Eco 50° programme is energy efficient and environmentally
friendly.
→«Programmes», Page18
If you do not have much tableware to
wash, use the additional Half Load
function.
1
The programme will adjust to a
lower load and consumption will
be reduced.
→«Additional functions», Page20
1
Depending on the appliance specifications
12

AquaSensor
1
The AquaSensor is an optical measuring device (light barrier) which
measures the turbidity of the washing
water. You can save water with the
AquaSensor.
Use of the AquaSensor depends on
the programme. If the soiling level is
low, the washing water is used in the
next wash cycle, so reducing water
consumption by 3-6 litres. If the soiling level is is greater, the washing
water is drained off and replaced with
fresh water. In the automatic programmes the temperature and running time are additionally adjusted to
the level of soiling.
Installation and connection
Installation and connection
Installation and connection
Scope of supply
After unpacking all parts, check for
any damage in transit and completeness of the delivery.
If you have any complaints, contact
the dealer who sold you the appliance or our Customer Service.
Note:The appliance was tested at
the factory to check it is in working
order. It is possible that water has left
marks on the appliance. These
marks will disappear after the first
wash cycle.
The delivery consists of the following:
¡ Dishwasher
¡ Instruction manual
¡ Installation instructions
¡ Warranty
¡ Installation material
¡ Steam guard plate
1
1
Installation and connection en
¡ Rubber apron
¡ Mains cable
¡ Quick reference guide
1
1
Installing and connecting the
appliance
You can position your built-under or
integrable appliance in a fitted kitchen between wooden and plastic
walls. If you subsequently install your
dishwasher as a free-standing appliance, you must stop it from tipping
over, e.g. by screwing it to the wall or
installing it under a continuous worktop that is securely connected to adjacent cabinets.
1. «Follow the safety instructions.»
→Page4
2. «Follow the instructions for elec-
trical connection.» →Page14
3. Check the «Scope of supply»
→Page13 and the condition of
the appliance.
4. Consult the installation instructions
for the installation dimensions required.
5. Make the appliance level using the
height-adjustable feet.
Make sure that the appliance is
standing on the floor securely.
6. «Install the drainage connection.»
→Page14
7. «Install the drinking water connec-
tion.» →Page14
8. Connect the appliance to the
power supply.
1
Depending on the appliance specifications
13

en Installation and connection
Drainage connection
Connect your appliance to drainage
connection so dirty water is discharged via the wash cycle.
Installing the drainage connection
1. Consult the installation instructions
supplied for the steps required
here.
2. Connect the wastewater hose to
the outlet connection of the siphon
using the enclosed parts.
3. When doing so, check that the
wastewater hose is not kinked,
crushed or twisted.
4. Also check that there is no cover
in the drainage system preventing
the wastewater from being discharged.
Drinking water connection
Connect your appliance to a drinking
water connection.
Installing the drinking water
connection
Note
¡ If you are replacing the appliance,
you must use a new water supply
hose.
1. Consult the installation instructions
supplied for the steps required
here.
2. Connect the appliance to the drink-
ing water connection using the enclosed parts.
Observe the «Technical data»
→Page60.
3. When doing so, check that the
drinking water connection is not
kinked, crushed or twisted.
Electrical connection
Connect your appliance to the power
supply.
Connecting the appliance to the
electricity supply
Notes
¡ Follow the «Safety instructions»
→Page5.
¡ Connect the appliance to alternat-
ing current only, in the range of
220 — 240V and 50Hz or 60Hz.
¡ Please note that the water safety
system is only functional if there is
a power supply.
1. Insert the non-heating appliance
plug of the power cable into the
appliance.
2. Insert the mains plug of the appli-
ance into a nearby socket.
The connection data for the appli-
ance can be found on the rating
plate.
3. Check that the mains plug is inser-
ted properly.
14
Familiarising yourself with your appliance en
1
2
3
5
6
7
8
9
10
11
12
13
14
4
Familiarising yourself with your appliance
Familiarising yourself with your appliance
Familiarising yourself with your appliance
Appliance
You can find an overview of the parts of your appliance here.
Rating plate Rating plate with «E number and FD number»
1
Depending on the appliance specifications
→Page60.
The data you need for «Customer Service»
→Page59.
15
en Familiarising yourself with your appliance
Detergent dispenser «Detergent» →Page32 is added to the detergent
dispenser.
Bottom basket «Bottom basket» →Page23
Filter system «Filter system» →Page43
Dispenser for special salt Add special salt for the «Water softening system»
→Page28 to the dispenser for special salt.
Tablet collecting tray During the wash cycle tablets automatically fall out of
the detergent dispenser into the tablet collecting tray
where they can fully dissolve.
Top basket «Top basket» →Page22
Cutlery drawer
EmotionLight
Etagere «Etagere» →Page25
Upper spray arms The upper spray arms wash the tableware in the top
Lower spray arm The lower spray arm washes the tableware in the bot-
Cutlery basket
1
1
1
«Cutlery drawer» →Page24
Interior lighting of the appliance.
→«Overview of basic settings», Page39
basket.
If the tableware has not been washed properly, clean
the spray arms.
→«Cleaning spray arms», Page44
tom basket.
If the tableware has not been washed properly, clean
the spray arms.
→«Cleaning spray arms», Page44
«Cutlery basket» →Page24
Dispenser for rinse aid Add rinse aid for the «Rinse aid system» →Page31
1
Depending on the appliance specifications
to the dispenser for rinse aid.
Controls
The controls are used to configure all functions of your appliance and to obtain
information about the operating status.
With some buttons you can perform different functions.
16
Familiarising yourself with your appliance en
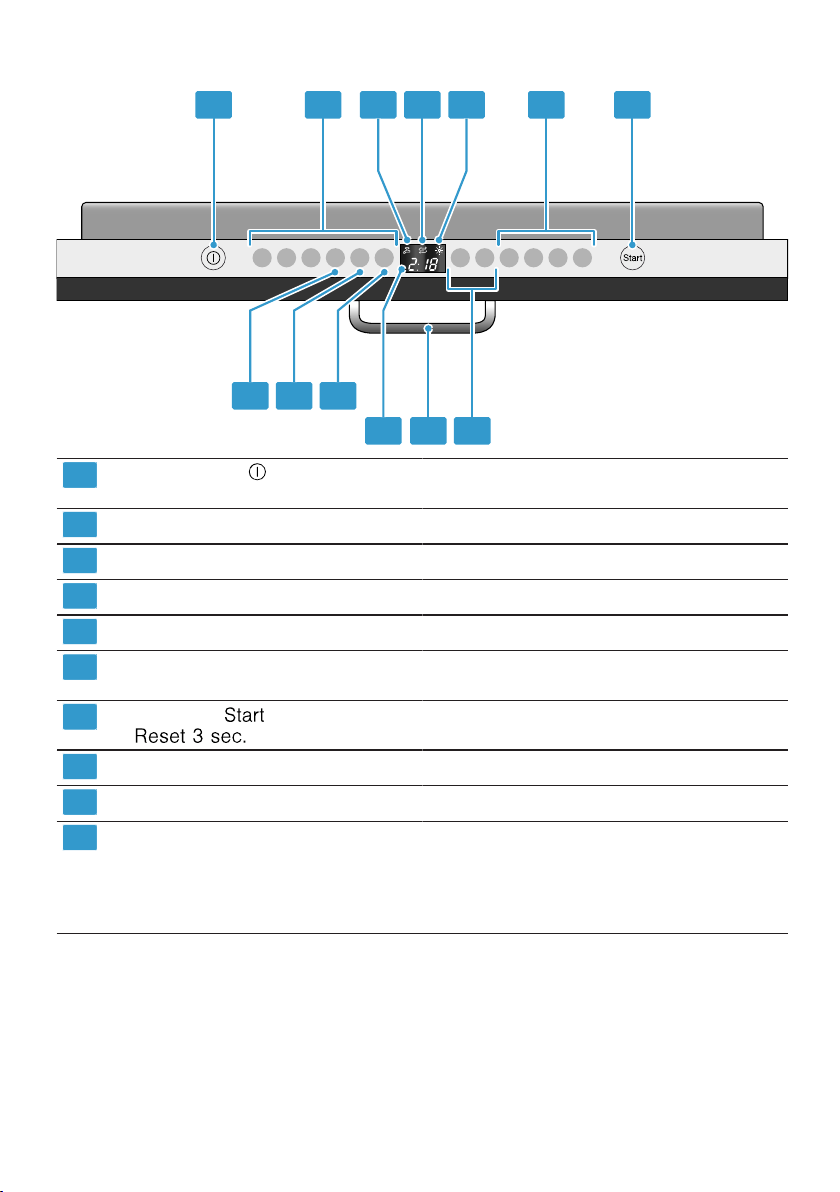
ON/OFF button «Switching on the appliance» →Page37
«Switching off the appliance» →Page38
Programme buttons «Programmes» →Page18
Water supply display «Display for water supply lights up» →Page48
Special salt refill indicator «Water softening system» →Page28
Rinse aid refill indicator «Rinse aid system» →Page31
Programme buttons and additional
functions
Start button and reset button «Starting the programme» →Page38
Timer programming «Setting timer programming» →Page37
Door opener
Display The display shows information about the remain-
1
Depending on the appliance specifications
1
«Programmes» →Page18
«Additional functions» →Page20
«Terminating the programme» →Page38
«Opening the appliance door» →Page37
ing running time or the basic settings. You can
change the basic settings via the display and the
setting buttons.
→«Changing basic settings», Page41
17

en Programmes
Programmes
Programmes
Programmes
You can find an overview of the programmes that can be selected here.
Different programmes, which can be
found on the control panel of your
appliance, are available depending
on the appliance configuration.
The running time may vary depending on the programme selected. The
running time depends on the water
temperature, the quantity of dishes,
the level of soiling and the «Additional
function» →Page20 selected. The
running time will change if the rinse
aid system is switched off or rinse
aid needs to be added.
The consumption values can be
found in the quick reference guide.
The consumption values relate to
normal conditions and a water hardness of 16-20°E. Different influencing factors such as water temperature or pipe pressure may result in
deviations.
Programme Use Programme se-
quence
Intensive 70°
Tableware:
¡ Washing pots and
pans, non-fragile
tableware and cutlery.
Level of soiling:
Intensive:
¡ PreRinse
¡ Cleaning 70°C
¡ Intermediate rinse
¡ Rinsing 69°C
¡ Drying
¡ Removing stubborn
burned or dried-on
food remnants containing starch and
protein.
When using powder detergent, you can also
apply a little to the inside of the appliance
door.
Auto 45-65°
Tableware:
¡ Cleaning mixed
tableware and cutlery.
Level of soiling:
Sensor-controlled:
¡ Optimised by
sensors depending
on the soiling of the
washing water.
¡ Removing common
household food remnants lightly driedon.
Additional functions
All
→«Additional functions», Page20
All
→«Additional functions», Page20
18

Programmes en
Programme Use Programme se-
quence
Eco 50°
Silence 50
Tableware:
¡ Cleaning mixed
tableware and cut-
lery.
Level of soiling:
¡ Removing common
household food rem-
nants lightly dried-
on.
Tableware:
¡ Cleaning mixed
tableware and cut-
lery.
Level of soiling:
¡ Removing common
Most economical programme:
¡ Pre-Rinse
¡ Cleaning 50°C
¡ Intermediate rinse
¡ Rinsing 60°C
¡ Drying
¡ Automatic opening
of appliance door
Reduced noise:
¡ PreRinse
¡ Cleaning 50°C
¡ Intermediate rinse
¡ Rinsing 65°C
¡ Drying
household food rem-
nants lightly dried-
on.
Glass 40°
Tableware:
¡ Cleaning delicate
tableware, cutlery,
temperature-sensit-
ive plastics, glasses
and stemware in the
Particularly gentle:
¡ PreRinse
¡ Cleaning 40°C
¡ Intermediate rinse
¡ Rinsing 60°C
¡ Drying
stemware basket.
Level of soiling:
¡ Removing lightly ad-
hering fresh food
remnants.
Quick 65°
Tableware:
¡ Cleaning mixed
tableware and cut-
lery.
Level of soiling:
Time-optimised:
¡ Cleaning 65°C
¡ Intermediate rinse
¡ Rinsing 70°C
¡ Drying
¡ Removing common
household food rem-
nants lightly dried-
on.
Additional functions
All
→«Additional functions», Page20
IntensiveZone
Half Load
HygienePlus
ExtraDry
Shine & Dry
→«Additional functions», Page20
IntensiveZone
VarioSpeedPlus
Half Load
ExtraDry
Shine & Dry
→«Additional functions», Page20
ExtraDry
Shine & Dry
→«Additional functions», Page20
19

en Additional functions
Programme Use Programme se-
quence
1 hr Programme
Tableware:
¡ Cleaning mixed
tableware and cut-
lery.
Level of soiling:
Time-optimised:
¡ Cleaning 65°C
¡ Intermediate rinse
¡ Rinsing 70°C
¡ Drying
¡ Removing common
household food rem-
nants lightly dried-
on.
Quick 45°
Tableware:
¡ Cleaning delicate
tableware, cutlery,
temperature-sensit-
Time-optimised:
¡ Cleaning 45°C
¡ Intermediate rinse
¡ Rinsing 55°C
ive plastics and
glasses.
Level of soiling:
¡ Removing lightly ad-
hering fresh food
remnants.
Tableware:
¡ Cleaning all types of
Cold rinse suitable:
¡ Pre-Rinse
tableware.
PreRinse
Level of soiling:
¡ Cold rinsing, inter-
mediate cleaning.
— Machine Care 70°C None
Machine Care
Additional functions
ExtraDry
Shine & Dry
→«Additional functions», Page20
ExtraDry
Shine & Dry
→«Additional functions», Page20
None
Information for test institutes
Test institutes are provided with information for comparability tests, e.g.
according to EN60436.
These are the conditions for conducting the tests, however they are not
the results or consumption values.
E-mail enquiries to: dishwasher@testappliances.com
The product number (E-Nr.) and the
production number (FD) are required
here. They can be found on the rating plate on the appliance door.
20
Additional functions
Additional functions
Additional functions
You can find an overview of the additional functions that can be selected
here. Different additional functions,
which can be found on the control
panel of your appliance, are available
depending on the appliance configuration.
Additional function
VarioSpeedPlus
Use
¡ The running time is
shortened by 20% to
66% depending on the
washing programme.
Loading…
Siemens iQ 300 varioPerfect Iron PDF User Guides and Manuals for Free Download: Found (6) Manuals for Siemens iQ 300 varioPerfect Device Model (Repair Hints, Operating Instructions Manual, Operation & User’s Manual)
The Siemens iQ 300 varioPerfect is a remarkable washing machine that combines cutting-edge technology with user-friendly features to deliver an outstanding laundry experience. Known for its efficiency and adaptability, this appliance has quickly become a favorite among households looking for a reliable washing solution. With its innovative varioPerfect function, this washing machine aims to provide both speed and energy savings without compromising on performance.
One of the standout features of the Siemens iQ 300 varioPerfect is its versatile wash settings. Users can choose between the following modes:
- Speed Perfect: This mode reduces wash times by up to 65%, ensuring that you never have to wait long for your laundry.
- Eco Perfect: This option allows users to save energy by optimizing the wash cycle for maximum efficiency, making it environmentally friendly.
- Load Sensor: This feature automatically adjusts water and energy usage based on the load size, enhancing resource conservation.
Another notable aspect of the Siemens iQ 300 varioPerfect is its high spin speed, which significantly reduces drying times. With a spin speed of up to 1,400 RPM, this washing machine efficiently extracts water from clothes, leading to reduced energy consumption during drying. This is particularly beneficial for busy families or individuals who often find themselves on tight schedules.
The energy efficiency ratings for the Siemens iQ 300 varioPerfect are impressive, with many models boasting an A+++, the highest efficiency grade possible. This not only translates into lower utility bills but also minimizes the machine’s environmental footprint. Consumers today are increasingly concerned about sustainability, and this washing machine addresses those concerns effectively.
When it comes to usability, the Siemens iQ 300 varioPerfect excels in several additional areas. The intuitive LED display conveniently showcases the selected program, remaining time, and other key details, making it easy to monitor the washing process. Moreover, the various pre-set programs cater to specific fabric types and washing needs, ensuring that each load receives the appropriate care.
Noise levels during operation are another consideration for homeowners, and the Siemens iQ 300 varioPerfect doesn’t disappoint. It operates quietly thanks to its advanced motor technology, allowing users to run washing cycles even during the night without causing disturbances. This makes it particularly appealing for individuals living in apartments or shared housing.
Service and maintenance for the Siemens iQ 300 varioPerfect are designed to be straightforward. The machine features a self-cleaning detergent drawer, which reduces the need for frequent cleaning and maintenance. The user manual provides comprehensive instructions for troubleshooting and care, allowing users to maximize the machine’s lifespan with ease.
In conclusion, the Siemens iQ 300 varioPerfect is an exceptional washing machine that successfully integrates innovation with efficiency. Its range of features, from the varioPerfect technology to its energy conservation capabilities, truly sets it apart in today’s market. This machine not only meets the washing needs of a modern household but also promotes a sustainable approach to laundry chores. Anyone considering a new washing machine should seriously evaluate the Siemens iQ 300 varioPerfect for its reliability, efficiency, and user-friendly operation.